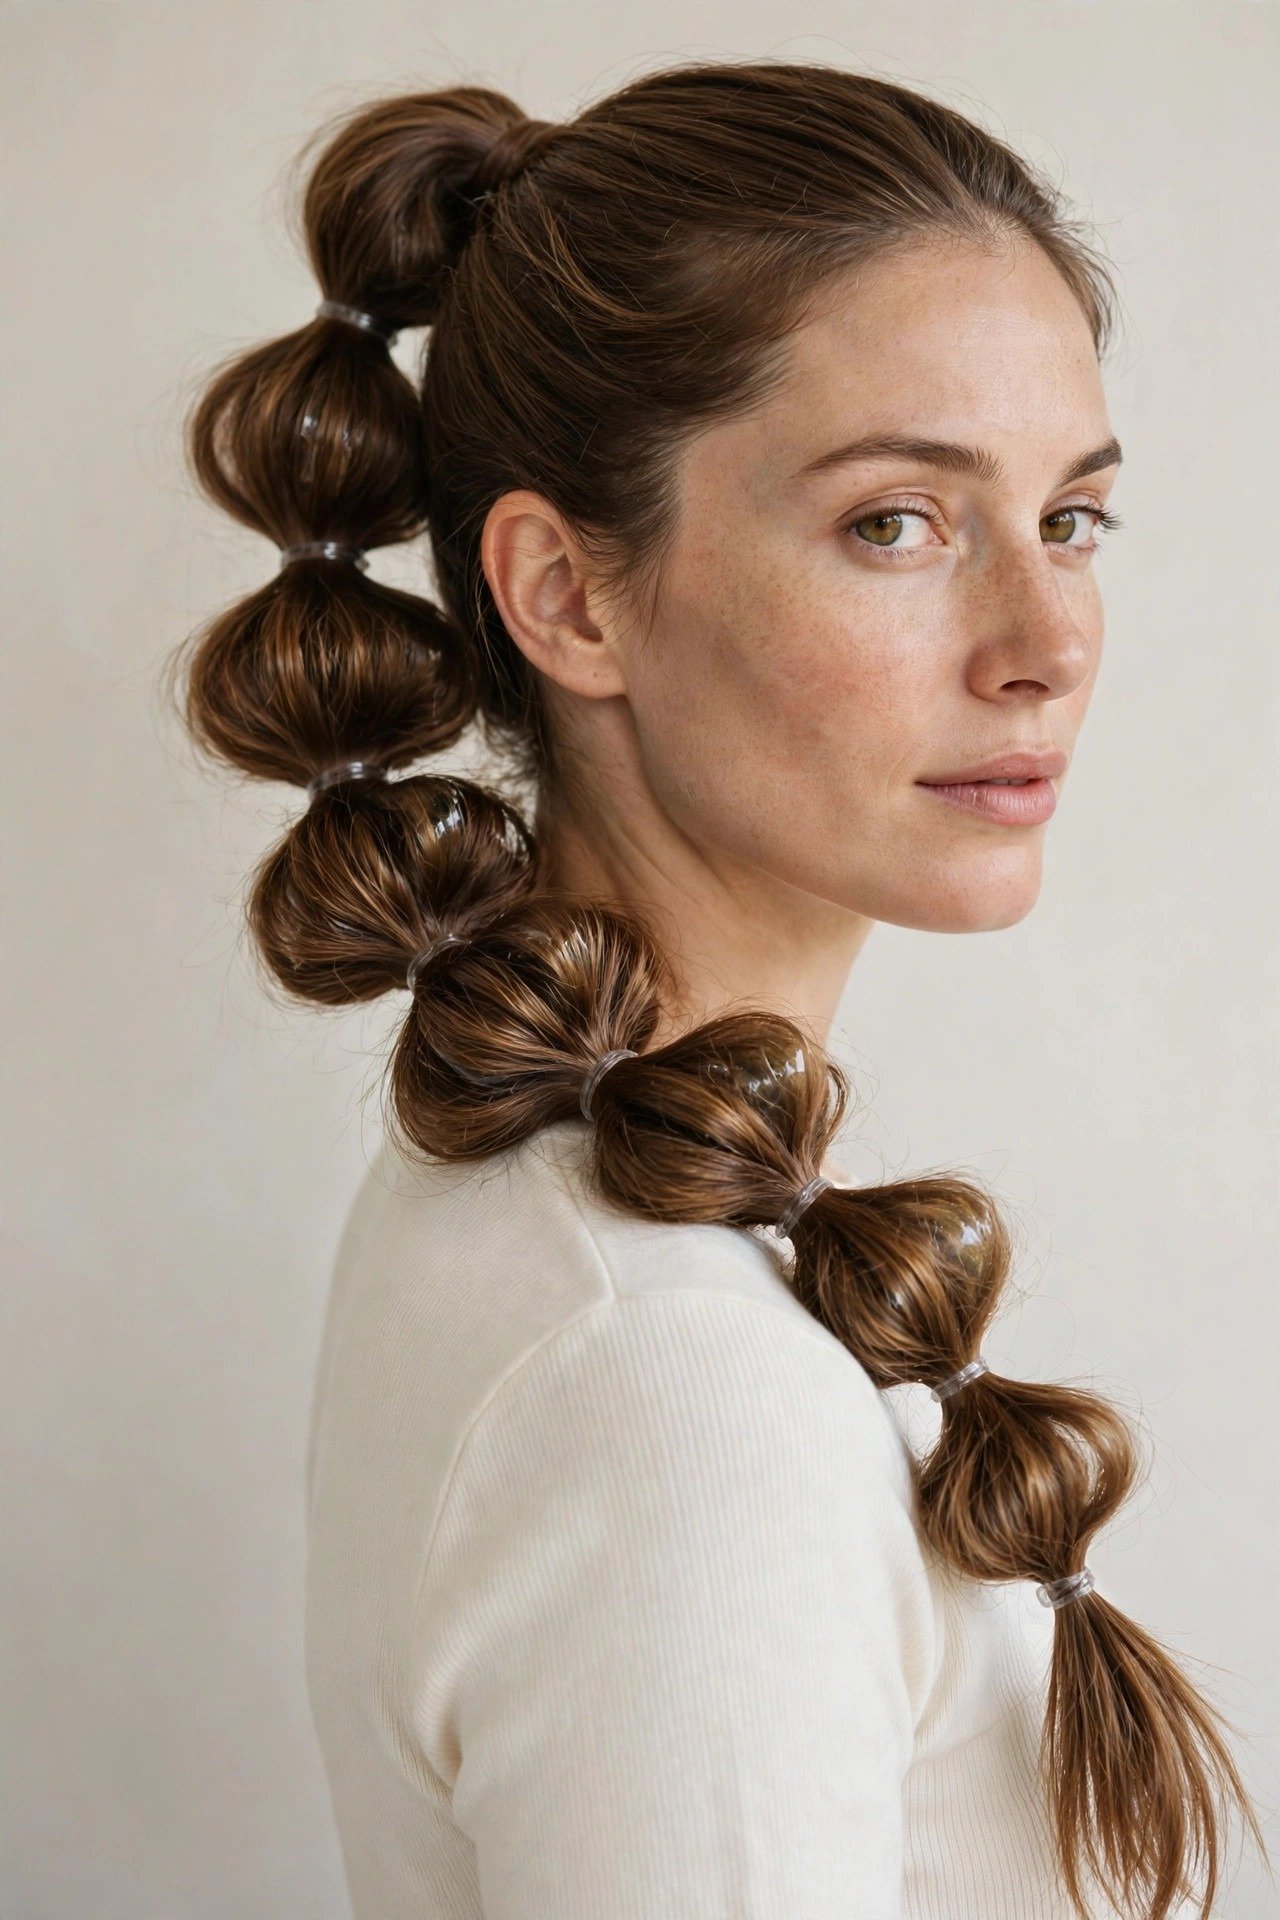
Bubble Braids Women 2026: The Playful Braid Guide
Bubble Braids Women 2026: The Playful Braid Guide
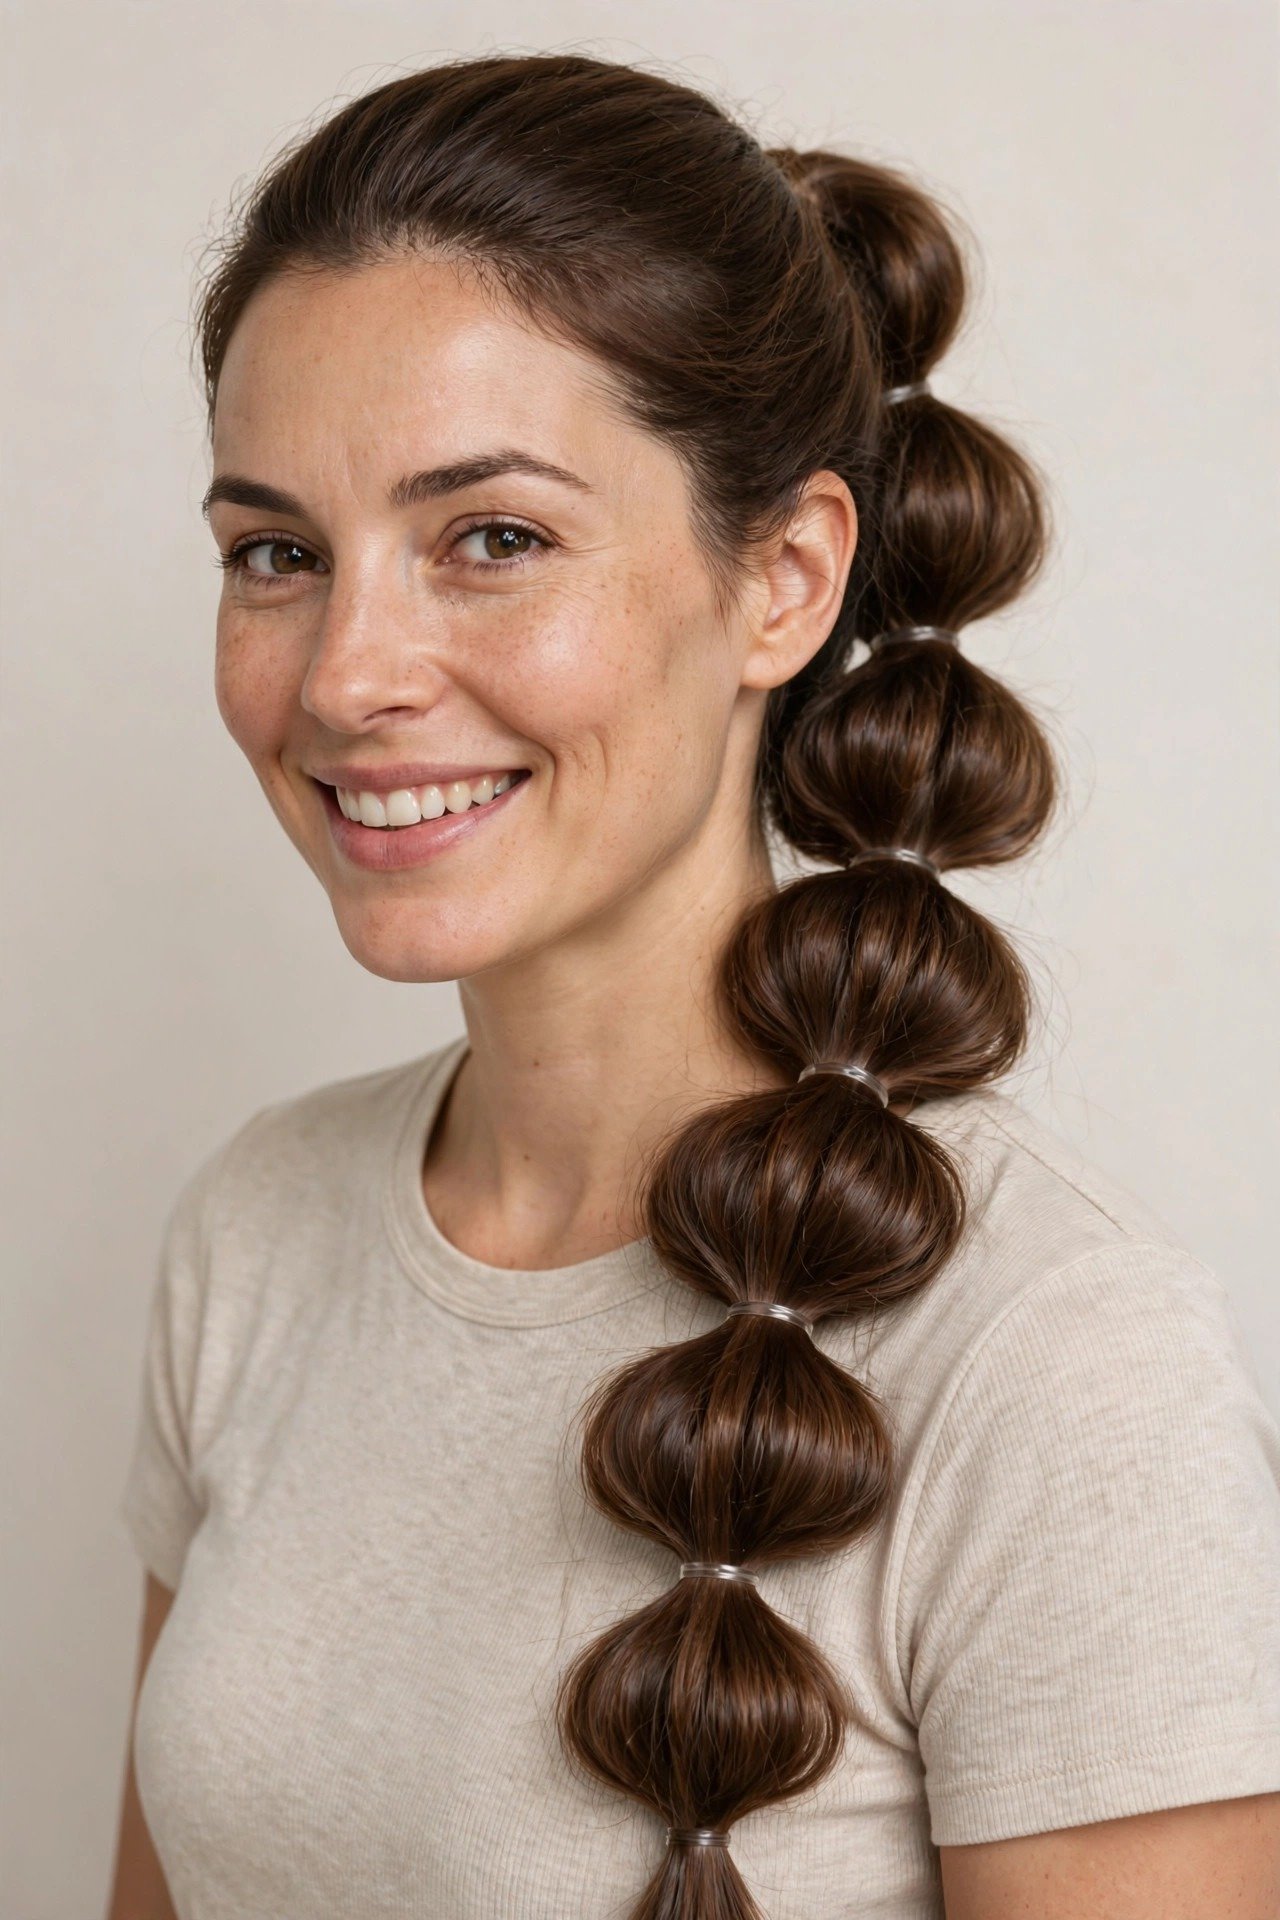
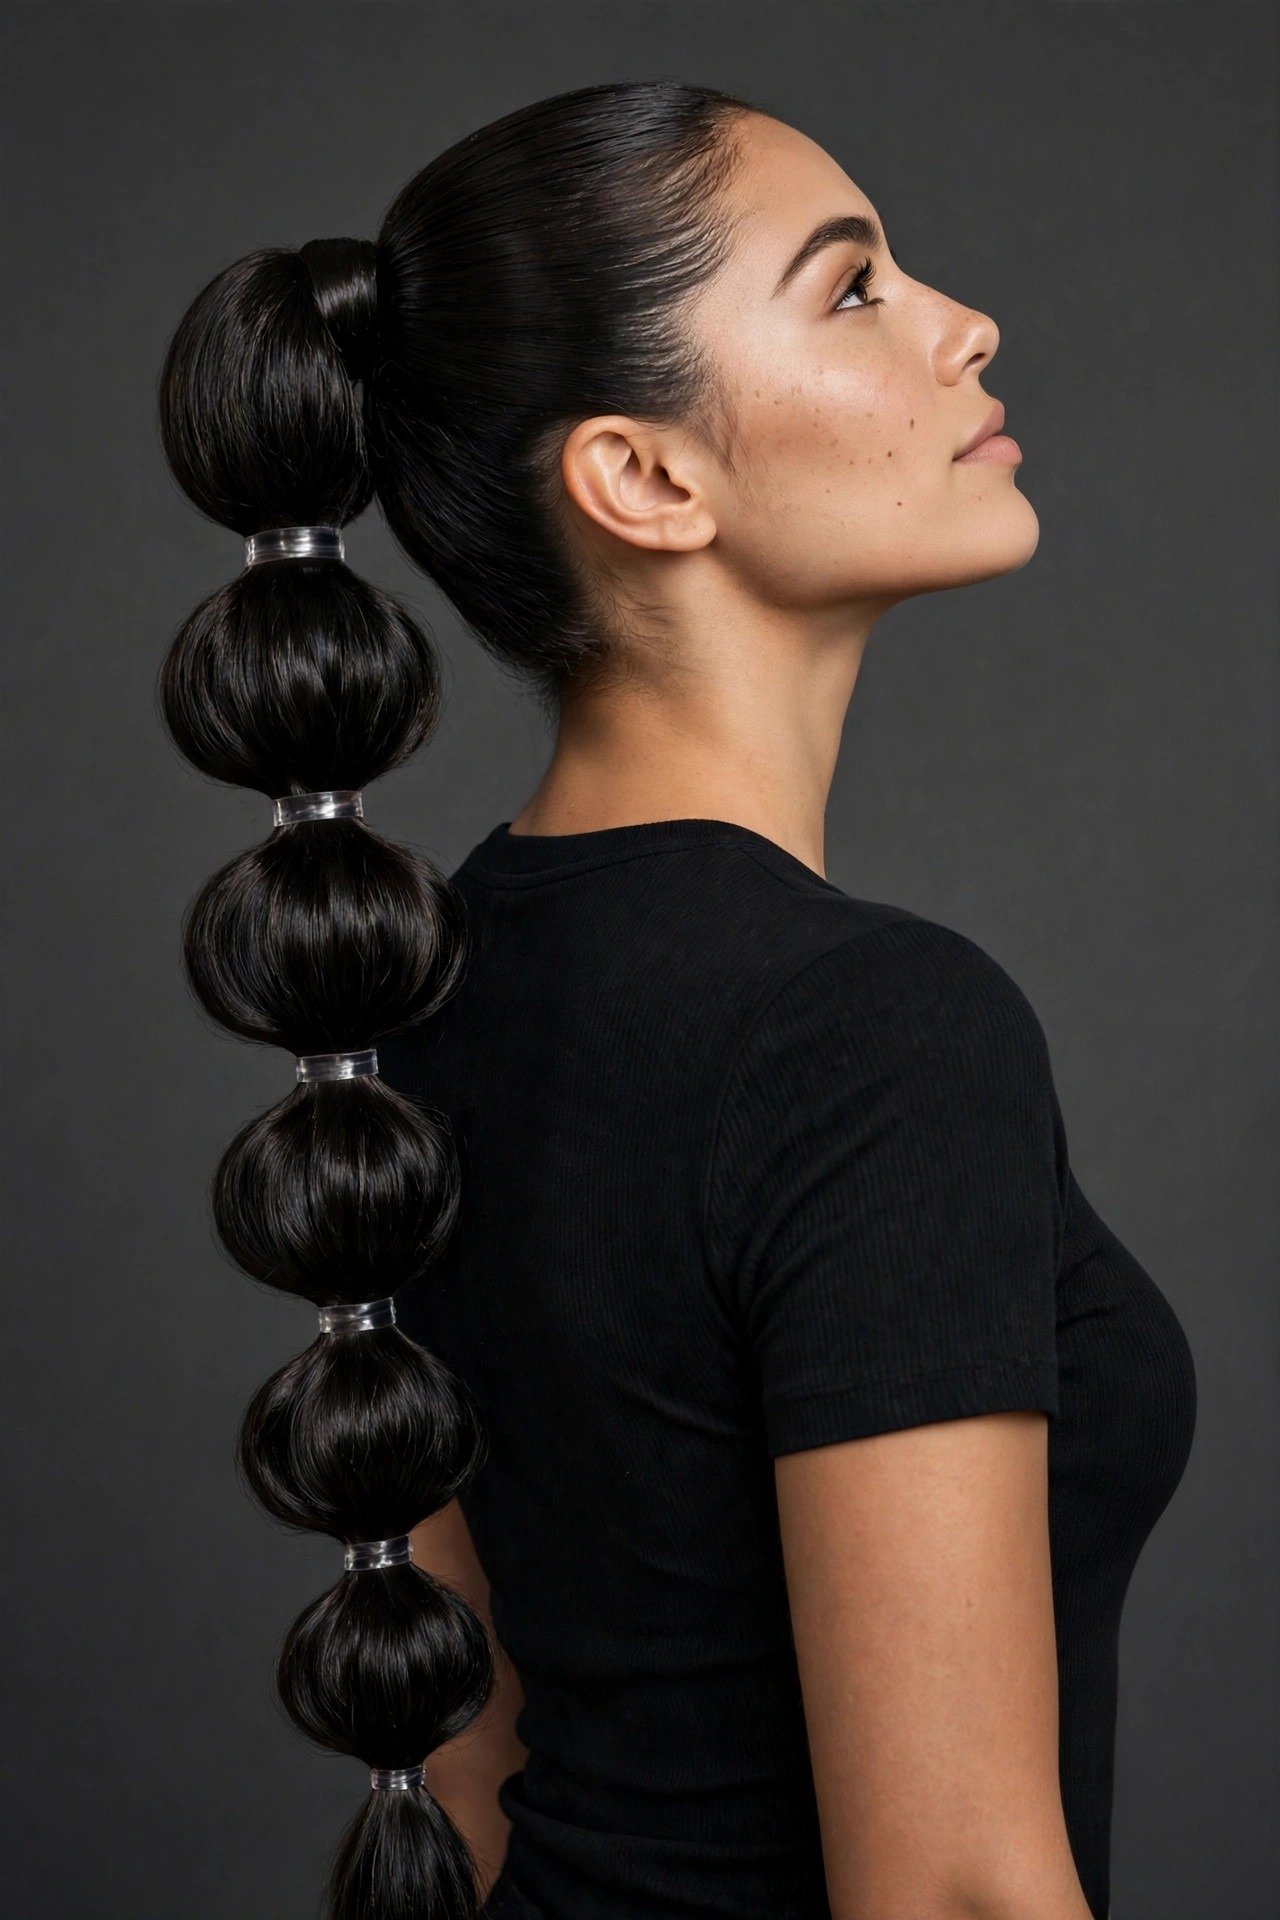
Bubble braids are the rare hairstyle that looks like you spent an hour at the salon but actually takes about ten minutes in front of your bathroom mirror. The technique is almost embarrassingly simple: you tie a ponytail, add elastics down the length at even intervals, and then gently tug each section outward so it puffs into a rounded “bubble.” That’s it. No complicated weaving, no arm-cramping French braiding behind your head, no YouTube pause-and-rewind marathon. In 2026, bubble braids have moved way beyond their cute-cheerleader origins and become a legit everyday staple, showing up at music festivals, on morning-run selfies, at office desks, and even down wedding aisles.
So why are they having such a massive moment right now? For one thing, the vibe of 2026 hair is playful confidence. We’ve collectively moved past the era where every hairstyle had to be sleek and severe. People want hair that looks like it’s having fun, and nothing reads “fun” faster than a bouncy row of bubbles. Bubble braids also nail the holy trinity of modern styling: they’re fast, they photograph incredibly well, and they’re forgiving. If your sections aren’t perfectly even, you just tug a little more on one side. If an elastic shows, you wrap a bit of hair around it. The style is designed to look a little imperfect, which means perfectionists can finally relax.
Another reason for the 2026 boom is versatility. A high, tight bubble ponytail gives you sporty, put-together energy that stays put through a workout. Two low bubble pigtails channel full Y2K nostalgia. A loose, side-swept bubble braid with a ribbon woven in reads soft and romantic enough for a date night or a wedding guest look. Same basic technique, three completely different personalities. Very few hairstyles can swing that wide a range with such a small skill investment, and that’s exactly why stylists keep recommending them to clients who “can’t do hair.”
This guide covers everything you need to make bubble braids your signature style in 2026. You’ll learn the classic bubble ponytail with a proper step-by-step tutorial, the double-braid pigtail upgrade, four variations for different moods, how to adapt the style to short, medium, and long hair, and the volume hacks that finally make bubble braids work on fine or thin hair. There’s also a realistic product kit — real products with real prices, plus what to skip — occasion-specific styling for workouts, festivals, and weddings, and the truth about how long they last, how to sleep in them, and how to take them out without snapping your hair.
Fair warning before we dive in: bubble braids are easy, but they’re not foolproof. There are a few specific mistakes that will make yours look flat, lopsided, or cheap, and you’ll find every one of them called out honestly in this guide along with the fix. By the end, you’ll know exactly what to buy, exactly how long each style takes, and exactly how to avoid the pitfalls. Let’s get into it.
What Are Bubble Braids? The 2026 Trend Explained
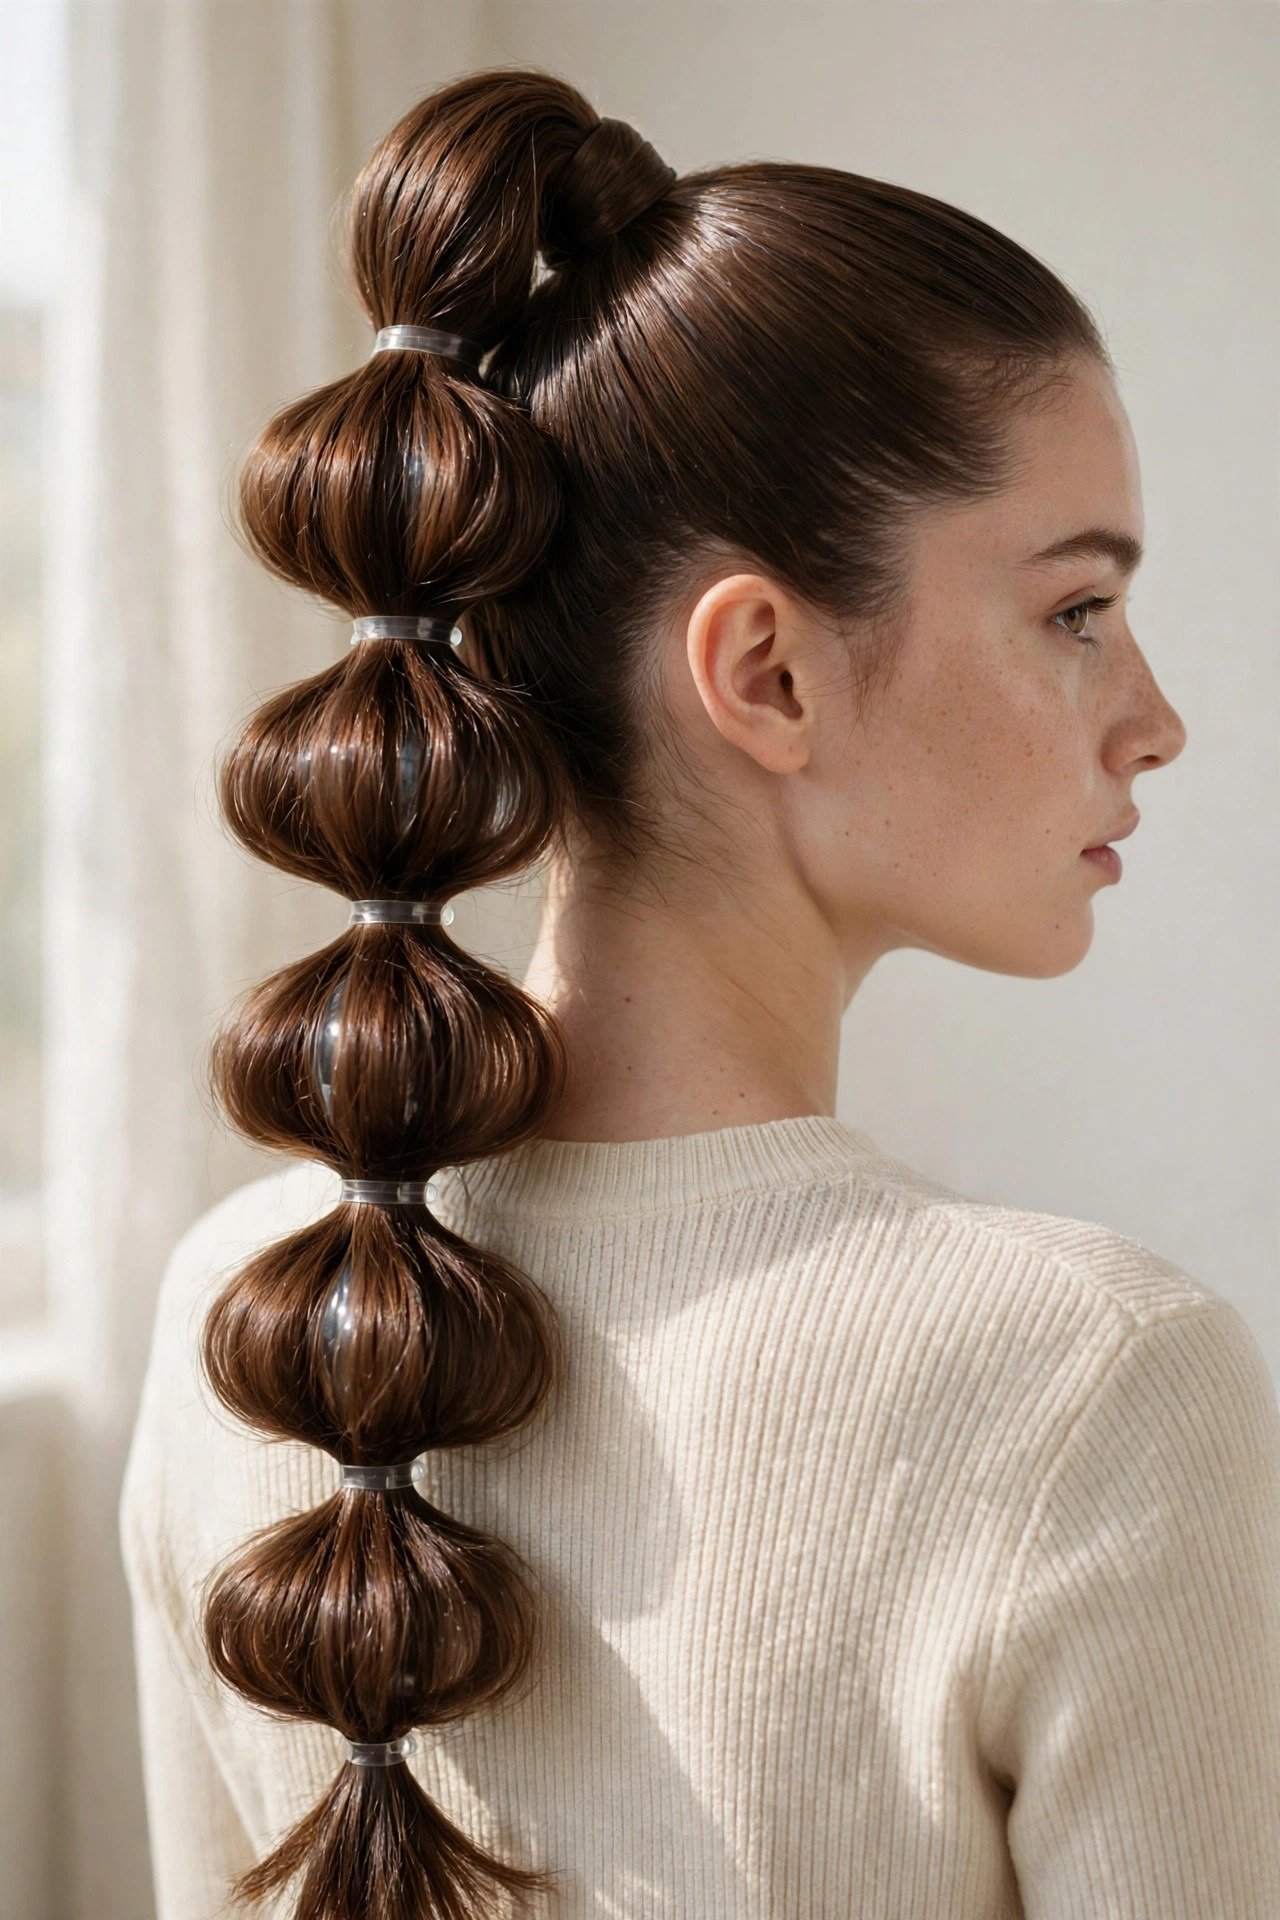
A bubble braid is technically a faux braid, which is the first thing to understand because it changes how you approach it. Real braids are built by weaving strands over and under each other. A bubble braid is built by anchoring a ponytail (or the end of a short real braid) and then sectioning the tail with elastics spaced a few inches apart. After the elastics are in, you gently pull and widen the hair between each pair — a technique stylists call pancaking — until each section rounds out into a soft, pillow-like bubble. The elastics do the structural work; your fingers do the shaping. Once you see it done, it clicks instantly, and most people nail it on their very first try.
The style has been around for years, but 2026 gave it a serious glow-up. The old version was often a single high, ultra-tight ponytail with small, hard bubbles — very cheerleader, very 2016. The 2026 version is softer and more editorial. Bubbles are bigger and looser, placements are lower and more varied, and the finishing is all about texture: ribbons threaded through, gold cuffs at the elastics, face-framing pieces pulled out, even temporary color misted over the bubbles for festival looks. It went from a gym hairstyle to a fashion hairstyle, and that shift is why you’re suddenly seeing it everywhere from runway-adjacent street style to wedding inspiration boards.
One honest reality check: bubble braids are a technique, not a miracle. They work best on hair that’s at least shoulder length, because you need enough tail to create three or four visible bubbles. They love second-day hair — slightly dirty hair has more grip and holds the pancaking better than freshly washed, slippery strands. And they rely on elastics, which means if you use cheap rubber bands that snag, you’ll pay for it at takedown. But get those basics right and you’ve got a style that’s genuinely faster than a French braid, more interesting than a plain ponytail, and sturdy enough to survive a full day. For most women, that’s a combination nothing else in the braid family can match.
Face shape-wise, this is one of the most forgiving styles out there. A high bubble ponytail lifts the eye upward and elongates a round face. A low, side-swept bubble braid softens a strong jawline. Doubles balance out a longer face by adding width at the sides. Hair texture matters more than face shape: straight hair gives the cleanest, most defined bubbles; wavy hair gives a romantic, tousled version; curly hair can work beautifully but needs to be stretched or blown out first, because tight curls fight the smooth rounded shape. If your hair is very slippery and fine, don’t worry — there’s an entire section later on the volume hacks that fix exactly that.
Cost and time are where bubble braids really win. A professional version at a salon runs roughly $25 to $60 depending on your city and how many variations you add, but there’s almost no reason to pay for one — this is firmly a DIY style. Budget ten minutes for a classic single bubble ponytail once you’ve practiced it twice, and fifteen to twenty minutes for doubles or anything with accessories. The only real investment is a pack of good elastics, which costs less than your morning coffee run. Keep that in mind as we go through the tutorials: every style in this guide is designed to be done by you, at home, on a regular Tuesday.
Classic Bubble Ponytail: Step-by-Step Tutorial
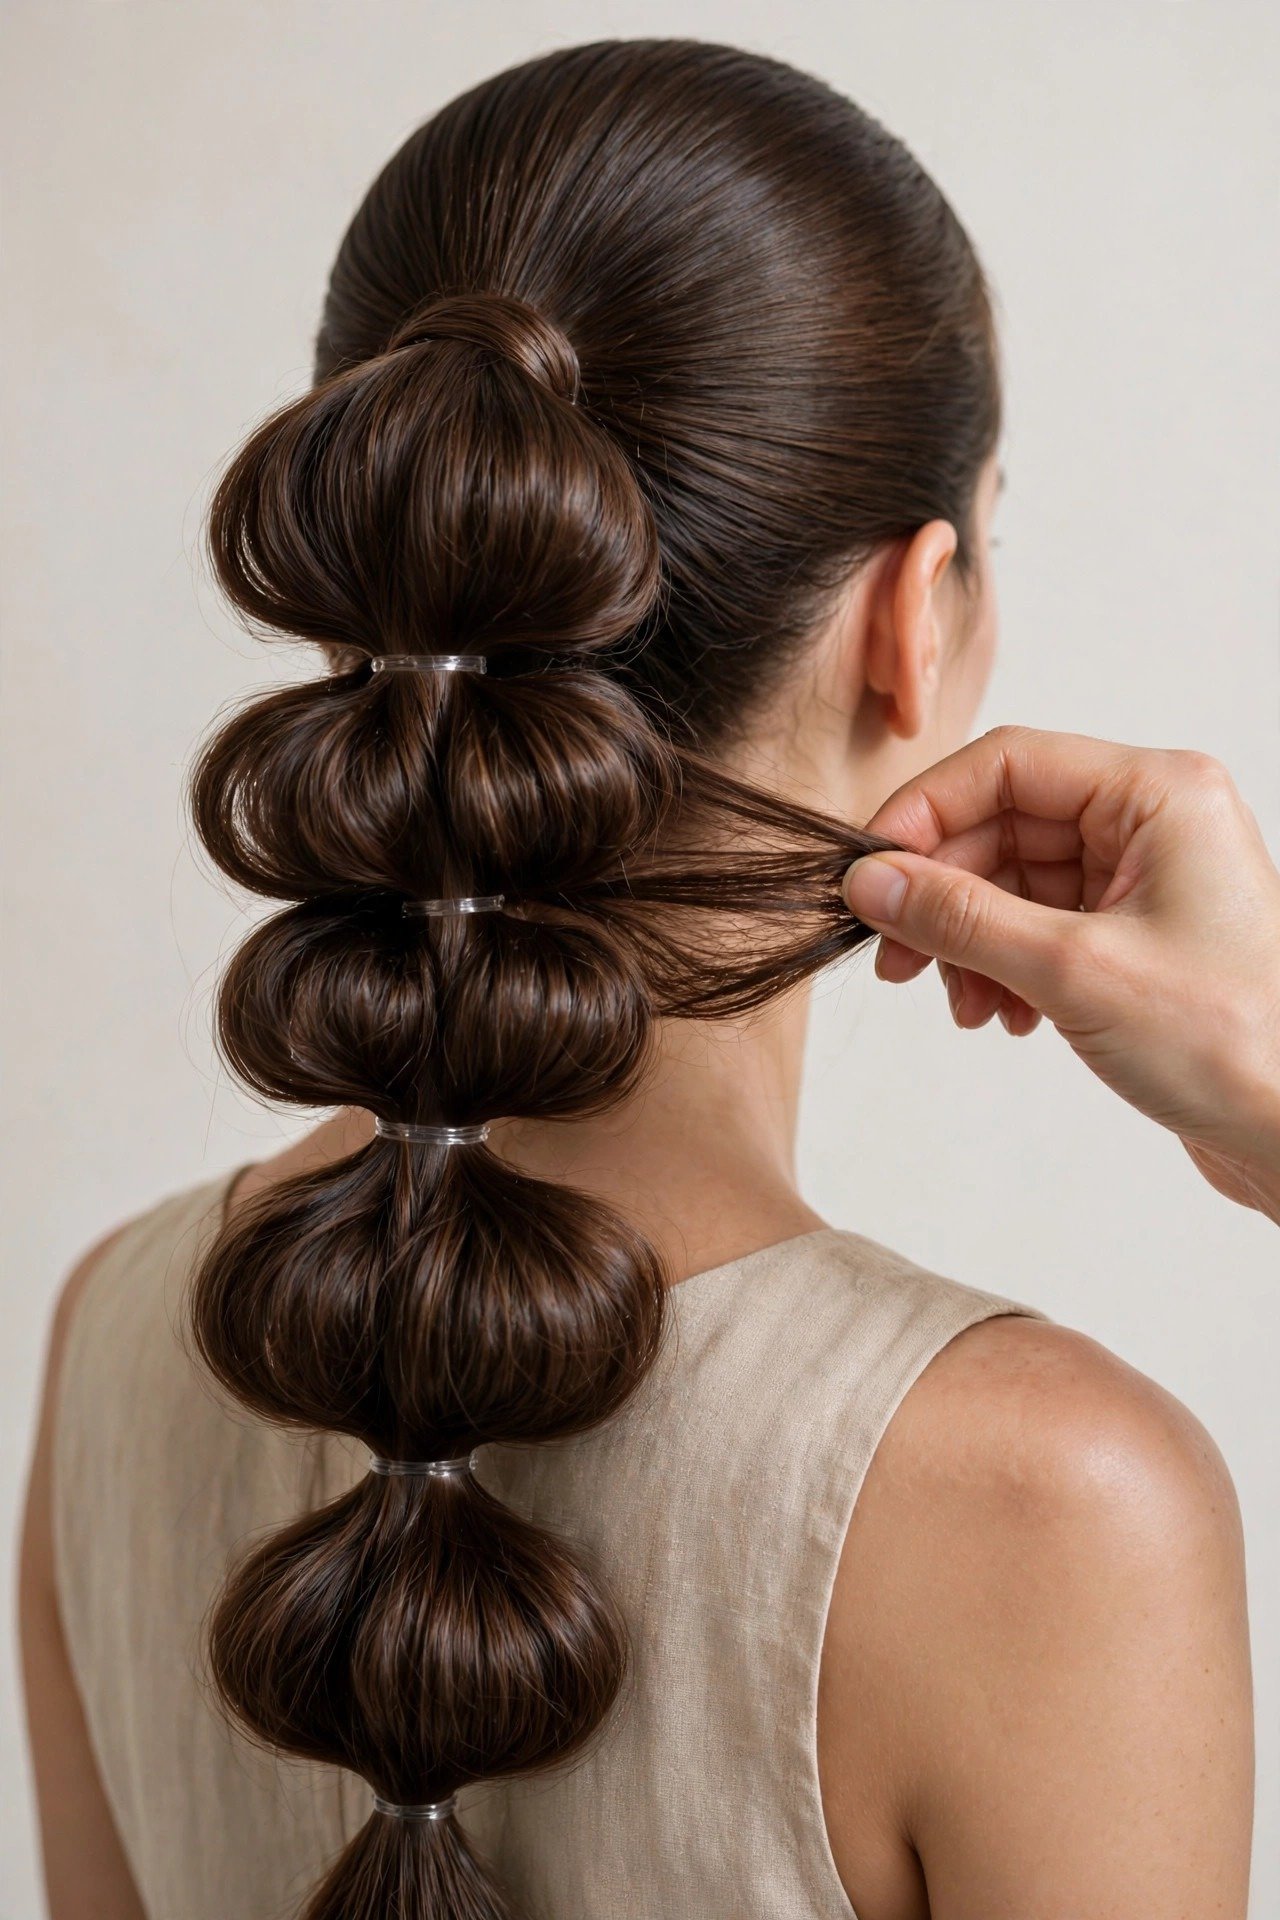
The classic bubble ponytail is where everyone should start, because every other variation in this guide is just a remix of this foundation. Get this one right and doubles, side styles, and low versions all become easy. You’ll need a brush, a rat-tail comb for smoothing, four to six small elastics, and a little texturizing product if your hair is very clean or slippery. Work on dry hair — this style doesn’t cooperate with wet hair, since wet strands clump instead of puffing. Give yourself fifteen minutes the first time; you’ll be down to ten by the third try.
- Smooth into a ponytail. Brush all your hair up to your chosen height — high at the crown for sporty energy, mid-head for everyday, low at the nape for something more polished. Secure with a strong elastic. Pro tip: tilt your head back slightly while smoothing the underside to avoid that bumpy ridge under the ponytail.
- Add grip if needed. If your hair is freshly washed or very fine, mist a light texturizing spray or work a pea-sized amount of dry shampoo through the ponytail. This one step is the difference between bubbles that hold and bubbles that slide flat within an hour.
- Place your first elastic. Measure roughly two to three inches down from the base and secure a small elastic around the ponytail. This spacing is the golden rule — too close together and you get tiny, cramped bubbles; too far apart and the sections sag instead of puffing.
- Continue down the tail. Keep adding elastics every two to three inches until you run out of ponytail. For most medium-to-long hair, that’s three to five bubbles total. Keep the spacing as even as you can by eyeballing it, or use two fingers as a rough measuring guide.
- Pancake each bubble. Starting at the top bubble, gently tug the hair between the elastics outward and slightly upward with your fingertips. Work around the whole section, pulling a little at a time. This is where the magic happens — a flat sectioned ponytail transforms into rounded bubbles in under a minute.
- Balance the shape. Step back and check both sides in a mirror. If one bubble is bigger than its neighbor, gently squeeze the bigger one inward or tug the smaller one outward. Bubble braids are forgiving, so small tweaks go a long way.
- Hide the elastics (optional but recommended). Take a thin strand of hair from under each elastic, wrap it around the band, and pin it with a bobby pin. This takes an extra three minutes and makes the whole style look twice as expensive.
- Set it lightly. A quick mist of flexible-hold hairspray keeps flyaways in check without making the bubbles crunchy. Skip heavy-hold sprays — they flatten the softness that makes this style cute.
Here’s the catch most tutorials skip: the first bubble, right below the ponytail base, is the hardest to make round because it’s anchored so tightly. Don’t fight it — let that first section stay a little smaller and let the bubbles get progressively fuller toward the ends. It looks natural, and trying to force the top one huge usually just creates frizz. Also, resist the urge to pancake before all the elastics are placed. If you puff as you go, you’ll disturb the spacing and end up with lopsided bubbles. Place first, puff second, always.
Stylist reality check on timing: your first attempt will probably take closer to twenty minutes, and that’s fine. Most of that is fussing with the pancaking, which is a feel thing you develop fast. By attempt three, the muscle memory kicks in and you’ll do the whole thing while half-watching TV. If you’re getting ready for an event, do a trial run the day before so you’re not learning under time pressure. And keep a couple of spare elastics in your bag — if one snaps midday, you want to fix it in thirty seconds, not hunt around.
Double Bubble Braids: The Pigtail Upgrade
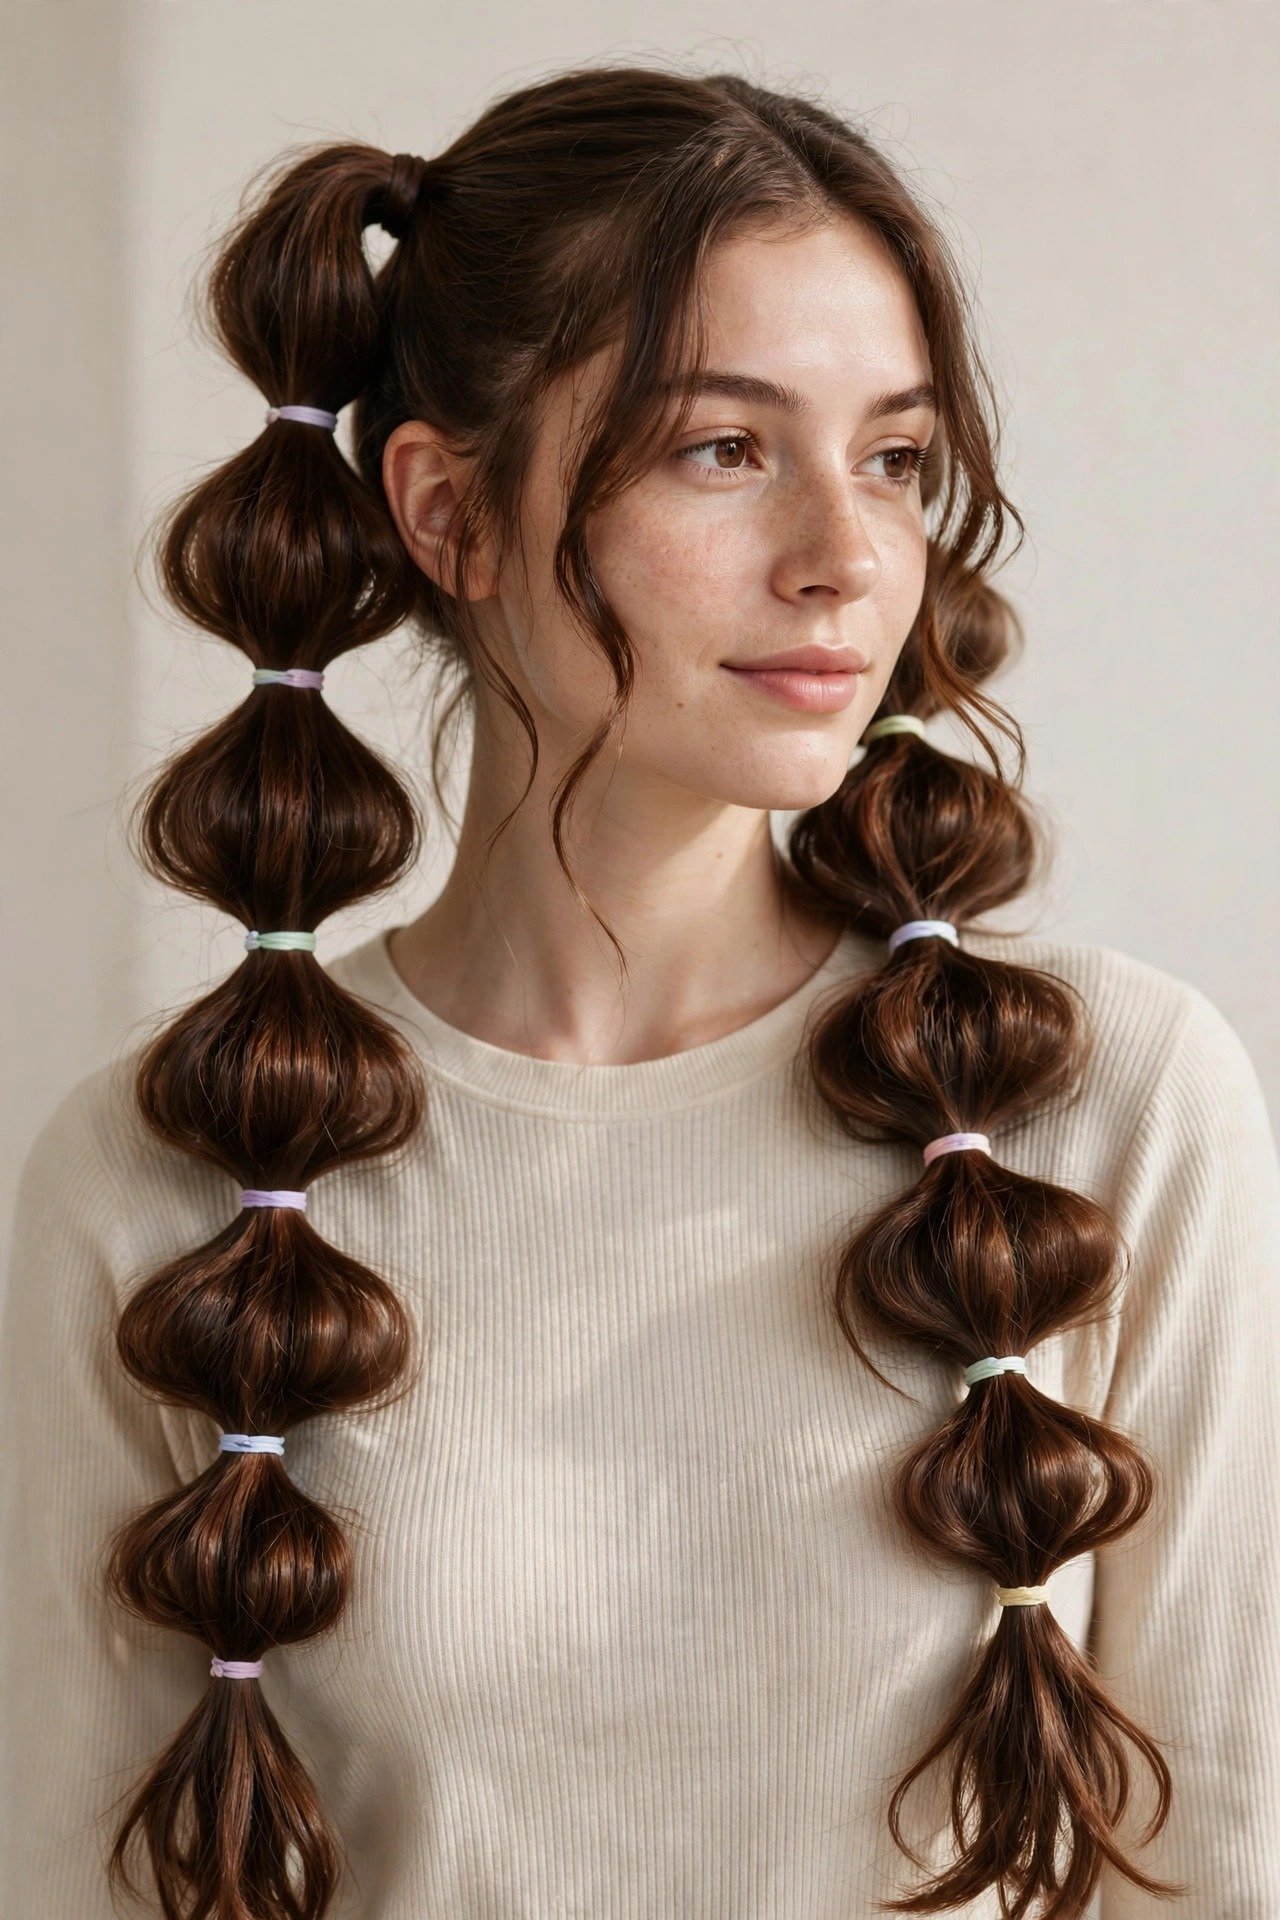
Double bubble braids — two bubble ponytails, one on each side — are the 2026 update to classic pigtails, and they bring a completely different energy than the single version. Where the classic reads polished and sporty, doubles read playful and nostalgic, with a strong Y2K streak that pairs perfectly with claw clips, tinted sunglasses, and mini skirts. They’re the festival favorite for a reason: two smaller braids distribute weight better than one heavy ponytail, they stay secure through dancing and heat, and they frame the face in a way that photographs ridiculously well from every angle.
The parting is everything with this style, so don’t rush it. Use a rat-tail comb to draw a clean center part from your forehead all the way to the nape — a zigzag part is fine if that’s your thing, but center is the classic 2026 look. Clip one side up so you’re only working with half your hair at a time. Now here’s the symmetry trick that separates good doubles from great ones: tie both ponytails loosely first, check their height and position in the mirror (use your phone’s front camera if your bathroom mirror is awkward), and only tighten them once they match. Doing one side completely and then trying to copy it is how you end up with one pigtail sitting noticeably higher than the other.
For placement, you’ve got two main options. High doubles — up near the temples — give maximum Y2K energy and work great for festivals, parties, and workouts. Low doubles, sitting just behind the ears, are softer and more wearable for everyday; they’re also the better pick if you have a longer face, since high doubles can exaggerate length. A clever middle ground is starting high and letting the bubbles fall forward over your shoulders, which gives you the playful look with a more flattering line. Whichever you choose, keep the elastic spacing slightly tighter than the classic — about two inches — because each side has less hair and needs the closer spacing to build visible bubbles.
The most common doubles mistake is uneven pancaking between the two sides. Your dominant hand will naturally pull harder, so one braid ends up noticeably fuller. Fix it by pancaking in rounds: do the top bubble on the left, then the top bubble on the right, then move down. Comparing as you go keeps them matched. Another tip: wrap the base of each ponytail with a strand of hair or a small scrunchie. It hides the elastic and adds a finished touch that makes doubles look intentional rather than like you ran out the door at 7 a.m. — even if you did.
Time and product notes: doubles take about fifteen to twenty minutes total, roughly five minutes more than a single because of the parting and symmetry checking. You’ll use eight to twelve small elastics depending on hair length. For hold, a light mist of flexible hairspray is enough — doubles are structurally secure by design, so heavy products just add weight. If you’re wearing them to a workout or a hot outdoor event, do your parting on slightly damp hair with a bit of gel smoothed along the part line; it keeps the center part crisp for hours instead of dissolving into fuzz by noon.
Bubble Braid Variations: Side, Half-Up & Low Styles
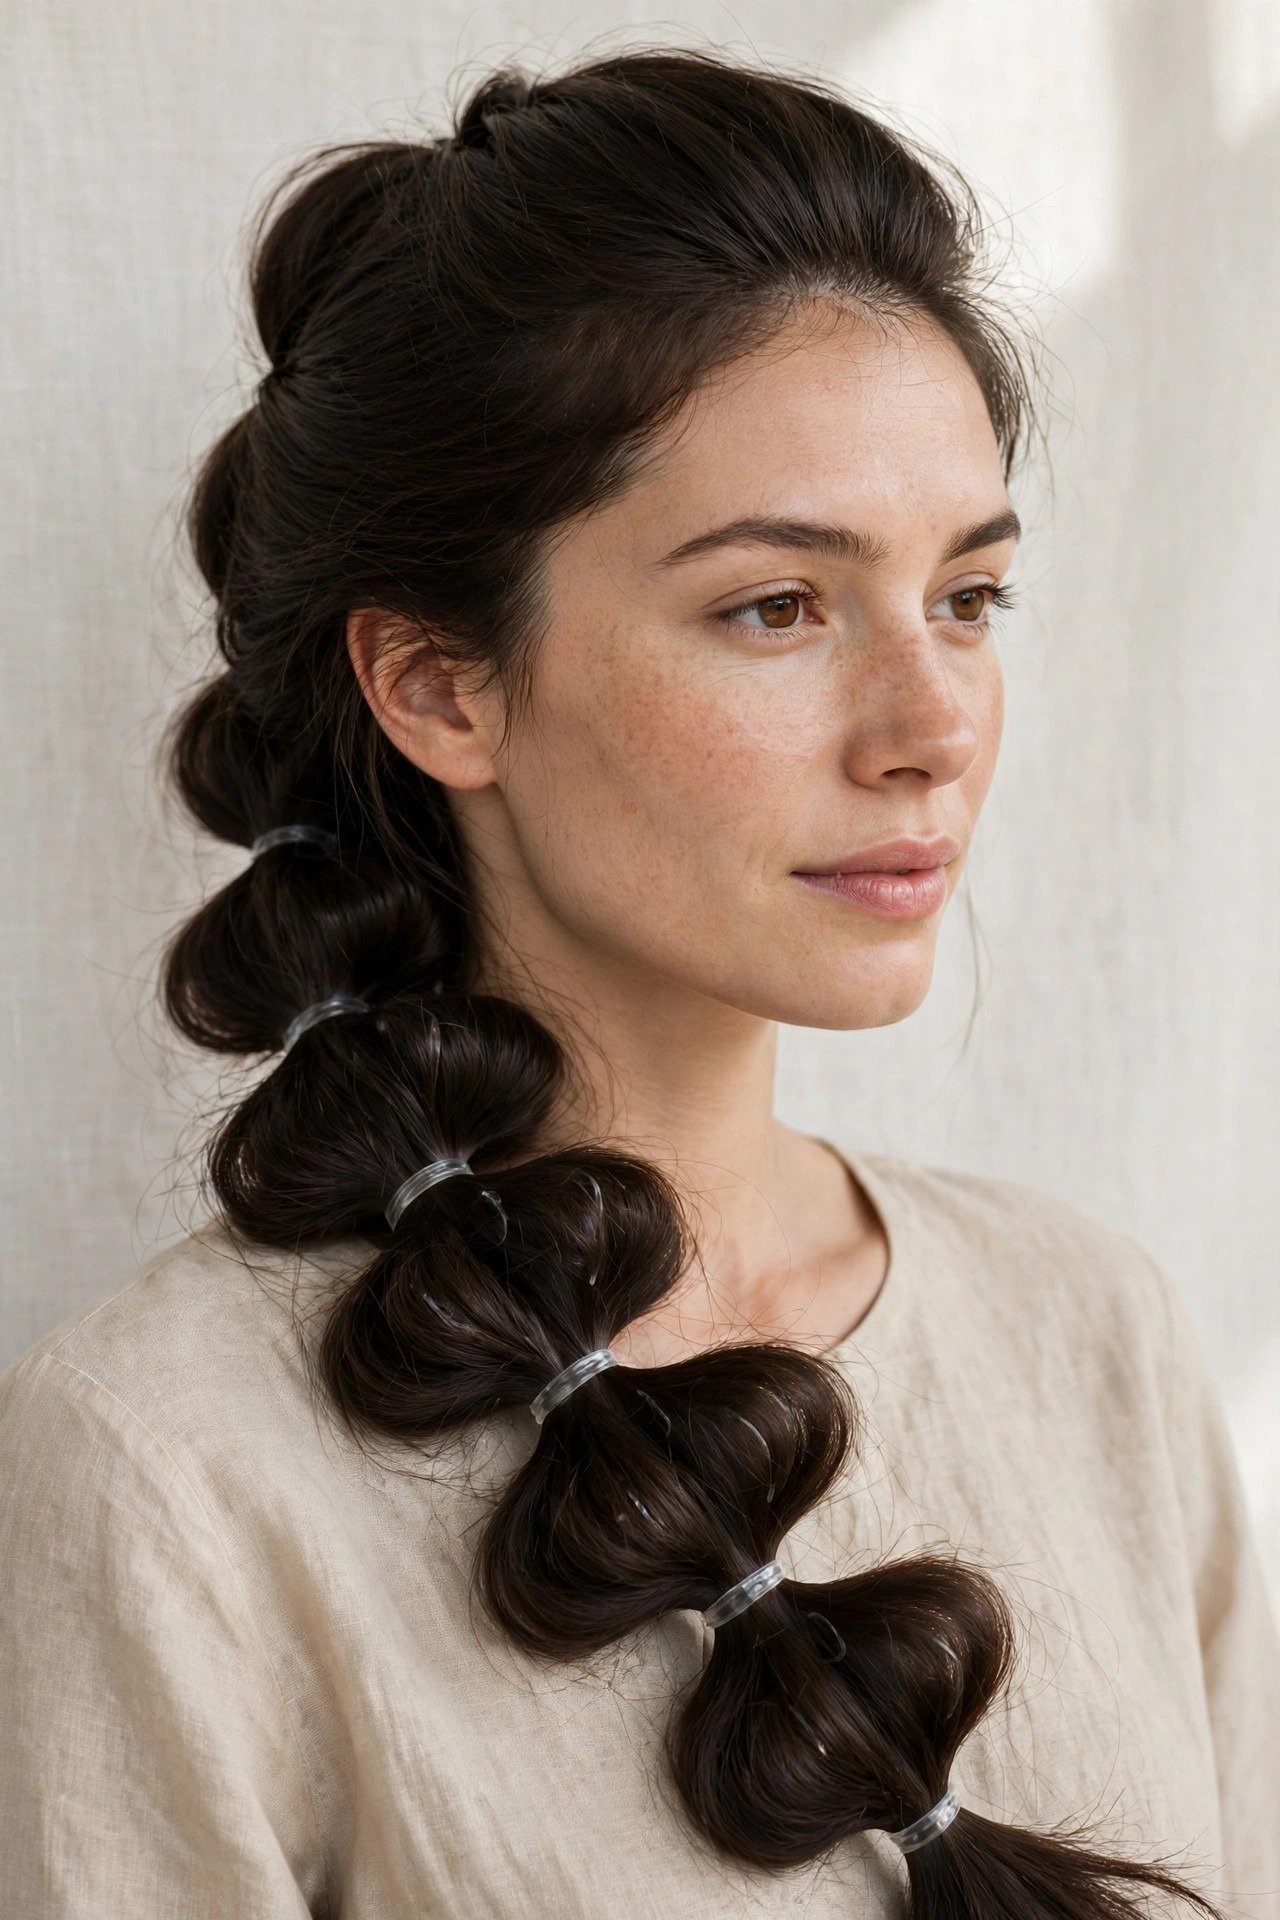
Once you’ve got the classic down, these four variations let you stretch one technique across your whole week. Each one takes the same bubble-building skill and just changes the placement or the base, so there’s no new learning curve — only new looks. They’re ordered from easiest to most involved, and each mini-tutorial assumes you already know the place-elastics-then-pancake routine from the classic tutorial above.
The Side Bubble Braid
Sweep all your hair over one shoulder and secure a low ponytail just behind your ear with a clear elastic. Add elastics every two to three inches down the tail and pancake each section, pulling slightly more toward the front so the bubbles cascade visibly over your shoulder instead of hiding behind it. This is the most romantic of the variations — it softens the whole look and works beautifully for date nights, dinners, and photos. Pull out a few face-framing strands around your temples before you start for extra softness. Time: about twelve minutes. Best on medium to long hair; on shorter hair the tail won’t clear your shoulder enough to show the bubbles.
The Half-Up Bubble Braid
Gather the top half of your hair (roughly from temple to temple) into a ponytail at the crown, leaving the bottom half loose. Build your bubbles down the ponytail exactly like the classic, spacing elastics two inches apart for smaller, cuter bubbles. This is the office-friendly variation — it keeps hair out of your face while showing off your length, and it reads polished rather than playful. It also happens to be the best variation for fine hair, since you’re working with less hair and the loose bottom half makes the whole head look fuller by comparison. Time: eight to ten minutes, making it the fastest style in this guide.
The Low Bubble Braid
Secure a low ponytail at the nape of your neck, keeping it smooth and sleek through the top. Space your elastics slightly wider here — three inches apart — and pancake gently for soft, elongated bubbles rather than round ones. Wrap each elastic with a strand of hair for a seamless, expensive finish. The low version is the grown-up bubble braid: it works for work meetings, weddings, and anywhere the high playful versions would feel too casual. Pair it with a middle part and tucked-behind-the-ears front sections for a sleek, editorial feel. Time: about twelve minutes including the elastic-wrapping.
The Dutch-Start Bubble Braid
Begin with a short Dutch braid (inside-out French braid) from your hairline for about three inches, then gather everything into a ponytail and build bubbles from there. The braided start adds texture and grip at the crown, which solves the two biggest complaints about plain bubble ponytails: the flat top and the visible elastic at the base. It also keeps the front secure through workouts and windy days. You only need to know a basic three-strand Dutch braid for the first few inches — nothing fancy. Time: fifteen to eighteen minutes, with most of the extra time going to the braided start. This is the variation stylists do most on clients because it looks the most “done.”
A word of honest advice on choosing between these: match the variation to your day, not your mood. The side braid is gorgeous but it swings forward and gets in the way during workouts. The half-up is perfect for the office but can feel underdressed at a festival. The low version photographs elegantly but won’t survive a high-energy day without extra pinning. Thinking about function first saves you from restyling at noon. And don’t be afraid to mix — a low bubble braid with a ribbon threaded through the elastics, or doubles where one side is a Dutch-start, are the kinds of small twists that make the style feel personal instead of copied.
Bubble Braids for Every Hair Length
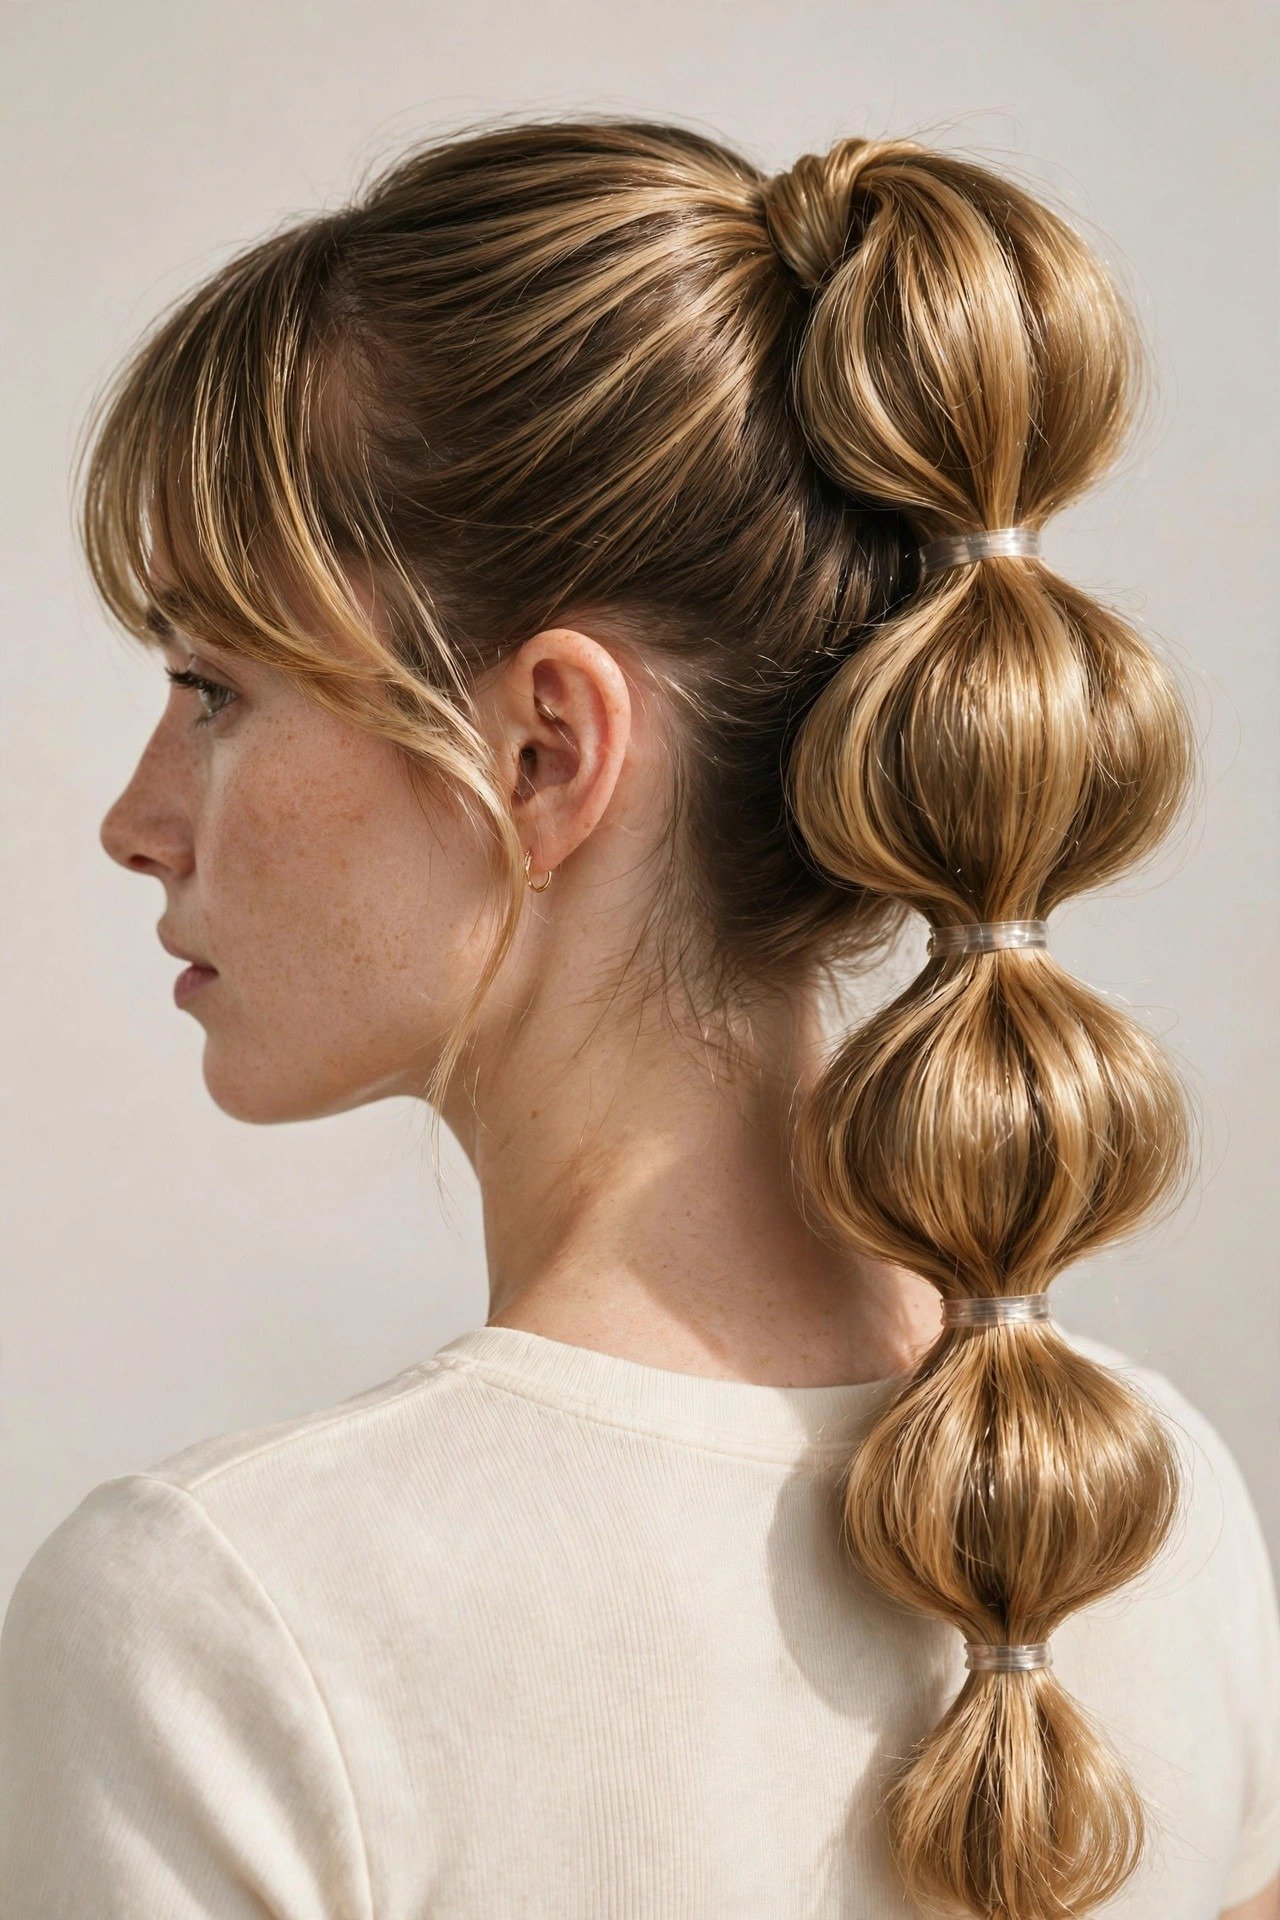
Short hair — chin to shoulder length — can absolutely do bubble braids, but you need to adjust expectations and technique. With this length you’ll get two, maybe three small bubbles, and they’ll sit close to the head. The trick is tighter elastic spacing (about an inch and a half apart) and aggressive pancaking to maximize each section’s fullness. A half-up bubble braid is usually the most flattering option on short hair because it uses the top layer where you have the most length. Skip the high ponytail version unless your hair is at least shoulder length; too short and the tail sticks out awkwardly instead of draping. A light texturizing powder at the roots before you start gives short hair the grip it needs to hold the shape.
Medium hair — shoulder to armpit length — is the sweet spot for bubble braids, honestly. You’ve got enough length for four to five beautiful bubbles without the weight that makes long hair pull and ache. Every variation in this guide works at medium length, and the style holds well because the tail isn’t heavy enough to drag the elastics down. If your hair is layered, tuck the shorter layers in with a bit of pomade or a light wax before placing elastics — layers poking out between bubbles is the number one complaint at this length, and a pea-sized amount of product like TIGI Bed Head Manipulator (around $15 for a 2 oz tub) smoothed over the surface fixes it. Budget twelve to fifteen minutes for a full style at this length.
Long hair — past the armpit — gives you the most dramatic bubbles but comes with its own challenges. Weight is the big one: a long bubble ponytail pulls on the base elastic all day, which can cause tension headaches and even breakage at the hairline if the base is too tight. Distribute the load by using a strong, wide elastic at the base (a fabric-covered band, not a tiny clear one) and keep the base snug rather than yanked. You’ll also use more elastics — six to eight for a full-length tail — and the whole style takes closer to twenty minutes. The payoff is worth it: long bubble braids have incredible movement, and pancaking on long hair creates those big, editorial bubbles you see all over social media.
If your hair is too short for the look you want, extensions are a legitimate shortcut — and in 2026, nobody’s judging. Clip-in extensions are the easiest route for bubble braids: a set of decent human-hair-feel clip-ins runs $25 to $60 on Amazon, while name brands like Luxy Hair start around $150. Clip them in before you build the ponytail, focusing volume at the back and sides where the bubbles will form. The elastics actually help here — each band anchors the extensions and hides the clips. One caution: synthetic extensions can look shiny and plasticky next to real hair, so stick to matte-finish sets or lightly dust them with dry shampoo to kill the shine. Tape-ins and sew-ins work too, but clip-ins give you the flexibility to add length only on bubble-braid days.
Very curly or coily hair deserves its own note because the standard advice often ignores it. Bubble braids work beautifully on stretched hair — a blowout, a stretched twist-out, or even just banding the hair overnight to elongate it gives you the smooth length the bubbles need. Trying to bubble-braid tight, unstretched curls usually ends in frizz and undefined sections, not because the style can’t work but because the technique needs smooth strands to round out. Prep with a leave-in and a light oil on the ends, stretch first, then build. The result is stunning — defined, sculptural bubbles with incredible texture — and it holds for days with a silk bonnet at night.
Fine or Thin Hair? Bubble Braids Volume Hacks That Work
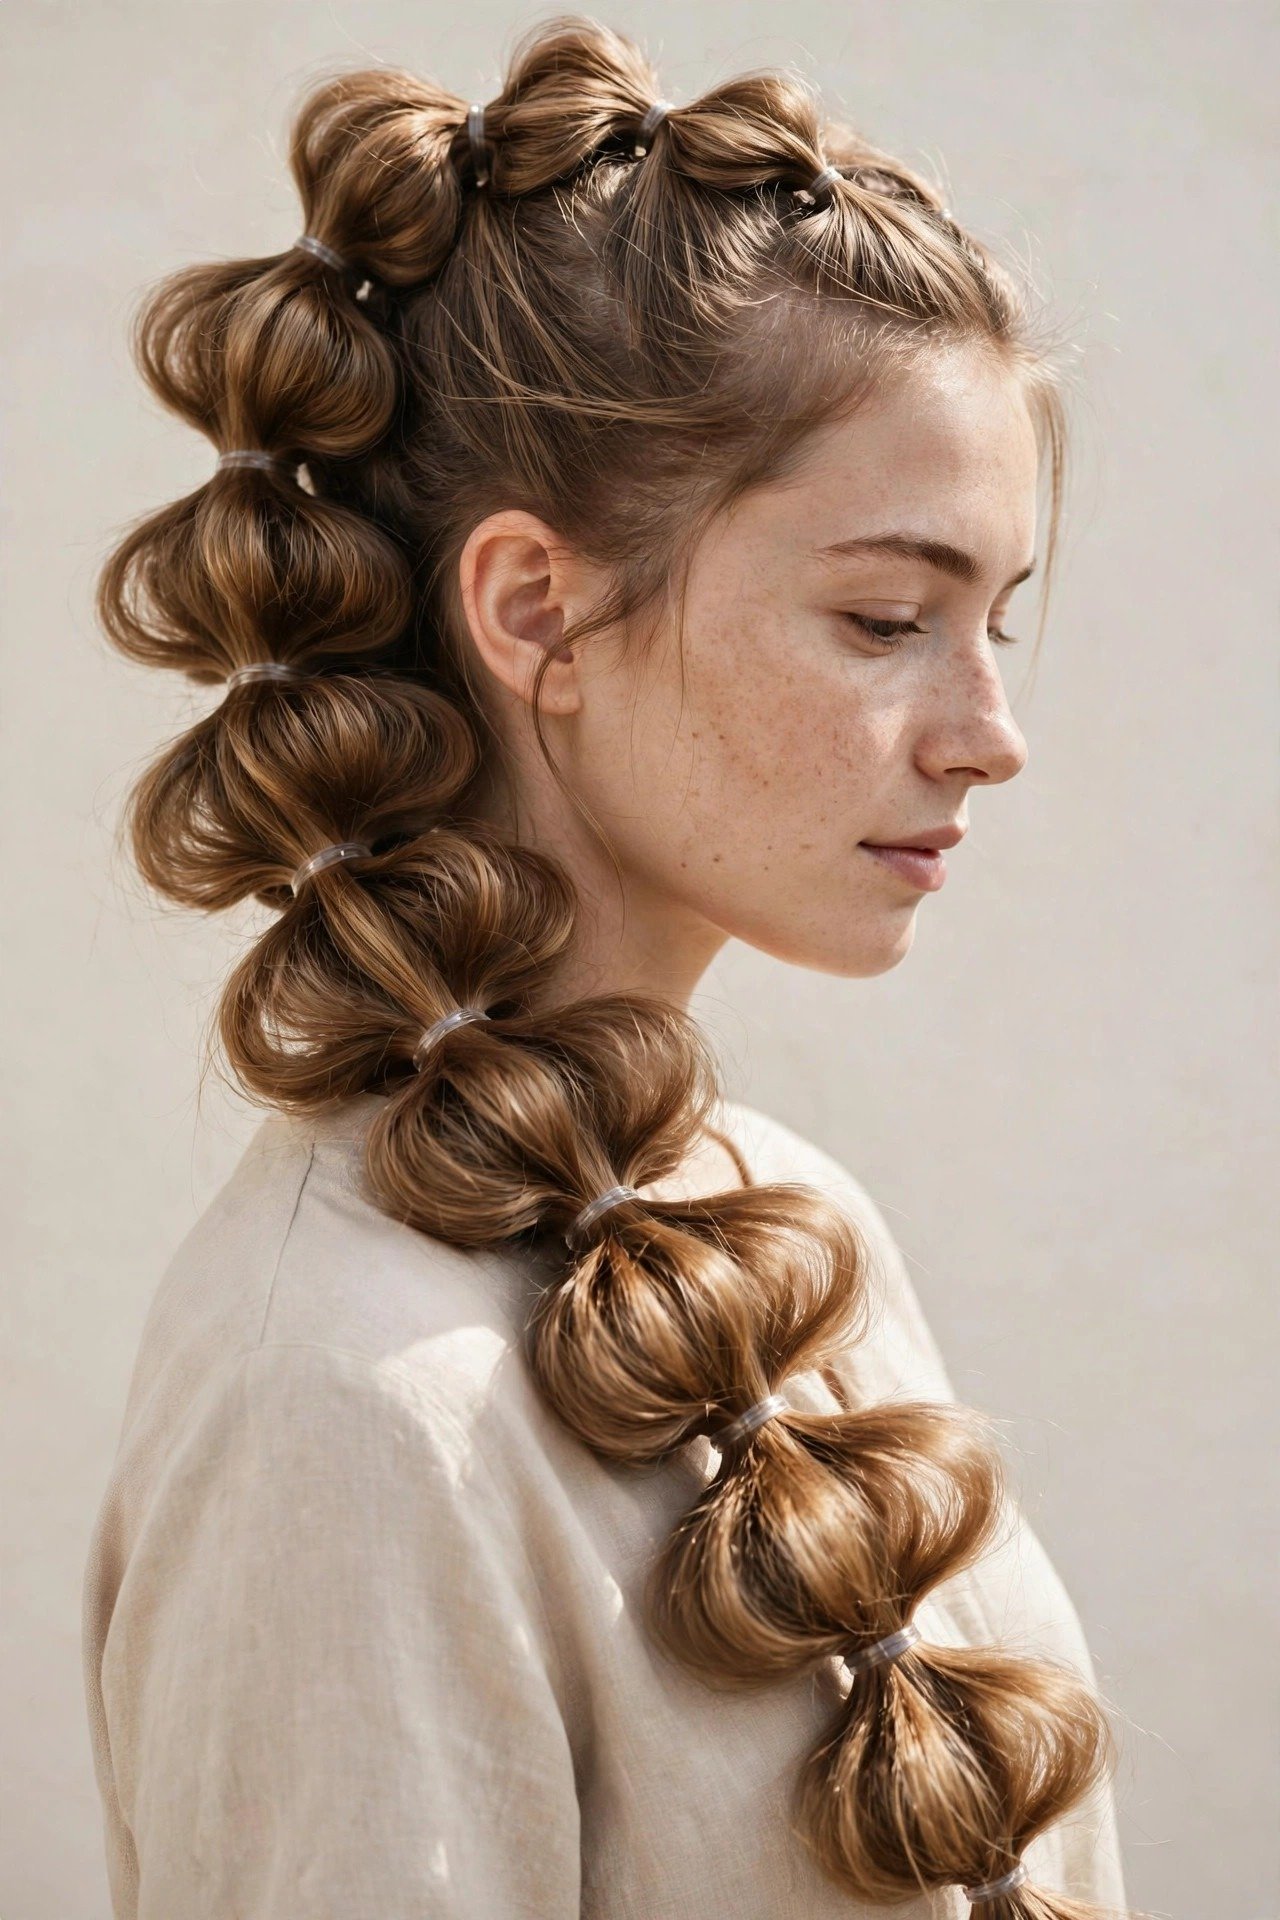
Let’s be blunt: bubble braids were not designed with fine hair in mind, and most tutorials pretend otherwise. The style needs volume to create those round, juicy bubbles, and fine hair naturally gives you less of it. But here’s the good news — fine hair also pancakes more easily and holds texture products better than thick hair, so with the right prep you can absolutely get gorgeous bubbles. It just takes a few extra steps that thick-haired tutorials skip. Consider this section your honest fine-hair manual.
Start with dry shampoo, and use more than you think you need. Batiste Original (about $9 for a full-size can) is the classic for a reason — it’s cheap, it adds real grit, and the scent options are inoffensive. Spray it at the roots and through the ponytail before you place a single elastic, then massage it in and wait two minutes. That waiting matters: dry shampoo needs a moment to absorb oil and create texture. If your hair is very clean, this step alone can double your bubble volume. Don’t use it as an afterthought once the style is built — by then the elastics are placed and the product can’t get where it needs to go.
Teasing is your second weapon, and I know it has a bad reputation. Done right — gently, with a fine-tooth comb, only at the roots of each ponytail section before you pancake — it adds real, lasting fullness without damage. The mistake people make is teasing aggressively up and down the whole strand, which creates tangles you’ll regret at takedown. Instead, hold each section up, backcomb three or four strokes right at the base near the elastic, then smooth the top layer over it with your fingers before pancaking. You get hidden volume with a clean surface. A rat-tail comb (Diane makes a good one for about $4) gives you the precision a brush can’t.
Pancaking technique matters more for fine hair than for any other type. Where thick hair needs gentle tugs, fine hair needs confident, aggressive pulling — you’re trying to create the illusion of fullness, so don’t be shy. Pull each section wider than feels natural, and pull slightly upward as well as outward to build height. Here’s a pro trick: after pancaking, gently tug a few tiny strands loose around each bubble for a lived-in, airy texture. It makes fine hair look intentionally tousled rather than thin. And place your elastics a little closer together — every two inches instead of three — because more, smaller bubbles read fuller than fewer large ones on fine hair.
The nuclear option for genuinely thin hair is a filler braid hidden inside the ponytail. Braid a small three-strand plait with the underlayer of your ponytail, then let the top layer fall over it before you place your bubble elastics. The hidden braid adds invisible bulk that puffs every bubble from the inside. It sounds fussy but takes about two minutes once you’ve done it once, and the difference is dramatic — it’s the same trick stylists use for thin-haired brides. Pair it with a volumizing powder like Big Sexy Hair Powder Play (around $20) dusted at the roots, and even very fine hair can produce bubbles that look twice as thick as they are. Just remember: more product and more teasing means more careful takedown later, so be gentle when the style comes out.
Bubble Braid Tools & Products You Actually Need (2026 Kit)
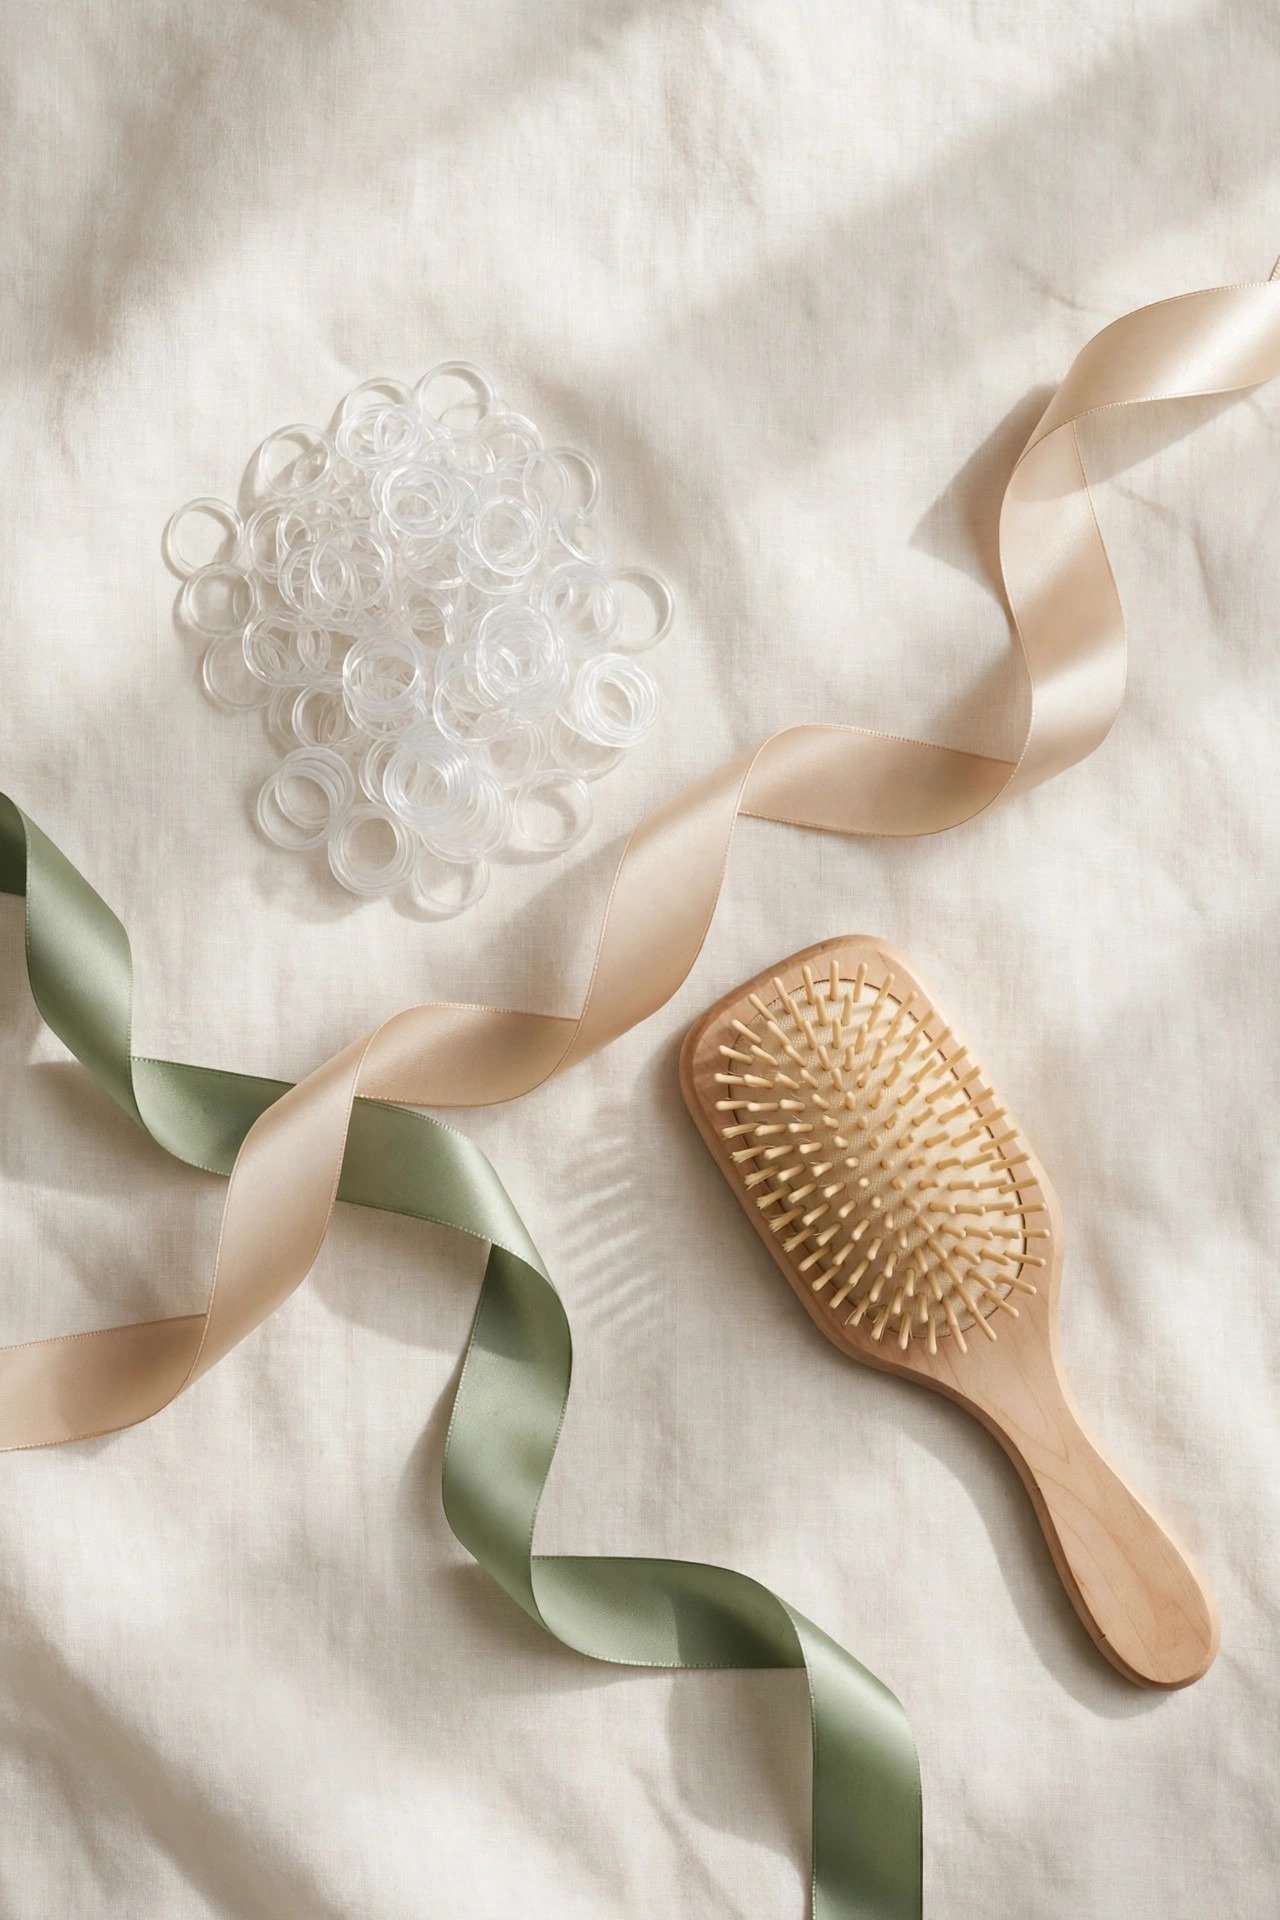
You don’t need much for bubble braids, but what you do need should be the right stuff — cheap elastics are genuinely the number one cause of breakage complaints with this style. Here’s the honest 2026 kit: what to buy, what it costs, and what you can skip without guilt.
1. Kitsch No-Snag Elastics (about $9 for a pack of 30). These are the gold standard for bubble braids. They’re small, strong, fabric-covered so they don’t rip hair, and they come in multi-color packs so you can match your hair. You’ll use four to twelve per style, so one pack lasts months. If Kitsch isn’t available where you shop, look for any fabric-covered mini elastics — the key word is fabric-covered, not clear plastic.
2. Goody Ouchless Mini Elastics (about $5 for a pack of 50+). The budget workhorse. Goody Ouchless bands are metal-free with a smooth coating, and the mini size is perfect for bubble spacing. They’re slightly less grippy than Kitsch, so they’re better for medium and thick hair than for very slippery fine hair. Keep a pack in your bag as backups — at this price there’s no excuse for a midday elastic emergency.
3. Batiste Dry Shampoo (about $9). As covered in the fine-hair section, this is non-negotiable for grip and volume. Even if your hair is thick, a light spray through the ponytail before placing elastics makes the bubbles hold their shape hours longer. The Original scent is the safest bet; the colored versions (for dark hair) are worth it if white residue is a concern on your hair color.
4. TIGI Bed Head Manipulator (about $15 for 2 oz). A pea-sized amount smoothed over the ponytail tames flyaways and poking-out layers without making hair sticky or stiff. It’s technically a texturizing putty, but for bubble braids you’re using it as a surface smoother. A little goes a very long way — one tub lasts most people six months or more at this usage rate.
5. Ouai Wave Spray (about $30). This is the splurge of the kit and it’s optional, but if you want that effortless, beachy texture in your bubbles, nothing beats it. Mist it through the ponytail before building for soft, touchable waves inside each bubble. If $30 feels steep for one style, a sea-salt spray from the drugstore (around $8–12) gets you 80% of the way there.
6. A rat-tail comb (about $4). Diane or Conair both make perfectly good ones. You need the pointed tail for clean partings (essential for doubles) and the fine teeth for gentle root teasing. This $4 tool does two jobs that no brush can do properly. Don’t skip it.
7. Small bobby pins matching your hair color (about $3–5). For securing wrapped strands around elastics and pinning down face-framing pieces. Buy the color closest to your hair — black pins on blonde hair draw the eye exactly where you don’t want it.
What to skip: expensive “bubble braid kits” sold on social media (they’re just marked-up elastics and a comb), heavy oils and serums applied before styling (they make hair slippery and kill bubble volume — save oils for takedown), and strong-hold hairsprays (they turn soft bubbles crunchy). Total kit cost if you buy everything: roughly $75, and most of it lasts months. The honest minimum — good elastics, dry shampoo, and a rat-tail comb — runs under $25 and covers 90% of what this style needs.
Bubble Braids for Workouts, Festivals & Weddings
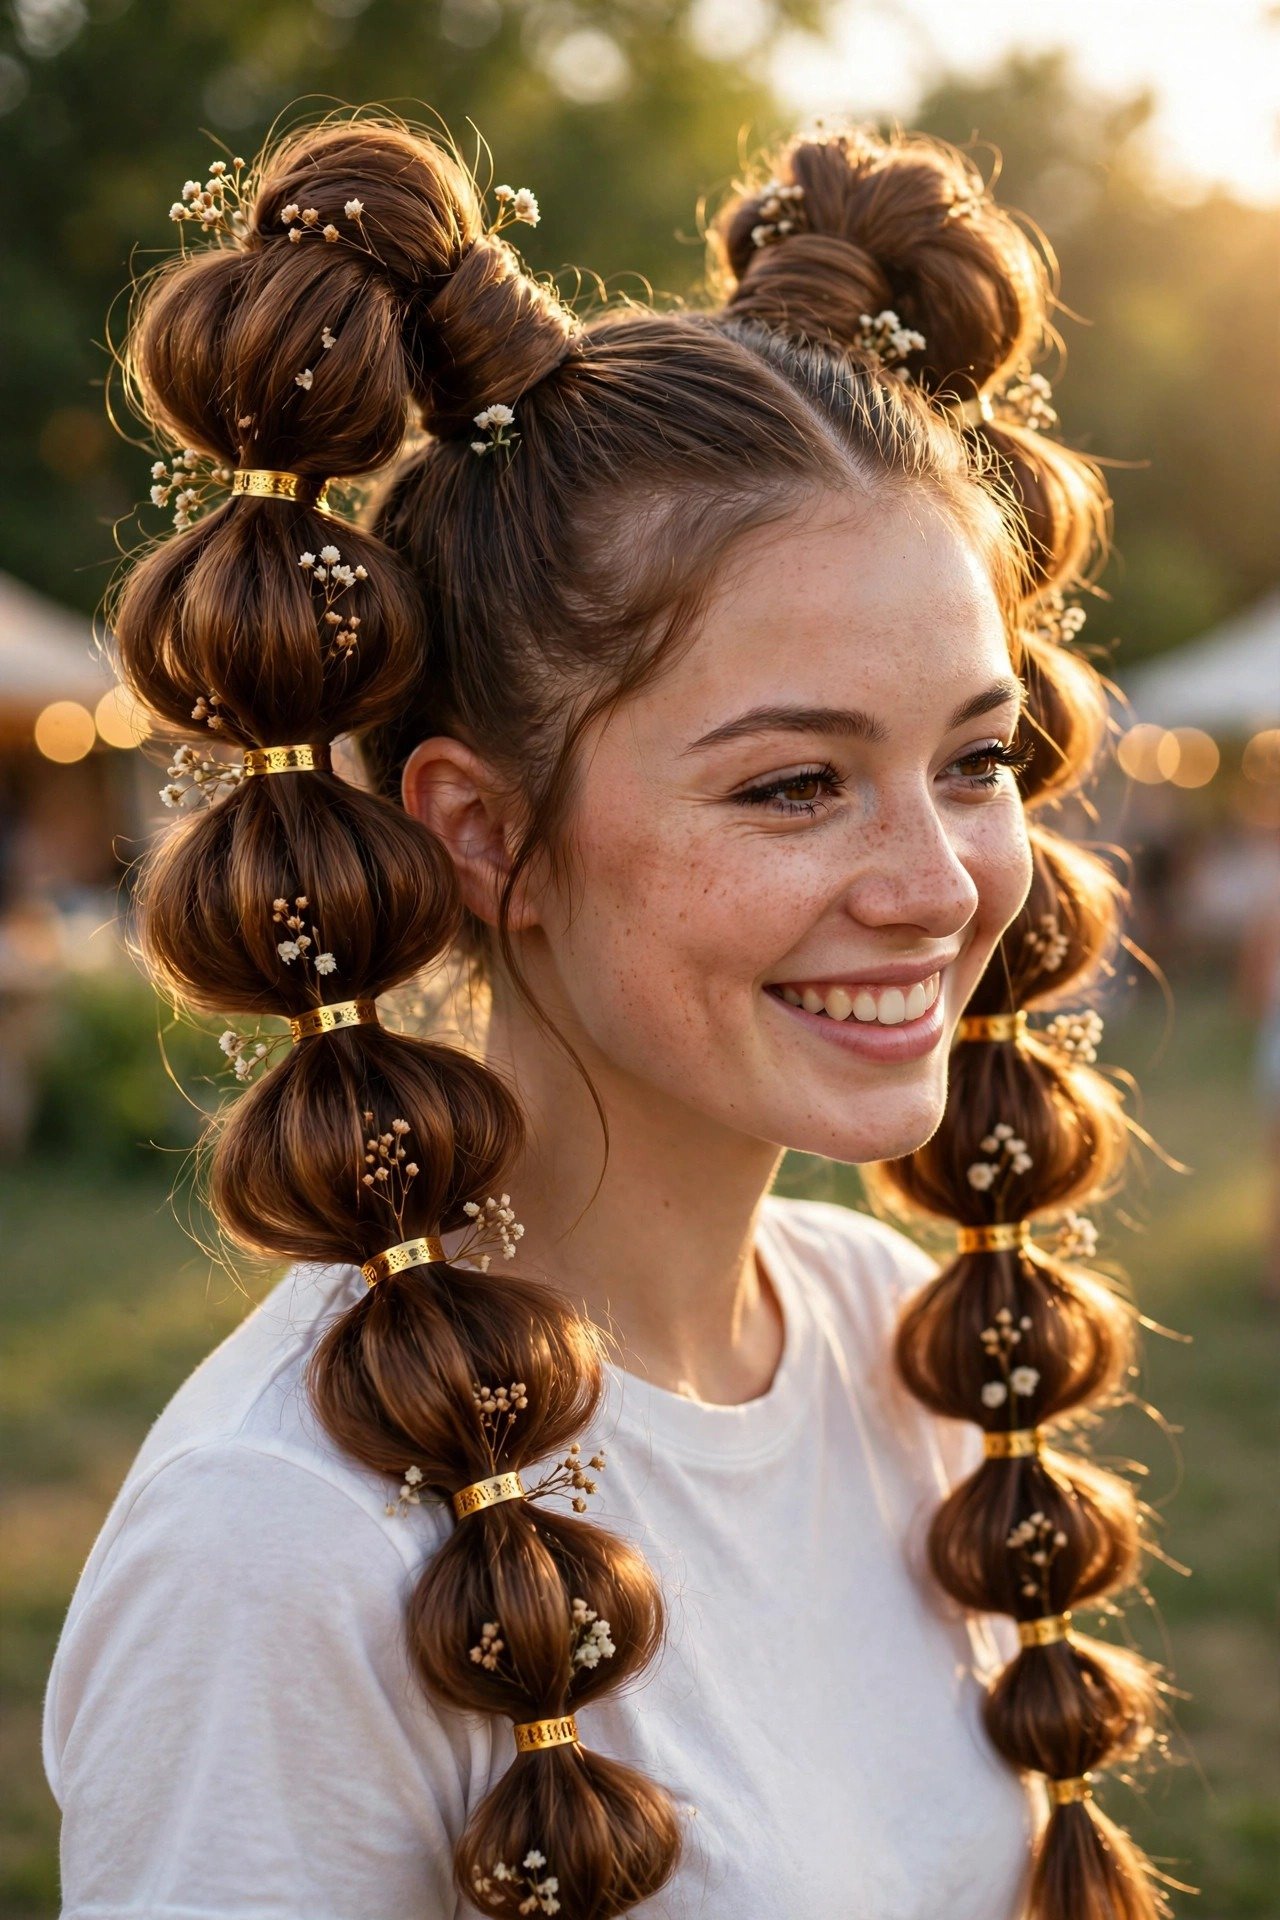
Bubble braids are one of the few styles that genuinely work across the gym, the festival field, and the wedding venue — but each occasion needs different prep. Here’s how to adapt the same technique for all three without learning a new style each time.
For workouts, security is everything. Go for high doubles or a high single bubble ponytail — high placement keeps hair off your neck and survives jumping, running, and floor work. Build on slightly damp hair with a bit of gel smoothed along the part and hairline; damp-set styles hold dramatically better through sweat than dry-set ones. Use strong elastics (this is where Kitsch earns its price) and space them every two inches so nothing shifts. Skip the pancaking at the gym — a tighter, less-puffed bubble braid stays put better, and you can always fluff it afterward. Sweat-proofing tip: apply dry shampoo to your roots before the workout, not after. It absorbs sweat as it’s produced instead of trying to fix greasy roots later. Total time: fifteen minutes, and it’ll survive a full training session.
For festivals, this is where bubble braids truly shine — they’re the unofficial hairstyle of festival season 2026 for good reason. They handle heat, wind, dancing, and long days without restyling, and they’re a perfect canvas for accessories. Thread a thin ribbon through the elastics as you build (just weave it in and out), add gold hair cuffs at two or three of the bands, or mist temporary color spray over the bubbles — brands like Jerome Russell or similar run about $8–12 a can and wash out in one shampoo. Glitter roots are optional but very on-theme; apply with a makeup sponge along the part. Practical notes: bring spare elastics and bobby pins in a tiny pouch, because festival conditions are where bands snap. And do your parting extra-clean in the morning — by hour six, a fuzzy part is what separates “festival cute” from “festival rough.”
For weddings — whether you’re the guest, the bridesmaid, or the bride — bubble braids need to be elevated, not playful. The formula: low placement, wider spacing, soft pancaking, and every elastic wrapped with hair so no band shows. Add pearl pins (a pack of decorative pearl bobby pins runs about $8–12) tucked at intervals, or weave in a silk ribbon that matches your outfit. The low bubble braid variation from earlier is your base; polish it with a light serum on the surface for shine and a flexible-hold spray to set. For brides, the Dutch-start version reads the most formal. One honest caution: if you’re the bride, do a full trial run with your stylist or at home — bubble braids photograph beautifully but you want to confirm the look matches your dress neckline and veil placement before the day.
For the office and everyday, the half-up and low variations are your friends. Keep the bubbles neat and modestly sized, skip the accessories, and wrap every elastic. A low bubble braid in particular reads as polished and intentional in professional settings — it’s interesting without being distracting. If your workplace is conservative, avoid doubles (they skew young and casual) and keep colors natural. The whole point is that one technique covers your entire life; you just dial the playfulness up or down with placement, size, and accessories.
How Long Do Bubble Braids Last? Sleep, Refresh & Takedown
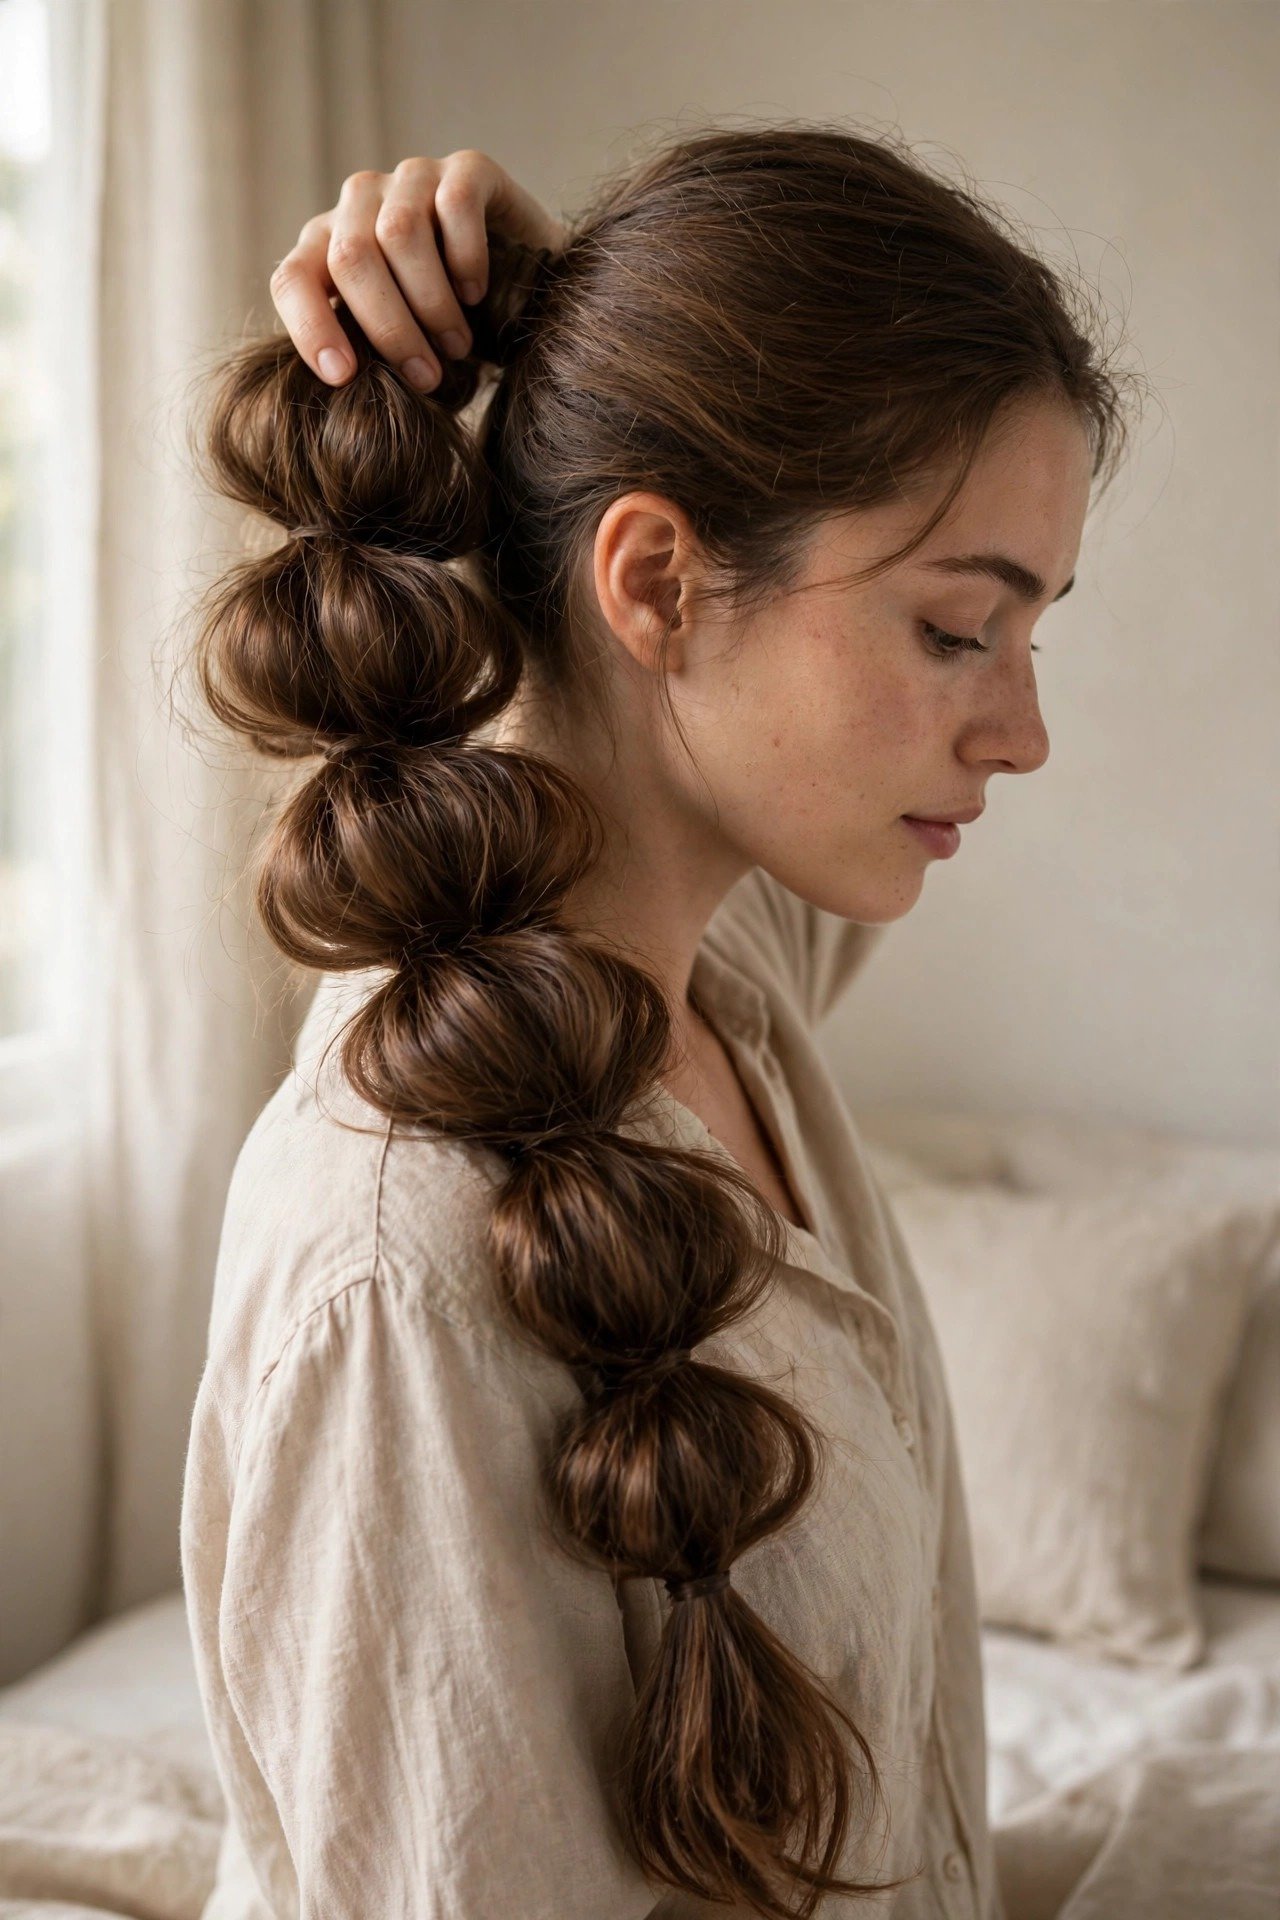
A well-built bubble braid lasts one to two days on most hair types, with day two often looking better than day one — slightly lived-in, softer, more natural. Getting to day three is possible but requires the right nighttime routine and realistic expectations. Here’s the full lifecycle: how to sleep in them, how to refresh them, and how to take them out without damage.
Sleeping in bubble braids is absolutely doable and it’s the key to multi-day wear. The non-negotiable is a silk or satin bonnet (about $10–15) or a silk pillowcase — cotton pillowcases create friction that frizzes the bubbles and loosens the elastics overnight. Before bed, gently re-pancake any flattened sections with your fingertips — don’t redo the elastics, just fluff. If you did doubles, you can loosely braid the two sides together into one loose plait for the night to keep them contained, then undo it in the morning. For a single bubble ponytail, some people prefer to take it down to a loose low ponytail overnight and rebuild the bubbles in the morning — that takes five minutes since the texture is already there. Either way, never sleep on them unprotected; that’s how you wake up to a matted mess.
Day-two refresh takes about five minutes. Flip your head upside down and massage dry shampoo into the roots — Batiste or your preferred brand — to absorb overnight oil. Then go bubble by bubble, gently re-pancaking each section to restore the roundness. If an elastic has slid, nudge it back into place rather than replacing it. Smooth flyaways with a tiny amount of pomade or the TIGI Manipulator on your fingertips. The most common day-two issue is the top looking flat while the bubbles still look good; fix it by gently lifting the hair at the crown with your fingertips or a few strokes of teasing at the roots. If the style is beyond refreshing — usually by day three — it’s faster to take it down and rebuild than to keep patching.
Takedown without breakage is where people actually damage their hair with this style, so pay attention. Never yank elastics out — especially small ones that have been in for two days. The safe method: apply a drop of oil or conditioner to each elastic, let it sit for thirty seconds to loosen the grip, then gently roll the band down and off. If a band is truly stuck, cut it with small scissors rather than pulling — one snip saves you from snapping multiple strands. Work from the bottom bubble upward, detangling each freed section with your fingers before moving on. After full takedown, brush gently from ends to roots and do a quick conditioning treatment if your hair feels dry. Done right, takedown takes five minutes and costs you zero broken hairs. Done wrong — ripping bands out dry — and you’ll find snapped short pieces around your hairline for weeks.
How long should you keep them in? Two days is the sweet spot for most people. Pushing to three or four days is possible with nightly bonnet protection, but each extra day increases tangling risk and scalp buildup, especially if you’ve used a lot of dry shampoo and texturizing product. Listen to your scalp: itchiness or tenderness at the elastic points means it’s time to take them down regardless of how good they still look. And if you wore them tight for a workout, take them down that evening — prolonged tension on the hairline is what causes those tiny broken baby hairs, not the style itself.
Mistakes That Ruin Bubble Braids (And How to Fix Them)
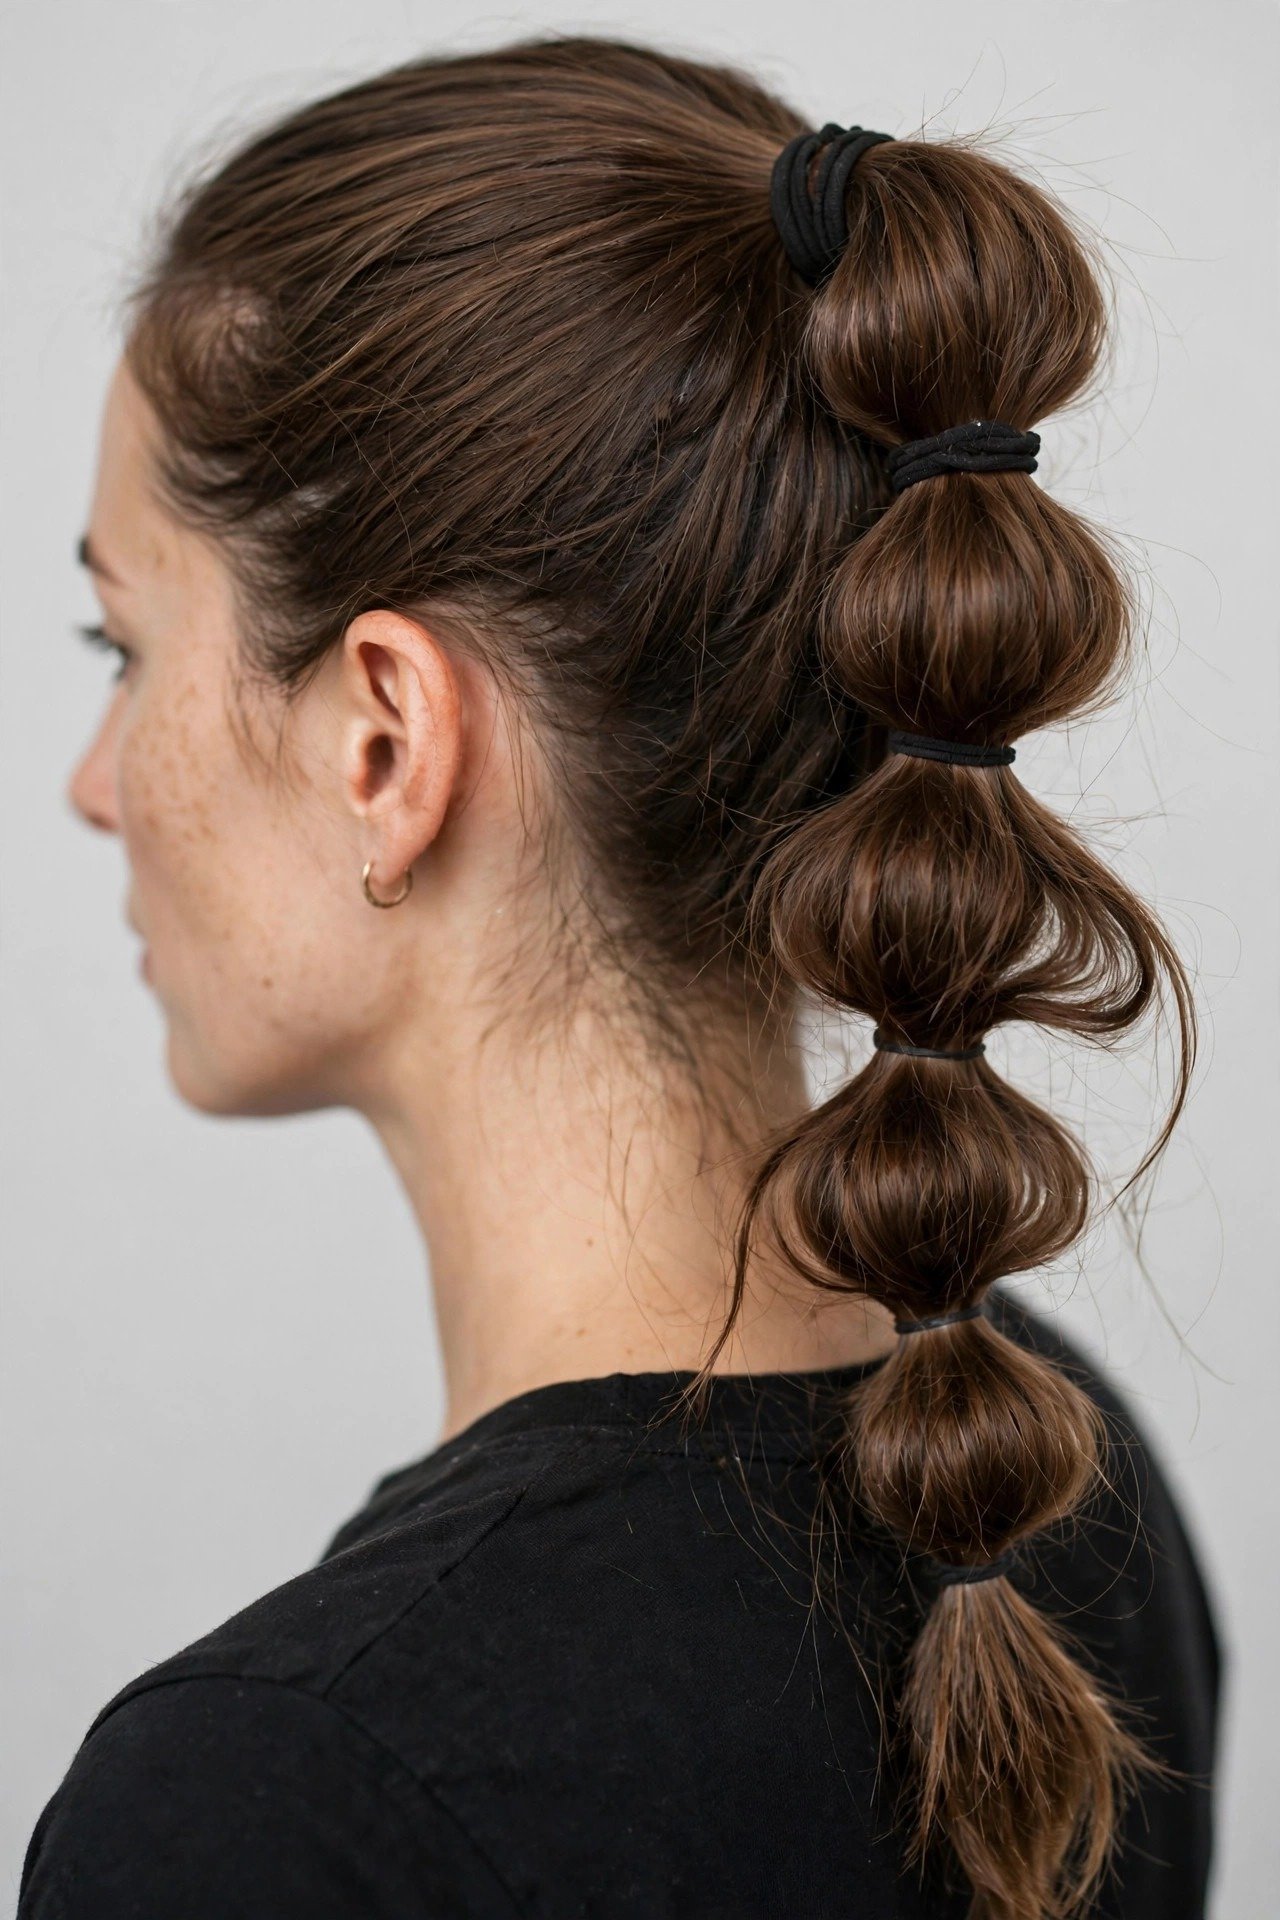
Every bad bubble braid I’ve ever seen comes down to one of five mistakes. Learn them now and you’ll skip the frustrating trial-and-error phase entirely.
Mistake 1: Uneven bubbles. One section is huge, the next is tiny, and the whole thing looks lopsided. This happens when elastic spacing is inconsistent — usually because you’re eyeballing it while rushing. The fix is boring but effective: actually measure. Use two fingers as a spacer, or mark your comb. And pancake in rounds (top bubble on each side, then next, then next) so you’re comparing as you go. If you’ve already built uneven bubbles, don’t redo the elastics — just squeeze the big ones inward and tug the small ones outward until they balance. The style is forgiving; use that.
Mistake 2: Visible elastics. Nothing cheapens a bubble braid faster than bright or contrasting bands glaring at every section. Two-part fix: first, match your elastic color to your hair (black bands on dark hair, clear or blonde on light hair). Second, wrap a thin strand of hair around each band and pin it — this takes three extra minutes total and is the single biggest upgrade you can make. For festival or casual looks, visible elastics are fine and even cute; for polished looks, wrap them. Know which look you’re going for before you decide to skip this step.
Mistake 3: Flat, sad pancaking. You placed the elastics perfectly but the sections refuse to puff — they just lie there, limp. Three likely causes: your hair is too clean and slippery (fix: dry shampoo or texturizing spray before building), you’re pulling too timidly (fix: be more aggressive — pull outward and upward with confidence), or your sections are too long between elastics (fix: space bands closer, every two inches instead of three). On very straight, silky hair, a light tease at the base of each section before pancaking makes an enormous difference.
Mistake 4: Pulling the base too tight. A yanked-tight ponytail base gives you a headache by noon and can cause real breakage at the hairline over time — those little snapped baby hairs don’t grow back quickly. The base should be snug, not strangling. If you get tension headaches from ponytails generally, try the “two-elastic” trick: secure the ponytail with one band, then add a second band right below it to distribute the weight. For doubles, this matters twice as much since each side pulls independently. Comfort is not optional; a style that hurts is a style you’ll never wear again.
Mistake 5: Building on wet or damp hair. Unless you’re specifically doing a sweat-proof gym set (where damp is strategic), building bubble braids on wet hair gives you clumpy, undefined sections that dry into weird shapes. The technique needs dry hair to create those smooth, round bubbles. If you’re short on time, rough-dry with a blow dryer for three minutes rather than building wet — it’s faster than fixing a bad set later. The one exception is very curly hair being stretched first; in that case, build on fully stretched, fully dry hair, never on wet curls.
One bonus reality check: bubble braids look best for about six to eight hours after building, then gradually soften. That’s normal, not failure. Plan your timing so the style is freshest when it matters — build right before the event, not three hours before. And photograph them in good light within that window if you want the social-media version of what you actually achieved. There’s no shame in timing your hair for the camera; stylists do it for every shoot.
2026 Bubble Braid Upgrades: Ribbons, Cuffs & Color
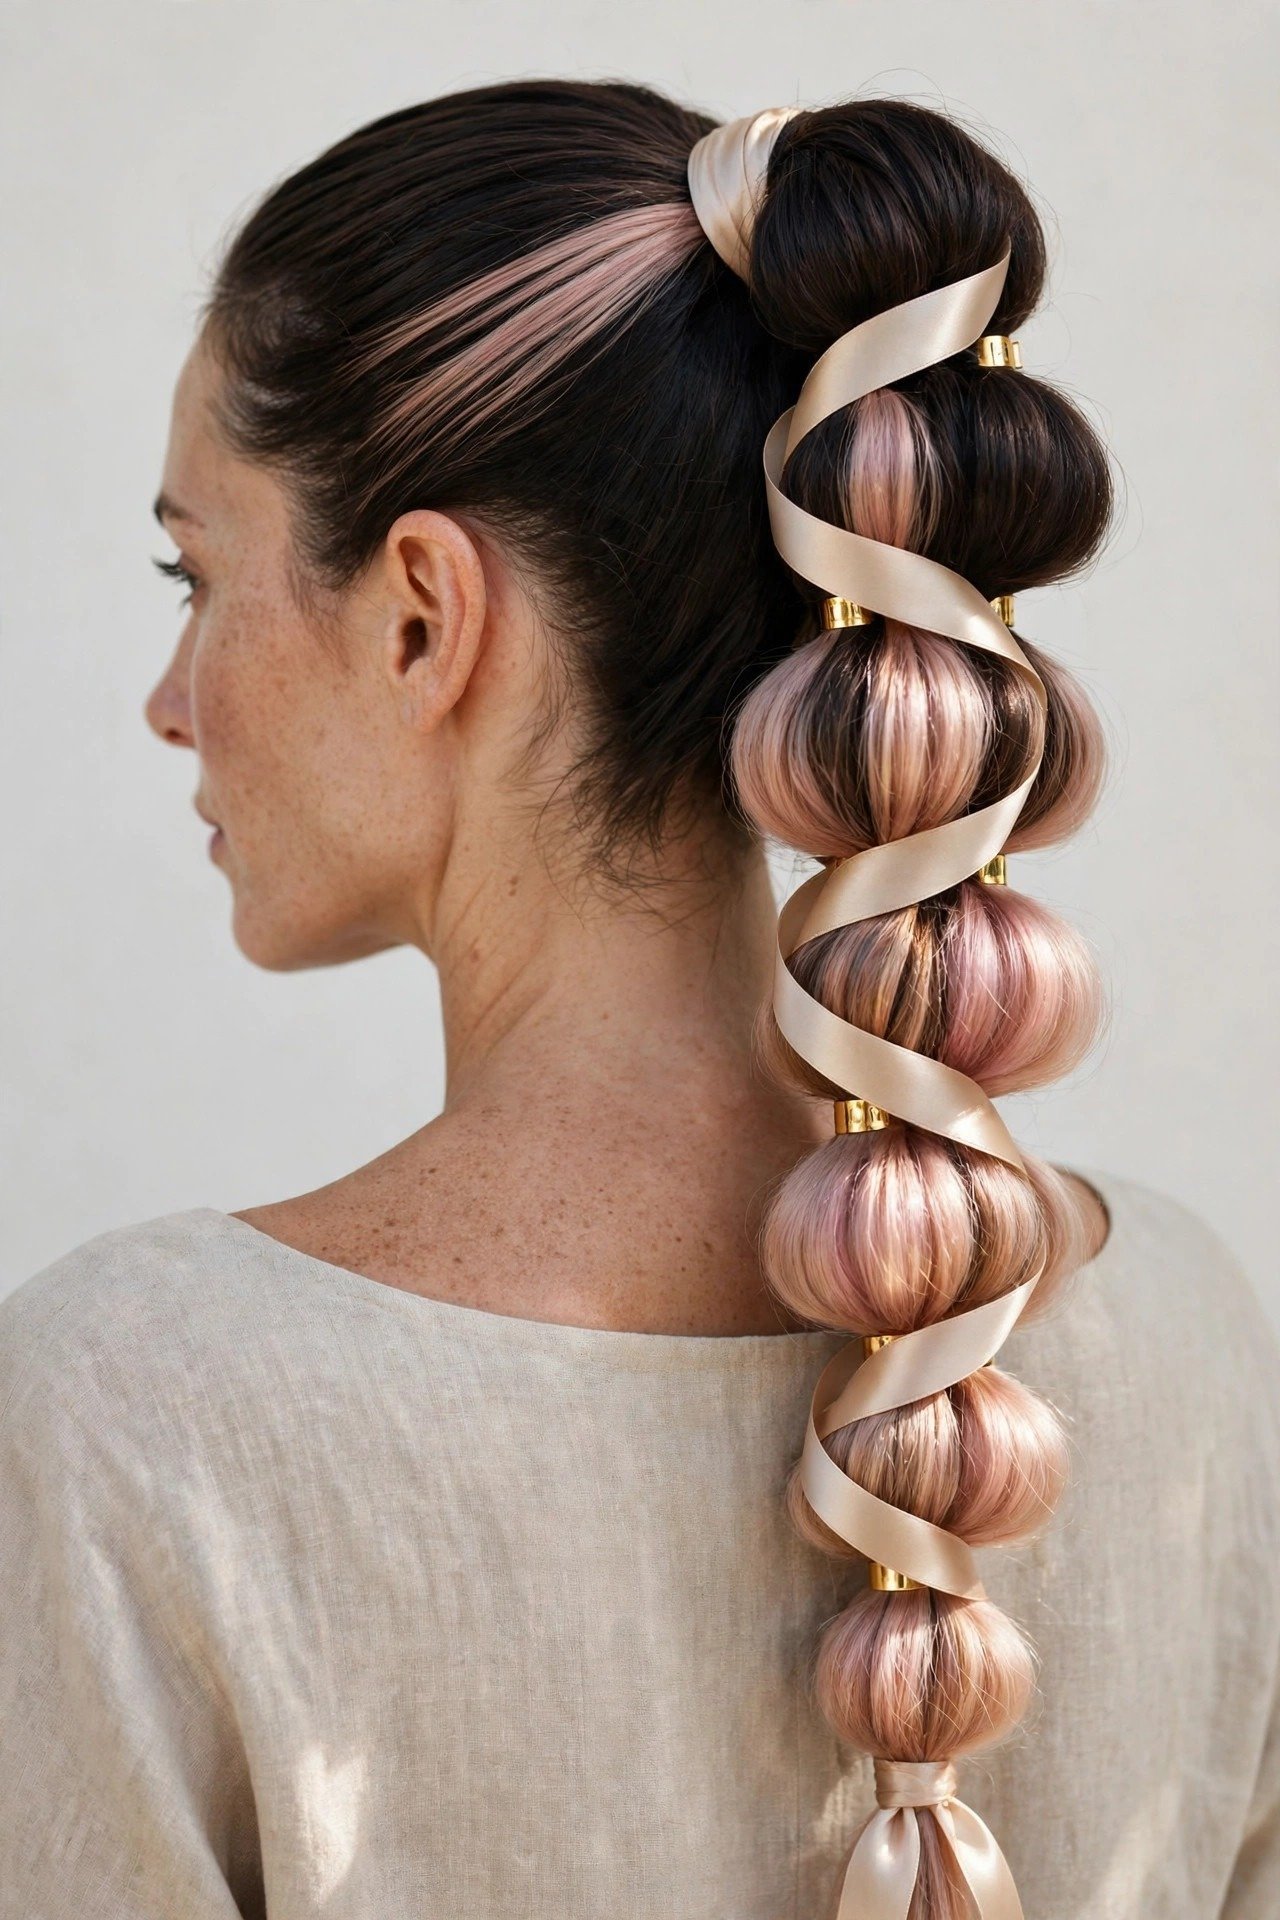
If the basic bubble braid is the 2024–2025 version, these upgrades are what make it unmistakably 2026. The trend this year is personalization — taking the simple technique and decorating it so it looks like yours. None of these add more than five minutes, and each one completely changes the personality of the style.
Ribbons are the biggest upgrade of the year, and they’re almost free. Buy satin ribbon in 1/4-inch or 3/8-inch width from any craft store (a spool costs $3–5 and lasts dozens of styles). Thread it through as you build: lay the ribbon along the ponytail before placing each elastic, so the band catches both hair and ribbon. Tie a small bow at the bottom bubble. Color strategy matters — black ribbon on dark hair is chic and subtle, cream or pastel ribbon on blonde hair is romantic, and a bold color (red, emerald) against any hair color makes a statement. For weddings, match the ribbon to your outfit or bouquet. Avoid wide ribbon (it overwhelms the bubbles) and wired ribbon (it won’t sit flat).
Hair cuffs and rings add instant edge. Gold or silver cuffs that clip around the ponytail at one or two of the elastics run about $8–12 for a multi-pack on Amazon — look for adjustable ones so they fit different ponytail thicknesses. Placement tip: put cuffs on the second and fourth bubbles, not every one; restraint reads expensive, excess reads costume. They work especially well on the low bubble braid for evening looks and on festival doubles. One caution: cheap cuffs with rough inner edges can snag hair, so run your finger inside before buying, or line them with a tiny piece of fabric tape.
Temporary color is the festival and party upgrade. Color sprays (around $8–12 a can) misted lightly over the bubbles give you pastel pink, lavender, or silver tips that wash out in one shampoo. For a more committed but still temporary option, semi-permanent dye on the ends lasts a few washes and looks incredible with the bubble texture — each bubble shows a gradient. The 2026-specific move is “bubble-dipped” color: apply temporary color only to alternating bubbles for a striped effect. It’s bold, it’s fun, and it photographs like crazy. Always do a strand test first, and protect your clothes and pillowcase — temporary color transfers until it’s fully dry and set.
Pearls, pins, and small accessories finish the elevated looks. Decorative pearl bobby pins ($8–12 a pack) tucked at the base of two or three bubbles turn a simple low bubble braid into wedding-guest hair. Tiny gold star or moon pins scattered through festival doubles catch the light beautifully. Fresh small flowers — baby’s breath is the classic — pinned at the top of a side bubble braid is a timeless romantic move for outdoor events. The rule for all accessories: odd numbers look better than even (three pins, not four), and cluster them asymmetrically rather than spacing them evenly. Symmetry in accessories reads stiff; asymmetry reads styled.
The through-line of all these 2026 upgrades is that the bubble braid is now a base, not a finished style. Think of the plain version as your canvas and these additions as the personalization that makes it current. Start simple, add one upgrade at a time, and pay attention to which ones feel like you. The women wearing the best bubble braids in 2026 aren’t following a template — they’re using the technique as a foundation and styling the rest to match their own taste. That’s the real trend, and it’s one worth joining.
Frequently Asked Questions About Bubble Braids
Do bubble braids work on short hair?
Yes, with adjustments. You’ll need at least chin-length hair to get two small bubbles, and shoulder length is the realistic minimum for a style that actually reads as a bubble braid. Use tighter elastic spacing (about an inch and a half apart) and pancake aggressively to maximize fullness. The half-up variation is the most flattering on short hair since it uses the top layer where length is greatest. If your hair is shorter than chin length, clip-in extensions are the practical shortcut — a $25–60 set from Amazon clipped in before styling gives you instant bubble-worthy length, and the elastics help anchor the clips invisibly.
How long does a bubble braid take to do?
A classic single bubble ponytail takes ten to fifteen minutes once you’ve practiced it twice; your very first attempt will be closer to twenty. Doubles take fifteen to twenty minutes because of the parting and symmetry checking. The half-up variation is the fastest at eight to ten minutes, while anything with a Dutch-braid start or wrapped elastics runs fifteen to eighteen. Day-two refreshes take about five minutes. Compared to a French or Dutch braid, which takes most beginners thirty-plus minutes, bubble braids are dramatically faster — that’s a big part of why they’ve become a daily-driver style rather than an occasional one.
Will the elastics damage my hair?
They can, but only if you use the wrong kind or remove them carelessly. Cheap rubber bands with metal clasps are the villains — they grip, snag, and snap strands on the way out. Fabric-covered mini elastics (like Kitsch at about $9 or Goody Ouchless at about $5) are designed to slide off without grabbing. The removal technique matters just as much: never yank bands out dry. Work a drop of oil or conditioner into each elastic, let it sit thirty seconds, then roll the band off gently — or snip stubborn ones with small scissors. Also avoid wearing the base ponytail painfully tight day after day; prolonged tension causes hairline breakage over time.
Can I sleep in bubble braids?
Absolutely, and it’s the secret to getting two days out of one styling session. The key is a silk or satin bonnet ($10–15) or silk pillowcase — cotton creates friction that frizzes bubbles and loosens elastics overnight. Before bed, gently re-fluff any flattened sections with your fingertips. For doubles, loosely braiding both sides together into one plait for the night keeps everything contained. In the morning, a quick dry-shampoo refresh at the roots and a round of re-pancaking brings the style back to about 90% of day-one quality in five minutes. Don’t push past two or three nights without a full takedown and wash, though — scalp buildup and tangling increase with each extra day.
Are bubble braids professional enough for work?
The low and half-up variations, done neatly with wrapped elastics and no accessories, read as polished and intentional in most workplaces — think interesting-but-not-distracting. The high playful versions and doubles skew young and casual, so save those for creative offices or casual Fridays if your workplace is conservative. The deciding factors are neatness (smooth top, even bubbles, hidden elastics) and restraint (no glitter, no bright ribbons at the office). When in doubt, the low bubble braid with a middle part is the safest professional choice — it has the quiet confidence of a sleek ponytail with more visual interest.
How do I hide the elastics?
Three methods, easiest first. One: match the elastic color to your hair so bands visually disappear — black on dark hair, clear or blonde on light hair. Two: wrap a thin strand of hair around each elastic and secure it with a bobby pin; this takes about three extra minutes total and makes the style look twice as expensive. Three: cover bands with accessories — small scrunchies at the base, gold cuffs at intervals, or ribbon threaded through the build. For casual and festival looks, visible elastics are perfectly fine and even part of the aesthetic. For polished, professional, or formal looks, wrap them. Match the method to the occasion and you’ll never think about it again.
Conclusion: Why Bubble Braids Deserve a Try in 2026
Here’s the honest summary after 7,000 words: bubble braids earned their 2026 moment because they solve real problems. They give you the visual interest of a braid without the skill barrier, the security of a ponytail without the boredom, and the versatility to go from gym to wedding with nothing but a change in placement and accessories. Very few hairstyles offer that much range for ten minutes of effort and a $9 pack of elastics. If you’ve ever stood in front of the mirror thinking you “can’t do hair,” this is the style that proves you wrong — gently, on the first try.
The women getting the most out of bubble braids this year aren’t the ones with perfect technique. They’re the ones who built the classic twice, figured out their spacing, and then started experimenting — a ribbon here, a lower placement there, doubles for Saturday and a sleek low version for Monday. The technique is simple enough to become background knowledge, like knowing how to do a decent ponytail, and then it just lives in your rotation. That’s the real win: not a style you wear once for Instagram, but a tool you reach for weekly because it works.
So start where this guide started. Grab decent elastics, give yourself fifteen unhurried minutes, and build the classic bubble ponytail. Pancake with confidence, wrap those elastics, and check the mirror. Then wear it out into your actual day — the workout, the errands, the dinner — and notice how it holds. My bet: within a month, you’ll have a favorite variation, a preferred elastic brand, and strong opinions about ribbon width. Welcome to the bubble braid era. It’s a fun one.