Ombre French Nails 2026: 32 Dreamy, Blended Designs
Ombre French nails are the softest, dreamiest version of the French manicure you have ever seen, and in 2026 they are everywhere. Instead of a sharp white line across the tip, ombre french nails melt the white gently into a sheer pink or nude base, so the colour fades like a watercolour wash rather than stopping at a hard edge. The result is elegant, modern and incredibly flattering on every skin tone, which is exactly why salons cannot keep up with demand. This winter the look has a fresh twist, too: Coveteur calls the season’s biggest nail moment Ghosted French plus Jelly Ombre, a barely-there tip dissolving into a glossy, jelly-like base. In this guide you will find 32 blended designs, from classic baby boomer pinks to glitter, pastel and bridal ombres, plus easy at-home steps.
What makes this style so wearable is how forgiving it is. A classic French needs a perfectly straight smile line, but an ombre French hides every tiny wobble inside its gradient, so it grows out gracefully and still looks polished after two weeks. It suits short nails, long almond shapes, office days, weddings and holidays equally well, and it pairs beautifully with the sheer, milky finishes seen across the season’s French manicure designs. Whether you book a salon appointment or try the sponge technique at home, the pages below show you exactly what to ask for, which colours blend best, and how to keep the fade flawless for as long as possible.
What Are Ombre French Nails
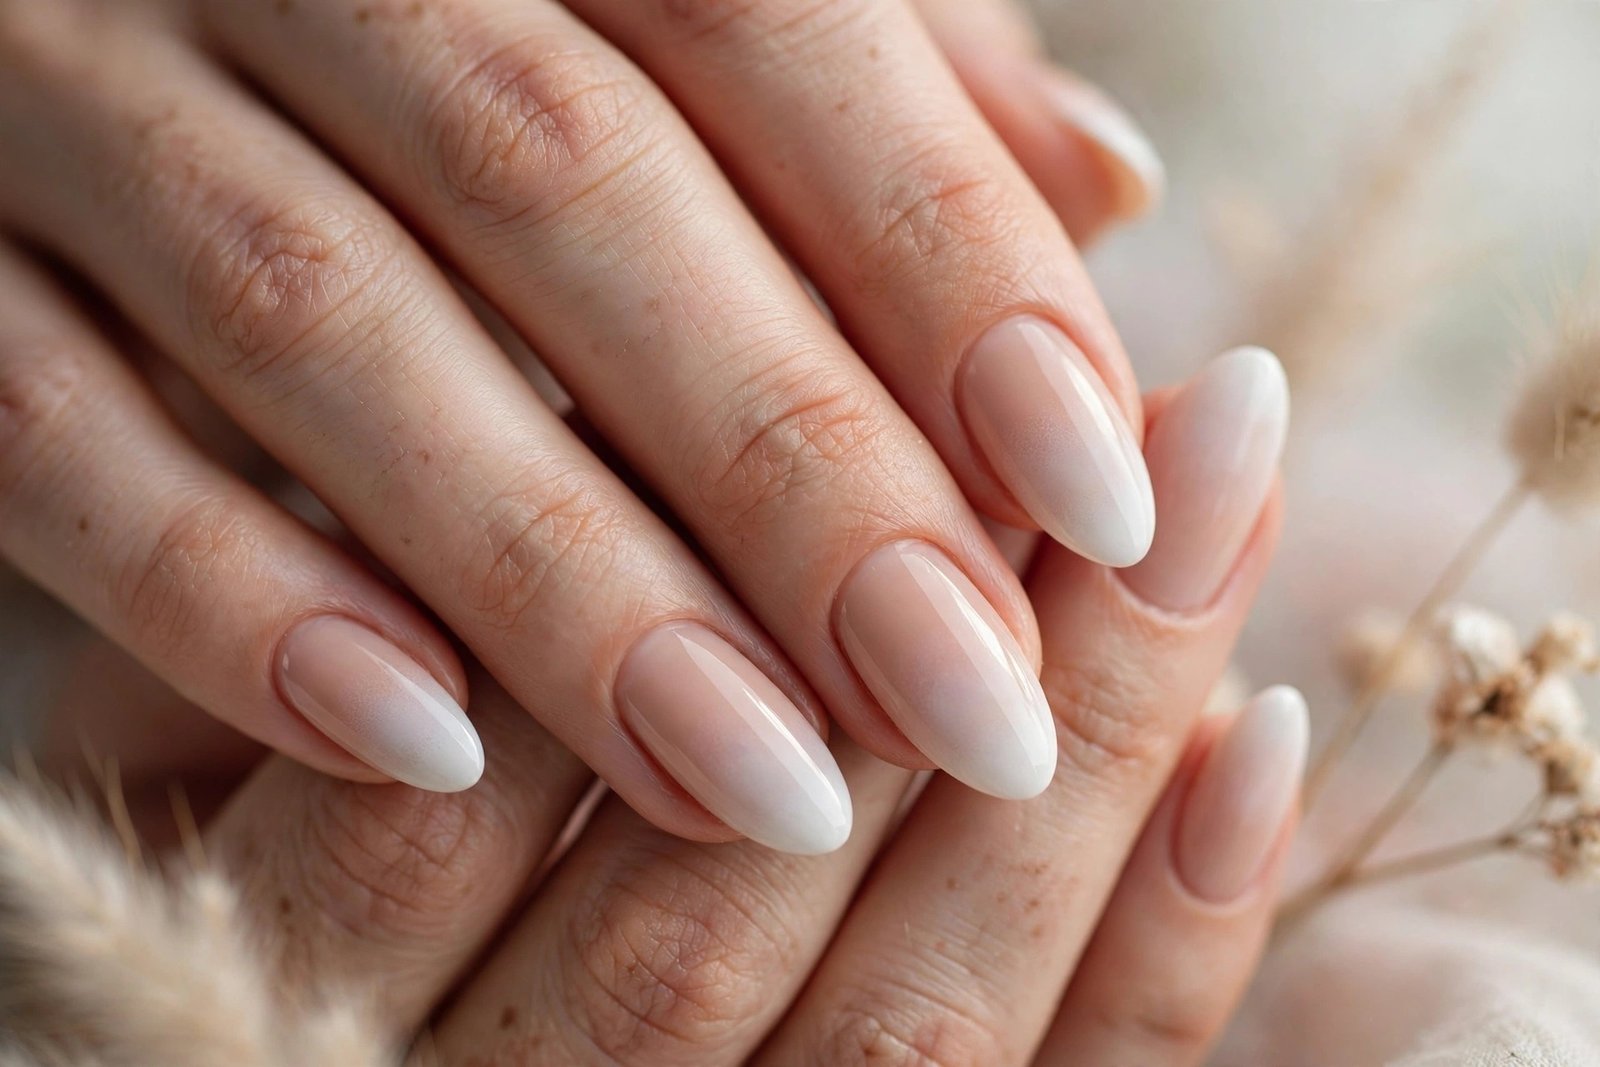
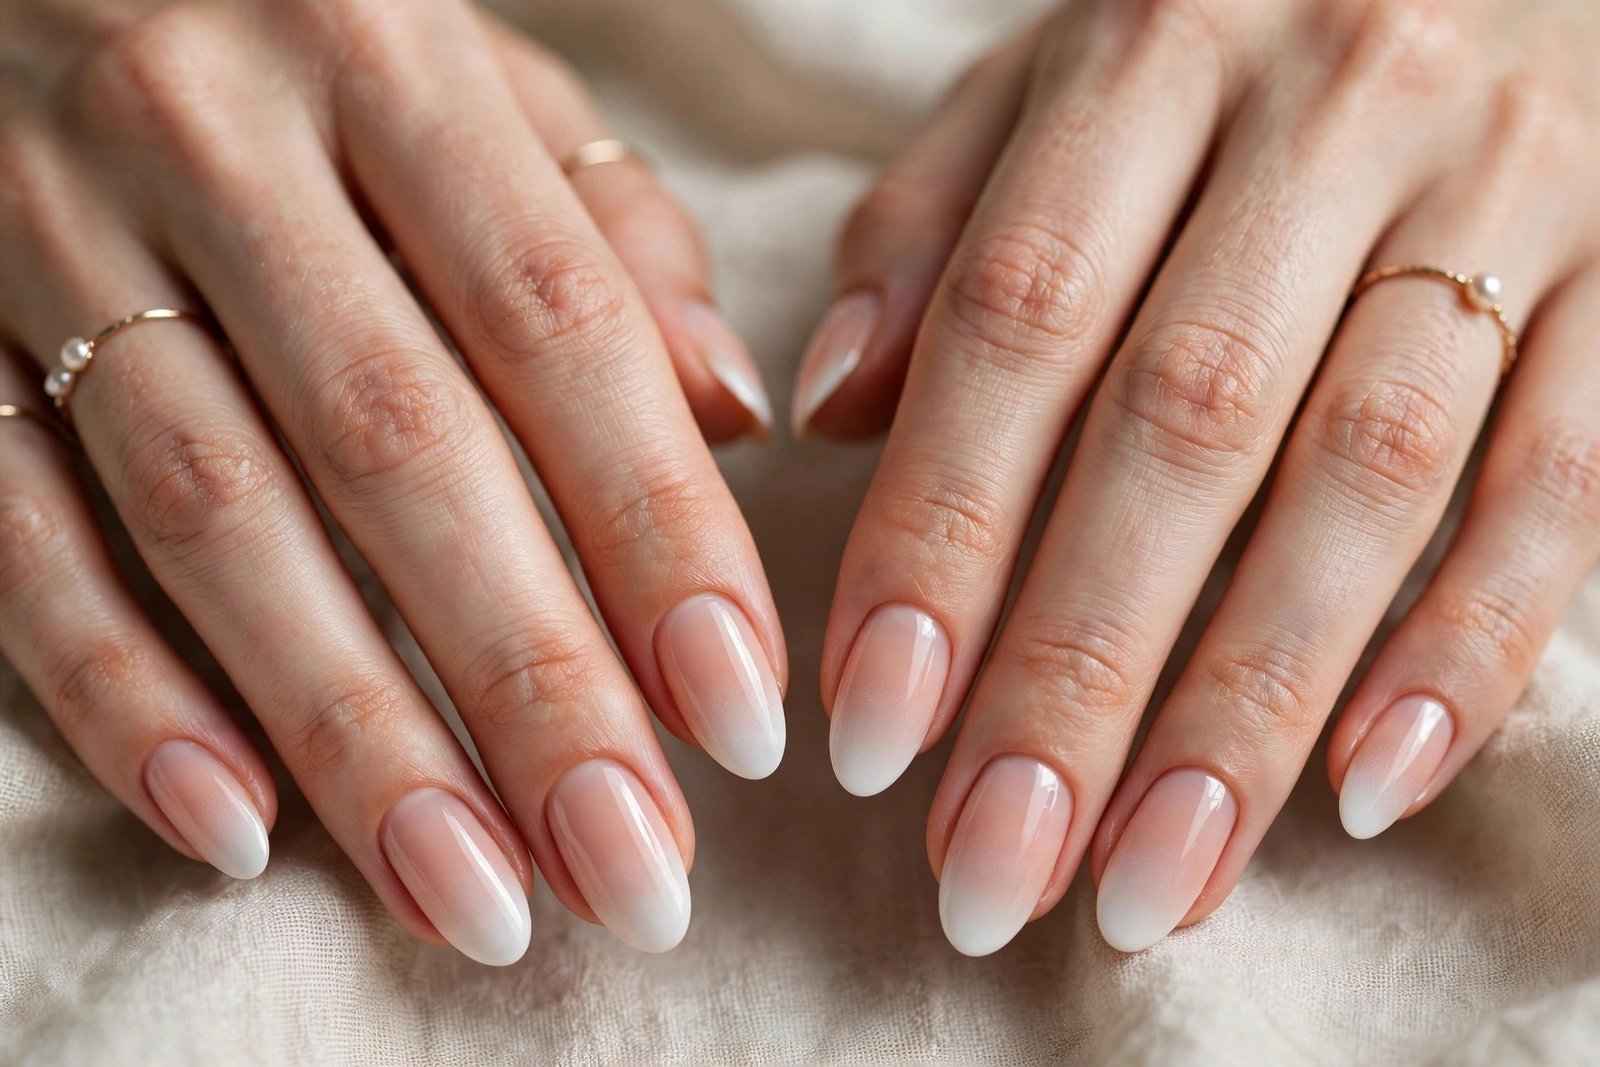
Ombre French nails are a French manicure where the white tip does not end in a crisp line but fades gradually into the natural-looking base. The tip is usually white, soft pink or a pale pastel, and it is blended downward with a sponge, an airbrush or a sheer builder gel until the two colours meet in a seamless gradient. The most famous version is the baby boomer, a pink-and-white fade that looks like a classic French viewed through soft focus. Newer variations use jelly bases, glitter fades and pastel tips, but the rule never changes: you should never be able to see exactly where the tip stops and the base begins.
The technique is what separates this look from its close cousins. A glazed French, for example, is all about a shiny chrome sheen over a classic tip, like the finish in our guide to glazed French nails, while an ombre French is all about the blend itself. Nail artists usually build the gradient over a sheer pink or nude builder gel, then fade white gel polish upward from the tip with a small sponge or a soft brush, curing between thin layers. Two or three whisper-thin layers give a smoother fade than one heavy coat, and a glossy top coat melts everything together. The finish is soft, dimensional and almost airbrushed.
The look also has a practical advantage that explains its staying power. Because there is no hard smile line, regrowth is far less obvious than on a classic French, so a manicure can stretch to three weeks without looking untidy. The sheer base flatters every skin tone, from the palest to the deepest, and the gradient draws the eye along the nail, making fingers look longer and more elegant. That is why the style appears in the winter trend roundups, including the Coveteur winter 2026 report at https://coveteur.com/winter-nail-trends-2026, which highlights ghosted tips and jelly ombre as the season’s defining French evolution. It is timeless, but right now it feels brand new.
Why Ombre French Nails Are Dominating 2026
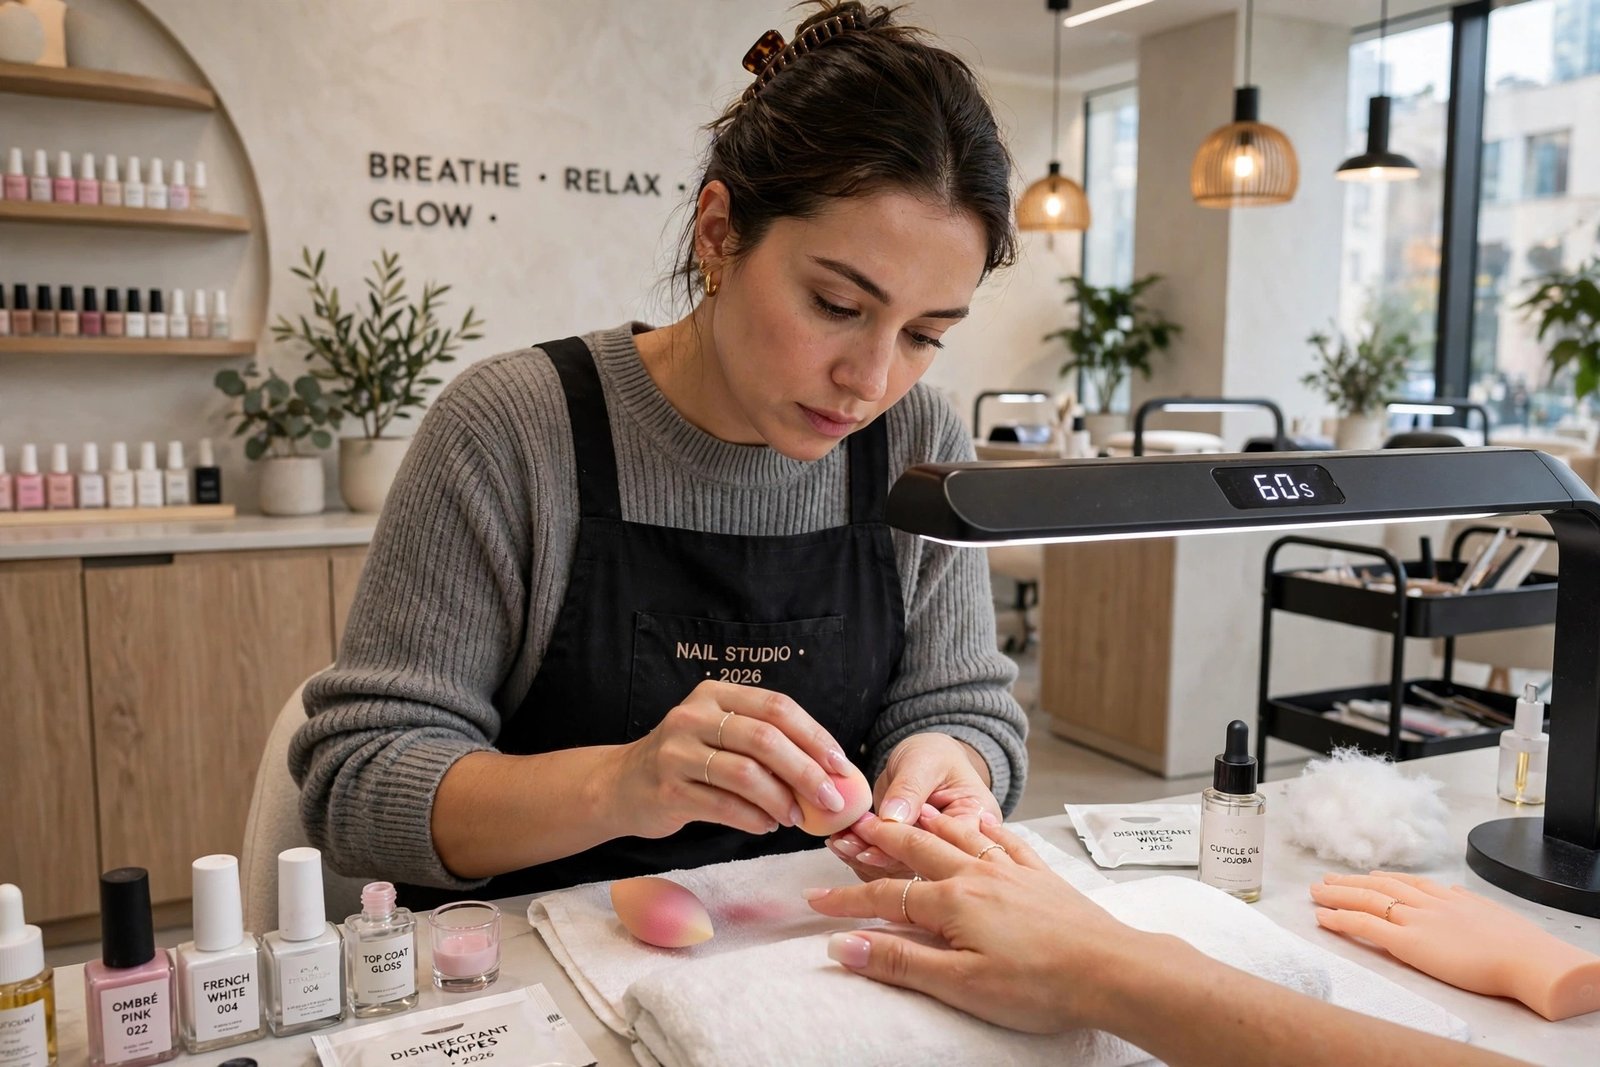
Ombre French nails are dominating 2026 because they sit exactly where three big trends meet: minimalism, skin-tone sheer bases and soft glamour. After years of bold chrome and loud nail art, the fashion world has swung back toward quiet luxury, and nothing says quiet luxury like a perfectly blended pink-and-white fade. Celebrities wear it on red carpets, brides choose it over plain white tips, and office workers love it because it reads as polished without ever looking overdone. The style photographs beautifully, which matters more than ever in a year when most nail trends are discovered on a phone screen first.
The second reason is versatility. The same gradient works in white, blush, lavender, peach or even grey, so it adapts to every season and every outfit without a full redesign. Winter 2026 leans into ghosted, barely-there tips and jelly finishes, and trend watchers at https://stylishboard.com/nail-trends-2026/ list soft ombre French variations among the year’s most requested salon looks. Add glitter, pearls or a chrome shimmer and the same base becomes evening-ready, while a matte top coat turns it into an edgy daytime statement. One technique, dozens of moods, and it never clashes with an outfit.
Finally, the ombre French is dominating because it is genuinely easier to live with than the manicures it replaces. The gradient camouflages chips and growth, the sheer base suits every skin tone, and the look works on natural nails, gel extensions and acrylics alike. It also bridges two audiences at once: lovers of classic French manicures get the familiar white tip, while fans of modern sheer finishes get the soft, milky nails base they already love. When a single design pleases traditionalists, minimalists and trend-hunters all at once, salons put it on every menu, and 2026 is the year it took over.
1. Classic White Ombre French
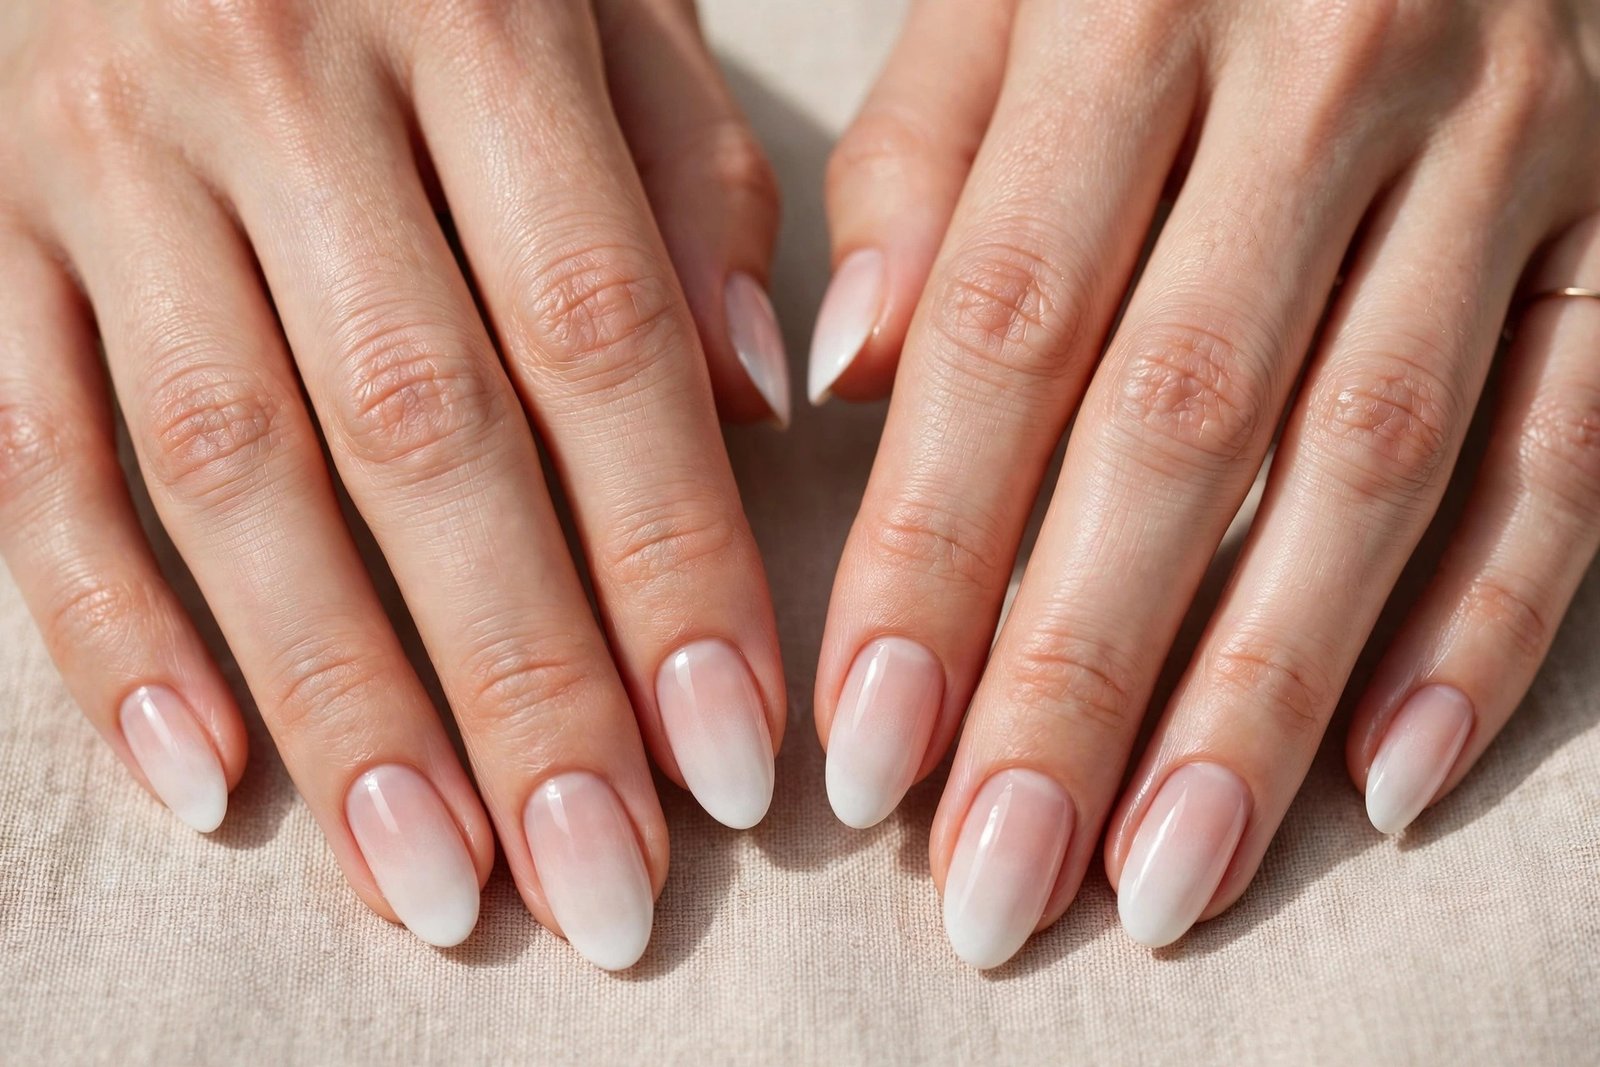
The classic white ombre French is the look that started it all: a clean white tip that melts gradually into a sheer blush-pink base, with no visible line anywhere. The fade usually begins about a third of the way down the nail, so the brightest white sits right at the free edge and softens as it travels toward the cuticle. The effect is like a traditional French manicure photographed slightly out of focus, and it reads as expensive, clean and calm. A high-gloss top coat is essential, because shine is what makes the two colours melt into one seamless surface.
This design suits absolutely everyone, which is why it remains the most requested ombre French in salons. It flatters short nails by making them look longer, and it gives long almond or square nails a refined, bridal finish. It works for job interviews, weddings, holidays and everyday wear, and it pairs with every outfit from denim to evening silk. If you have warm undertones, ask for a slightly peachy pink base; cool undertones look best with a rosy or neutral pink. It is the safest first ombre French to try, and the hardest to get wrong.
At the salon, ask for a white ombre French with a sheer pink builder gel base and a soft, airbrushed fade rather than a painted smile line. For a do-it-yourself version, paint two thin coats of sheer pink, cure, then dab white gel polish onto a makeup sponge and press it gently onto the tips, building the colour in three light layers. Blend the lower edge of the white with a clean sponge corner before curing, then seal with a glossy top coat. Keep the layers thin, because thick white polish is what causes a harsh, chalky edge.
2. Baby Boomer Pink Ombre
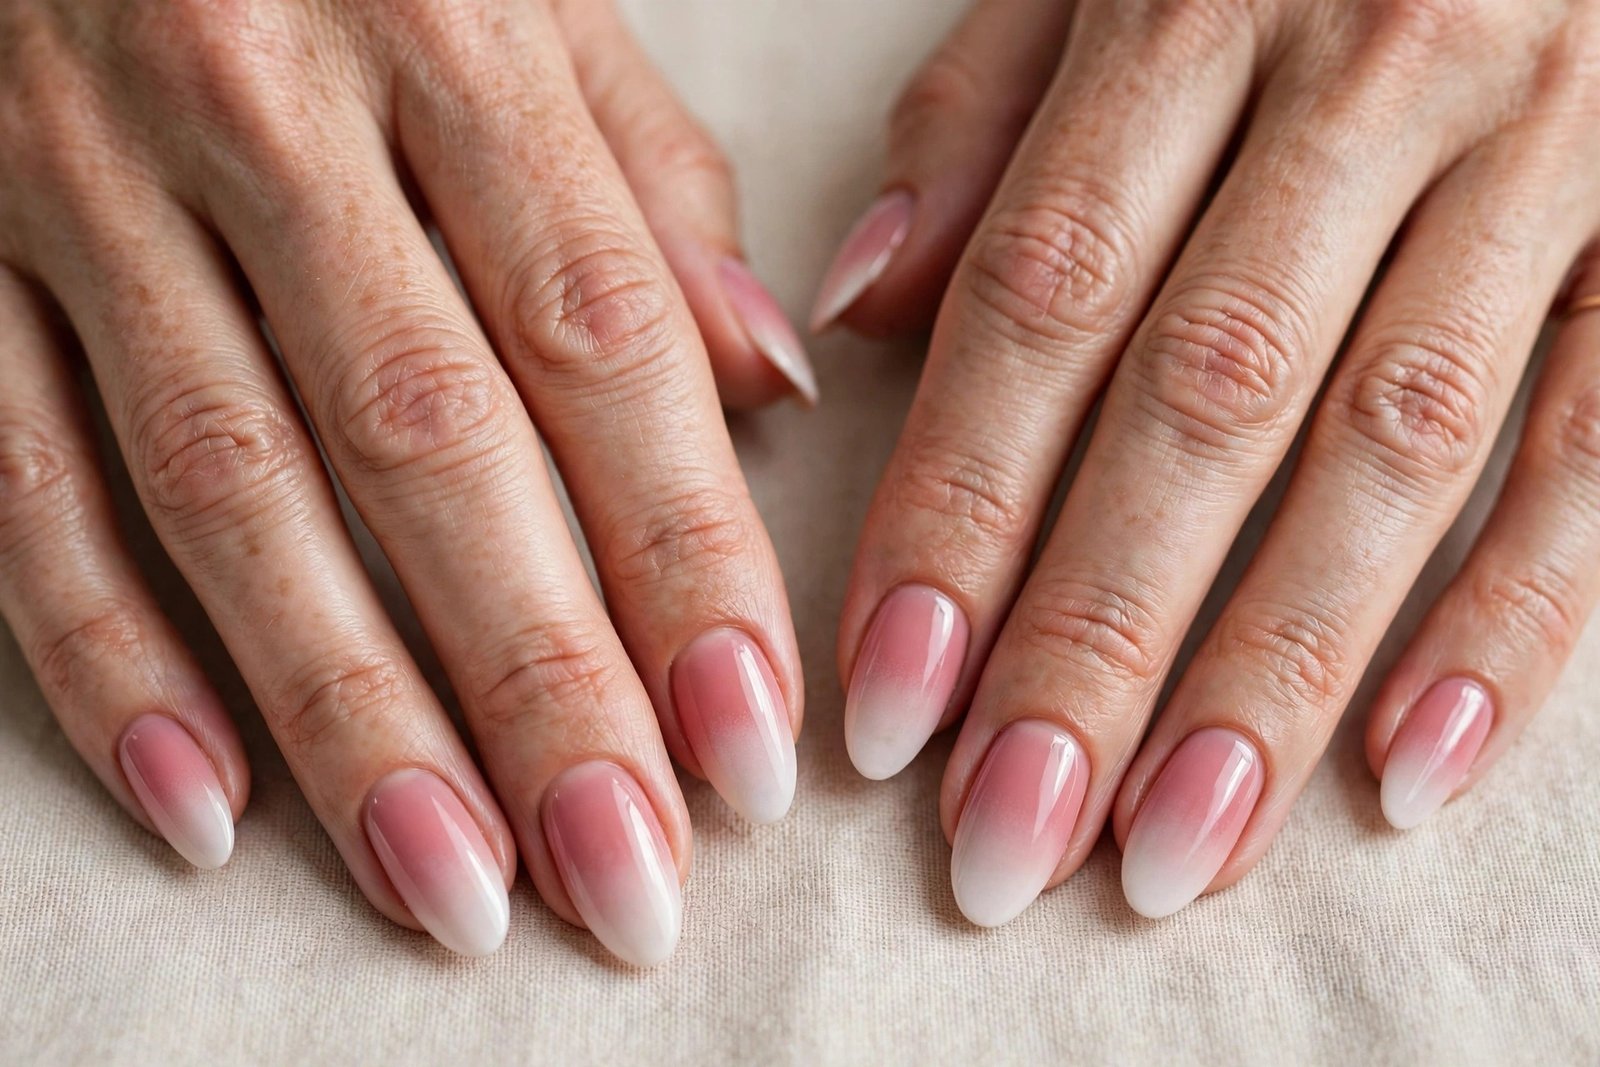
Baby boomer pink ombre is the original ombre French and still the most loved: a milky white tip dissolving into a warm, rosy pink base that looks like your natural nail, only better. The pink is usually a soft, slightly translucent shade that lets a hint of the nail show through, which keeps the whole manicure looking fresh and real rather than painted. The fade is long and gentle, covering nearly half the nail, so the transition feels like a blush spreading across the surface. Finished with a glass-like top coat, it glows.
This style is perfect for brides, for anyone who wants a manicure that looks like a better version of their own nails, and for people who dislike bold colour but still want a visible design. It suits every age and every skin tone, and it is especially flattering on medium and longer nails where the long fade has room to breathe. It also hides regrowth better than almost any other French variation, so it is the ideal choice if you want three weeks between appointments without the grow-out giving you away.
Ask your nail artist for a baby boomer using a pink builder gel base and white gel faded with a sponge, and request a long, soft gradient rather than a short, sharp one. At home, start with a sheer pink base coat, then sponge white polish onto the tips in thin layers, overlapping each layer slightly lower than the last to stretch the fade. A small, soft eyeshadow brush can feather the edge before curing. Finish with two coats of glossy top coat, and reapply top coat every few days to keep the shine alive.
3. Nude Ombre French
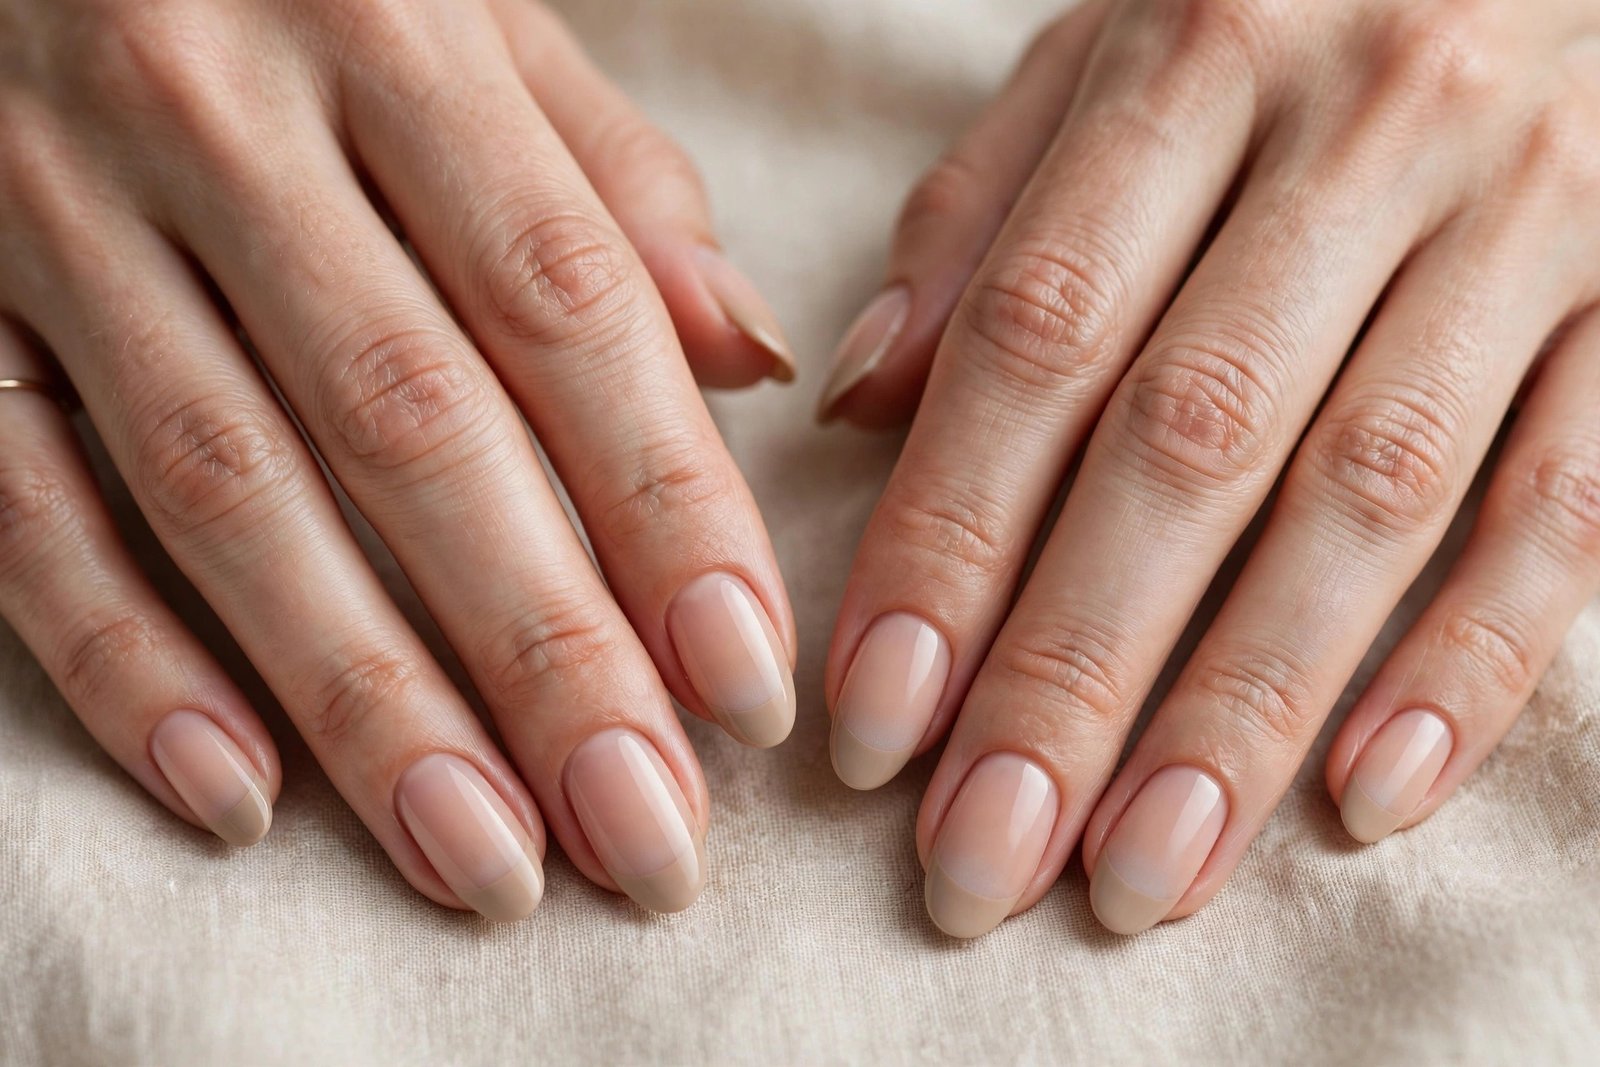
Nude ombre French nails trade the classic white tip for a warm beige, taupe or caramel fade that blends into a nude base matched to your skin tone. The result is the most understated version of the style: from a distance it looks like a beautifully groomed natural nail, and only up close do you notice the soft gradient at the tip. The nude tip can be a single shade darker than the base, or a slightly deeper latte tone for more definition. Either way, the blend stays feather-soft, and the overall effect is calm, expensive and quietly confident.
This design is made for minimalists, for professionals who need a manicure that never distracts, and for anyone whose skin tone makes stark white tips look harsh. Because the colours are so close to the skin, the gradient also makes fingers appear longer and slimmer, which flatters short nails beautifully. It works with every outfit and every season, and it is one of the few nail designs that looks equally good with no jewellery and with a full stack of rings. If you love quiet luxury, this is your ombre French.
At the salon, bring a reference photo and ask the artist to match the base to your skin tone, then fade a nude one or two shades deeper onto the tips. For a home version, choose a sheer nude polish as the base and a slightly deeper nude or soft taupe for the tips, sponging the darker shade on in thin layers. The key is contrast: too little and the fade disappears, too much and it stops looking nude. Test the two shades side by side on one nail first, and always finish with a glossy top coat.
4. Glitter Ombre French
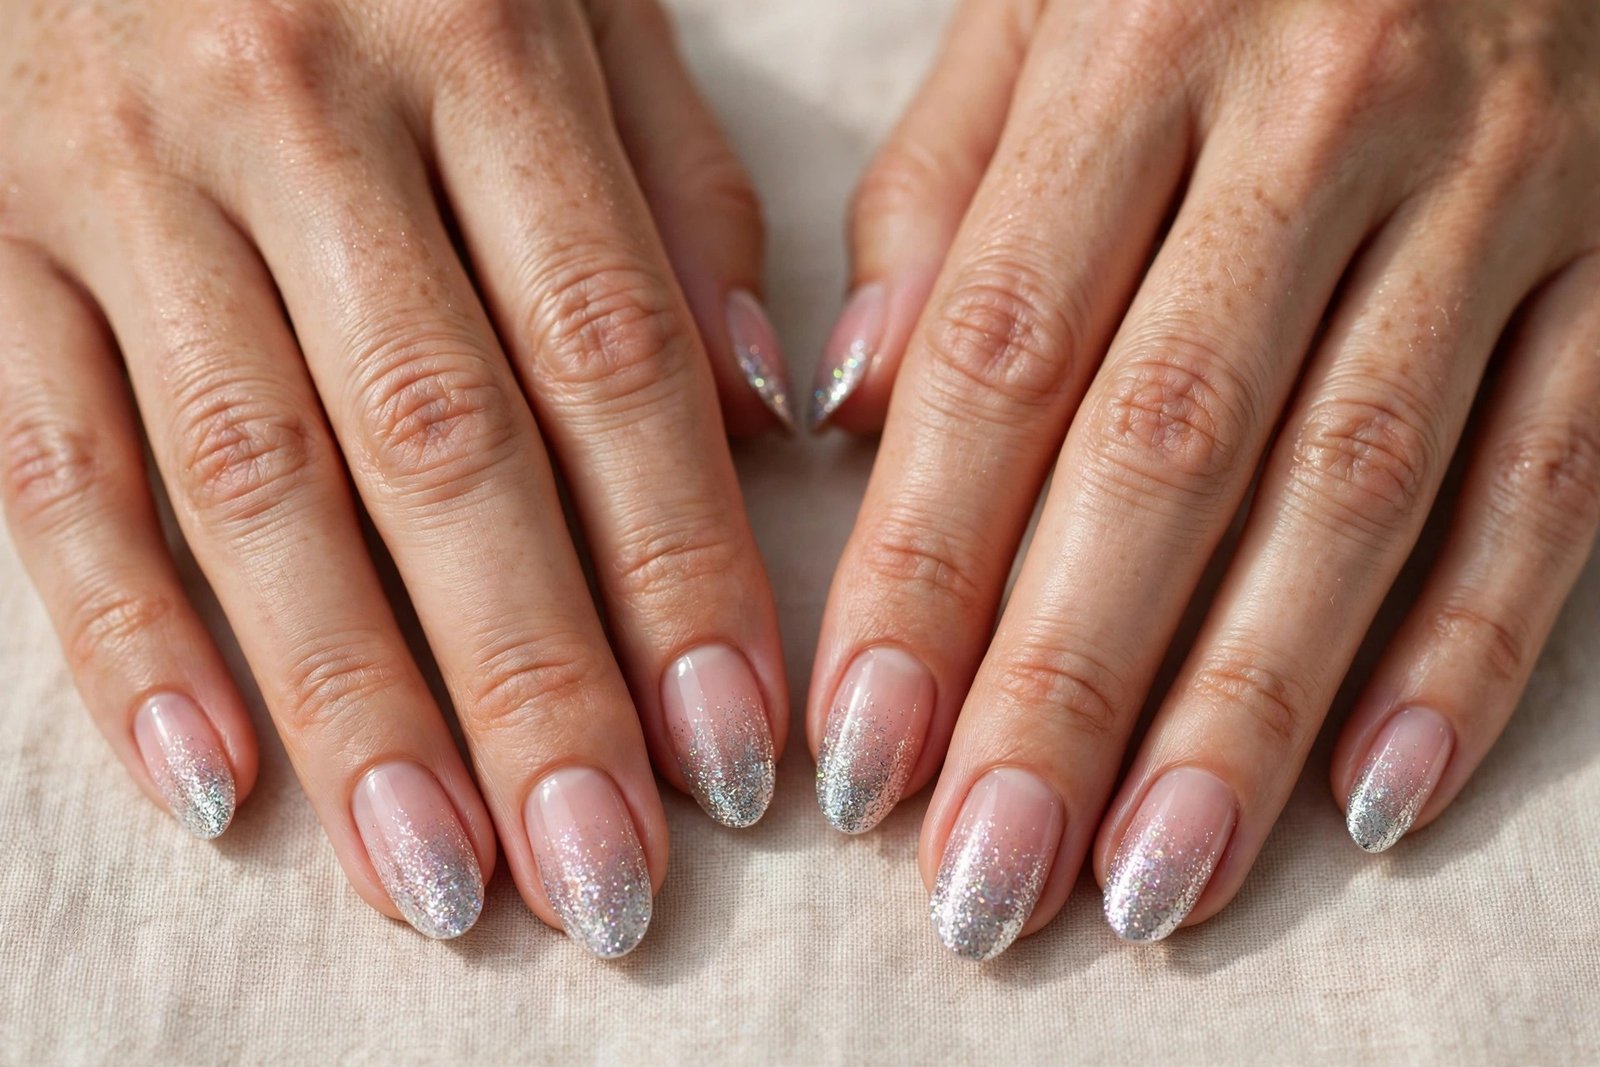
Glitter ombre French nails keep the soft pink base of a classic ombre and replace the solid white tip with a sparkling fade of fine glitter. The glitter is densest at the free edge and scatters thinner as it moves down the nail, like frost melting into morning light. Silver and champagne glitter are the most popular, but rose gold and iridescent flakes give the same design a warmer or more magical feel. The sparkle catches the light with every movement, yet the sheer base keeps the whole manicure elegant rather than loud.
This is the ombre French to choose for parties, holidays, New Year celebrations and any evening when you want your hands to catch the light. It suits all nail lengths, but it is especially beautiful on medium and long nails where the glitter has room to scatter. It also works wonderfully as an accent: try glitter fades on the ring fingers and a plain white ombre on the rest for a balanced, expensive look. If you love sparkle but find full glitter nails too much, this gradient gives you the shine in a softer dose.
Ask the salon for a glitter ombre with fine glitter gel sponged from the tips, and request a smooth, encapsulated finish so the surface feels glassy, not gritty. At home, paint a sheer pink base, then dab glitter polish onto a sponge and press it onto the tips, adding more layers at the very edge and fewer toward the middle. Seal with two coats of top coat, because glitter drinks top coat and can look dull without it. A peel-off base around the cuticles makes cleanup far easier.
5. Blue Ombre French
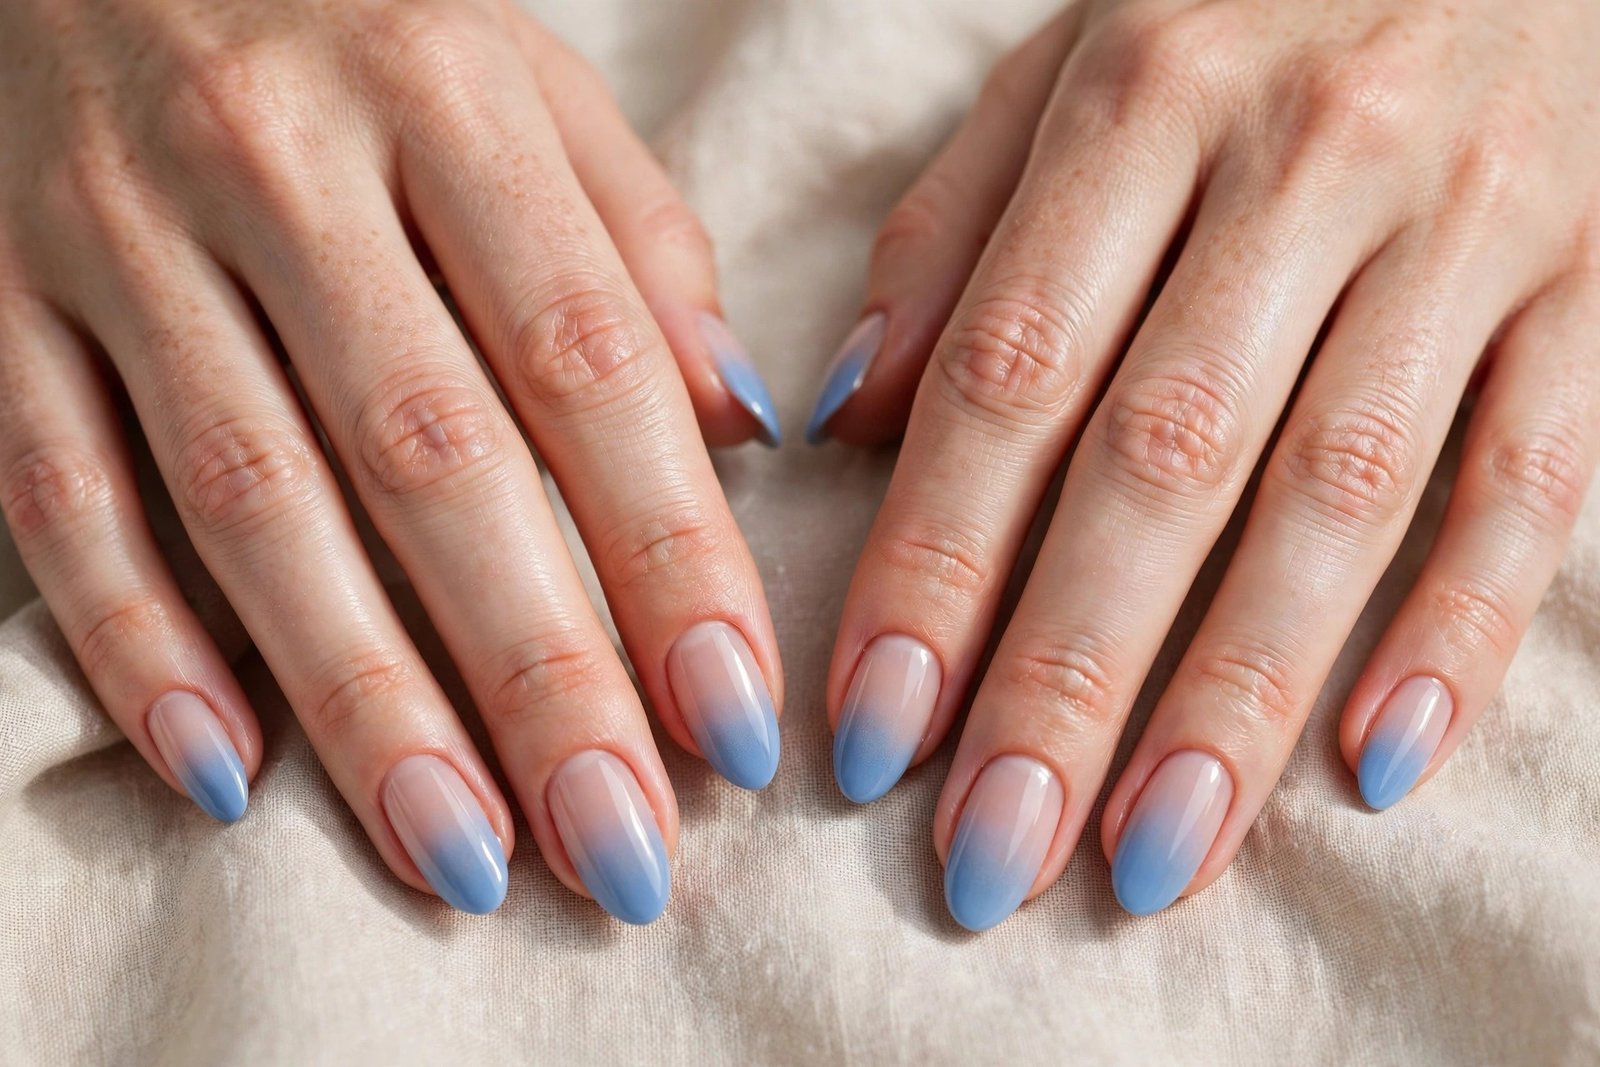
Blue ombre French nails soften the classic white tip into a dreamy powder blue, sky blue or dusty denim shade that fades into a sheer nude or pale pink base. The blue can be barely-there pastel for a subtle, icy effect, or a slightly deeper cornflower for more presence, but the fade always stays gentle. The cool tone of the blue makes the white of the nail bed look brighter, and the overall effect feels fresh, modern and a little bit dreamy, like a clear winter sky reflected on the nails.
This design suits cool skin tones beautifully, and it is a wonderful choice for winter, for beach holidays and for anyone who wants a French manicure with a twist that still feels wearable. It looks striking on almond and coffin shapes, where the long fade has space to show off the colour change, but it works on short nails too if the blue is kept pale. Pair it with silver jewellery and cool-toned outfits for a coordinated finish, or let it be the single cool accent in a warm, neutral wardrobe.
At the salon, ask for a pastel blue ombre French over a sheer nude base, and request the fade to start low so the blue reads as a soft wash rather than a solid block. For a home attempt, sponge pastel blue gel polish onto the tips in three thin layers, feathering the lower edge with a clean sponge. Blue pigments can stain, so always use a good base coat and wipe the skin with a small brush dipped in acetone before curing. A glossy top coat keeps the blue looking icy rather than chalky.
6. Pink Ombre French
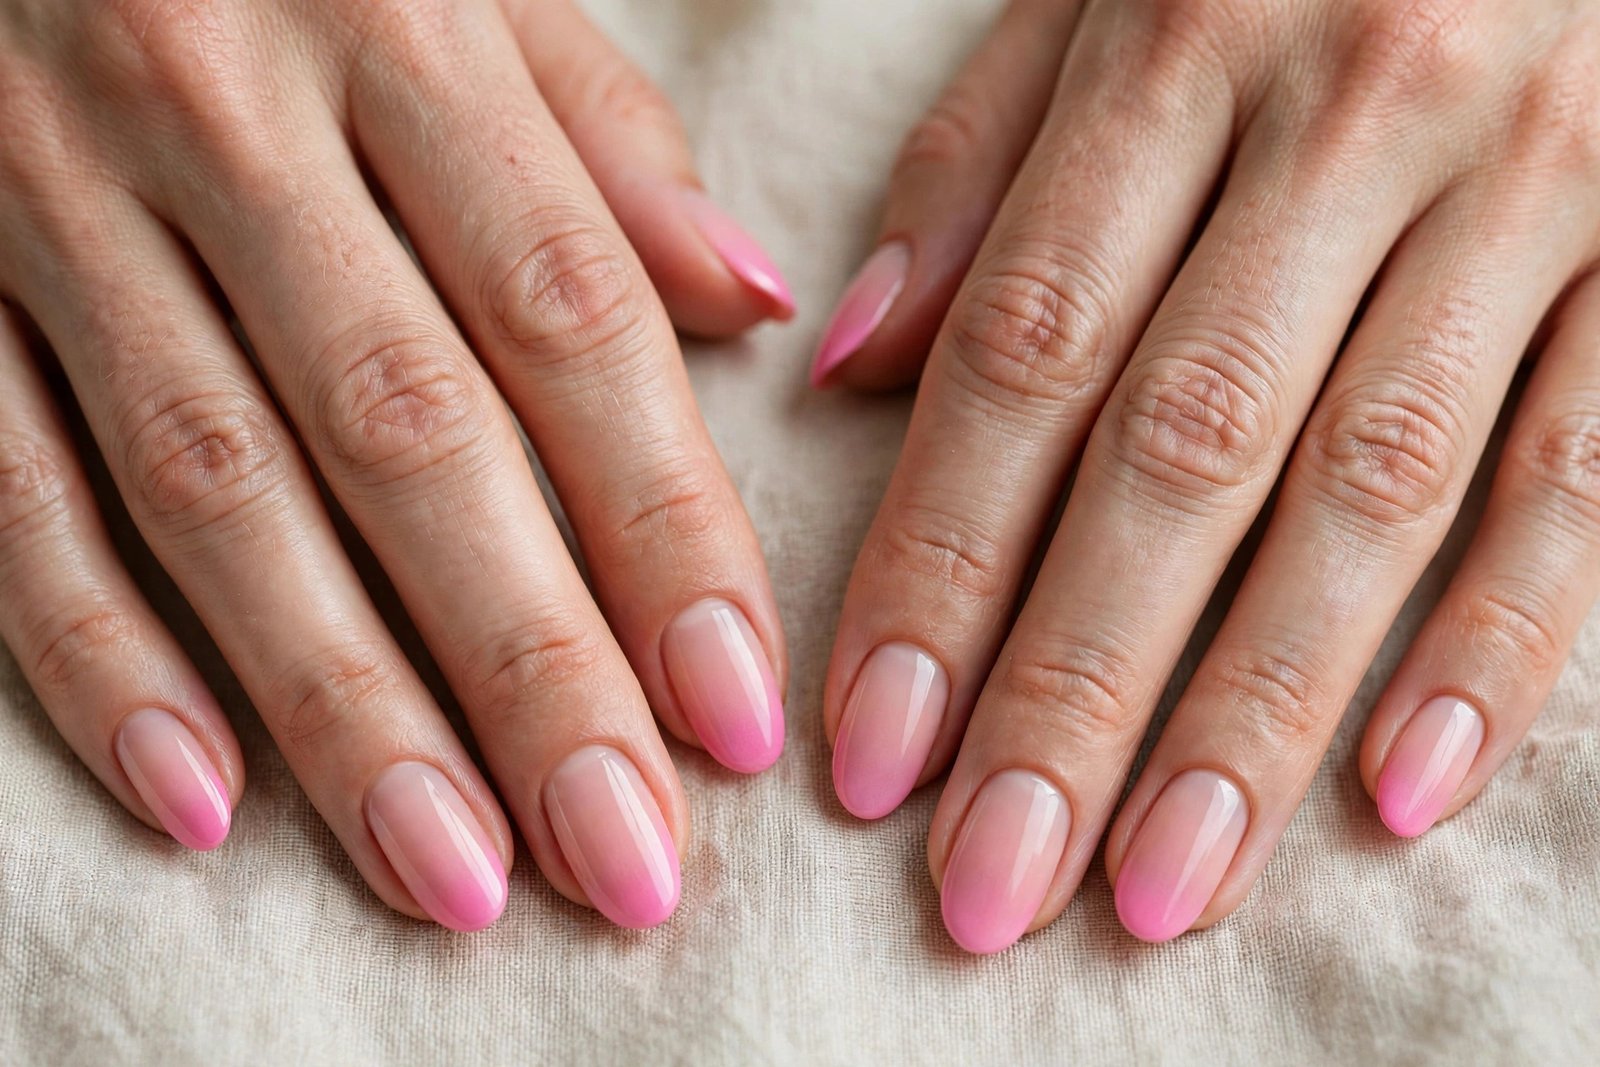
Pink ombre French nails replace the white tip with a soft bubblegum, rose or hot pink fade that melts into a sheer blush base. The pink can be sweet and pastel for a romantic daytime look, or a bolder fuchsia for a playful, statement finish, but the gradient keeps even the brightest pink feeling soft and wearable. The fade is usually longest on the middle of the nail, giving a gentle, curved transition that flatters the natural shape of the fingertip. A glossy finish makes the pink look juicy and fresh.
This design is perfect for anyone who loves pink but finds a solid pink manicure too flat. It suits warm and cool skin tones alike, with cooler pinks flattering fair skin and warmer rose shades glowing on deeper skin. It is a favourite for spring, for Valentine season and for holidays, and it looks adorable on short nails where the pink tip feels like a candy coating. It also pairs beautifully with gold jewellery and with soft, feminine outfits, though the deeper shades can hold their own with denim and leather too.
Ask your nail artist for a pink ombre French with the tip colour matched to your mood, from soft baby pink to vivid rose, over a sheer blush builder gel. At home, use a makeup sponge to dab the pink polish onto the tips, building the colour in thin layers and letting each layer fade a little lower. A pale pink base underneath the sponge work helps the gradient look seamless. Finish with a shiny top coat, and add a thin line of glitter at the fade if you want extra sparkle.
7. Lavender Ombre French
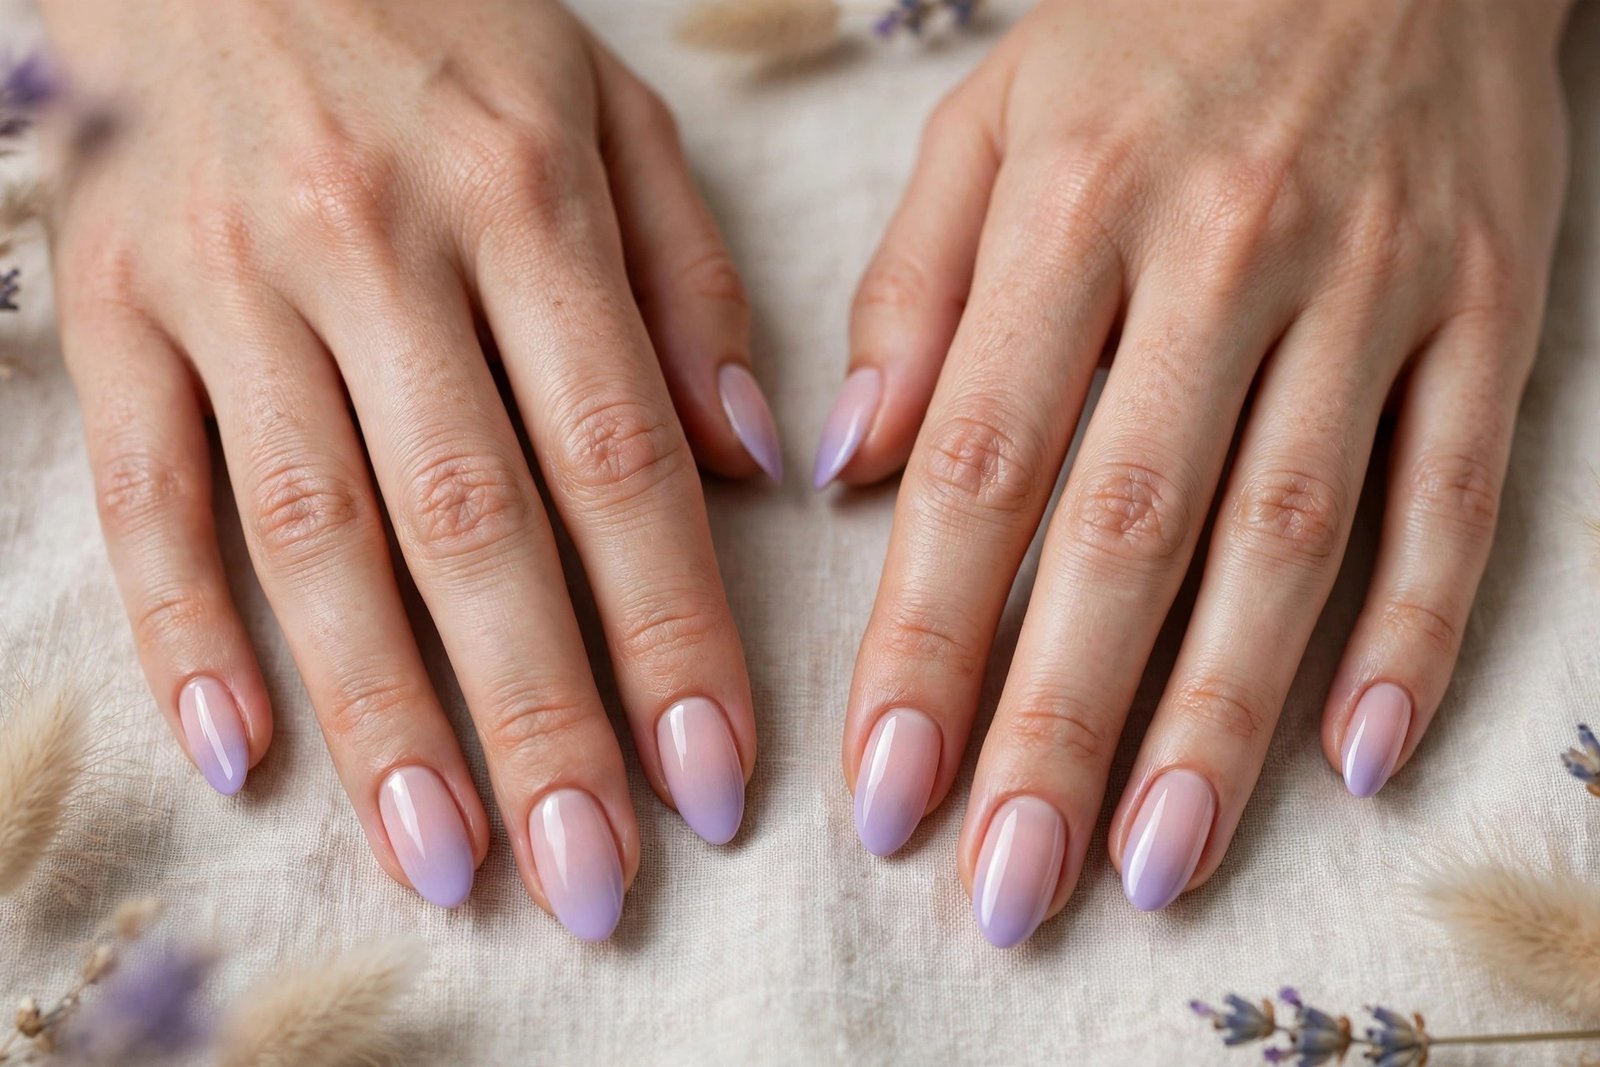
Lavender ombre French nails bring a soft lilac tip into the classic fade, blending it gently into a pale pink or milky nude base. The lavender is usually a pale, almost milky shade, so the manicure stays delicate and dreamy rather than bold, with just enough purple to feel modern and a little bit magical. The fade can be long and whispery, or slightly shorter for a clearer lilac tip, and a glossy top coat gives the whole nail a soft, almost watercolour glow. It is one of the prettiest pastel ombres you can wear.
This design suits cool and neutral skin tones especially well, and it is a lovely choice for spring, for weddings and for anyone who wants a French manicure that feels fresh without being loud. It looks beautiful on almond and oval shapes, where the curved fade echoes the nail shape, and it flatters short nails too when the lavender is kept pale. Pair it with silver jewellery, with lilac and grey outfits, or let it soften a structured black outfit with a touch of colour that never shouts.
At the salon, ask for a lavender ombre French with a milky lilac tip faded over a sheer pink base, and request a long, soft blend. For a home version, sponge a pale lavender gel polish onto the tips in thin layers, feathering the edge downward with a clean sponge corner. Lavender can look chalky if applied too thickly, so keep the layers sheer and build slowly. A glossy top coat is essential to keep the lilac looking luminous, and a drop of cuticle oil each day keeps the whole manicure fresh.
8. Reverse Ombre French
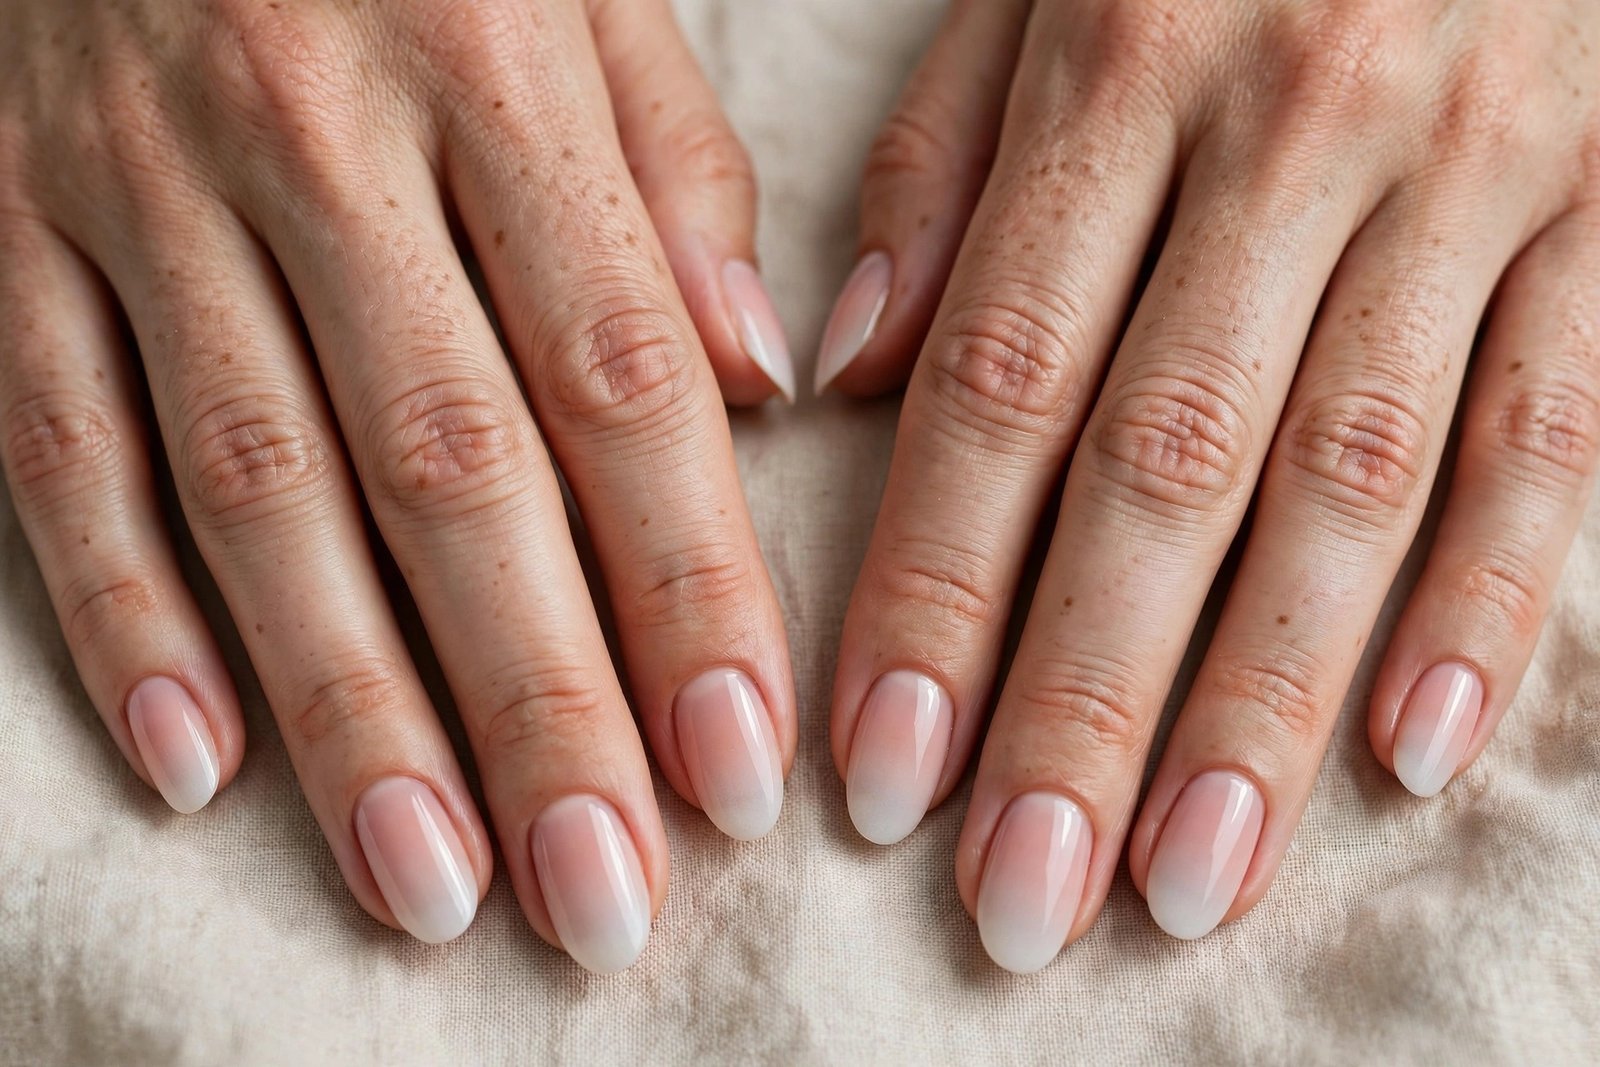
Reverse ombre French nails flip the classic design: instead of the colour fading from the tip, the deeper shade sits near the cuticle and fades outward toward a pale, almost bare tip. The result is a soft, romantic gradient that looks like a blush spreading from the base of the nail, with the lightest colour at the free edge. Pink, peach and nude versions are the most popular, but a deeper rose near the cuticle gives a more dramatic, sunset-like effect. The look feels fresh precisely because it breaks the French rulebook.
This design suits anyone who wants an ombre French that feels a little different, and it is especially flattering on short nails, where the colour near the cuticle draws the eye along the whole nail. It also suits people who dislike white tips but still want the clean, elongated feeling of a French manicure. Because the darkest colour sits near the cuticle, regrowth is even less visible than on a standard ombre, making it a smart choice for longer wear between appointments.
Ask the salon for a reverse ombre French with the colour concentrated at the cuticle and faded toward the tip, using a sponge or airbrush for the smoothest blend. At home, apply a sheer base, then sponge your chosen colour onto the lower half of the nail, fading it upward, and leave the tips pale. Work in thin layers and cure between each one, feathering the top edge of the colour with a clean sponge. Seal with a glossy top coat, and clean the cuticle line carefully for a professional finish.
9. Ombre French on Short Nails
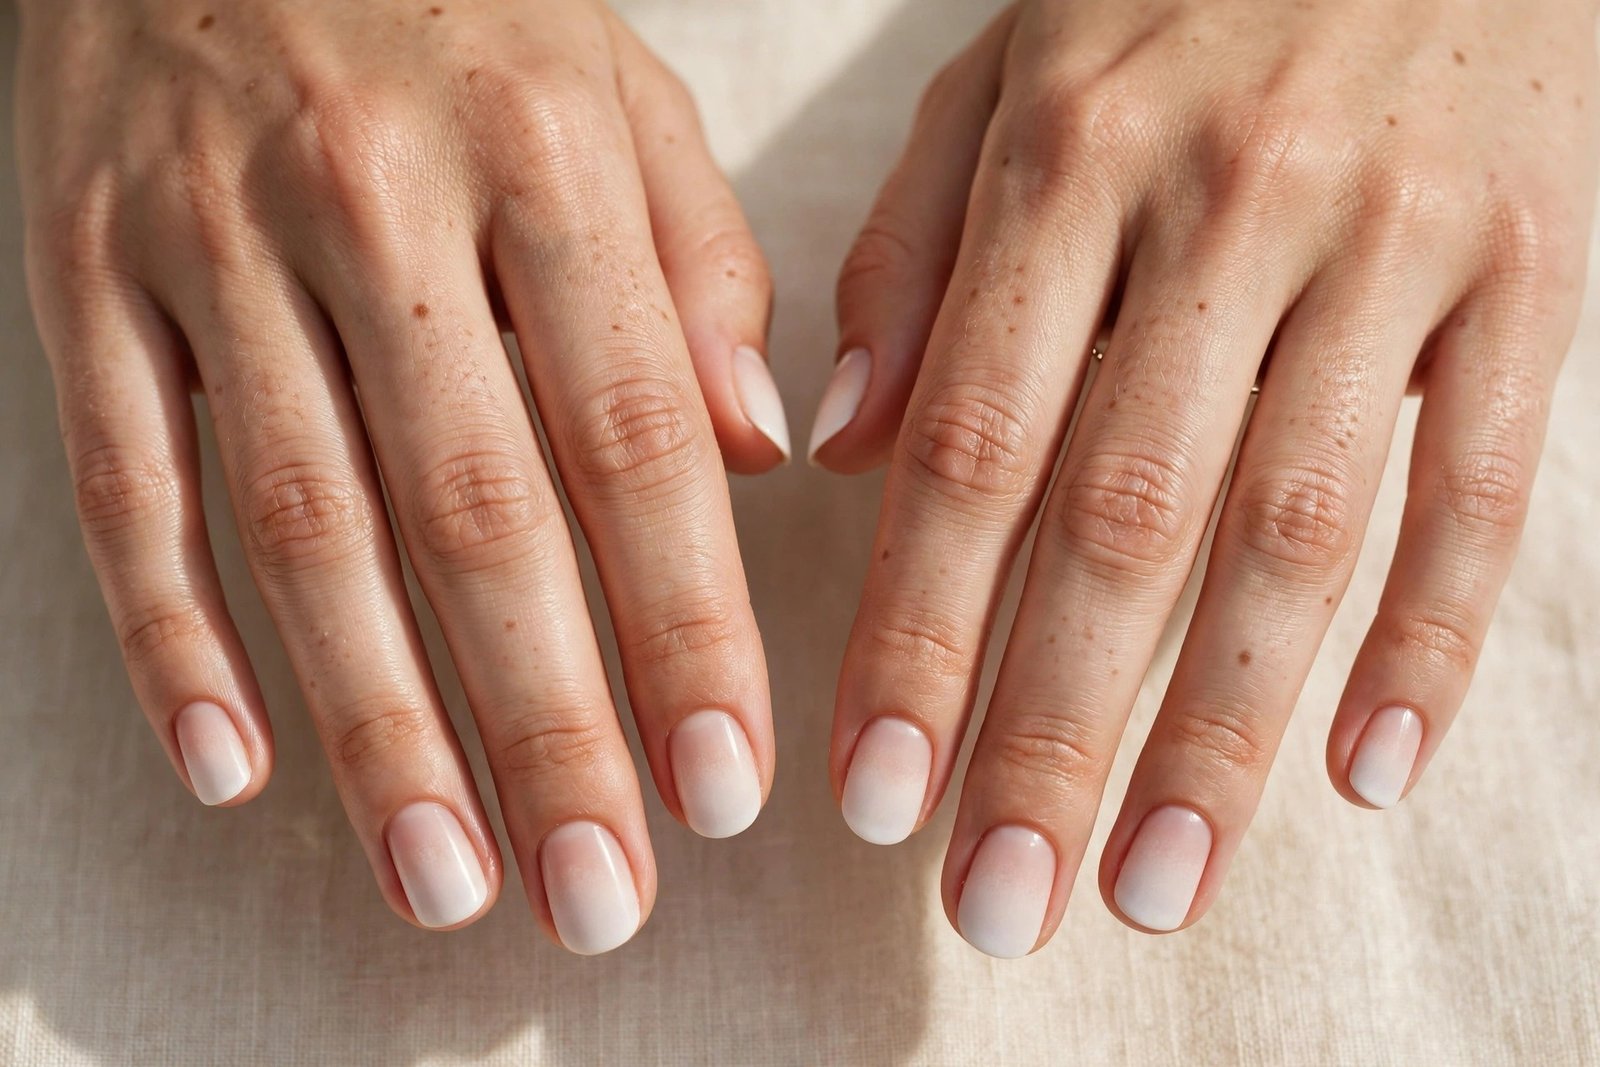
Ombre French on short nails proves that you do not need length to wear this trend: a soft white fade over a sheer pink base makes even the shortest nails look longer, cleaner and more elegant. On short nails the fade is kept compact, with the white concentrated at the very tip and melting quickly into the base, so the gradient never overwhelms the nail. The effect is subtle and polished, like a classic French that has been softened at the edges. A glossy top coat adds shine and makes the small surface look perfectly finished.
This design is ideal for anyone who keeps nails short for work, for sport, for typing all day, or simply because they prefer the feeling. It suits nurses, teachers, new parents and anyone who types or works with their hands, because short nails chip less and the ombre fade hides growth beautifully. It also flatters wider nail beds, since the vertical gradient draws the eye lengthwise and creates the illusion of a longer, slimmer nail. If you have always thought French manicures were only for long nails, this version will change your mind.
Ask the salon for a short, soft ombre French with a compact fade, and request a sheer pink builder gel to add a little strength to the natural nail. At home, keep the sponge work very light: two thin layers of white on just the top third of the nail, feathered quickly before curing. Short nails show mistakes more easily, so clean the sidewalls with a small brush before curing each layer. A strengthening base coat and a glossy top coat will keep the manicure looking fresh for two weeks.
10. Almond Ombre French
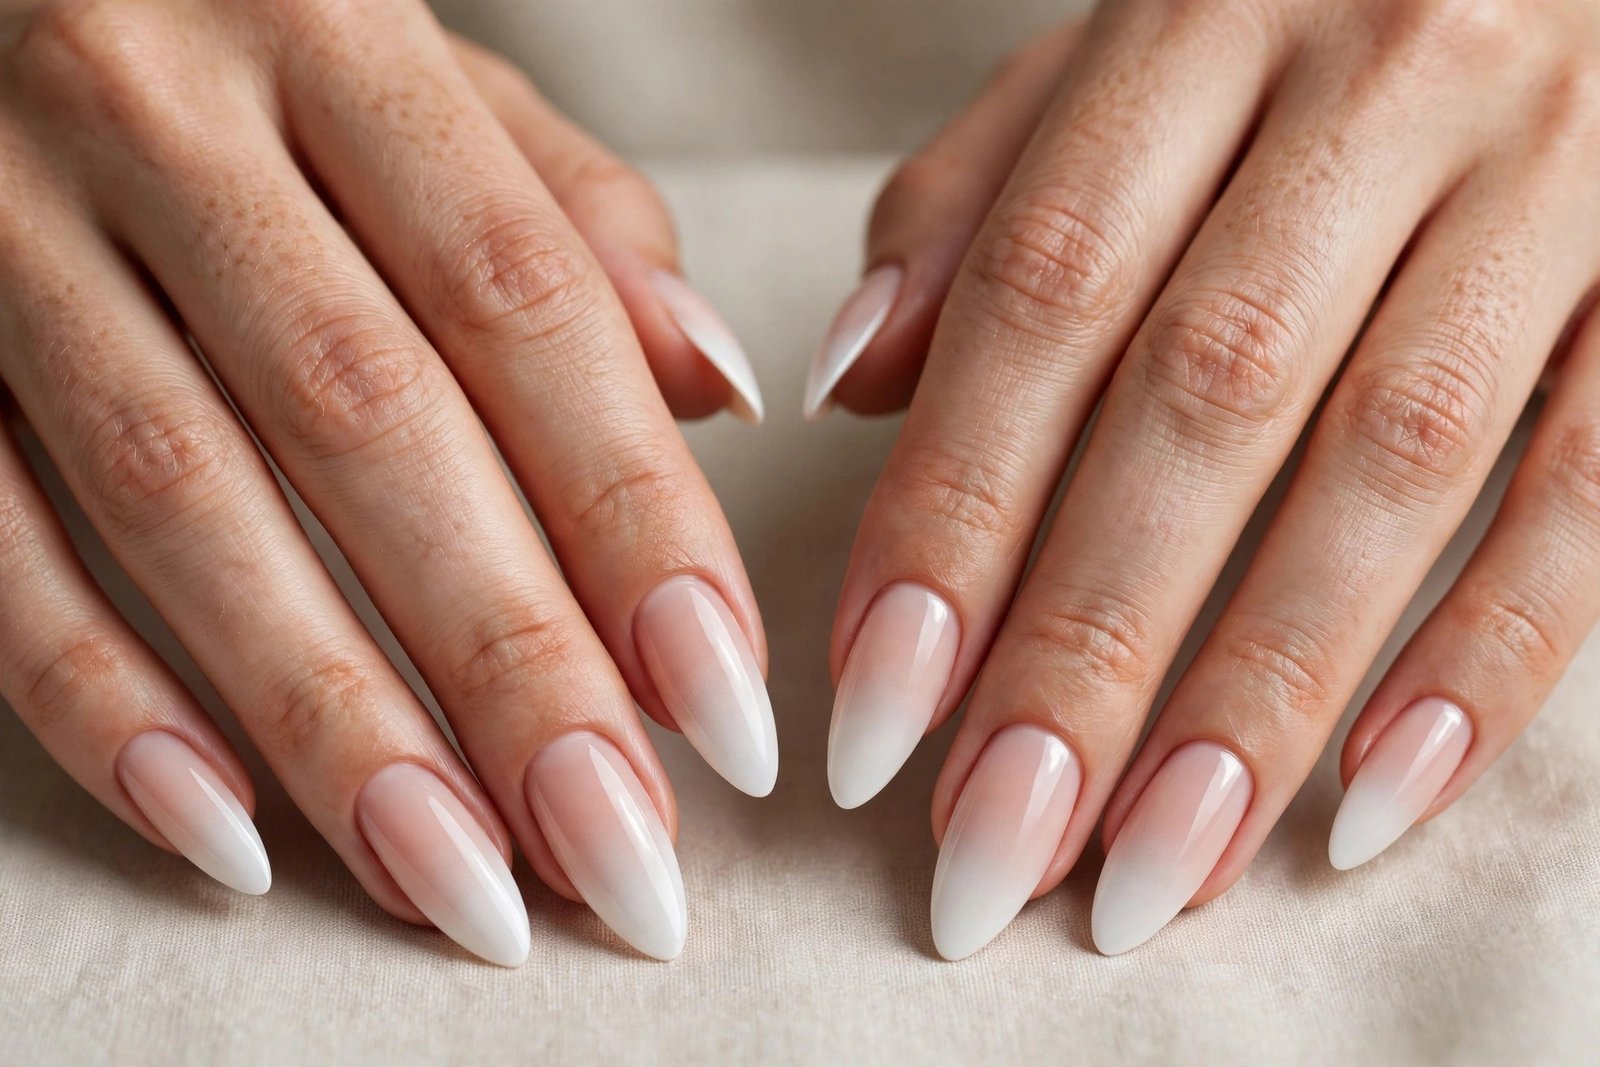
Almond ombre French nails pair the softest gradient with the most elegant shape: a white or blush tip that fades along the tapered almond curve into a sheer pink base. The long, pointed-oval shape gives the fade plenty of room to breathe, so the gradient can stretch gracefully across half the nail, and the curved transition echoes the shape of the tip itself. The result is feminine, refined and slightly dramatic, like a classic French reimagined for a red-carpet moment. A high-gloss finish completes the luxury feel.
This design suits anyone who loves long nails and wants a manicure that feels glamorous without being loud. It elongates the fingers beautifully, which makes it a favourite for weddings, for formal events and for photos, where the almond shape photographs like jewellery. It works with every ombre colour, from classic white to lavender and peach, and it pairs beautifully with rings, because the tapered shape leaves the fingers looking long and graceful. If you want the most elegant ombre French possible, start here.
Ask the salon to shape the nails into a soft almond first, then apply a white or pastel ombre with a long, airbrushed fade over a sheer pink builder gel. At home on almond extensions, sponge the tip colour on in thin layers, following the curve of the nail so the fade stays even on both sides. Almond tips are the most fragile part of the nail, so cap the free edge with top coat and avoid using your nails as tools. Reapply top coat every three days to protect the tips.
11. Coffin Ombre French
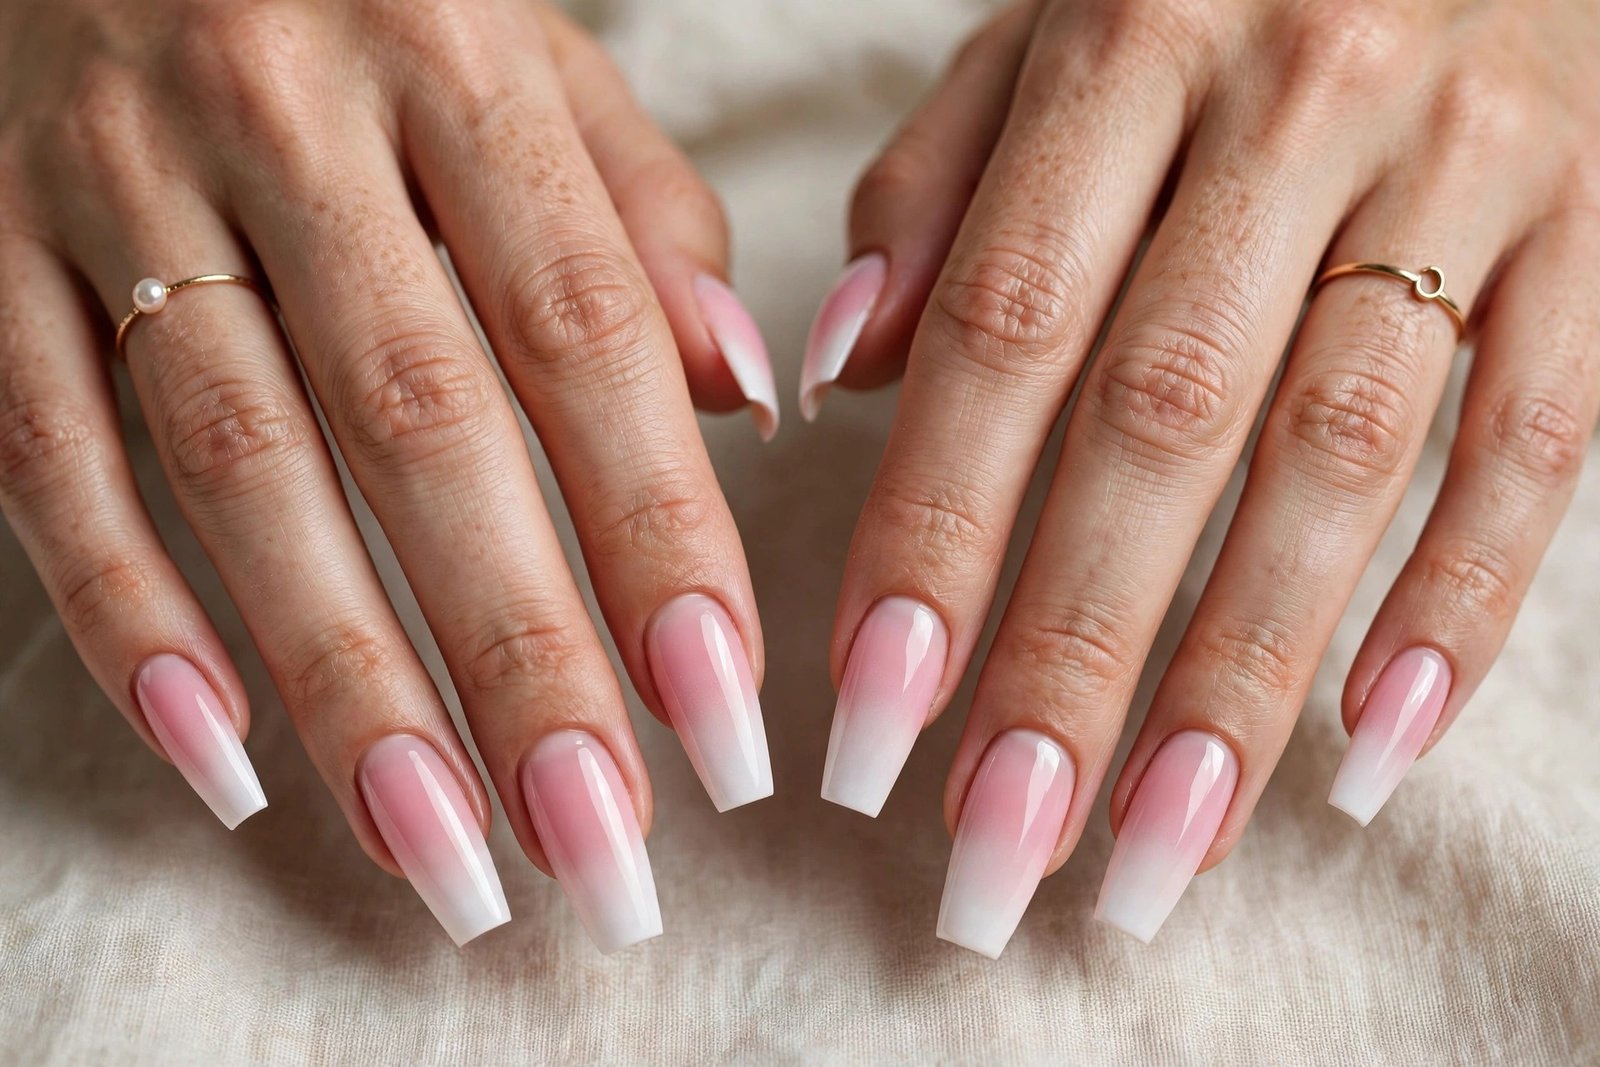
Coffin ombre French nails bring the soft gradient to a bold, tapered shape: a white or pink tip fading into a sheer base across a long, flat-ended nail. The wide, straight tip gives the fade a broad canvas, so the gradient can be long, smooth and dramatic, and the shape itself adds a modern, fashion-forward edge to the otherwise classic design. The contrast between the soft, romantic fade and the strong, architectural shape is what makes this version so striking. A glossy finish keeps it looking expensive rather than harsh.
This design suits confident nail wearers who love long lengths and statement shapes, and it is a favourite for nights out, for holidays and for anyone who treats their nails as a fashion accessory. It flatters longer fingers and looks especially good with bold rings and bracelets, because the shape holds its own against strong jewellery. It also gives nail artists the most room to play, so it is the best shape for combining an ombre fade with glitter, rhinestones or chrome shimmer on top.
Ask the salon for a coffin shape with a long ombre fade, using builder gel or acrylic for strength at this length. At home, build the gradient with a sponge in thin layers, working from the tip downward and feathering the edge before curing. Long coffin nails need a strong apex and a good top coat, so cap the free edge carefully and avoid pressure on the corners. Keep a nail file handy for tiny snags, and reapply top coat every few days to protect the fade.
12. Ombre French with a Soft Chrome Shimmer
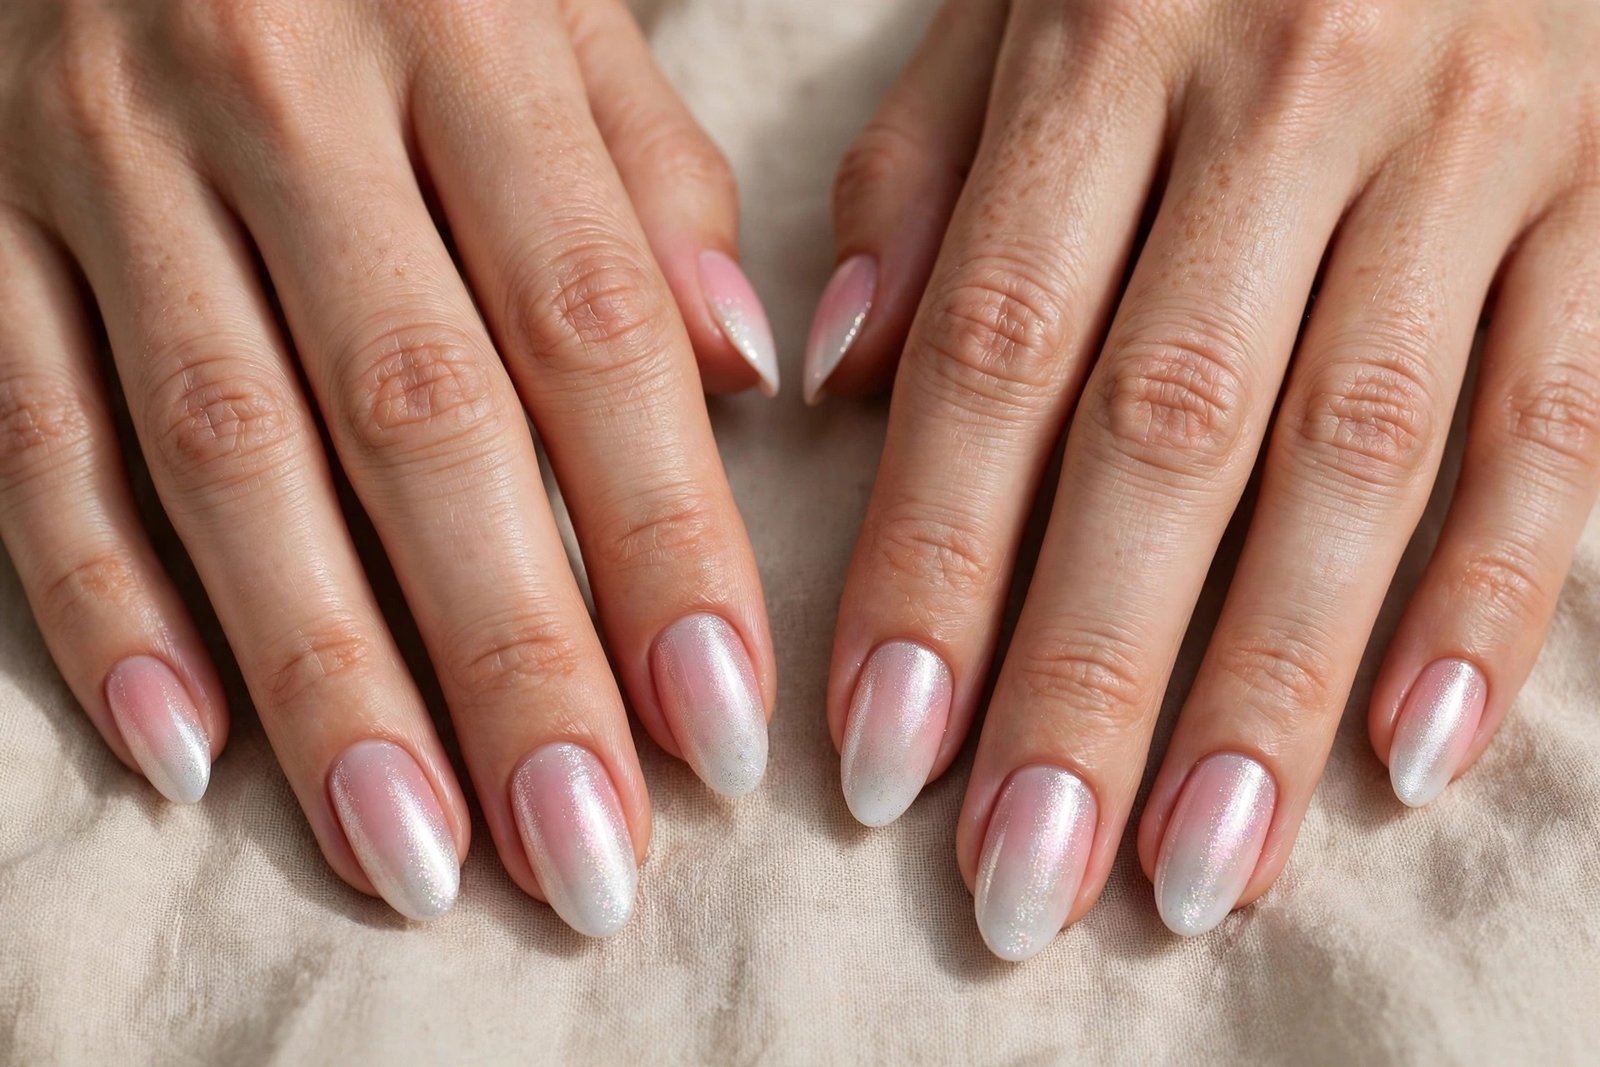
This design keeps the ombre French in charge and adds only a whisper of chrome shimmer on top: a classic white-to-pink fade, finished with a fine pearly dust that catches the light as the hands move. The shimmer sits over the gradient rather than replacing it, so the blended tip remains the star and the chrome simply adds a soft, moonlit glow. The effect is subtle and luminous, like frost on a window. For the difference between a shimmer dusting and a full glazed finish, see our guide to chrome nails.
This version suits anyone who loves the ombre French but wants a little extra magic for evenings, weddings or festive seasons. It flatters every skin tone, because the pearl shimmer is neutral and sheer, and it looks beautiful on almond, coffin and square shapes alike. It is also a clever choice for photography, since the shimmer adds dimension that a flat gradient can lack. If you find a plain ombre too quiet but a full chrome manicure too bold, this gentle middle ground is exactly right.
Ask the salon for a white ombre French with a sheer pearl chrome pigment dusted lightly over the cured gradient, then sealed with a no-wipe top coat. At home, complete your ombre fade first, cure it, then rub a tiny amount of pearl chrome powder over the surface with a silicone applicator and seal with top coat. Less is more: too much powder hides the fade underneath. Work on one nail at a time, and keep the powder away from the cuticles for a clean finish.
13. Floral Accent Ombre French
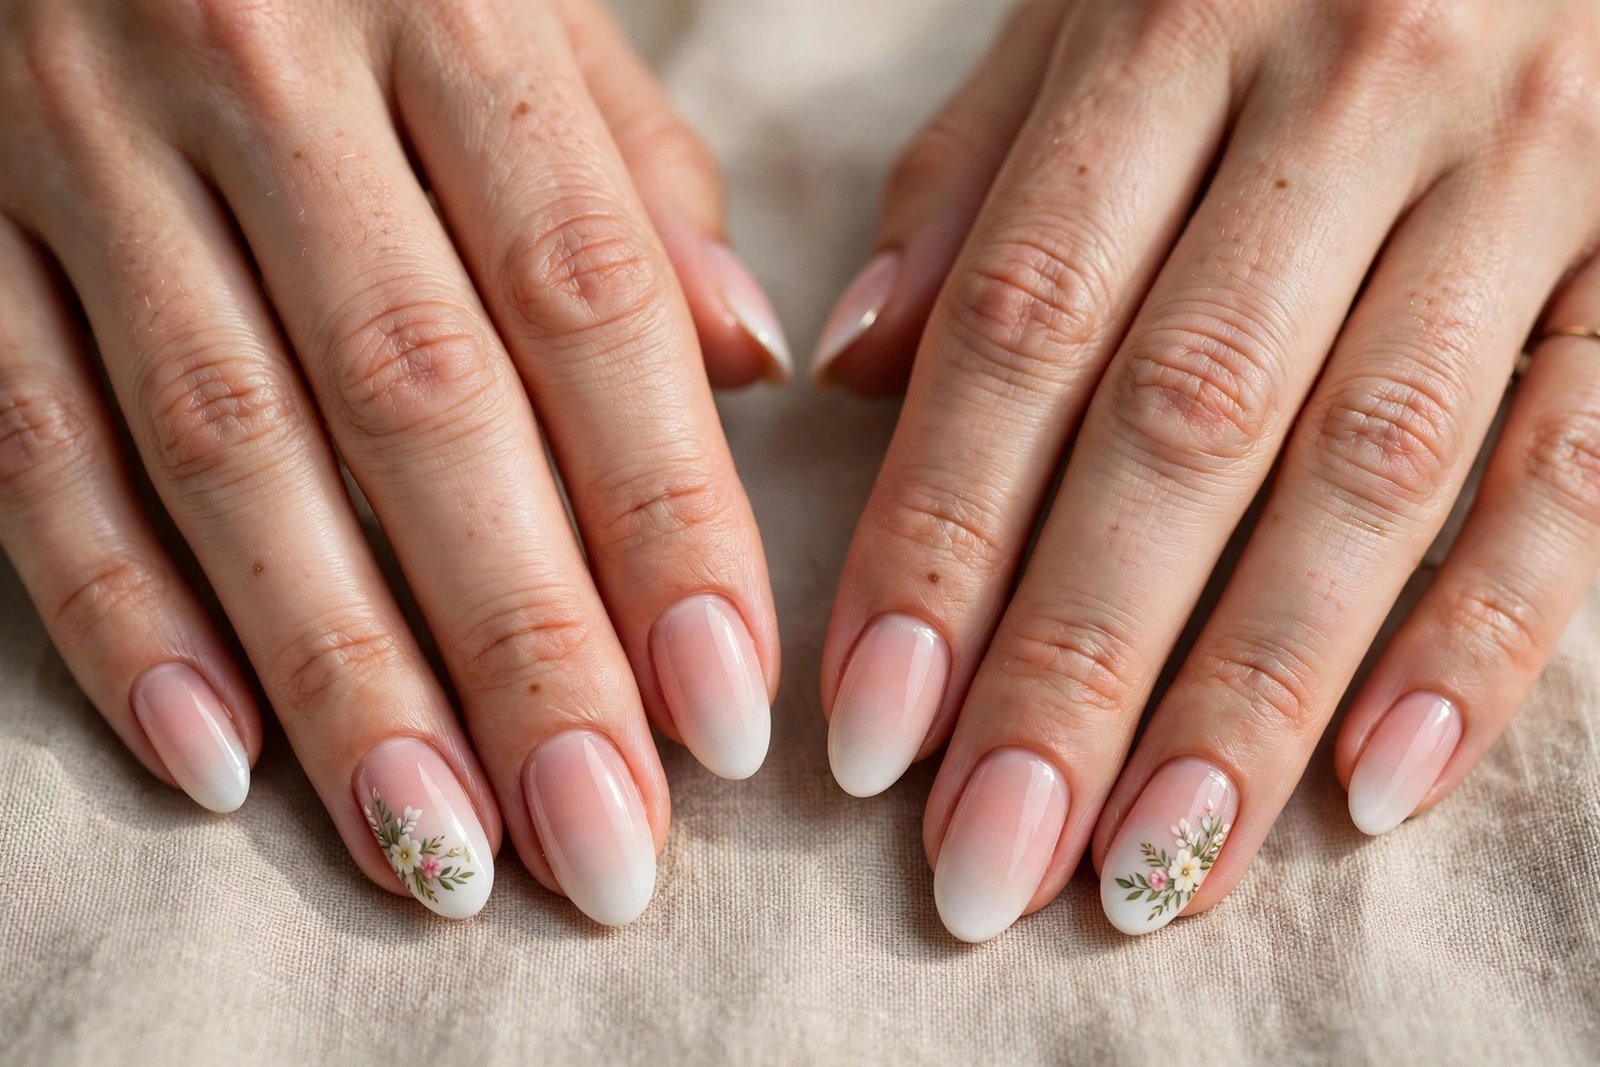
Floral accent ombre French nails pair a soft white-to-pink gradient with a single hand-painted flower on one or two accent nails, usually the ring fingers. The flowers are kept small and delicate: tiny white daisies, soft pink blossoms or fine green leaves painted over the sheer base, so they never compete with the gradient. The rest of the nails stay clean and classic, which makes the floral detail feel like a piece of jewellery rather than a pattern. The overall effect is romantic, fresh and quietly artistic.
This design is perfect for spring weddings, for garden parties, for bridesmaids and for anyone who loves floral nail art but wants it to feel grown-up. It suits all nail lengths, though the flowers need a little room, so medium and long nails show the detail best. It also works beautifully as a seasonal choice: cherry blossom in spring, tiny roses in summer, dried-flower tones in autumn. If you want a manicure that feels personal and handmade, the floral accent gives the classic ombre a story.
Ask the salon for a white ombre French with a hand-painted floral accent on the ring fingers, and agree on the flower style before they start. At home, finish the ombre on all nails first, then paint the flowers with a fine detail brush and a dotting tool, using white and soft pink polish with a touch of green for leaves. Keep the design small and off-centre so it feels delicate. Seal everything with a glossy top coat, and practise the flower on paper first if you are new to nail art.
14. Rhinestone Ombre French
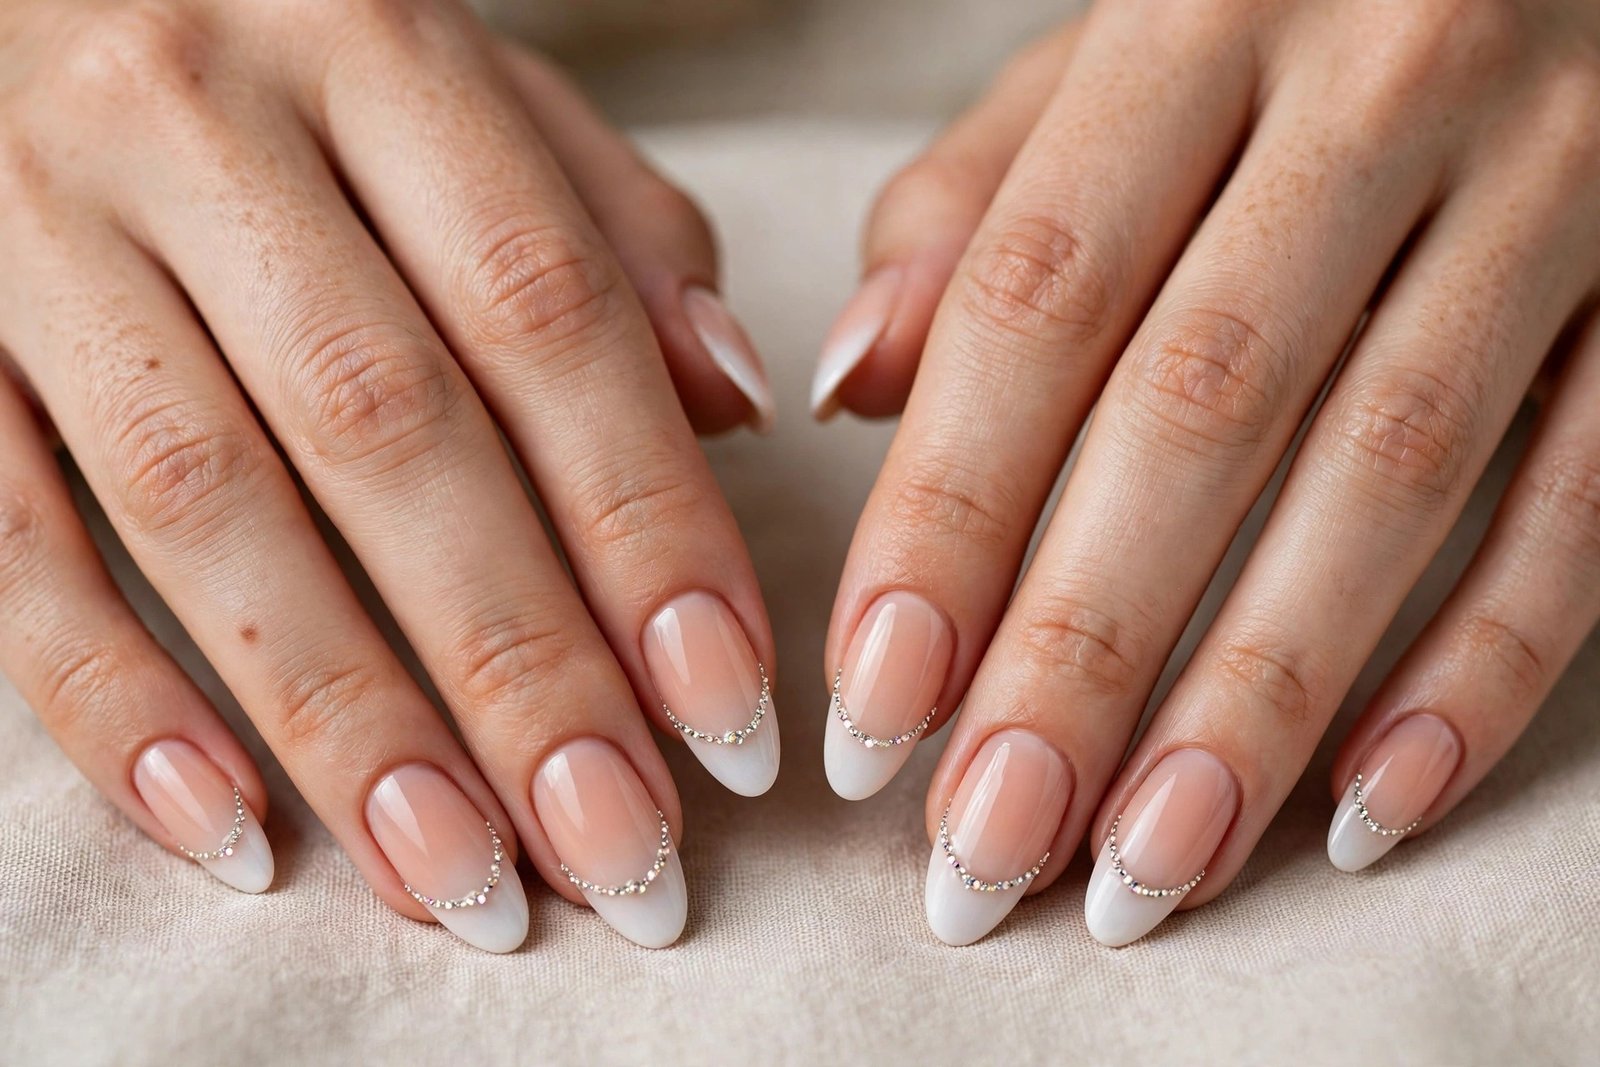
Rhinestone ombre French nails add a line of tiny crystals where the white tip meets the pink base, tracing the soft curve of the gradient like a row of miniature diamonds. The stones can be a single crystal on each nail for a subtle sparkle, or a delicate line of micro-rhinestones for a more glamorous, jewellery-like effect. Because the gradient underneath is soft and sheer, the crystals stand out beautifully without making the manicure look busy. The result is the most glamorous ombre French in this collection.
This design is made for weddings, for engagement parties, for New Year celebrations and for any occasion when your hands will be photographed. It suits medium and long nails best, where there is room for the stones to sit comfortably, and it flatters every skin tone because the crystal sparkle is neutral. It also pairs beautifully with diamond rings, since the stones echo the jewellery. If you want a manicure that feels like an accessory in itself, the rhinestone ombre is the one to choose.
Ask the salon for a white ombre French with rhinestones placed along the fade line, and request the stones to be set in builder gel so they stay put. At home, finish the ombre and cure it, then place the crystals with a wax pencil and a drop of nail glue or builder gel, curing after each nail. Keep the stones small and the placement symmetrical, and seal around them with top coat rather than over them, so they keep their shine. Remove the stones gently with acetone and a wooden stick.
15. Milky White Ombre French
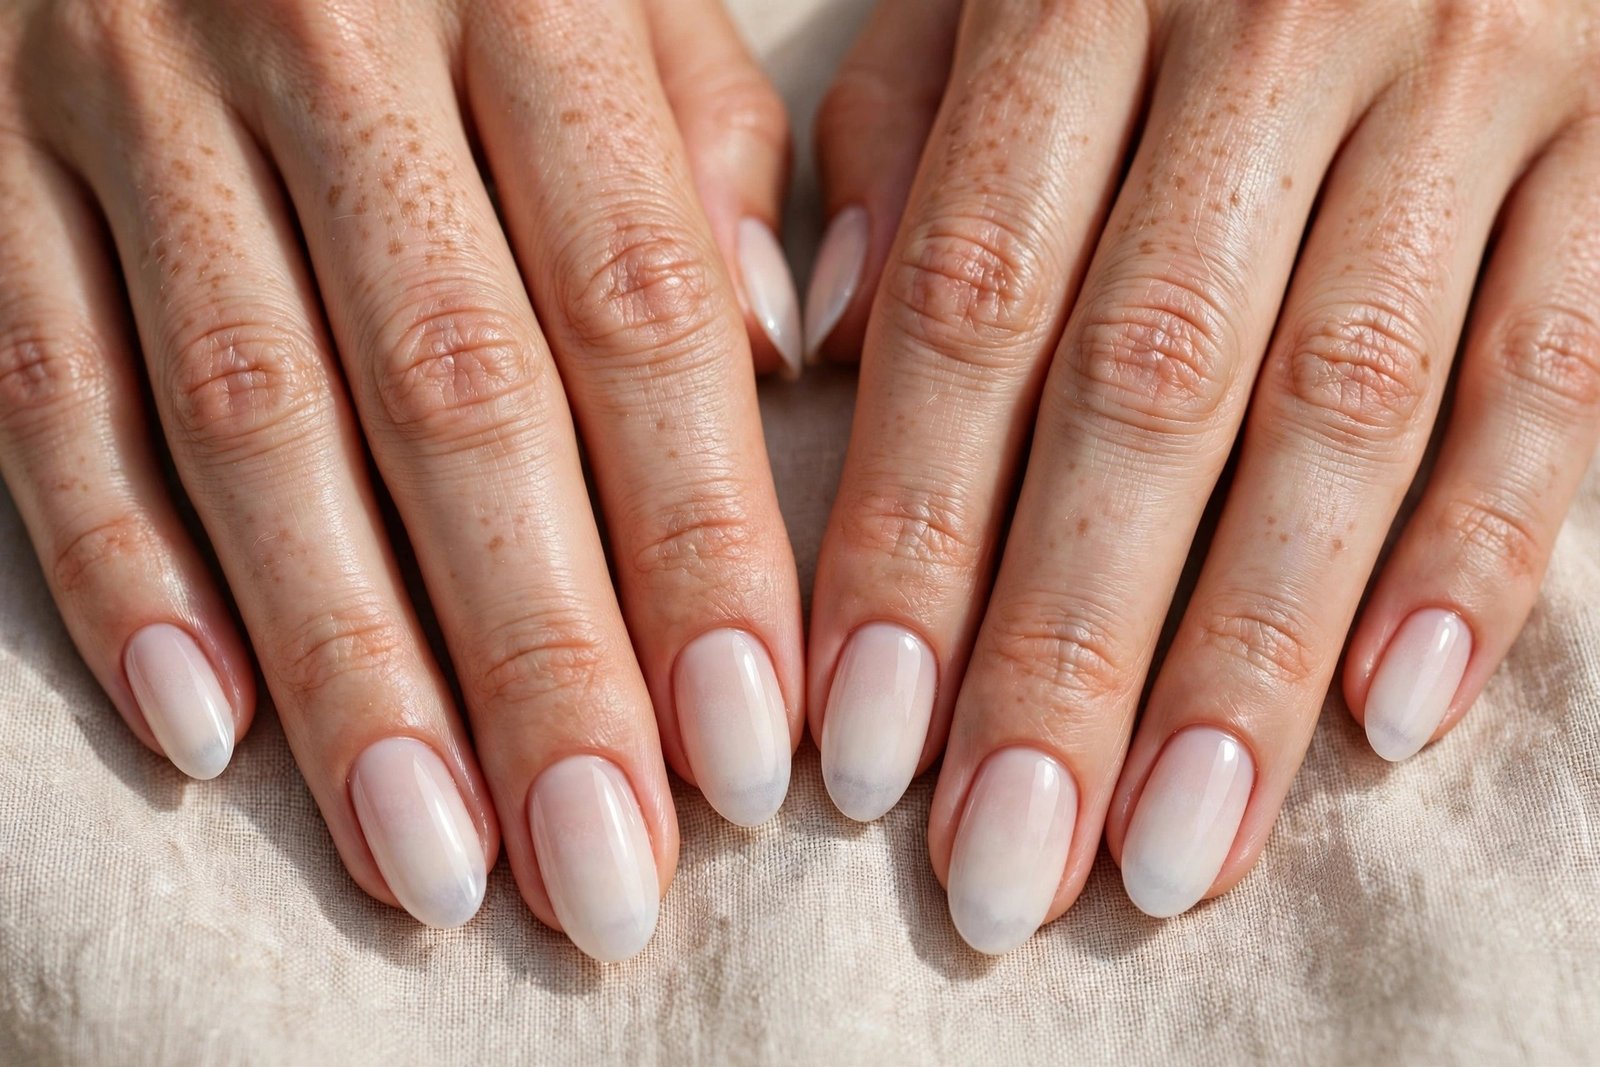
Milky white ombre French nails use a creamy, translucent white base instead of pink, so the whole nail looks like frosted glass with a brighter white tip fading into it. The milky base softens the contrast between tip and nail bed, giving a dreamy, cloud-like finish that feels modern and clean. The gradient is gentle and long, and the sheer, milky quality of the base lets a hint of the natural nail show through, which keeps the look fresh rather than flat. A glossy top coat makes the milkiness glow.
This design suits anyone who loves the sheer, clean aesthetic of milky nails but wants the structure of a French tip as well. It flatters fair and medium skin tones beautifully, and it looks stunning on short and medium nails where the milky finish feels light and fresh. It is a wonderful choice for winter, for minimalists and for office wear, because it reads as polished and intentional without any colour at all. If you love white-on-white, this is the softest way to wear it.
Ask the salon for a milky white builder gel base with a white ombre tip faded over it, and request a sheer, translucent milk rather than an opaque white. At home, apply two thin coats of milky white polish as the base, then sponge a brighter white onto the tips in thin layers, feathering the edge. Milky shades can look streaky if applied thickly, so keep every layer thin and let each one dry fully. Finish with a glossy top coat to bring out the creamy, glassy finish.
16. Peach Ombre French
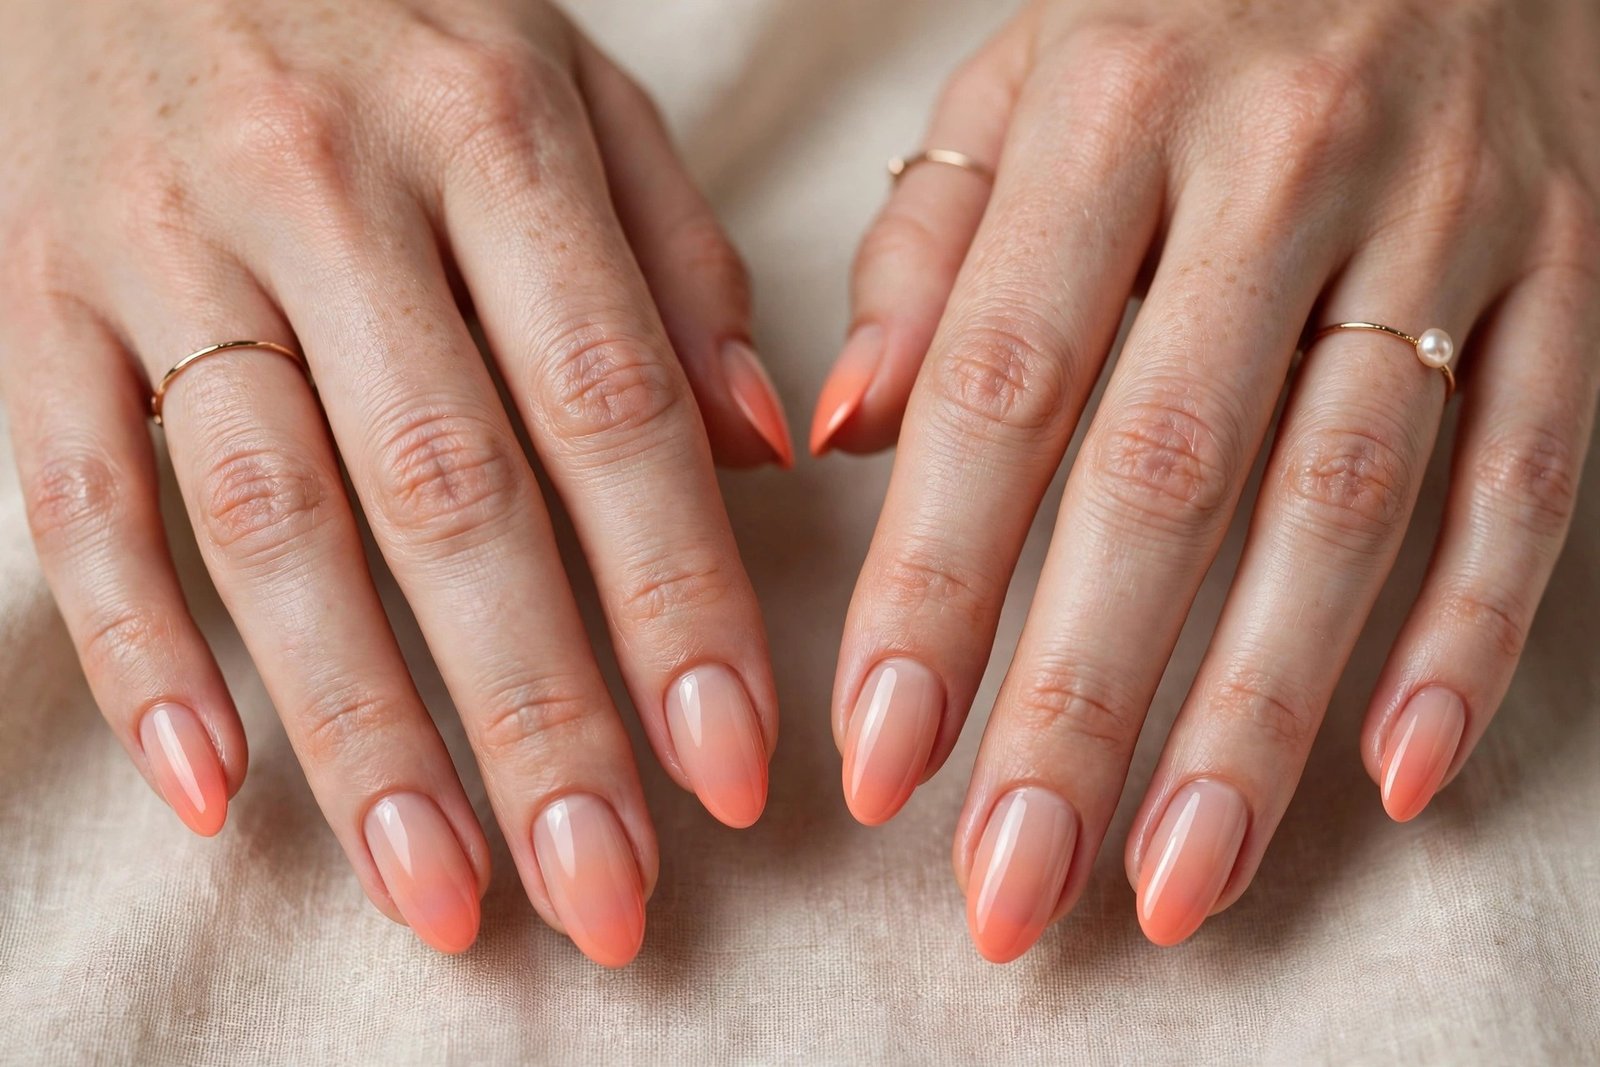
Peach ombre French nails warm up the classic design with a soft coral-peach tip that fades into a sheer nude or pale pink base. The peach is gentle and juicy, like the inside of a ripe peach, and it gives the manicure a sunny, healthy glow that white tips cannot match. The fade is long and soft, so the peach melts into the base without any hard edge, and the overall effect feels fresh, feminine and a little bit playful. A glossy finish makes the peach look like fresh fruit rather than flat colour.
This design suits warm skin tones especially well, and it is a beautiful choice for spring and summer, for holidays and for anyone who wants a French manicure with warmth. It flatters short and medium nails, where the peach tip feels like a soft pop of colour, and it pairs beautifully with gold jewellery and with warm, earthy outfits. It also suits people who find white tips too stark: the peach gives the same clean structure with a much softer, friendlier feeling.
Ask the salon for a peach ombre French with a sheer nude base, and request a soft, slightly translucent peach rather than a neon coral. At home, sponge peach gel polish onto the tips in thin layers, building the colour gradually and feathering the lower edge with a clean sponge. Peach shades can look patchy if applied in one thick coat, so three thin layers will always beat one heavy one. Finish with a glossy top coat, and add a drop of cuticle oil daily to keep the manicure looking fresh.
17. Rose Gold Ombre French
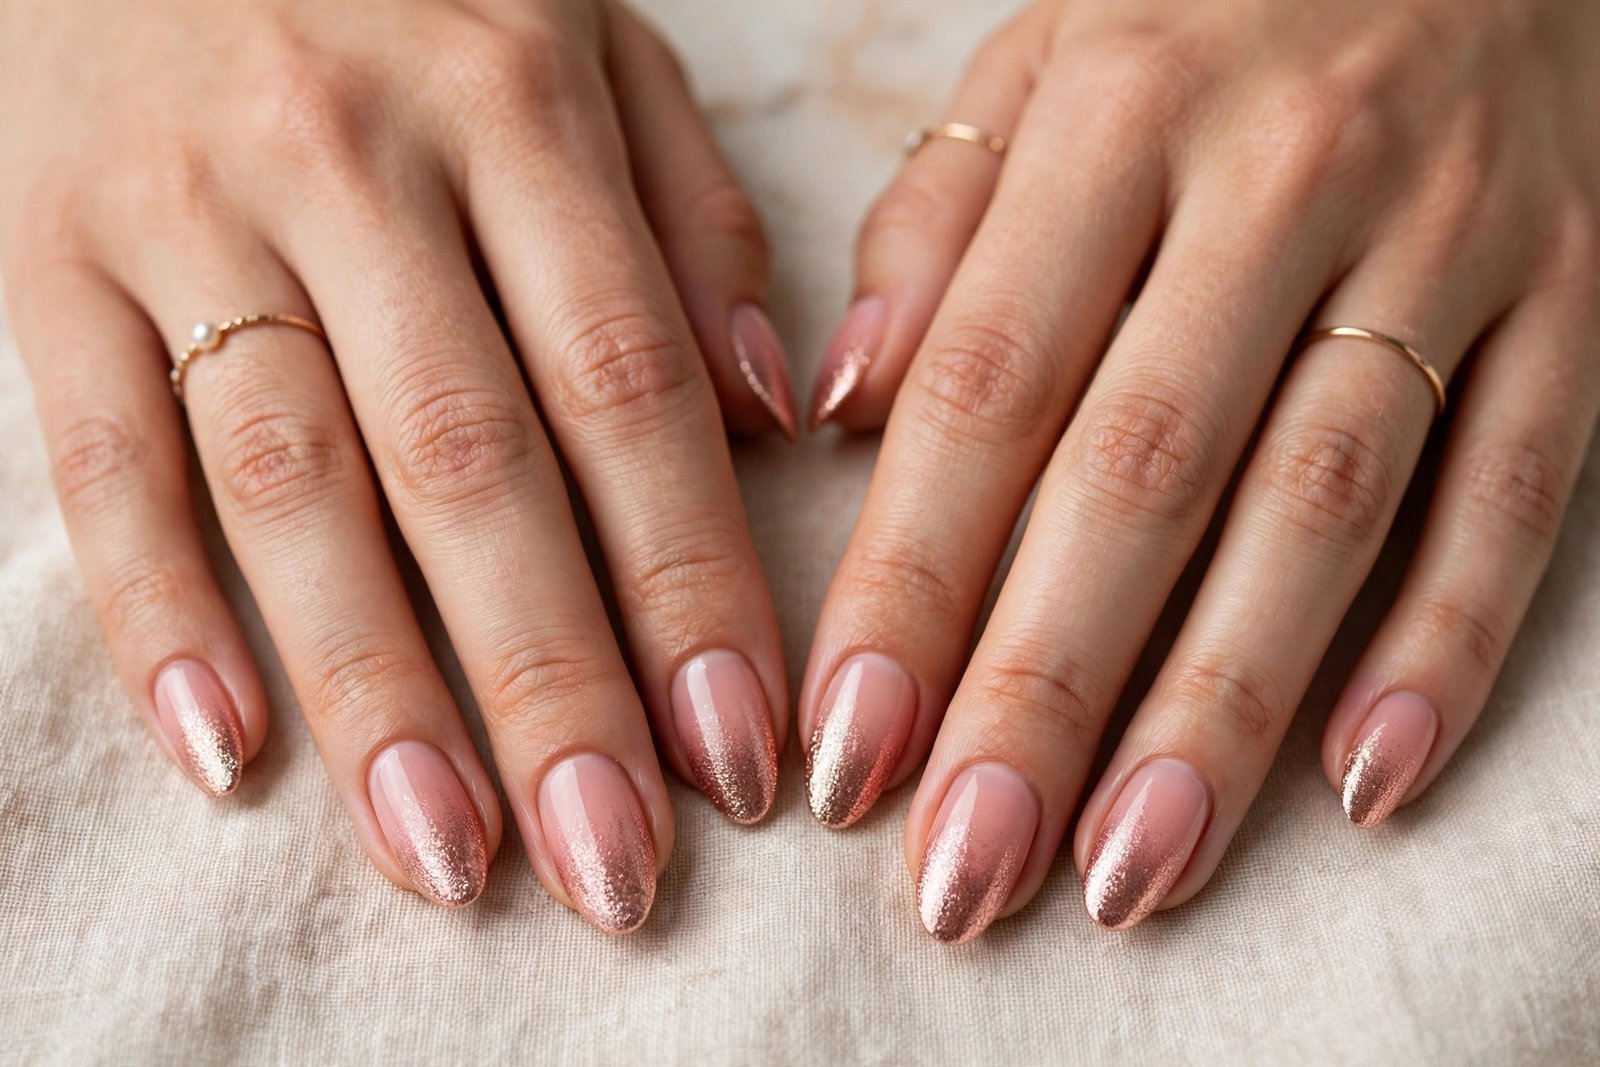
Rose gold ombre French nails replace the white tip with a warm, metallic rose gold fade that melts into a sheer blush base. The rose gold can be fine glitter, a soft metallic pigment or a shimmering foil effect, but it always stays sheerest at the bottom of the fade, so the sparkle thins out gracefully. The warm metallic tone gives the manicure a luxurious, jewellery-like quality, and the blush base underneath keeps it romantic rather than flashy. It is the most grown-up glitter ombre you can wear.
This design suits anyone who loves rose gold jewellery, and it is a beautiful choice for weddings, for anniversaries, for Valentine season and for festive evenings. It flatters warm and neutral skin tones especially well, and it looks stunning on medium and long nails where the metallic fade has room to shine. It also pairs beautifully with rose gold rings and bracelets, creating a coordinated, polished look. If you want sparkle that still feels elegant and expensive, rose gold is the perfect metal.
Ask the salon for a rose gold glitter ombre over a sheer blush base, using fine glitter gel sponged from the tips and sealed with a smooth top coat. At home, paint a sheer pink base, then dab rose gold glitter polish onto a sponge and press it onto the tips, adding more layers at the edge and fewer toward the middle. Seal with two coats of top coat, because glitter needs extra sealing to feel smooth. A peel-off base coat around the cuticles will make the glitter cleanup much easier.
18. Grey Ombre French
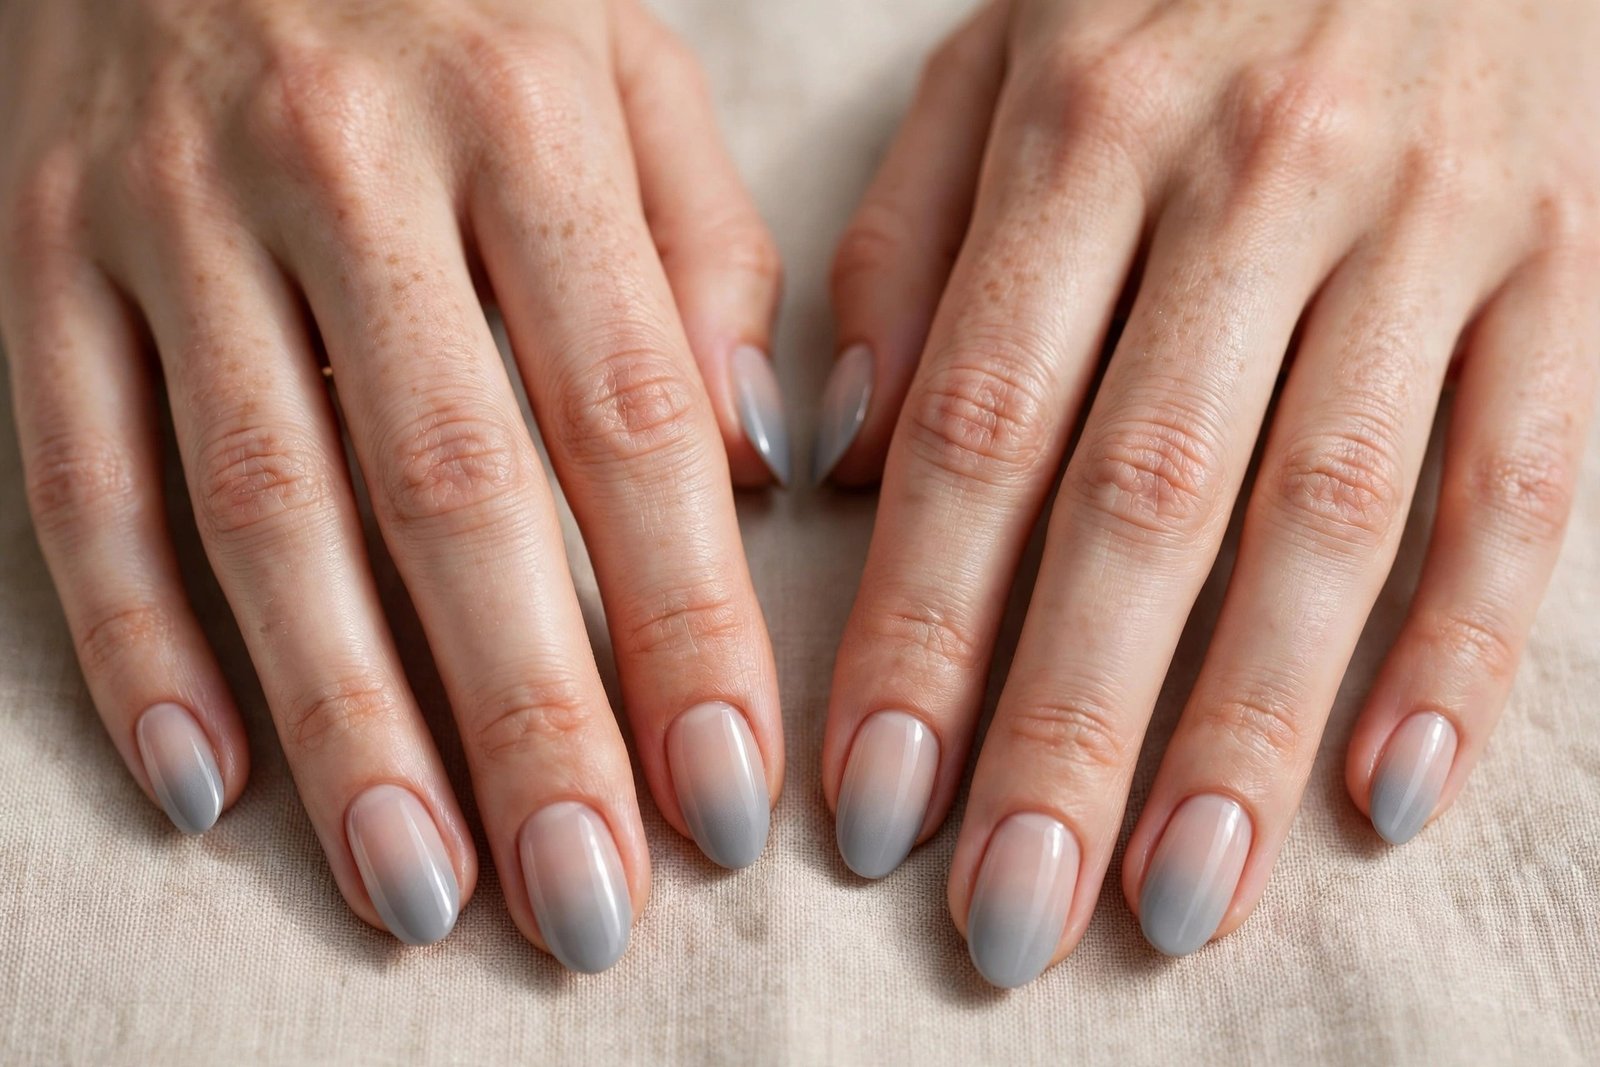
Grey ombre French nails bring a cool, modern edge to the classic design: a soft dove grey or smoky silver tip fading gently into a sheer nude base. The grey is usually pale and slightly blue-toned, so it reads as sophisticated rather than dull, and the long, soft fade keeps the whole manicure feeling light. The effect is minimalist and architectural, like a classic French viewed through a cool, winter filter. A glossy top coat adds depth, while a matte top coat makes it feel even more modern.
This design suits cool skin tones and anyone who loves minimalist, fashion-forward nails. It is a wonderful choice for winter, for office wear and for pairing with silver jewellery and monochrome outfits, where the grey tip echoes the cool tones of the wardrobe. It also suits people who find white tips too traditional: grey gives the same clean structure with a contemporary twist. If your style leans toward greys, blacks and cool neutrals, this ombre French will fit your wardrobe perfectly.
Ask the salon for a dove grey ombre French over a sheer nude base, and request a pale, blue-toned grey rather than a dark charcoal. At home, sponge pale grey gel polish onto the tips in thin layers, feathering the edge with a clean sponge before curing. Grey can look muddy if applied too thickly, so build the colour slowly and keep the layers sheer. Finish with a glossy top coat for a polished look, or try a matte top coat for a soft, velvety finish.
19. Black Tip Ombre French
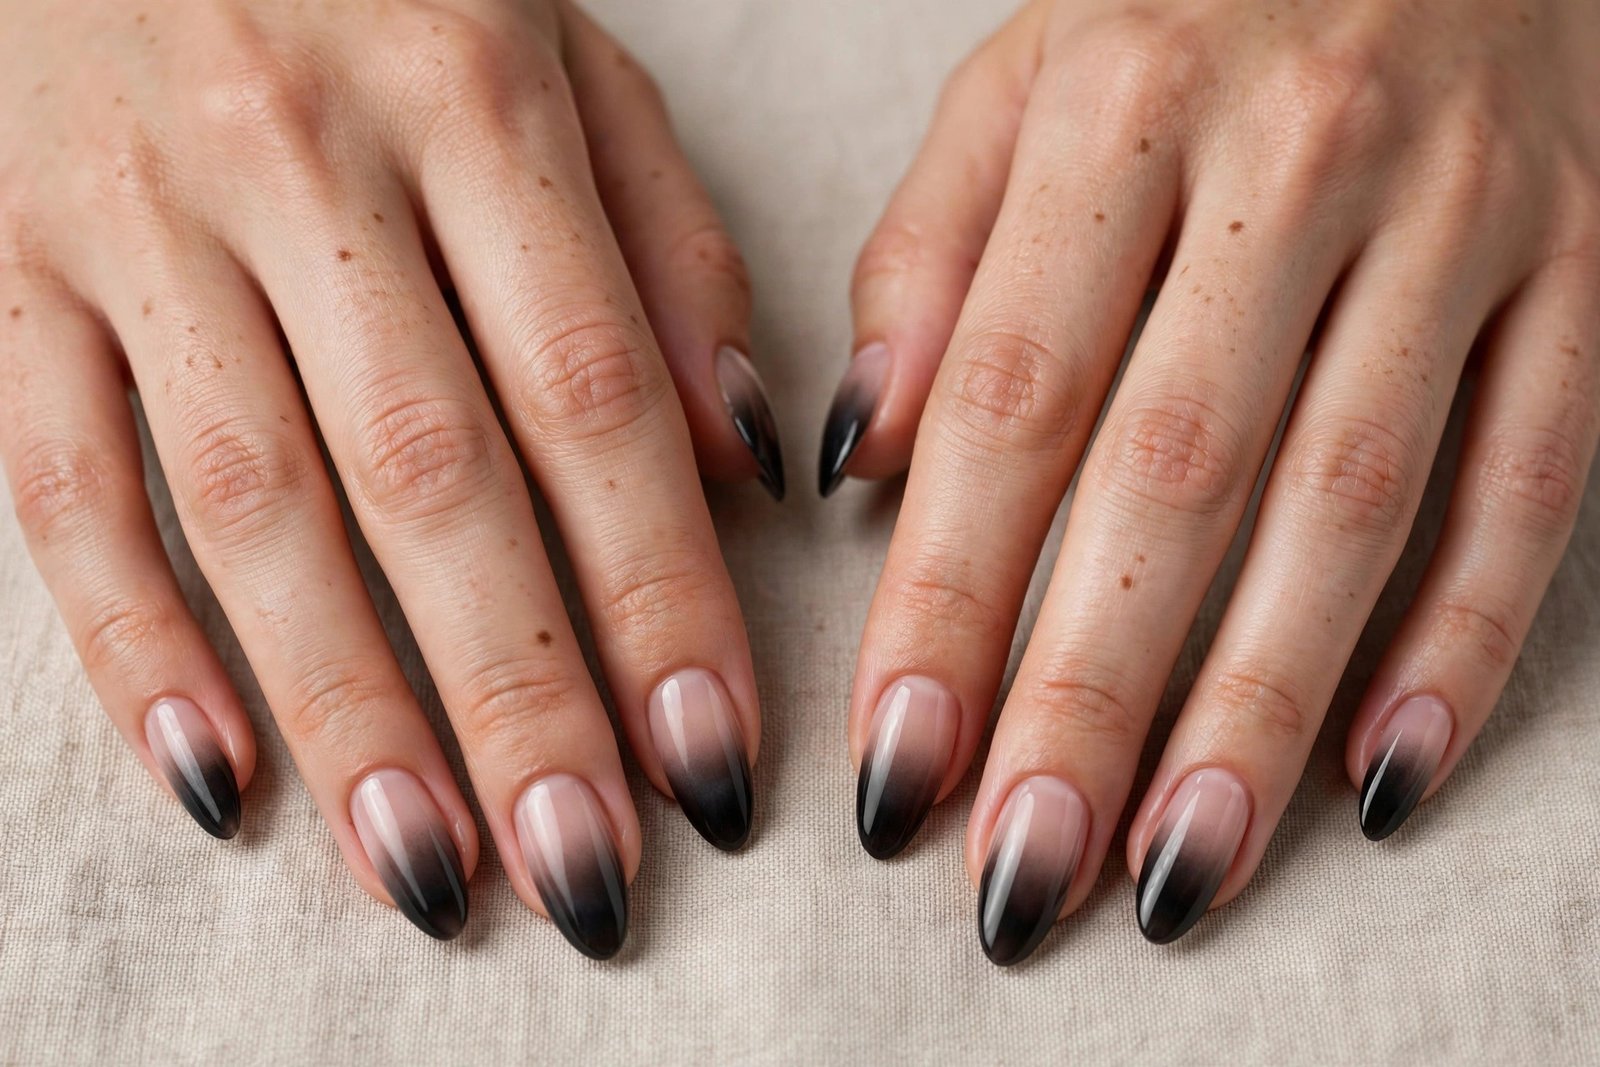
Black tip ombre French nails take the softest technique and give it the boldest tip: a smoky black fade that melts from the free edge into a sheer nude or pale pink base. The black is never a solid block; it is sponged on so it is darkest at the very tip and dissolves into grey, then into nothing, as it moves down the nail. The contrast is dramatic but the gradient keeps it elegant, like a classic French wearing evening dress. A glossy top coat deepens the black and makes the fade look smoky and smooth.
This design suits confident nail wearers who love a bold manicure but still want the elongated, flattering shape of a French. It looks striking on almond, coffin and stiletto shapes, where the long fade has room to show off the smoky transition, and it pairs beautifully with black outfits, silver jewellery and evening looks. It is also a favourite for autumn and winter, when darker nails feel seasonal. If you love black nails but find a solid black manicure too heavy, this gradient is the perfect compromise.
Ask the salon for a black ombre French with a long, smoky fade over a sheer nude builder gel, and request the black to be built in thin layers so it never looks blocky. At home, sponge black gel polish onto the tips in very thin layers, feathering the edge downward with a clean sponge and curing between layers. Black pigment stains, so always use a base coat and clean the skin before curing. Finish with a glossy top coat, and wear gloves for cleaning to protect the dark tips.
20. Pastel Rainbow Ombre French
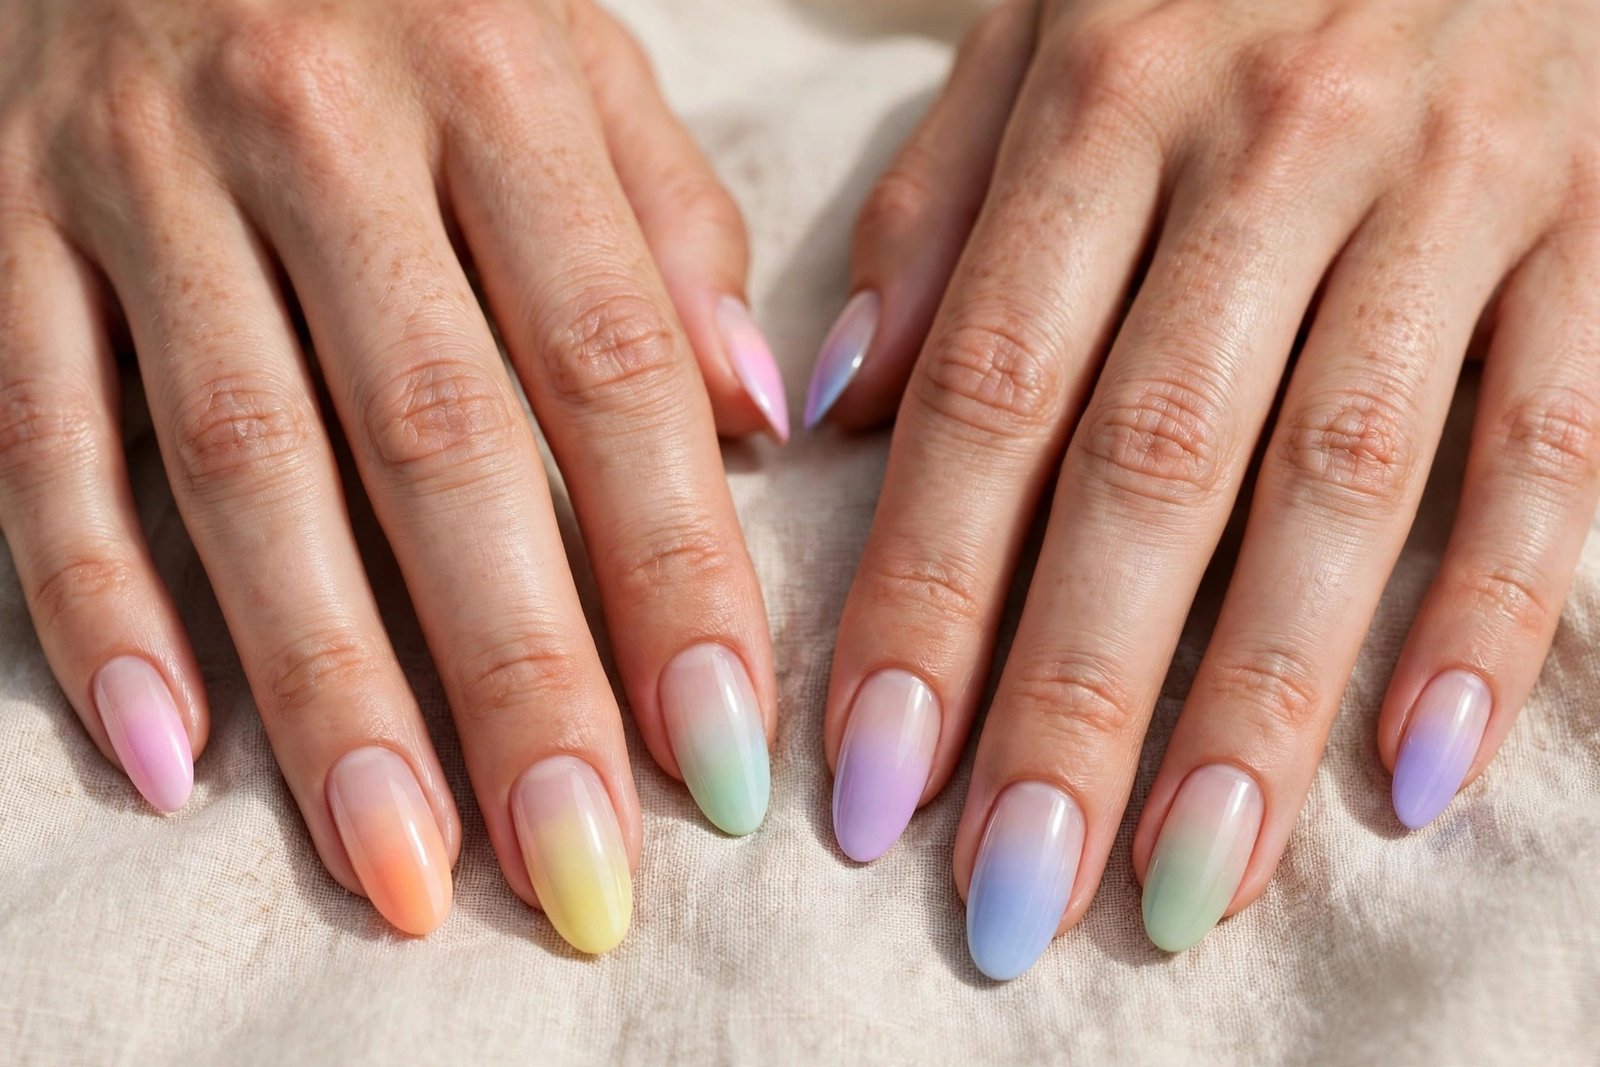
Pastel rainbow ombre French nails give each nail its own pastel tip colour: baby pink, mint, lilac, sky blue and lemon, each fading softly into the same sheer nude base. The colours are kept pale and milky, so the rainbow feels dreamy rather than loud, and the shared sheer base ties all five colours together into one harmonious manicure. The fade on each nail is long and gentle, so the pastel melts into the base like watercolour. The overall effect is joyful, fresh and surprisingly wearable.
This design suits anyone who loves colour but wants it in a soft, grown-up dose, and it is a wonderful choice for spring, for festivals, for holidays and for brightening a grey winter week. It flatters all skin tones, because the pastels are pale and the sheer base is neutral, and it looks adorable on short and medium nails where the rainbow feels playful. It also suits people who cannot choose a single colour: the rainbow lets you wear five favourites at once without any clash.
Ask the salon for a pastel rainbow ombre French with a different pale pastel on each tip over a sheer nude base, and request the colours to stay milky and sheer. At home, use a separate small sponge for each colour to avoid muddying the shades, and work one nail at a time, sponging the pastel onto the tip in thin layers. Keep the fade long and soft, and finish with a glossy top coat to unify the colours. A white base coat under the pastels will make the colours look brighter and cleaner.
21. Ombre French with Gold Foil
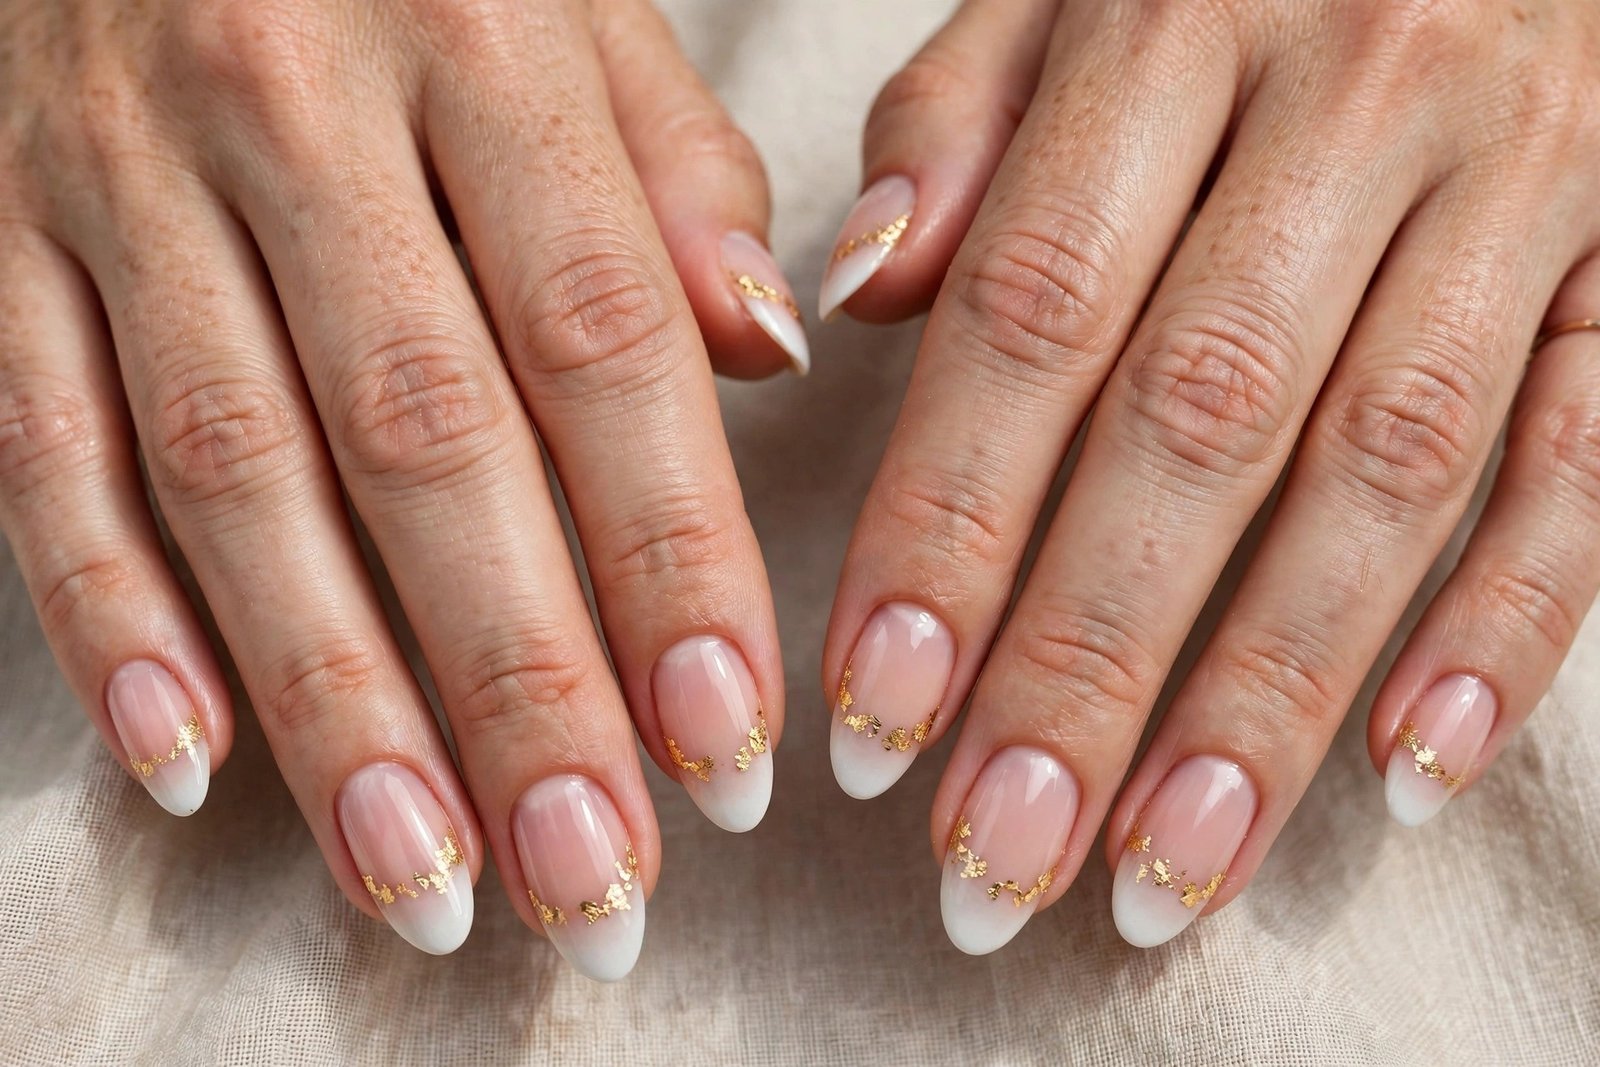
Ombre French with gold foil pairs a classic white-to-pink gradient with delicate flakes of gold leaf scattered near the fade line, like sunlight caught on the nail. The foil can be a few tiny flakes on each nail, a fine gold line tracing the curve of the gradient, or a single bold flake on an accent nail. Because the gold is irregular and organic, it never looks stiff or symmetrical, and it adds a luxurious, handcrafted feeling to the otherwise clean design. The glossy top coat seals the foil flat and makes it shine.
This design suits anyone who loves a touch of luxury, and it is a beautiful choice for weddings, for festive seasons and for evenings when you want your nails to feel like jewellery. It flatters every skin tone, because gold is universally warm and flattering, and it looks stunning on almond and coffin shapes where there is room for the foil to spread. It also pairs beautifully with gold rings and bracelets, creating a coordinated, polished finish that feels expensive without trying too hard.
Ask the salon for a white ombre French with gold foil flakes placed along the fade line, sealed under a glossy top coat. At home, finish the ombre and cure it, then press tiny pieces of gold leaf onto a tacky layer of top coat with tweezers, arranging them near the gradient. Seal with two coats of top coat to keep the foil flat and smooth. Work with small pieces, because large flakes can lift at the edges, and keep the foil away from the free edge so it does not catch.
22. Matte Ombre French
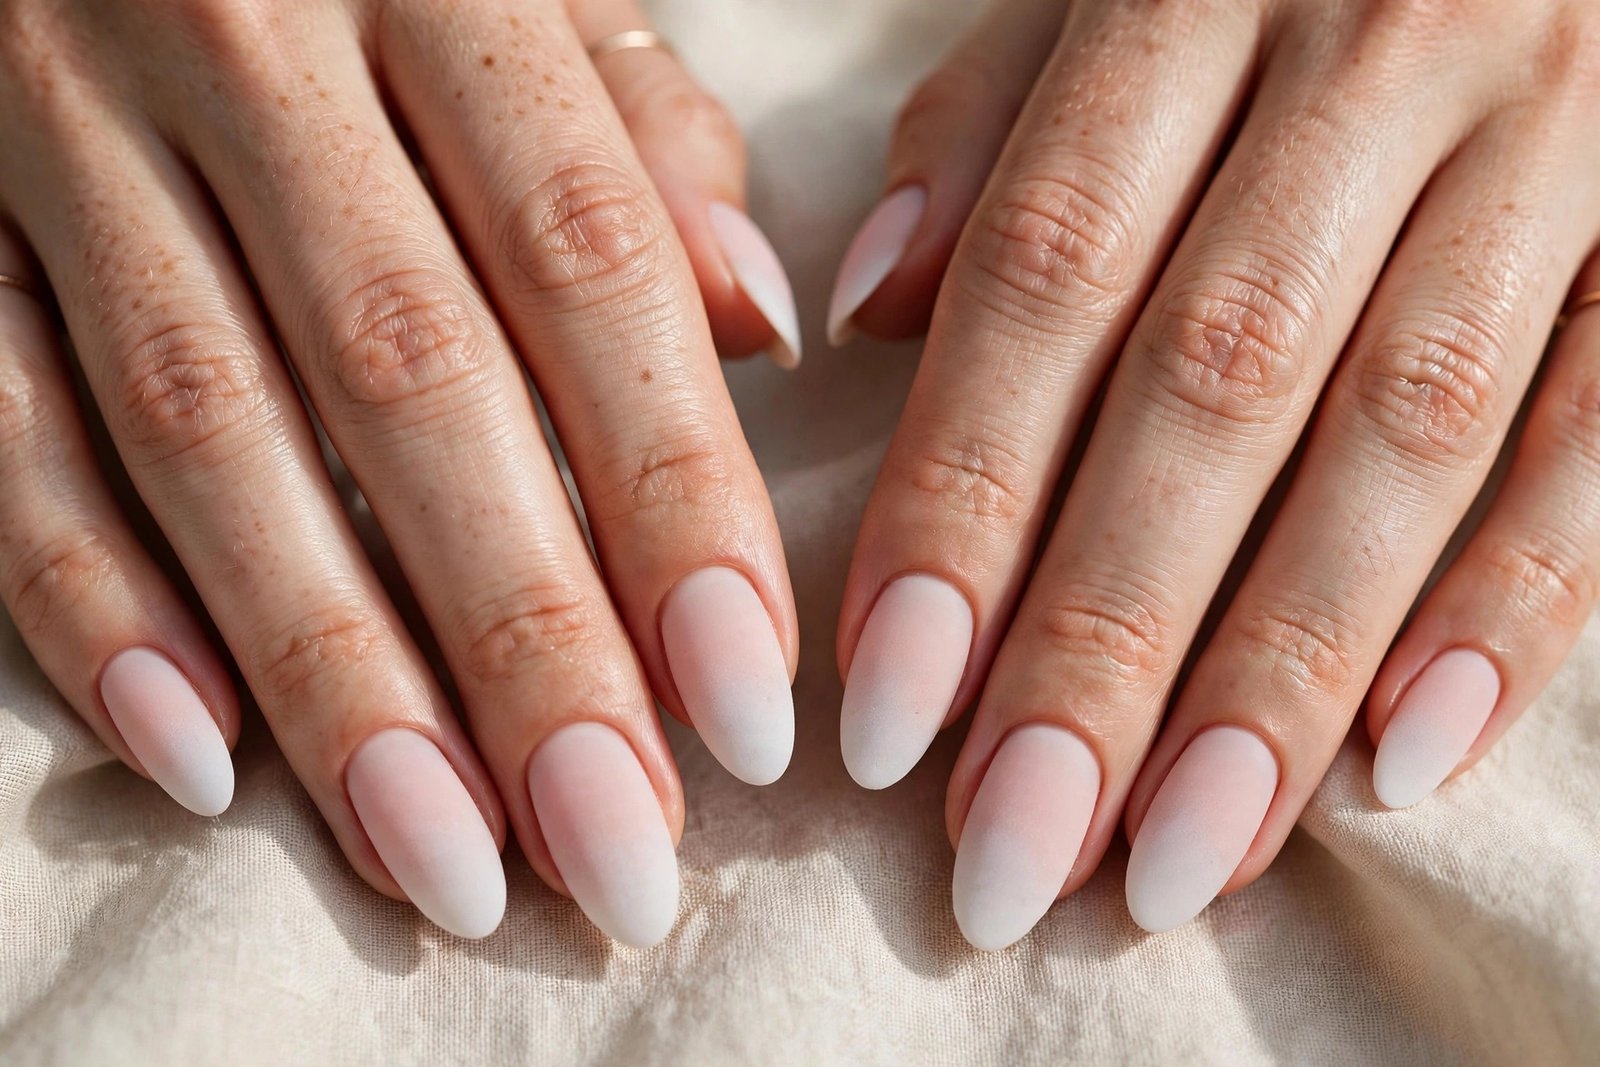
Matte ombre French nails take the classic white-to-pink gradient and finish it with a velvety matte top coat, which transforms the whole manicure. Without shine, the gradient looks softer and more powdery, like chalk pastel on paper, and the contrast between tip and base becomes gentler and more diffused. The matte finish also makes the design feel modern and editorial, a little bit edgy and very different from the glossy French everyone expects. It is the same beloved gradient, wearing a completely different texture.
This design suits anyone who loves a modern, understated manicure and wants their ombre French to stand out without adding colour or sparkle. It flatters all skin tones and all nail shapes, and it looks especially good on short and square nails where the matte texture feels clean and architectural. It is a wonderful choice for autumn and winter, for office wear and for pairing with matte lipstick or a suede outfit. If you love the ombre French but find glossy nails too shiny, matte is your answer.
Ask the salon for a white ombre French finished with a matte top coat, and request a velvety, even matte rather than a patchy one. At home, complete the ombre as usual with a glossy finish first, then apply a matte top coat and let it dry fully without touching anything. Matte top coats show every fingerprint and can look uneven if applied too thickly, so use one thin, even layer. Avoid hand cream on the nails themselves, because oils can create shiny patches on a matte finish.
23. Square Ombre French
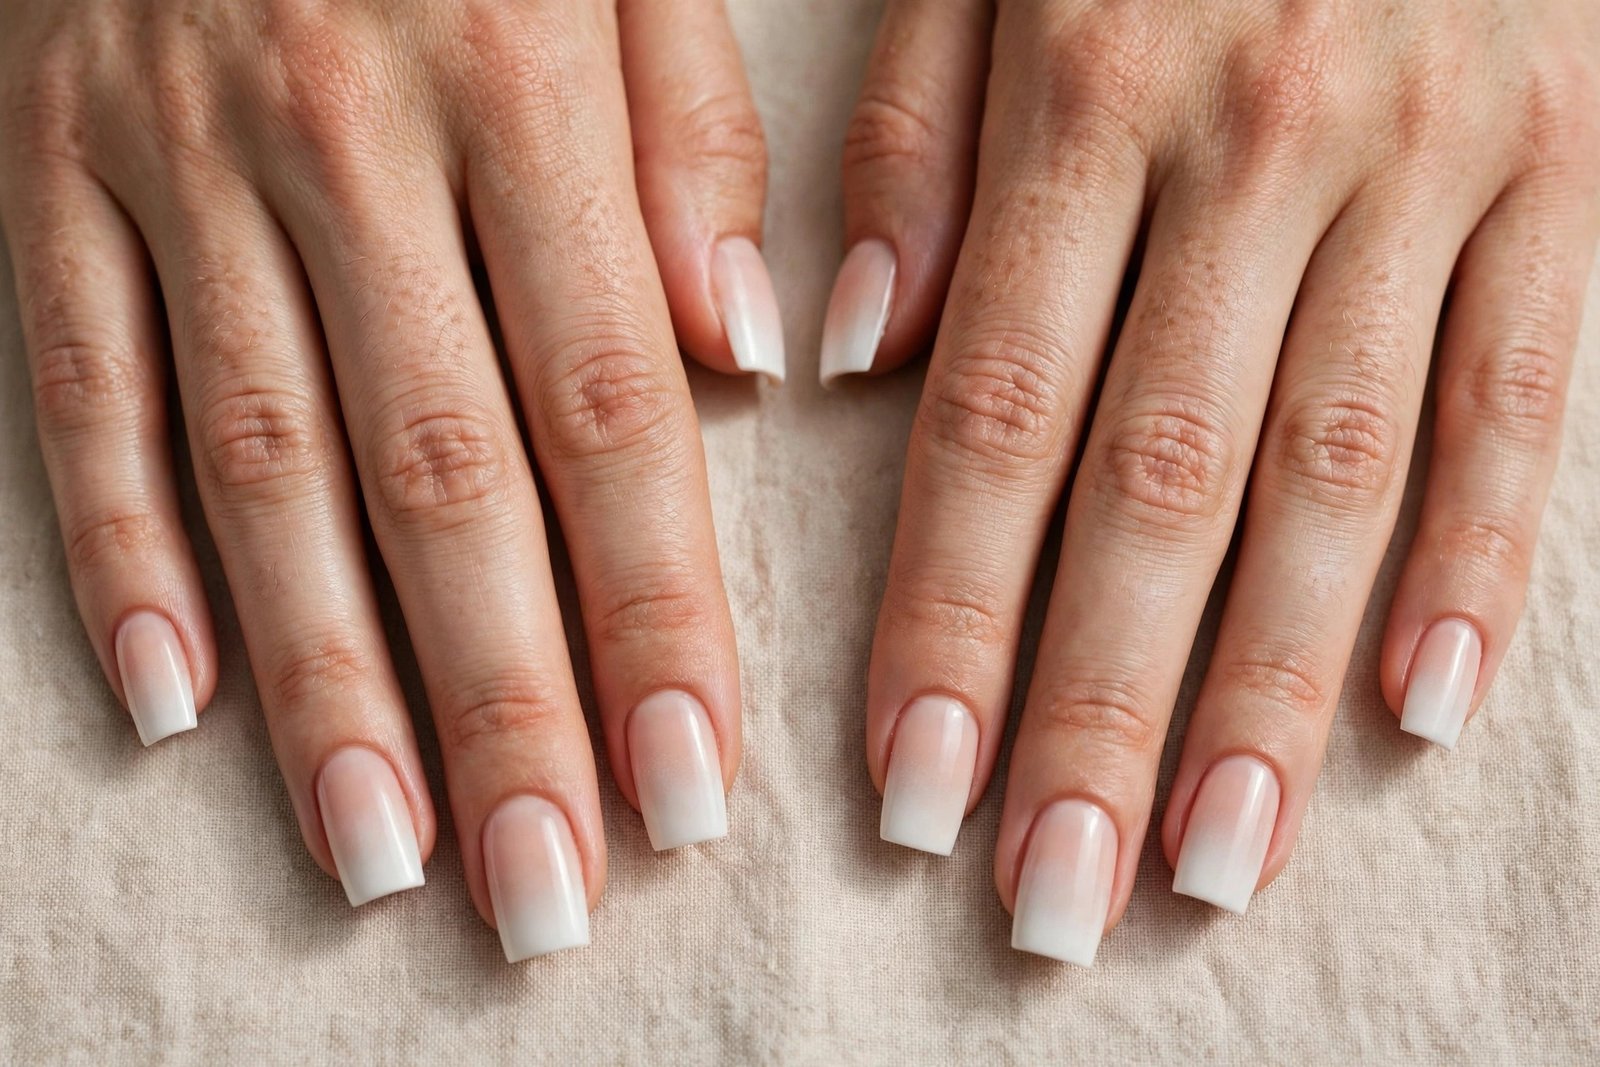
Square ombre French nails pair the soft gradient with a crisp, straight-edged square shape: a white tip fading into a sheer pink base across a flat, clean free edge. The straight tip gives the fade a neat, geometric frame, so the gradient looks tidy and modern, while the soft blend stops the shape from feeling harsh. The contrast between the sharp square corners and the feather-soft fade is what makes this version so satisfying. A glossy top coat keeps the whole manicure looking sharp and polished.
This design suits anyone who loves a clean, structured nail shape and wants a French manicure that feels modern rather than vintage. It flatters longer nail beds and longer fingers, and it is a favourite for office wear, where the square shape reads as neat and professional. It also suits people who type all day, because the straight edge is sturdy and less likely to snag than a pointed shape. If you love the classic French but want it with a contemporary edge, the square ombre is the perfect update.
Ask the salon for a square shape with straight sidewalls and a white ombre fade, using a sponge or airbrush for the smoothest blend. At home, file the nails square first, keeping the corners slightly softened so they do not catch, then sponge the white polish onto the tips in thin layers. Square tips show an uneven fade more easily, so keep the sponge flat against the nail and build the colour gradually. Cap the free edge with top coat to protect the corners from chipping.
24. Stiletto Ombre French
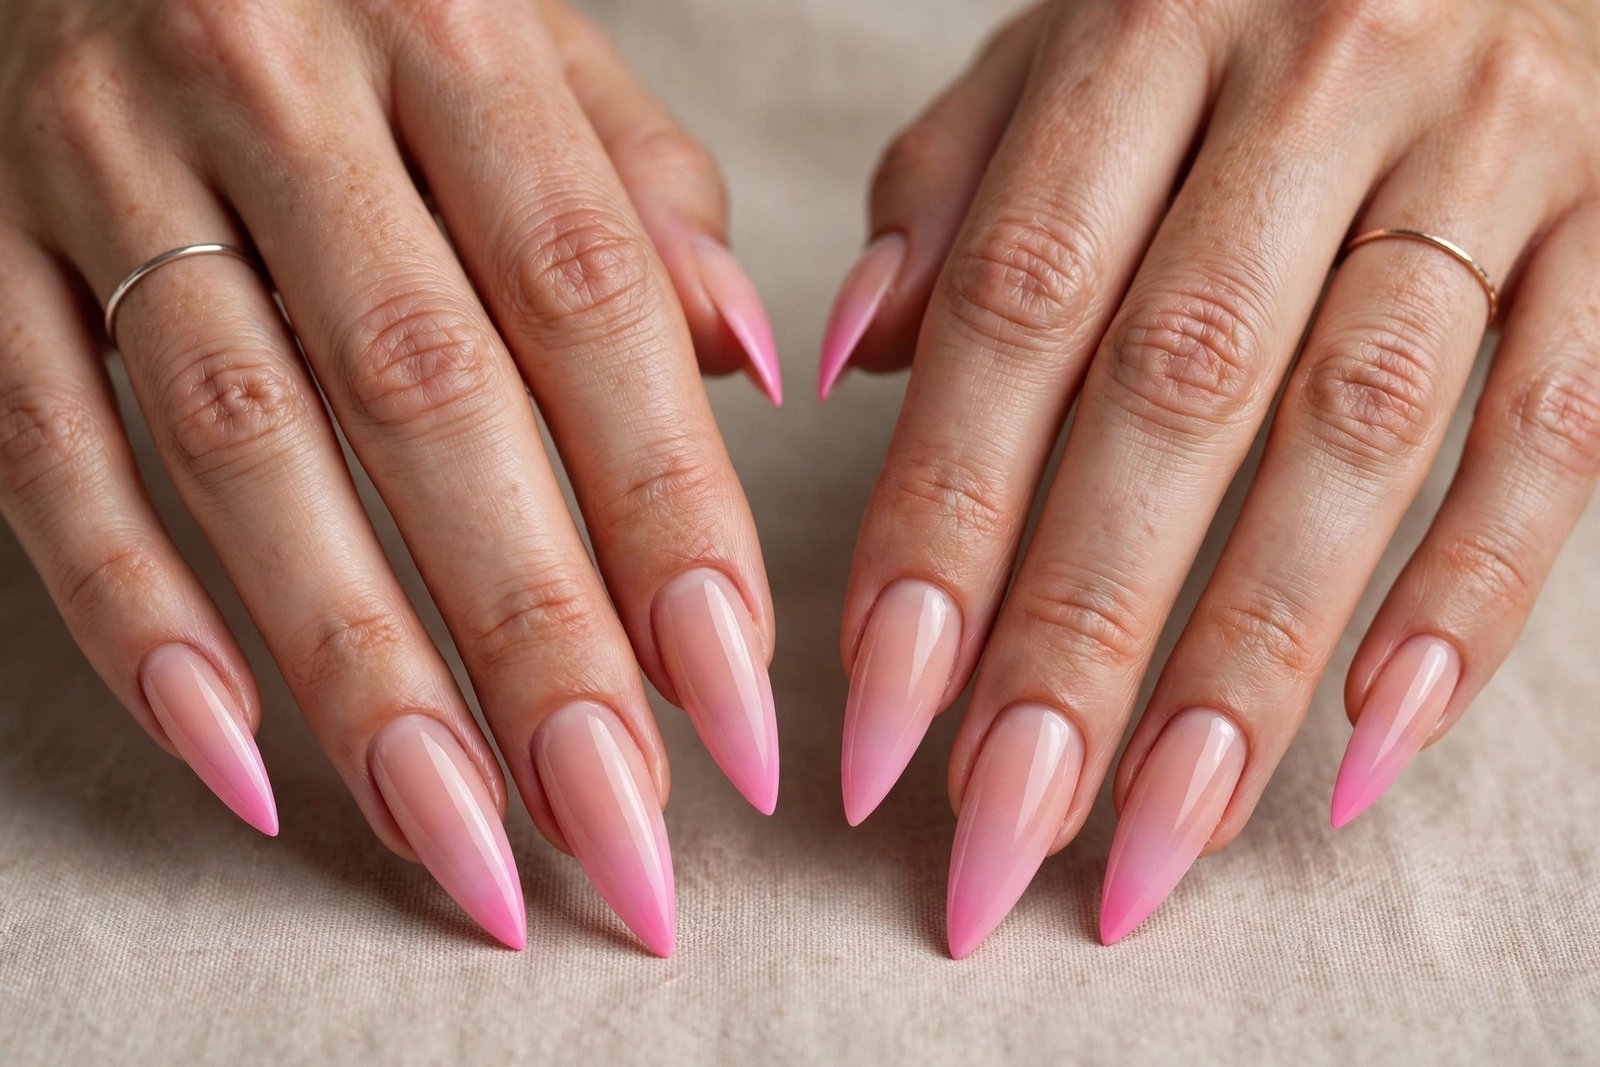
Stiletto ombre French nails bring the soft gradient to the most dramatic shape of all: a long, pointed nail with a white or pink tip fading into a sheer base along its sharp, tapered length. The extreme length gives the fade an enormous canvas, so the gradient can stretch slowly and luxuriously from tip to cuticle, and the pointed shape makes the whole manicure feel glamorous and a little bit dangerous. The softness of the ombre balances the drama of the shape, so the result is striking but never harsh. A glossy finish completes the drama.
This design suits confident nail lovers who enjoy long, statement nails and are comfortable with the extra care they need. It is a favourite for photoshoots, for nights out and for special occasions, where the dramatic shape photographs beautifully. It also flatters the hands by making the fingers look exceptionally long and slender, and it pairs well with bold rings and evening outfits. If you want the most eye-catching ombre French in the room, the stiletto version is impossible to ignore.
Ask the salon for a stiletto shape built with acrylic or hard gel for strength, then a long ombre fade applied with an airbrush or sponge. At home on stiletto extensions, sponge the tip colour on in thin layers, following the taper so the fade stays even on both sides. Stiletto tips are fragile, so cap the point with top coat and avoid opening cans or tapping hard surfaces with your nails. Keep a spare nail file handy, and book infills promptly to keep the shape safe.
25. Ombre French with Pearls
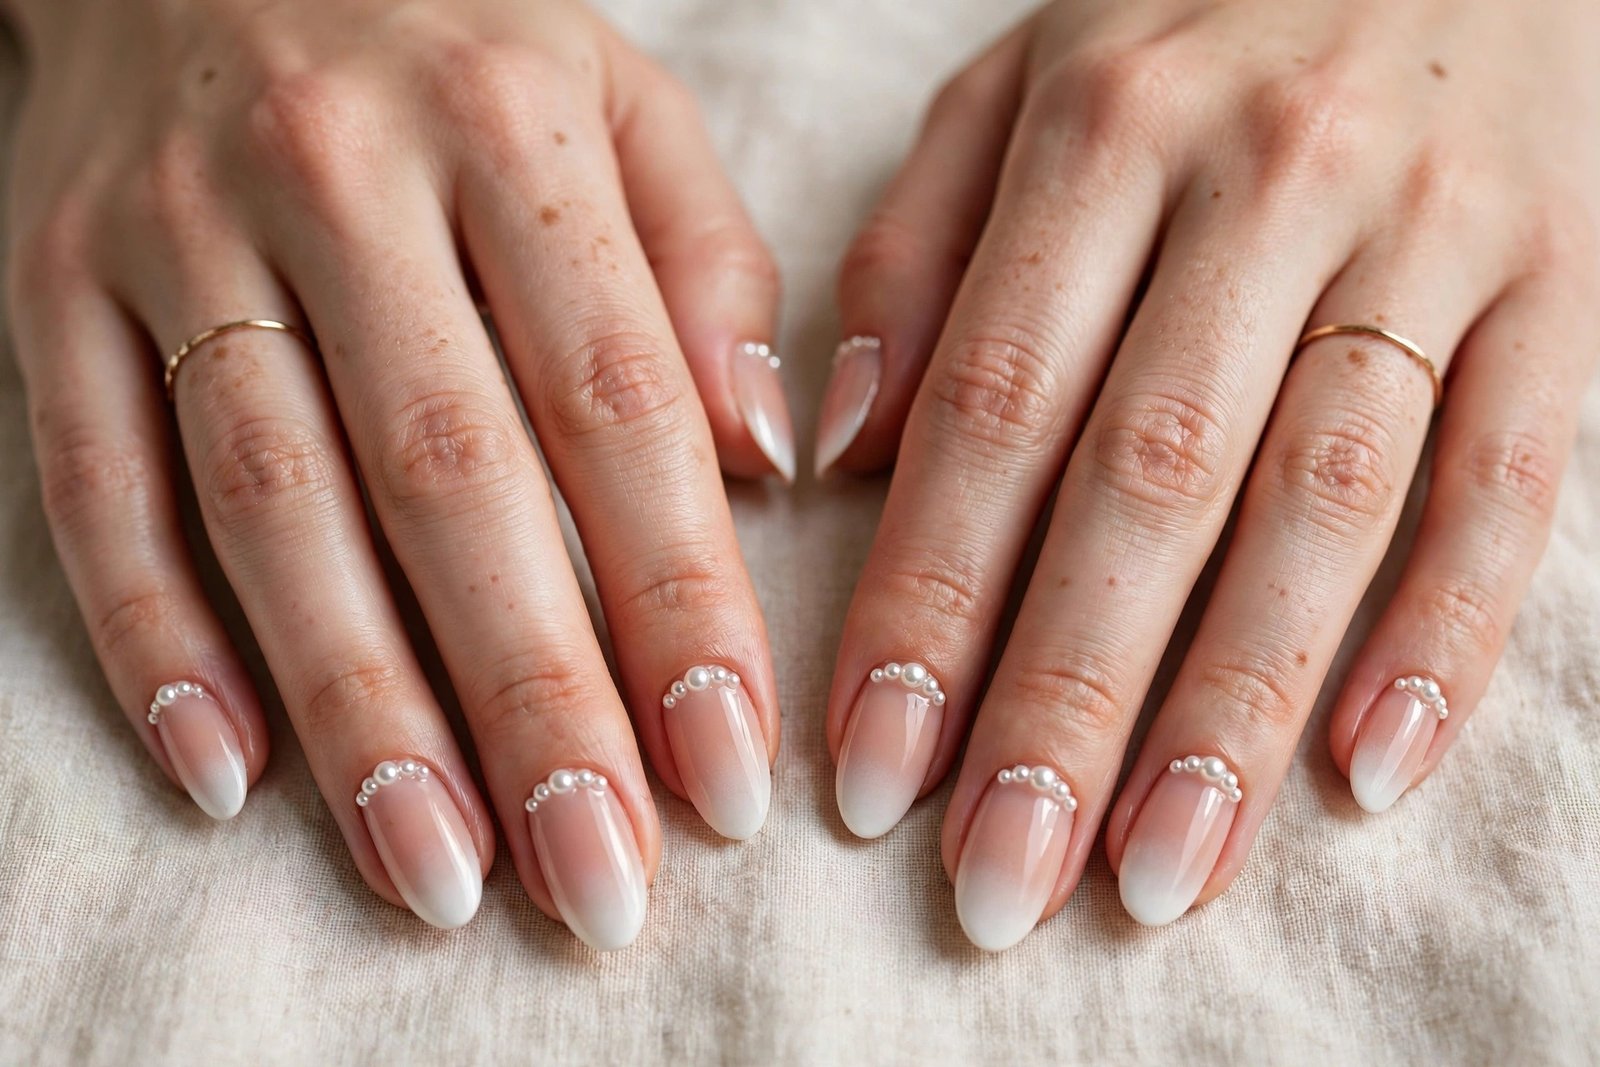
Ombre French with pearls pairs a soft white-to-pink gradient with tiny, lustrous pearls placed near the cuticle or along the fade line. The pearls can be a single small pearl on each nail for a whisper of luxury, or a small cluster on the ring fingers for a more bridal, jewellery-like effect. Because the pearls are round, white and softly reflective, they blend beautifully with the milky gradient underneath, and the whole manicure feels like something from a vintage jewellery box. A glossy top coat makes the pearls glow.
This design is made for brides, for engagement photos and for anyone who loves a romantic, vintage-inspired manicure. It suits medium and long nails best, where the pearls have room to sit without crowding the nail, and it flatters every skin tone because the white pearl is neutral and luminous. It also pairs beautifully with pearl earrings and necklaces, creating a coordinated, classic look. If you want a manicure that feels like an heirloom, the pearl ombre is the one to choose.
Ask the salon for a white ombre French with small flat-backed pearls set in builder gel near the cuticle, and request the pearls to be sealed around their edges so they stay secure. At home, finish the ombre and cure it, then place the pearls with a wax pencil and a drop of nail glue, pressing gently and curing if you use builder gel. Keep the pearls small and the placement symmetrical, and avoid soaking the nails in water for the first few hours. Remove them gently with acetone and a wooden stick.
26. Autumn Ombre French
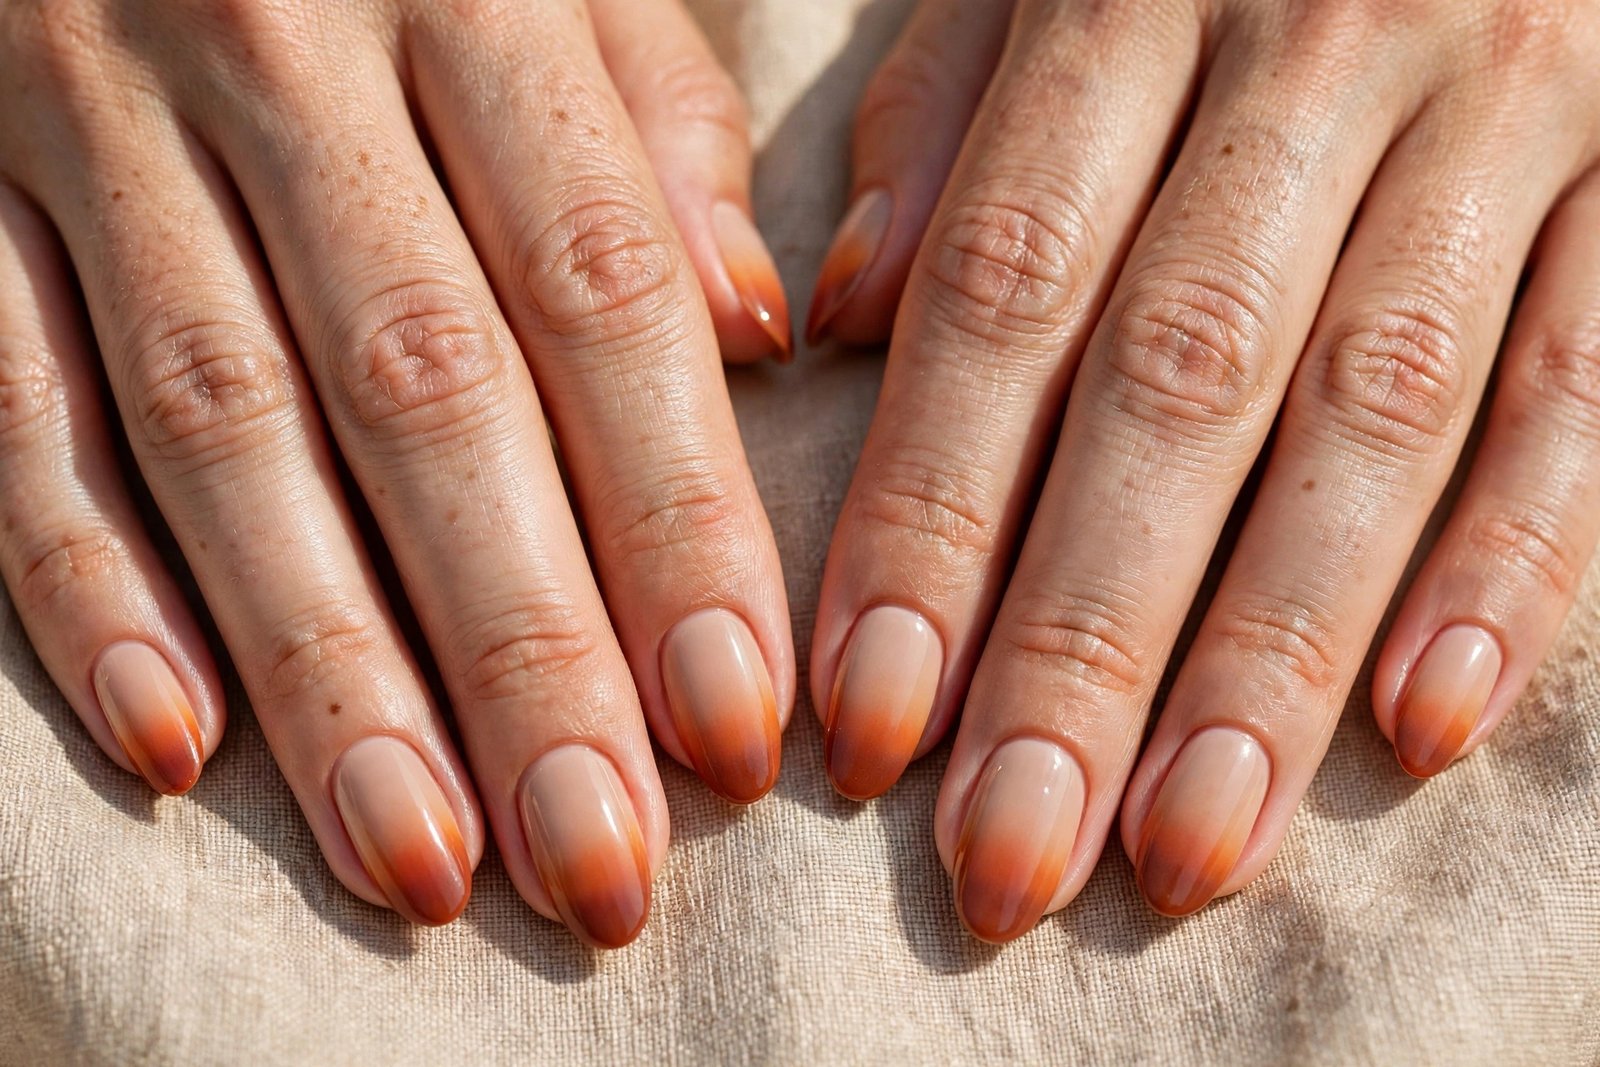
Autumn ombre French nails warm the classic gradient with seasonal colour: burnt orange, terracotta, deep rust or warm caramel tips fading into a sheer nude base. The warm tones feel like falling leaves and cosy knitwear, and the soft fade keeps even the deepest rust feeling gentle and wearable. The gradient can be long and smoky for a subtle effect, or shorter and richer for a bolder autumn statement. A glossy top coat deepens the warm colours and makes the whole manicure glow like late afternoon light.
This design suits warm skin tones beautifully, and it is a wonderful choice for autumn, for Thanksgiving gatherings and for anyone who wants their nails to match the season. It flatters all nail shapes, from short squares to long almonds, and it pairs beautifully with chunky knitwear, with leather jackets and with gold jewellery. It also suits people who love warm, earthy colours but find a solid terracotta manicure too heavy: the gradient gives you the autumn colour in a softer, more elegant dose.
Ask the salon for an autumn ombre French with a burnt orange or terracotta tip faded over a sheer nude base, and request the fade to be long and smoky. At home, sponge the autumn shade onto the tips in thin layers, building the colour gradually and feathering the edge with a clean sponge. Warm pigments can look patchy in one thick coat, so three thin layers will always give a smoother result. Finish with a glossy top coat, and add a gold foil flake or two if you want extra autumn sparkle.
27. Winter White Ombre French
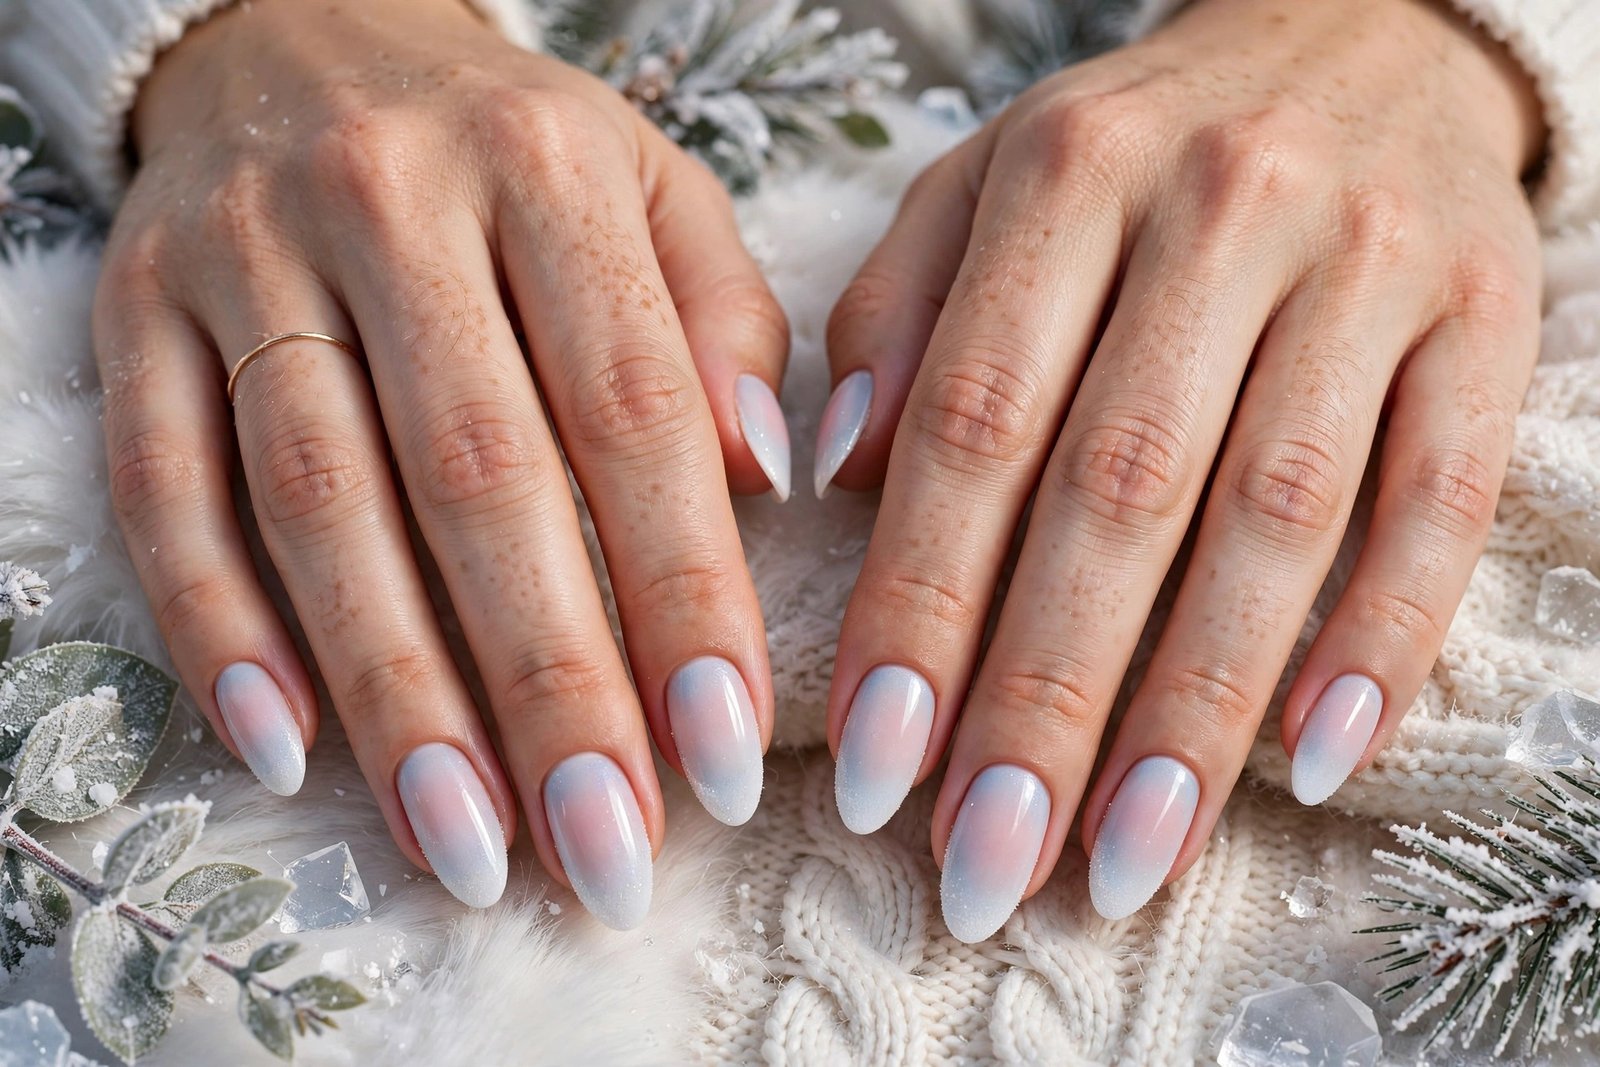
Winter white ombre French nails are the iciest version of the trend: a bright, snowy white tip fading into a pale, cool-toned base with the faintest hint of blue or pink. The white is crisp and clean, like fresh snow, and the fade is long and soft, so the manicure feels frosty without ever looking harsh. A touch of fine silver glitter or a pearly shimmer over the gradient can make it sparkle like ice in sunlight. The overall effect is clean, cool and quietly magical, like a winter morning.
This design suits cool skin tones and anyone who loves a fresh, wintry manicure. It is a beautiful choice for the holiday season, for winter weddings and for New Year celebrations, when icy whites feel perfectly seasonal. It looks stunning on almond and coffin shapes, where the long fade has room to show off the cool gradient, and it pairs beautifully with silver jewellery and with cosy white or grey outfits. If you want a manicure that feels like winter itself, this is the one.
Ask the salon for a winter white ombre French with a bright white tip faded over a pale, cool-toned sheer base, and request a long, soft blend. At home, sponge bright white gel polish onto the tips in thin layers, feathering the edge with a clean sponge before curing. White can look chalky if applied too thickly, so keep the layers sheer and build slowly. Finish with a glossy top coat, and add a dusting of fine silver glitter at the very tips if you want a frosty sparkle.
28. Bridal Ombre French
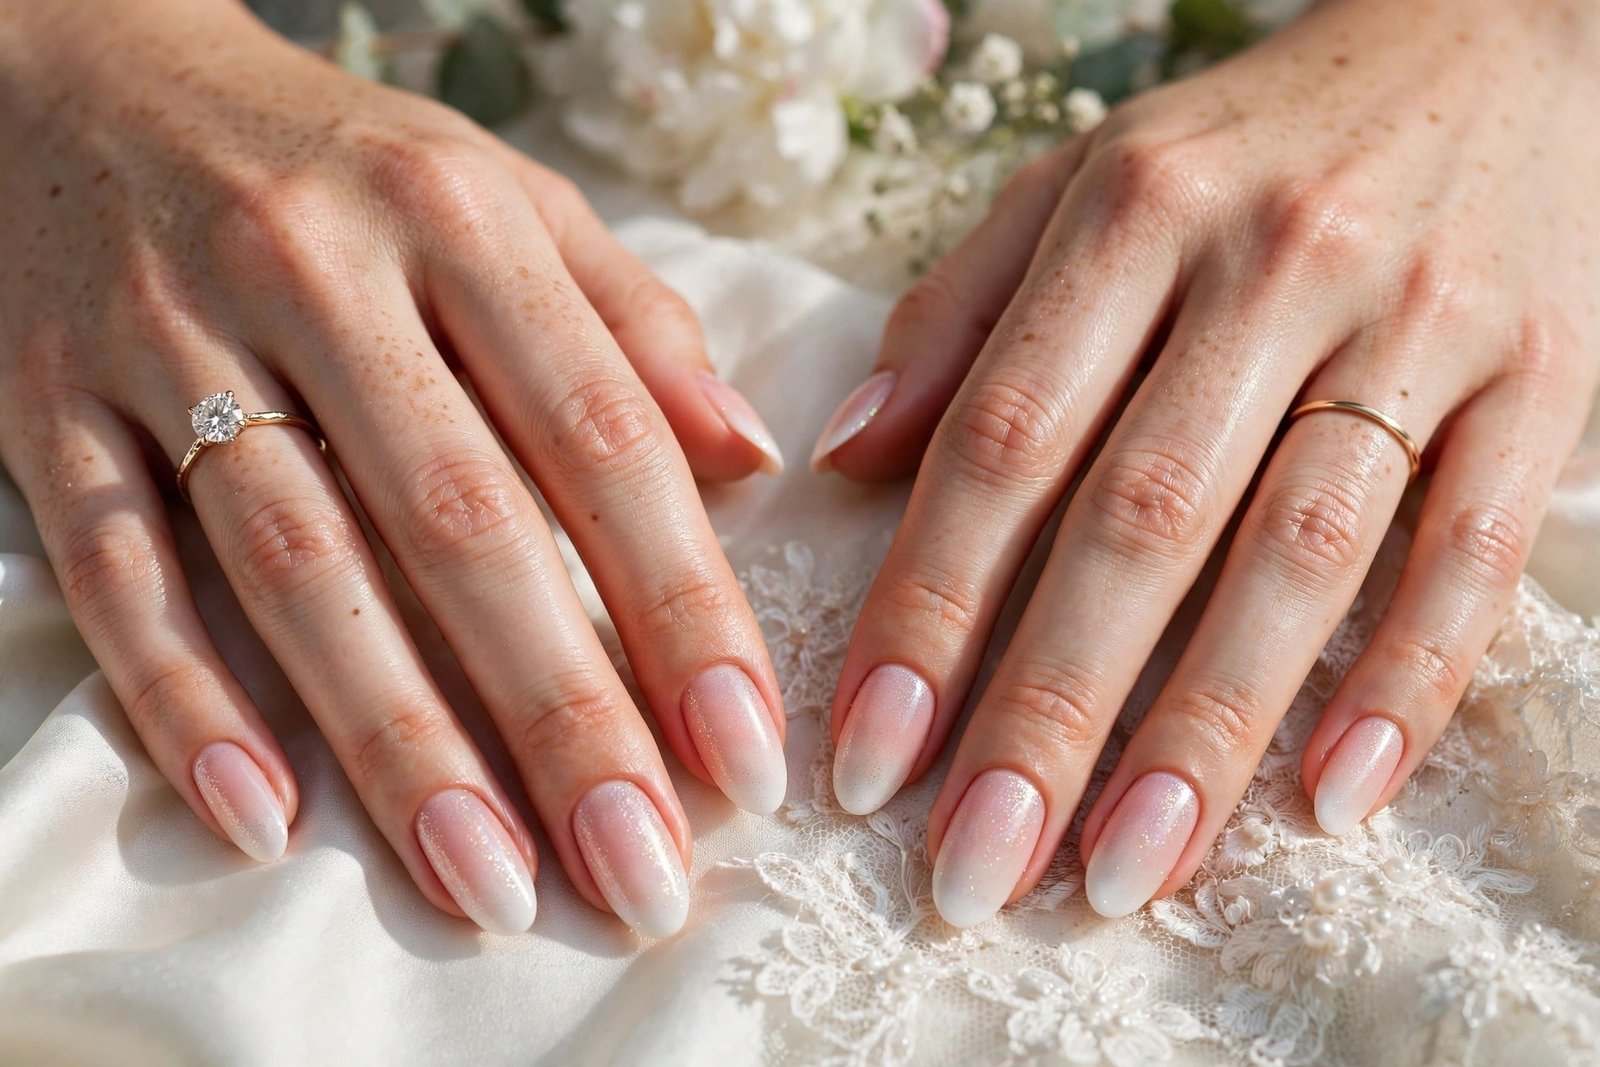
Bridal ombre French nails are the most romantic version of the trend: a flawless white-to-blush gradient, sometimes with the faintest shimmer or a single tiny crystal, designed to look perfect in wedding photographs. The fade is long, smooth and utterly seamless, the blush base is matched to the bride’s skin tone, and the whole manicure is finished with a glass-like top coat that catches the light in every photo. It is the classic bridal French, softened and modernised, and it looks beautiful holding a bouquet or showing off a ring.
This design suits every bride, every skin tone and every wedding style, from a grand ballroom celebration to a small garden ceremony. It flatters all nail lengths, though medium and long almond shapes photograph best, and it pairs with every dress colour, from pure white to champagne and blush. It also suits bridesmaids and mothers of the bride, since the same gradient can be worn in slightly different shades for a coordinated but not identical look. If you want one manicure that is guaranteed to look timeless in your wedding album, this is it.
Ask the salon for a bridal ombre French with a long, airbrushed fade and a glossy finish, and book a trial at least two weeks before the wedding so you can adjust the shade. At home, practise the gradient a few times before the big day, and keep the layers thin for the smoothest blend. Add a single tiny crystal on the ring fingers if you like, and finish with two coats of top coat for extra shine. On the day itself, apply cuticle oil and reapply top coat the night before for a flawless finish.
29. Ombre French with Tiny Daisies
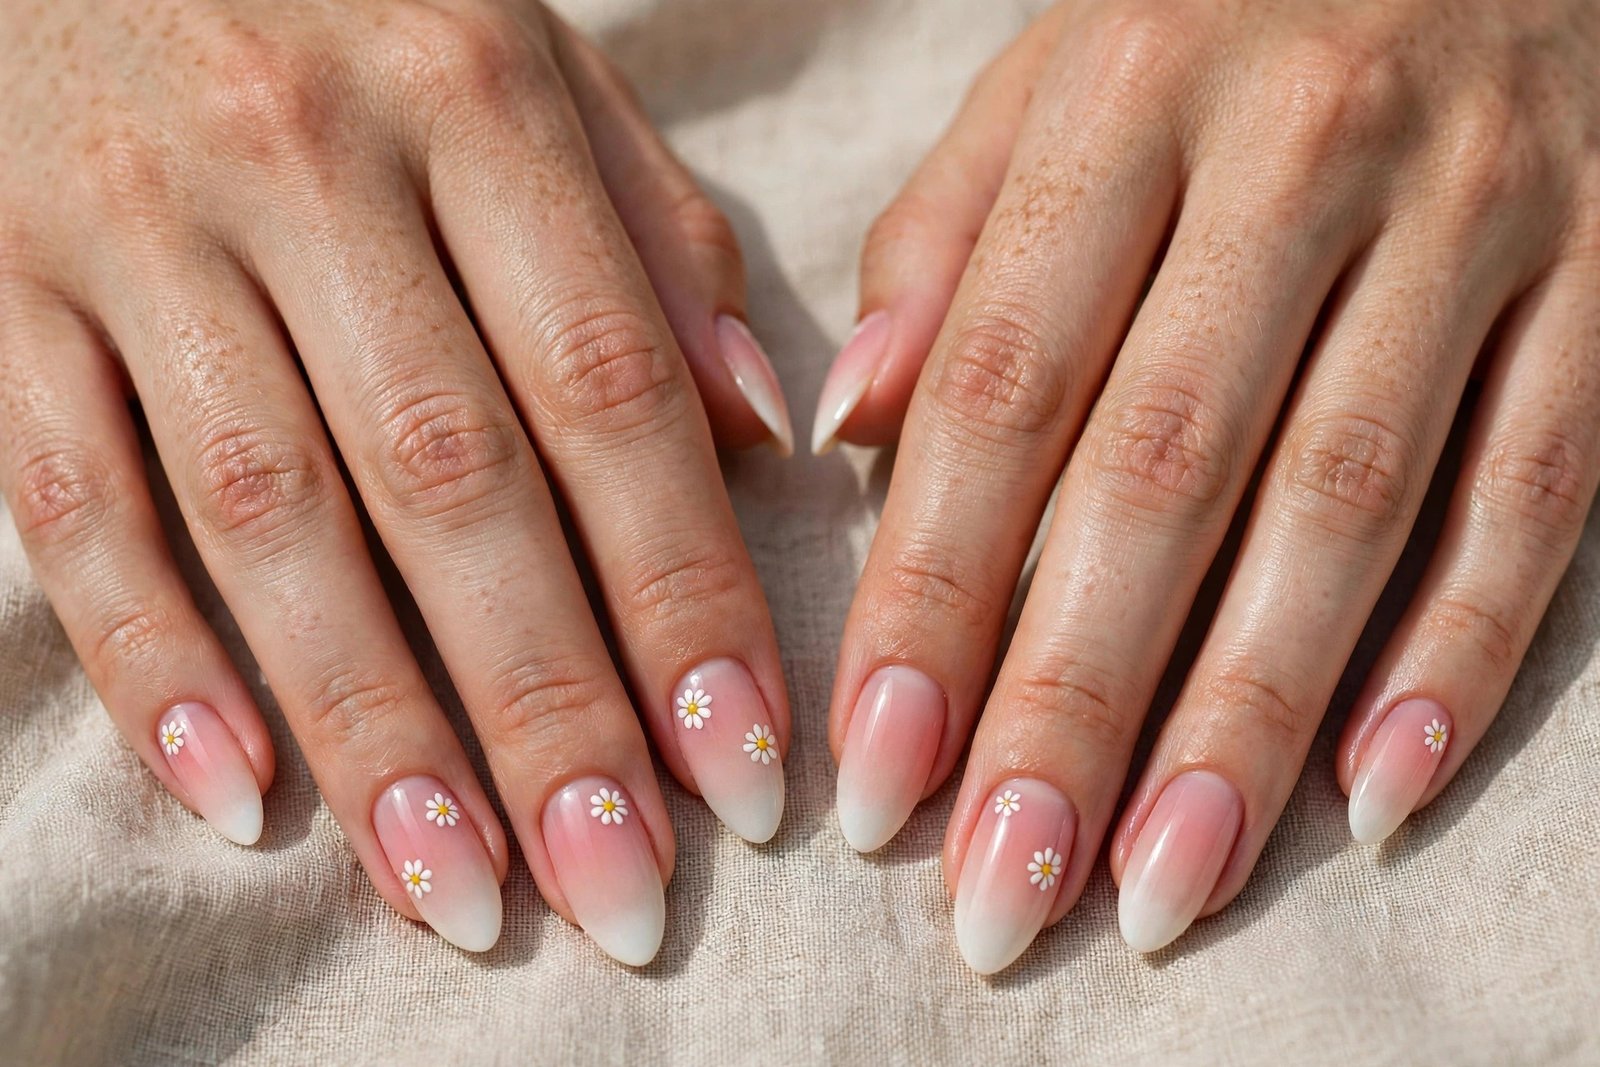
Ombre French with tiny daisies pairs a soft white-to-pink gradient with small, hand-painted daisy flowers scattered across the nails. The daisies are kept tiny and delicate: five white petals around a yellow centre, painted on one or two nails while the rest stay clean and classic. The flowers sit over the sheer part of the gradient, so they look like they are floating on the nail, and the overall effect is fresh, cheerful and handmade. It is the sweetest, most spring-like ombre French in this collection.
This design suits anyone who loves a playful, feminine manicure and wants a touch of spring all year round. It is a wonderful choice for spring weddings, for garden parties, for festivals and for holidays, when the daisies feel perfectly seasonal. It flatters short and medium nails, where the tiny flowers feel proportionate, and it pairs beautifully with floral dresses and with delicate gold jewellery. If you want a manicure that makes people smile, the tiny daisies will do it every time.
Ask the salon for a white ombre French with tiny hand-painted daisies on the ring fingers, and agree on the flower size before they start. At home, finish the ombre first, then paint the daisies with a dotting tool: five white dots in a circle for the petals, a yellow dot in the centre, and a tiny green stem if you like. Keep the flowers small and off-centre so they feel delicate. Seal with a glossy top coat, and practise the daisy on paper first if you are new to nail art.
30. Coral Ombre French
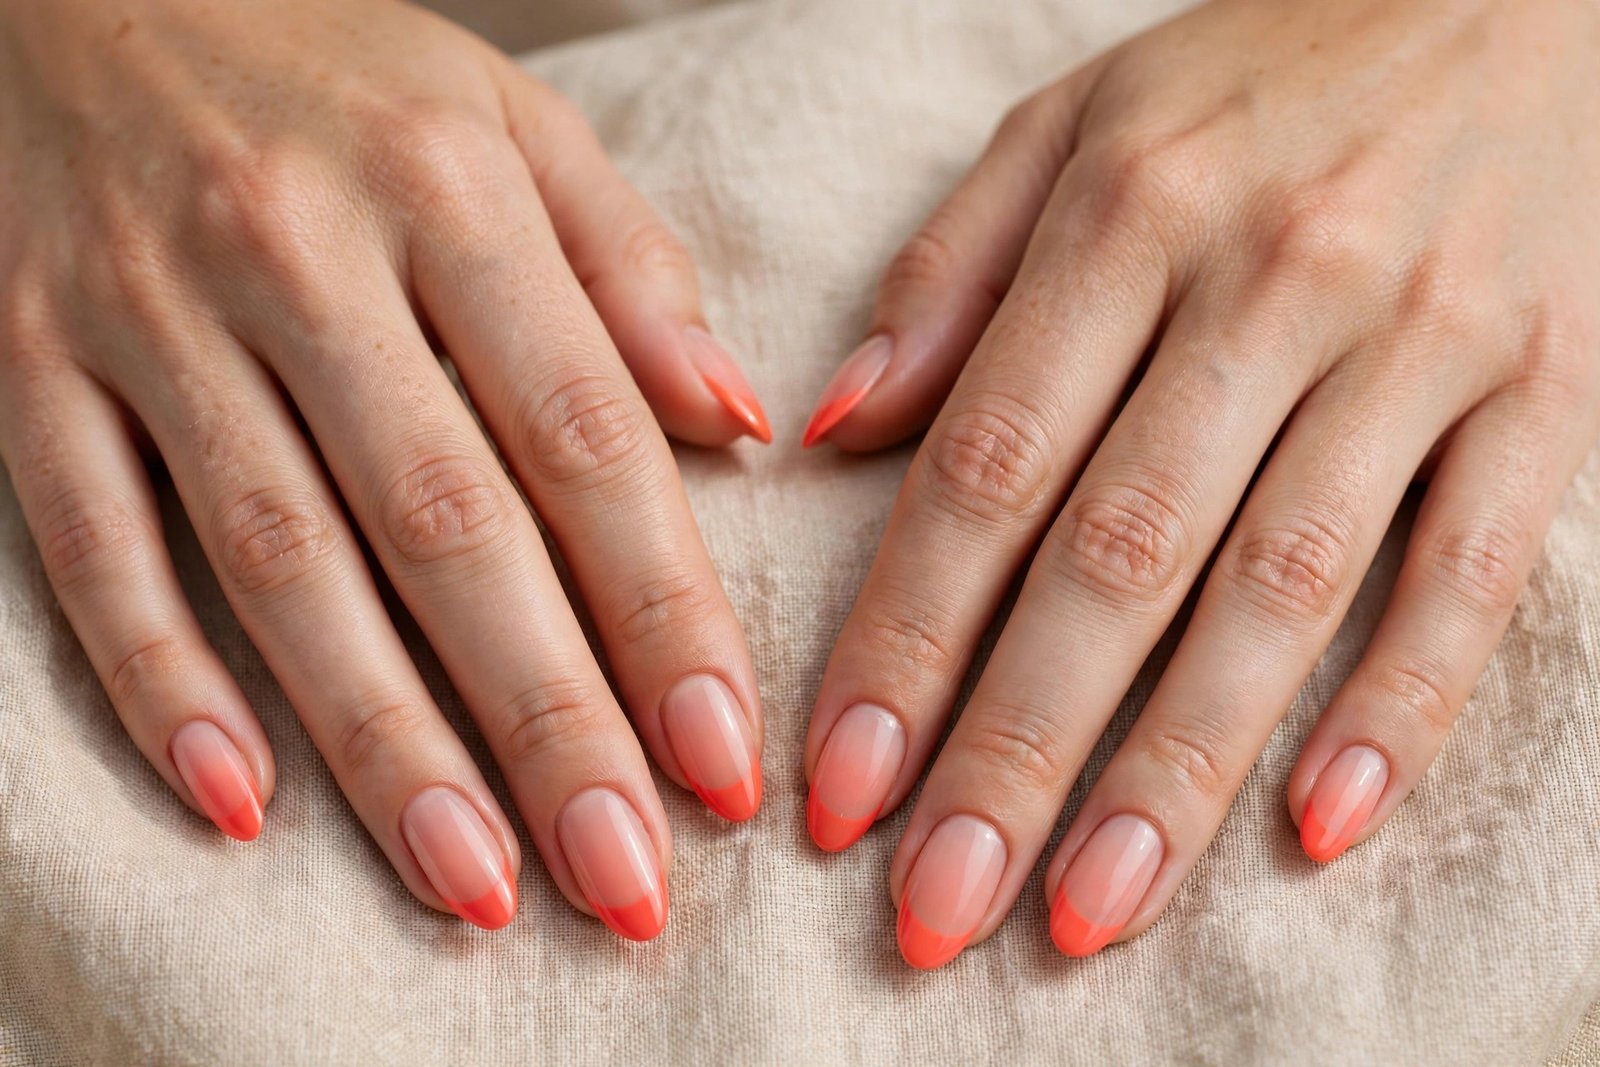
Coral ombre French nails bring a warm, tropical energy to the classic gradient: a vibrant coral tip fading into a sheer peachy base, like a sunset melting into the sky. The coral can be soft and peachy for a gentle daytime look, or brighter and more vivid for a holiday statement, but the gradient always keeps it feeling soft and wearable. The fade is long and smooth, so the coral thins out gracefully, and the overall effect is sunny, healthy and full of life. A glossy finish makes the coral look juicy and fresh.
This design suits warm and medium skin tones especially well, and it is a beautiful choice for summer, for beach holidays and for anyone who wants a French manicure with a warm, tropical twist. It flatters short and medium nails, where the coral tip feels like a pop of sunshine, and it pairs beautifully with gold jewellery, with white linen outfits and with a summer tan. It also suits people who find white tips too cool: the coral gives the same clean structure with a much warmer, friendlier glow.
Ask the salon for a coral ombre French with a sheer peachy base, and request a soft, slightly translucent coral rather than a neon shade. At home, sponge coral gel polish onto the tips in thin layers, building the colour gradually and feathering the lower edge with a clean sponge. Coral shades can look patchy in one thick coat, so three thin layers will always beat one heavy one. Finish with a glossy top coat, and apply cuticle oil daily to keep the manicure looking fresh and hydrated.
31. Lilac and Silver Ombre French
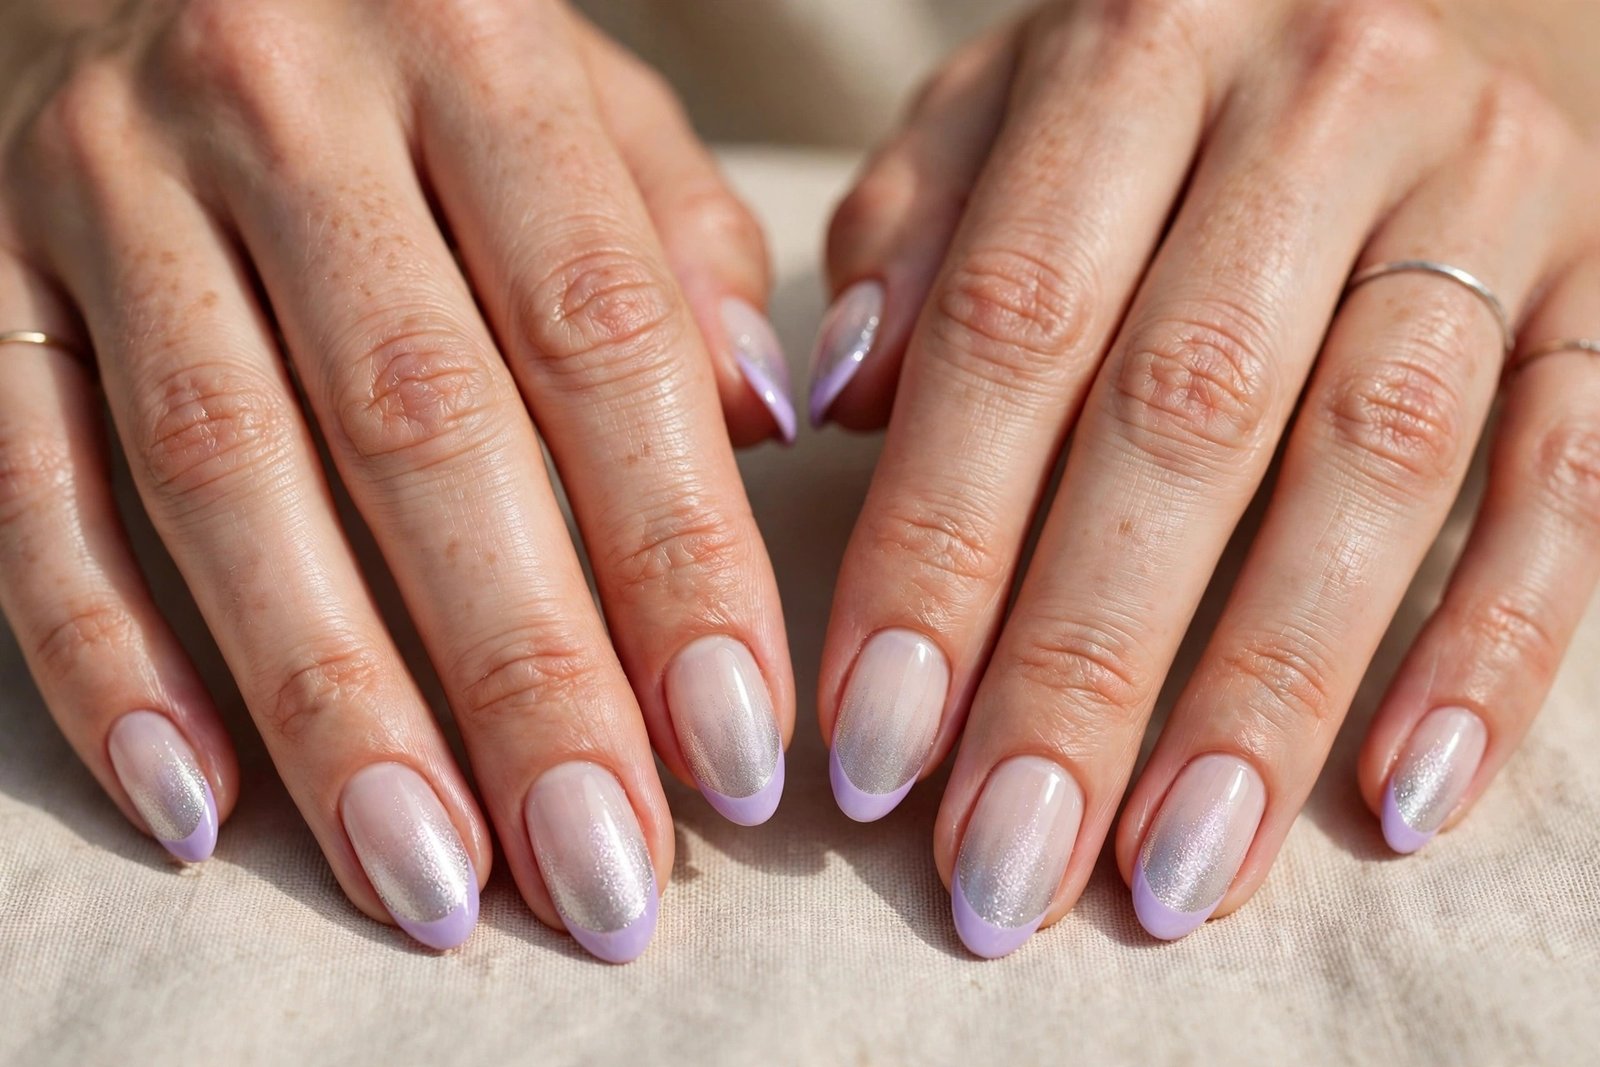
Lilac and silver ombre French nails combine a soft lilac tip with a whisper of silver shimmer, fading together into a pale, milky base. The lilac is pale and dreamy, the silver adds a cool, icy sparkle that catches the light, and the two colours melt into each other so gently that you cannot tell where one ends and the other begins. The result is a manicure that feels magical and a little bit otherworldly, like moonlight on a spring evening. A glossy top coat brings out the silver sparkle beautifully.
This design suits cool and neutral skin tones, and it is a lovely choice for spring, for winter evenings and for anyone who loves a manicure with a touch of fantasy. It looks beautiful on almond and oval shapes, where the curved fade echoes the nail shape, and it flatters short nails too when the lilac is kept pale. Pair it with silver jewellery, with lilac and grey outfits, or let it be the single cool accent in a warm wardrobe. If you love pastel colours with a little extra magic, this is your ombre French.
Ask the salon for a lilac ombre French with a fine silver shimmer dusted over the gradient, sealed with a glossy top coat. At home, sponge pale lilac gel polish onto the tips in thin layers, then add a dusting of fine silver glitter or a sheer silver shimmer polish over the fade before curing. Keep the silver light so it enhances the lilac rather than hiding it. Finish with a glossy top coat, and clean the cuticle line carefully for a professional, polished result.
32. Jelly Ombre French
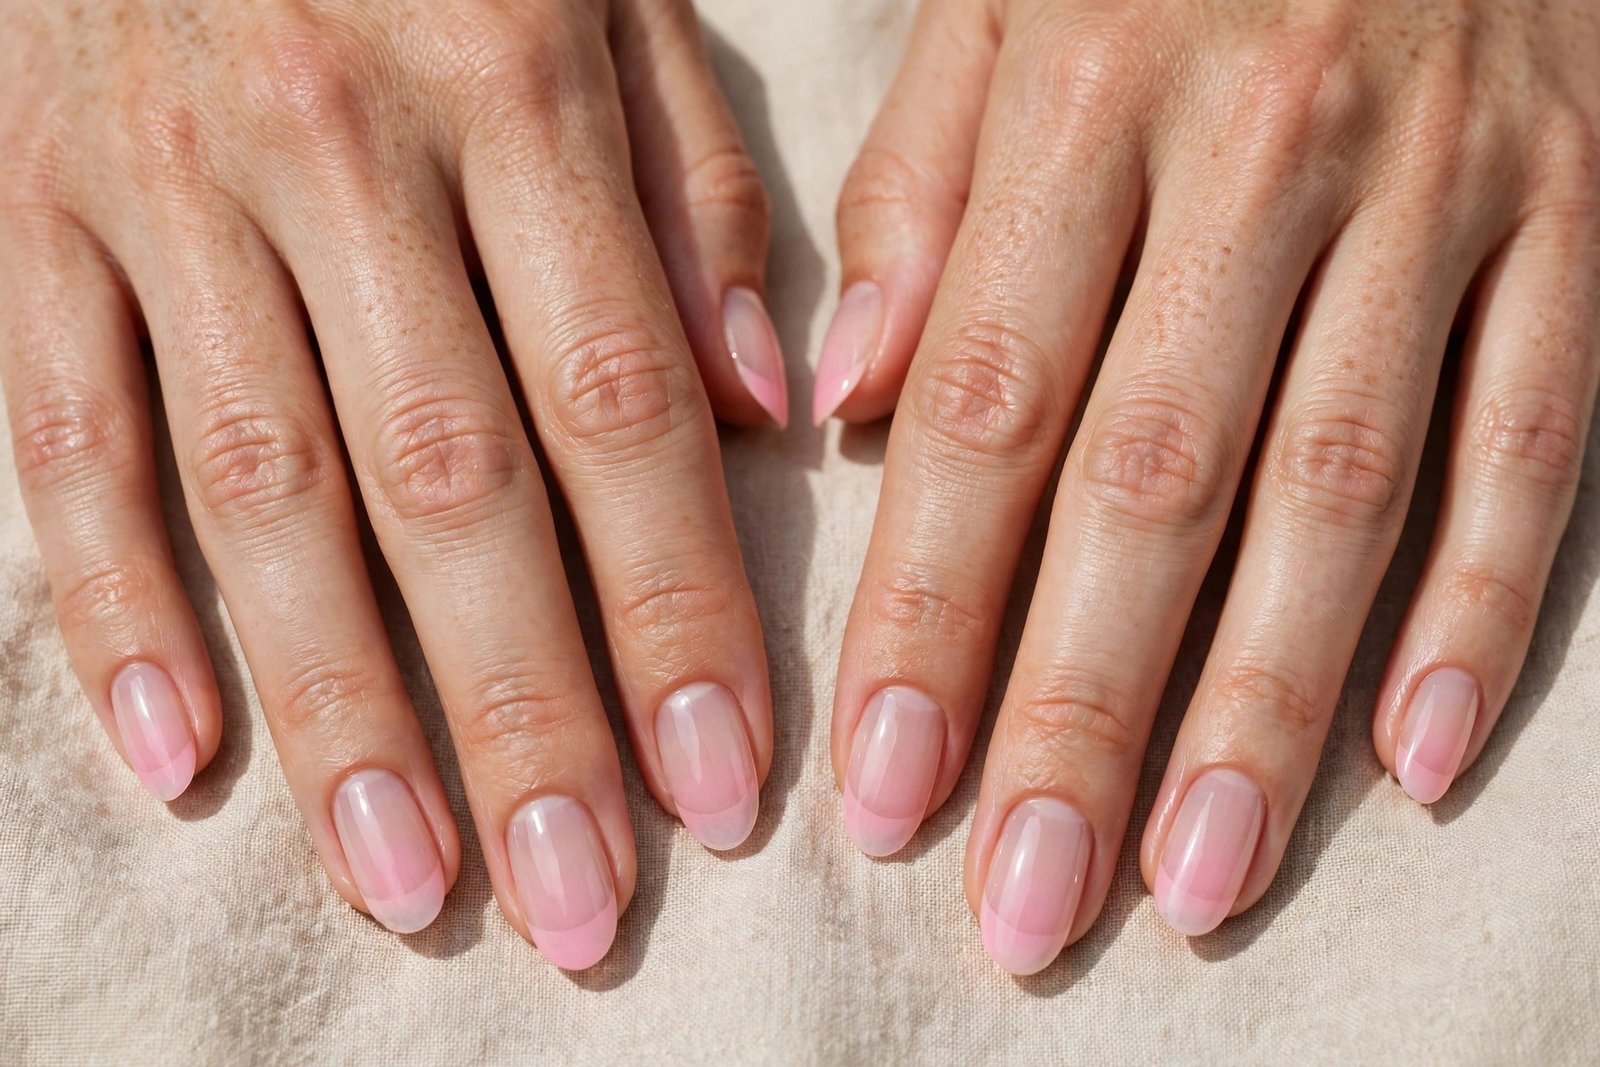
Jelly ombre French nails are the trendiest version of the style in winter 2026: a translucent, jelly-like tip in soft pink, peach or milky white that fades into an equally sheer, glossy base. The jelly finish is squishy and translucent, like coloured glass, so light passes through the nail and the gradient looks like it is glowing from within. The fade is long and dreamy, and the high-gloss top coat makes the whole nail look wet and juicy. It is the ghosted French look that Coveteur highlighted for the season, softened into a full jelly gradient.
This design suits anyone who loves the sheer, modern nail trend and wants the most fashionable ombre French of the moment. It flatters every skin tone, because the jelly translucency lets the natural nail show through, and it looks beautiful on short, natural nails where the jelly finish feels light and fresh. It is a wonderful choice for winter, for minimalists and for anyone who wants a manicure that feels current without being loud. If you want the ombre French that nail artists are most excited about right now, this is it.
Ask the salon for a jelly ombre French using translucent jelly gel shades, with the tip colour faded over a sheer jelly base and finished with a high-gloss top coat. At home, use sheer jelly polishes rather than opaque ones, sponging the tip colour on in thin layers and building the translucency gradually. Jelly shades need several thin layers to build colour, so be patient and cure between each one. Finish with two coats of glossy top coat to get the wet, glassy look that makes jelly nails so special.
How to Do Ombre French Nails at Home
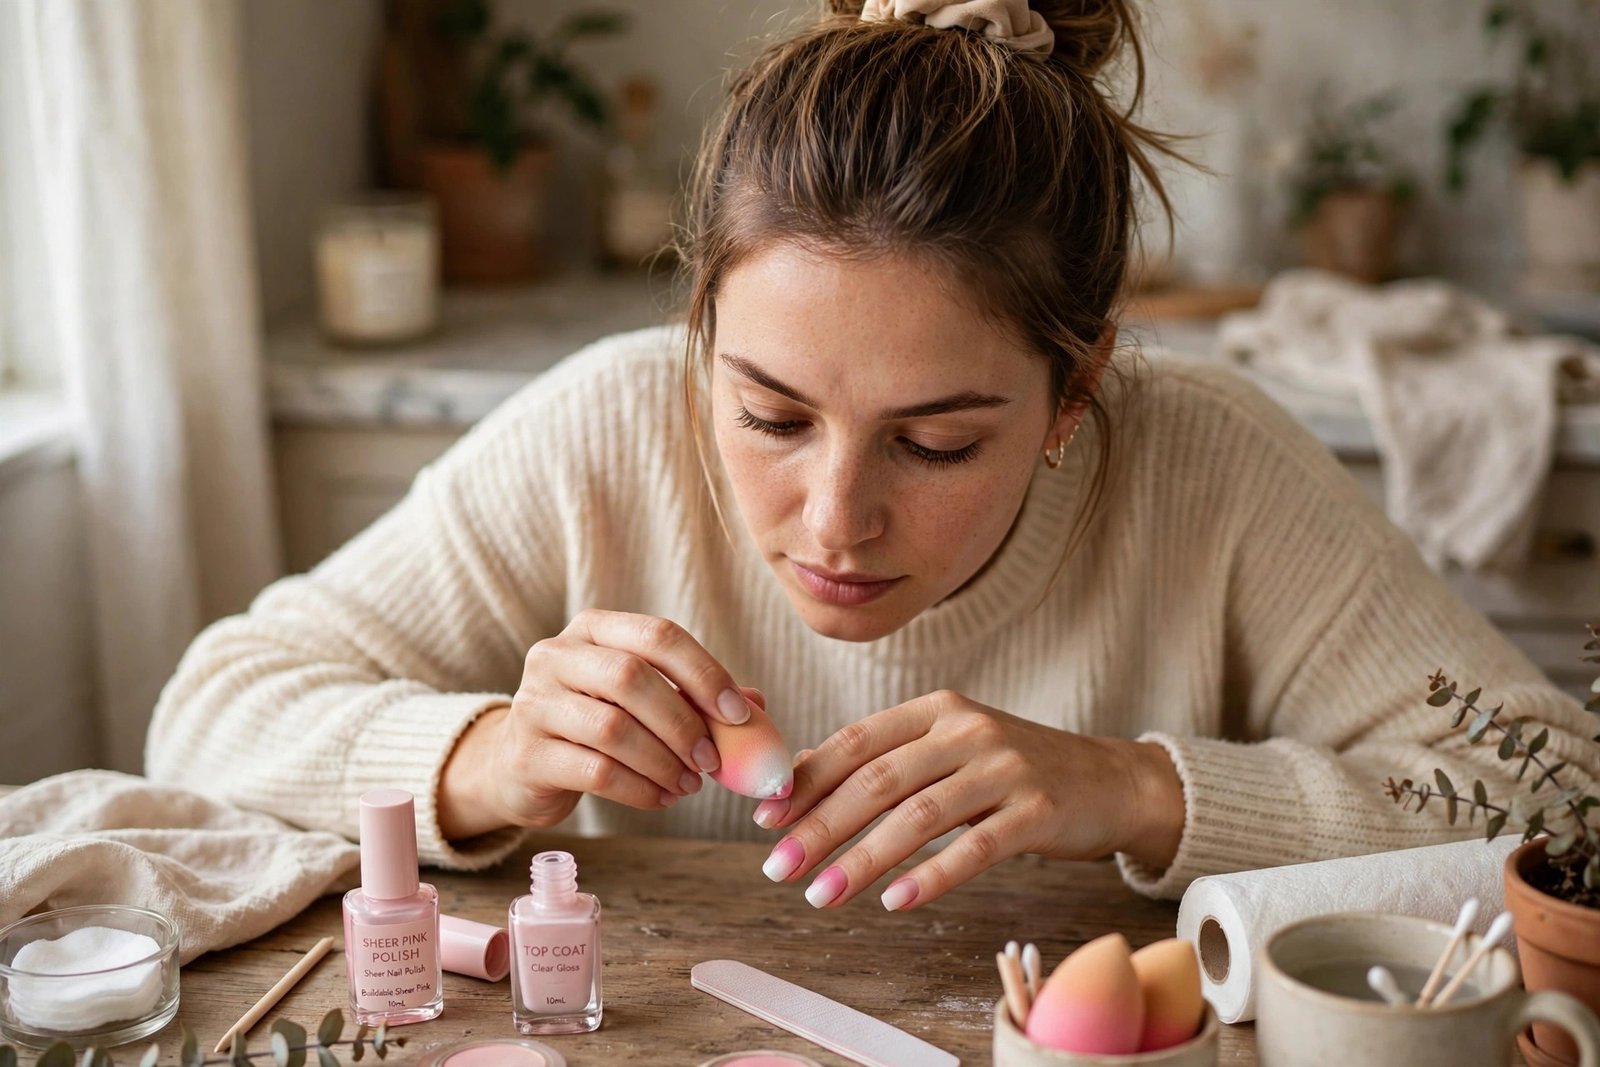
Start with clean, shaped nails and a good base coat, because a smooth foundation is what makes a gradient look professional. Push back the cuticles gently, file the nails into your chosen shape, and buff the surface lightly so the polish grips evenly. Apply a sheer pink or nude base colour in two thin coats, letting each coat dry or curing it fully if you are using gel. This sheer base is the canvas for the whole ombre, so keep it even and streak-free. If the base looks patchy, add a third thin coat rather than one thick one, because thick layers are the enemy of a smooth fade.
The sponge is the secret weapon of the ombre French, and the technique is simpler than it looks. Take a small wedge of a makeup sponge and paint two stripes of polish onto it: your tip colour on one side and your base colour on the other, overlapping slightly in the middle. Dab the sponge gently onto the nail, starting at the tip and working downward, and repeat the dabbing three or four times, adding a little more polish to the sponge each time. The repeated dabbing is what creates the gradient, so keep the pressure light and even, and do not drag the sponge across the nail.
For the smoothest, most professional fade, work in thin layers and cure or dry between each one. After the first sponged layer, look at the fade: if the line between the colours is still visible, add a second layer with the sponge, overlapping slightly lower than before. A third layer will usually make the transition completely seamless. You can also feather the edge with a clean, dry sponge or a soft eyeshadow brush before curing, which softens any harsh spots. If you are using builder gel, the baby boomer technique works the same way: apply the pink builder gel, then fade white gel upward from the tip with a brush, curing between layers.
Once the gradient looks seamless, seal it with a top coat, and do not skip this step. A glossy top coat melts the two colours together visually, smooths any tiny texture left by the sponge, and protects the gradient from chipping. Apply one generous coat, cap the free edge by brushing the top coat across the very tip, and let it dry fully or cure it under the lamp. If you want a glass-like finish, add a second coat of top coat after the first has dried. For a matte version, use a matte top coat instead, but apply it in one thin, even layer.
Keeping an ombre French looking fresh is mostly about protecting the tips and feeding the cuticles. Wear gloves for washing dishes and cleaning, because water and chemicals lift polish from the free edge first. Apply cuticle oil every day to keep the skin around the nails soft and to stop the polish from peeling at the cuticle line. Reapply a clear top coat every three or four days to restore the shine and seal any tiny chips before they spread. With gel, an ombre French can last three weeks, and with regular polish, a good top coat will stretch it to ten days without losing the fade.
Frequently Asked Questions
What is the difference between ombre French nails and classic French nails?
The difference is the tip. A classic French manicure has a sharp, painted white line across the tip with a clear edge, while an ombre French fades the white gradually into a sheer pink or nude base, so there is no visible line at all. The ombre version looks softer, more modern and more forgiving, because the gradient hides tiny mistakes and makes regrowth far less obvious. Classic French feels crisp and traditional, while ombre French feels dreamy and blended. Both use the same colours, but the ombre finish is airbrushed rather than painted, which is why it photographs so beautifully and lasts longer between appointments.
Are ombre French nails the same as baby boomer nails?
Baby boomer nails are the most famous type of ombre French, but the two terms are not quite identical. A baby boomer is specifically a pink-and-white ombre French, with a soft white tip fading into a rosy pink base, and it is the original version of the look. Ombre French is the wider category, covering the same gradient technique in any colour: blue, lavender, peach, glitter, black and many more. So every baby boomer is an ombre French, but not every ombre French is a baby boomer. If you ask for a baby boomer at the salon, you will get the classic pink-and-white fade.
How long do ombre French nails last?
With gel polish or builder gel, an ombre French manicure usually lasts two to three weeks, and the gradient makes regrowth much less noticeable than a classic French, so it can stretch even longer without looking untidy. With regular nail polish, expect seven to ten days of good wear, longer if you reapply top coat every few days and wear gloves for cleaning. The fade itself does not wear off faster than any other design, but the tips can chip if you use your nails as tools. Daily cuticle oil and a fresh top coat are the simplest ways to extend the life of any ombre French.
Can I do ombre French nails at home?
Yes, ombre French nails are one of the most beginner-friendly salon looks to try at home, because the gradient hides small mistakes that a classic French would show. You need a sheer pink or nude base polish, a white or pastel tip colour, a small makeup sponge, and a glossy top coat. Sponge the tip colour on in thin layers, feathering the edge before it dries, and build the fade gradually rather than in one heavy coat. Gel polish gives a smoother result if you own a lamp, but regular polish works well too. Practise on one nail first, and you will be surprised how quickly the technique clicks.
What nail shape suits ombre French nails best?
Ombre French nails work on every shape, but each shape shows the gradient differently. Almond and coffin shapes give the fade the most room, so the gradient looks long, luxurious and dramatic, which is why they are favourites for weddings and special occasions. Square nails give the design a clean, modern frame, while short, rounded nails make the ombre feel subtle and practical for everyday wear. Stiletto shapes make the fade look bold and glamorous. The best shape is the one you already love and feel comfortable wearing, because the gradient flatters them all equally.
What colours work best for ombre French nails?
Classic white over sheer pink is the most popular and most flattering combination, and it suits every skin tone. Nude and beige tips are the most understated, while pastel shades like lavender, baby blue and peach add a soft touch of colour without losing the elegance. Glitter, rose gold and silver work beautifully for evenings and celebrations, and deeper shades like black, grey or burnt orange give the design a bold, seasonal edge. The key is contrast: the tip colour should be clearly different from the base, but the fade between them must stay soft and gradual.
How much do ombre French nails cost at a salon?
Prices vary by location and salon, but an ombre French manicure usually costs a little more than a classic French because the gradient takes extra time and skill. In most salons, expect to pay roughly twenty to fifty percent more than a standard French manicure, with gel or builder gel versions costing more than regular polish. Extras like rhinestones, pearls, gold foil or hand-painted flowers add to the price, usually a small amount per nail. Always ask for a quote before the appointment starts, and remember that a good ombre fade is worth paying for, because a rushed gradient shows every flaw.
Do ombre French nails work on short nails?
Yes, ombre French nails work beautifully on short nails, and they are one of the best designs for shorter lengths. The vertical gradient draws the eye along the nail, which creates the illusion of extra length, and the soft fade looks polished without needing a long tip to show it off. On short nails, keep the fade compact, with the colour concentrated near the tip and melting quickly into the base, so the gradient never overwhelms the nail. A sheer pink base and a soft white tip is the most flattering combination for short nails, and it hides growth exceptionally well.
How do I make my ombre French manicure last longer?
Start with a good base coat and thin, fully cured layers, because thick polish peels faster than thin polish. Cap the free edge with top coat every time you apply it, and reapply a clear top coat every three or four days to restore shine and seal tiny chips before they spread. Wear gloves for dishes, cleaning and gardening, and avoid using your nails to open cans or scrape labels. Apply cuticle oil daily to keep the skin flexible and stop lifting at the cuticle line. With these habits, a gel ombre French can last three weeks, and a regular polish version can stretch well past a week.
Are ombre French nails good for weddings?
Ombre French nails are one of the best choices for a wedding, and they are among the most requested bridal manicures in 2026. The soft white-to-blush gradient looks elegant in photographs, flatters every skin tone, and matches any dress colour, from pure white to champagne and blush. It also photographs beautifully holding a bouquet or showing off a ring, and the gradient hides regrowth, so the manicure still looks perfect on the day even if it was done a few days earlier. Add a single crystal or a tiny pearl for extra sparkle, and book a trial first to perfect the shade.
Conclusion
Ombre French nails have earned their place as the defining French manicure of 2026 because they do something no other version can: they keep the timeless elegance of the white tip while softening it into a dreamy, modern gradient. From the classic baby boomer to glitter, pastel, bridal and jelly variations, the 32 designs in this guide prove that one simple technique can create endless moods, and every single one flatters the hands that wear it. The blend is forgiving, the regrowth is invisible, and the finish looks expensive on every nail length and every skin tone. That is a rare combination, and it is why salons cannot keep up with demand.
Whether you book a salon appointment or try the sponge technique at home, start with the classic white ombre and let your confidence grow from there. Pick the shade that matches your mood, keep your layers thin, and always finish with a glossy top coat to melt the gradient together. Your nails will look polished, modern and effortlessly elegant, and the fade will keep looking fresh long after a classic French would have shown its age. Try one of these 32 designs this week, and discover why the ombre French is the manicure everyone is asking for in 2026.