Halo Braid Women 2026: 16 Heavenly Crown Braid Styles
The Halo Braid: 2026’s Most Heavenly Hairstyle
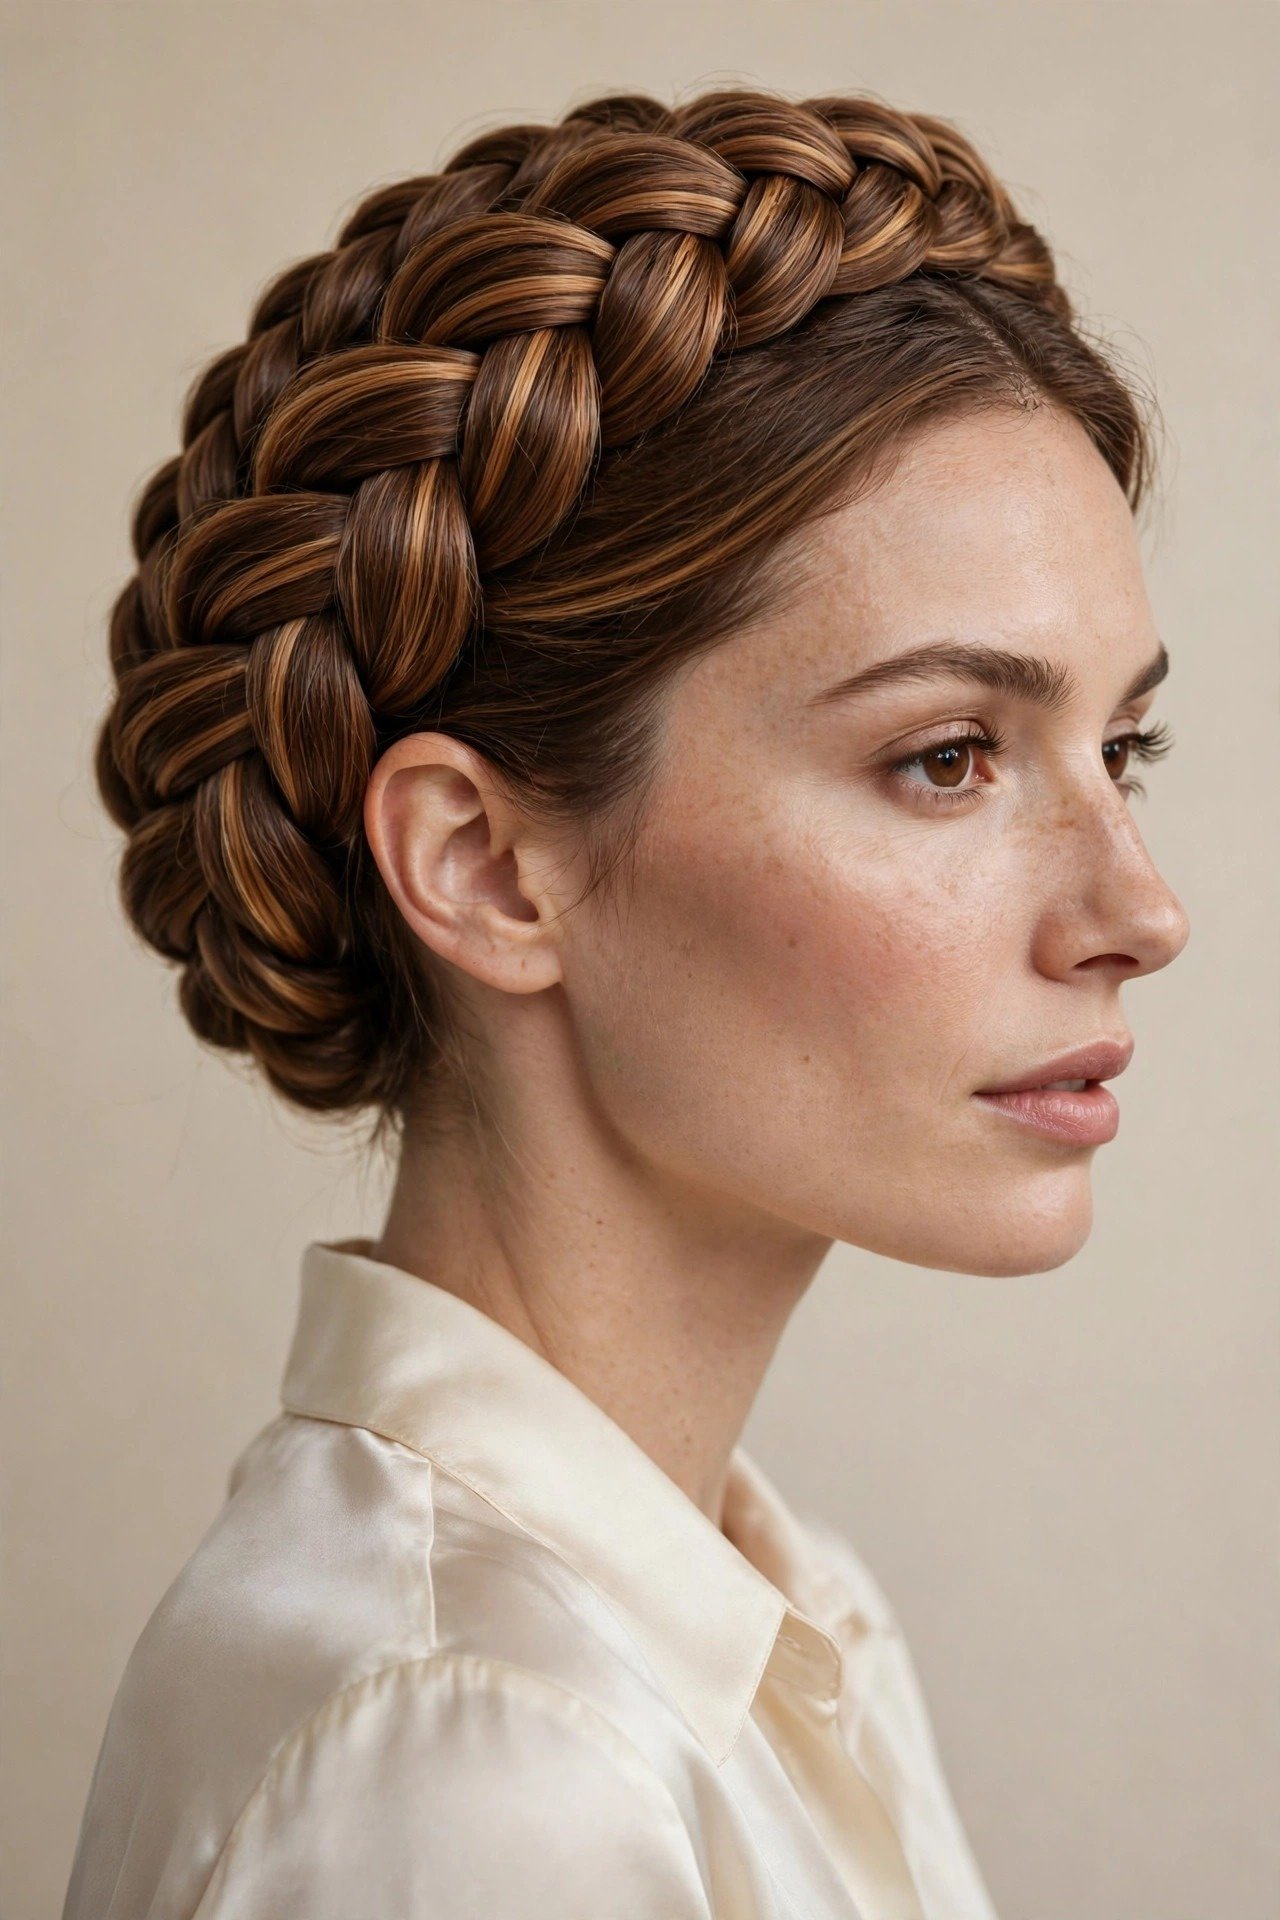
A halo braid is the one hairstyle that never needs an introduction at a wedding, a festival, or a Monday morning meeting — it simply arrives, radiant, and the room notices. In 2026, the halo braid has evolved from a romantic Pinterest fantasy into one of the most requested in-salon styles of the year, and for good reason: it is protective, it photographs like a dream, it works on nearly every hair texture, and it can be dressed up or down in under fifteen minutes once you know the mechanics.
The halo braid — also called the crown braid — is created by braiding the hair around the entire perimeter of the head so the plait forms a continuous ring, like a halo. Traditionally it is one long Dutch or French braid wrapped and pinned into place, but 2026’s versions are far more inventive: fishtail halos, rope-twist crowns, double Dutch circles, half-up halos, and bridal halos pinned with pearls and fresh flowers. Whether your hair is waist-length and thick or a shoulder-grazing bob that needs a little extension help, there is a halo braid variation engineered for you.
This guide is written the way a master braider would talk you through it in the chair: honest about what works on which hair type, exact about technique, specific about products, and blunt about the mistakes that make a halo braid fall flat — literally. Below you will find sixteen fully detailed halo braid styles for 2026, each with who it suits, exactly what to ask your stylist, a step-by-step method, the products that make it last, a maintenance schedule, and the pitfalls to avoid. By the end, you will know not just which halo braid to wear, but how to make it look expensive.
One more thing worth saying upfront: a halo braid is one of the most genuinely protective styles you can wear. Because the ends are tucked and pinned away from friction, wind, and shoulder-bag straps, a well-made halo braid can protect fragile ends for two to three days at a time. Stylists who specialize in protective braided updos will tell you the same thing — the halo is the crown braid that earns its name by guarding your hair while it turns heads.
16 Heavenly Halo Braid Styles for 2026
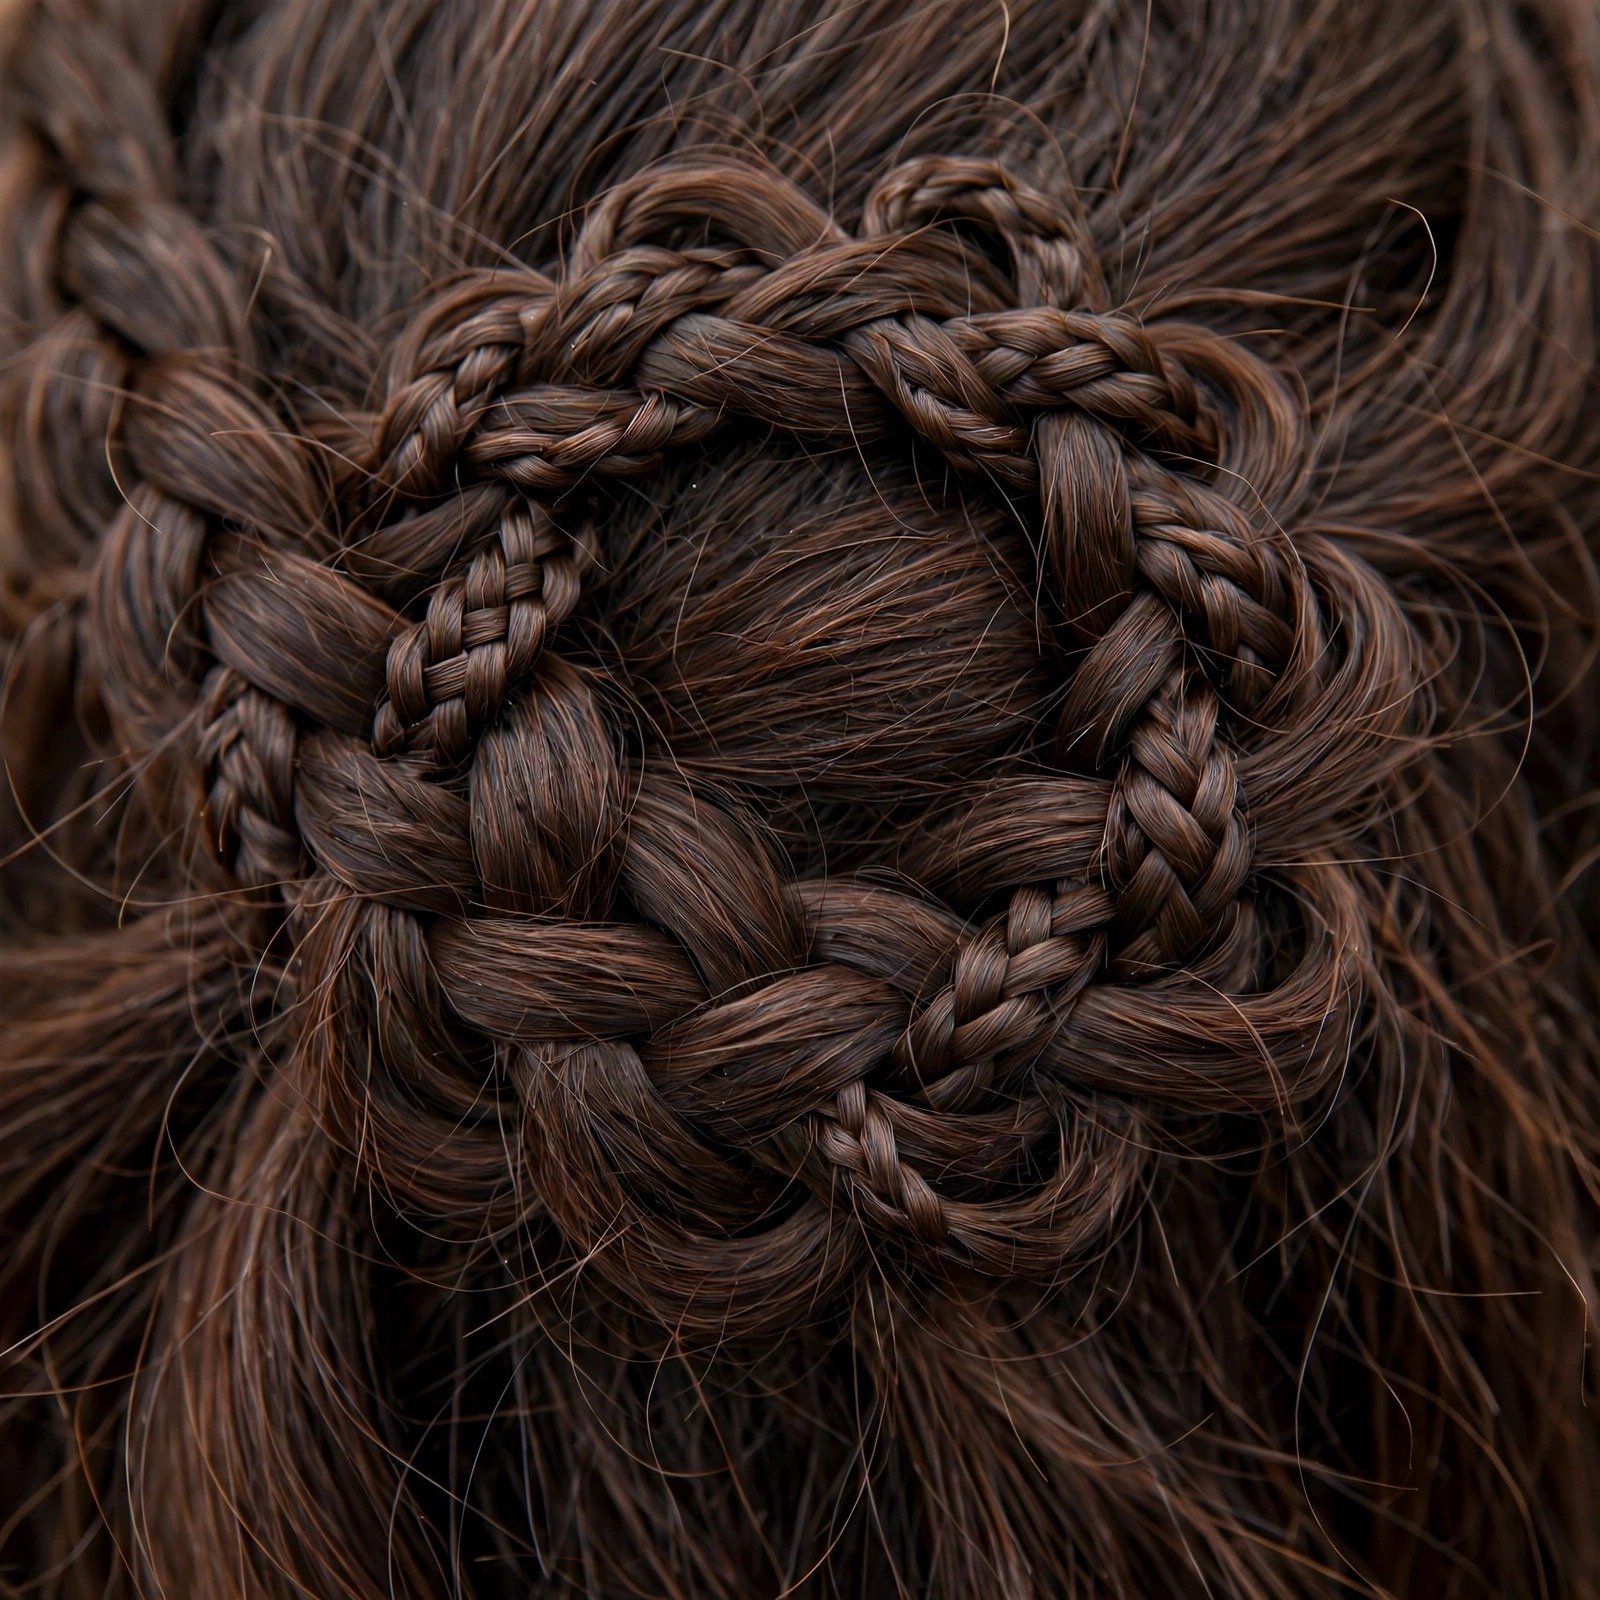
Every halo braid below is achievable at home with practice, though the bridal and event versions are worth booking a stylist for — a second pair of hands at the back of your head changes everything. Read each style’s “who it suits” note honestly, gather the products listed, and give yourself twice as long as you think you need on the first attempt. Speed comes with repetition; the first halo braid is a learning braid.
1. The Classic Dutch Halo Crown
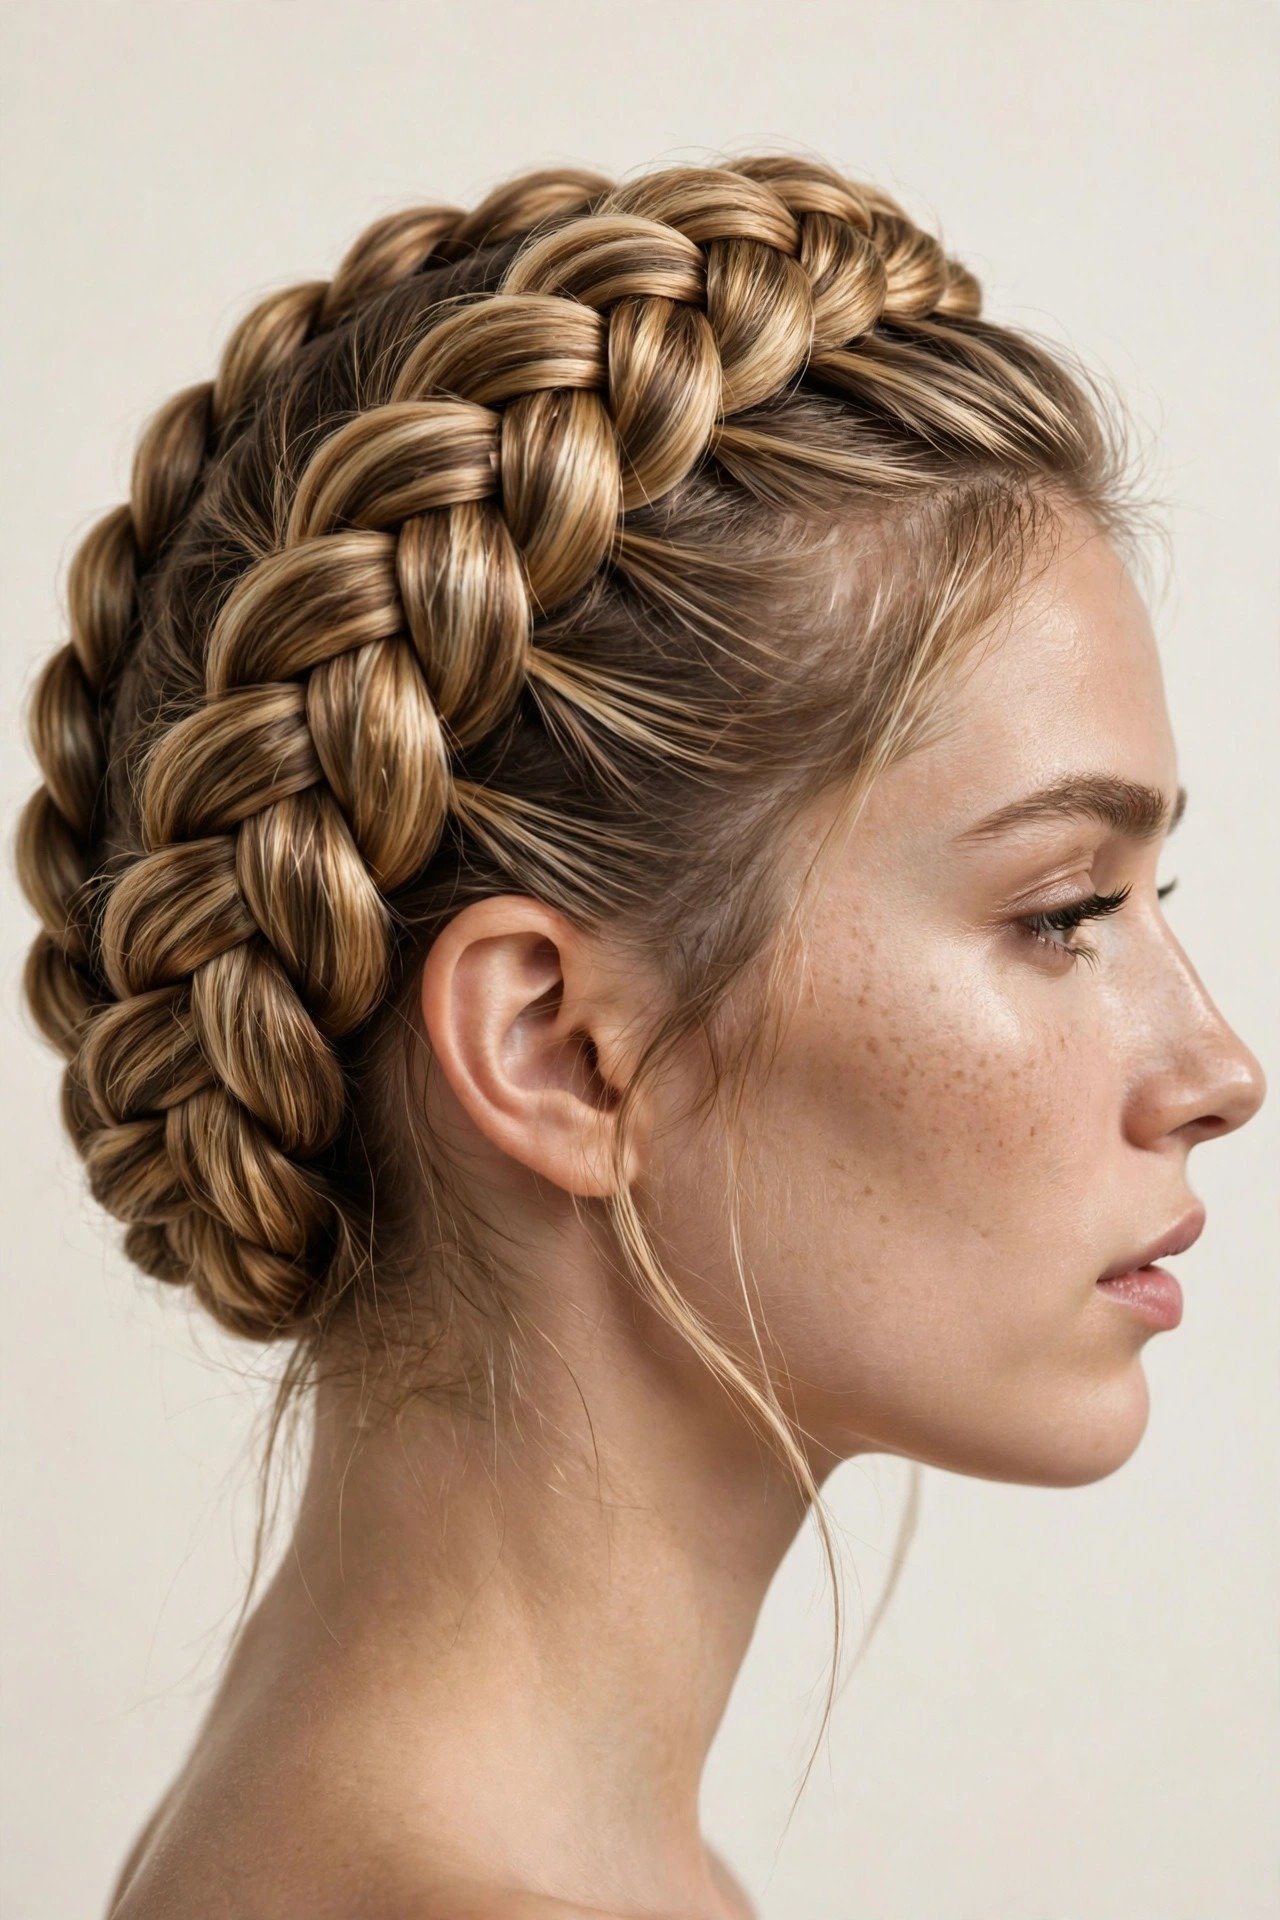
Who it suits: The classic Dutch halo crown is the universal donor of halo braids — it flatters oval, round, square, and heart face shapes because the raised three-dimensional braid adds height at the crown, which visually lengthens the face. It works best on medium to thick hair of at least shoulder length; on fine hair it can look sparse unless you pancake it (see style 13). Straight, wavy, and loosely curled textures all take beautifully to the Dutch technique because the braid sits on top of the hair rather than sinking into it.
What to ask your stylist: Ask for “a Dutch crown braid with the braid positioned one inch behind the hairline, pancaked lightly for fullness, ends pinned flat under the nape.” Show two reference photos: one of the front hairline placement you like, one of the fullness level. Specify whether you want it sleek (wedding) or softly pulled (everyday) — the tension is completely different, and a stylist cannot guess your preference.
Step-by-step: 1) Brush hair smooth and apply a light mousse for grip. 2) Create a deep side part or center part, then begin a Dutch braid (crossing sections UNDER, not over) at one temple, working around the hairline toward the back. 3) Add hair from both sides as you travel around the head, keeping the braid one to two inches from the hairline. 4) When you complete the circle and run out of loose hair, finish as a regular three-strand braid. 5) Wrap the tail flat against the nape, tucking it under the braid’s start, and pin with at least six bobby pins in an X pattern. 6) Gently pancake — pull the outer edges of the braid loops outward — for fullness.
Products: A volumizing mousse on damp hair (applied at roots), a light-hold flexible hairspray to finish, and matte bobby pins matched to your hair color. For slippery, freshly washed hair, a texturizing powder at the roots is non-negotiable — day-old hair grips ten times better than squeaky-clean hair.
Maintenance: A Dutch halo crown lasts one to two days. Sleep in a silk bonnet to get a second day; refresh the hairline with dry shampoo and re-pin any loosened sections in the morning. Never re-braid over product buildup — take it down, brush through, and start fresh.
Common mistakes: Braiding too close to the hairline (it looks like a headband, not a crown, and causes tension headaches); crossing sections OVER instead of under (that makes a French braid, which sits flat — the Dutch pop is the whole point); and using too few pins at the nape, which lets the whole crown slide backward by lunchtime.
2. The Boho Messy Halo Braid

Who it suits: The boho messy halo is made for wavy and curly textures — types 2B through 3C — where the natural texture does half the work for you. It is the most forgiving halo for beginners because imperfection is the aesthetic. Round and heart faces benefit most: the soft, pulled-out pieces around the face break up width and add romance. On pin-straight hair, you will need to create the texture first with a wave iron, or the “messy” reads as “unfinished.”
What to ask your stylist: “A deconstructed halo braid — Dutch braid around the head, heavily pancaked, with two inches of face-framing pieces left out and curled, and the crown gently backcombed for lift.” Emphasize you want it to look effortless, not undone — there is a precise line between the two, and it is controlled entirely by how the stylist finishes the hairline pieces.
Step-by-step: 1) On dry hair, create loose waves with a 1.25-inch iron, alternating directions. 2) Leave out two face-framing sections at the temples. 3) Dutch-braid around the head loosely — keep a full inch of slack in every section. 4) Pin the tail under at the nape. 5) Now the important part: pull the braid edges wide, tug small pieces free along the hairline, and pinch random loops to create the lived-in texture. 6) Curl the left-out face pieces away from the face. 7) Mist with a flexible-hold spray — never a strong hold, which kills the softness.
Products: Sea-salt spray or texture spray before braiding, a 1.25-inch curling iron, flexible-hold hairspray, and a pea-sized amount of pomade to piece out the face-framing sections so they look intentional rather than frizzy.
Maintenance: This is a one-day style by design — the looseness that makes it beautiful also makes it fragile. It will not survive a night’s sleep. The upside: takedown leaves you with gorgeous second-day waves, so nothing is wasted.
Common mistakes: Pulling pieces out symmetrically (real effortlessness is asymmetric — pull more on one side); skipping the wave prep on straight hair (the braid will look stringy, not boho); and using heavy oils before braiding, which collapses the texture within an hour. If you love this undone texture, you will also love the relaxed techniques in our bubble braid guide, which uses the same pancaking principle.
3. The Bridal Pearl-Pinned Halo
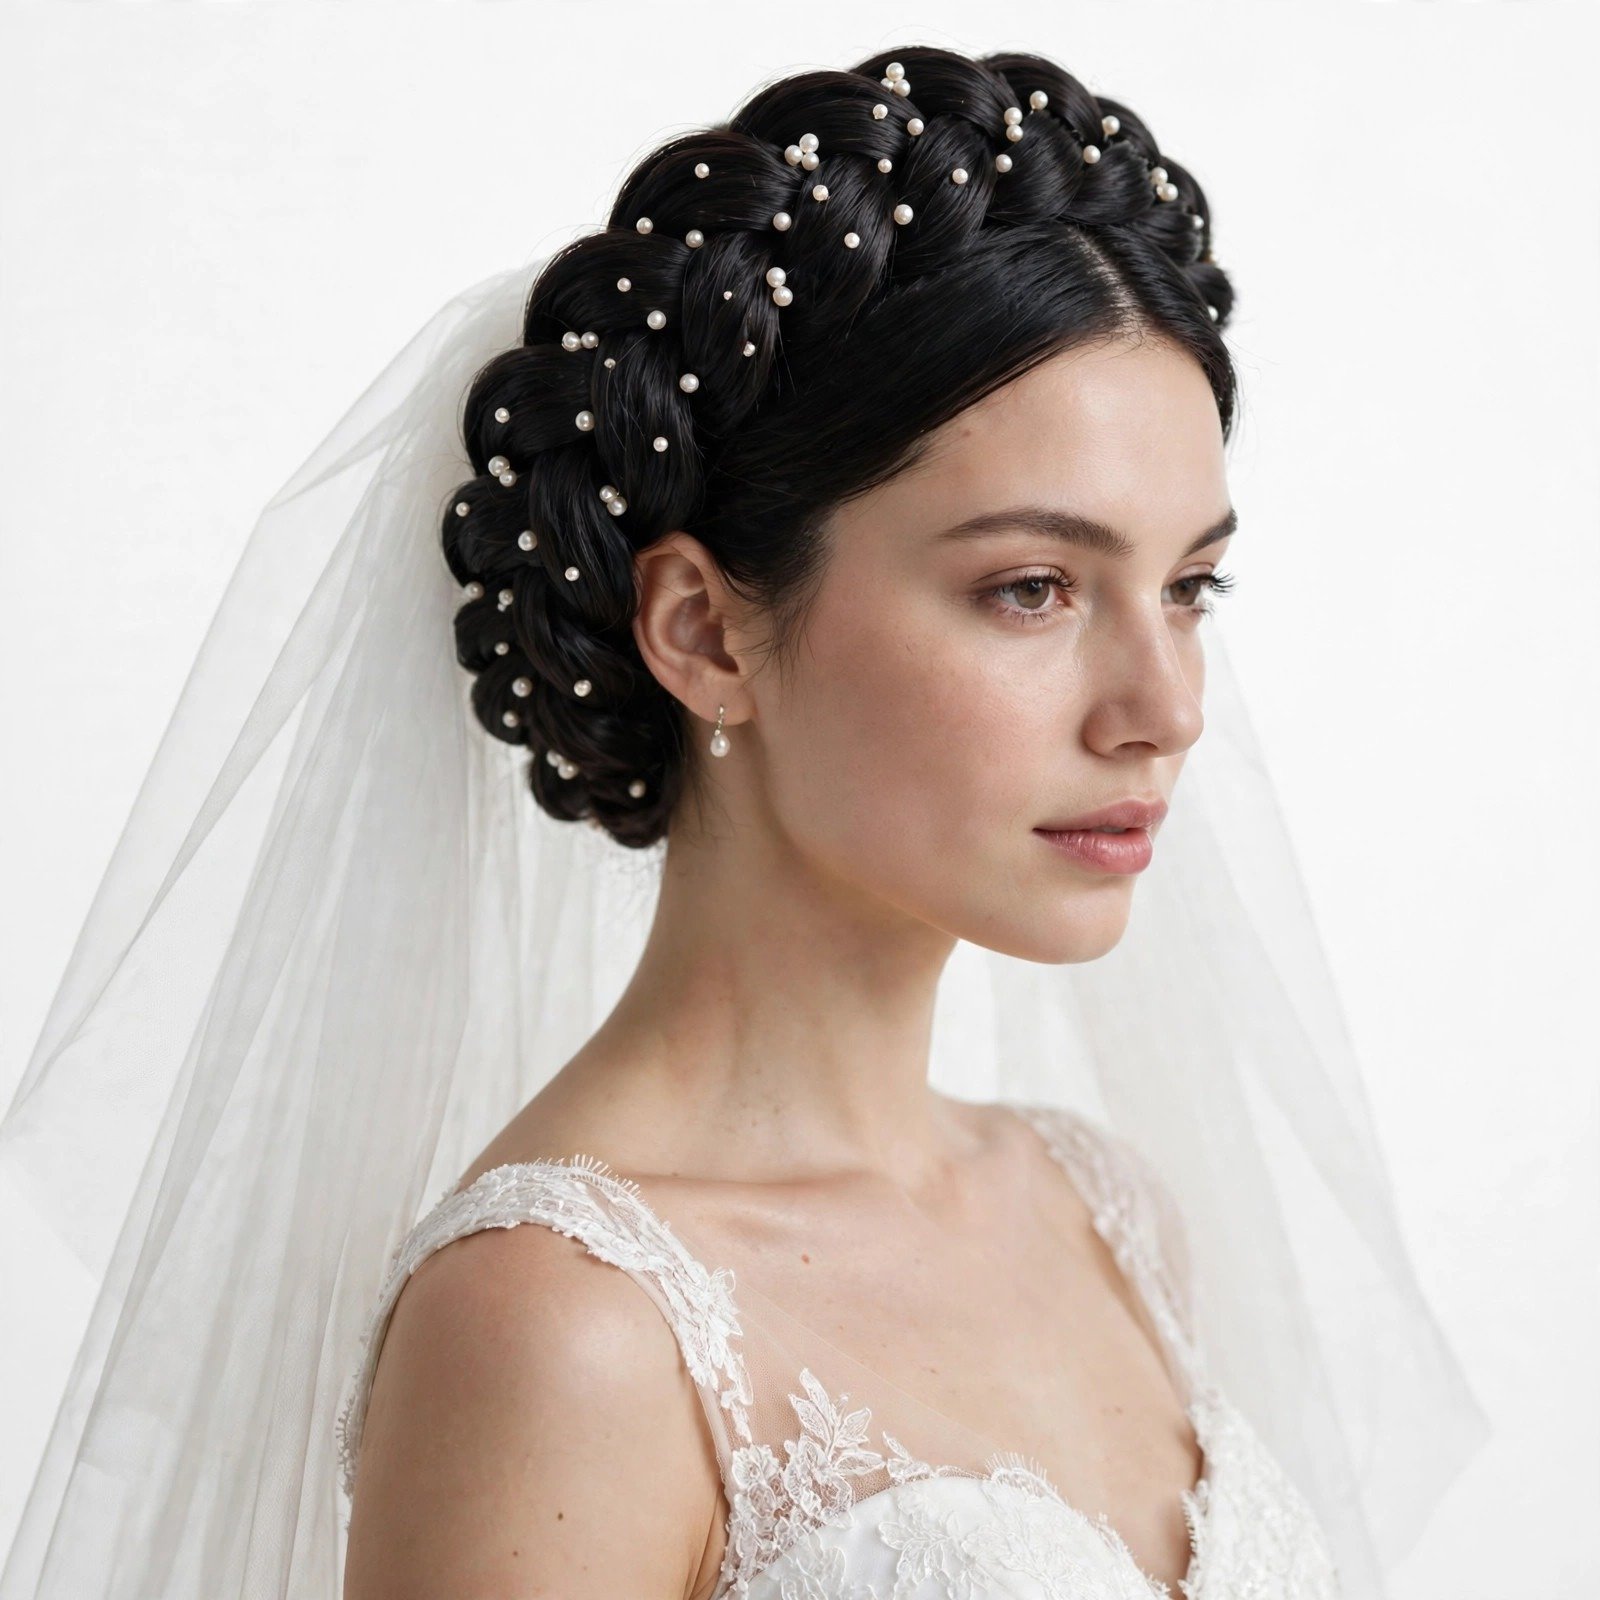
Who it suits: Every bride with enough hair to braid — which means shoulder length or longer, any texture, any face shape. The pearl pins are the great equalizer: they add focal points that draw the eye around the crown, making this the most photogenic halo of the sixteen. It is especially powerful for brides with fine hair, because the pins create visual richness that the hair alone cannot.
What to ask your stylist: Book a trial — non-negotiable for bridal. Ask for “a polished Dutch halo crown, medium tension, finished with 12 to 18 small pearl pins distributed evenly, plus a veil anchor point at the nape.” Bring your veil to the trial so the stylist can engineer the anchor. Ask how many pins they plan to use total; a bridal halo needs 20 to 30 pins minimum including the structural ones, and brides are always surprised by the number.
Step-by-step (for the stylist or a skilled friend): 1) Prep with smoothing cream and a full blowout — bridal halos must start glassy. 2) Dutch-braid the crown with medium-firm tension, keeping the braid uniform in size all the way around. 3) Pin the tail flat and crisscross bobby pins every inch along the braid’s underside. 4) Place pearl pins by pushing the pin straight into a braid loop, not between loops — they grip ten times better inside a loop. 5) Space them evenly but not symmetrically; stagger slightly for a natural scatter. 6) Set everything with a strong-hold, humidity-resistant spray in two light layers, not one heavy one.
Products: Smoothing blowout cream, strong-hold humidity-proof hairspray, 12–18 pearl hairpins (U-shaped pins hold better than straight ones), and a mini emergency kit for the day: six extra pins, a travel hairspray, and blotting papers for the hairline.
Maintenance: A bridal halo is engineered to last 10 to 12 hours — ceremony through last dance. Do not touch it once set; every touch loosens it. Assign one bridesmaid the emergency kit and the knowledge of where the veil anchor is.
Common mistakes: Skipping the trial (the number-one bridal hair regret); placing pins between braid loops where they slide out within an hour; and choosing pins that are too large — oversized pearls look costume-y in photos, while 4–6mm pearls read as luxury. For more bridal braid inspiration, our goddess braids collection covers the thicker, more dramatic end of the bridal braid spectrum.
4. The Fishtail Halo Braid
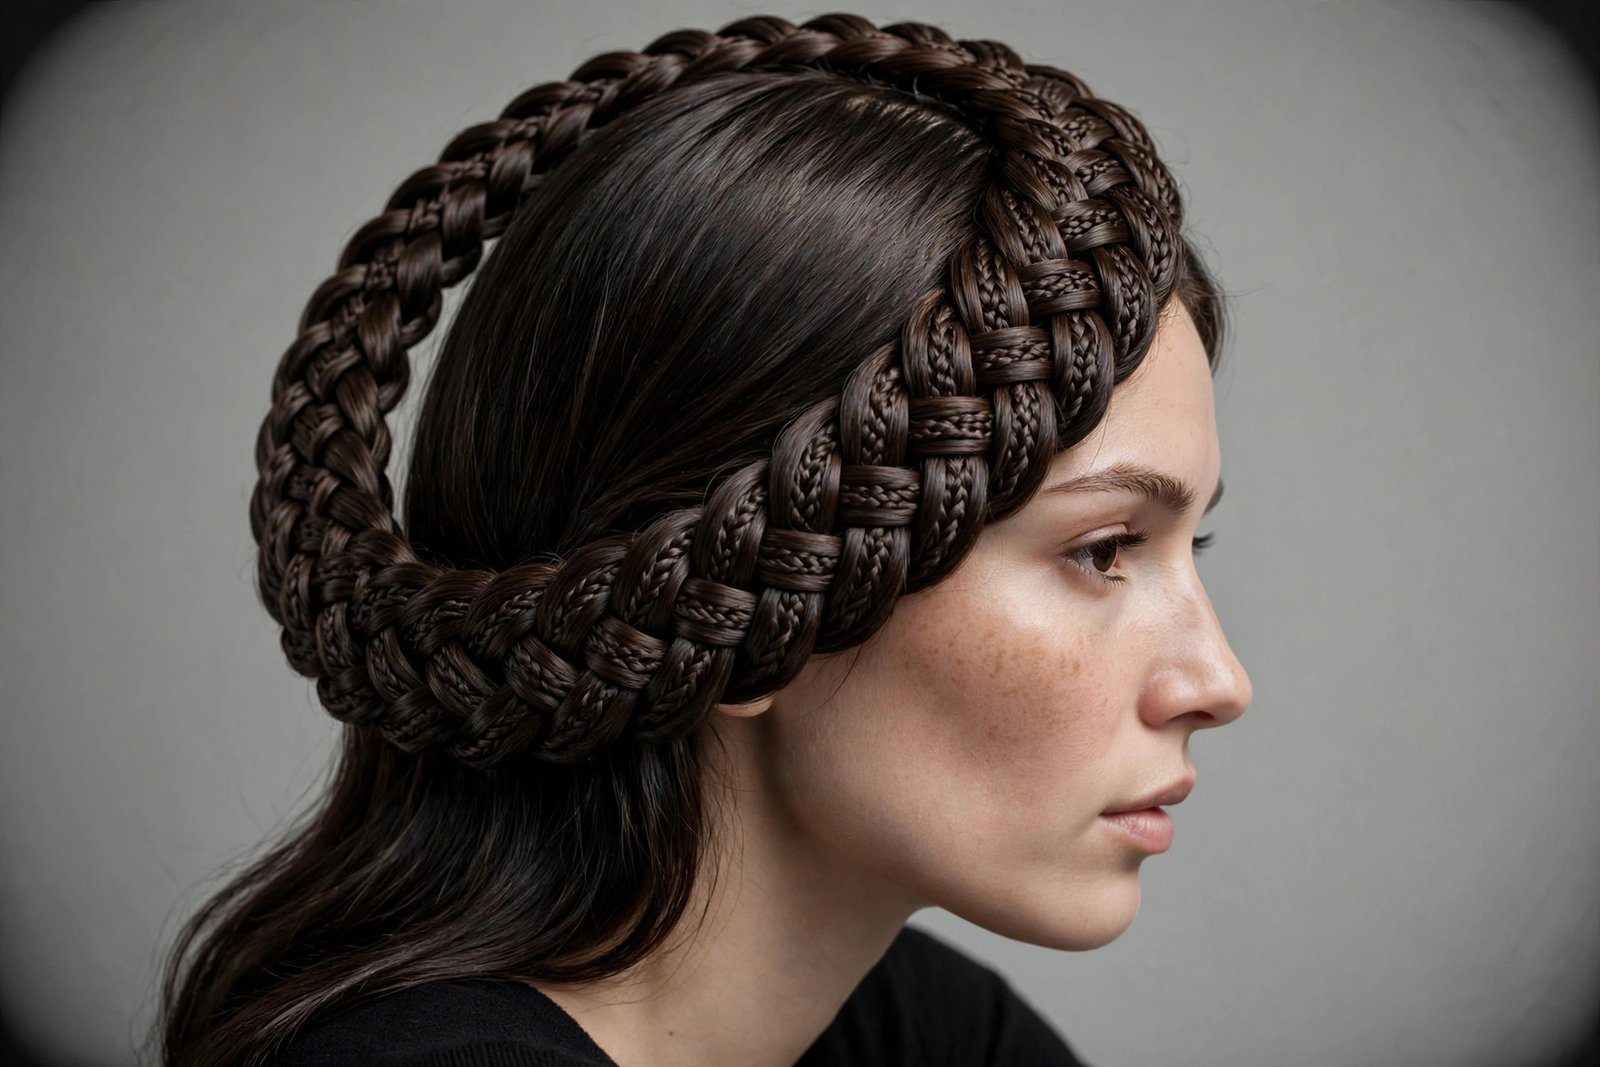
Who it suits: The fishtail halo is the connoisseur’s choice — it suits long hair (armpit length or longer) best, because the fishtail pattern needs length to show its intricate weave. It flatters oval and long face shapes particularly well, since the fine, detailed texture adds visual width at the sides. On short or layered hair, the fishtail unravels into fuzz; this is a style for one-length or long-layered hair.
What to ask your stylist: “A fishtail crown braid — two fishtail braids started behind each ear, joined and pinned into a continuous circle, pancaked moderately.” Fishtail halos are almost always built from two braids meeting at the back rather than one continuous braid, because fishtailing all the way around your own head is genuinely difficult. Ask your stylist to keep the fishtail pieces small (half-inch sections) for the intricate look — chunky fishtails lose the signature detail.
Step-by-step: 1) Smooth hair with a light serum — fishtails show every flyaway. 2) Split hair into two sections behind the ears. 3) Fishtail each side: divide into two strands, take a thin piece from the outside of the left strand and cross it to the inside of the right; repeat alternating. Keep pieces thin and tension even. 4) Secure each fishtail with a clear elastic. 5) Wrap each braid around to the opposite side, pinning along the way to form the circle. 6) Tuck and pin the tails under the opposite braid’s start. 7) Gently pancake the outer edges only — never the center, or the fishtail pattern disappears.
Products: Anti-frizz serum, clear mini elastics, light-hold spray. A small amount of edge control or pomade on the hairline keeps the intricate look crisp in photos.
Maintenance: Lasts one day comfortably, two if you sleep in a silk bonnet and do not touch it. Fishtails loosen faster than Dutch braids because the weave is finer — expect to re-pin two or three sections on day two.
Common mistakes: Taking pieces too thick (you get a rope twist, not a fishtail); uneven tension (the braid corkscrews instead of lying flat); and pancaking the center of the braid, which destroys the very pattern you worked to create. The fishtail is a patience style — your first attempt will take 30 minutes, your tenth will take 12.
5. The Rope-Twist Halo
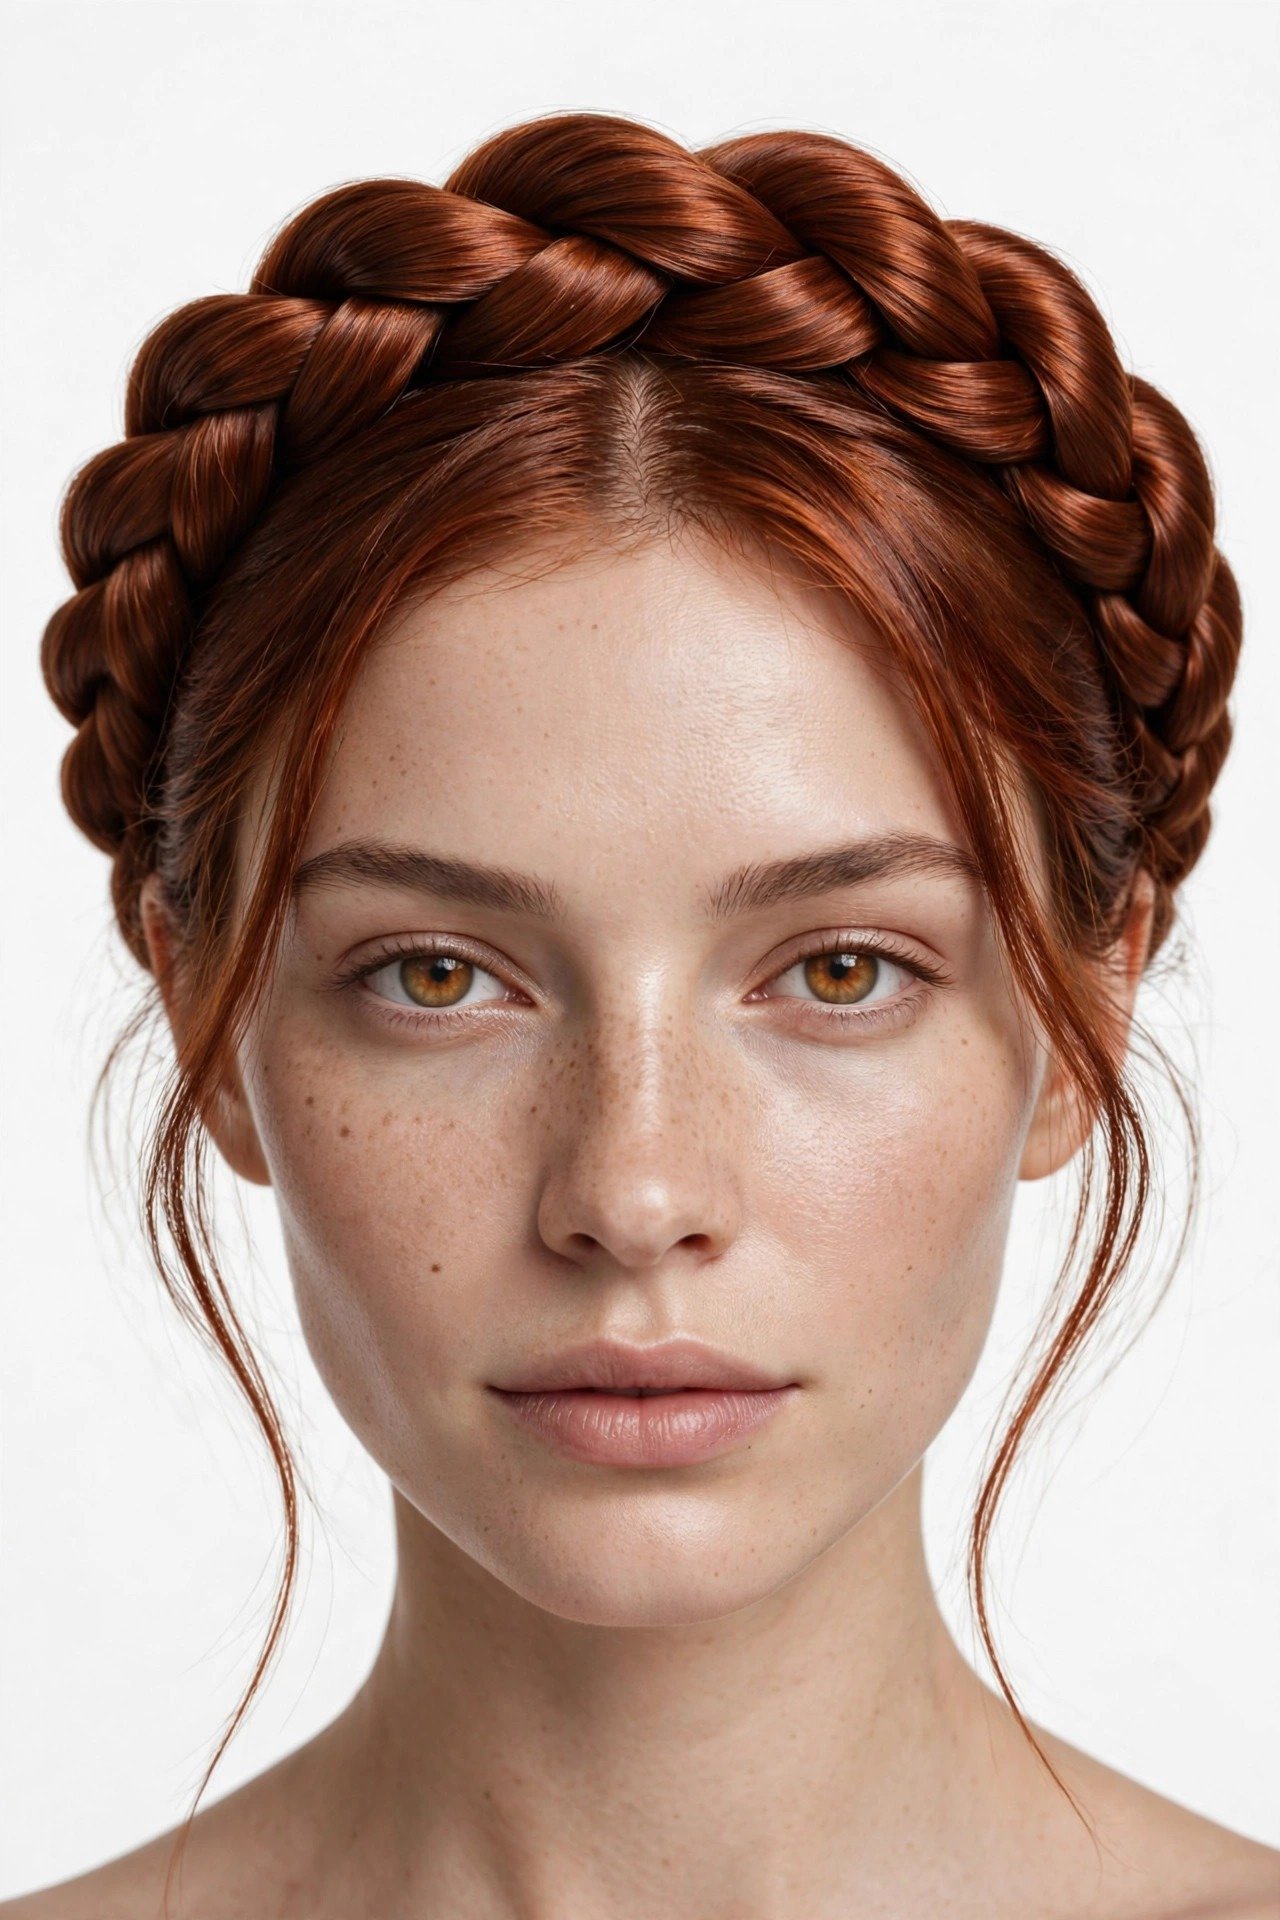
Who it suits: The rope-twist halo is the minimalist’s halo — best on straight to loosely wavy hair, where the clean twisted rope shows its sculptural line. It suits women who find three-strand braiding fiddly, because a rope twist uses only two sections and is dramatically easier to do on yourself. Oval, square, and heart faces all wear it well; the smooth, continuous line of the twist is especially elegant on strong jawlines.
What to ask your stylist: “A rope-twist crown — two-strand twists wrapped around the head and pinned, smooth finish, no pancaking.” Specify the finish: glossy and sleek, or slightly loosened. A rope twist has no loops to pancake, so fullness comes entirely from your hair’s natural volume — ask honestly whether your density will carry it, or whether you should add a volumizing prep.
Step-by-step: 1) Part hair where you want the twist to begin (side part looks best). 2) Take a two-inch section at the part and divide into two strands. 3) Twist each strand clockwise individually, then wrap them counterclockwise around each other — the opposing directions are what lock the rope. 4) Add hair to the outer strand as you travel around the head, like a French braid but with two strands. 5) When you run out of hair to add, continue twisting the two strands to the ends and secure with a clear elastic. 6) Wrap the tail under the braid start and pin generously. 7) Smooth the surface with a light serum — the beauty of a rope twist is its glassy surface.
Products: Smoothing serum, clear elastics, medium-hold spray. On fine hair, a root-lifting mousse before styling gives the rope enough body to read as a crown rather than a cord.
Maintenance: One of the longest-lasting halos — two to three days easily, because the twist structure is inherently stable. Refresh with dry shampoo at the roots and smooth the rope’s surface with serum each morning.
Common mistakes: Twisting both strands in the same direction as the wrap (the rope unravels the moment you let go — the counter-direction is structural, not stylistic); adding hair to the inner strand instead of the outer (the twist migrates off the hairline); and skimping on pins — rope twists are heavy and need a pin every inch.
6. The Double Dutch Halo
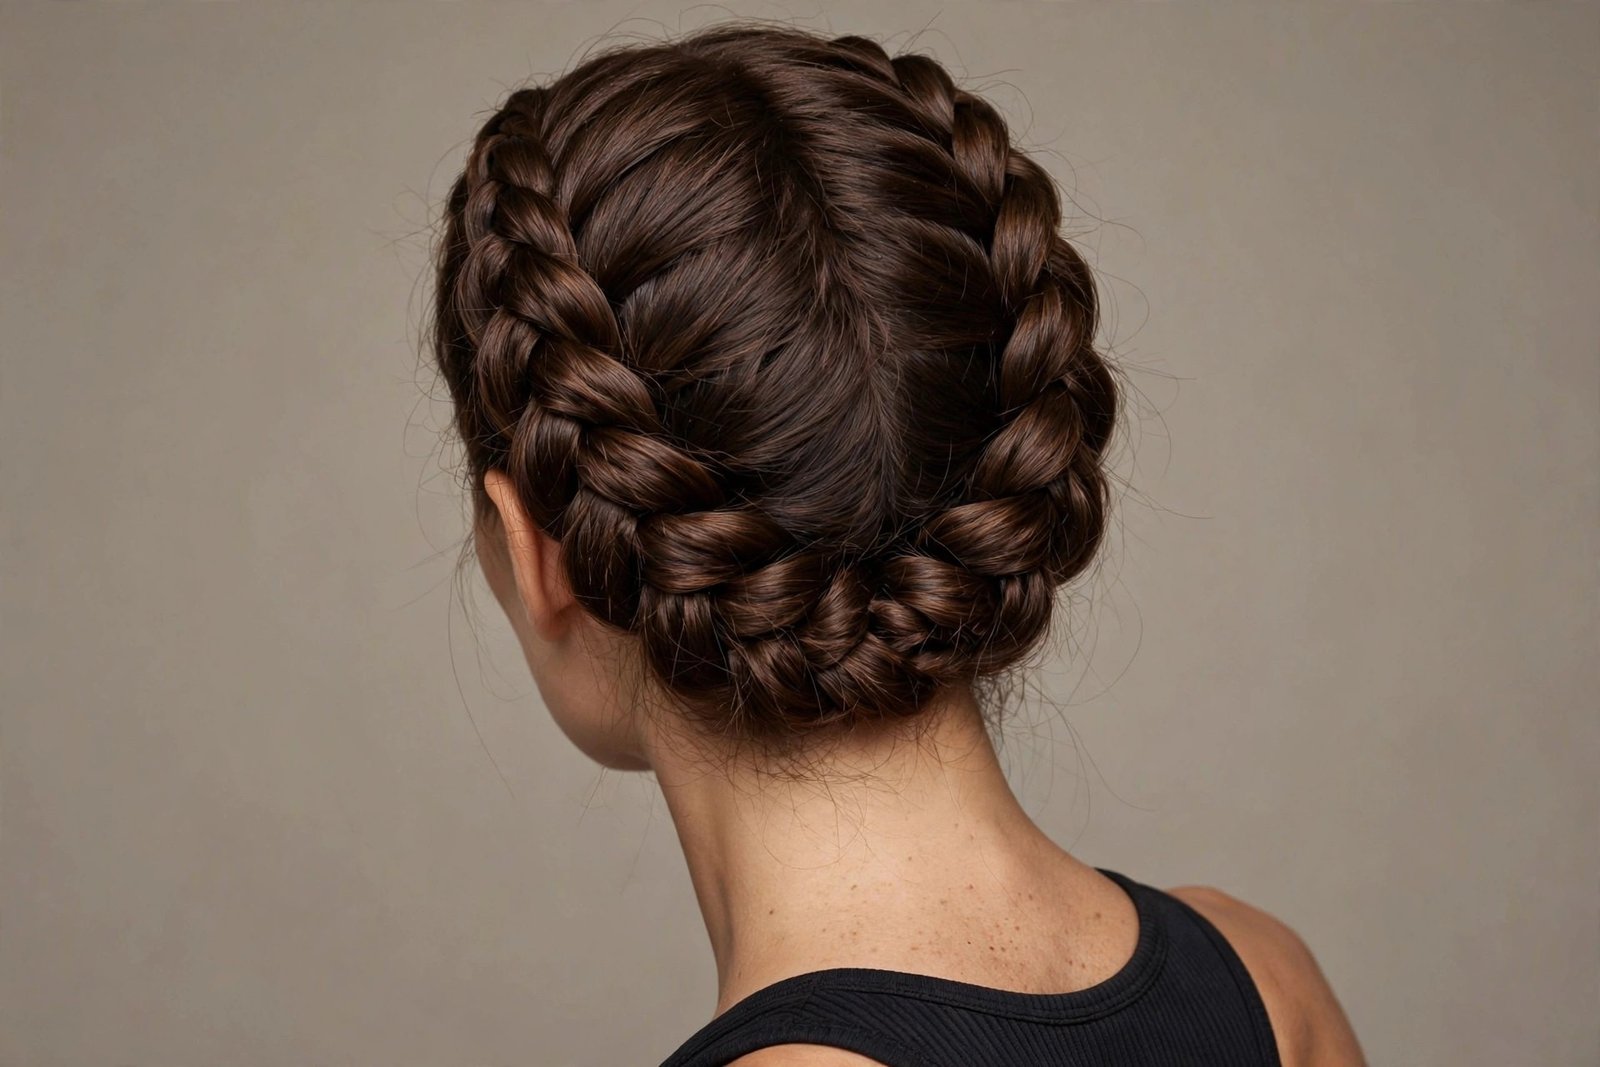
Who it suits: The double Dutch halo is the athlete’s crown — built from two Dutch braids (one from each side) that meet and join at the back. It suits thick, heavy hair that a single braid struggles to contain, and it is the most secure halo of all sixteen, which is why dancers, bridesmaids, and festival-goers swear by it. Round faces benefit from the height it builds at the crown. If your hair eats bobby pins for breakfast, this is your halo.
What to ask your stylist: “Two Dutch braids from the temples, joined at the nape into one continuous circle, ends tucked and pinned flat.” Ask for the join to be placed at the back center, not off to one side — an off-center join is visible in photos. If you want it sleek, ask the stylist to braid on smoothed, serum-treated hair; for texture, ask for braiding on waved hair.
Step-by-step: 1) Part hair down the center from forehead to nape. 2) Clip one side away. 3) Dutch-braid the free side from the temple, following the hairline curve down toward the nape, adding hair from both sides. 4) When you reach the nape center, continue as a regular braid to the ends and secure with a clear elastic. Repeat on the other side. 5) Cross the two tails over each other at the nape, wrap each toward the opposite side, and pin flat along the braid line. 6) Tuck elastic ends under the braids and pin. The result reads as one seamless circle.
Products: Strong-hold gel or braiding balm on the hairline for a sleek version (this tames baby hairs that otherwise escape within an hour), clear elastics, and a generous number of bobby pins — plan on 12 to 16 for thick hair.
Maintenance: Two to three days. This is the longest-wearing halo because the load is distributed across two braids. Sleep in a silk bonnet; in the morning, smooth the hairline with edge control and re-pin only if needed.
Common mistakes: Braiding both sides toward the same direction (they must mirror each other); joining the tails with a visible elastic instead of tucking and pinning; and parting the hair crookedly at the start — a wobbly center part telegraphs through the entire style.
7. The Half-Up Halo Braid
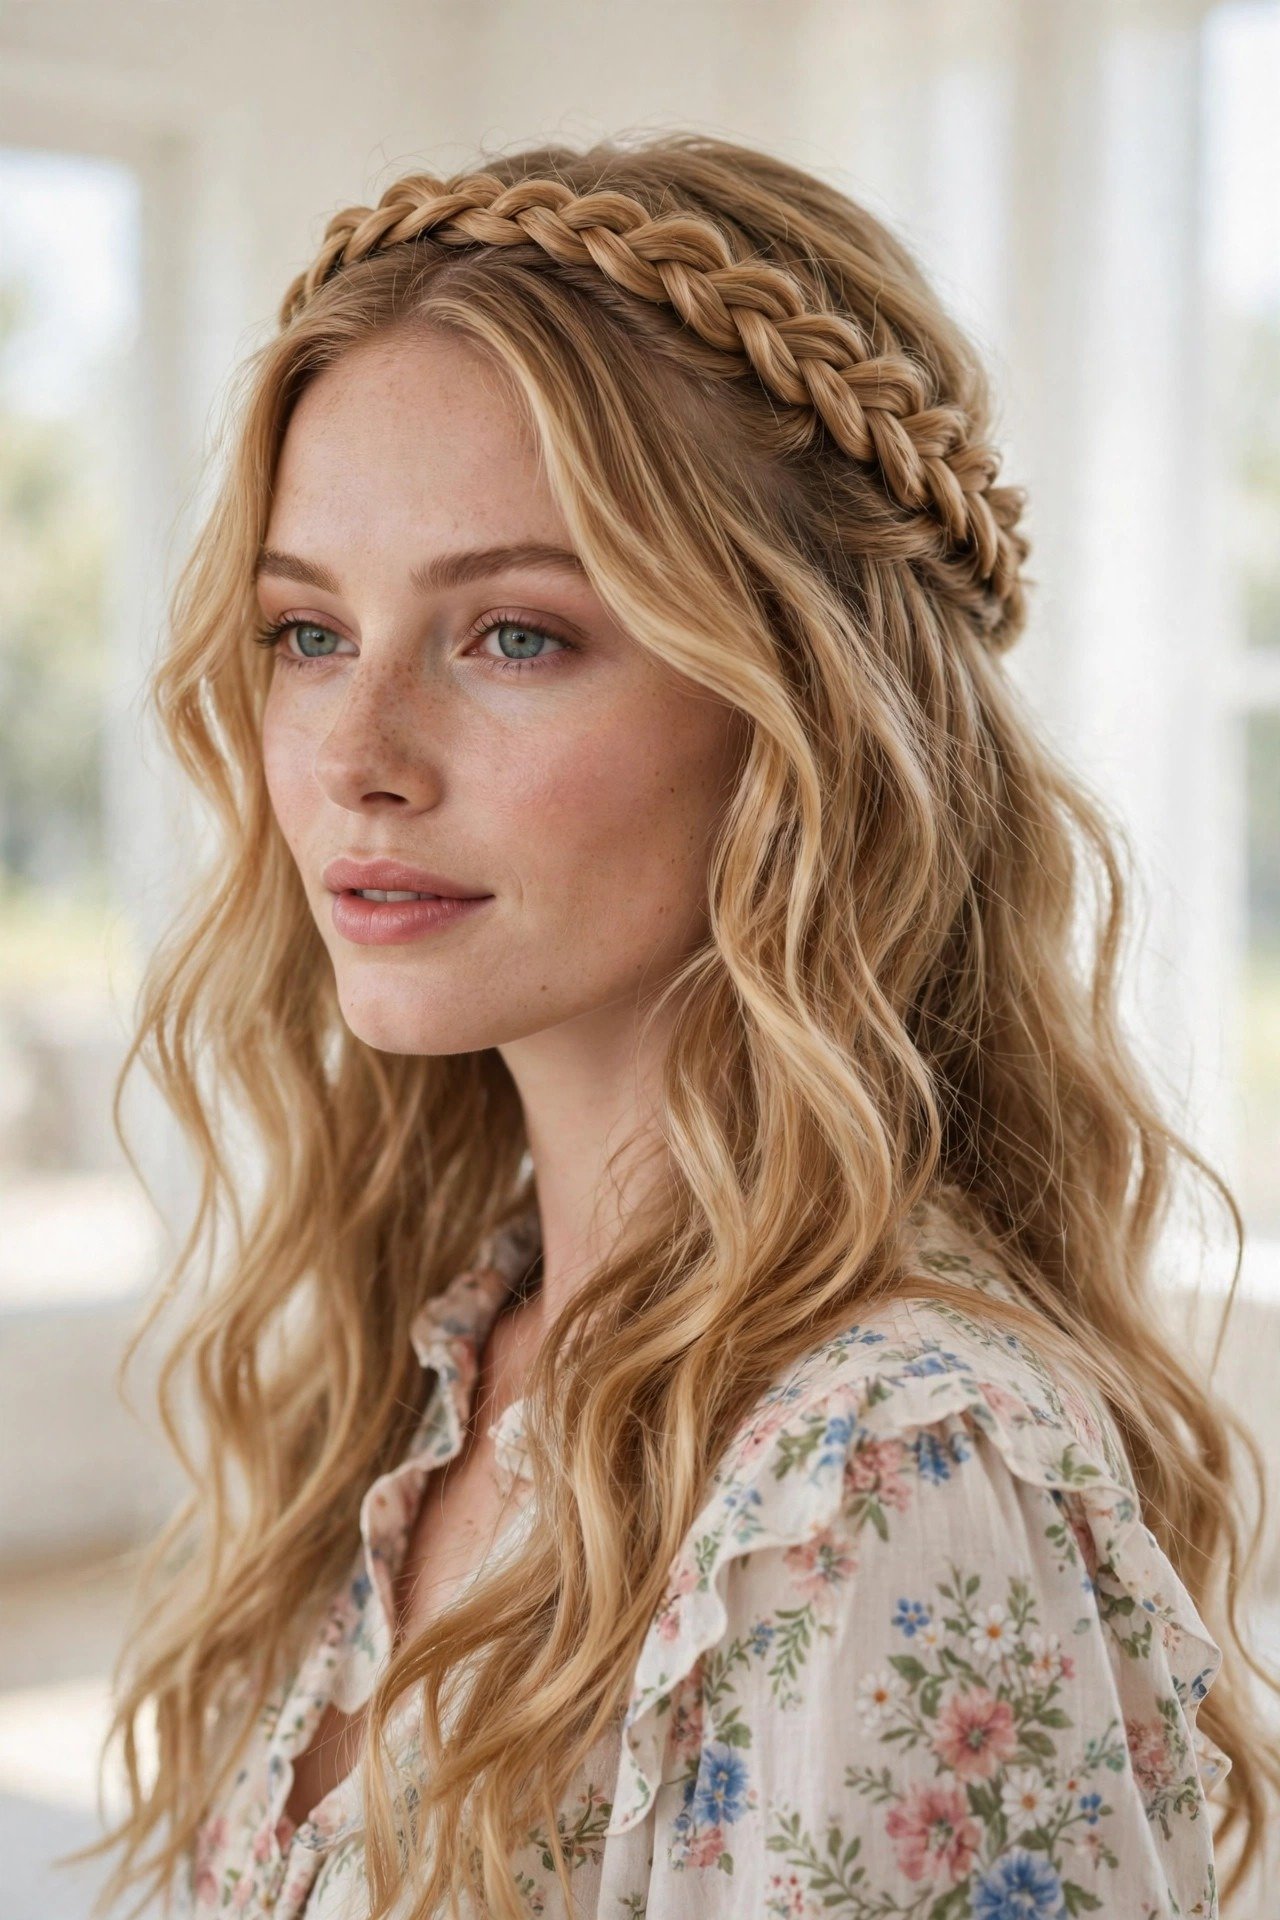
Who it suits: The half-up halo is for women who love the crown effect but refuse to put all their hair up — the braid circles the crown while the remaining length flows free. It suits long hair best (the contrast between the structured crown and flowing length is the point) and flatters every face shape, because the loose hair softens the jawline while the braid lifts the crown. It is also the best halo for showing off balayage or dimensional color, since the loose length displays the color work.
What to ask your stylist: “A half-up Dutch crown braid using the top half of the hair, with the bottom half left down in soft waves.” Specify how much hair goes up — roughly the top third is classic, but some women prefer a thinner halo using only the top quarter. Also specify the braid’s position: right at the crown (more dramatic) or slightly back (softer).
Step-by-step: 1) Section the top half of the hair from temple to temple, clipping the bottom half away. 2) Dutch-braid the top section around the crown, from one temple to the other, adding hair only from the top section. 3) Secure the end with a clear elastic, then wrap and pin it under the braid’s start to form the partial circle. 4) Release the bottom hair and add soft waves with a 1.5-inch iron. 5) Gently pancake the braid for fullness. 6) Blend the transition by pulling a few pieces of the loose hair up over the braid’s lower edge.
Products: Heat protectant for the loose length, a 1.5-inch curling iron, texturizing spray on the braid for grip, and light-hold spray overall. A shine serum on the loose ends keeps them looking expensive against the matte texture of the braid.
Maintenance: One day for the braid, though the waves can be refreshed on day two. The half-up halo loosens faster than full halos because the loose hair pulls at the braid — plan to re-pin the nape area if you wear it past eight hours.
Common mistakes: Taking too much hair into the braid (you lose the half-up effect and it just becomes a full halo with a weird underlayer); braiding the top section too tightly, which creates a visible ledge where the loose hair begins; and skipping heat protectant on the loose length — the contrast only works if the loose hair looks healthy.
8. The Faux Halo for Short Hair
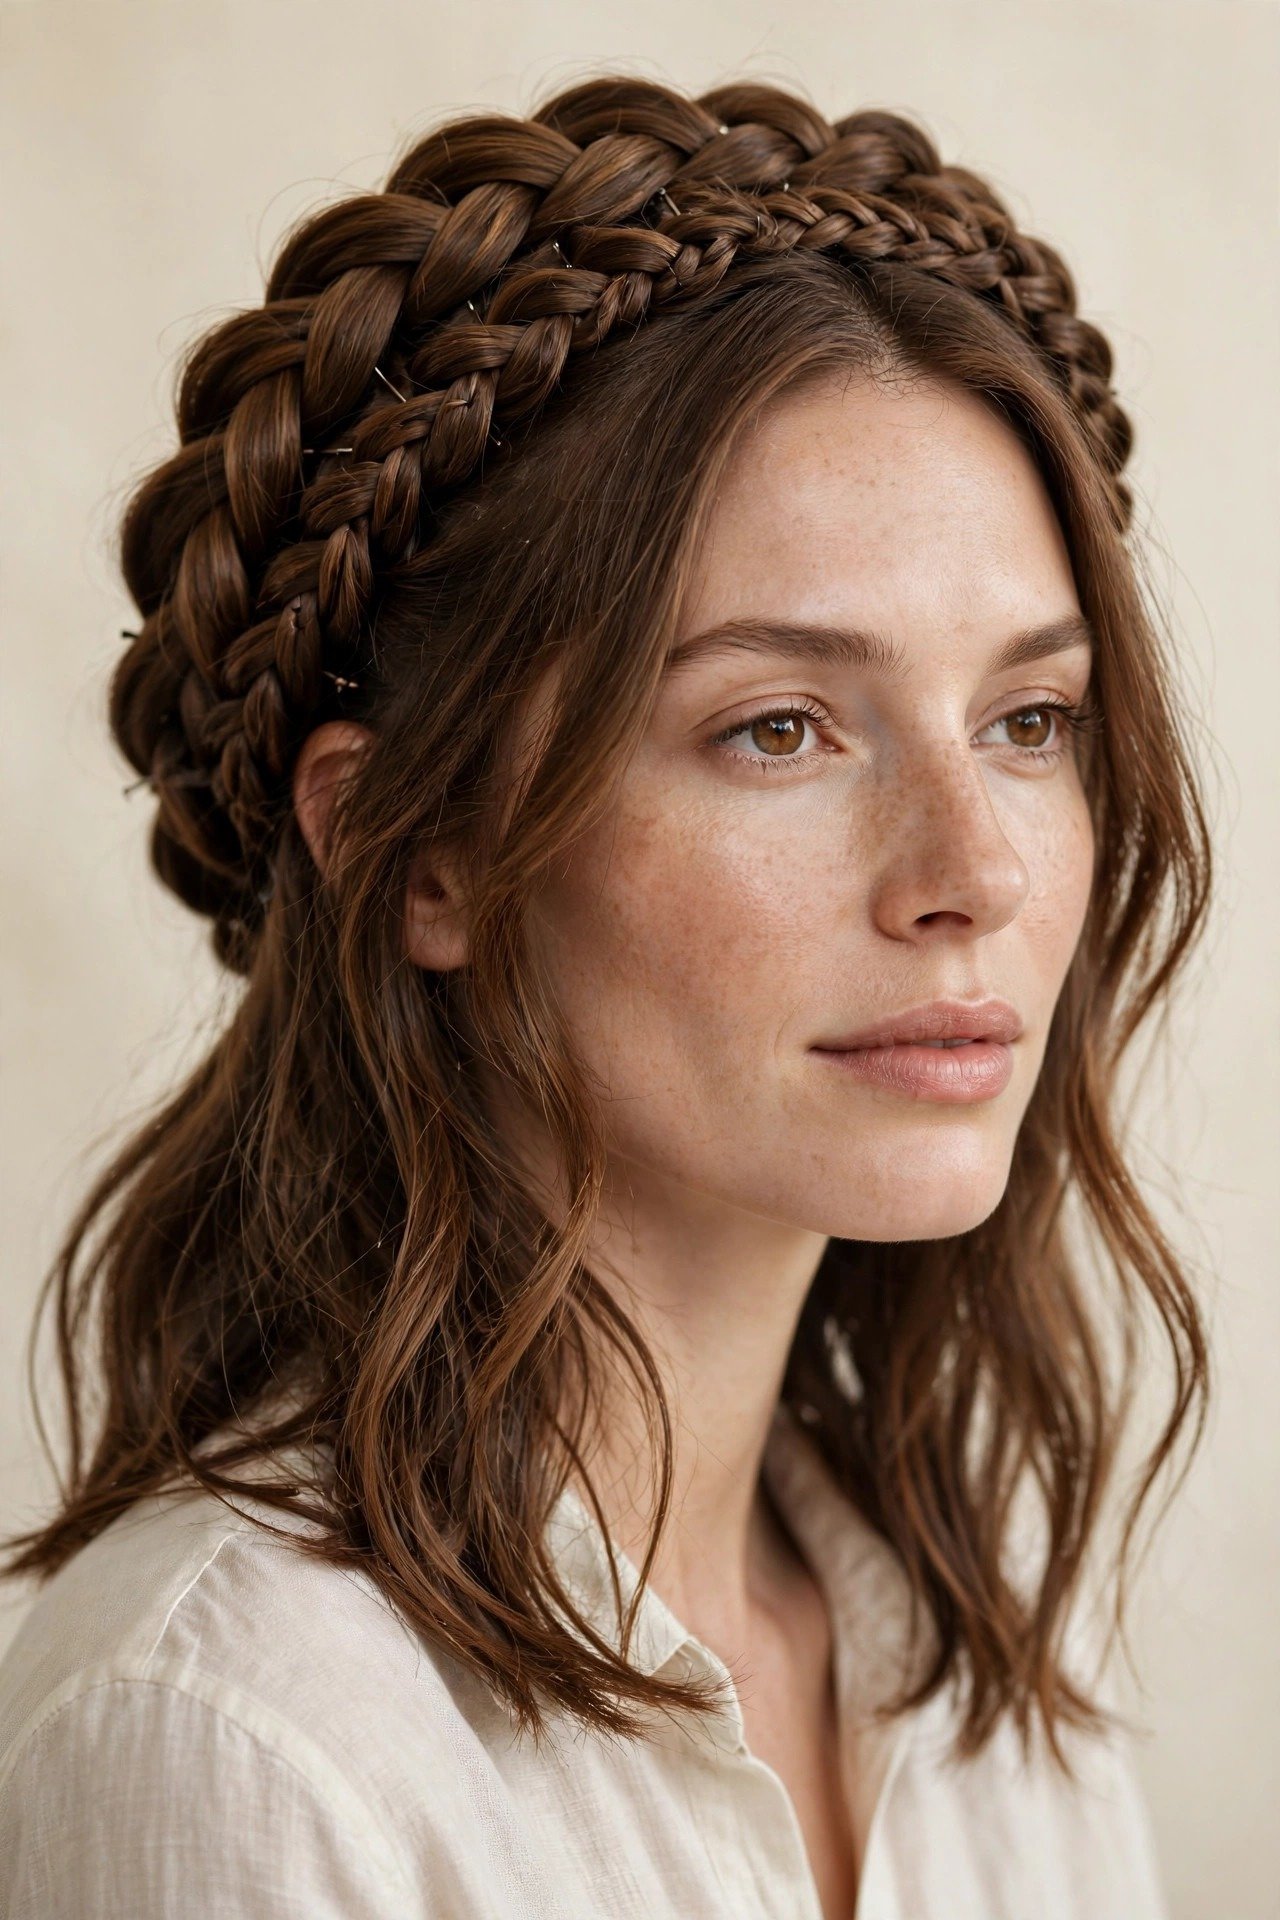
Who it suits: Shoulder-length bobs, lobs, and growing-out pixies — this is the halo for hair that is “almost long enough.” It suits anyone with hair that reaches at least the chin, because the technique fakes the circle with pinned sections rather than one continuous braid. It is also the answer for very fine hair: building the halo from sections creates fullness that a single braid of fine hair cannot.
What to ask your stylist: “A faux crown braid for short hair — pinned rope-twist or braid sections forming a halo, with extensions if needed for fullness.” Ask whether they recommend clip-in extensions for the day; one weft of clip-ins at the back can be the difference between a convincing halo and a sparse one. If it is for an event, ask for the extensions to be color-matched and cut to blend.
Step-by-step: 1) If using clip-ins, install one weft horizontally at the back for extra hair to work with. 2) Create a deep side part. 3) From the part, take a two-inch section and rope-twist it (see style 5), adding hair as you go around the hairline. 4) When you run out of length — usually near the opposite temple on short hair — pin the twist end flat. 5) Take the next section behind it and repeat, overlapping the new twist over the pinned end of the last. 6) Continue section by section around the head, each new twist covering the last one’s end. 7) Finish by tucking the final end under the first twist and pinning everything in an X pattern.
Products: Clip-in extensions (optional but transformative), texturizing powder for grip on short layers, matte bobby pins in your exact hair color, and strong-hold spray — short layers escape, so the hold needs to be serious.
Maintenance: This is an event-day style — four to eight hours of wear. Short layers will begin escaping; carry extra pins. Remove clip-ins before sleeping, always.
Common mistakes: Trying to braid one continuous circle on short hair (the layers pop out and it looks messy, not boho); visible extension wefts (install them lower and cover the tracks with the twists); and placing the twists too far back from the hairline, which reads as a random updo rather than a crown.
9. The Textured Curly Halo
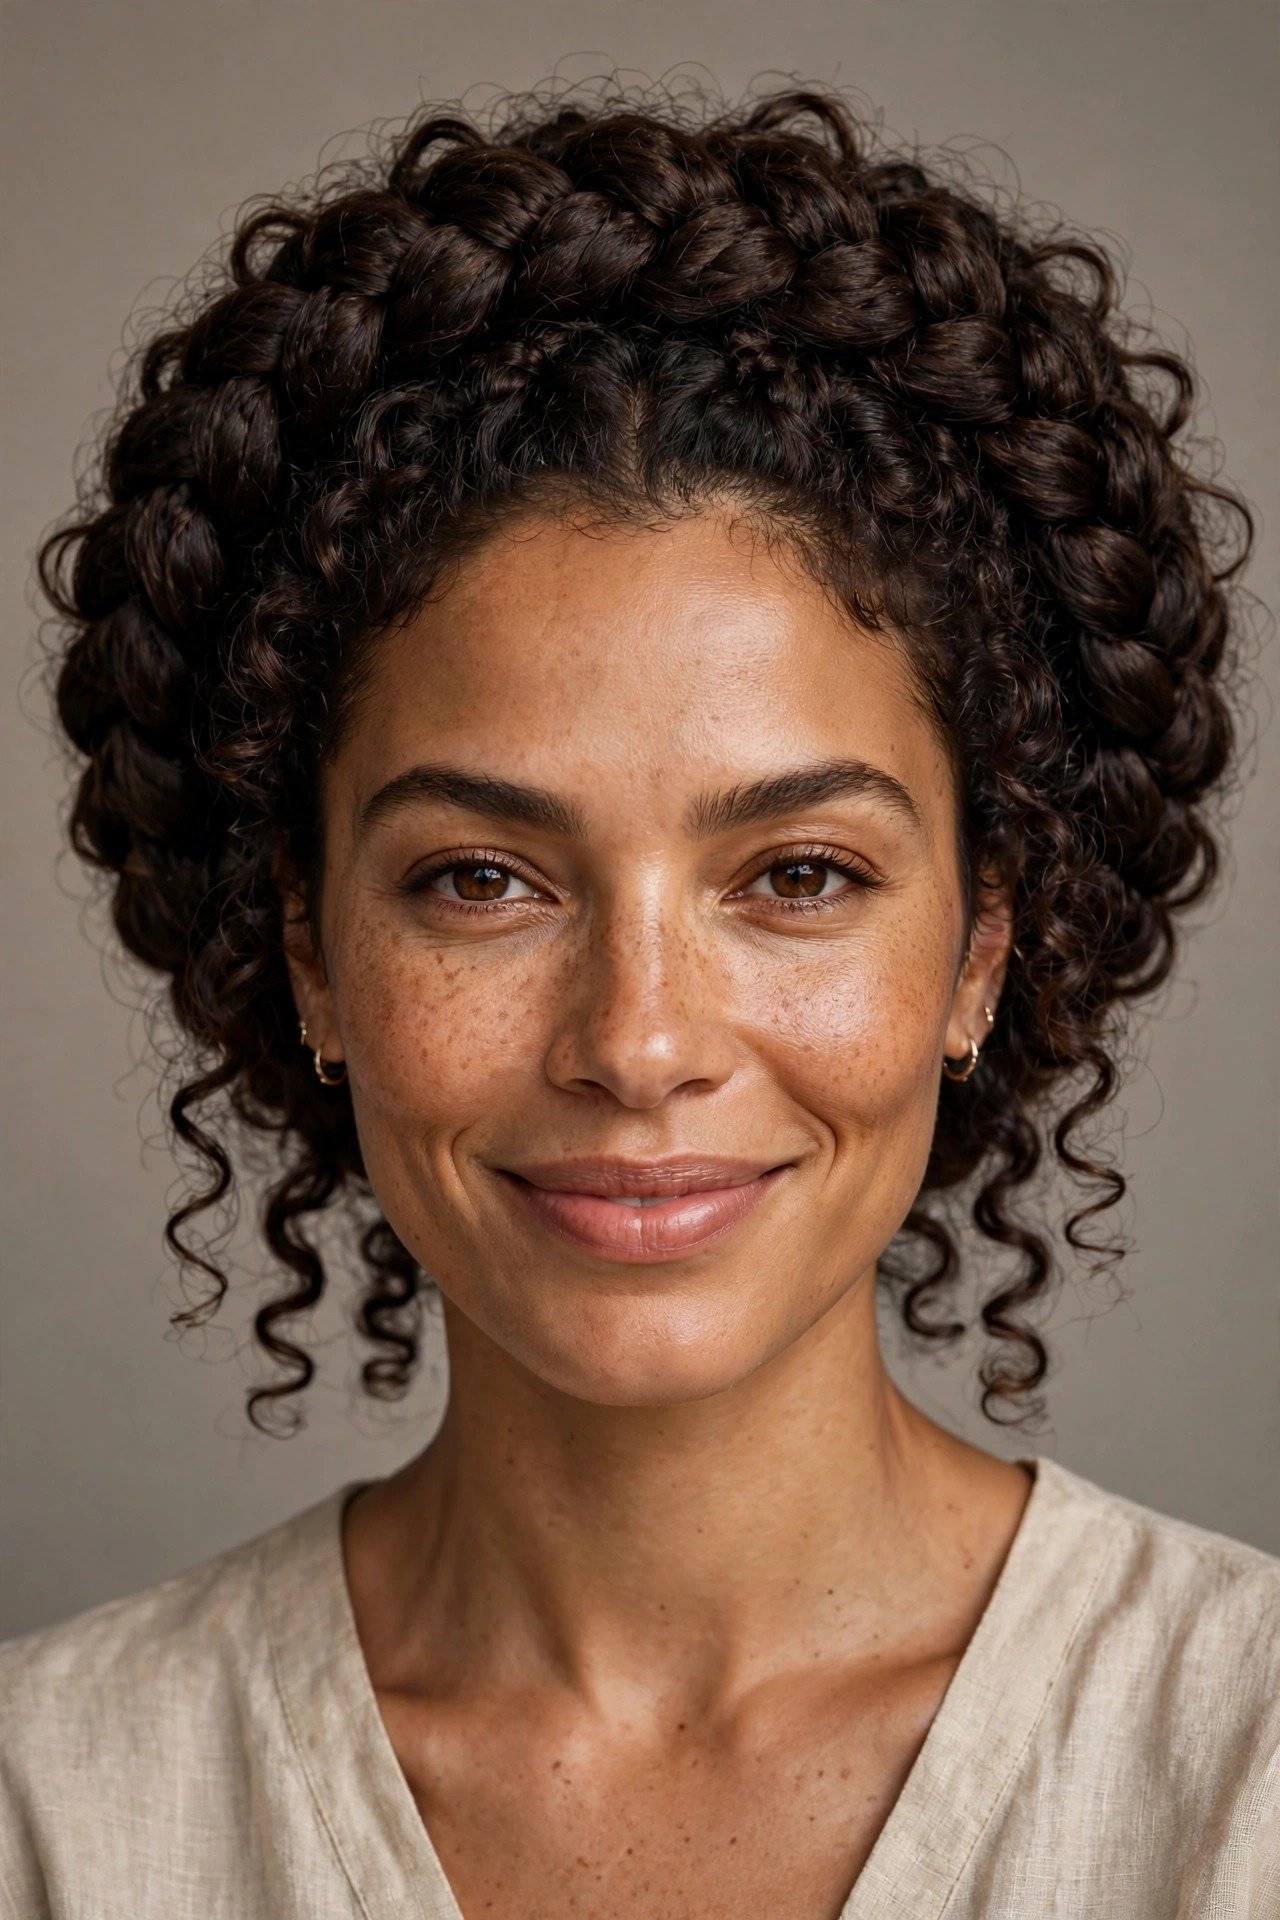
Who it suits: Natural curls and coils — types 3A through 4C — where the halo braid becomes a protective style as well as a beautiful one. The texture gives the braid incredible volume and presence; a curly halo has a regal, almost sculptural quality that straight hair cannot replicate. It suits all face shapes, and it is one of the best protective options for natural hair because the ends stay tucked for days.
What to ask your stylist: “A crown braid on stretched or blown-out natural hair, medium tension — not tight at the hairline — finished with the curls’ natural texture visible.” Be explicit about tension: tight braiding at the edges causes traction alopecia over time, and a good stylist will welcome the instruction. Ask them to braid on hair that has been stretched (banded or lightly blown) rather than shrunken — you need the length.
Step-by-step: 1) Start on stretched, moisturized hair — apply leave-in conditioner and a butter or cream to each section as you work. 2) Part as desired. 3) Create chunky two-strand flat twists (not three-strand braids) around the head — flat twists are gentler on curly hair and create a fuller halo. 4) Add hair to the outer strand as you go. 5) Pin the ends under at the nape. 6) Gently fluff the twists by pulling them slightly wider — never pancake aggressively on curly hair, which causes frizz. 7) Lay the edges with edge control and a soft brush.
Products: Leave-in conditioner, a moisturizing twisting cream or butter, edge control, a silk or satin bonnet for nighttime, and a spray bottle with water and leave-in mix for refreshing.
Maintenance: Three to five days — the longest-wearing halo in this guide. Each night, tie the hairline with a silk scarf and wear a bonnet. Refresh the crown’s moisture with a light mist on day three. Take it down by day five to avoid matting at the roots.
Common mistakes: Braiding on dry, unmoisturized hair (breakage and frizz); braiding too tightly at the edges (traction damage — if it hurts, it is too tight, full stop); and using heavy waxes or gels that flake — on dark curly hair, flakes are visible and ruin the finish.
10. The Halo Braid with Curtain Bangs
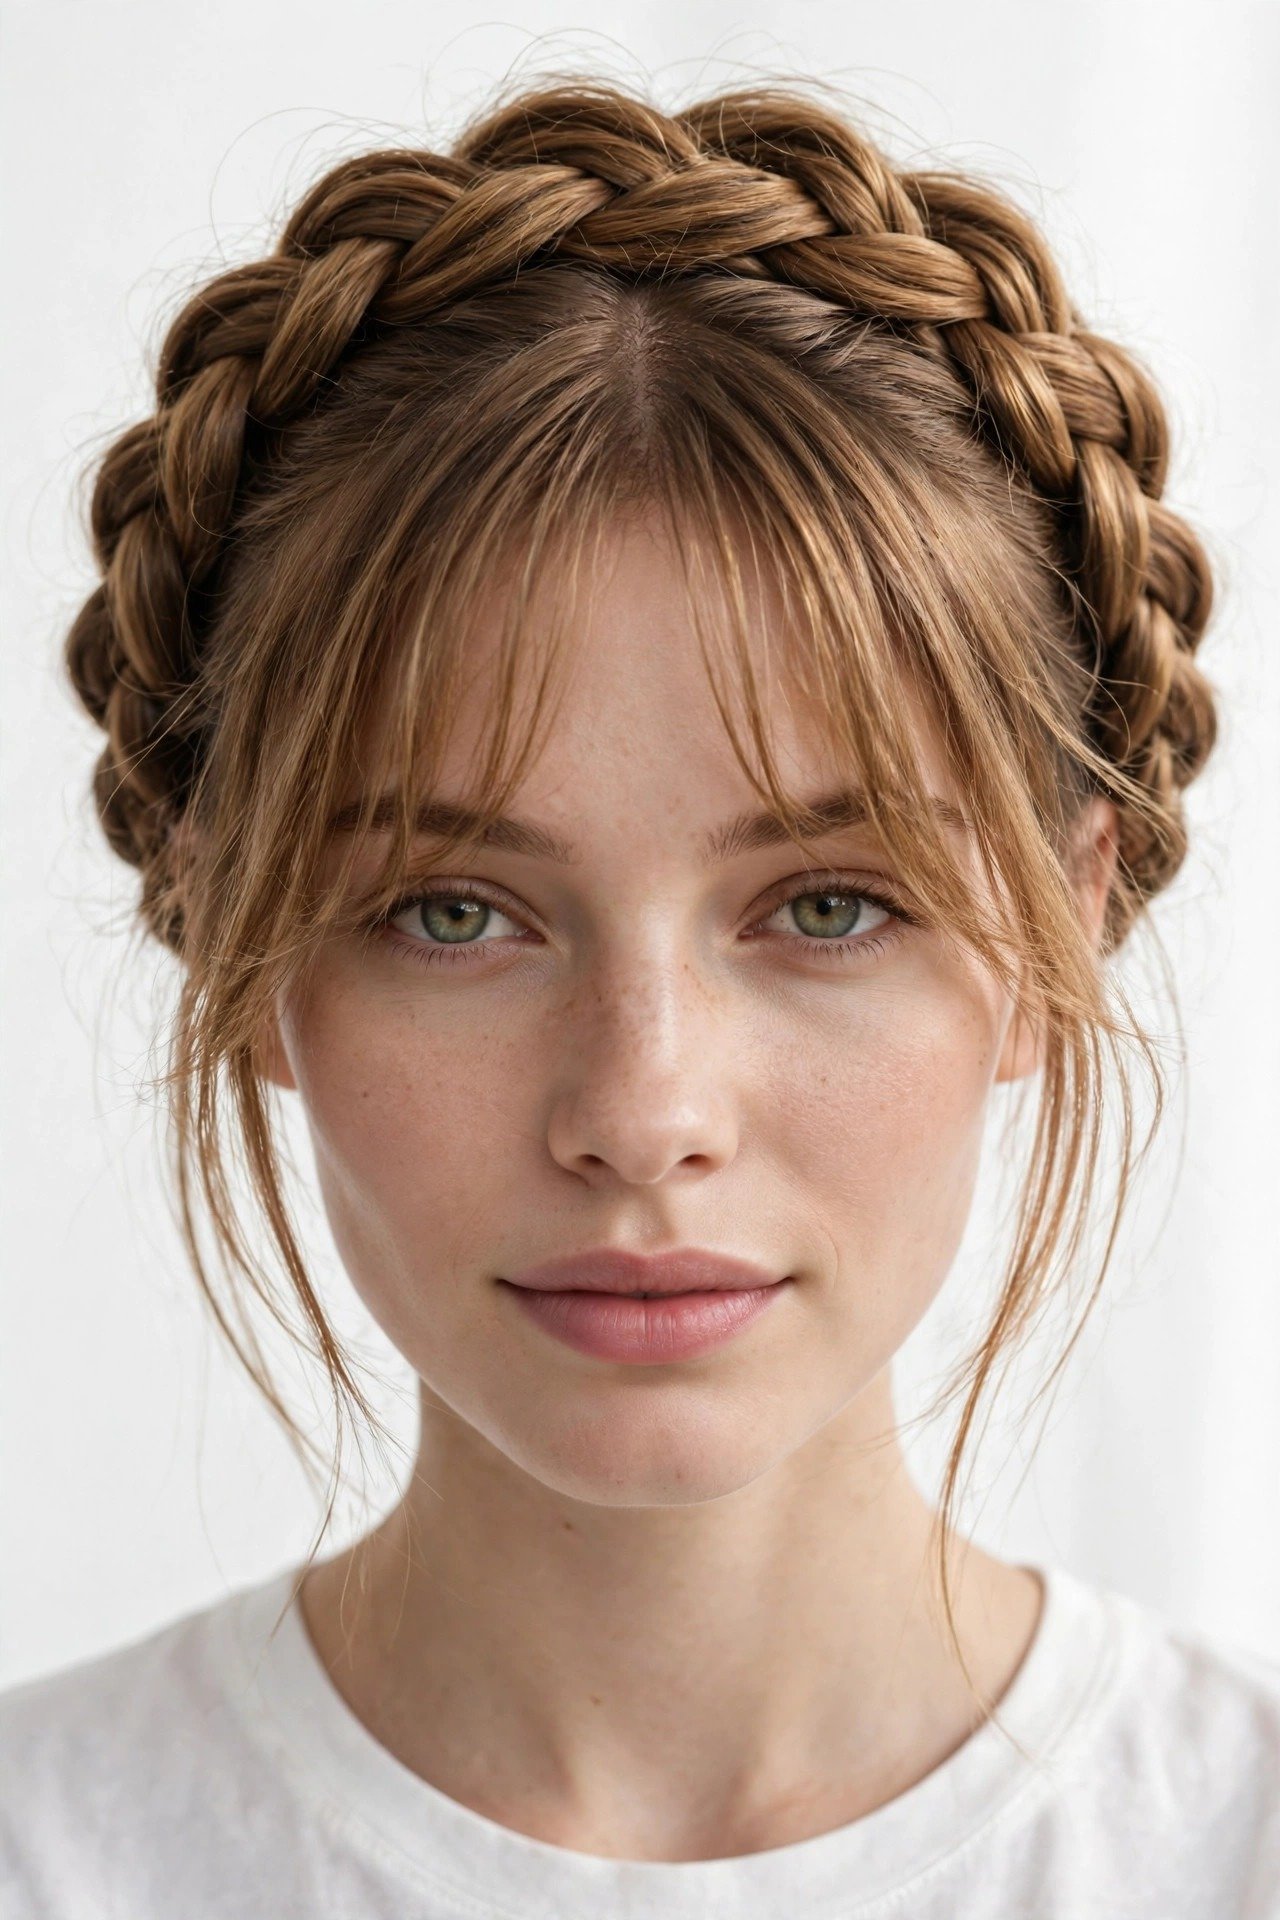
Who it suits: The halo braid with curtain bangs is 2026’s most requested pairing because the bangs soften the formality of the crown. It suits high foreheads beautifully (the bangs do their usual camouflage work) and flatters square faces by breaking up the forehead’s width. The bangs must be long enough to stay out of the braid — chin-length or longer works; micro bangs get swallowed.
What to ask your stylist: “A halo crown braid with my curtain bangs left out and styled to frame the face.” Ask the stylist to braid just behind the bangs’ roots so the bangs fall naturally in front of the braid — if the braid swallows the bangs’ roots, the bangs look disconnected. For events, ask for the bangs to be curled away from the face and set.
Step-by-step: 1) Section out the curtain bangs (roughly a triangle from the temples to the crown) and clip them forward, away from the braiding zone. 2) Braid the halo — Dutch or rope twist — starting behind the clipped section. 3) Pin and finish the crown as usual. 4) Release the bangs. 5) Blow-dry or iron them with a round brush, curving away from the face. 6) Tuck the bangs’ outer edges slightly behind the braid’s front edge so they blend. 7) Set the bangs with a light spray — they move independently of the braid and need their own hold.
Products: Round brush or thermal brush for the bangs, light-hold spray, and a tiny flat iron for touch-ups. Keep blotting papers handy — bangs plus forehead plus a long day equals shine that transfers to the hair.
Maintenance: The braid lasts one to two days; the bangs need daily restyling. On day two, re-curl or re-blow the bangs while leaving the braid intact — the combination refreshes in five minutes.
Common mistakes: Braiding over the bangs’ roots (the bangs disappear and the style loses its signature softness); cutting bangs too short to work with the style; and over-spraying the bangs, which makes them stiff and separates them visually from the soft braid.
11. The Milkmaid Halo with Ribbons
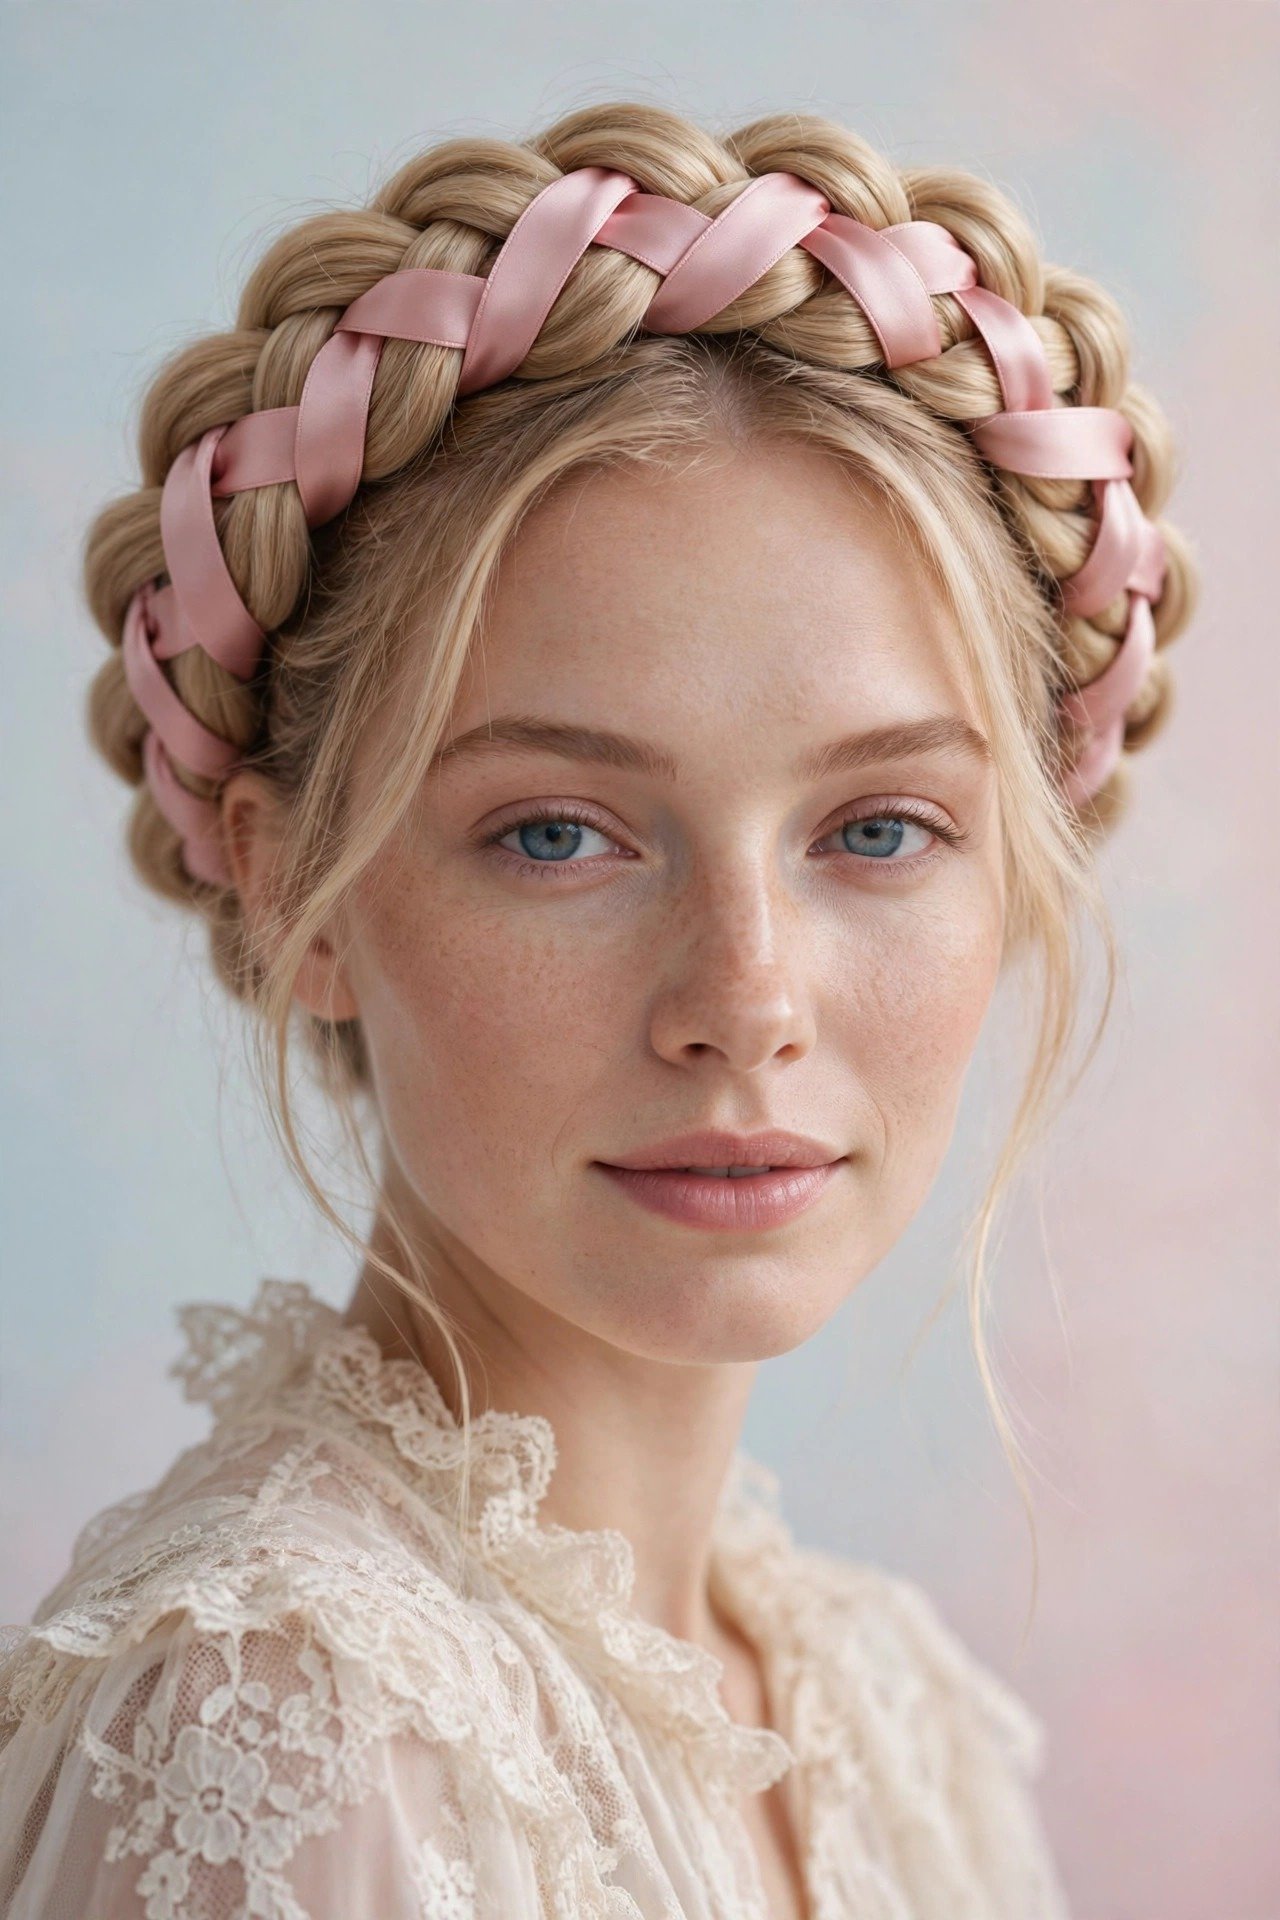
Who it suits: The romantic maximalist — this is the halo for garden weddings, spring festivals, and anyone whose aesthetic leans cottagecore or vintage. It suits medium to thick hair best, because the ribbon needs a substantial braid to weave through. All face shapes work; the ribbon adds a vertical detail that photographs beautifully from every angle.
What to ask your stylist: “A milkmaid crown braid — one thick braid wrapped over the top of the head (not around the hairline) — with a satin ribbon woven through.” Note the distinction: a true milkmaid sits higher and more forward than a halo, like a headband placed on top. Bring the actual ribbon you want used — width matters, and half-inch satin is the sweet spot. Ask for the ribbon to be secured at both ends with pins, not just tucked.
Step-by-step: 1) Part hair down the center. 2) Create two regular three-strand braids, one behind each ear, and secure with clear elastics. 3) Tie the ribbon to the base of one braid. 4) Weave the ribbon through the braid by threading it over-under through the loops as you go — or simpler, wrap it spirally around the braid. 5) Lift the braids up and over the head, crossing them at the crown. 6) Pin each braid’s end under the opposite braid near the temple. 7) Adjust the ribbon so the bow or ends sit asymmetrically — centered bows look costume-y.
Products: Half-inch satin ribbon (about a yard), clear elastics, bobby pins. A light texturizing spray on the braids before wrapping gives the pins something to grip.
Maintenance: Six to ten hours. The ribbon loosens before the braids do — check it every few hours and re-tie if needed. This is not a sleep-in style.
Common mistakes: Using wired ribbon (it kinks and looks crafty, not romantic); centering the bow (asymmetry is more sophisticated); and braiding too loosely — milkmaid braids sit on top of the head and need firm tension to stay put against gravity.
12. The Halo Braid for Thick Hair
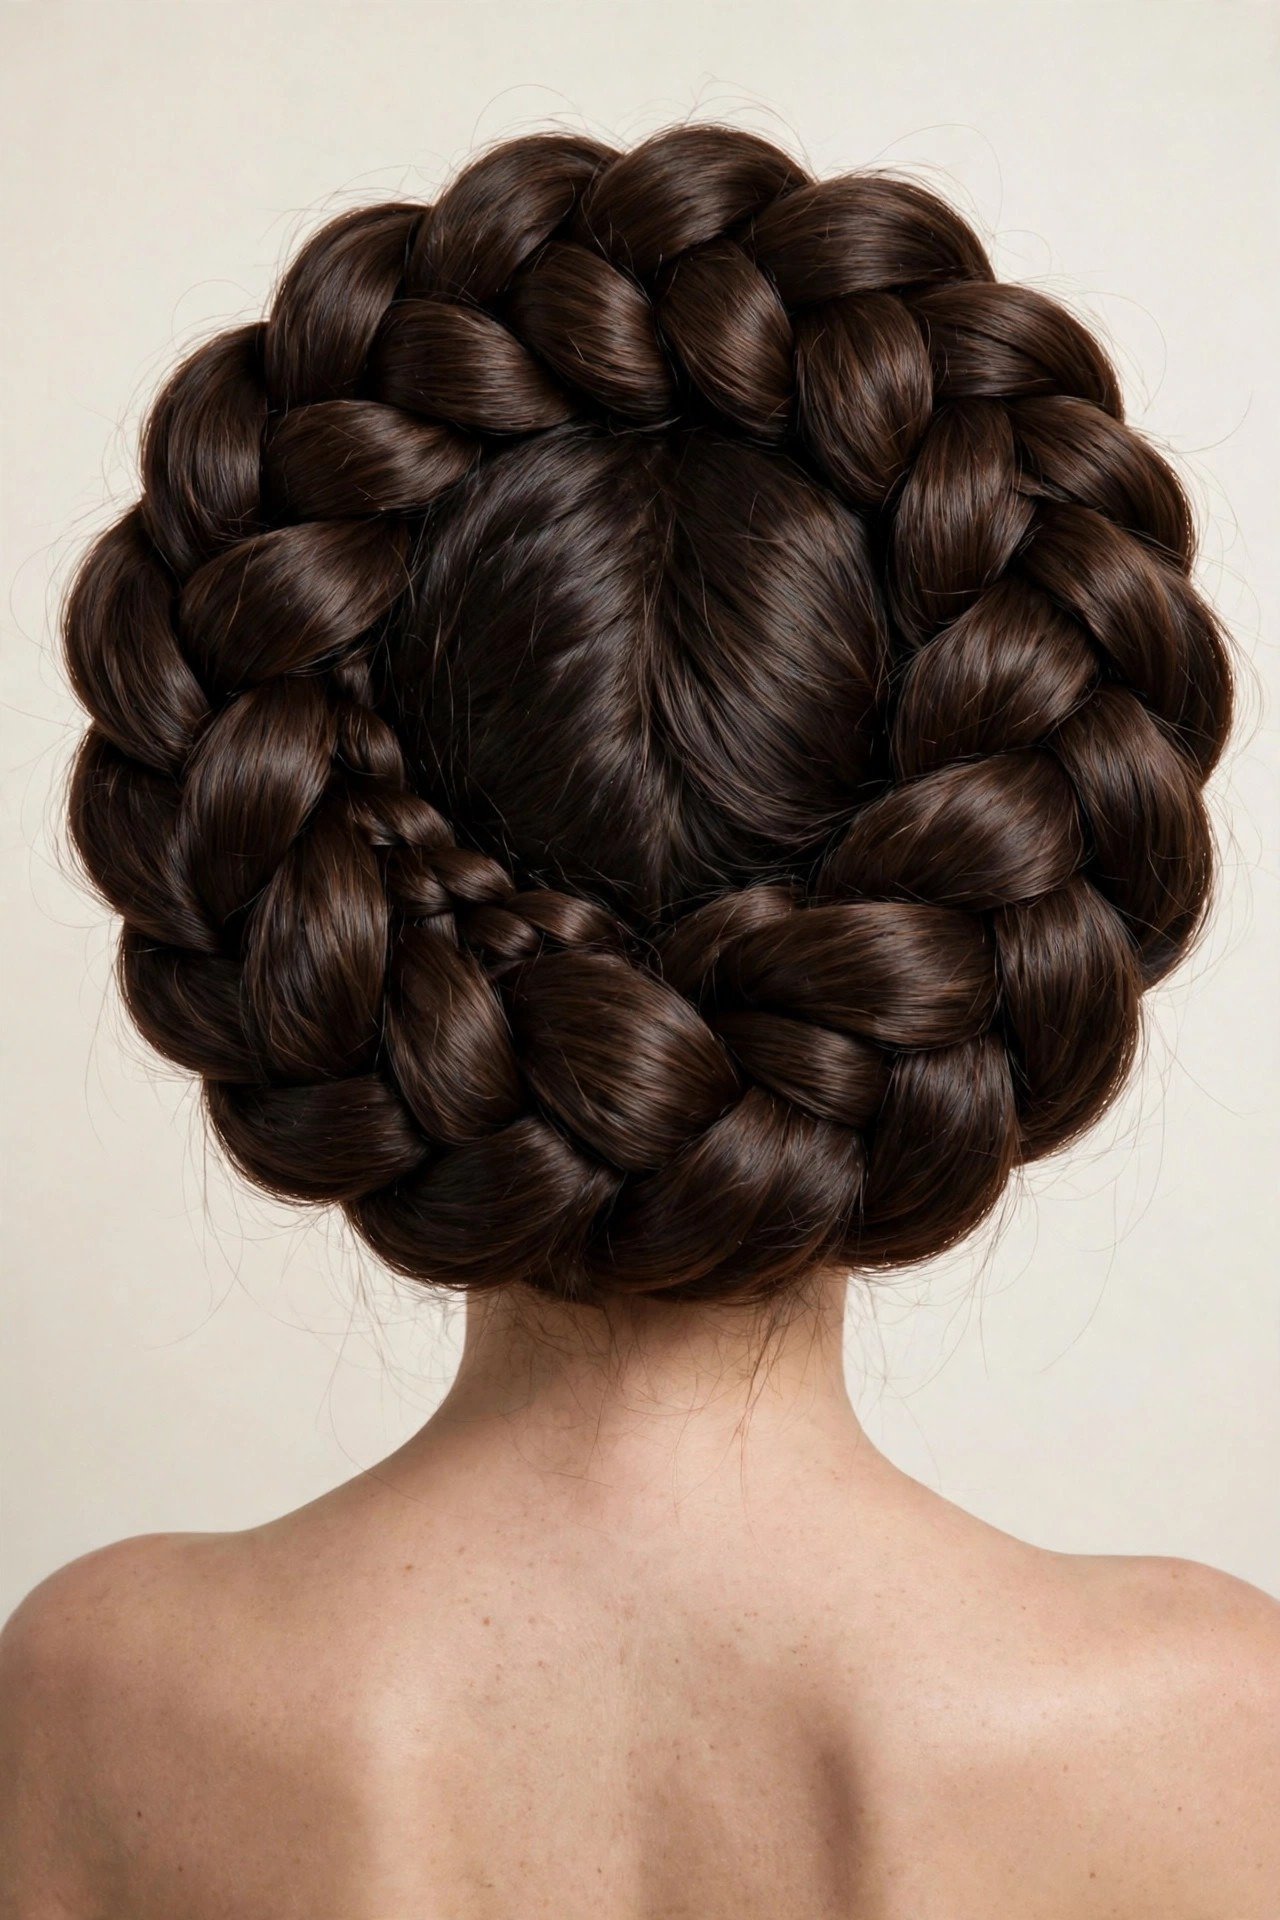
Who it suits: Women with dense, heavy, waist-length (or longer) hair — the ones for whom most updos collapse by noon. Thick hair is actually the ideal halo hair: the braid is substantial, the circle is full, and the style holds its shape for days. If your ponytail elastic snaps regularly, this section was written for you.
What to ask your stylist: “A Dutch halo engineered for very thick hair — sectioned braiding, thinned ends if needed, and structural pinning.” Ask whether they recommend braiding in two sections (a double Dutch halo, style 6) rather than one — for truly massive hair, two braids distribute weight better and last longer. Also ask about end-thinning: tapering the last three inches of the braid’s tail makes the tuck-under at the nape lie flat instead of creating a lump.
Step-by-step: 1) On thick hair, work in slightly damp hair with a strong smoothing cream — dry thick hair fights you. 2) Consider the double-braid method (style 6) as your default. 3) Braid with firm, even tension — loose braiding on thick hair creates a bulky, unstable crown. 4) As you braid, periodically press the braid flat against the head to keep it from standing away. 5) For the nape tuck: thin the tail’s ends with thinning shears (or ask your stylist to), then wrap flat and pin with heavy-duty bobby pins — standard pins bend in thick hair. 6) Anchor the braid to the head with pins placed vertically through the braid into the hair beneath, every two inches.
Products: Heavy-duty bobby pins (the 3-inch ones), strong smoothing cream, clear elastics rated for thick hair, and a firm-hold spray. A braiding balm on the hairline controls the baby hairs that thick hair produces in abundance.
Maintenance: Two to three days easily — thick-hair halos are structural marvels. The enemy is weight migration: if the crown starts sliding back, add two vertical anchor pins at the temples. Sleep in a bonnet to prevent the braid from flattening on one side.
Common mistakes: Using standard bobby pins (they bend and the style collapses); braiding too loosely out of fear of tension headaches (on thick hair, loose braiding creates more weight-pull than firm braiding — counterintuitive but true); and skipping the end-thinning, which leaves a visible lump at the nape that ruins the circle’s line.
13. The Fine-Hair Halo (Pancaked to Perfection)
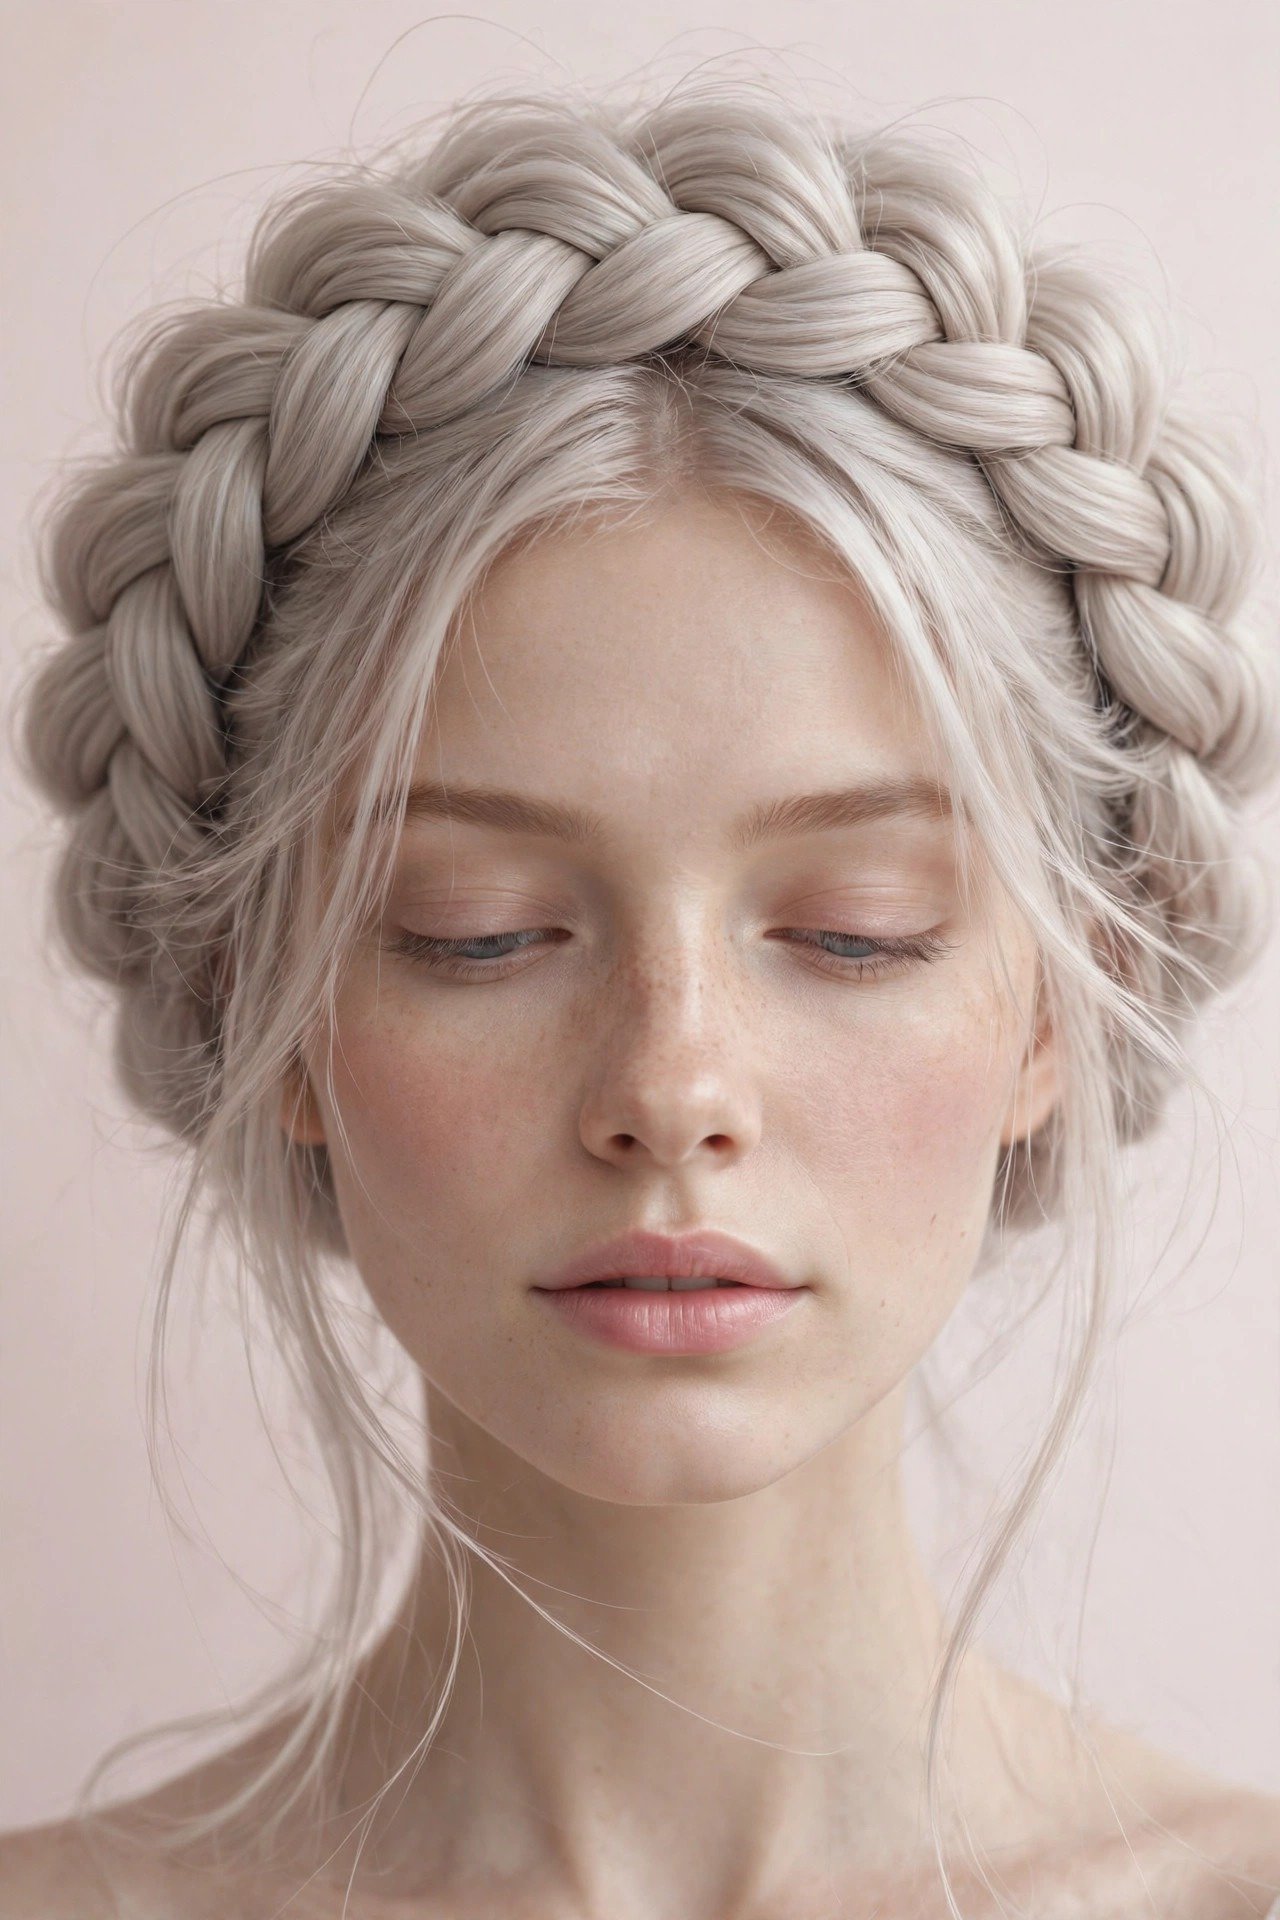
Who it suits: Fine, low-density hair — the hair type most women assume cannot wear a halo braid. It can, with the right engineering. This style suits anyone whose ponytail circumference is under two inches. The pancaking technique (pulling each braid loop wide) can visually double a braid’s size, and strategic prep work gives fine hair the grip it naturally lacks.
What to ask your stylist: “A halo braid for fine hair — maximum pancaking, braided on second-day hair with texturizing prep, ends backcombed before tucking.” Ask honestly whether they recommend a halo braid extension (a braided hairpiece that pins around the head) for events — there is no shame in it, and for very fine hair it produces a dramatically better result than struggling with natural density. A good stylist will tell you the truth.
Step-by-step: 1) Prep is everything: on dry hair, apply texturizing powder generously at the roots and a dry texture spray through the lengths. Fine hair must feel gritty to braid well. 2) Backcomb the crown lightly for a foundation of volume. 3) Dutch-braid around the head with medium tension — too tight and the braid disappears into the head. 4) Before pinning the tail, backcomb the tail’s ends so the tuck has body. 5) Pin the circle in place. 6) Now pancake aggressively: starting at the nape, pull each outer loop outward until the braid is twice its original width. Work slowly — fine hair’s loops tear if yanked. 7) Set with a volumizing (not smoothing) spray.
Products: Texturizing powder, dry texture spray, a fine-tooth backcombing brush, and volumizing hairspray. Avoid serums and oils entirely in the prep — they are the enemy of fine-hair braiding.
Maintenance: One day. Fine-hair halos are the most fragile because there is less hair mass holding the structure. Do not attempt a second day — take it down, enjoy the texture waves it leaves, and restyle fresh.
Common mistakes: Braiding on freshly washed hair (it slips apart within an hour); pancaking before pinning (pancake last, always — pancaking first loosens the braid’s anchor); and using heavy products “for hold” that collapse what little volume exists.
14. The Wedding-Day Floral Halo
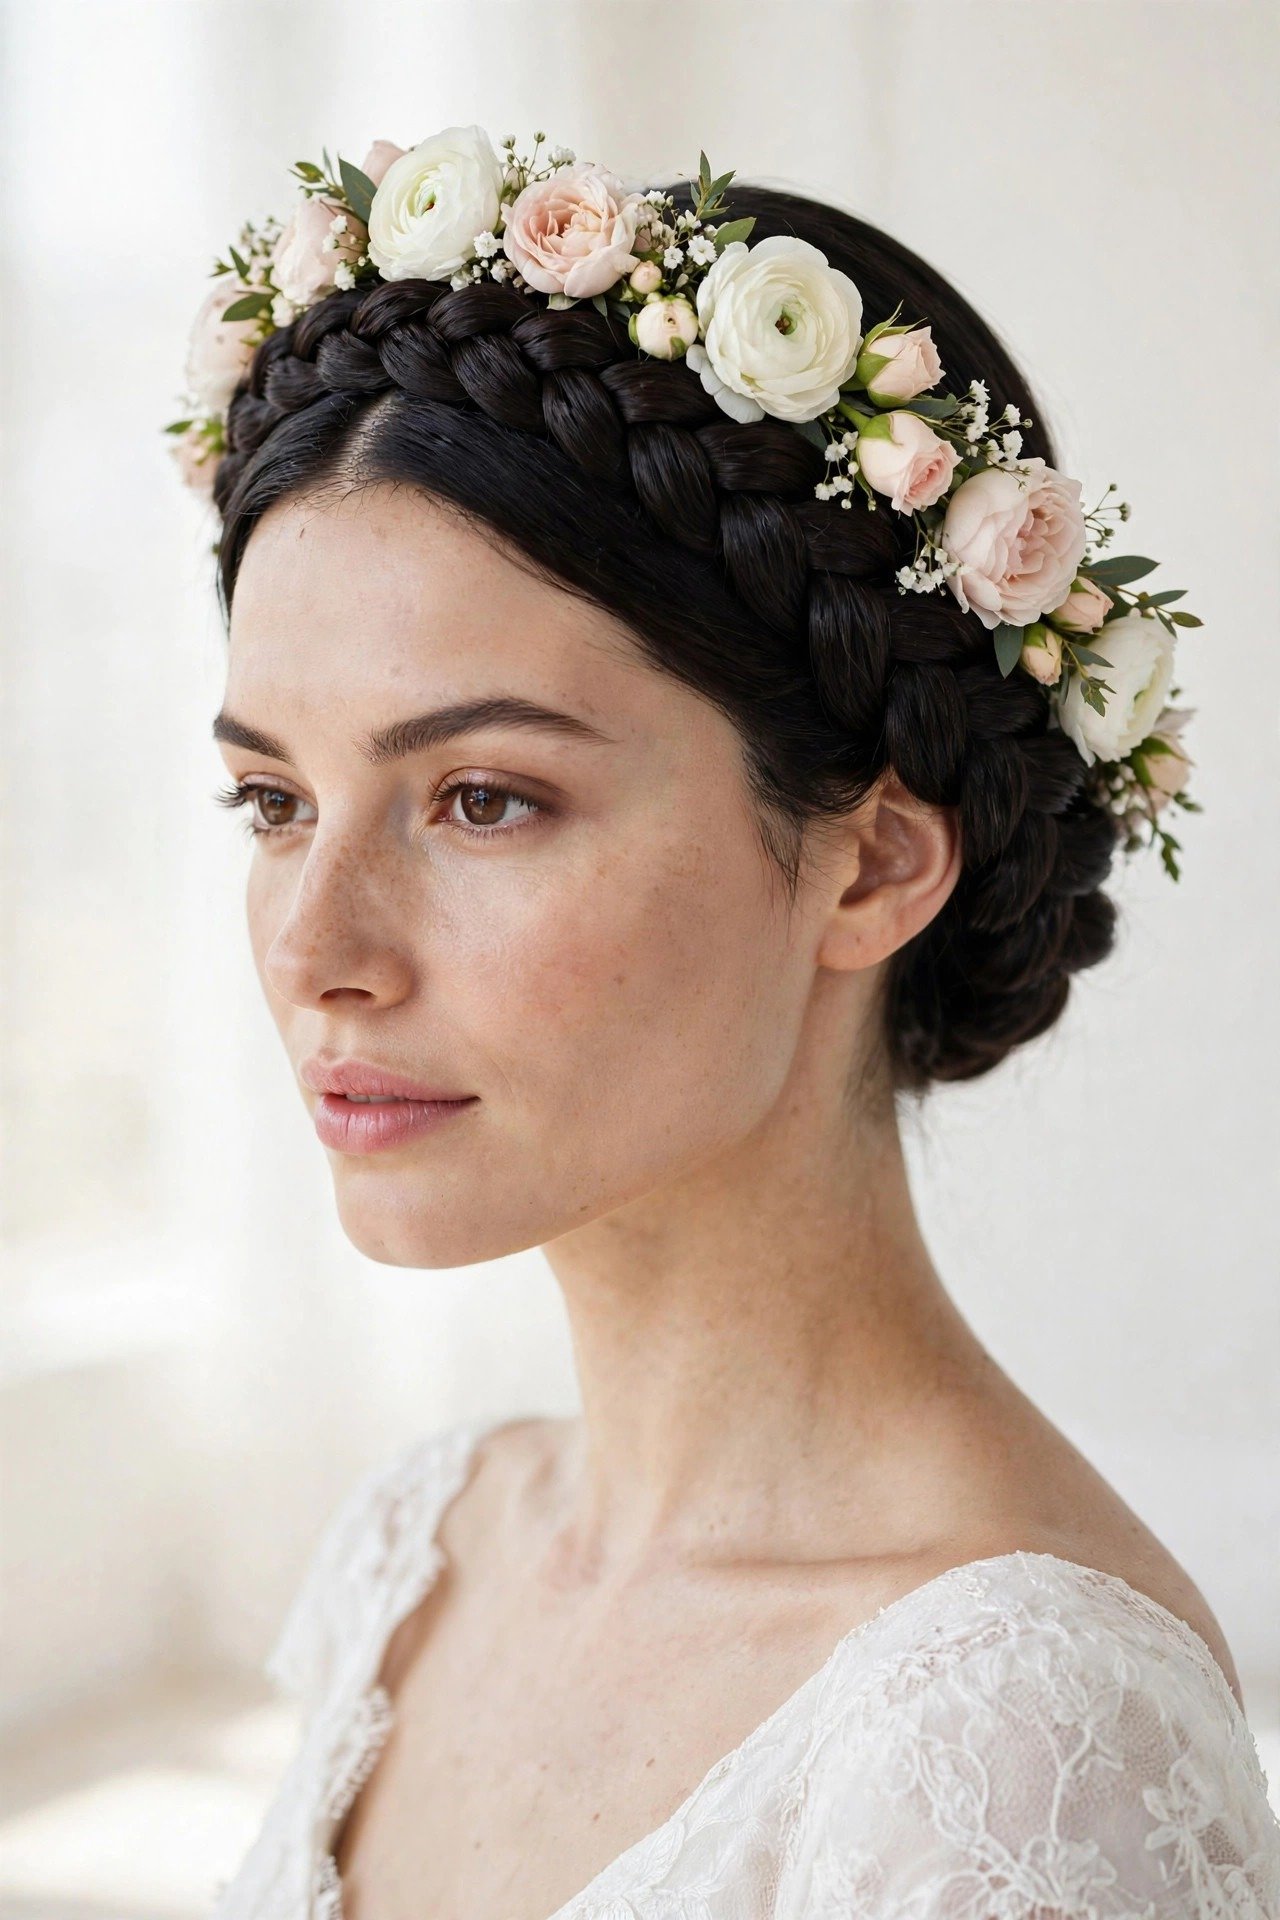
Who it suits: Brides, bridesmaids, and guests at outdoor, garden, bohemian, or destination weddings. The fresh flowers make this the most seasonal halo — spring and summer weddings are its natural habitat. It suits medium to long hair; the flowers need braid length to nestle into. All face shapes, all textures — flowers are universally flattering.
What to ask your stylist: “A halo crown braid with fresh flowers wired in — I will bring the flowers.” Coordinate with your florist: ask for small, hardy blooms (spray roses, wax flower, baby’s breath, ranunculus buds) with wired stems, delivered the morning of. Tell your stylist the flower plan at the trial and do a placement map — which blooms go where. Ask how they will water-proof the placements: a tiny piece of floral water tube or damp cotton wrapped in floral tape at each stem keeps blooms fresh for 8+ hours.
Step-by-step: 1) Build a polished Dutch halo (style 1 or 3) as the foundation — the braid must be complete and set before flowers go in. 2) Starting at one temple, insert wired blooms by pushing the wire into a braid loop and bending it to hook. 3) Work asymmetrically — cluster two or three blooms at one temple, then scatter singles around the remaining three-quarters. 4) Tuck greenery sprigs behind blooms to hide mechanics. 5) Step back and check in a mirror from all angles, including the back — floral halos are photographed from behind constantly. 6) Mist flowers lightly with water (not hairspray — hairspray wilts petals).
Products: Fresh wired blooms from your florist, floral wire and tape (your stylist should carry these), U-shaped hairpins for heavier blooms, and a small water mister for the day.
Maintenance: The braid lasts all day; the flowers last 8 to 12 hours with water tubes. Keep the bouquet’s water mister in the bridal emergency kit. In direct summer sun, expect blooms to fade by evening — plan the heaviest floral impact for the ceremony and photos.
Common mistakes: Choosing large, heavy blooms (garden roses look stunning but drag the braid down — spray roses give the same effect at a quarter of the weight); inserting flowers before the braid is fully pinned (the braid shifts and takes the flowers with it); and using delicate blooms like sweet peas that wilt within two hours of leaving water.
15. The Halo Braid with Face-Framing Tendrils

Who it suits: Anyone who finds a full halo too severe — the tendrils are the softening agent. This suits square and oblong faces especially well, because the curved tendrils break up angular lines. It is also the best halo for women with shorter face-framing layers that refuse to stay in a braid: instead of fighting them, you feature them.
What to ask your stylist: “A halo crown braid with two curled tendrils left out at the temples, about half an inch wide each.” Specify the tendril length — they should fall to the cheekbone or jawline, not the chin (too long looks stringy). Ask for them to be curled away from the face with a small iron and set separately from the braid.
Step-by-step: 1) Section out two half-inch pieces at the temples and clip them forward. 2) Braid the halo normally, starting behind the clipped sections. 3) Finish and pin the crown. 4) Release the tendrils and curl each away from the face with a 0.75-inch iron — small iron, defined curl. 5) While warm, pinch the curl to set it, then let cool. 6) Break up the cooled curl gently with your fingers — never a brush — and position it to fall naturally. 7) Set tendrils with a light spray, holding the can 10 inches away so the mist is fine.
Products: A 0.75-inch curling iron, heat protectant, light-hold spray, and a tiny amount of pomade on the tendril ends to keep them from frizzing into fuzz.
Maintenance: The braid lasts one to two days; tendrils need re-curling daily (two minutes with the small iron). On humid days, accept that tendrils will relax — that is fine, soft waves at the temples still flatter.
Common mistakes: Leaving tendrils too thick (they look like missed sections, not styling); curling them toward the face (they collapse against the cheek and disappear); and cutting the tendrils fresh on the day — style them from existing layers instead.
16. The Sleek Ballerina Halo
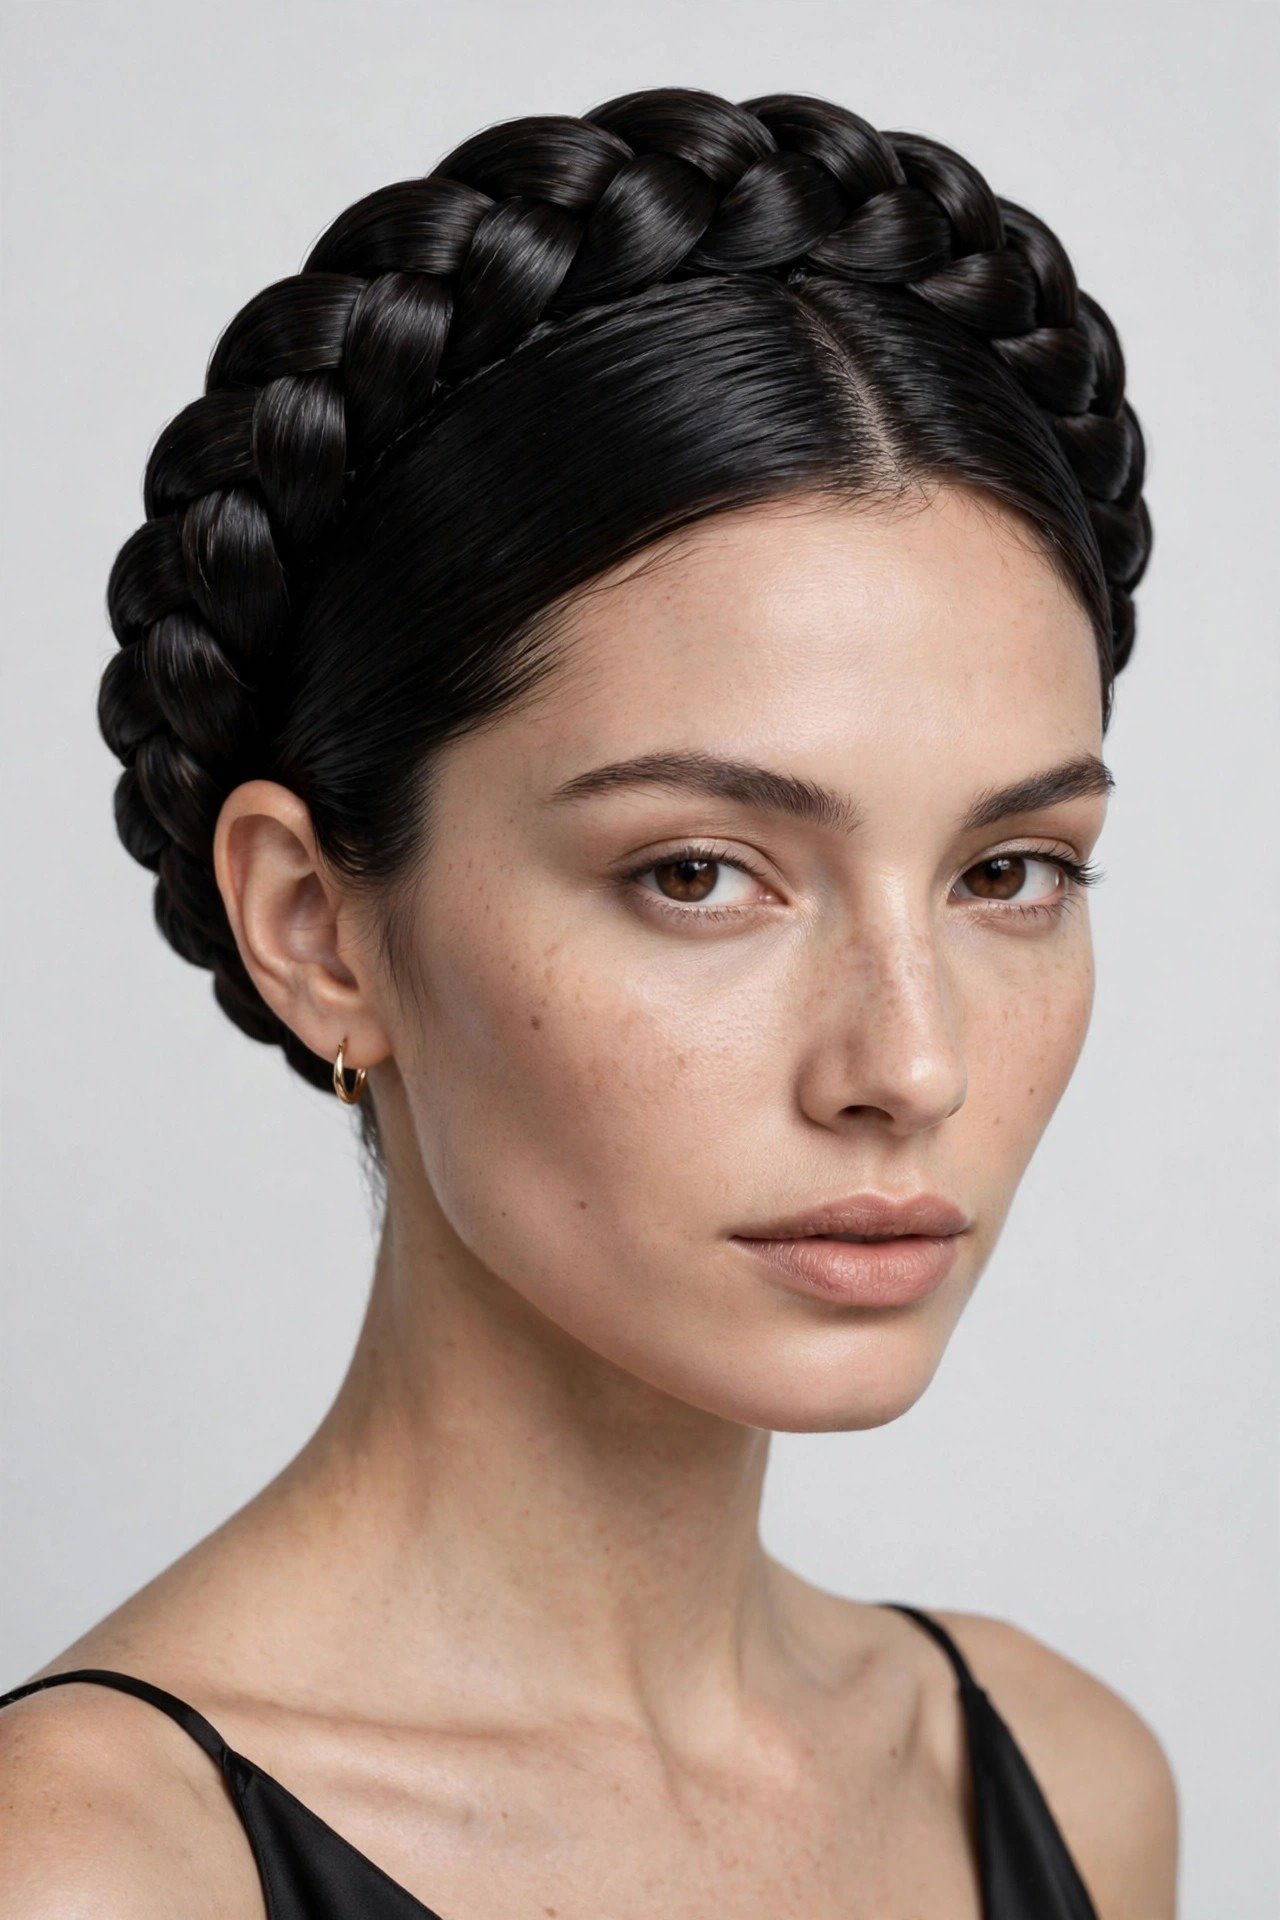
Who it suits: The minimalist, the corporate leader, the woman who wants a halo with architectural precision. This suits straight hair best — the glassy finish is the entire statement — and flatters oval and heart faces with its clean lines. It is the halo for job interviews, boardrooms, galas, and anyone whose personal style is “polished” rather than “romantic.”
What to ask your stylist: “A sleek, high-polish halo braid — Dutch braid with gel-smoothed hairline, no pancaking, no pieces left out, mirror finish.” Specify the part: a clean center part is the most ballerina, a deep side part the most editorial. Ask for the braid to sit slightly further back from the hairline than usual — about two inches — which creates the elongated, regal forehead line that defines the look.
Step-by-step: 1) Apply a strong smoothing gel to damp hair and blow-dry smooth with a paddle brush — the foundation must be glassy. 2) Flat-iron the lengths if needed; every wave will show. 3) Create a precise center or side part with a tail comb. 4) Dutch-braid with firm, even tension, keeping every section clean — no fuzzy edges. 5) Smooth each section with a touch of pomade as you braid. 6) Pin the tail flat and finish with a boar-bristle brush over the hairline to lay every baby hair. 7) Set with a high-shine, strong-hold spray — this is the one halo where shine spray is mandatory, not optional.
Products: Strong smoothing gel, heat protectant, flat iron, pomade for the hairline, boar-bristle brush, and high-shine strong-hold hairspray. Edge control on the hairline and nape keeps the perimeter razor-clean.
Maintenance: One to two days. The sleek finish is vulnerable to humidity — in damp weather, carry the shine spray for touch-ups. Sleep in a silk bonnet; the smoothness survives surprisingly well.
Common mistakes: Skipping the blowout (braiding air-dried hair never achieves the glass finish); pancaking even slightly (it breaks the architectural line); and using matte products anywhere in the process — every product in this style should add shine, not absorb it.
How to Do a Halo Braid in 10 Minutes: The Universal Tutorial
Once you understand the mechanics, any halo braid follows the same skeleton. Here is the universal method that underlies all sixteen styles above — learn this, and every variation becomes a simple modification.
Minutes 0–2: Prep. Start with day-old hair if possible — it grips better than freshly washed hair. If your hair is freshly washed, apply texturizing powder at the roots and a light mousse through the lengths, then rough-dry. Brush thoroughly; every tangle will fight you during braiding. Decide your part (center, side, or none) and your braid type (Dutch for dimension, French for flatness, rope twist for simplicity).
Minutes 2–7: Braid. Begin at one temple, about an inch behind the hairline. Dutch-braid around the head, adding hair from both sides as you go — the top-side additions come from above the braid line, the bottom-side additions from below it near the nape. Keep your hands close to the head and maintain even tension; the braid should hug the skull, not hover. When you complete the circle and run out of loose hair, finish the remaining length as a regular three-strand braid.
Minutes 7–9: Secure. Wrap the tail flat against the nape, tucking it under the braid’s starting point. Pin with bobby pins in X formations — push one pin in one direction, a second pin crossing it. Use at least six pins for medium hair, more for thick hair. The pins should go through the braid and into the hair beneath, anchoring braid to head.
Minutes 9–10: Finish. Pancake if desired (styles 1, 2, 13), or smooth if sleek (styles 5, 16). Pull out face-framing pieces if your variation calls for them. Set with hairspray in two light passes from 10 inches away. Check the back with a hand mirror — the nape tuck is where DIY halos most often fail, and a two-second check saves hours of insecurity.
The single biggest leap in your halo braid skill will come from practicing the Dutch braid motion until it is muscle memory. Braid a practice Dutch braid down the side of your head — not even a halo, just a side Dutch — five times over a week. By the sixth attempt, your hands will know the under-crossing rhythm, and the halo becomes an exercise in direction rather than technique.
What to Ask Your Stylist: The Exact Script
Walking into a salon and saying “halo braid” produces wildly different results depending on the stylist’s training. Use this script to get exactly what you want: “I’d like a Dutch crown braid — the braid circling the whole head about an inch behind my hairline, with [sleek / softly pancaked / textured] finish. My hair is [fine / medium / thick] and [straight / wavy / curly], and it’s for [everyday / work / a wedding / a festival]. I’d like the tail tucked flat at the nape with no visible elastic. Can you show me the back before I leave?”
Fill in the brackets honestly — especially the hair-type description, because stylists plan their pin count, product choice, and tension entirely around density and texture. Bring two reference photos on your phone: one showing the fullness level you want, one showing the hairline placement. And always ask to see the back. A halo braid is worn in 360 degrees; the back view is not optional.
Price-wise, expect to pay for an updo service — typically $65 to $150 depending on your market, more for bridal with a trial. A trial for event styling is worth every cent; halo braids are one of the most trial-dependent styles because tension, placement, and fullness preferences vary so much person to person.
Halo Braid Maintenance: Making It Last
A halo braid’s lifespan depends on the style (see each section above), but these universal rules extend any of them. Night one: wear a silk or satin bonnet — cotton pillowcases create friction that loosens braids and frizzes the hairline. If the braid feels tight at bedtime, it was braided too tightly; loosen two or three pins rather than suffering. Morning refresh: apply dry shampoo at the roots along the hairline, smooth baby hairs with edge control, and re-pin any sections that have migrated. Never re-braid over more than one day of product — the buildup makes hair slippery and the re-braid will fail faster than the original.
Washing after a halo: take the style down gently, removing pins before unbraiding (pulling pins through braided hair causes breakage). Detangle from ends to roots with a wide-tooth comb before shampooing — braided hair sheds normally, and the shed hairs tangle if you shampoo first. Follow with a deep conditioner, because even gentle braiding stresses the hair slightly. If you wear halo braids weekly, alternate with fully loose styles to give your hairline a break from tension.
Halo Braid FAQs

How long does my hair need to be for a halo braid?
Shoulder length is the practical minimum for a true one-braid halo — you need enough length for the braid to travel the full circumference of your head (roughly 22 to 24 inches of braiding path on an average head) plus a tail to tuck.
If your hair is chin-length to shoulder-length, use the faux halo method in style 8, which builds the crown from overlapping pinned sections instead of one continuous braid. With clip-in extensions, even a bob can wear a convincing halo for an event. As a rule of thumb: if you can pull your hair into a low ponytail, you have enough for a faux halo; if the ponytail reaches your collarbone, you have enough for a real one.
Can I do a halo braid on myself, or do I need a stylist?
You can absolutely learn to do a halo braid on yourself — the Dutch braid technique is the only real skill required, and it becomes muscle memory within a week of practice.
Start with the rope-twist halo (style 5), which uses two strands instead of three and is dramatically easier to manage behind your head. Use two mirrors (a wall mirror plus a hand mirror) so you can see the back. Book a stylist for weddings and formal events, not because you can’t do it, but because a professional’s back-of-head access produces a cleaner nape tuck and the style photographs better. For everyday wear, DIY is completely realistic.
Will a halo braid damage my hair or cause breakage?
A halo braid is one of the least damaging updos when done correctly — the ends are tucked away from friction, which actually protects them.
Damage comes from three mistakes: braiding too tightly (if you feel pulling at the hairline or get a headache, it is too tight), leaving the same braid in for more than three days (matting at the roots), and ripping pins out instead of removing them carefully. Braid with firm but comfortable tension, take it down within two to three days, remove pins before unbraiding, and your halo braid is a protective style, not a damaging one.
How do I keep my halo braid from falling apart during the day?
Anchor failure is almost always a pin problem, not a braid problem — use more pins than you think you need, placed in X formations through the braid into the hair beneath.
The full formula: braid on day-old or texturized hair (never slippery clean hair), use a pin every one to two inches along the braid’s underside, cross pins in X shapes at the nape tuck, and finish with two light layers of hairspray rather than one heavy one. For all-day events, carry six emergency pins. If the crown slides backward, the nape tuck is failing — add two vertical pins through the braid at the temples to re-anchor it forward.
What is the difference between a halo braid and a crown braid?
There is no technical difference — “halo braid” and “crown braid” are two names for the same style: a braid circling the head like a crown or halo.
“Halo braid” became the dominant term through Pinterest and Instagram in the late 2010s, while “crown braid” is the older salon term. Some stylists use “milkmaid braid” for the variation where two braids cross over the top of the head (style 11), reserving “halo/crown” for the single circle around the hairline — but in common usage, all three terms overlap heavily. When booking, describe the placement you want rather than relying on the name alone.
Conclusion
The halo braid endures because it solves the oldest problem in hairstyling: how to look completely finished with a style that is secretly practical. It protects your ends, survives the day, flatters nearly every face, and carries you from a morning meeting to an evening wedding without a restyle. In 2026, its sixteen variations — from the architectural sleekness of the ballerina halo to the romantic abandon of the boho messy crown — mean there is no hair type, no occasion, and no skill level left out.
Start with the rope-twist halo if you are new to braiding your own hair; graduate to the Dutch crown when your hands learn the rhythm; and book the bridal pearl-pinned version the next time you need to feel like the most polished woman in the room. Whichever of the sixteen you choose, remember the three rules that separate a good halo from a great one: braid on hair with grip, pin more than feels necessary, and always check the back. Master those, and the crown is yours.