Braided Bun Women 2026: 16 Sculpted Updo Styles
There is an updo I keep doing on clients this fall that gets more phone photos than anything else in my chair: the braided bun. Not the messy topknot you threw up on a Tuesday. I am talking about braids woven deliberately into or around a bun — lacquered, polished, architectural — the kind of hair that makes a woman stop mid-conversation and ask your stylist’s name. A braided bun for women in 2026 is not casual. It is a decision. It says you planned this.
I have styled braided buns for weddings, holiday galas, engagement shoots, and one very memorable New Year’s Eve where the bun outlasted the fireworks, the dancing, and the midnight rain. I have also taken apart braided buns done by someone else — the ones where the braid was too loose, the bun slipped by dessert, and the photos told the whole story. The difference between a braided bun that looks sculpted and one that looks like it gave up is never luck. It is prep, tension, and knowing which variation actually suits the occasion.
Here is what this guide covers: what a braided bun really is and why it owns fall 2026, exactly how to prep your hair before you start, sixteen distinct braided bun styles for women — from classic three-strand buns to space-bun pairs, bridal crowns, and rope twists — a step-by-step for the classic sculpted version you can do at home, the products and tools that actually earn their place, how to make the whole thing last all night, and answers to the questions I get asked most. If you have been saving braided bun photos without knowing where to start, this is your starting line.
What Is the Braided Bun, Really?
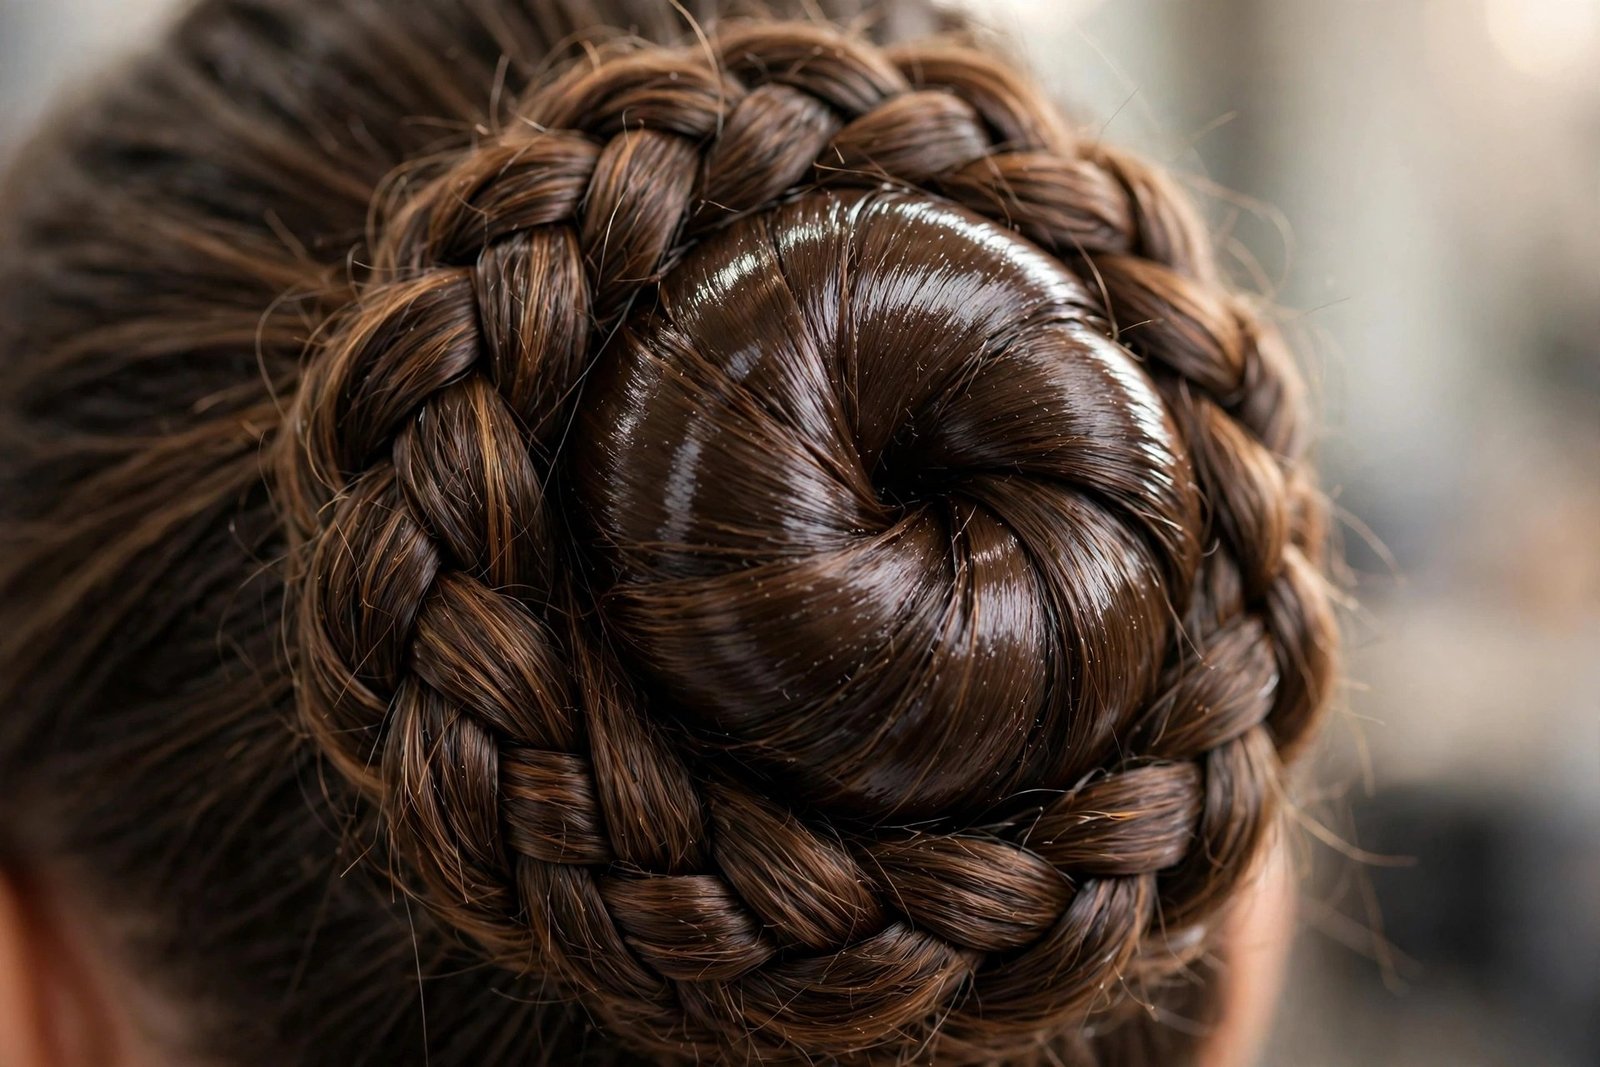
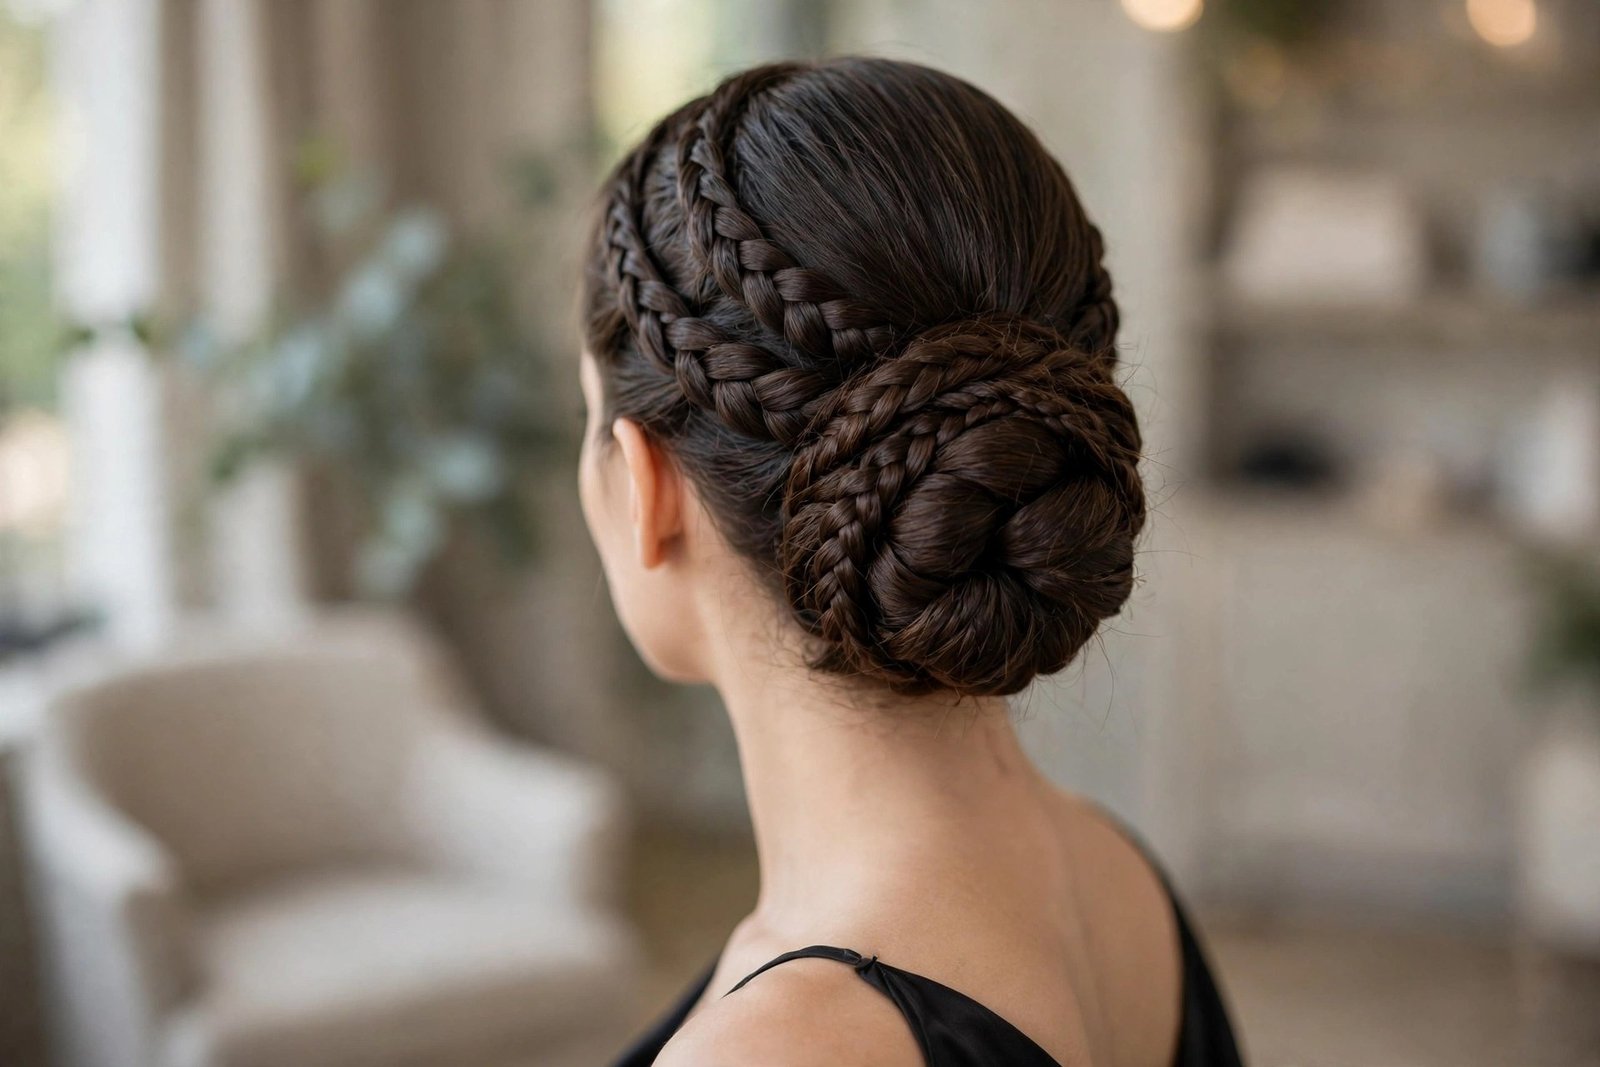
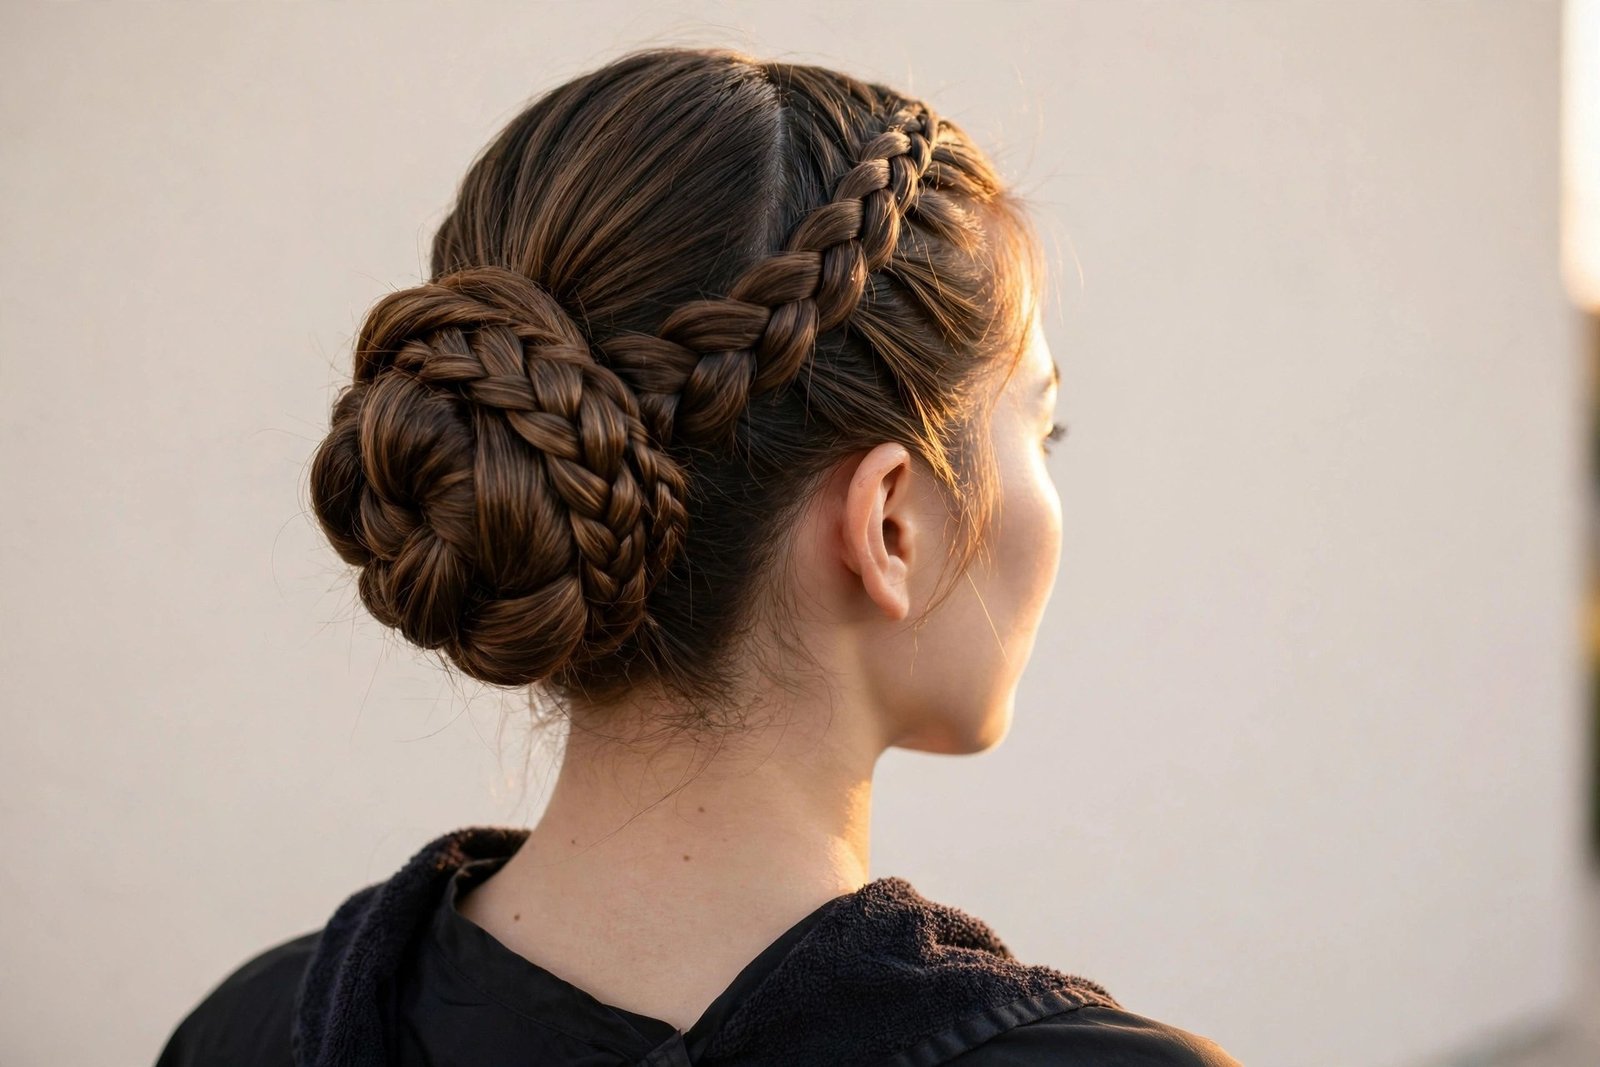
A braided bun is exactly what it sounds like and nothing like you expect: braids that are woven into, around, or above a bun so the two elements read as one piece. The braid might wrap the base of the bun like a frame, coil on top of it, climb the sides of the head before feeding into the knot, or form a crown that melts into a low chignon. The point is integration. A braid sitting next to a bun is two hairstyles sharing headspace. A braided bun is one structure, and you can feel the difference when it holds through a long night.
What separates the 2026 braided bun from the updos of a few years back is finish. The current version is lacquered and polished — hair smoothed with gel and edge control, braids pulled tight enough to hold their pattern for hours, the surface finished with shine spray so it photographs with dimension instead of frizz. This is not the undone, lived-in aesthetic that dominated the last few seasons. The braided bun women are asking for now is architectural. You should be able to see the braid pattern clearly from across a room.
It works on medium to long hair, and the sweet spot is hair long enough to braid with real length left over to form the bun — roughly shoulder-blade length and beyond. Shorter hair is not disqualified; it just changes the game. You will lean on Dutch braids (which sit on top of the hair and need less length) or add clip-in extensions for fullness and length. Extensions are not cheating here. Half the red-carpet braided buns you admire had help, and there is nothing wrong with building the hair you want for the night you want it.
The occasions are where this style earns its reputation. Weddings, holiday parties, formal evenings, engagement photos, black-tie events — anywhere you need hair that looks intentional from the first photo to the last dance. A braided bun keeps everything off the neck, shows off earrings and a neckline, and photographs from every angle because the detail wraps all the way around. I have never had a client regret choosing one for a big night. I have watched several regret choosing a style that collapsed by nine.
Why Braided Buns Own Fall 2026
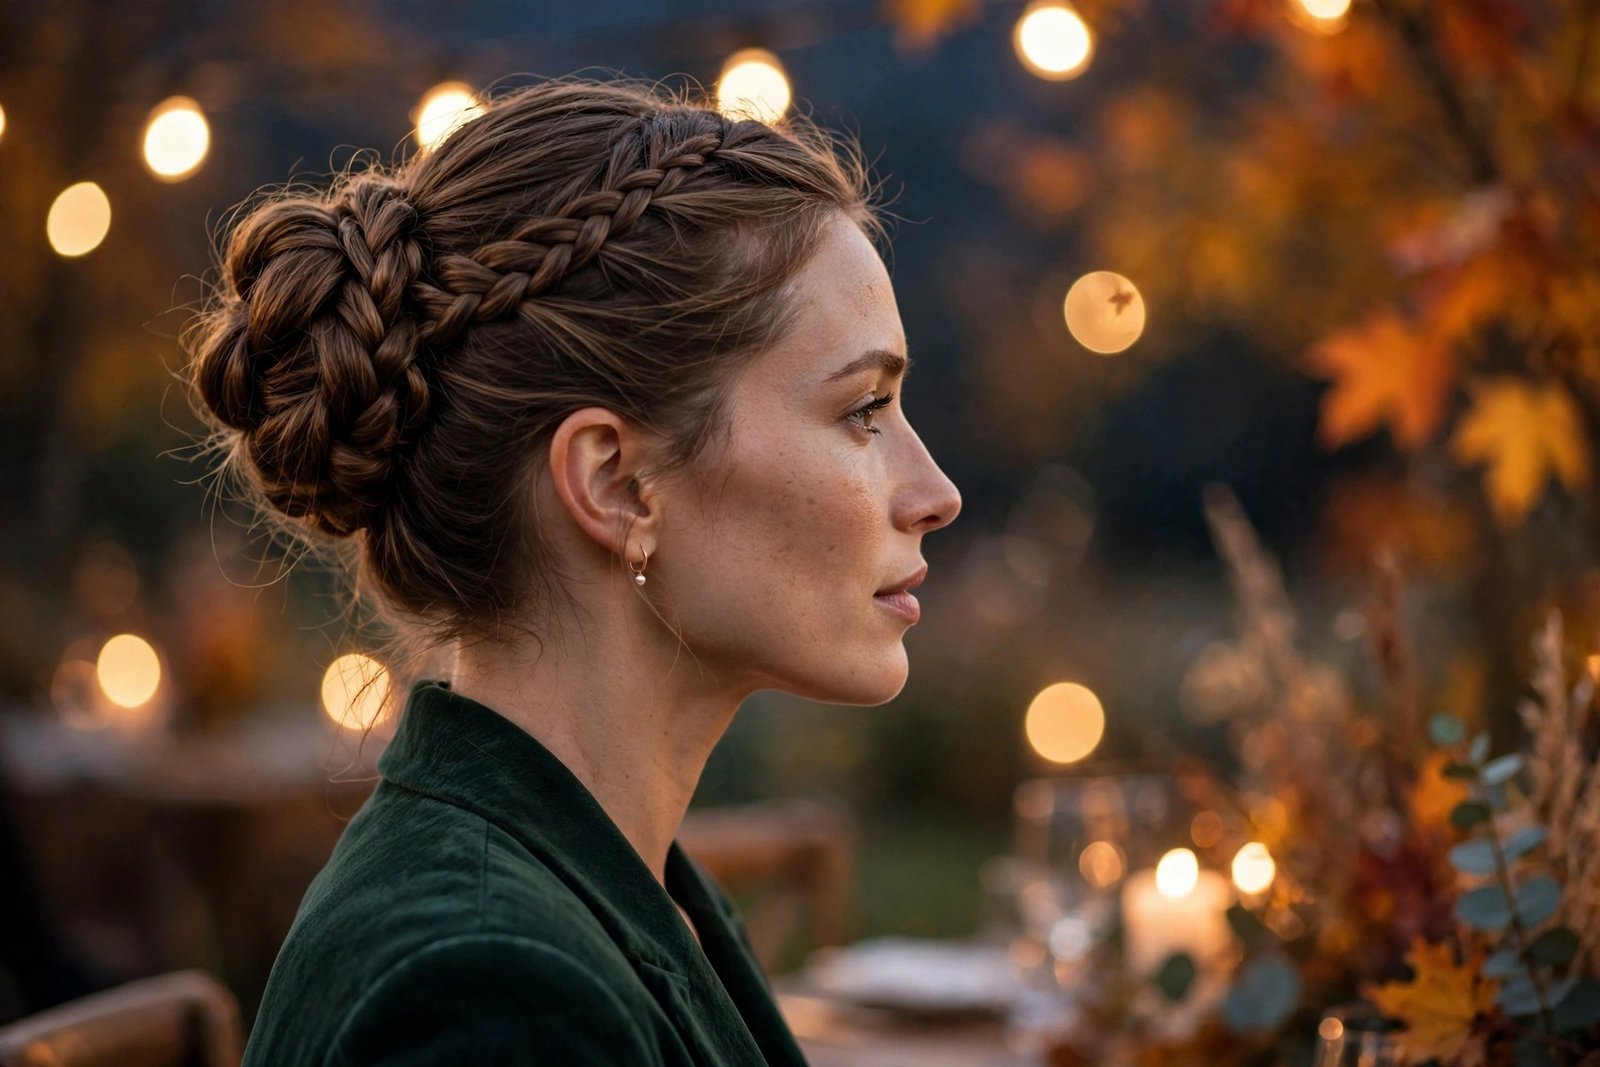
Every season has an occasion updo, and this fall the braided bun won by a landslide. Part of it is the timing. Fall and winter bring the events — weddings in October, holiday parties in December, New Year’s Eve — and women want hair that survives a long evening without a touch-up kit. The braided bun is built for endurance. Tight braids are structural; they hold the bun the way rebar holds concrete. A style that starts perfect and ends perfect has obvious appeal when the calendar fills up.
The other part is the look itself. After years of soft, undone texture, there is a real appetite for polish again. The lacquered, sculpted finish of the 2026 braided bun feels like a response to all that looseness — hair that is controlled on purpose, every braid deliberate, every edge laid down. It photographs beautifully, which matters more than anyone admits. When your hairstyle will appear in two hundred tagged photos, “effortless” stops being the goal and “flawless” takes over.
I have also watched the braid techniques themselves get more interesting. The braided bun is no longer just a three-strand braid coiled around a knot. Stylists are folding in fishtails, Dutch braids, rope twists, bubble braids, and waterfall patterns — sometimes two techniques in one head of hair. The style has range now. A braided crown flowing into a low bun reads romantic; Dutch-braid sides into a sleek top knot reads powerful; a pair of braided space buns reads playful. One concept, completely different personalities. That range is why it keeps showing up everywhere instead of burning out as a trend.
And practically speaking, it suits the season. Cooler air is kinder to styled hair than summer humidity, so the lacquered finish holds longer with less fighting. Sweaters and turtlenecks frame the neckline a braided bun exposes. The whole thing just fits fall. If you are choosing one occasion style to master before the holidays, this is the one.
Prep: The Hair You Need Before You Start
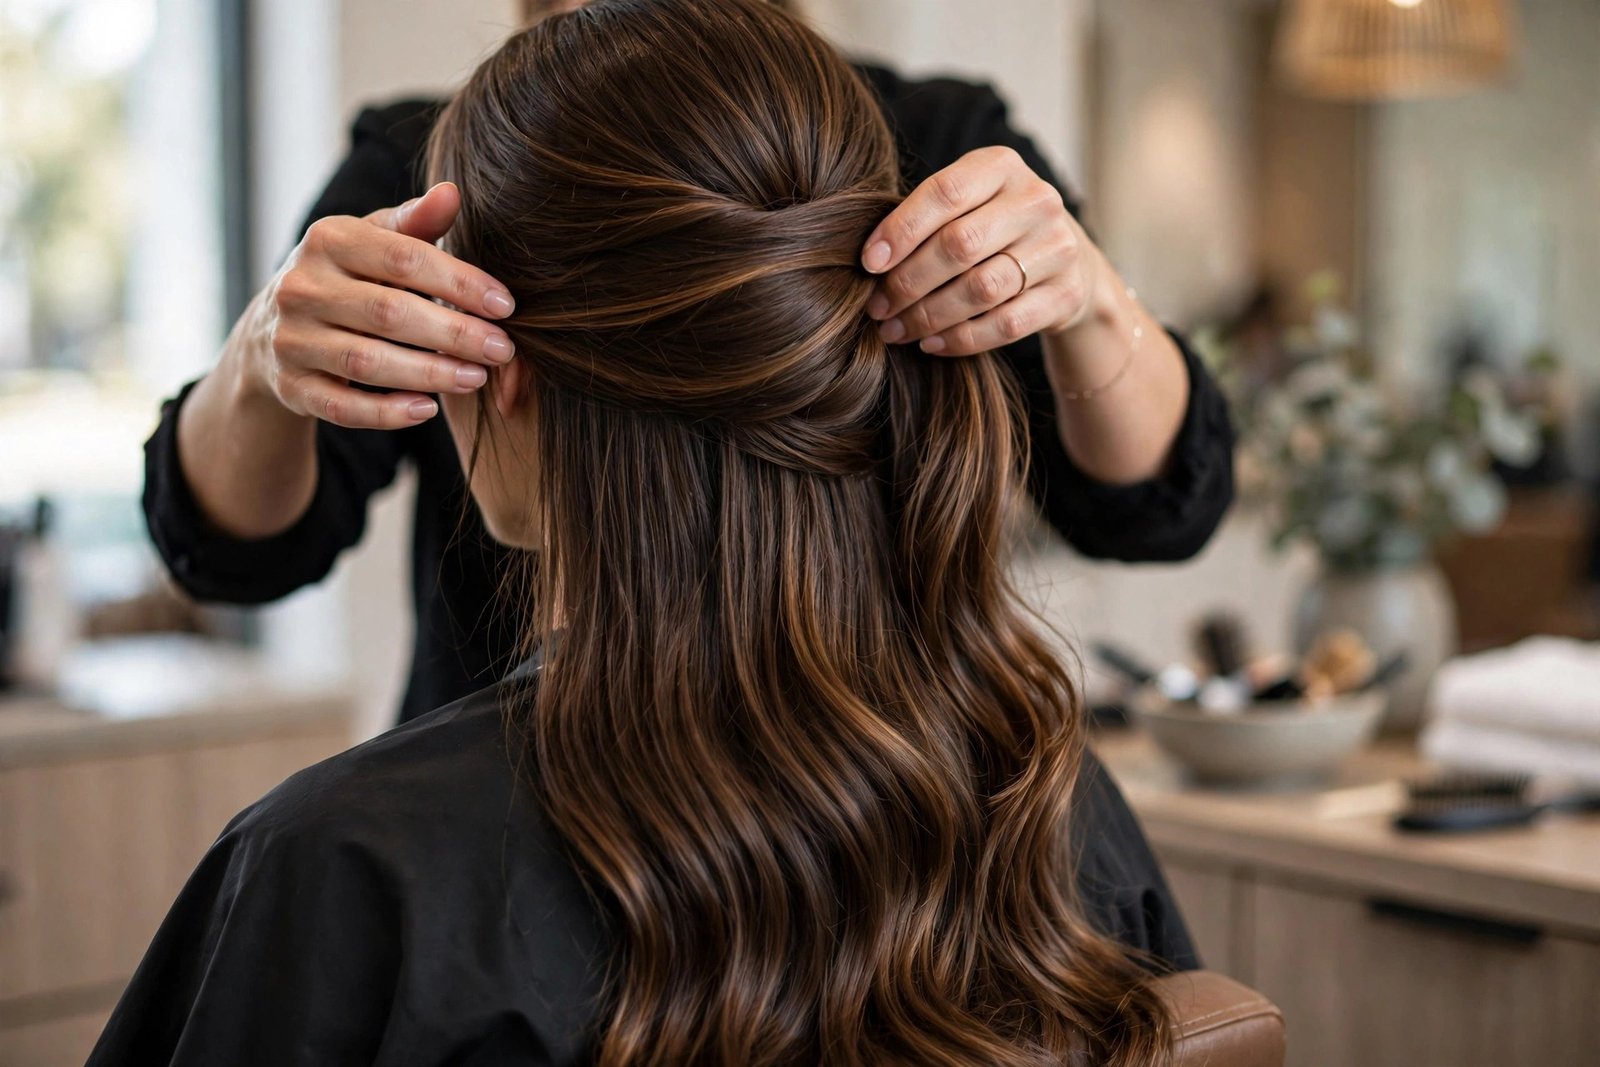
The braided bun is won or lost before you pick up a bobby pin. I am serious about this: the prep determines whether the style holds for ten hours or forty minutes. Here is the foundation that works, whether you are doing it yourself or sitting in my chair.
Start with day-old hair. Freshly washed hair is too clean, too slippery — braids slide right out of it and pins find nothing to grip. Hair that was washed yesterday has natural oils and texture that give braids something to bite. If your hair is freshly washed and you cannot wait, a texture spray or a light dry shampoo at the roots creates the same grip. Do not skip this. Clean hair is the number one reason DIY braided buns unravel.
Blow-dry smooth with a paddle brush, directing everything back. You want the hair moving in one direction — back and up or back and down, depending on where your bun will sit — before the braiding starts. Cowlicks and part lines that fight the direction will fight the whole style. If your hair is naturally curly or wavy, straighten the lengths you plan to braid, or at least smooth them enough that the braid pattern reads clean. The tighter and smoother the braid, the longer it holds and the sharper it photographs.
Work a styling cream or light gel through the hair before braiding. Not enough to make it wet — enough to tame flyaways and give the surface that lacquered control. For edges and the hairline, keep edge control handy; you will smooth it at the end, but laying the groundwork early means less cleanup later. If your hair is fine or slippery, add a volumizing powder or texturizing spray at the roots where the bun will anchor. Grip is everything. The bun needs something to sit against, and the pins need something to bite into.
Length check: if your hair reaches at least your shoulder blades, you have enough for most of the sixteen styles below without help. Shorter than that, or fine hair that braids thin, and I recommend clip-in extensions in your shade — one pack is usually enough — clipped in before braiding so the braids and the bun have real substance. Fullness is half the visual impact of this style. A thin braided bun reads delicate; a full one reads sculpted. Know which one you want and build toward it.
Braided Bun Styles 1–3: The Lacquered Classics
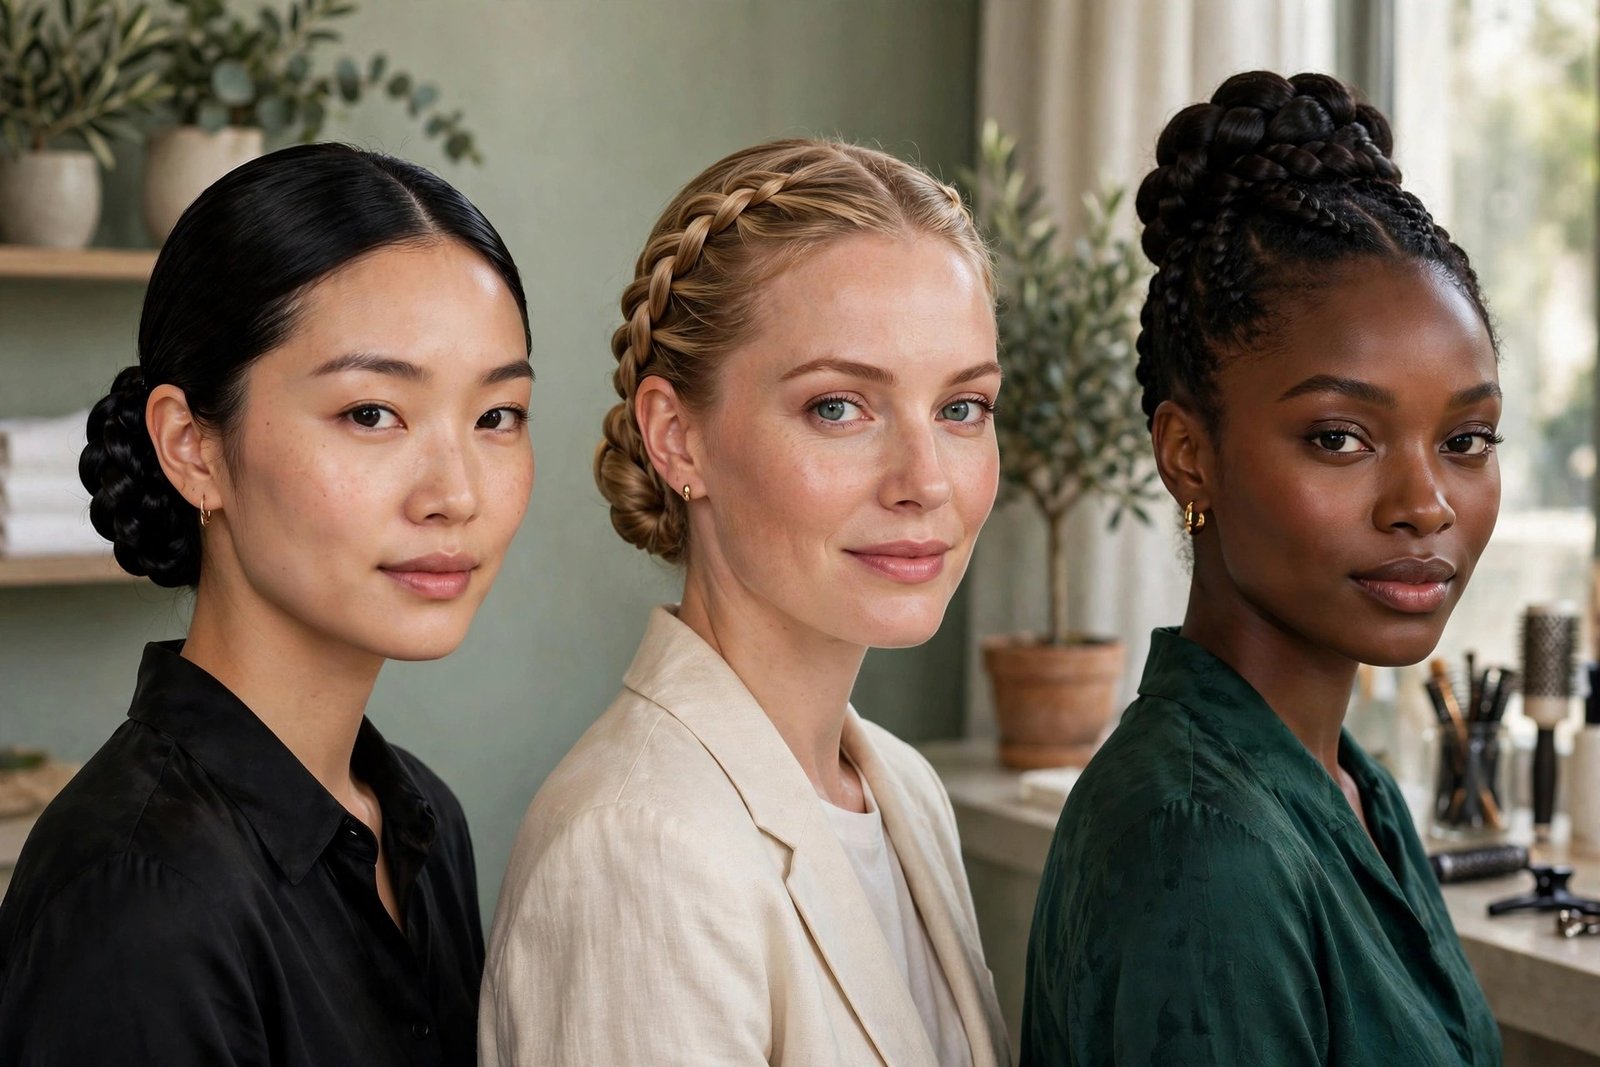
These three are the foundation. Every other style in this guide is a variation on what these teach you: tension, wrapping, and polish. Learn one of these well and the rest get easier.
1. The Classic Three-Strand Braided Bun
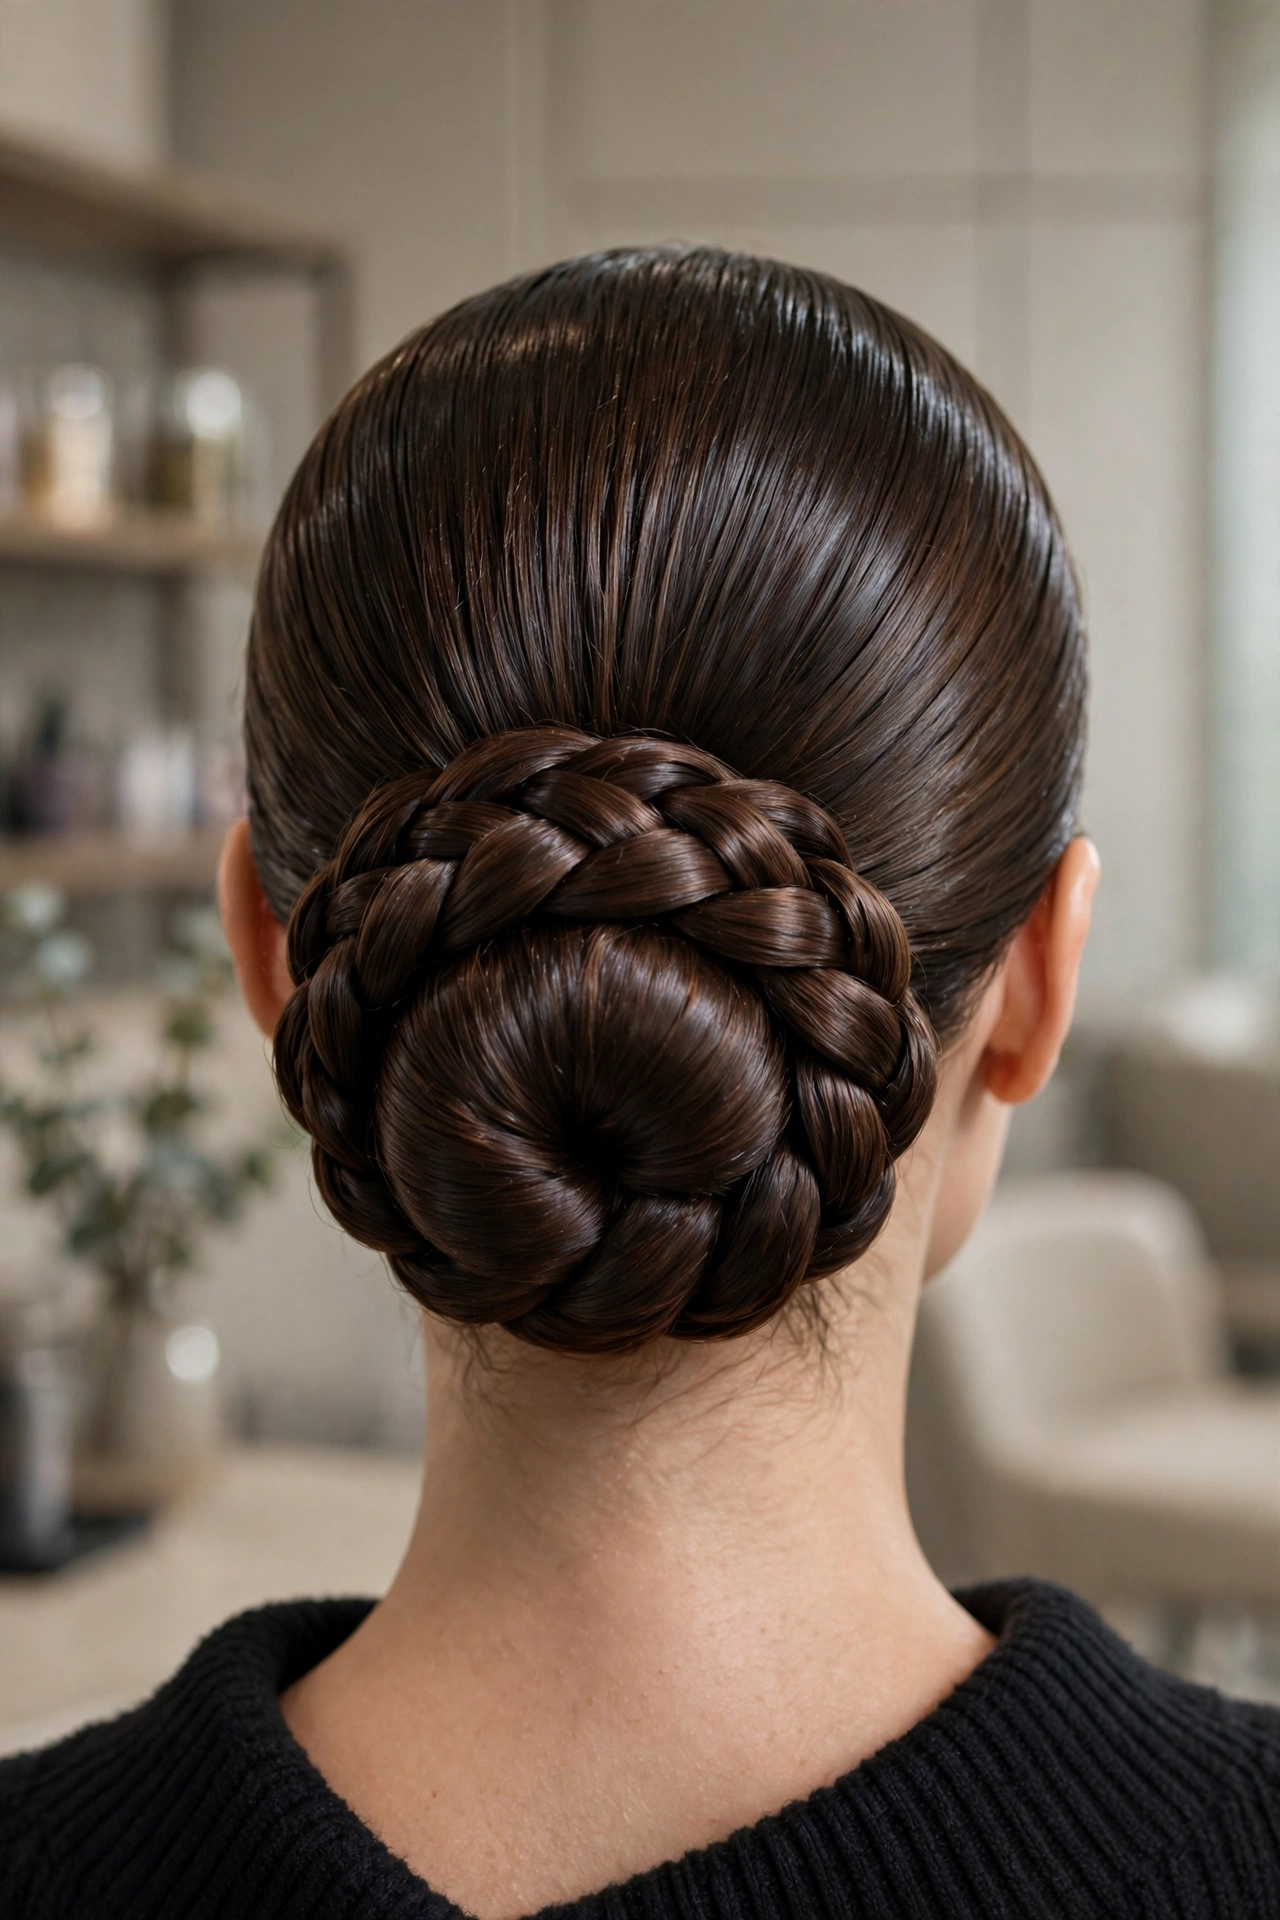
The original and still the most reliable. Gather the hair into a ponytail where you want the bun to sit — high, mid, or low — braid it in a tight three-strand braid to the ends, secure with a small clear elastic, then coil the braid around the ponytail base and pin. The coiling is the skill: keep the coil flat against the head, tuck the tail underneath, and pin every inch or so with pins pushed in against the coil’s direction so they lock. Done right, the braid reads as a rope wrapped around the bun, and the whole thing looks carved.
This is the version I do for clients who need certainty — the maid of honor, the job-interview dinner, the woman who has been burned by updos before. It holds, it photographs, and it suits every face shape because the bun placement is yours to choose. High for drama, low for elegance. Wear it lacquered with gel and shine spray, and it is the most 2026 thing on this list despite being the oldest idea in it.
2. French Braid into a Sleek Low Bun
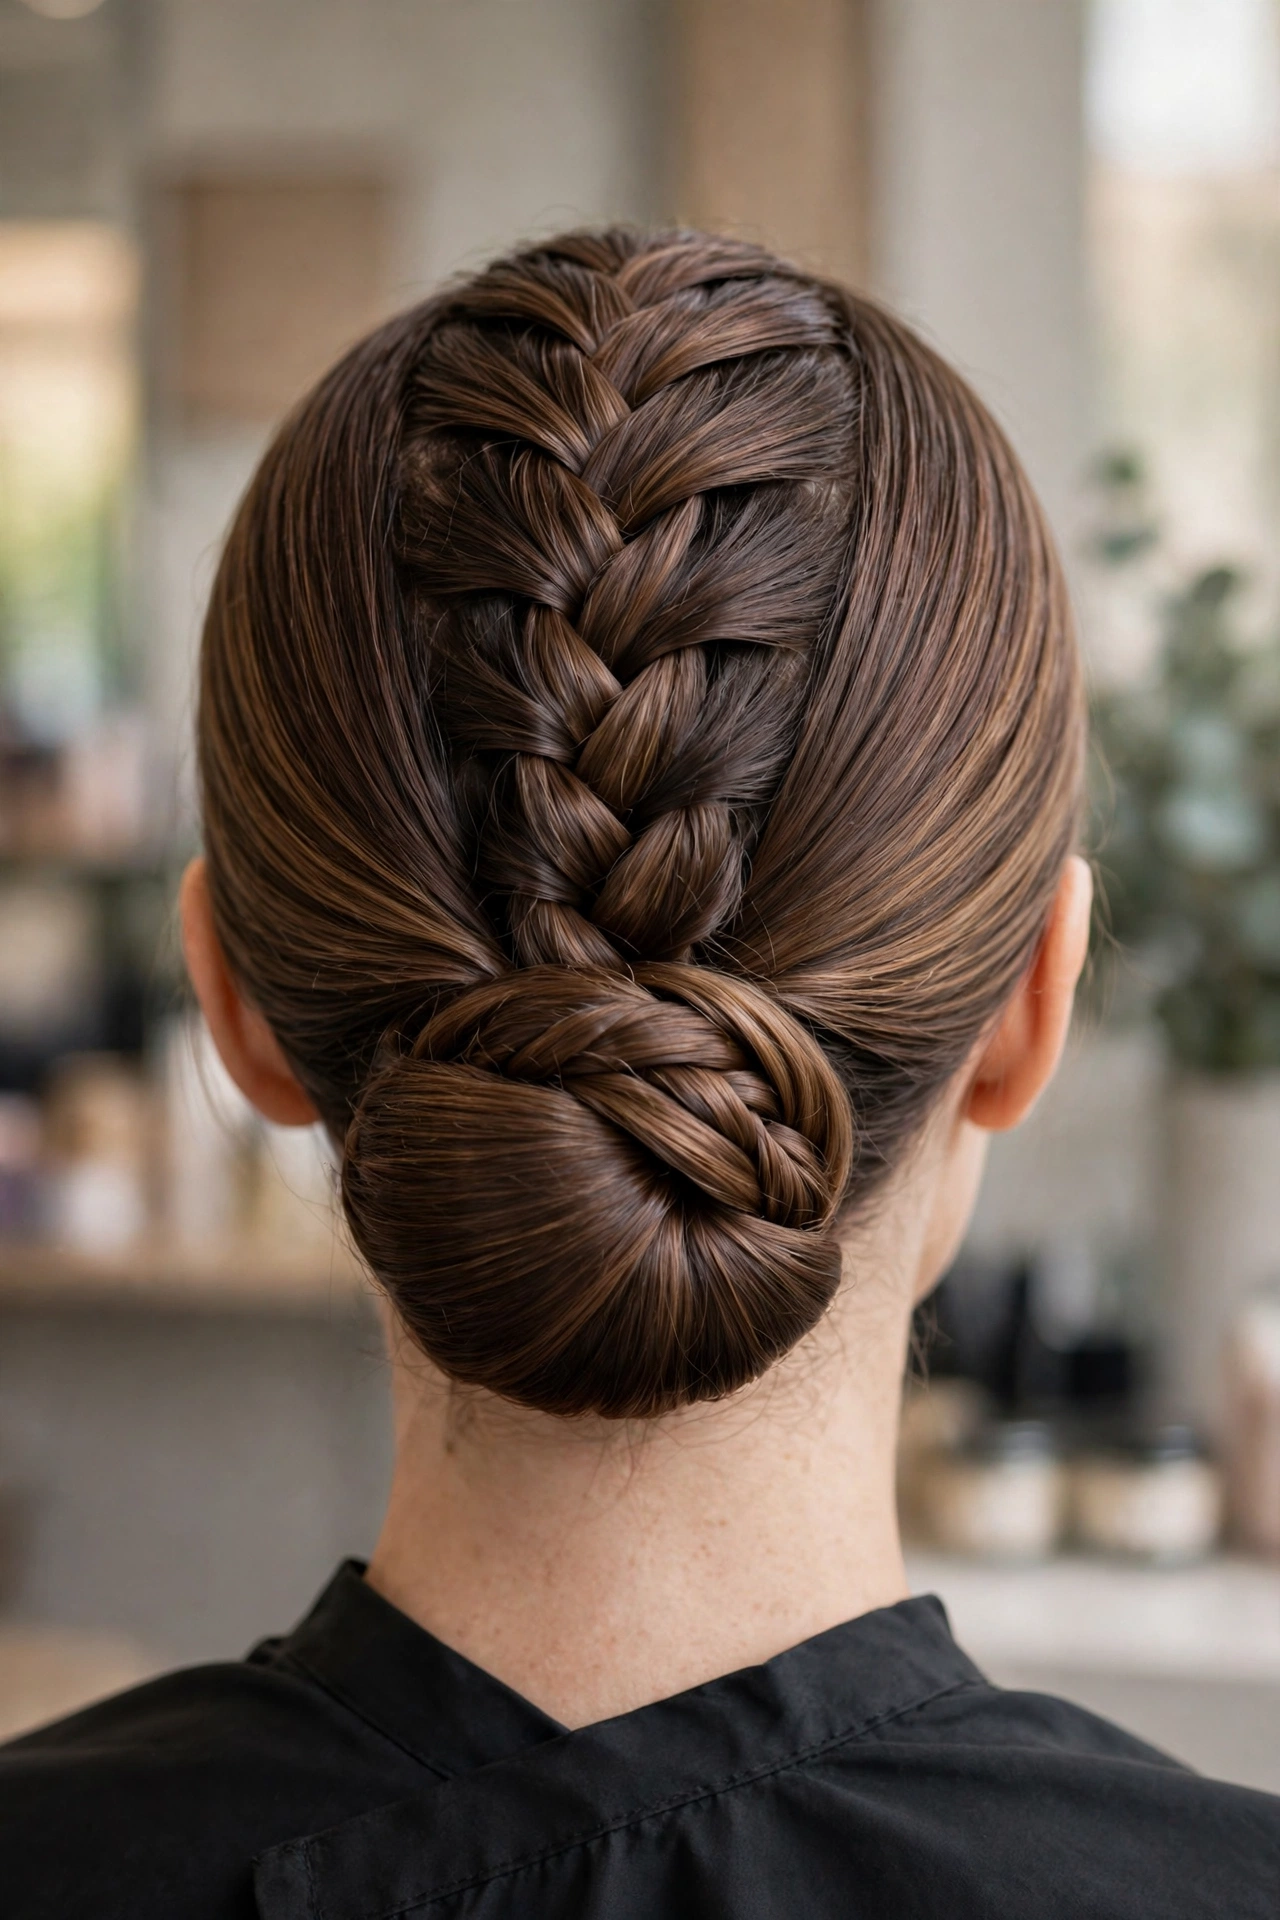
Start a French braid at the crown or the nape — your choice — and braid down the back of the head, feeding in hair as you go. When you reach the nape, stop feeding and finish the remaining length as a regular three-strand braid, then coil it into a low bun and pin. The French braid gives you a gorgeous textured panel running down the back of the head that flows straight into the bun. From behind, this is one of the most beautiful views in updos.
The key is keeping the French braid tight against the scalp as you feed. Loose feeding creates bumps that the bun cannot hide. Braid with the head tilted slightly forward so gravity helps you keep tension. This style is perfect for weddings — yours or someone else’s — because it looks intricate while being genuinely secure. Add a few small pins or a delicate hair vine into the bun and it is bridal-ready.
3. The Ballerina Braided Bun
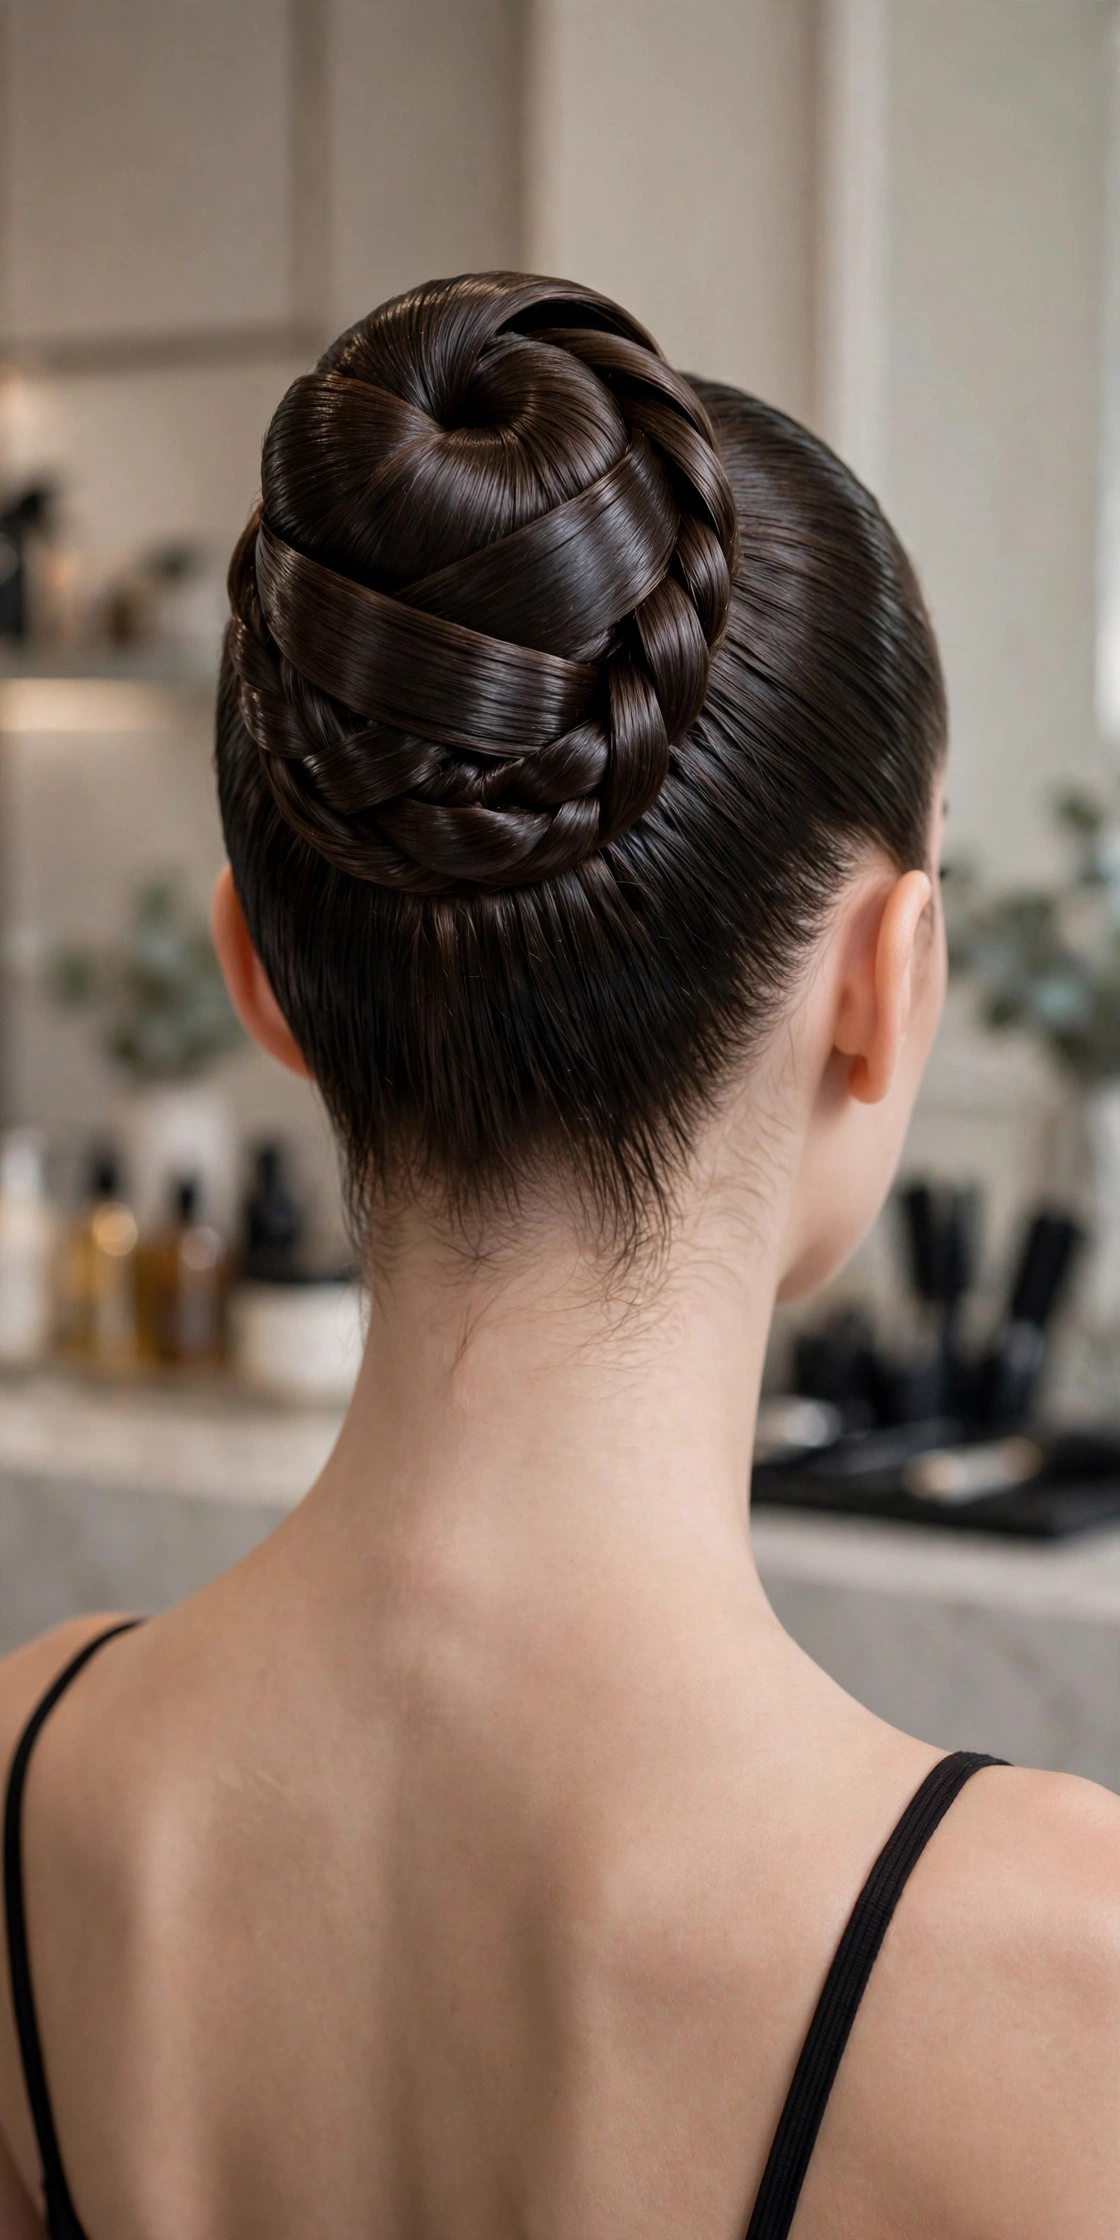
High, centered, immaculate. The ballerina braided bun sits at the crown — the highest point of the head — and the braiding wraps it like ribbon. Pull the hair into a high ponytail, smooth every bump (this style shows everything, so the ponytail base must be perfect), braid, and coil. The difference from the classic is placement and finish: higher, tighter, more lacquered. Think performance, not romance.
This is the New Year’s Eve version of the classic. It elongates the neck, shows off the shoulders, and stays put through anything because the high placement uses gravity in your favor instead of against it. It demands confidence — there is nowhere to hide in a ballerina bun — but the payoff is a silhouette that reads powerful in every photo. Edge control on the hairline is non-negotiable here; the whole head is on display.
Braided Bun Styles 4–6: Crowns and Side Braids
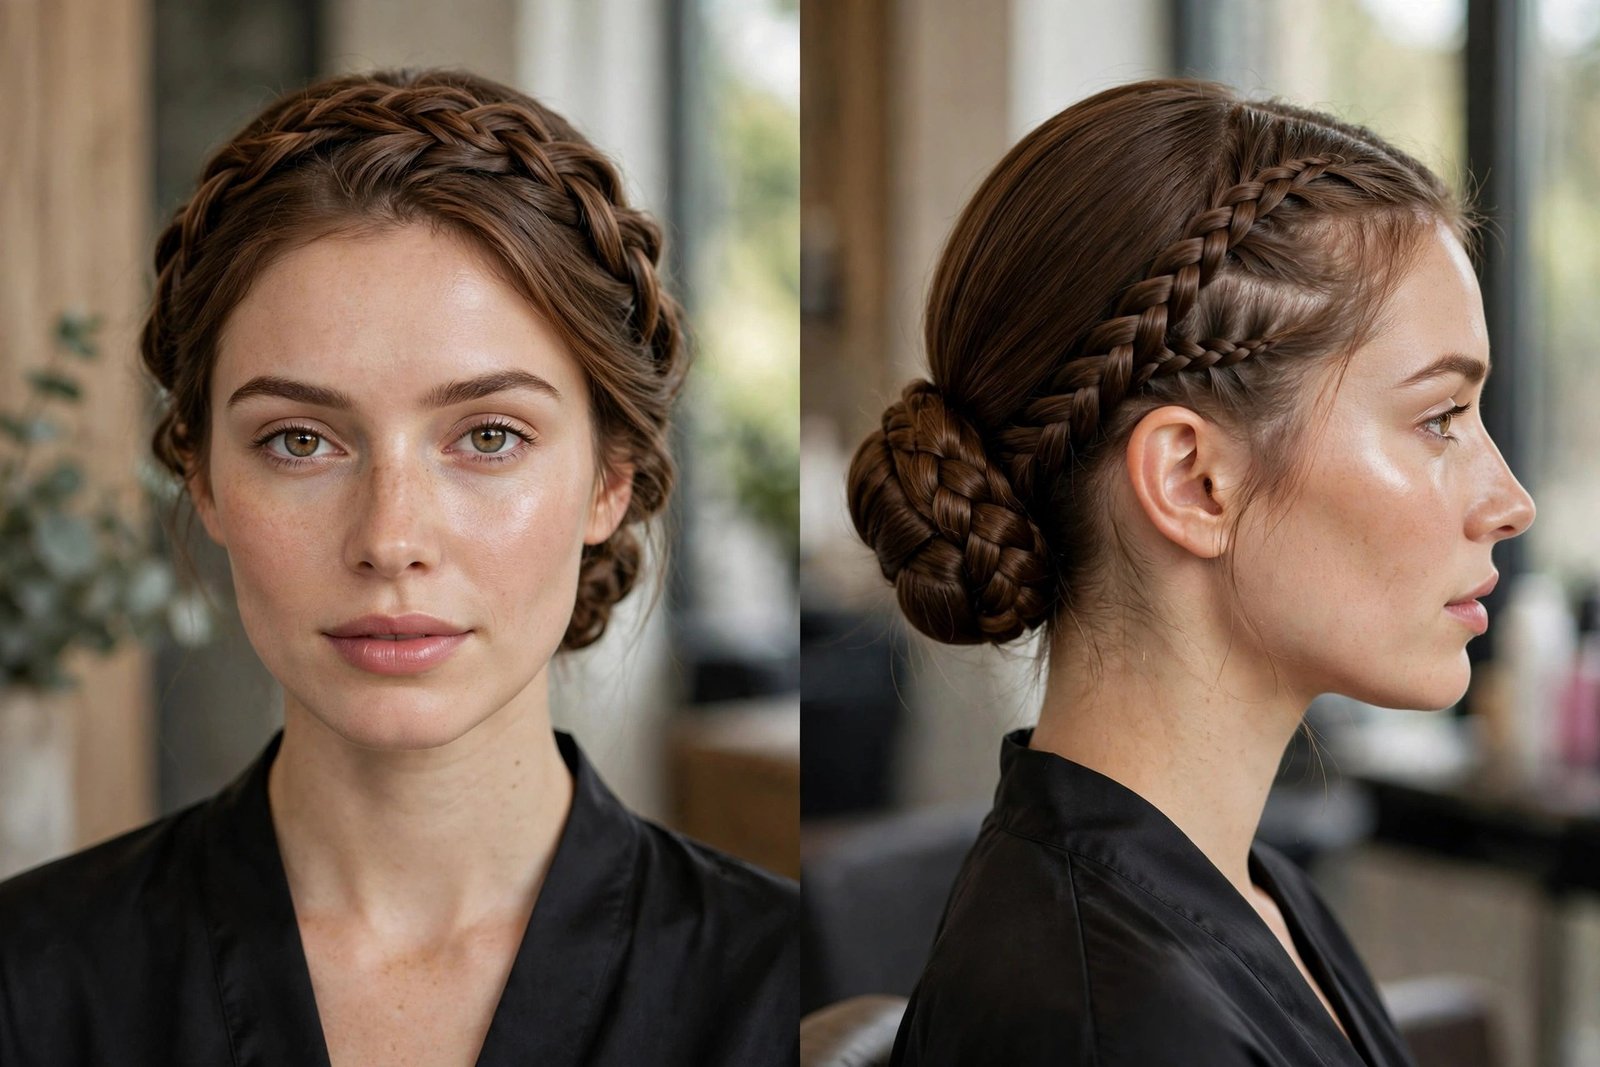
These three bring the braid forward — across the crown, down the sides — so the detail is visible from the front, not just the back. If your event involves being photographed face-on, this group is your lane.
4. Braided Crown Flowing into a Low Bun
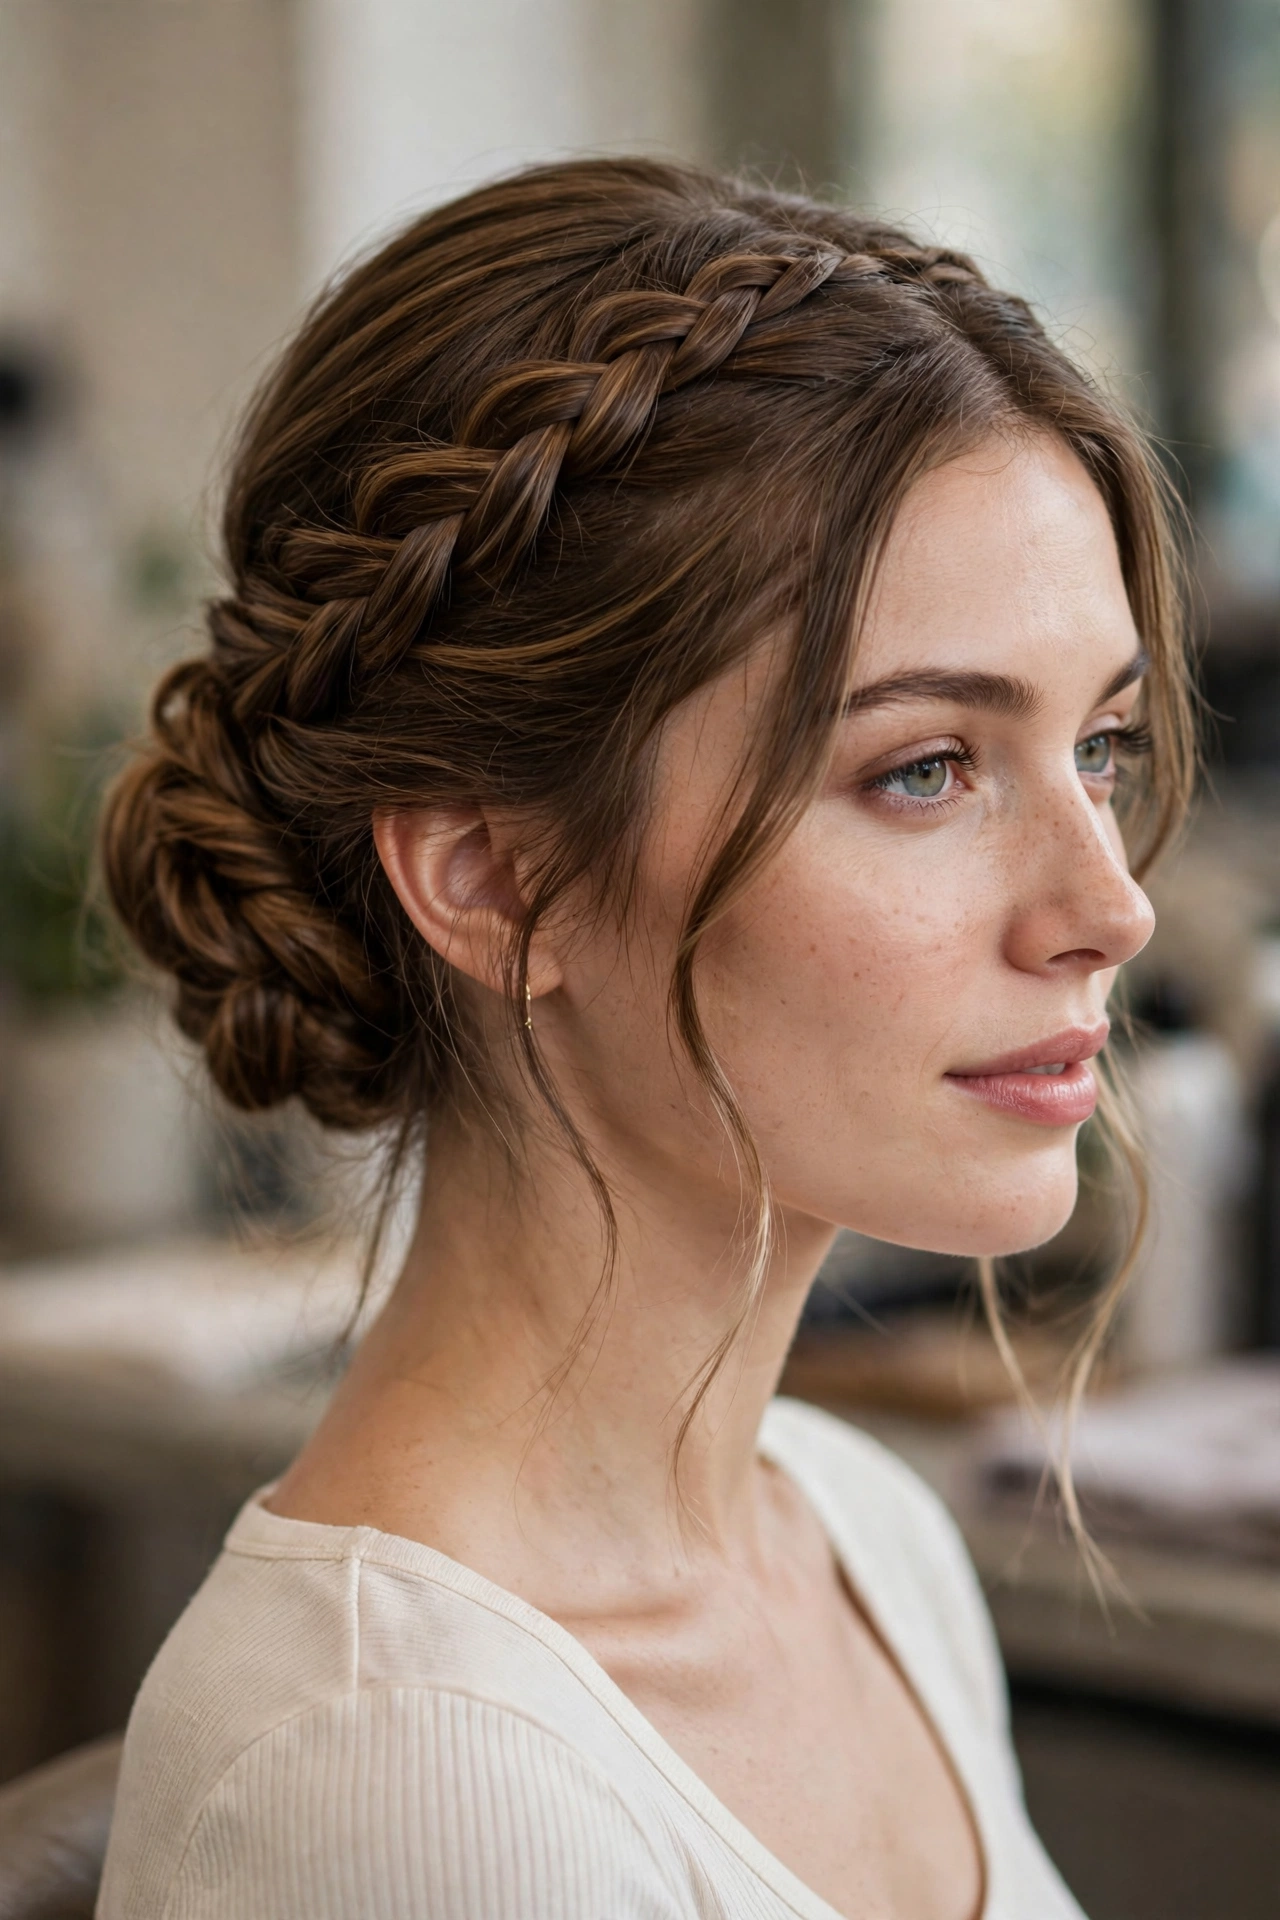
The romantic one. Braid a Dutch or French braid along one side of the head, across the crown like a headband, and down the other side — a true crown — then gather everything at the nape into a low bun. Or do a half-crown: braid from one temple across to the opposite ear and let it feed into a low side bun. Either way, the braid frames the face and the bun anchors the back, and the whole style reads soft and deliberate.
Tension control matters more here than in any other style on this list. The crown braid must be snug enough to stay but loose enough at the hairline to flatter — pull it drum-tight and it looks severe; leave it slack and it lifts off the head by evening. My rule: braid firmly at the scalp, then gently pancake (pull the braid edges outward) only on the outer curve for fullness. This is the wedding-guest sweetheart. It is also forgiving on rounder faces because the crown adds height.
5. Dutch-Braid Sides into a Sleek Bun
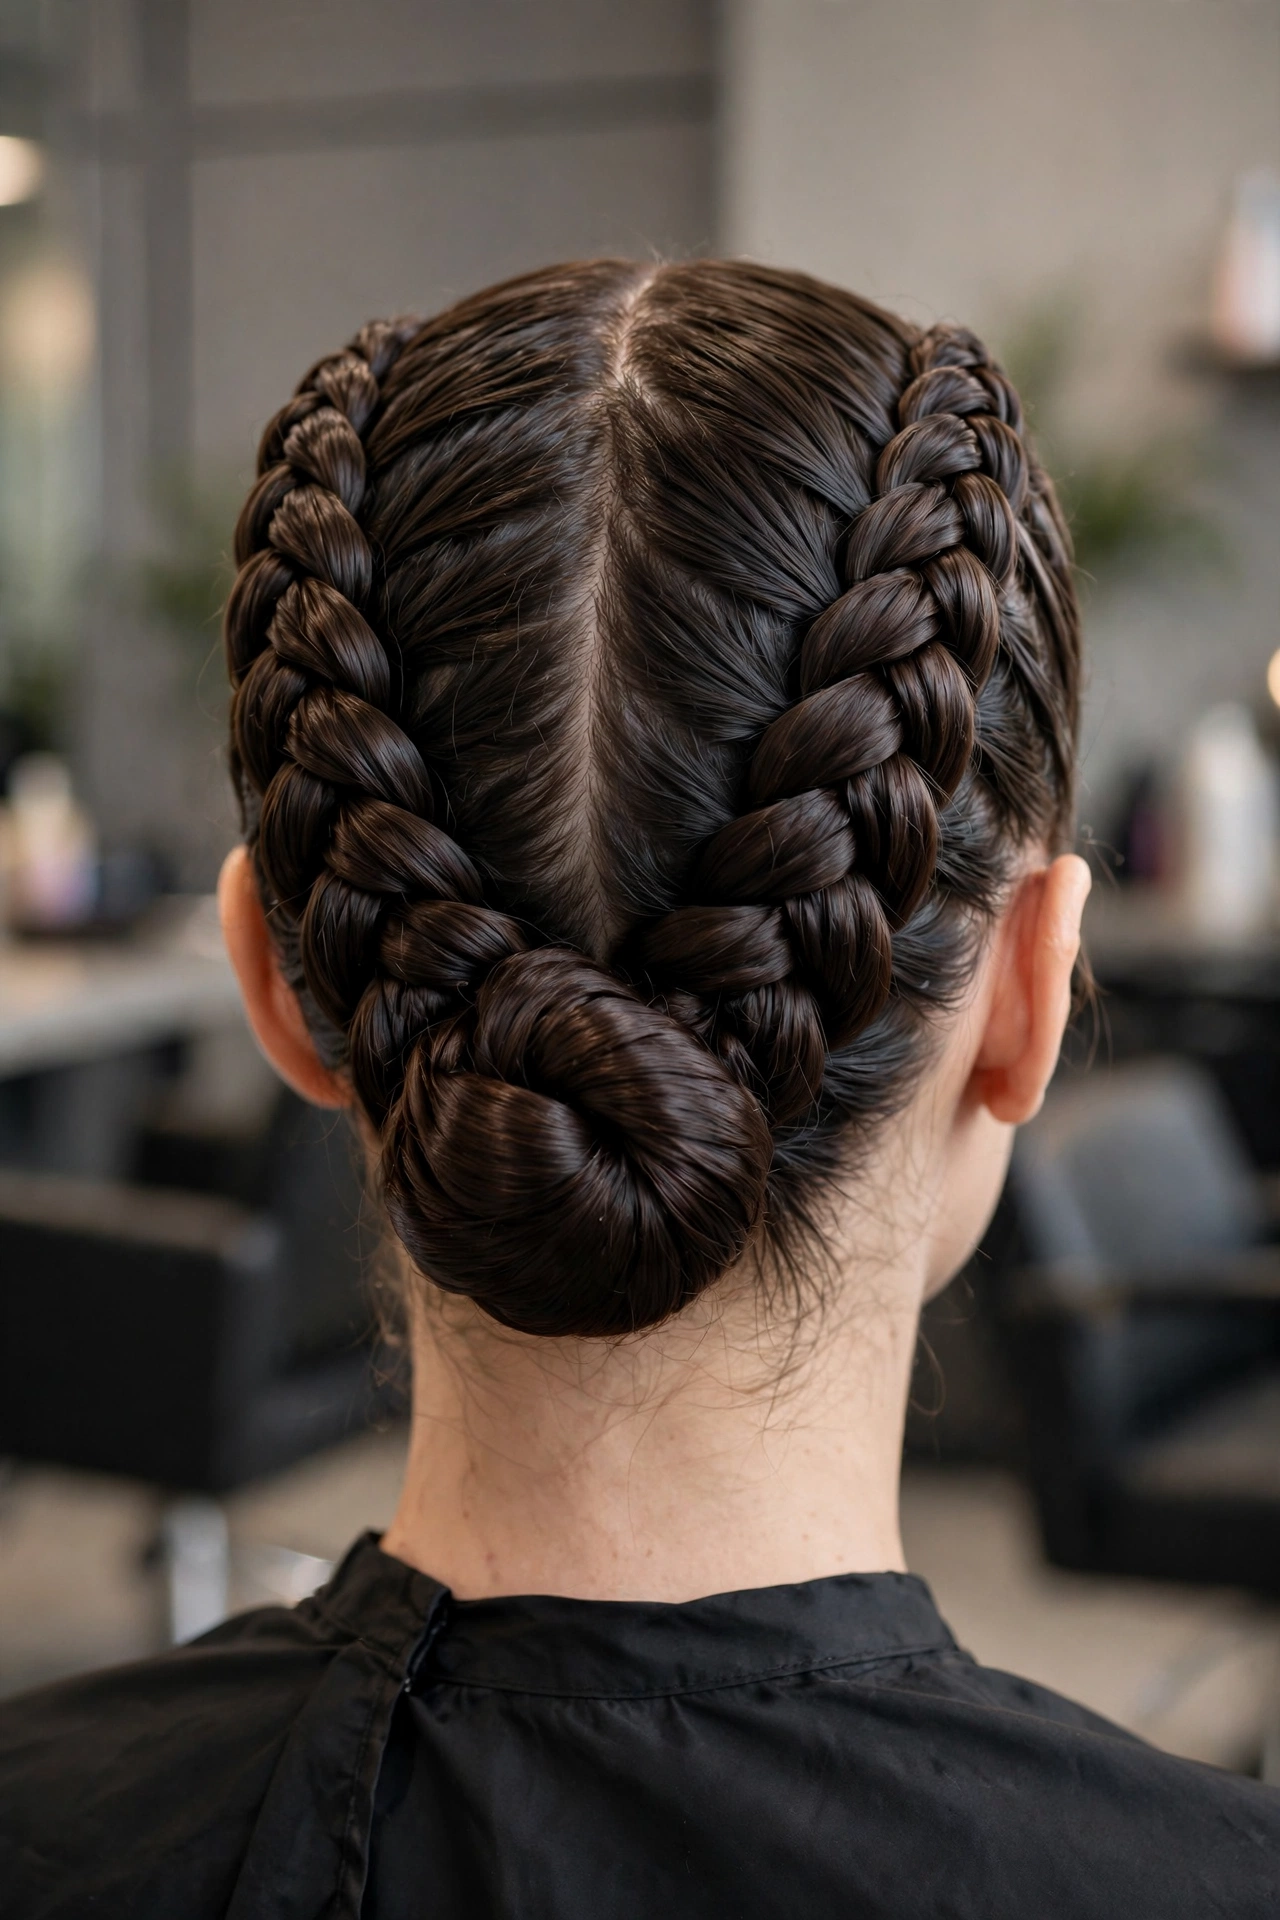
Two Dutch braids, one on each side, running from the temples back to meet at the crown or nape, where the remaining hair becomes the bun. Dutch braids sit on top of the hair instead of under it, so the pattern pops — bold, raised, graphic. This is the edgiest style in the guide, and it earns it honestly. The symmetry of the two braids converging into one bun is striking from every angle.
Part the hair cleanly down the middle before you start; a crooked part ruins the symmetry this style depends on. Braid each side tightly, keeping them mirror images — same width, same tension, meeting at the same point. The bun itself should be sleek and controlled to balance the bold braids: a smooth low knot or a polished mid bun. This is the holiday-party power move. It also holds up to wind and weather better than almost anything else here, because the whole head is braided down before the bun even forms.
6. The Fishtail Braided Bun
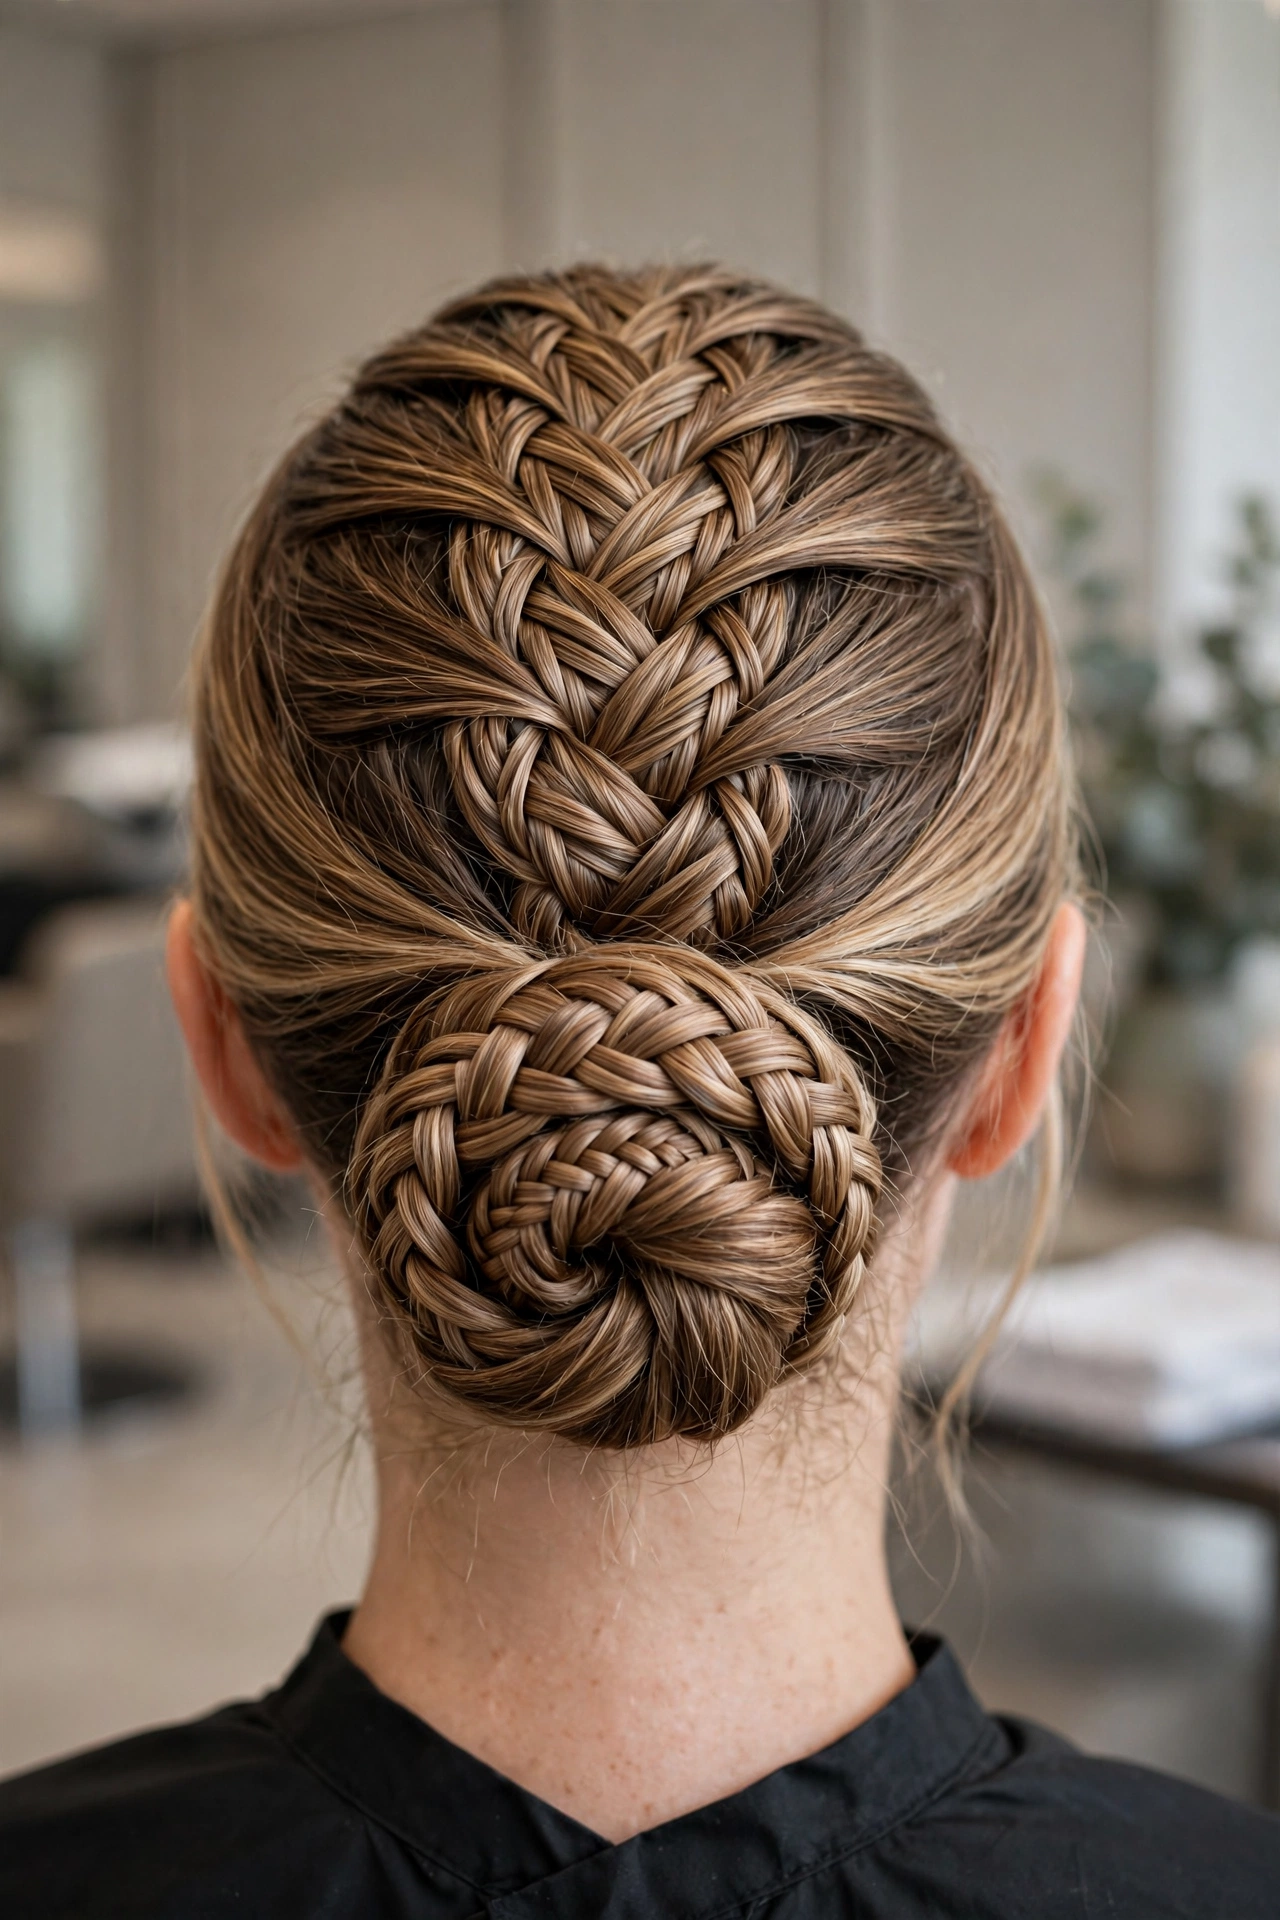
The fishtail is the most intricate-looking braid for the least extra effort. Gather into a ponytail, split it in two, and weave small sections from the outside of each half to the inside of the other, working down. Coil the finished fishtail around the base into a bun and pin. The result is a herringbone texture wrapped around the bun — detailed, refined, and completely different from a three-strand coil.
Fishtails look best slightly chunky, so do not stress about micro-precision; the pattern forgives. The one caution: fishtails take longer to braid, and the small sections mean more opportunities for pieces to slip if your grip product is not doing its job. Use a light gel on the ponytail before you start. This style suits formal evenings beautifully — it has the intricacy of a salon piece with a texture that feels modern rather than vintage.
Braided Bun Styles 7–9: High Knots and Wraps
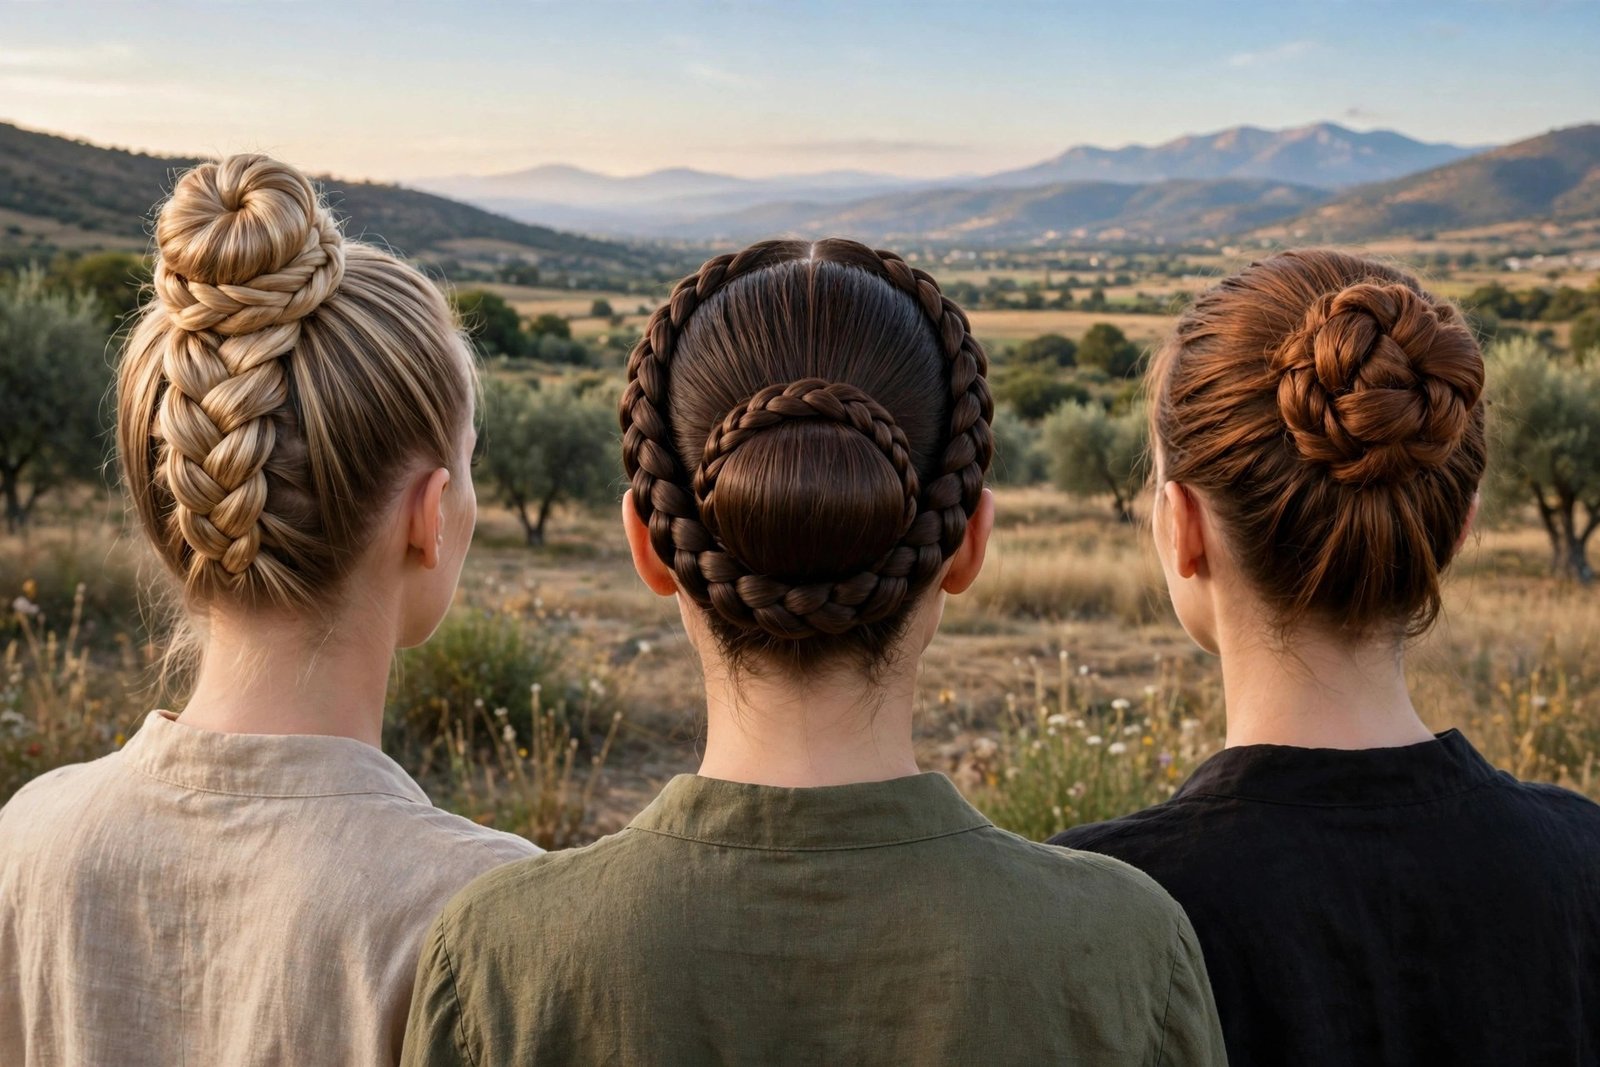
Up high and unapologetic. These three put the bun at or above the crown and wrap it in braid — maximum visibility, maximum drama.
7. Fishtail Braid Wrapped Top Knot
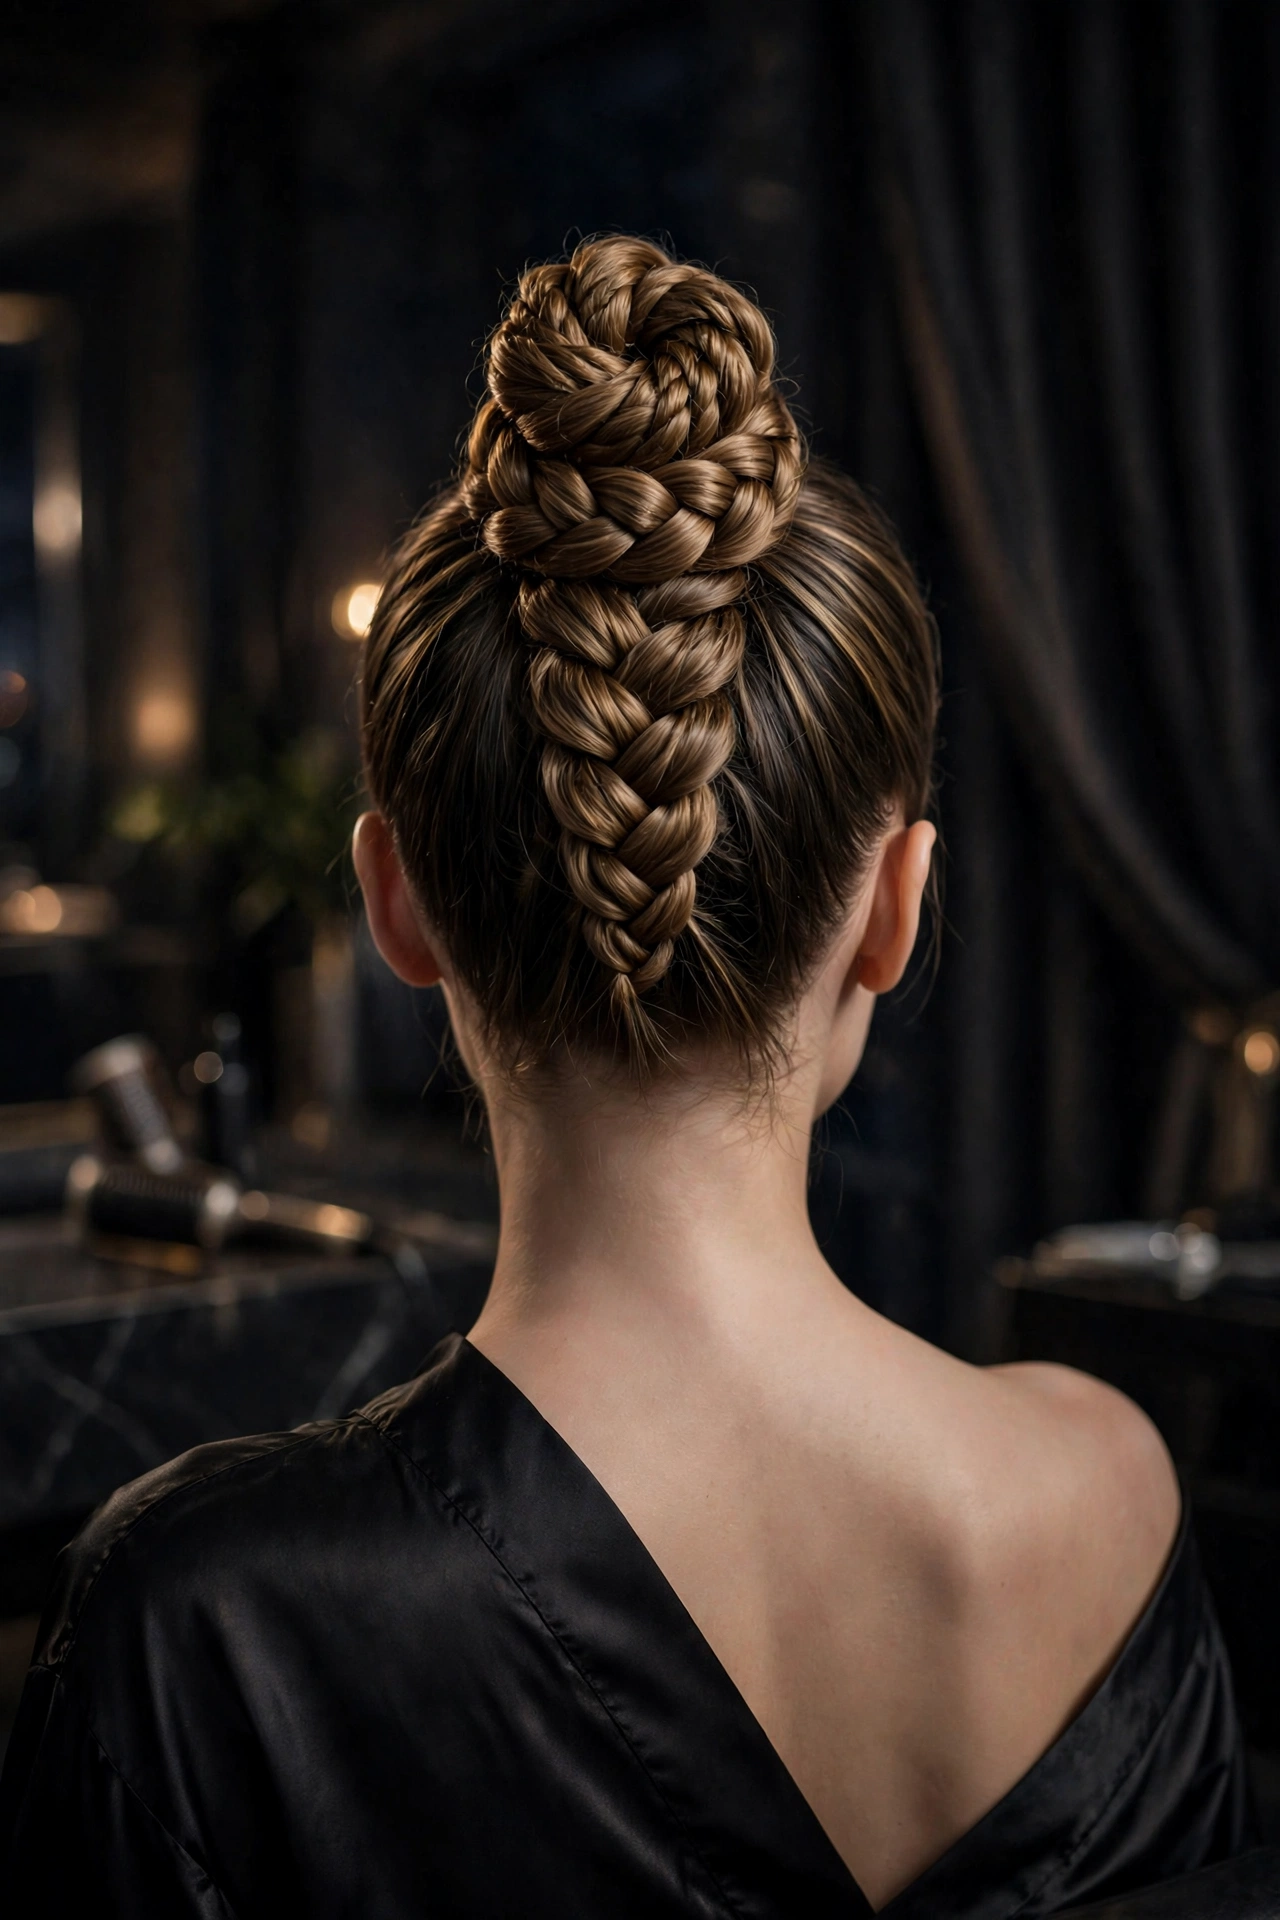
The primer’s star, and for good reason. Pull everything into a high ponytail, fishtail-braid the length, and wrap the fishtail around the base to form a top knot. Because the fishtail’s herringbone texture wraps the knot, the bun itself becomes the detail — you do not need accessories. Finish lacquered and this is the single most photographed style I do for evening events.
The wrap is the technique to practice. Coil the fishtail around the base keeping each pass snug against the last, and pin as you go rather than coiling everything and pinning at the end. A top knot has gravity working against it, so pins are structural here, not decorative — use more than you think you need. This style loves long hair; the more fishtail you have to wrap, the more impressive the knot. Shoulder-length hair can still do it, but expect a smaller, tighter knot.
8. The Wrapped Braid Frame Bun
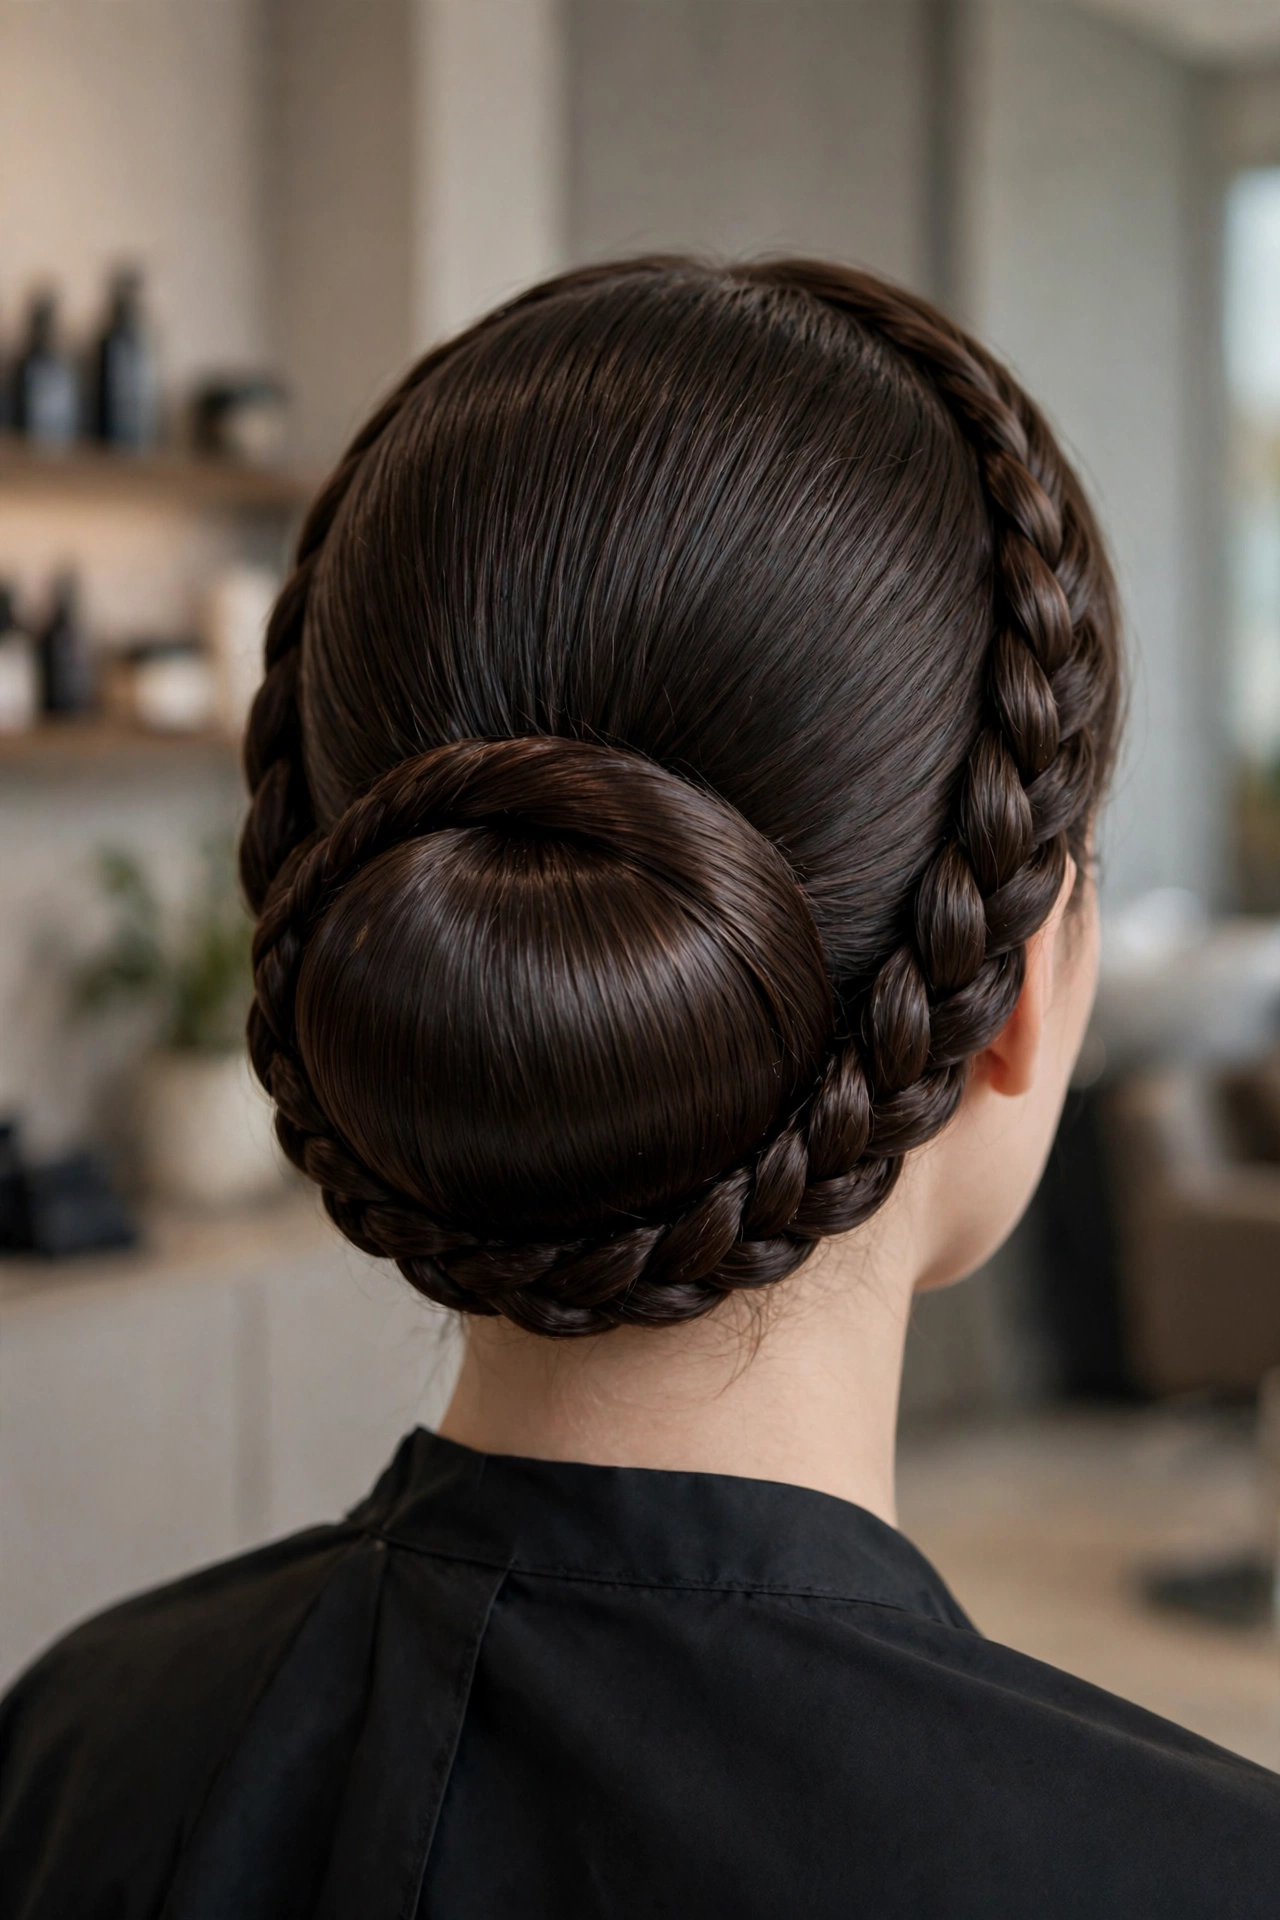
Here the braid does not form the bun — it frames it. Make a smooth, polished bun first (a classic sock-bun-style round bun or a sleek twisted knot), then take a section of hair from underneath or the side, braid it, and wrap it around the bun’s base like a frame. The contrast between the smooth bun and the textured braid frame is what makes this style. It looks like two techniques collaborating.
This is my recommendation for women who want the braided bun look but have fine hair. The smooth bun can be padded with a hair donut for fullness, and the single braid frame needs only a modest section of real hair. It is also the fastest style in this group — the bun goes up in minutes, the frame braid takes five. Elegant without the hour-long commitment.
9. Knotted Braid Bun
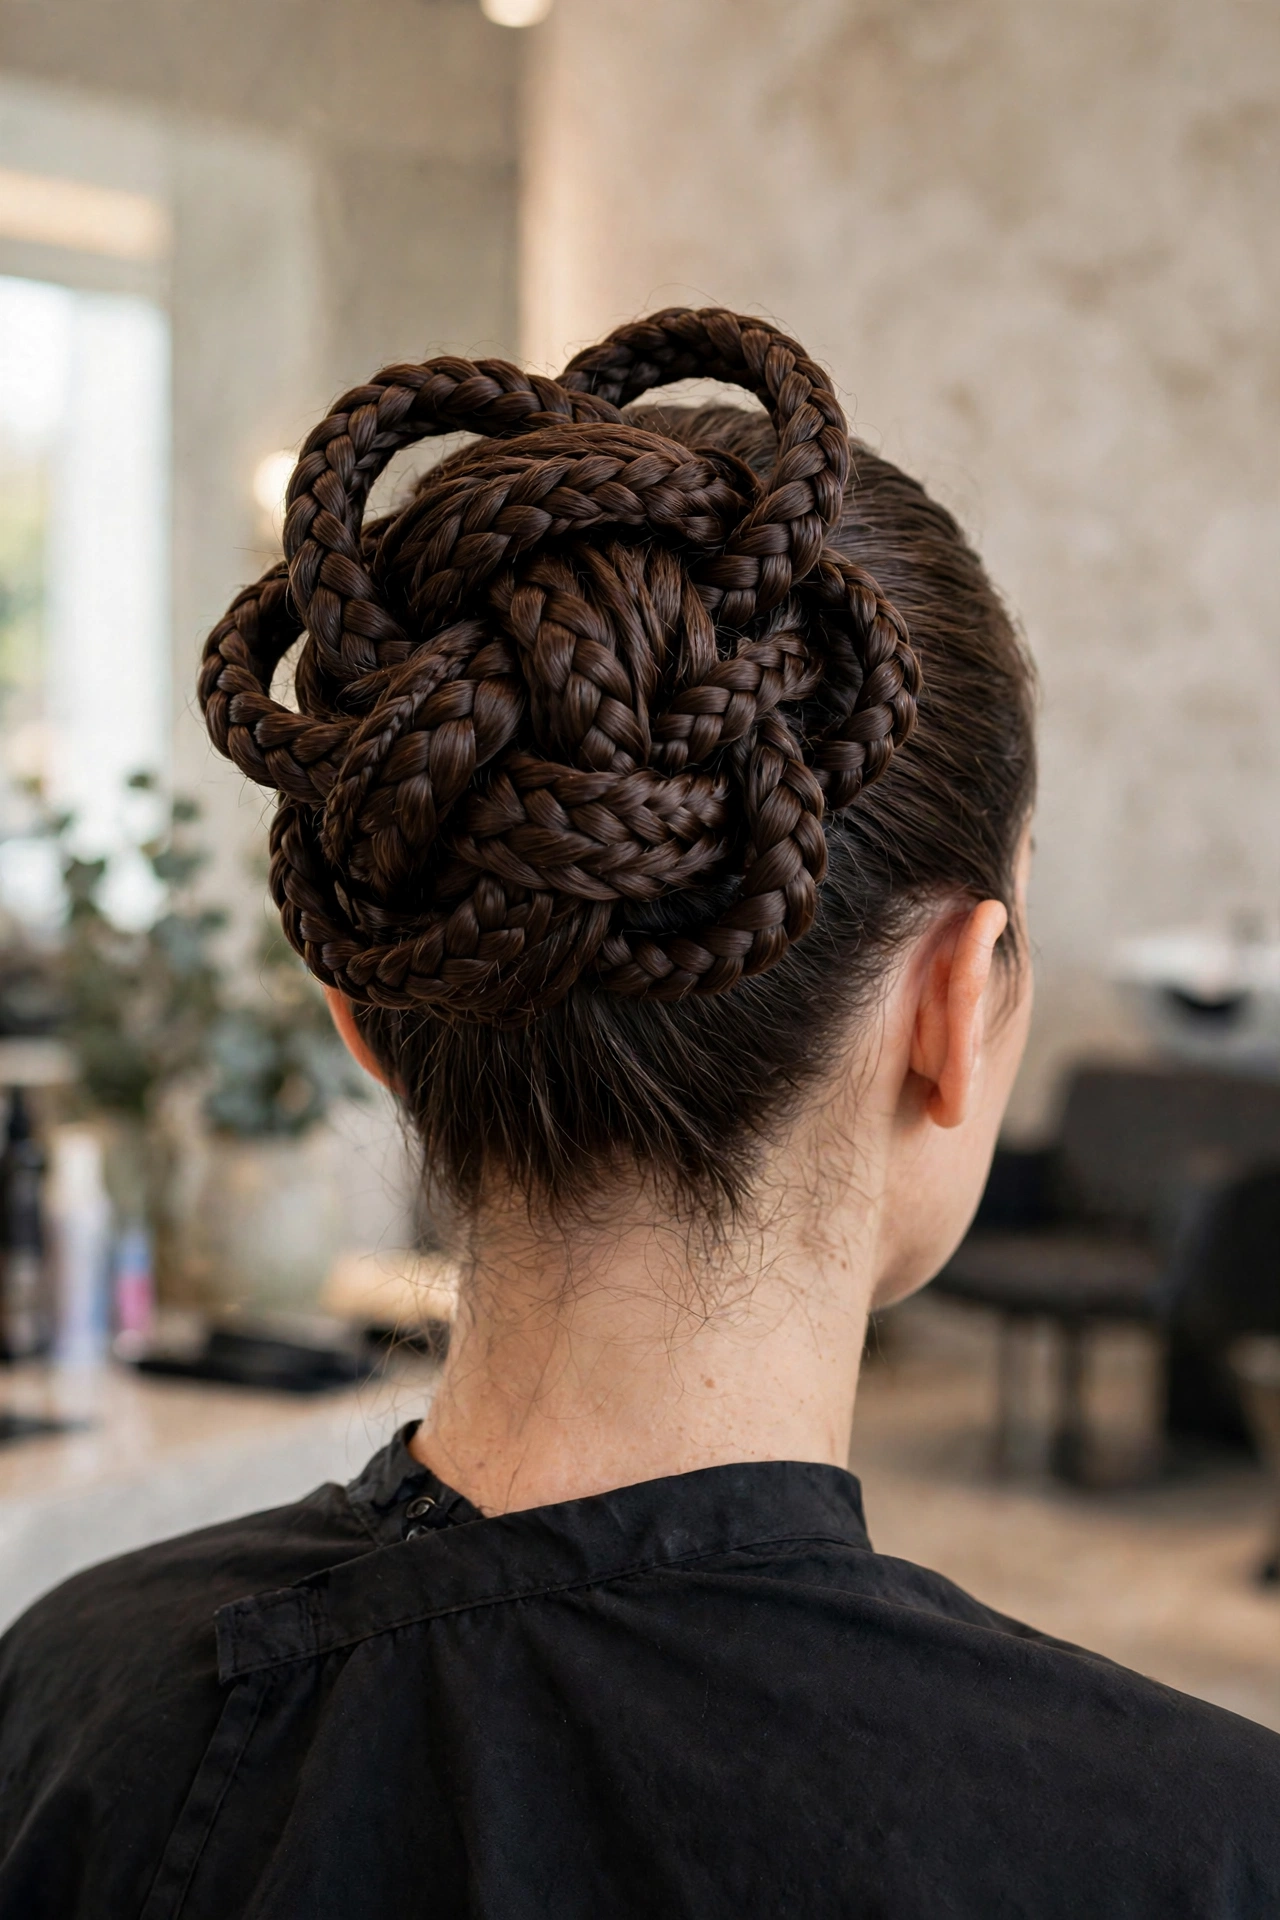
Instead of coiling the braid, tie it. Braid the ponytail, then literally tie the braid into a knot — or two, for a double-knot — and pin the ends underneath. The knot creates a sculptural, almost architectural shape that coiling cannot replicate. It reads modern and intentional, like the hair equivalent of a statement necklace.
Knots need length and a braid with real body, so this suits medium-to-long hair and benefits from extensions if your braid is thin. The knot should sit centered and proud; pin from underneath, anchoring into the ponytail base, not into the knot itself, or you will flatten the shape you just built. Finish with shine spray — the knot’s curves catch light beautifully. This is the style for the woman who wants people to ask how it was done.
Braided Bun Styles 10–12: Space Buns and Rope Twists
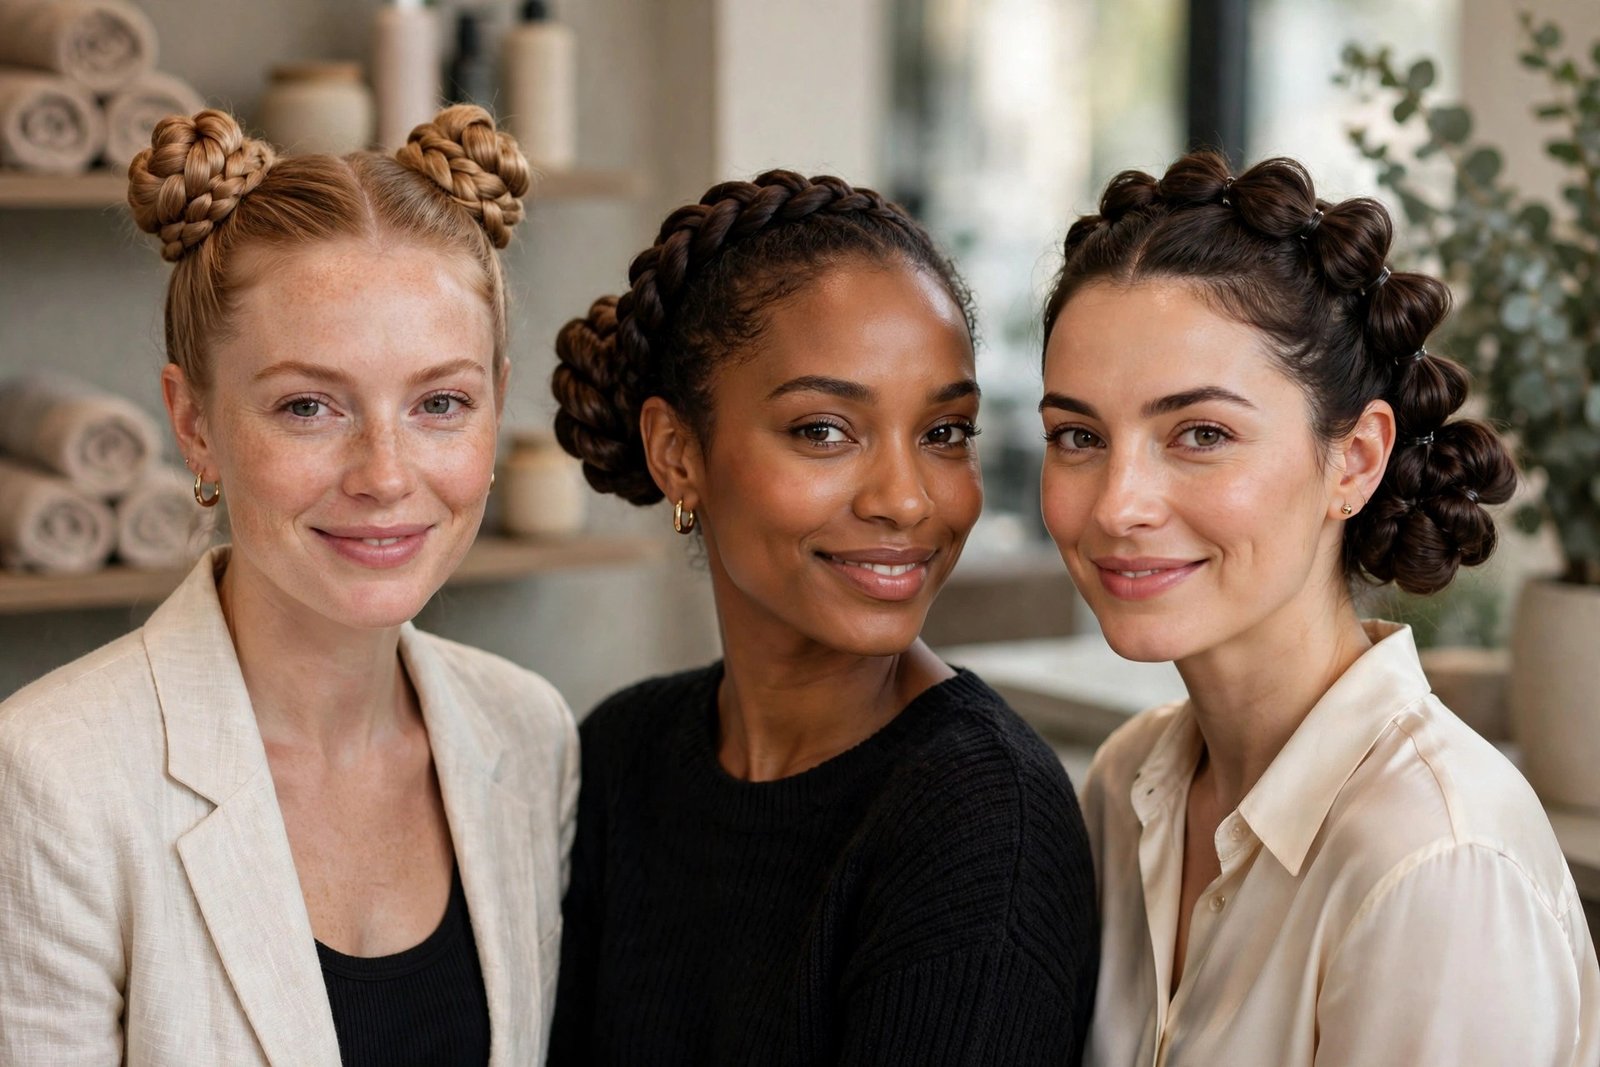
The playful end of the spectrum — but make no mistake, these are finished and polished, not sloppy. Precision is what keeps them occasion-worthy instead of costume.
10. The Braided Space-Bun Pair
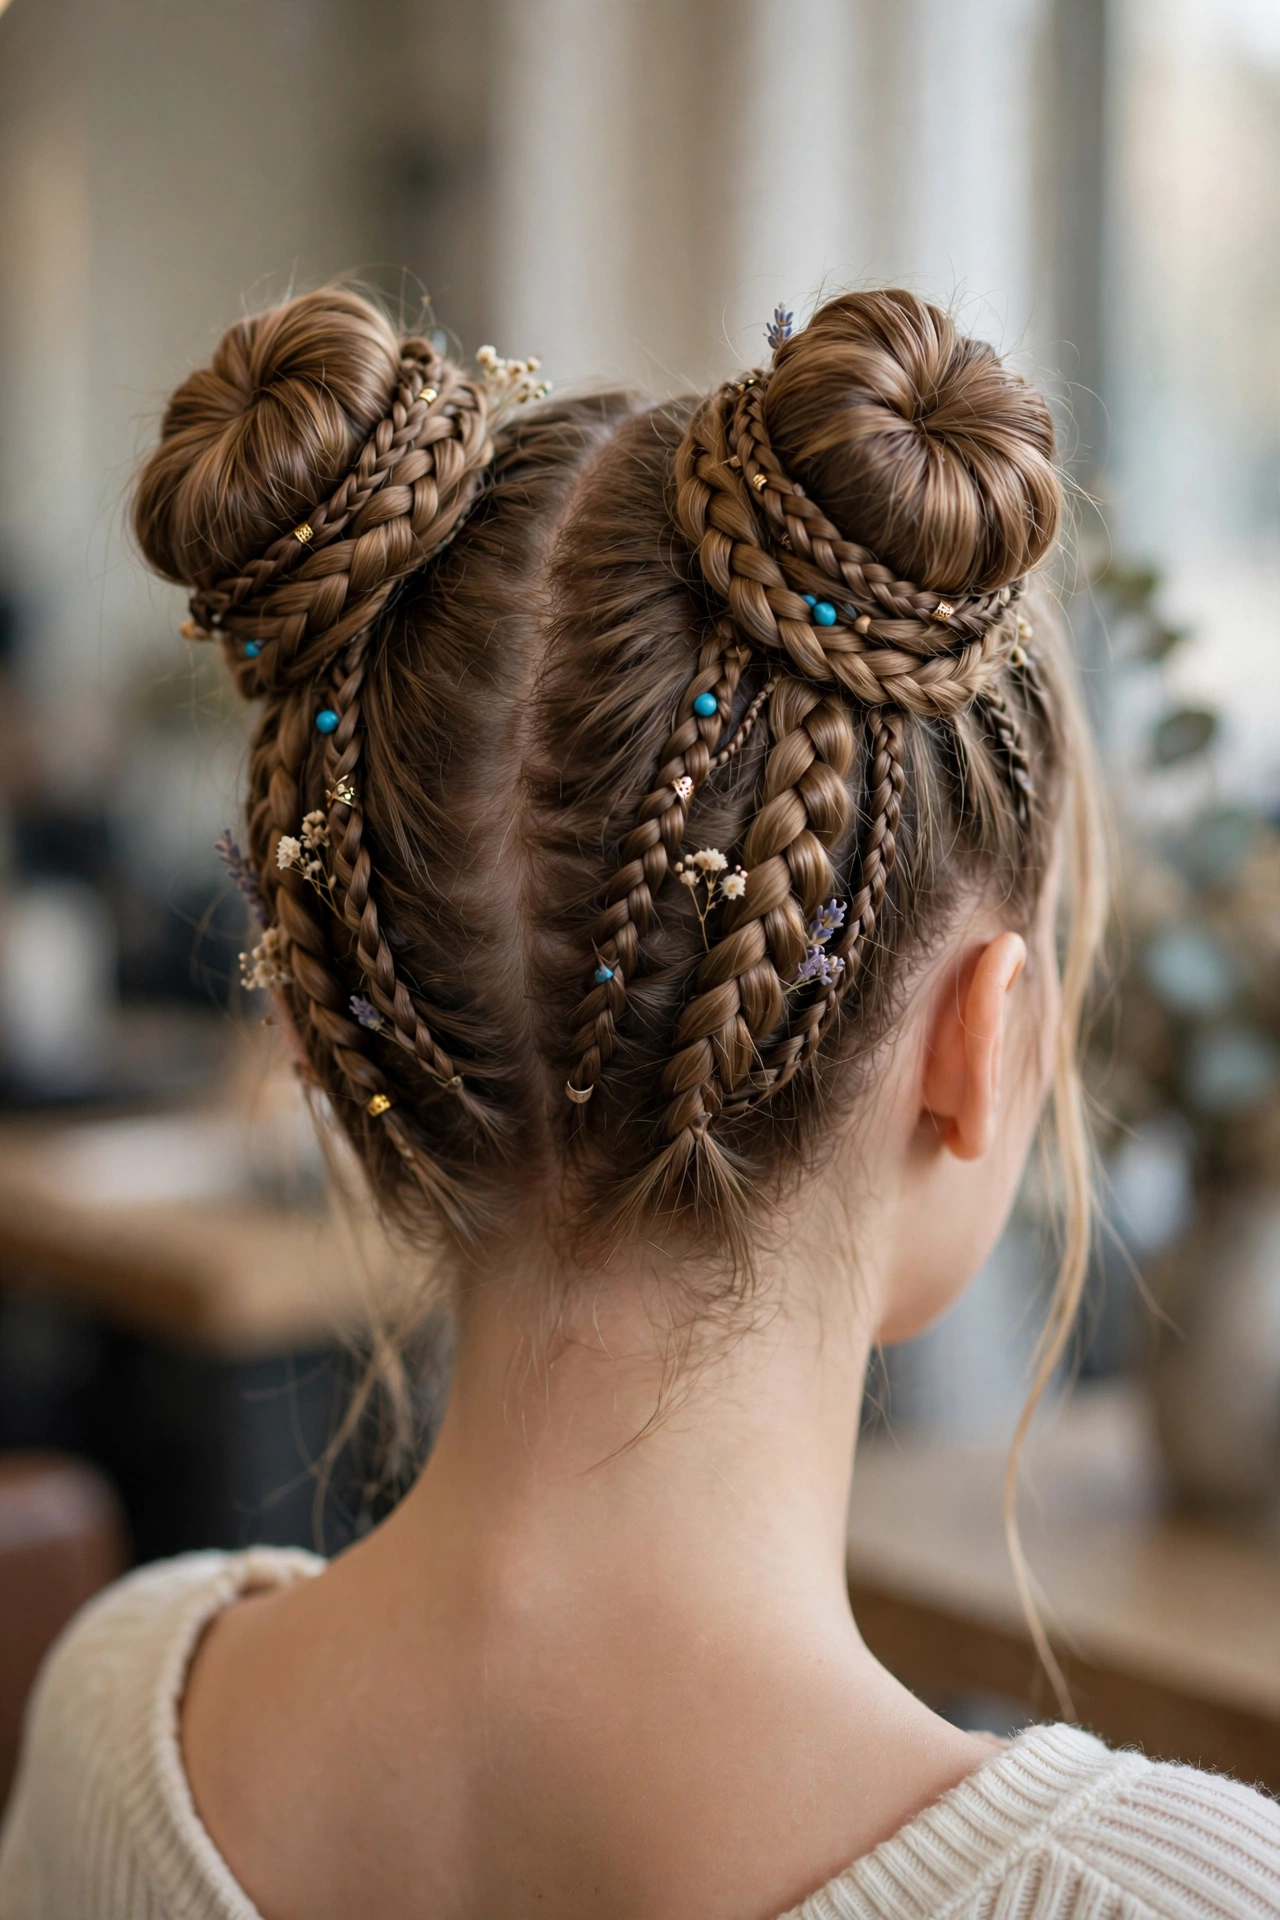
Two buns, both braided, sitting high on either side of the crown. Part down the middle, make two high pigtails, braid each (three-strand or fishtail — your call), and coil each into its own bun. The symmetry is the whole game: same height, same size, same braid. Done with polish, this is festival-chic; done sloppy, it is a different look entirely, and not the one we want.
This is the youngest-feeling style in the guide and it knows it. It works for concerts, themed parties, and nights where the dress code says fun. The braiding is what elevates it past a basic space-bun pair — each bun wrapped in its own braid reads deliberate and crafted. Keep the part razor-clean and the edges laid; the contrast between the precise parting and the playful silhouette is the charm. Not bridal, not boardroom — but absolutely unforgettable where it belongs.
11. Twisted Rope-Braid Bun
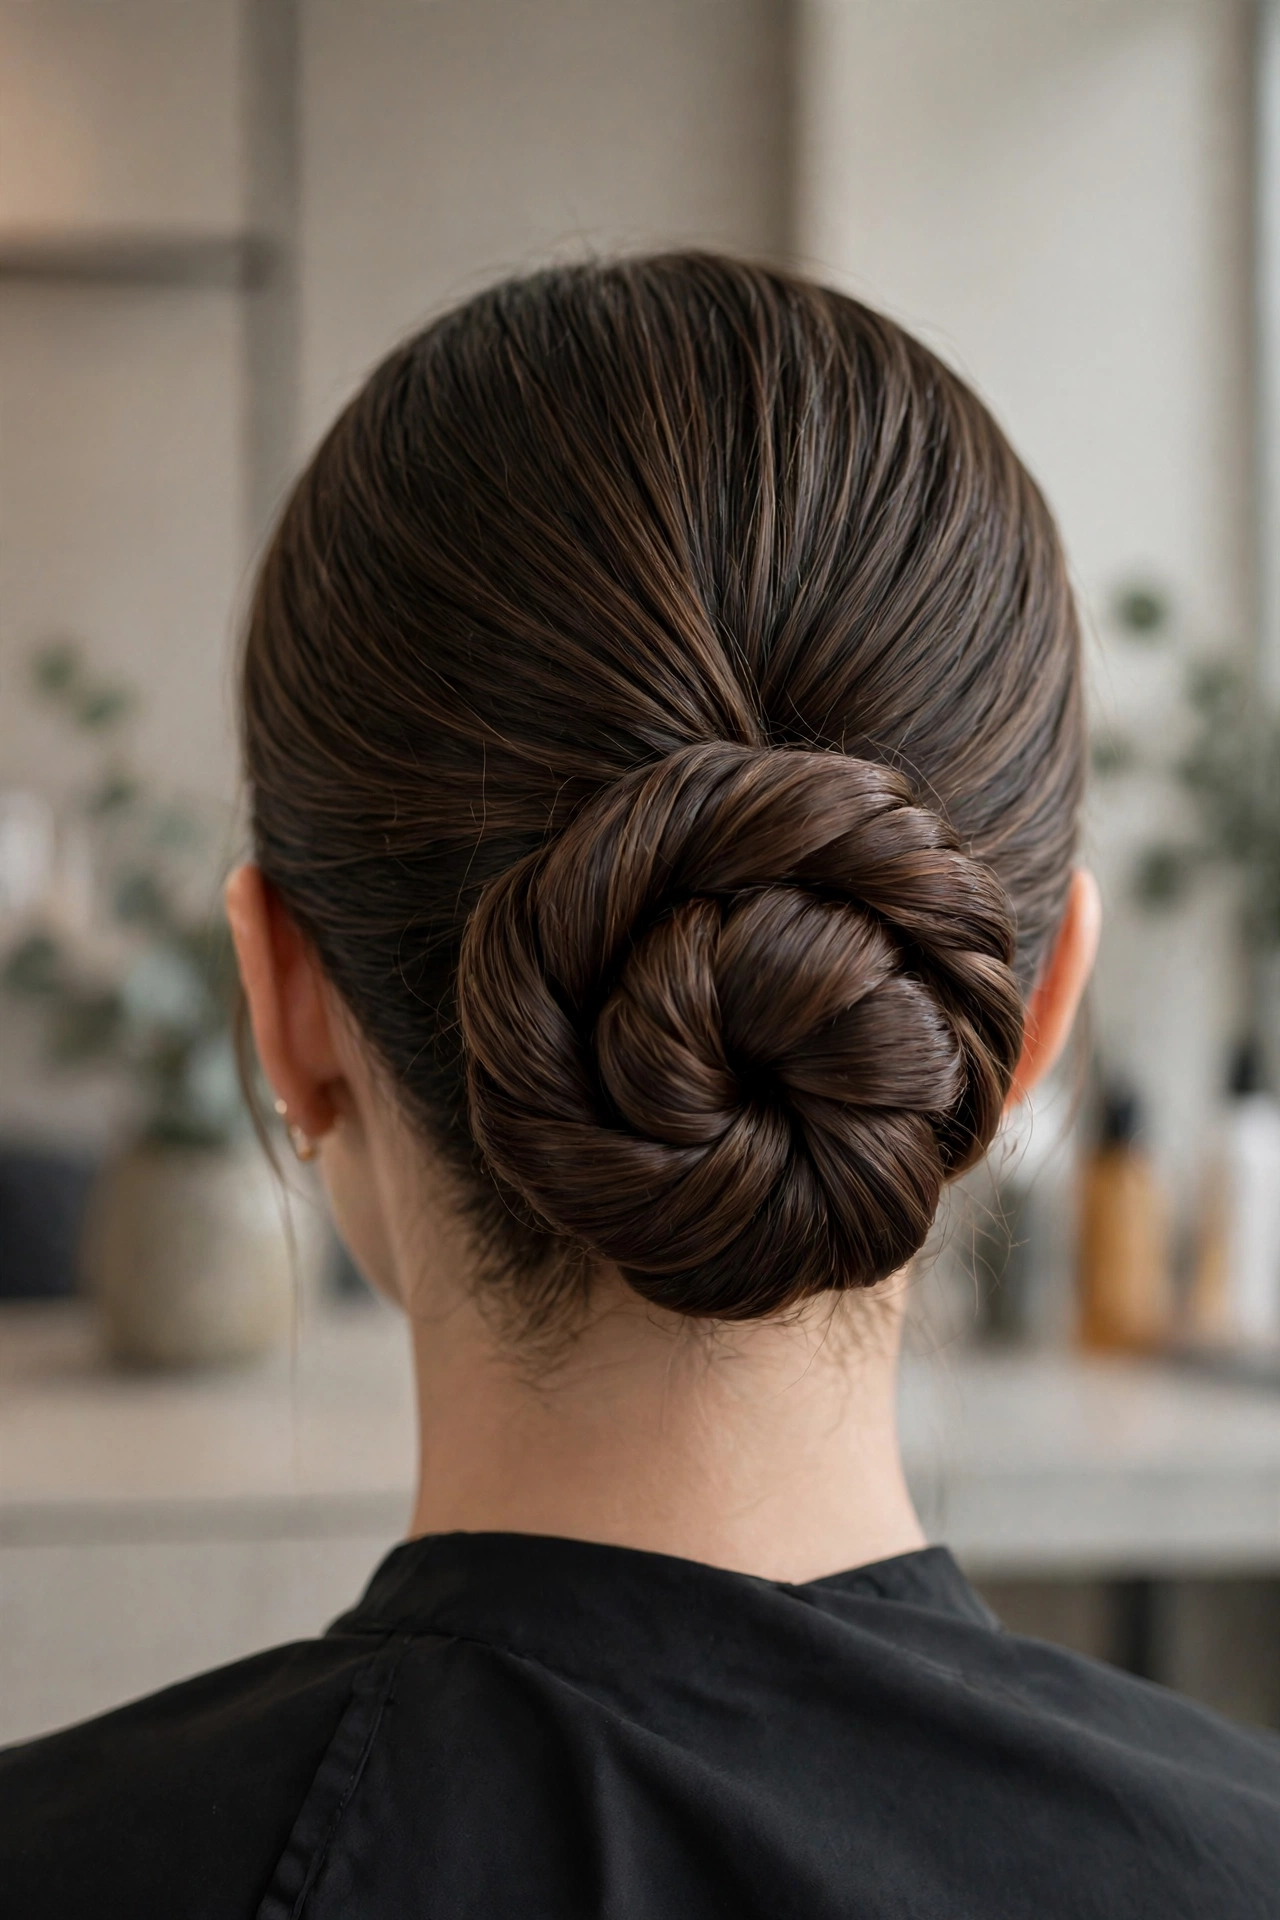
The rope braid — two sections twisted around each other — is the fastest braid that still looks like you tried. Gather into a ponytail, split in two, twist each section in the same direction, then twist them around each other in the opposite direction (this counter-twist is what locks it). Coil the rope into a bun and pin. The result is a smooth, twisted texture with clean diagonal lines — minimal, modern, and very 2026.
The rope braid unravels if you get the twist direction wrong, so remember: sections twist one way, the pair wraps the other. It is a thirty-second thing to learn and a lifetime skill for updos. This style suits straight or straightened hair best, because the clean twist lines need a smooth surface to read. It is also one of the most secure buns here — the rope’s tension holds itself together, so it needs fewer pins than a coiled braid. My pick for long days that end in late nights.
12. Bubble-Braid into Bun
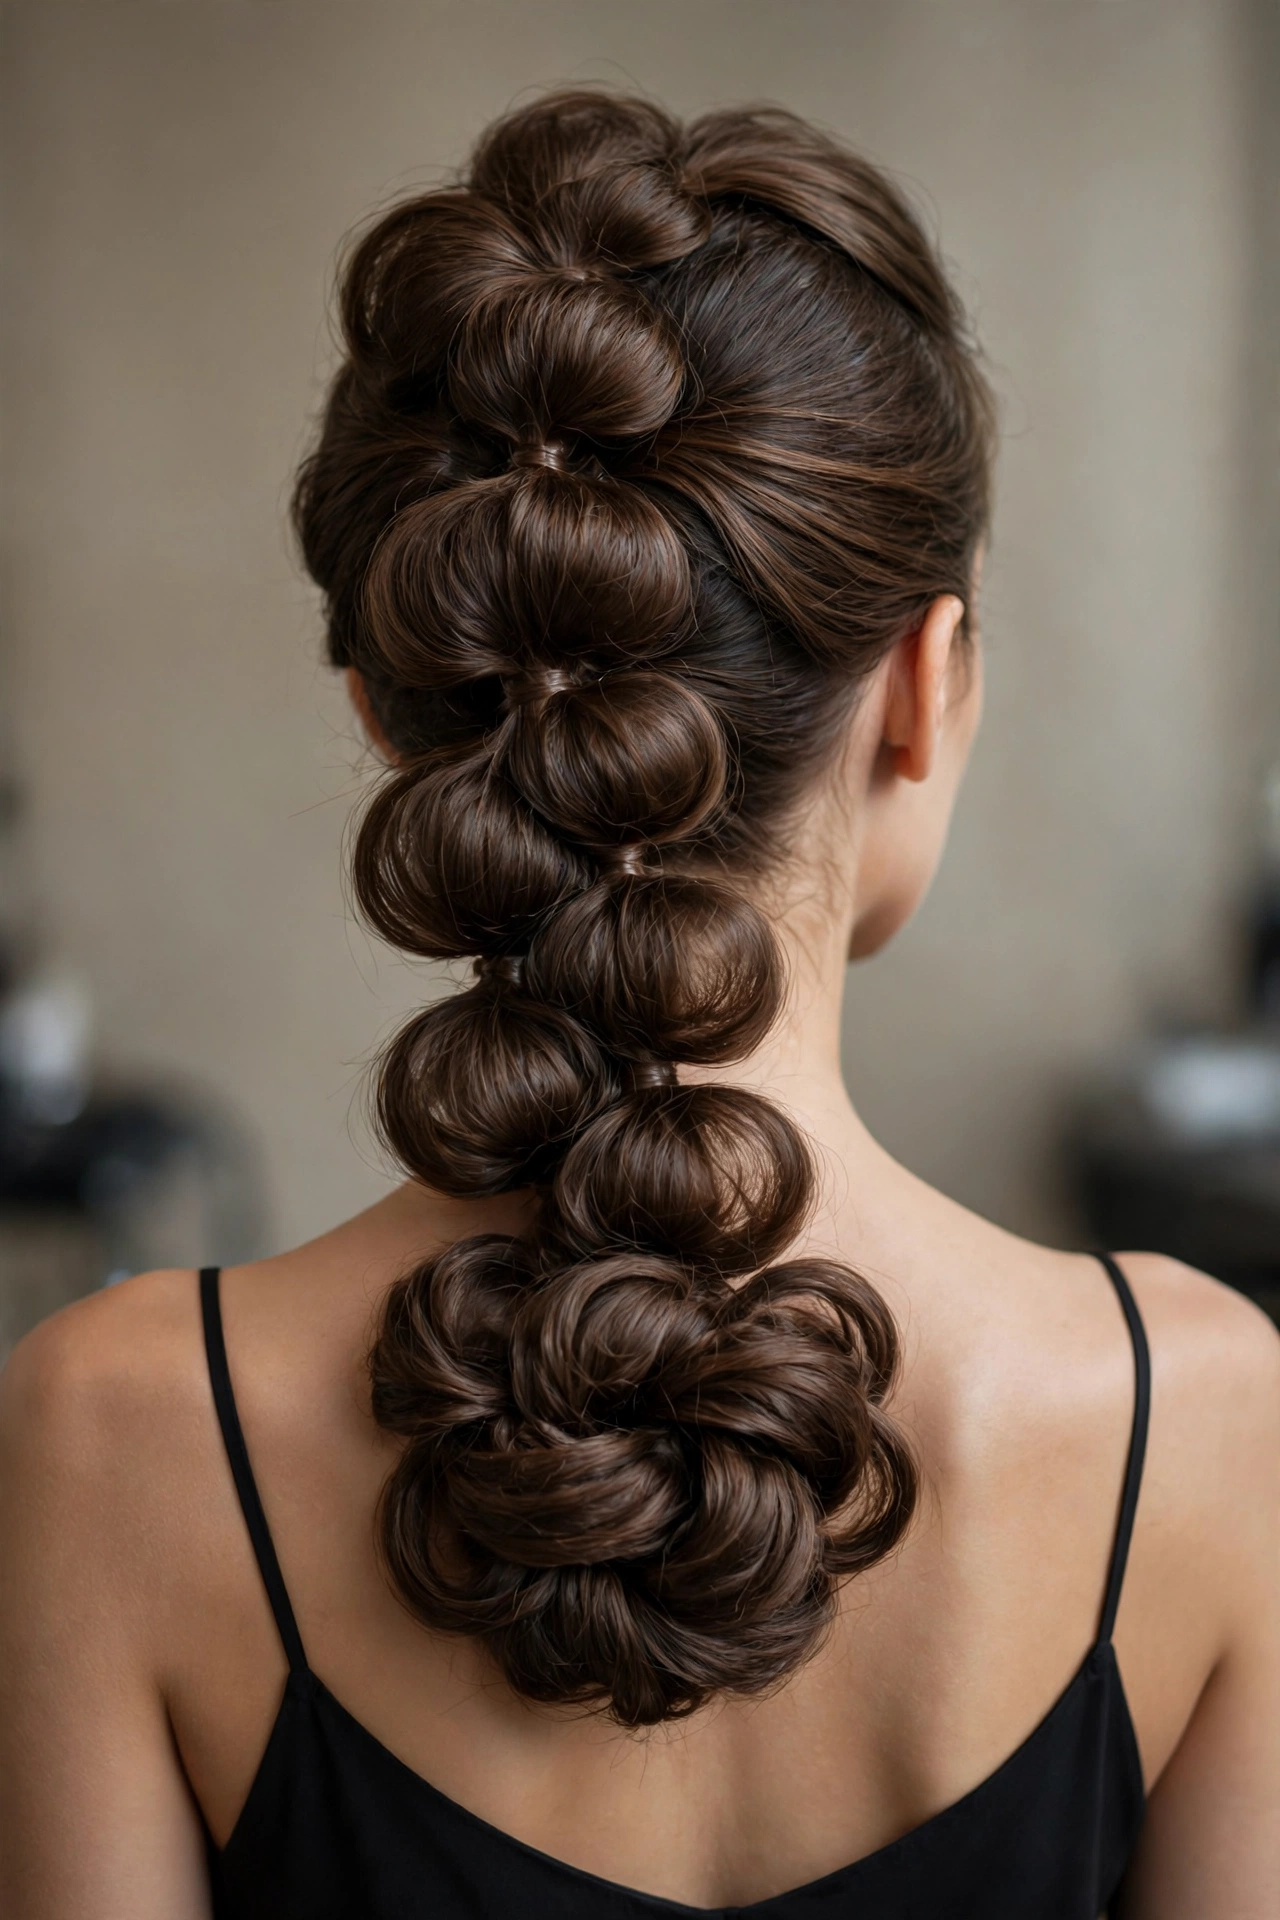
The bubble braid — a ponytail sectioned with elastics and puffed into bubbles — feeds into a bun at the nape or crown. It is the most fashion-forward style in this guide: the bubbles give the back of the head a sculptural, almost couture texture, and the bun anchors it. Each bubble should be even and full, puffed gently by pulling the hair between elastics outward.
Use small clear elastics so they disappear, and match the bubble size to your hair’s fullness — fine hair makes smaller bubbles, and that is fine. This style photographs incredibly well from behind, which makes it a strong choice for events where the back of your head will be seen (seated dinners, ceremonies). It is also surprisingly sturdy: the elastics do half the holding work, so the pins have less to do. Just keep the bubbles lacquered — frizz between bubbles is the one thing that cheapens the look.
Braided Bun Styles 13–14: Bridal and Holiday Showpieces
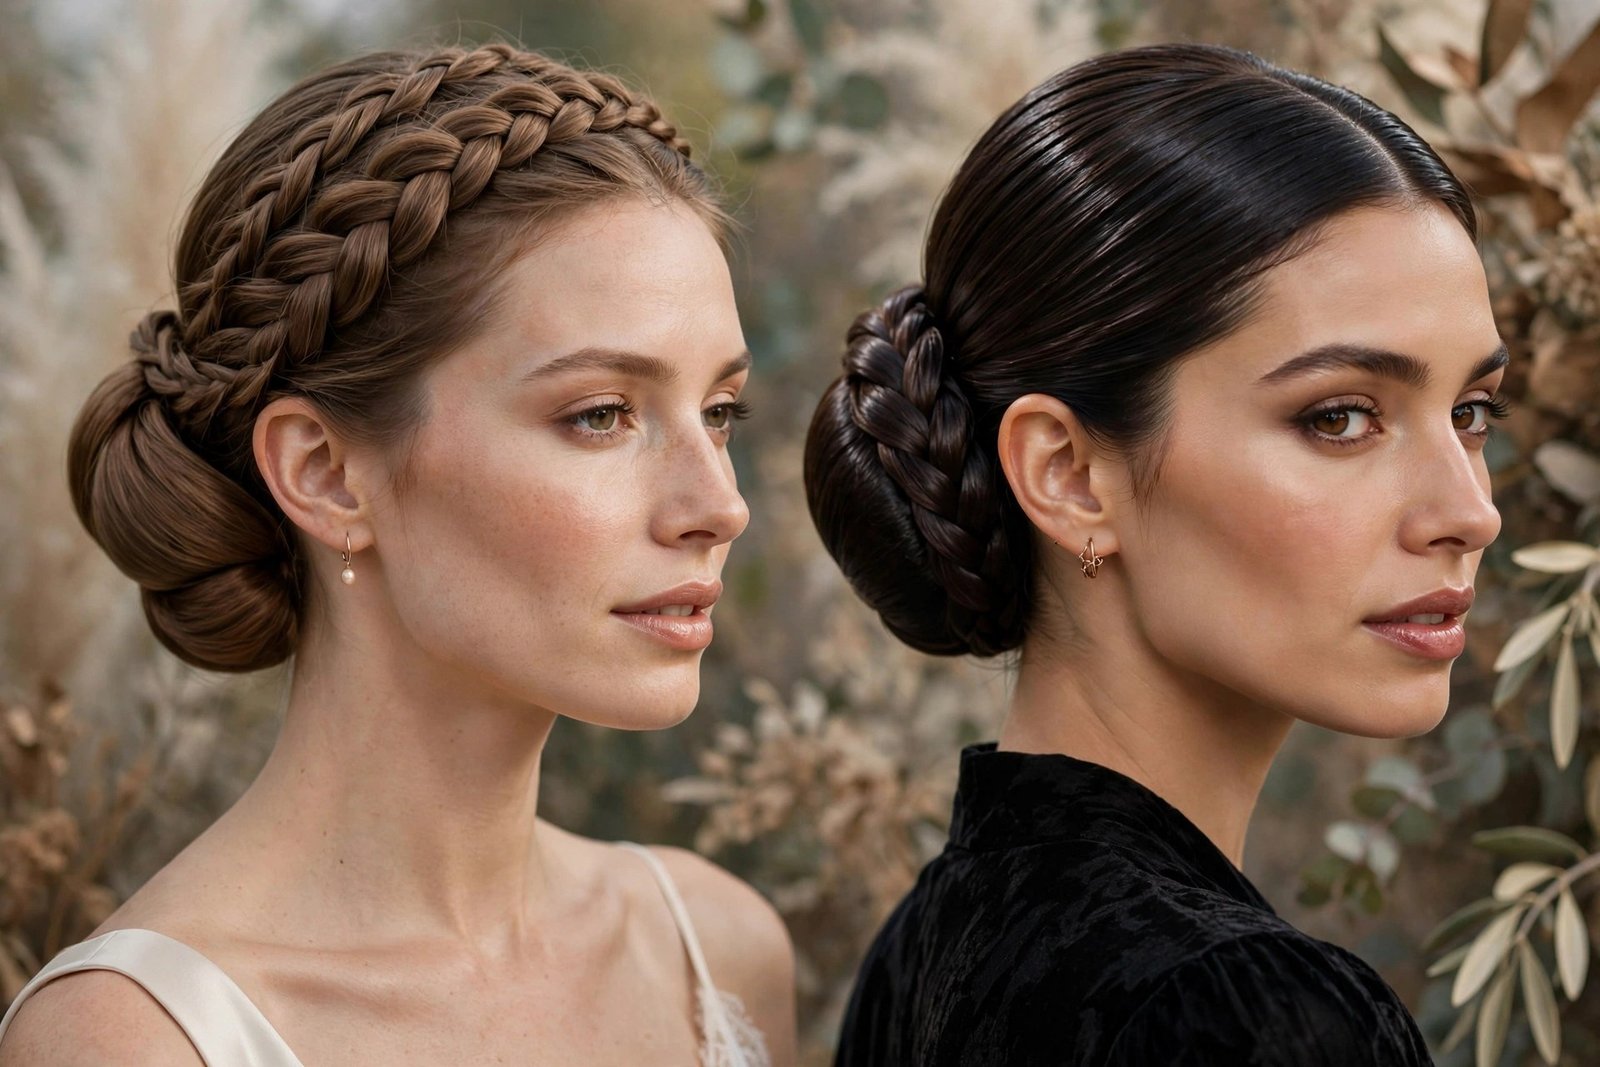
These two are built for the biggest nights — the ones with a photographer and a dress you will remember. They take longer, they use more product, and they are worth every minute.
13. The Bridal Braided Crown and Sculpted Bun
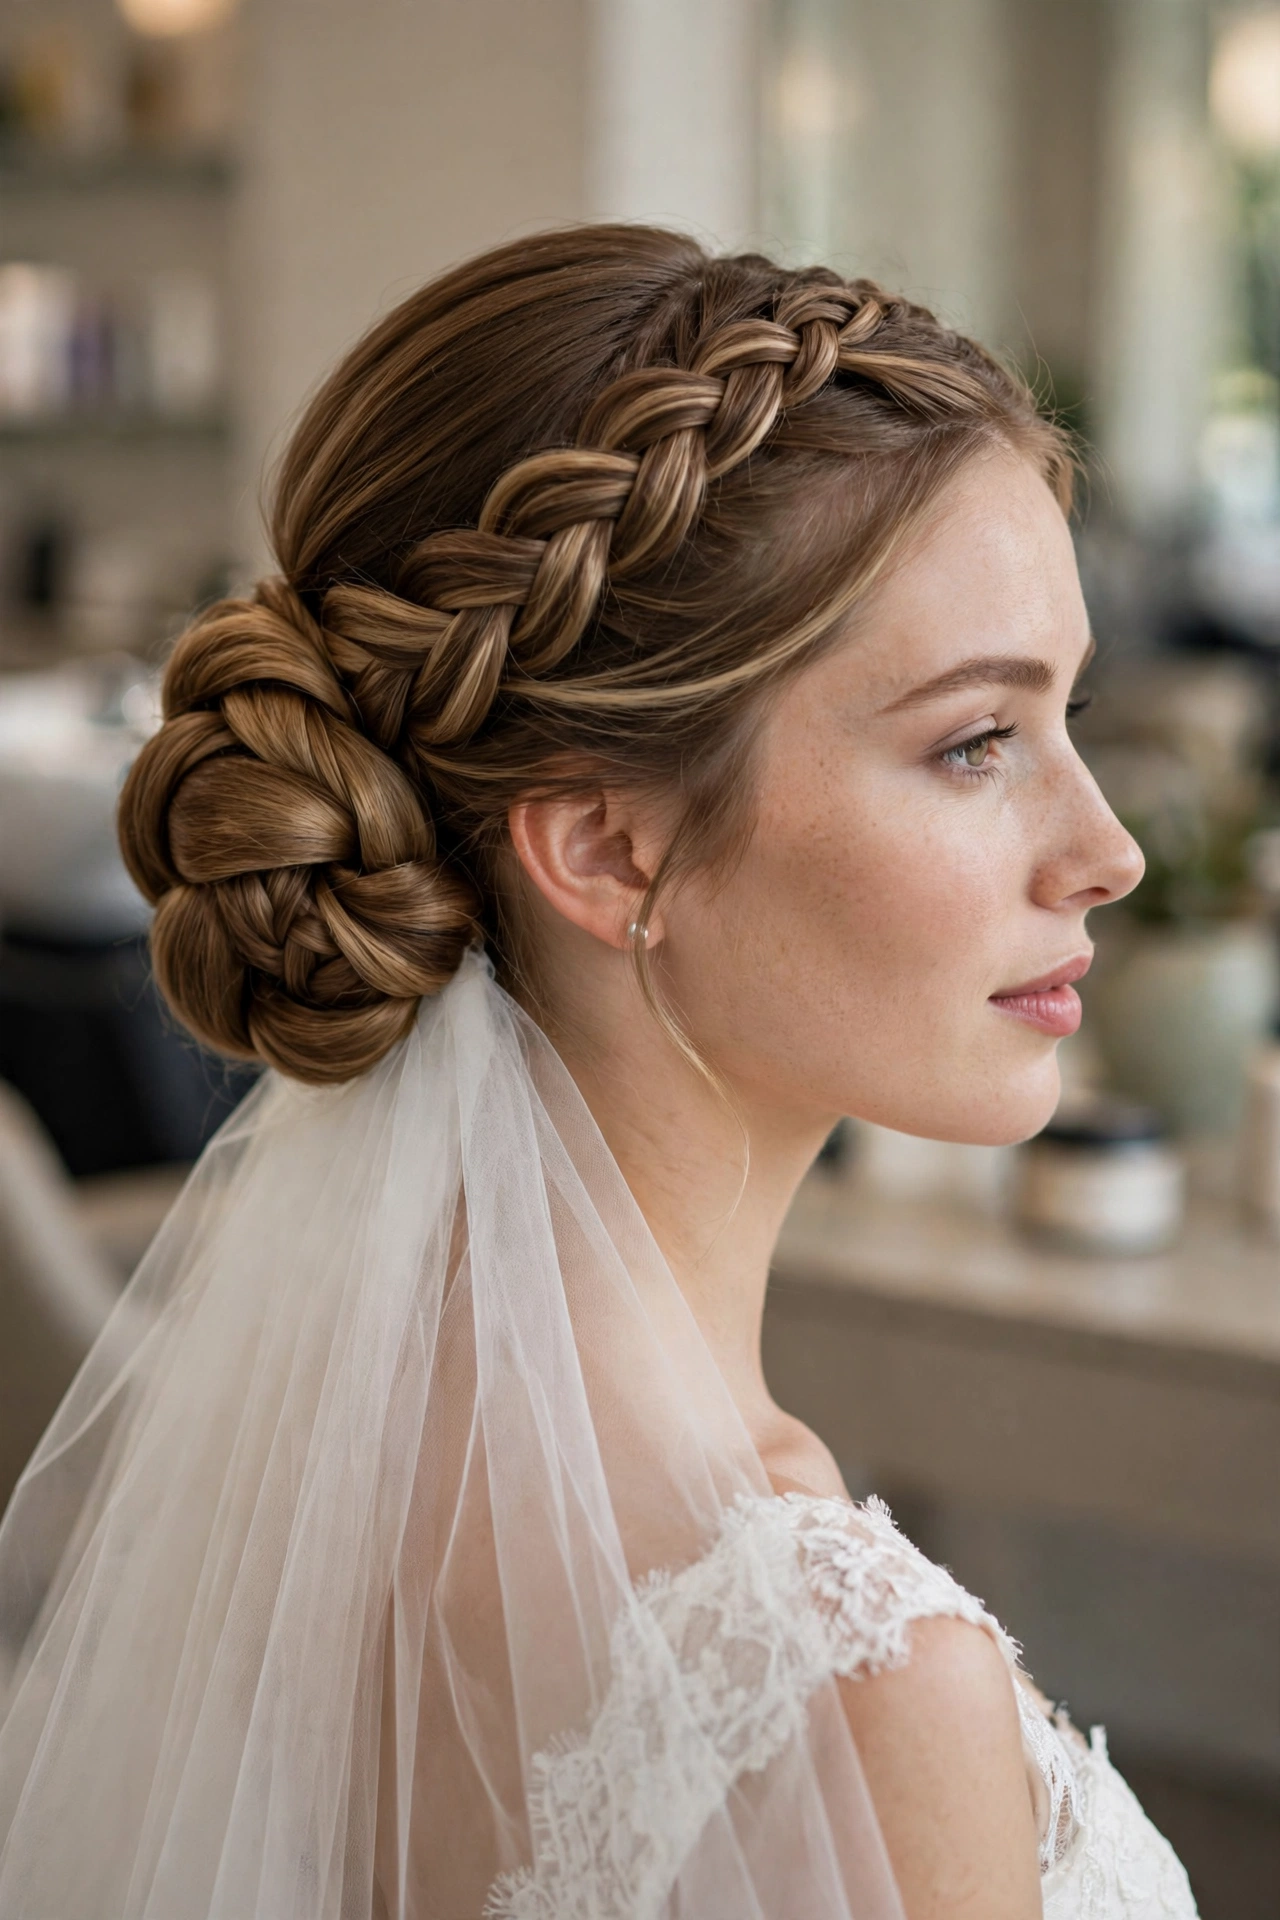
The wedding version of everything above. A Dutch braid crown across the front — braided tight, pancaked gently for fullness — flowing into a large, sculpted low bun at the nape, with the braid continuing to wrap the bun’s base. This is the style brides screenshot. It holds a veil or hair vine beautifully: pins slide into the braid’s texture and disappear, and the low placement keeps the veil sitting naturally.
Bridal timing matters. Do the trial weeks before, photograph it in daylight and flash, and wear it for a full evening to test the hold. On the day, build in more time than you think — this is a ninety-minute style, not a forty-minute one. Extensions are standard for bridal; the fullness photographs as luxury, and thin bridal hair is the one regret I hear most. If you are the bride, this is not the morning to experiment. If you are a guest, this is how you look incredible without upstaging anyone.
14. The Holiday Lacquered Chignon Bun with Braid Detail
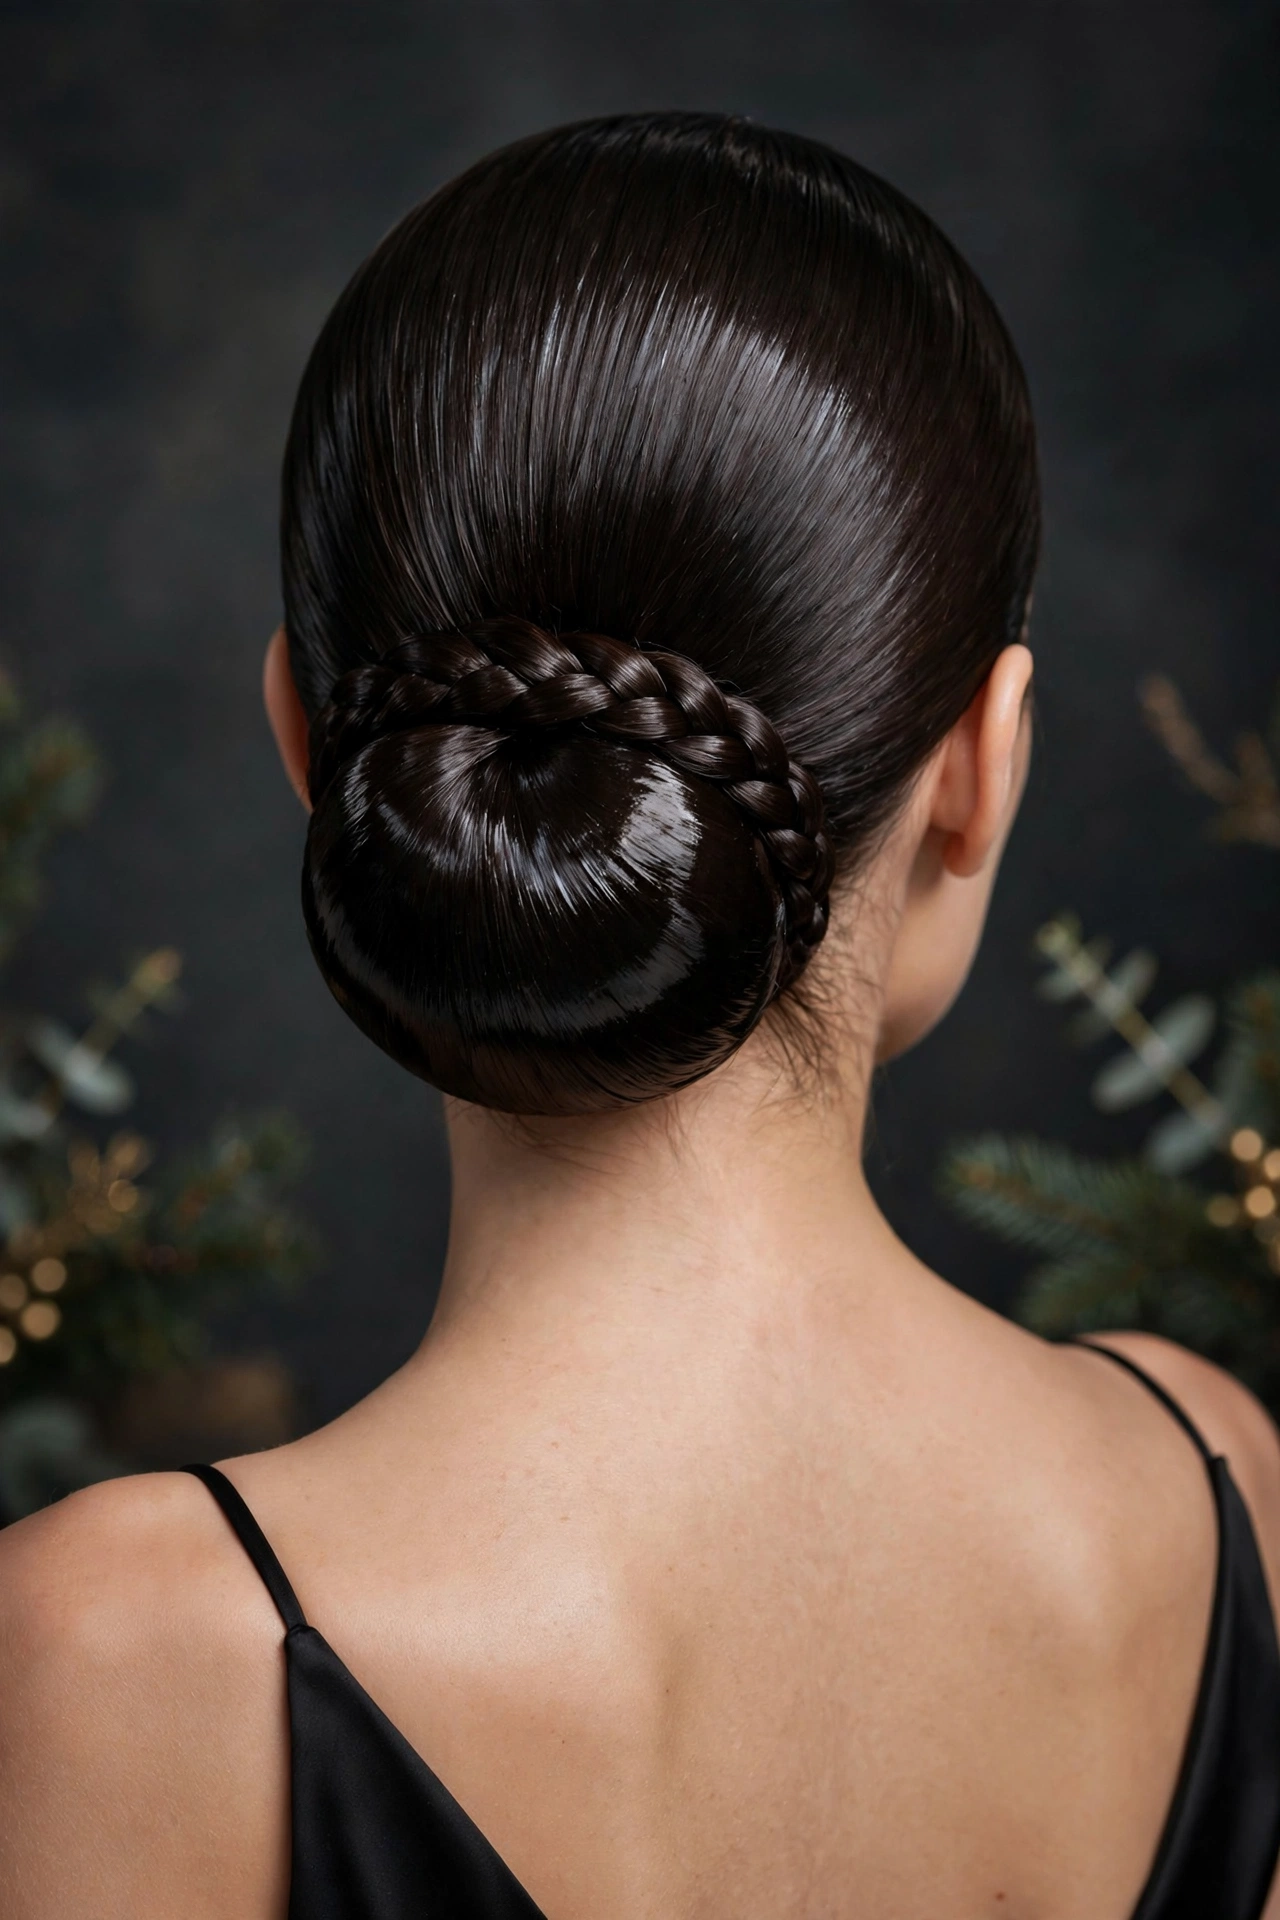
Low, glossy, perfect. A sleek chignon bun at the nape — smooth as glass — with a single tight braid wrapped around its base or climbing one side. This is the New Year’s Eve, the gala, the black-tie answer. The lacquered finish is the point: gel-smoothed, edge-controlled, shine-sprayed until it reflects light. It is the most polished style in this guide, and it pairs with statement earrings and a bare neckline like nothing else.
The chignon must be truly smooth, which means the ponytail base must be truly smooth — brush it out completely before forming the bun, and do not be shy with the smoothing product. The braid detail should be crisp and tight; a loose braid next to a glassy chignon looks like a mistake. This style is also the best traveler of the group: the low placement and tight finish survive car rides, coats, and winter wind better than any high bun. Arrive looking exactly as you left.
Braided Bun Styles 15–16: Understated and Modern
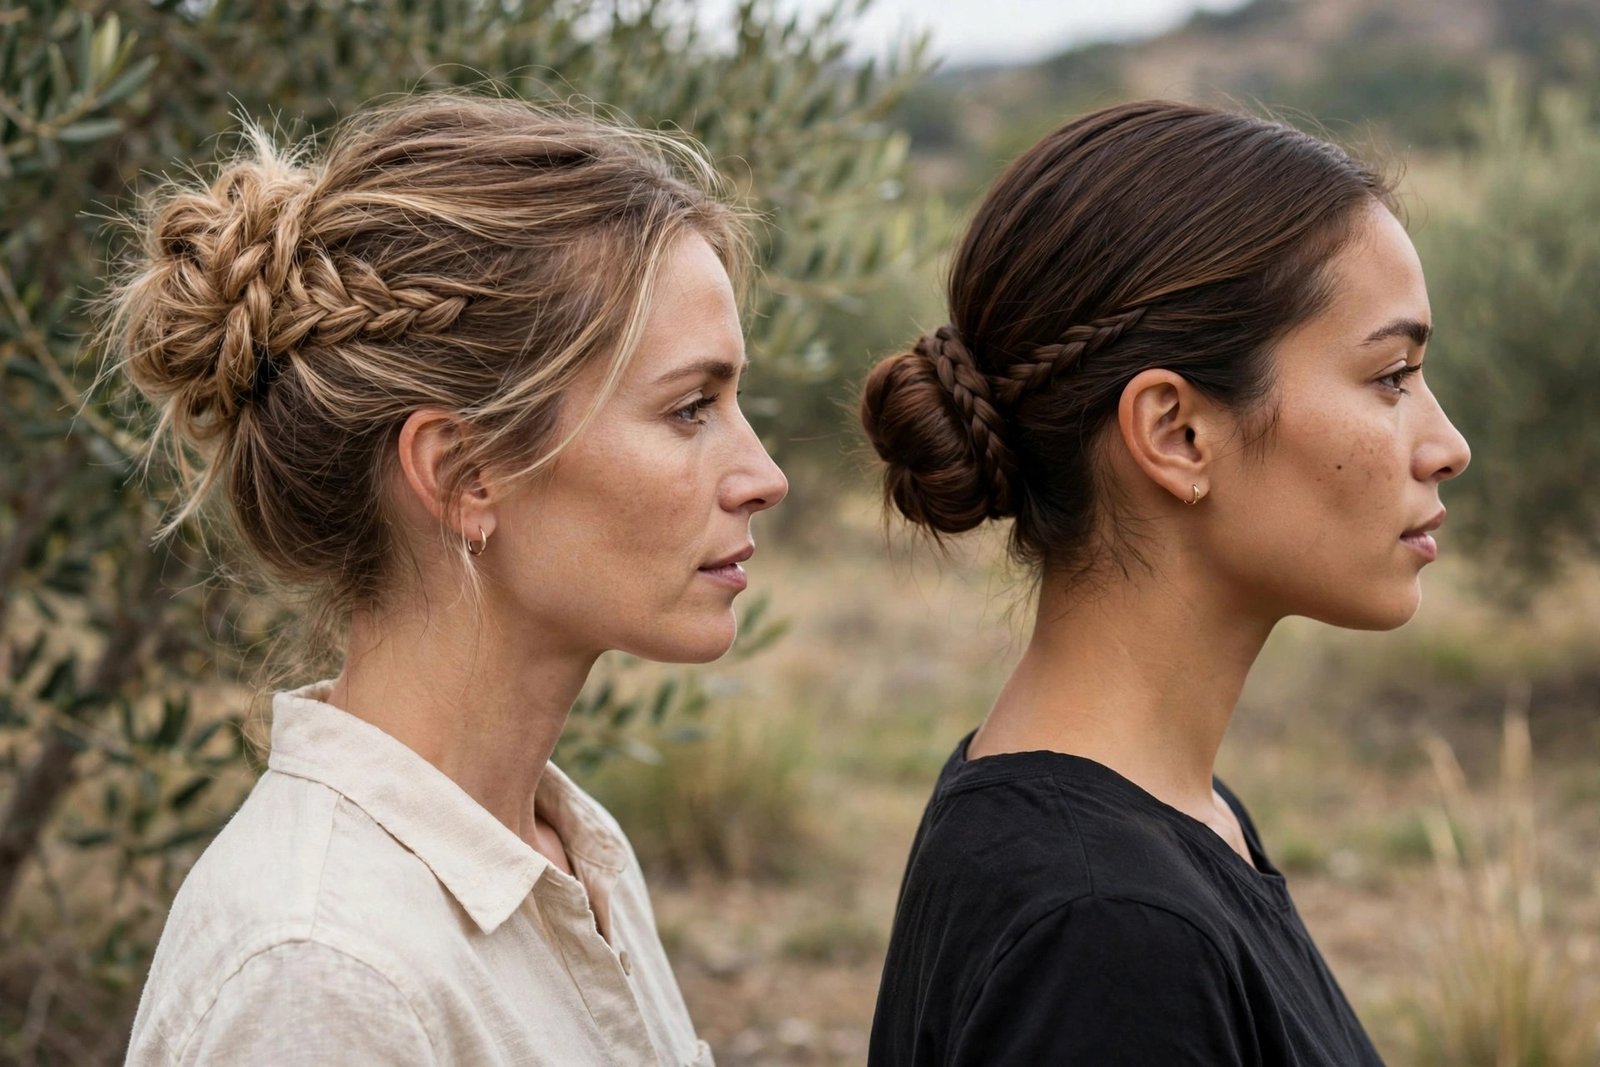
Not every occasion wants drama. These two keep the braided bun concept but dial the finish toward modern and wearable — the versions you can wear to dinner without feeling overdressed.
15. The Soft Textured Braided Bun
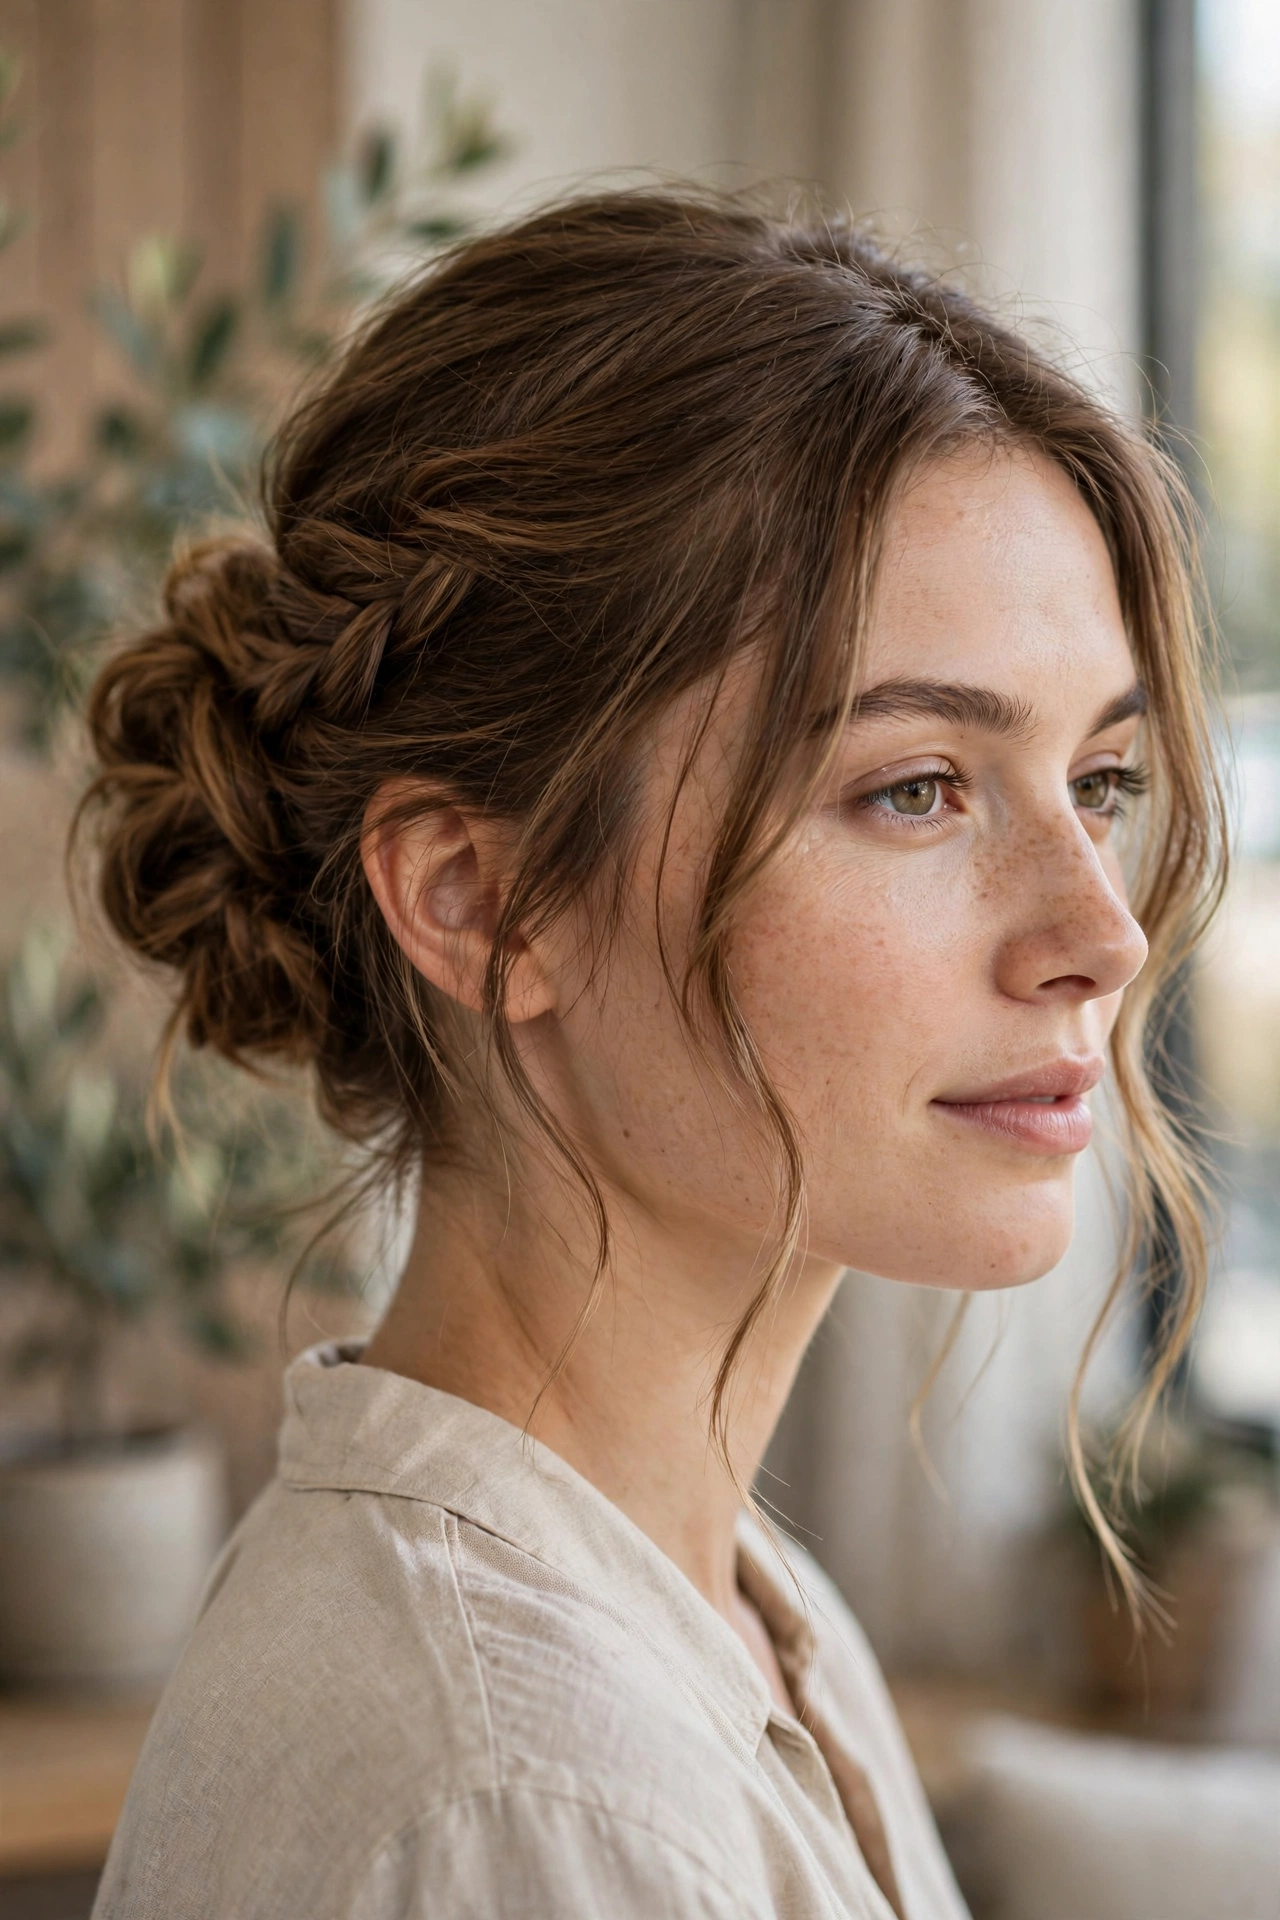
The daytime version. A looser three-strand braid coiled into a mid bun, with the finish intentionally softer — less gel, more texture spray, a few face-framing pieces left out and curled. It is still a braided bun, still deliberate, but it breathes. This is the style for brunches, daytime events, and the woman who wants the trend without the lacquer.
The line between “soft” and “messy” is tension at the hairline. Keep the braid itself secure and the bun pinned properly — the softness comes from the finish and the face-framing pieces, not from a loose structure. If the bun is slipping, it is not soft, it is failing. Pin it like you mean it, then soften the surface. This style also transitions well: tighten the face-framing pieces and add shine spray, and it moves convincingly into evening.
16. The Minimalist Single-Braid Wrap Bun
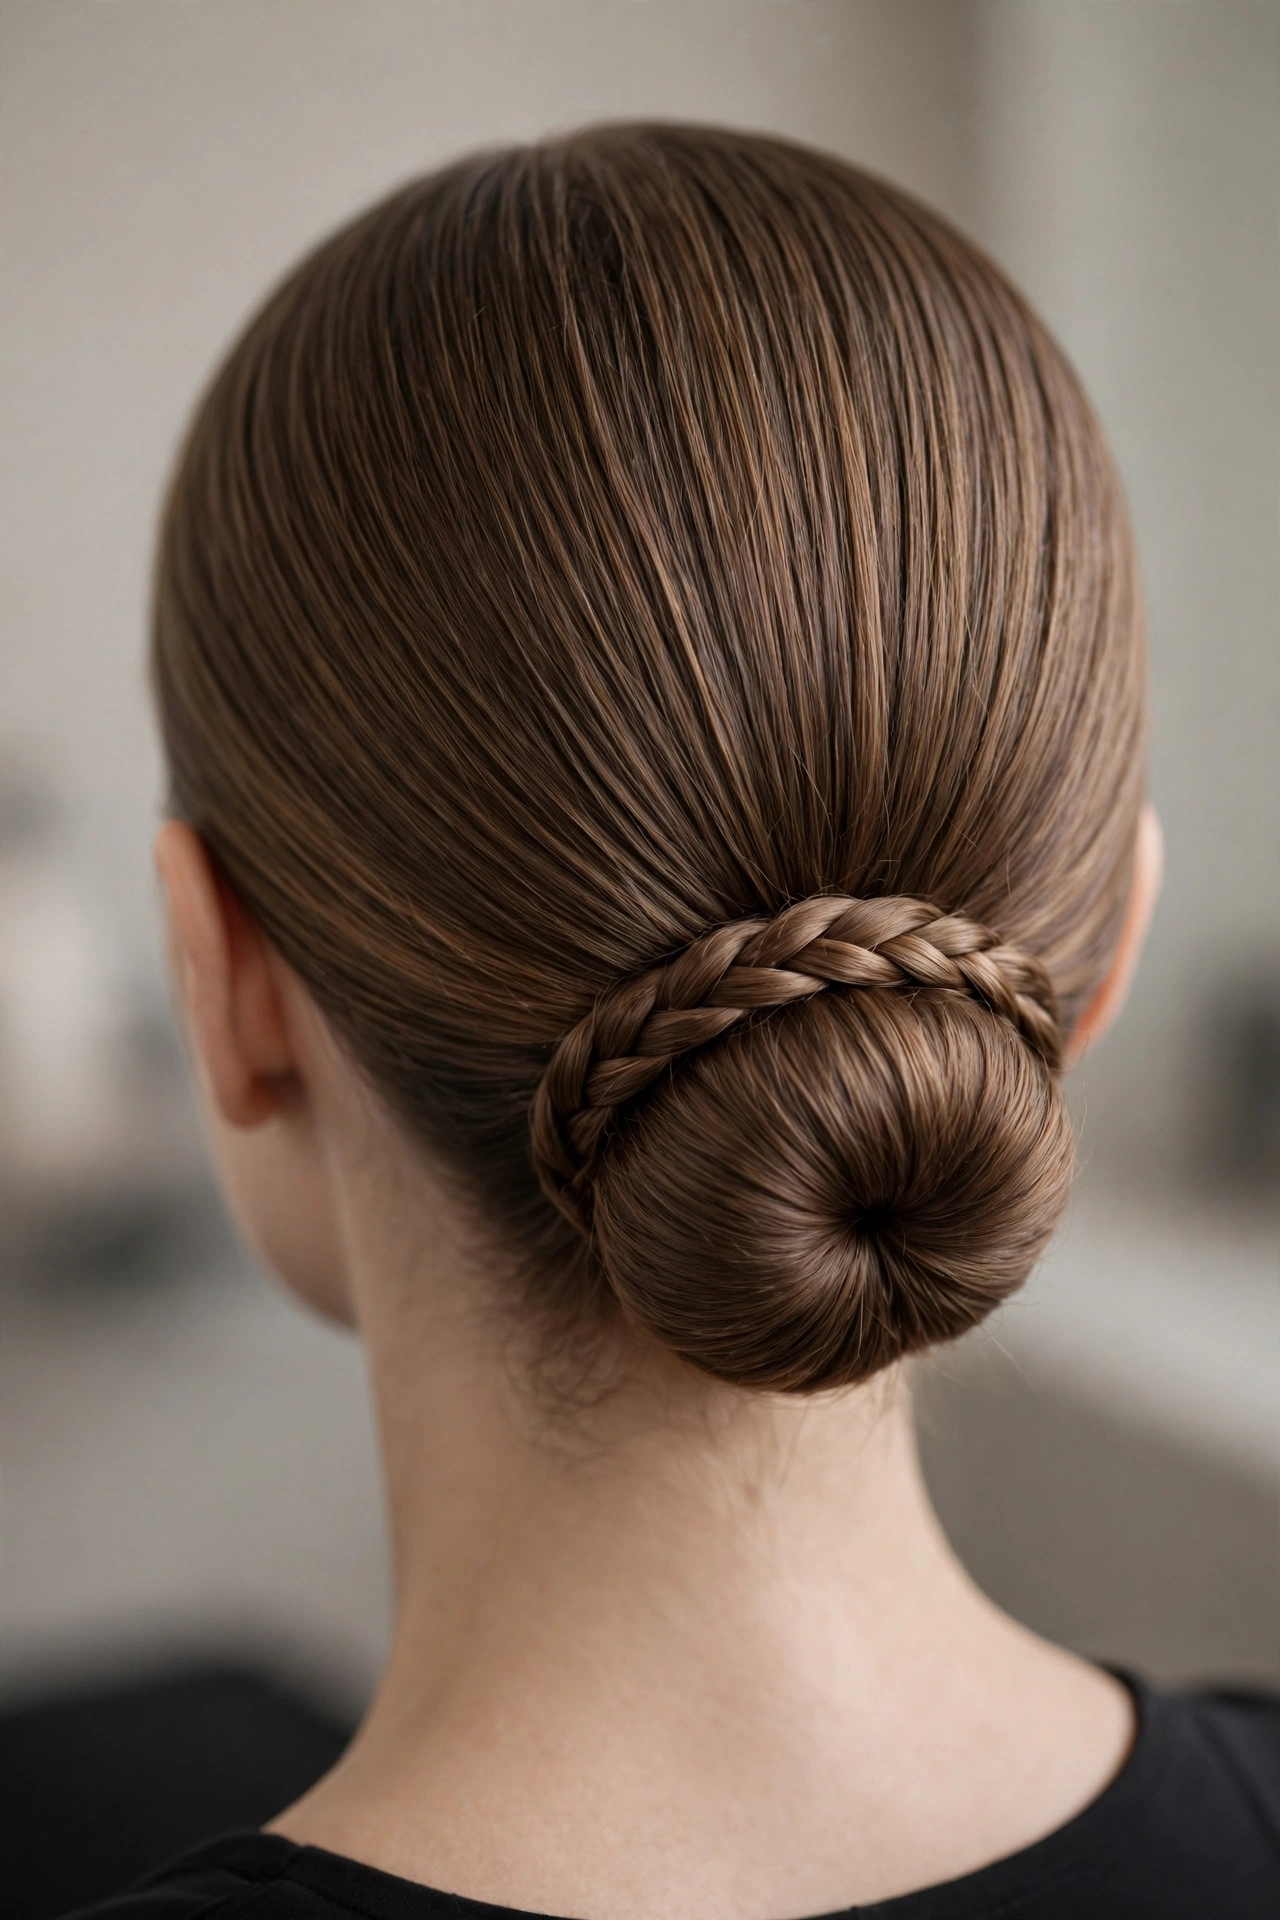
One smooth low bun, one thin tight braid wrapped once around its base, everything else immaculate. That is the entire style, and it is enough. The restraint is the statement — a single braid line circling a perfect bun reads confident and modern, like good tailoring. It takes fifteen minutes, holds all day, and works in offices, galleries, and anywhere minimalism is the dress code.
Because there is so little to look at, everything must be perfect: the bun smooth, the braid even, the parting clean, the edges laid. This style exposes sloppy work, which is why beginners should start with the fuller styles and work down to this one. But once you can do it, it becomes your default — the braided bun you wear when you do not have to think about your hair at all.
Step-by-Step: The Classic Sculpted Braided Bun
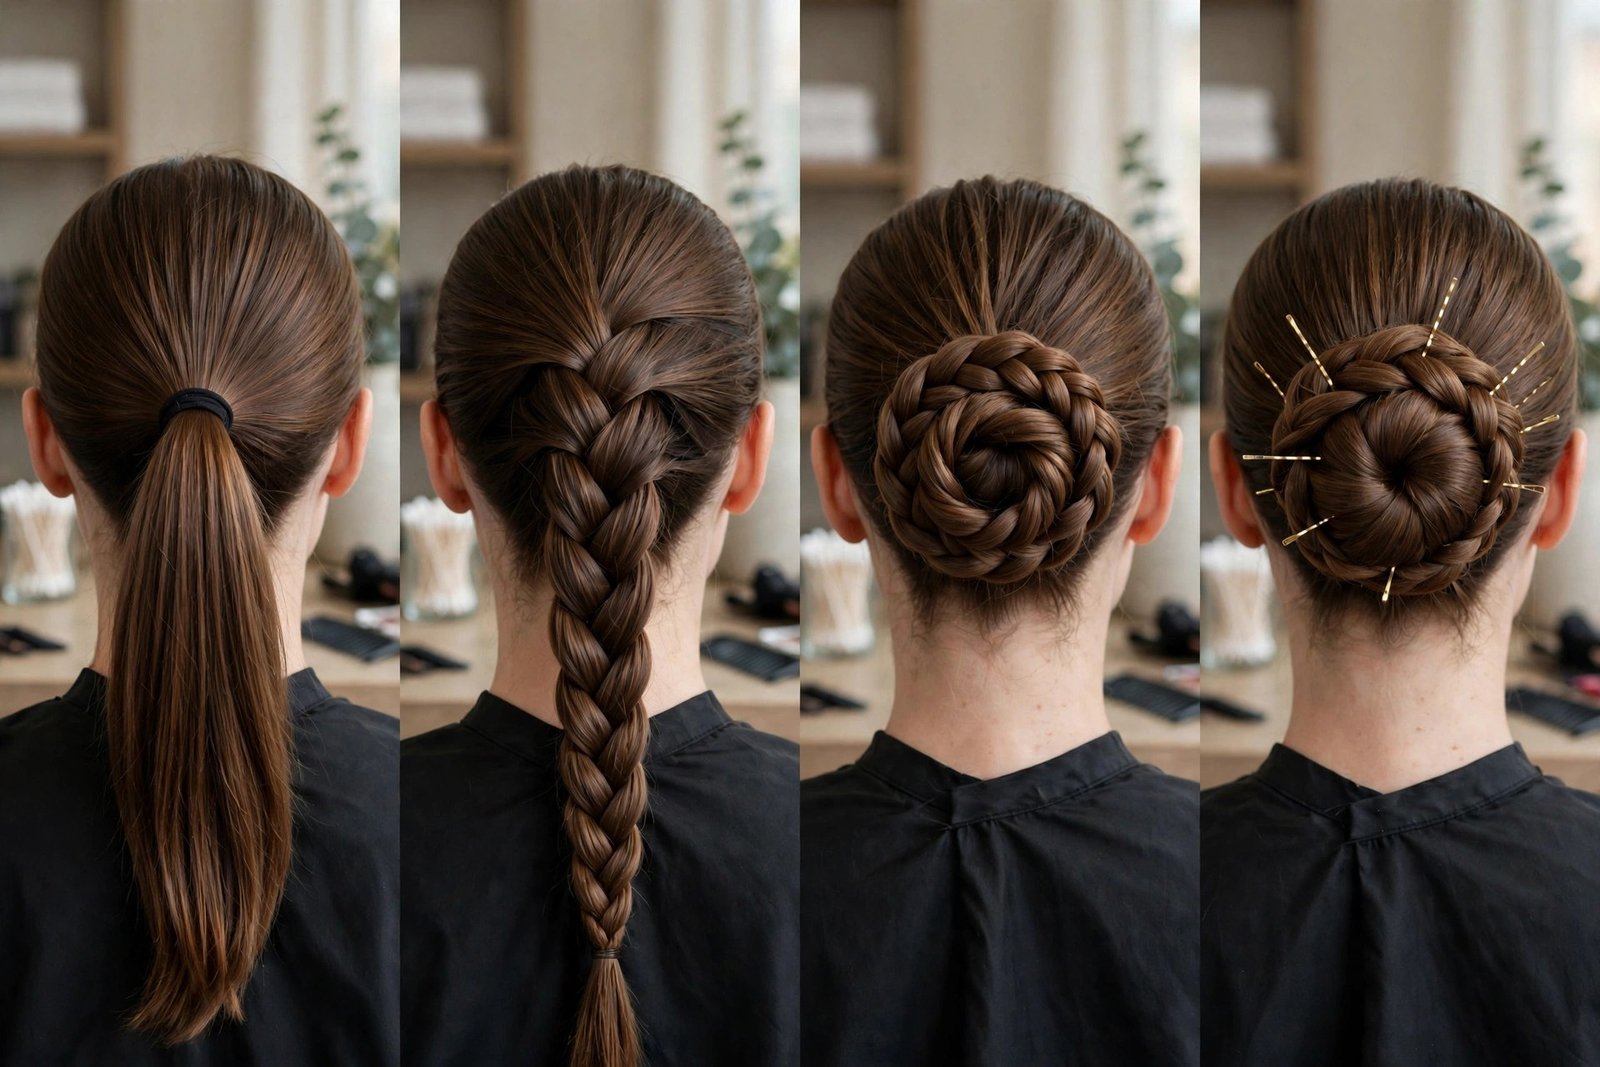
This is the version to learn first — style number one, done properly, at home. It takes most women thirty to forty-five minutes the first time and about twenty once it is in your hands. Read through once, then do it with a mirror you can see the back of your head in.
Step one: prep. Day-old hair, or texture spray on clean hair. Brush everything smooth, directing it toward where the bun will sit — let us say the mid-back of the head for this walkthrough. Work a quarter-sized amount of styling cream or light gel through the lengths, and smooth the hairline with edge control.
Step two: the ponytail. Gather the hair into a ponytail at your chosen spot and secure it with a strong elastic — not a stretched-out old one. The ponytail is the foundation; if it sags, the bun sags. Smooth the surface with a bristle brush, checking for bumps by running your palm over it. Wrap a small section of hair around the elastic to hide it and pin underneath.
Step three: the braid. Braid the ponytail in a tight three-strand braid, keeping even tension all the way down. Braid to the very ends — a stubby unbraided tail is the most common beginner giveaway — and secure with a small clear elastic. If pieces poke out, smooth them with a touch of gel; do not re-braid unless it is genuinely uneven.
Step four: the coil. Wrap the braid around the ponytail base, keeping each pass flat and snug against the last. Tuck the tail end underneath the coil. Pin as you go: slide each bobby pin into the coil against the direction of the wrap, catching scalp hair underneath, every inch or so. Use more pins than feels necessary — ten to fourteen for a full bun is normal.
Step five: the finish. Check the hairline and smooth any flyaways with edge control on a toothbrush or edge brush. Mist the whole style with a firm-hold hairspray from about a foot away — close spraying creates wet spots. Then finish with shine spray for the lacquered 2026 look. Step back, check every angle, and add pins anywhere you see movement. A finished braided bun should feel like a single solid structure when you gently press it. If anything shifts, pin it now, not at the venue.
Products and Tools That Actually Work
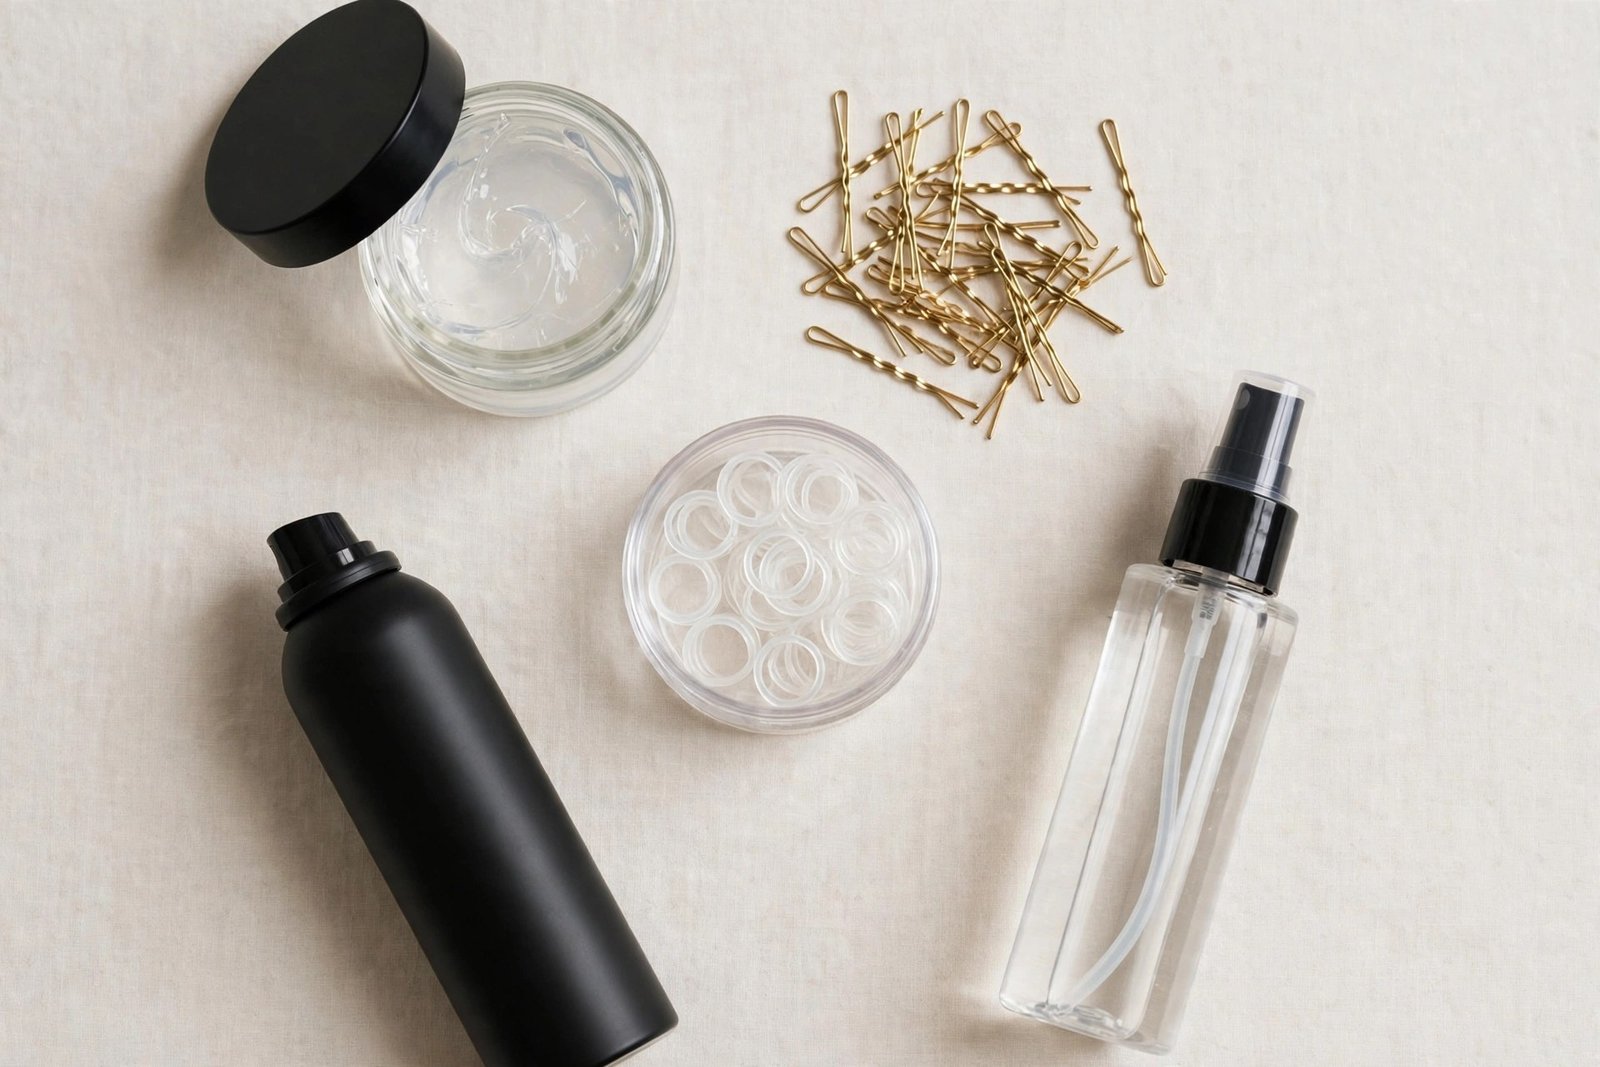
You do not need a professional kit. You need the right few things, and you need to know what each one is for. Here is the honest list — what I reach for in my own kit, and what you can skip.
Styling cream or light gel: the workhorse. Applied before braiding, it tames flyaways and gives the braid grip. A quarter-sized amount for medium hair, more for thick. Do not use heavy wax — it builds up and dulls the finish, and it makes restyling the next day miserable.
Edge control: for the hairline, the nape, and any baby hairs. Apply with a toothbrush or an edge brush for precision. The 2026 braided bun is defined by its clean edges, and this is the product that makes them. A little goes a long way; too much looks greasy in flash photography.
Texture spray or dry shampoo: for clean hair that needs grip. Spray at the roots before you start, let it sit a minute, then brush through. This is what makes freshly washed hair braid-able. Skip it on day-old hair — you already have natural texture.
Bobby pins and hairpins: buy more than you think. Standard bobby pins for anchoring the coil, U-shaped hairpins for tucking and shaping the bun. Match them to your hair color. Cheap pins bend and lose grip; a decent pack costs little and holds all night. Throw away pins that have lost their coating — they snag.
Small clear elastics: for securing braid ends and bubble sections. Clear disappears into the hair; colored ones show. Buy the small size — the large ones are too bulky for braid ends and create a visible bump under the coil.
Firm-hold hairspray and shine spray: the finishing pair. Hairspray locks the structure; shine spray gives the lacquered surface. Spray hairspray first, let it set for a minute, then shine spray lightly. Reversing the order dulls the shine. Travel-size cans go in the clutch for touch-ups.
What to skip: heavy oils before braiding (they make everything slippery), leave-in conditioners with silicone overload (same problem), and decorative pins as structural pins (they are weaker — use real pins for hold and add decorative ones after). And the hair donut? Useful for the framed-bun style if your hair is fine, unnecessary otherwise. Do not buy tools for problems you do not have.
Making It Last All Night
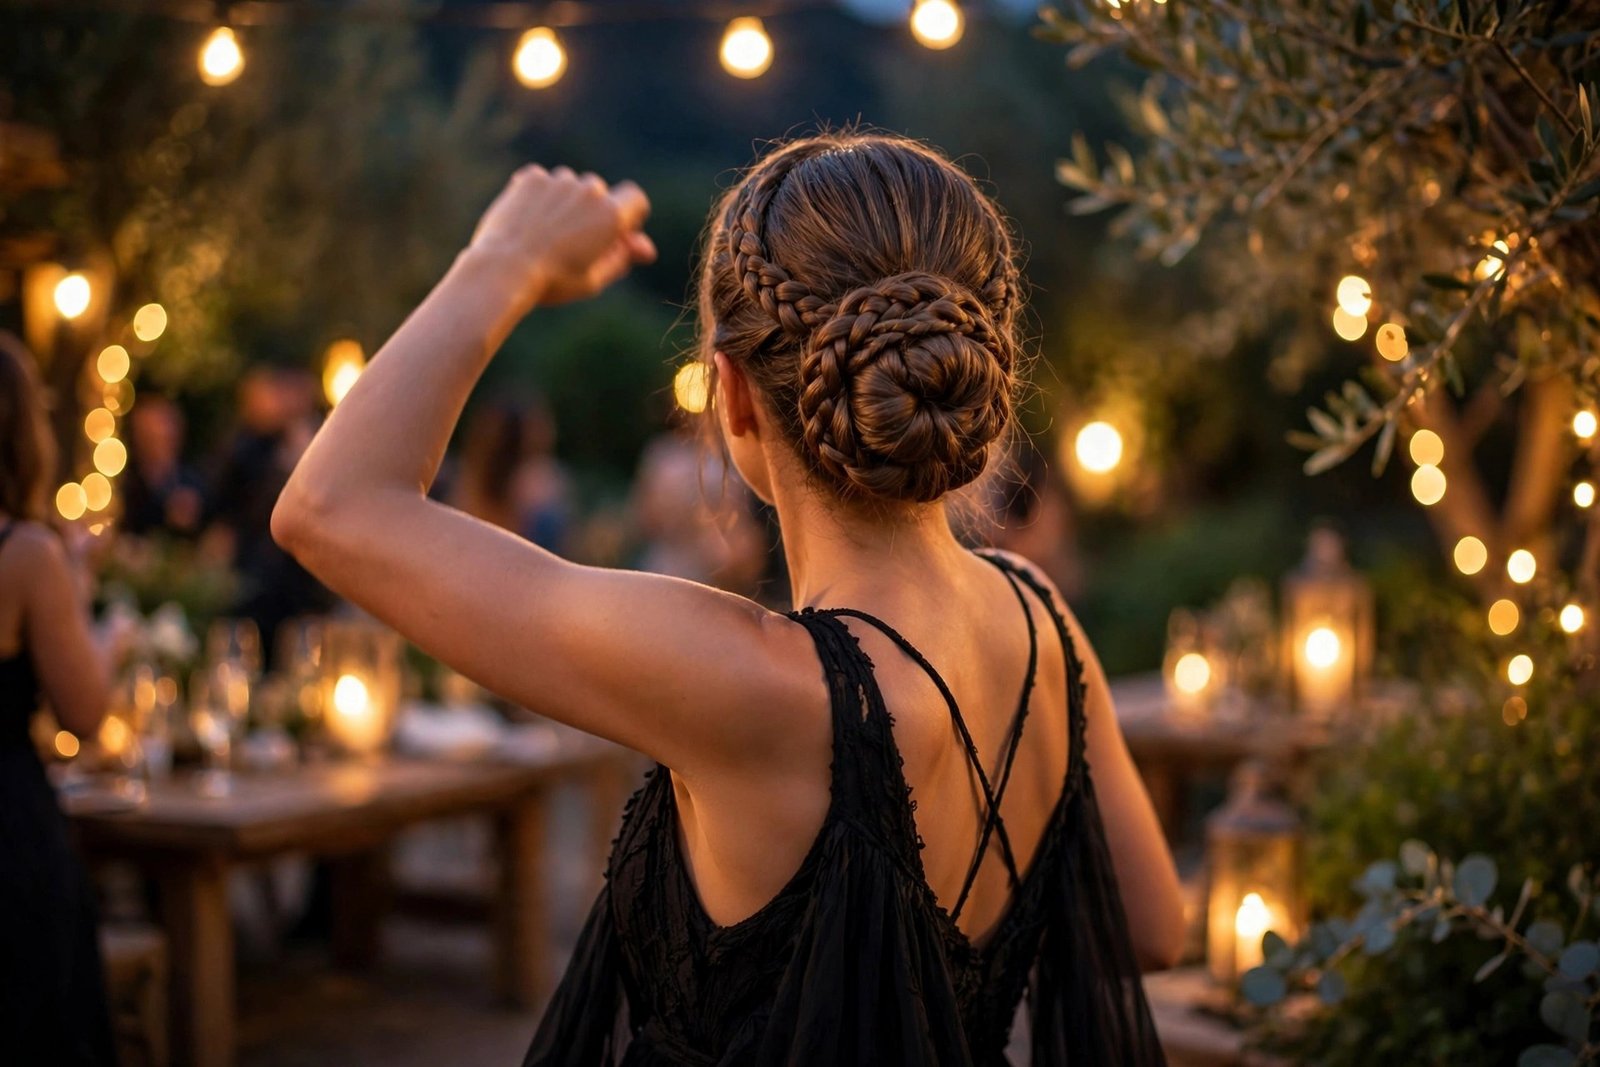
A braided bun that looks perfect at six and tired at ten is a failure of technique, not of the style. The style can hold. Here is how you make sure it does.
Pin like you mean it. This is the single biggest factor. Most DIY braided buns use half the pins they need. Every pass of the coil should be pinned, pins should catch scalp hair (not just bun hair), and they should be pushed in against the wrap direction so the coil’s own tension locks them. When you think you are done, press the bun gently — anything that shifts gets another pin. I would rather see fourteen pins and a solid bun than six pins and a prayer.
Anchor the ponytail base with two elastics crossed in an X, or one strong elastic plus pins around the base. The base carries the entire weight; if it loosens, everything above it migrates. For heavy or very long hair, add two to four pins driven horizontally through the base into the scalp hair before you even braid. This hidden scaffolding is what professionals do and what tutorials skip.
Control the environment. Humidity is the enemy of the lacquered finish — if your event is outdoors or the venue runs warm, use an anti-humidity spray as your final layer instead of relying on hairspray alone. Wind is the enemy of the structure — for outdoor photos, position the bun low rather than high; low buns catch less wind and recover better. And the car ride: sit with the bun clear of the headrest, or bring a silk scarf to drape loosely over it. I have seen more buns ruined by headrests than by dancing.
Pack a three-item touch-up kit: three to four spare bobby pins, a travel edge control or mini gel, and a travel hairspray. That is it. Mid-evening, check the nape and the hairline — those are the two places that loosen first. Smooth, pin, spray. Two minutes in the restroom and you are back to six o’clock. What you should not do is re-braid or re-coil anything mid-event; touch-ups are for edges and pins, not reconstruction. If the structure was built right, you will never need reconstruction.
Braided Buns for Every Hair Type
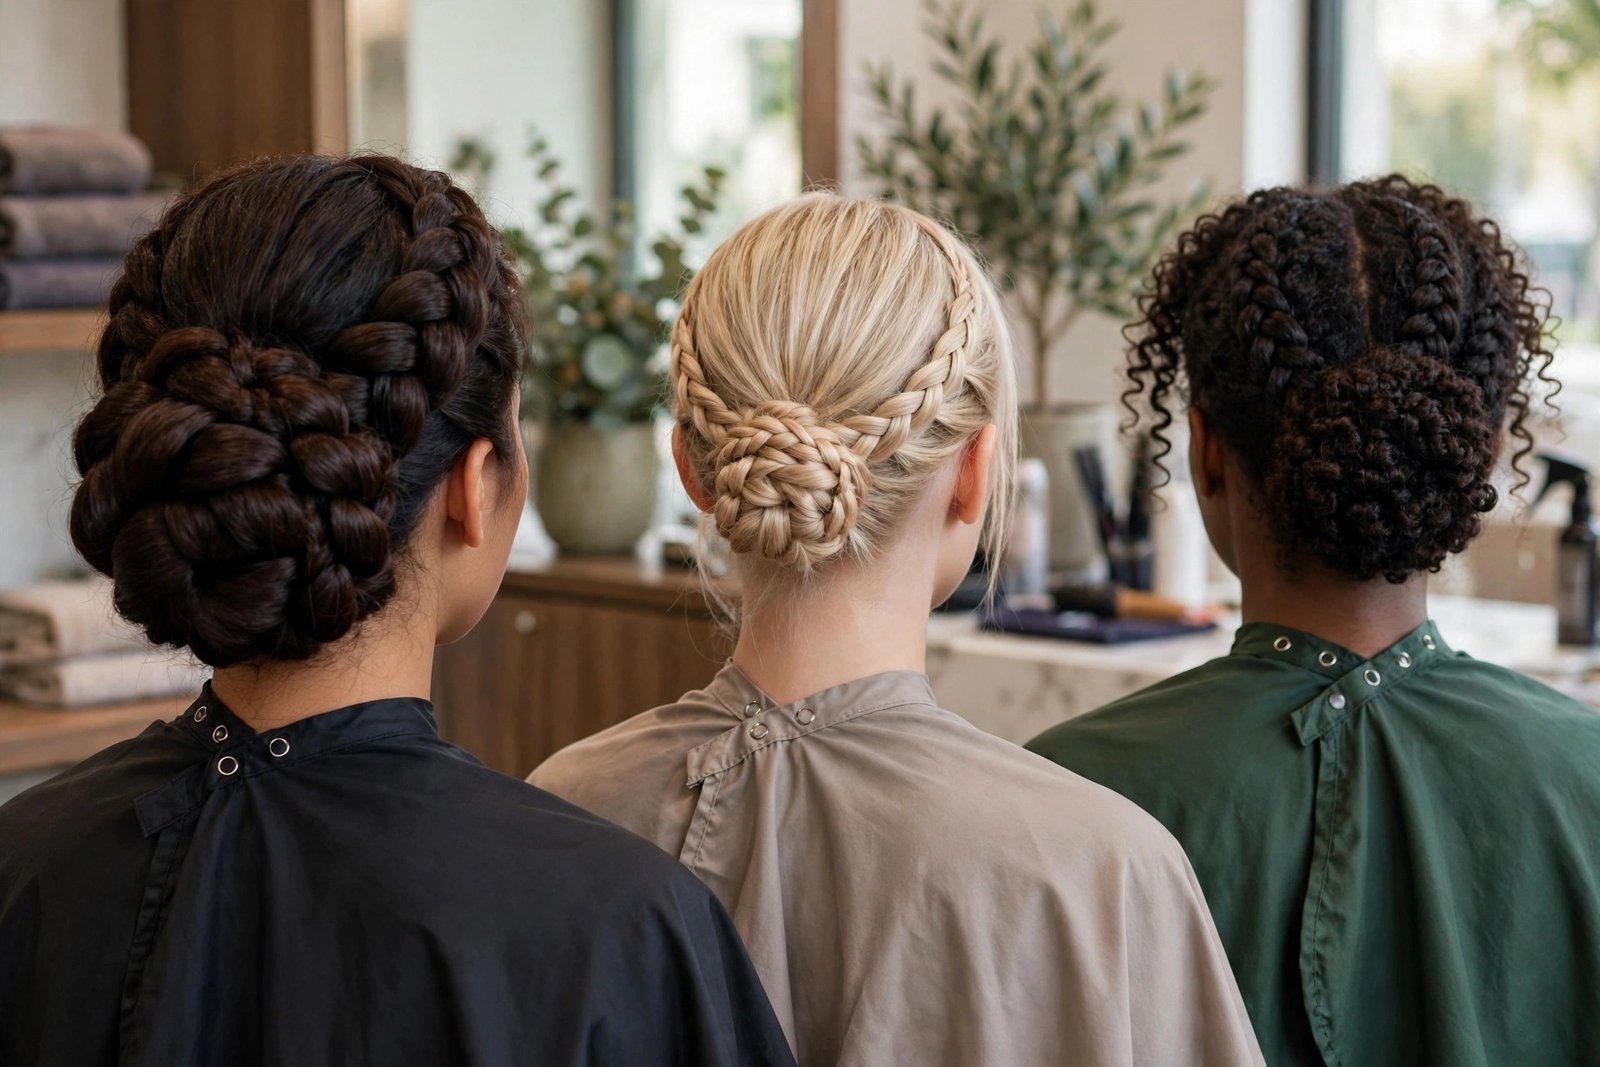
The braided bun is not a one-texture style. It adapts — but the adaptation has to be honest about what your hair does, or you will fight it all night. Here is the real breakdown.
Thick, coarse hair is the natural home of the braided bun. It braids with body, coils with fullness, and holds pins without complaint. Your challenge is control, not grip: use more smoothing product, braid in smaller sections for even tension, and take the extra time on the hairline. The result on thick hair is the most sculptural version of this style — the one that looks carved.
Fine hair needs building. Texture spray at the roots, a volumizing powder where the bun anchors, and clip-in extensions if the braid looks thin — one pack, matched to your shade, clipped in before braiding. The framed-bun style (number eight) was practically designed for fine hair: the bun gets its fullness from technique, and only one braid needs real hair. Do not skip the grip products. Fine hair is slippery, and a braided bun on unprepped fine hair is a countdown to collapse.
Curly and coily hair braids beautifully — the texture gives the braid incredible grip and dimension. Smooth the lengths you plan to braid with a blow-dry or flat iron first if you want the lacquered 2026 finish; the braid pattern reads sharper on smoothed hair. Or lean into the texture: a braided bun on natural texture has a richness that straight hair cannot replicate, and it is fully on-trend. Either choice works. What does not work is half-smoothing — pick a lane.
Short hair — above the shoulders — can still wear this trend with adjustments. Dutch braids need the least length, so styles four and five are your best entry points: braid what you have along the crown or sides and gather the rest into a small bun, padding it with a mini donut if needed. Extensions change the equation entirely; with one pack of clip-ins, most short-haired women can wear the full classic. Be honest about the length in the mirror, build what you need, and no one will know the difference.
Frequently Asked Questions
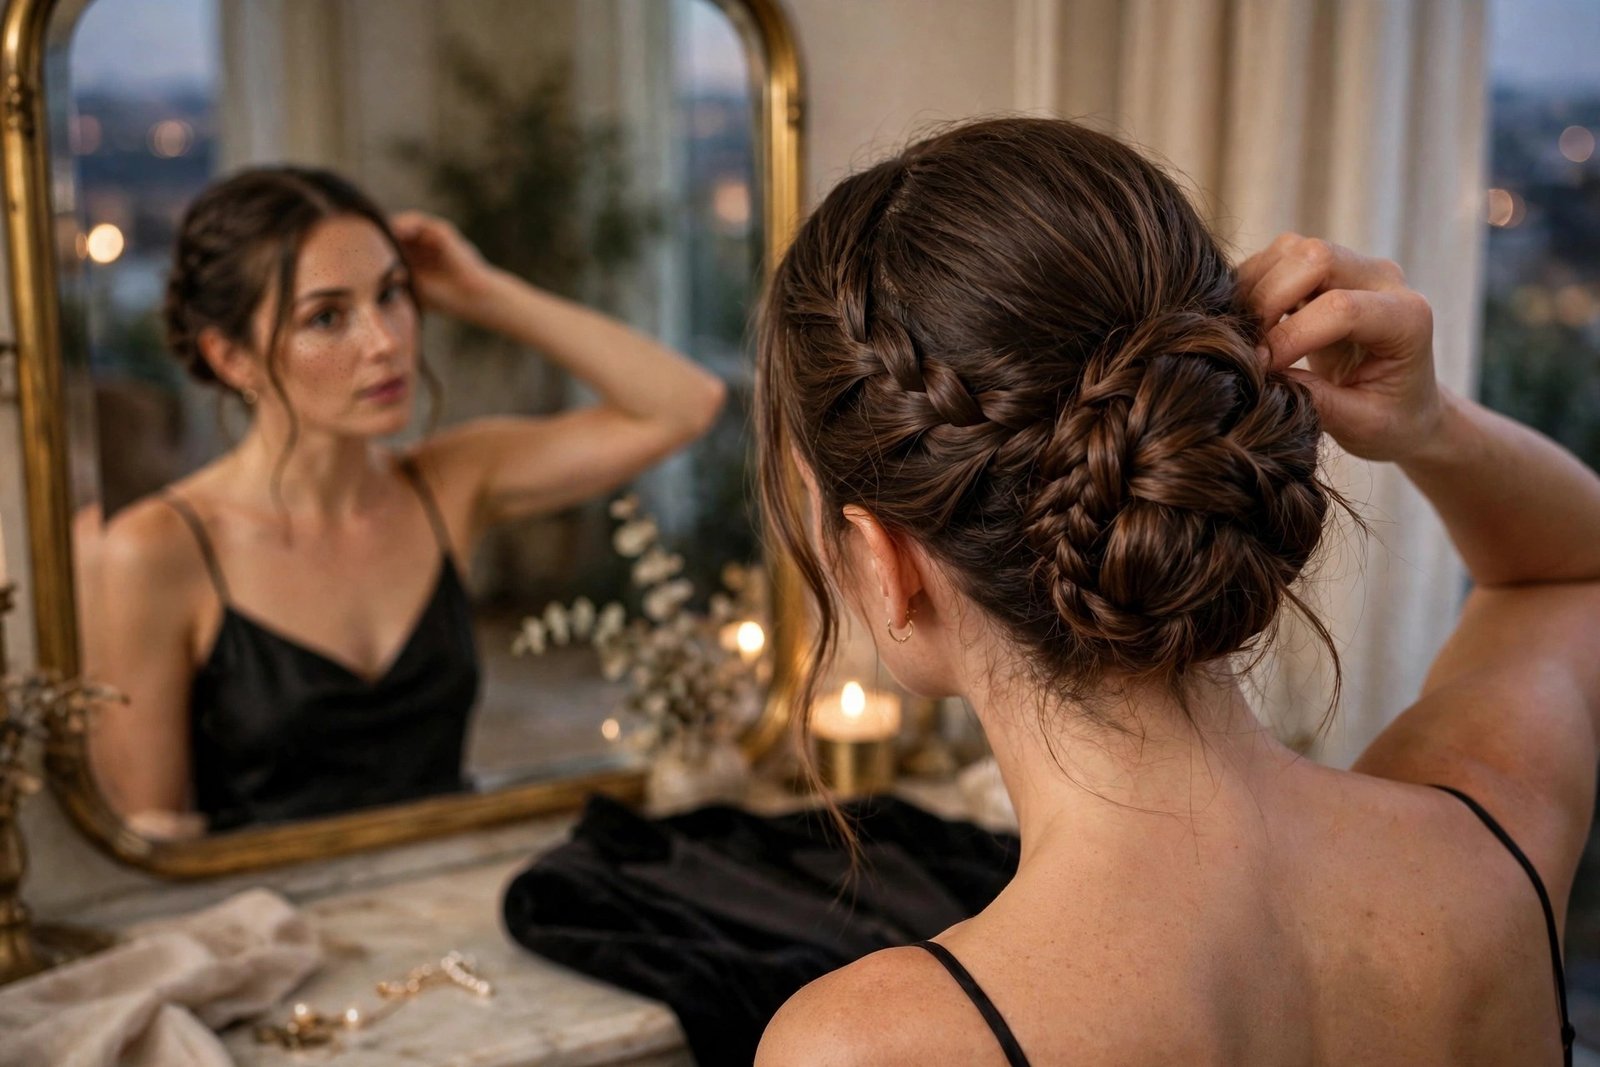
The questions I hear most about braided buns — from clients in the chair, from friends texting me photos, and from women standing in front of the mirror the night before the event.
How long does a braided bun take to do?
At home, plan thirty to forty-five minutes the first time and about twenty once you know the motions. The braiding is what takes the time — the coiling and pinning go fast. In a salon, a stylist will take forty-five minutes to an hour for the classic, and ninety minutes for bridal versions with crown braiding and extensions. Whatever your plan, do a full trial run before the event day. Discovering at 5 p.m. that your arms get tired braiding overhead is not a lesson you want on the wedding day.
Will a braided bun work on short or fine hair?
Yes, with honest adjustments. Fine hair needs texture spray, root grip products, and usually clip-in extensions for fullness — the braid and bun both read better with substance. Short hair above the shoulders should lean on Dutch-braid styles, which need the least length, or add extensions to reach the classic coiled versions. The style is adaptable; what it is not is magic. Match the variation to your length and build the fullness you need, and it will hold like anyone else’s.
How do I keep my braided bun from falling out?
Three things: prep, pins, and base. Prep with day-old hair or texture spray so the hair has grip. Pin generously — ten to fourteen pins for a full bun, each catching scalp hair and pushed against the wrap direction. And anchor the ponytail base with crossed elastics or horizontal pins before braiding, because the base carries everything. If your braided buns have failed before, it was almost certainly one of these three, and usually the pins. Use more than you feel reasonable. Professionals do.
Can I do a braided bun on freshly washed hair?
You can, but you have to manufacture the grip that day-old hair gives you for free. Spray texture spray or dry shampoo at the roots, let it sit a minute, brush through, and use a light gel on the lengths before braiding. The braid will hold. What you should not do is braid squeaky-clean hair with no product — it is slippery, the pins slide, and the style loosens within the hour. If you must wash the same day, wash early so the hair has hours to settle before you style.
Are braided buns suitable for weddings?
They are one of the best wedding choices there is — for brides, bridesmaids, and guests. The style holds through ceremonies, photos, dinner, and dancing without touch-ups; it keeps hair off the neck in warm venues; it anchors veils, vines, and decorative pins securely; and it photographs beautifully from every angle because the detail wraps around the head. Brides should do a trial, build in ninety minutes on the day, and consider extensions for fullness. Guests should choose a variation that does not outshine the bridal party — the minimalist wrap or the soft textured version, not the full bridal crown.
Conclusion
The braided bun earned its place as fall 2026’s sculpted occasion updo for the simplest reason: it works. It holds through long nights, it photographs from every angle, and it adapts to nearly every hair type and every level of drama — from the minimalist single-braid wrap you wear to dinner to the bridal crown you wear once. Sixteen styles, one foundation, and a technique that rewards preparation over talent.
If you take one thing from this guide, take the prep. Day-old hair or texture spray, smooth the direction, product before braiding, pin like you mean it. Everything else — the fishtails, the crowns, the knots — is decoration on a structure that either holds or does not. Build the structure right and the style takes care of itself.
Pick your variation from the sixteen, do the trial run this week, and walk into your next event with hair that does not need a second thought. That is the whole promise of the braided bun: put it up, pin it down, and forget about it until the compliments start. They will start early.