
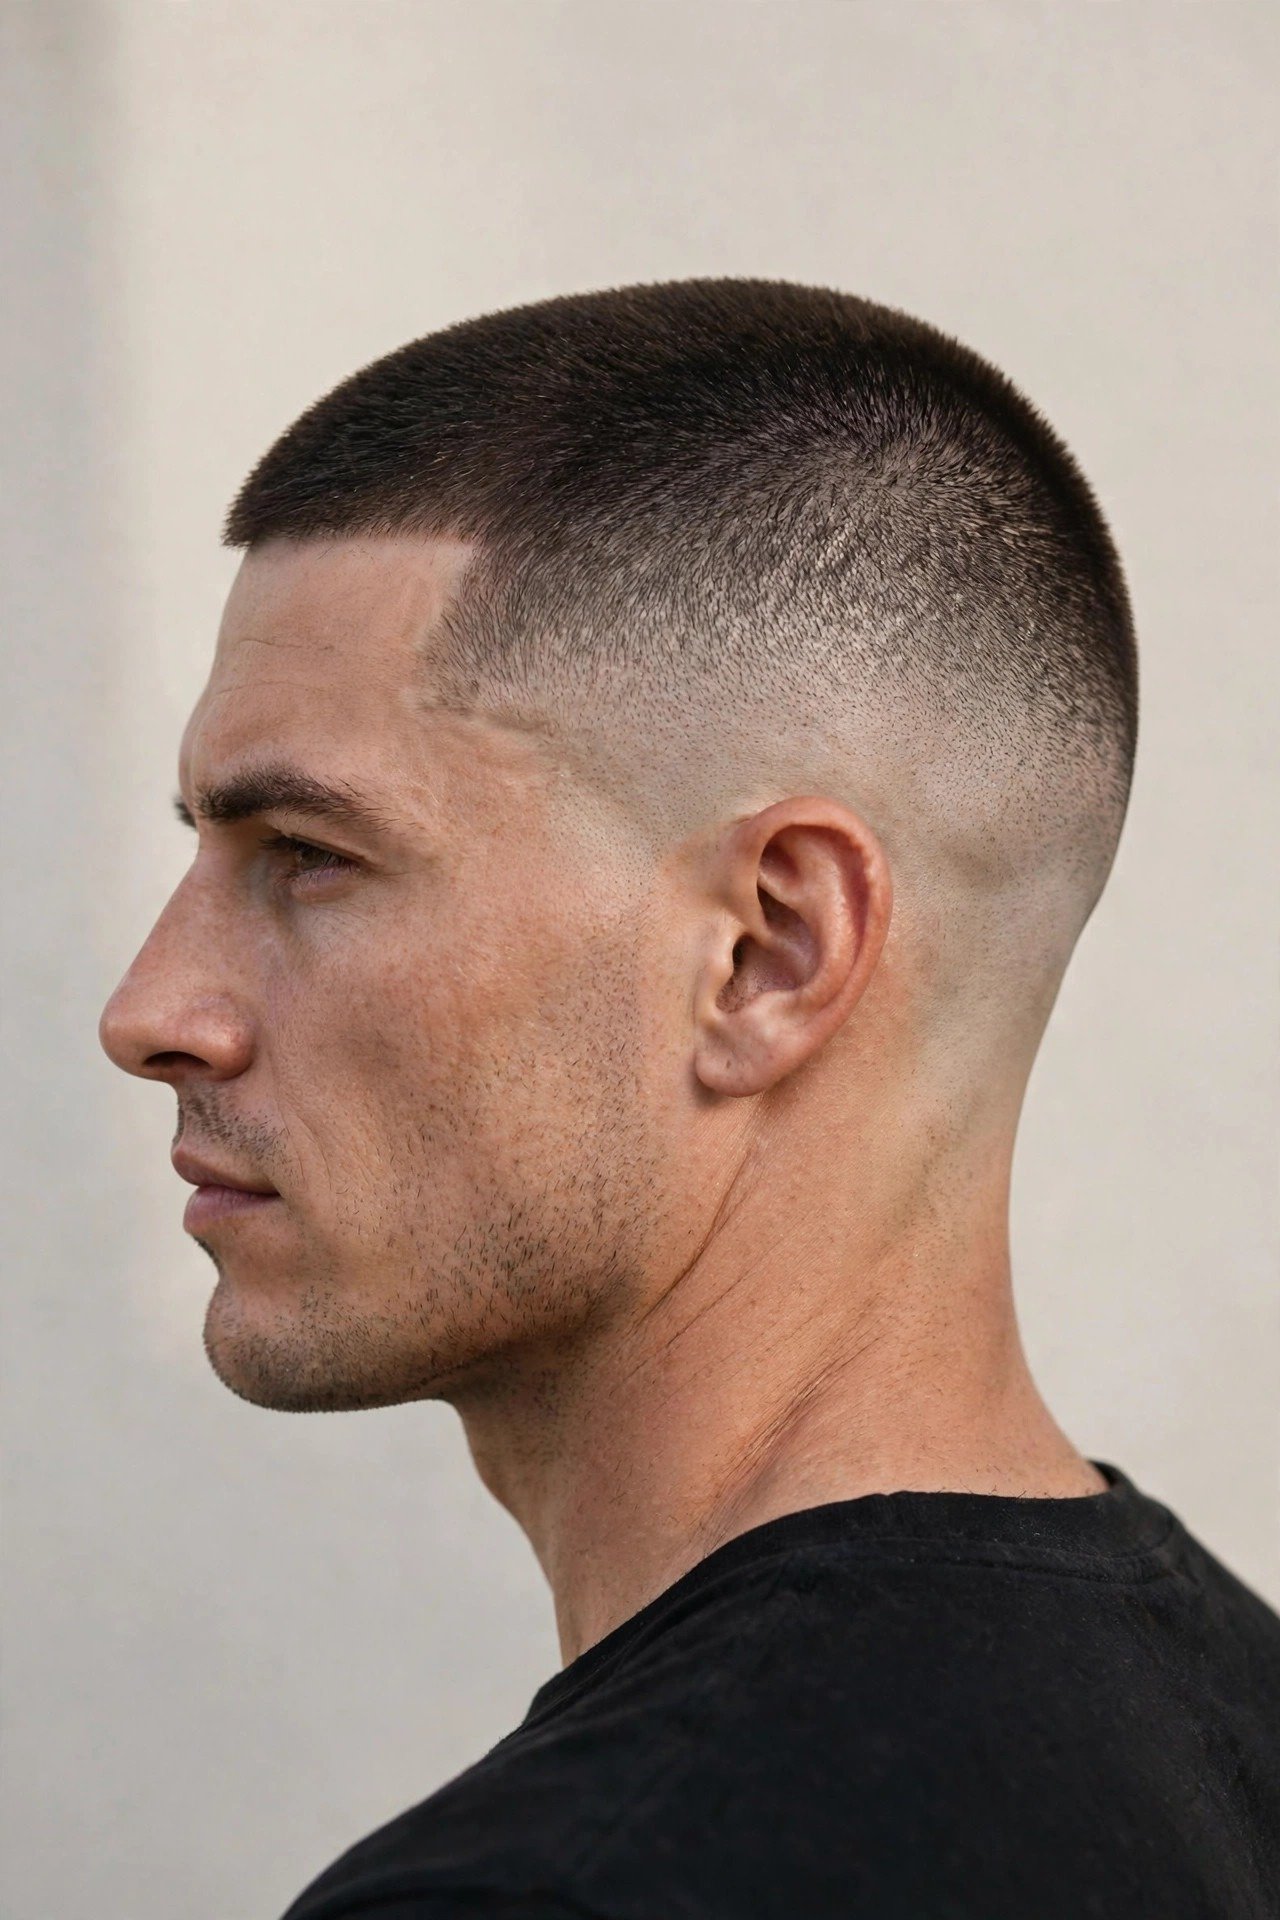
Buzz Cut Fade Men 2026: The Military-Sharp Cut That Never Really Left
Buzz Cut Fade Men 2026: The Military-Sharp Cut That Never Really Left
Listen, if you think the buzz cut fade is just a lazy haircut for guys who don’t care about their hair, you’re about twenty years out of date. I’ve been cutting hair for a long time, and I’ve watched this cut cycle through every era — the boot camp induction cut, the ’90s hip-hop butch, the mid-2010s high-and-tight military wave, and now what we’re seeing in 2026: the refined, deliberate, almost architectural version of it. Today’s buzz cut fade isn’t what you get because you gave up. It’s what you get because you know exactly what you want: clean lines, zero maintenance, and a silhouette that makes your jawline do all the talking. The modern version has texture on top, a fade that’s blended to perfection, and a neckline so crisp it looks drawn with a ruler. It photographs well, it survives humidity, and it makes a guy look like he has his life together even if his apartment is a disaster. This guide is everything I tell my clients in the chair, minus the shop noise — guard lengths in millimeters, the ten variations that actually matter, honest talk about head shapes, which clippers are worth your money, and how to keep your scalp from turning into a flaky, sunburned mess.
Here’s the thing about 2026 specifically: the buzz cut fade has absorbed a decade of barbering technique and come out the other side smarter. The skin fades are smoother, the transitions are tighter, and the top is no longer just one uniform length — we’re seeing subtle layering, point-cut texture, and even slight length graduation from front to back. It borrowed ideas from the textured crop, the French crop, and the crew cut, and folded them into a cut that still takes twenty minutes in the chair. Walk through any major city this year and you’ll see the same thing I see from behind the chair every Saturday: the guys getting the most compliments aren’t the ones with elaborate styles. They’re the ones with a perfect fade and a confident buzz on top. It’s the haircut equivalent of a black t-shirt that fits perfectly — simple, but only when it’s done right.
What most guides won’t tell you is that a great buzz cut fade is actually harder to execute than a long layered cut. There’s nowhere to hide. Every uneven patch shows. Every bump on your head becomes a feature. A bad blend line screams from across the room. That’s why this article goes deep — I’m giving you the guard chart, the fade anatomy, the honest head-shape assessment, and the exact phrases to use at the barbershop so you walk out looking like the reference photo instead of a cautionary tale. And if you’re going DIY, I’ve got you: the clipper models, the technique, the order of operations, and the mistakes I watch guys make every single week. By the end of this, you’ll know this cut better than half the barbers cutting it.
What Is a Buzz Cut with Fade? Military Precision Meets Modern Style
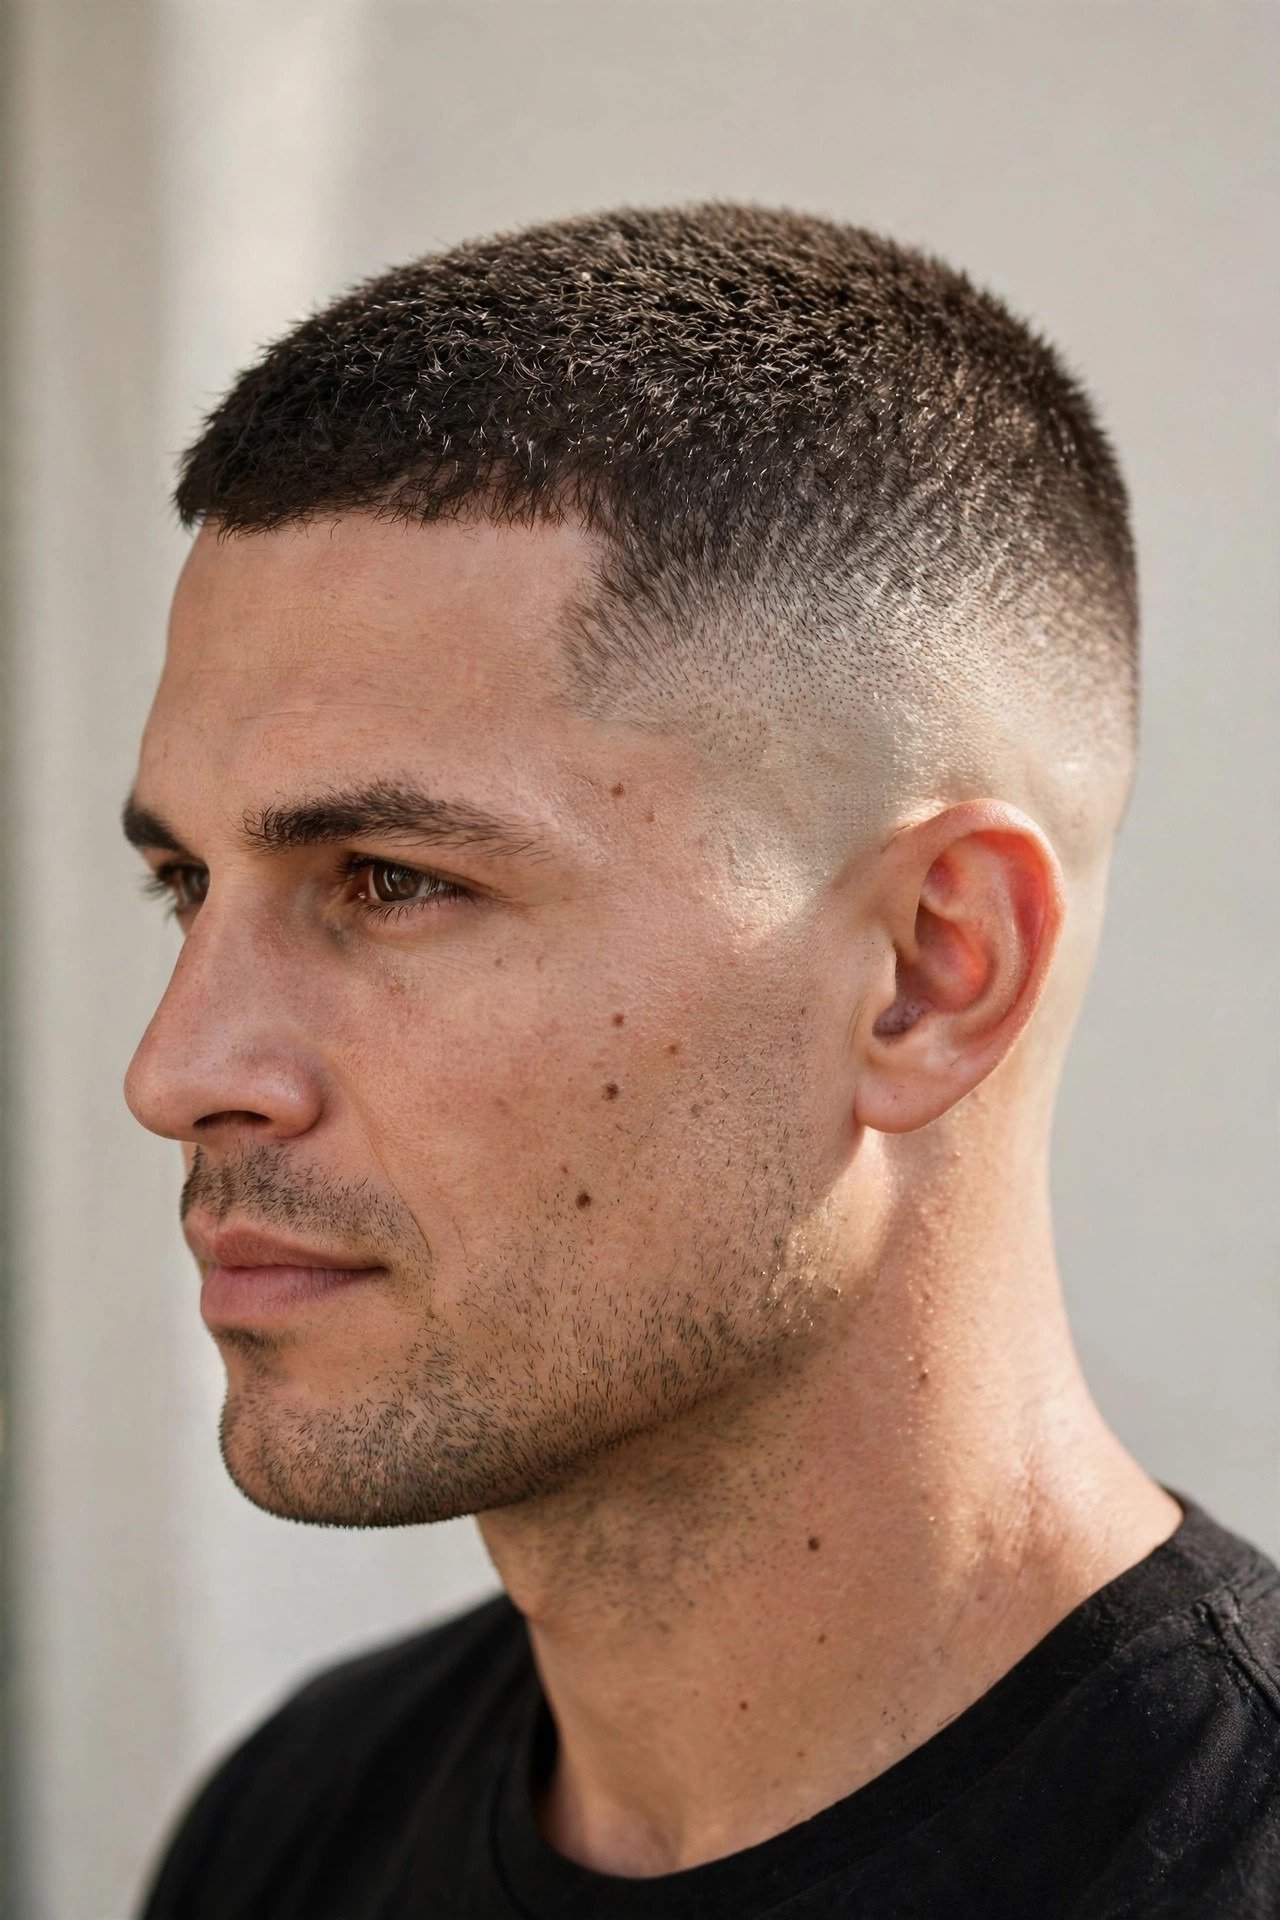
The buzz cut fade is exactly what it sounds like — the top of the hair is cut uniformly short with electric clippers, while the sides and back are faded, meaning they gradually taper from longer (near the top) down to very short or completely bare skin at the bottom. That gradient is the whole game. Without the fade, you’ve got a classic one-length buzz cut: honest, simple, a little brutal. With the fade, you’ve got architecture — a transition zone where your hair seems to dissolve into your skin, and the visual effect makes your head look more symmetrical, your jawline sharper, and your whole look more intentional. The fade is what separates the “I did this myself in the bathroom” look from the “my barber is an artist” look, even though the technique is teachable.
The military DNA runs deep in this cut, and that’s where most of its rules come from. The original induction cut — the one recruits get on day one — is a #0 or no-guard pass over the entire head, and it was never designed to look good. It was designed to be fast, hygienic, and equalizing: everybody looks the same, nobody’s hair gets in the way of a gas mask seal, and lice can’t hide in it. But here’s what soldiers figured out fast, and what barbers eventually caught onto: when you start varying the lengths — longer on top, shorter on the sides, fading down to the skin — the cut stops being punishment and starts being style. The “high and tight” became the unofficial signature of infantry culture precisely because it balanced discipline with identity. It says I’m sharp, I’m serious, and I still care how I look. That tension — between regulation and individuality — is exactly what makes the 2026 version so compelling.
Modern barbers took that military skeleton and rebuilt it with finesse. The top in 2026 isn’t the single-guard pass it used to be; a good barber will cut the top with a #4 or #5 guard and then go back over it with shears or a point-cutting technique to knock down bulk and create micro-texture. The fade itself now comes in three heights — low, mid, and high — each sitting at a different point on the head and each saying something different. A low fade hugs the ear and nape and looks conservative; a mid fade sits at the temples and reads classic; a high fade climbs above the temples and looks aggressive, athletic, almost confrontational. Then there’s the neckline: the back edge can be faded out naturally, squared off with a hard line, or tapered into a soft V. Each combination — top length, fade height, neckline style — produces a different personality. That’s why two guys can both say “buzz cut fade” and walk out looking nothing alike.
There’s also a precision element that people underestimate. A proper fade is cut in zones, and your barber is thinking in increments most clients never notice. The bottom band might be foil-shaved to true bald, then a #0.5 guard creates the first visible step, then #1, then #1.5, then the top length — each band maybe half an inch tall, blended with flick-out motions and clipper-over-comb work until no line exists between them. The tool for most of this is the adjustable taper lever on the clipper, which moves the blade between open and closed in tiny gradations — half-guard steps that let a good barber erase lines rather than just create them. When it’s done right, you can’t see where one length becomes another. You just see hair melting into skin. That melt is the entire aesthetic, and it’s the reason this cut photographs so cleanly from every angle.
One more thing worth understanding before we go deeper: the buzz cut fade is a shape cut, not a texture cut. It works with your head’s geometry instead of against it. Long hair can camouflage an uneven crown or a flat spot on the back of your head; a buzz cut puts it on display. That’s the trade-off at the heart of this style, and it’s why the head-shape section of this guide exists. But when it works — when your head is reasonably symmetrical and the fade is executed cleanly — nothing looks more deliberate. It’s the cut that says you don’t need length to make an impression. And in 2026, with barbering technique at the level it’s at, there’s never been a better time to get it cut.
Why the Buzz Cut Fade Is Back in 2026
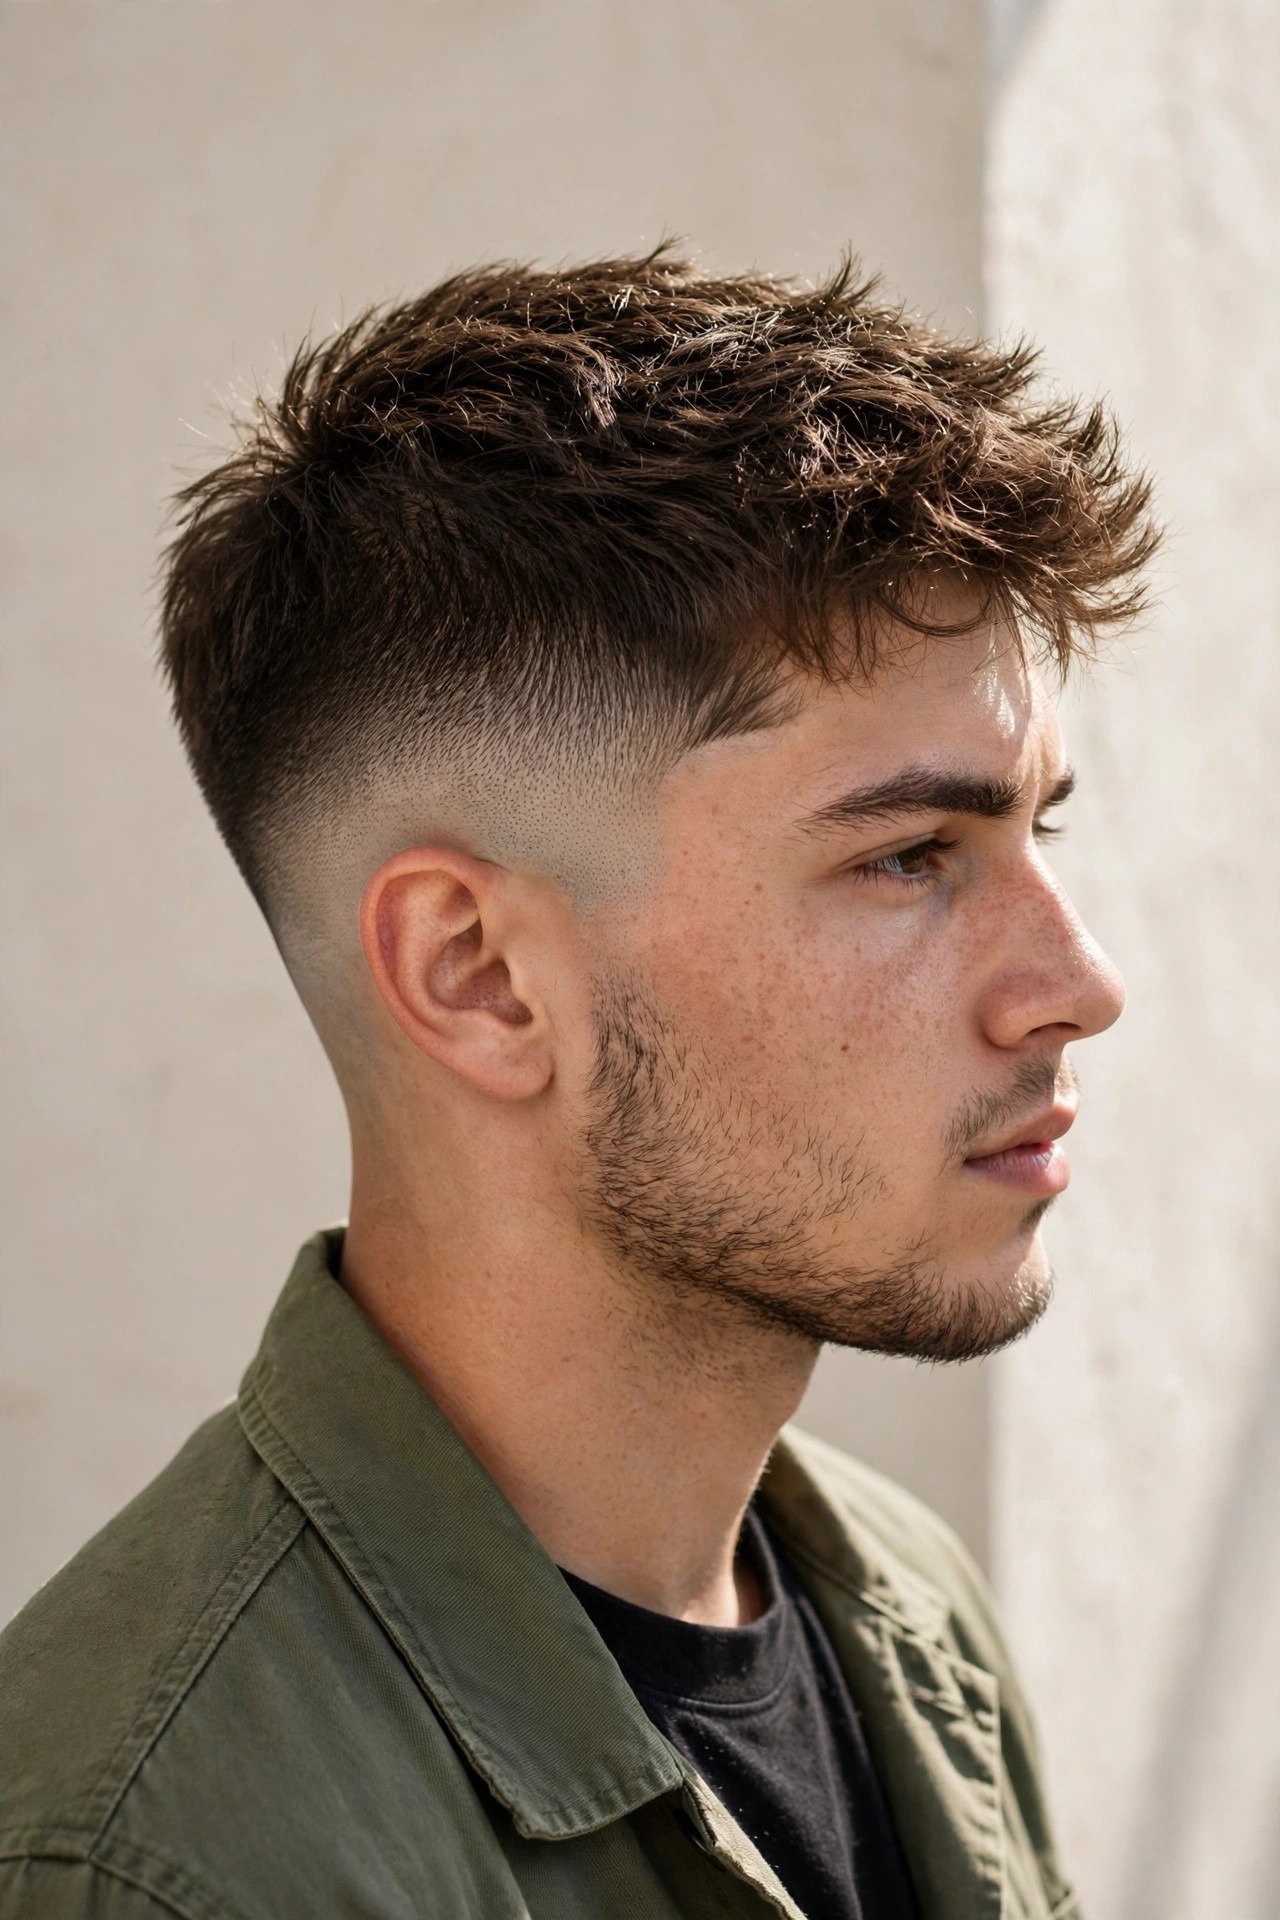
Every few years, men’s hair trends swing back toward short, and 2026 is one of those years — hard. The longer, messier styles that dominated the early 2020s (curtains, wolf cuts, the endless broccoli perm era) are receding, and what’s replacing them is precision. The buzz cut fade is leading that swing, and it’s not hard to see why. The practical case writes itself: it’s cheap to maintain, it never needs styling product, it survives summer heat and winter hats equally well, and it works under a hard hat, a helmet, or a headset. But the style case is stronger than it’s ever been, because the 2026 version isn’t the crude military cut people picture — it’s been refined by a decade of fade culture into something that genuinely flatters the face.
Celebrity influence has done its usual quiet work. The guys who’ve been photographed with sharp buzz fades this year — athletes, actors in training-montage mode, musicians between eras — keep reinforcing the same association: short hair means you’re focused, you’re in your physical prime, you’re not hiding behind anything. There’s a reason the “new era” haircut for a public figure is almost always a buzz. It signals a reset. And beyond celebrities, the fitness and combat-sports boom of the last few years has pushed the aesthetic hard. When your reference images are boxers, MMA fighters, and footballers, the buzz cut fade is simply the correct haircut for the body you’ve built. A thick neck and defined traps with long floppy hair looks mismatched; with a clean fade, the whole package reads coherent.
Then there’s the money angle, and guys are honest about this in the chair more than you’d think. A fade haircut every two to three weeks at forty to sixty bucks adds up to real money over a year — and the buzz cut fade is the one premium cut you can genuinely learn to do yourself. The clippers cost less than three barbershop visits, and once you’ve got the technique down, your lifetime cost drops to basically zero. In an economy where everyone’s quietly optimizing their spending, a haircut that looks expensive but costs nothing to maintain has obvious appeal. I’ve had multiple clients tell me they keep the buzz fade specifically because it lets them spend their grooming budget elsewhere — on skincare, on a better fragrance, on a sharper wardrobe. It’s the haircut that frees up the rest of your look.
The barbering industry itself has also pushed this trend forward. Fades have been the core skill of modern barbering for over a decade now, which means the average barber in 2026 blends a fade better than the average barber of 2016 ever could. The craft got better, so the cut got better. Techniques like the foil-shaver finish at the baseline, clipper-over-comb through the transition, and texture-shears on top are now standard in good shops rather than specialty skills. You can walk into a decent shop almost anywhere and get a fade that would’ve been a portfolio piece ten years ago. When the execution floor rises, the cut’s popularity follows — guys recommend it to their friends because they finally know a guy who can do it right.
Finally, there’s a cultural undertow that’s hard to measure but easy to feel: short hair reads as confidence in a way it didn’t a decade ago. The long-hair era had a whiff of hiding — hiding a high hairline, hiding a weak jaw, hiding behind the messiness. The buzz cut fade is the opposite move. It exposes everything: your hairline, your skull shape, your face. Choosing it is a statement that you’re fine with what’s underneath. In the chair, I hear it in the language guys use now: they don’t say “just take it all off” like they’re surrendering. They say “clean it up, fade the sides, keep it tight” — that’s the language of intention, not resignation. The cut hasn’t changed that much. The attitude wearing it has.
Buzz Cut Lengths Explained: The #0 to #8 Guard Guide
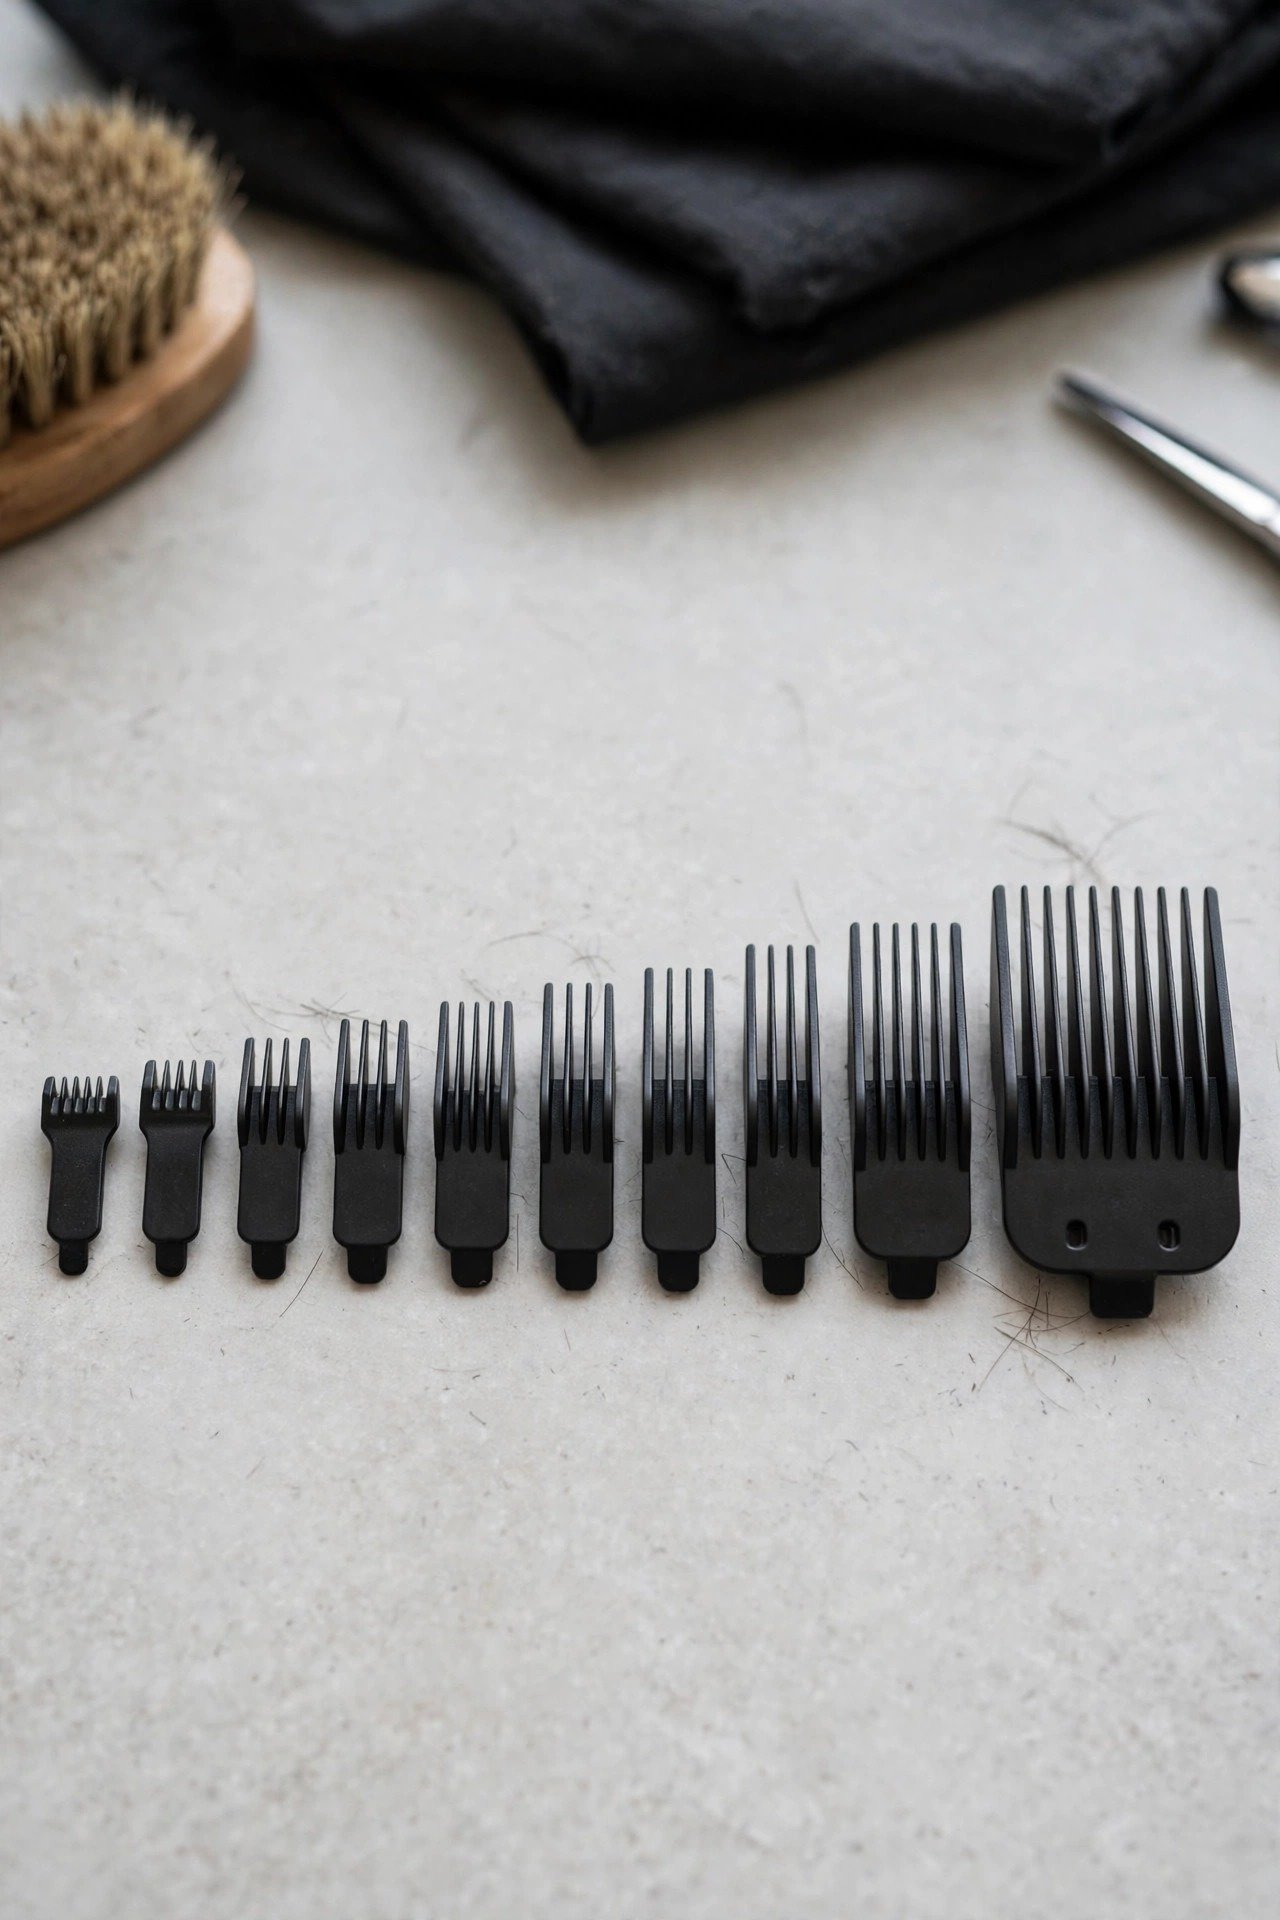
If there’s one piece of knowledge that separates a good buzz cut fade from a guessing game, it’s guard numbers — and most guys walk into the shop without actually knowing what they’re asking for. Clipper guards are numbered plastic combs that snap over the blade, and each number corresponds to a specific cutting length. The standard Wahl/Andis system runs like this: #0 is the bare blade at about 0.8mm (basically stubble), #0.5 is 1.5mm, #1 is 3mm, #1.5 is 4.5mm, #2 is 6mm, #3 is 10mm, #4 is 13mm, #5 is 16mm, #6 is 19mm, #7 is 22mm, and #8 is 25mm (a full inch). For a buzz cut fade, you’re almost always living between #0 and #5. Anything above #5 on top starts drifting into crew-cut territory, and anything above #6 isn’t really a buzz anymore. Memorize the big three: #1 is 3mm, #2 is 6mm, #3 is 10mm. Those three numbers cover probably eighty percent of buzz cuts ever cut.
What length should you actually choose? It depends on three things: your hair texture, your scalp situation, and how much maintenance you want. Coarse, thick, dark hair shows scalp faster — a #2 on thick dark hair looks shorter than a #2 on fine blond hair because the contrast between hair and scalp is higher. If you’ve got thick dark hair and you want that clean military look, you’re probably a #1 or #2 guy. If your hair is fine or light, you can go a #3 or #4 and still look sharp while showing less scalp. Scalp-wise: the shorter you go, the more every bump, scar, and asymmetry shows. A #1 leaves 3mm of hair, which is forgiving — it softens the head shape and hides minor irregularities. A #0 or bald-on-top leaves nothing to hide behind. First-timers should never start at #0. Start at #3 or #4, look in the mirror, and go shorter next time. You can always take more off. You cannot put it back.
For the fade portion, the numbers work differently — it’s not one number, it’s a sequence. A classic mid fade with a #3 (10mm) top typically runs like this from bottom to top: foil shave or #0 at the baseline (0 to 0.8mm), then a #0.5 (1.5mm) band, then #1 (3mm), then #1.5 (4.5mm), then #2 (6mm) blending into the #3 top. That’s five zones across maybe two inches of head. The half guards — #0.5 and #1.5 — are the unsung heroes of fading; they’re the in-between steps that make a blend look smooth instead of stair-stepped. This is also where the taper lever matters: with the lever, a single #1 guard can cut anywhere between roughly #1 closed and #0.5 open, giving your barber micro-gradations between the named guards. If your fade has visible lines between lengths, either the half guards or the lever work was skipped.
One practical detail that trips people up: not all guard systems are identical. The numbering above is the Wahl/Andis standard used by most of the industry, and premium clipper sets include all the half sizes. But budget clippers sometimes ship with a limited set — just #1 through #4, no half guards — and that limits how clean a fade you can cut at home. If you’re buying clippers specifically to do your own fades (more on models and prices later), make sure the set includes #0.5 and #1.5, or buy them separately. They’re cheap — usually under ten dollars — and they’re the difference between a fade that looks blended and one that looks like stacked ledges. I’ve seen too many DIY fades ruined not by bad technique but by missing guards.
And a word on seasonal and lifestyle adjustments, because the “right” number isn’t fixed year-round. In summer, a lot of my clients drop one guard size — the shorter cut runs cooler and the contrast looks better with a tan. In winter, going one size up gives a little insulation and softens the look under beanies (which, by the way, will flatten and crease any buzz cut, so plan your hat strategy separately). If you’re in a job interview cycle or a formal season, a #3 or #4 top with a low fade reads more conservative than a #1 with a high skin fade, which reads more aggressive. The numbers are a dial, not a setting. Learn the dial, and you can tune the cut to whatever your life needs that month.
10 Buzz Cut Fade Variations That Actually Matter
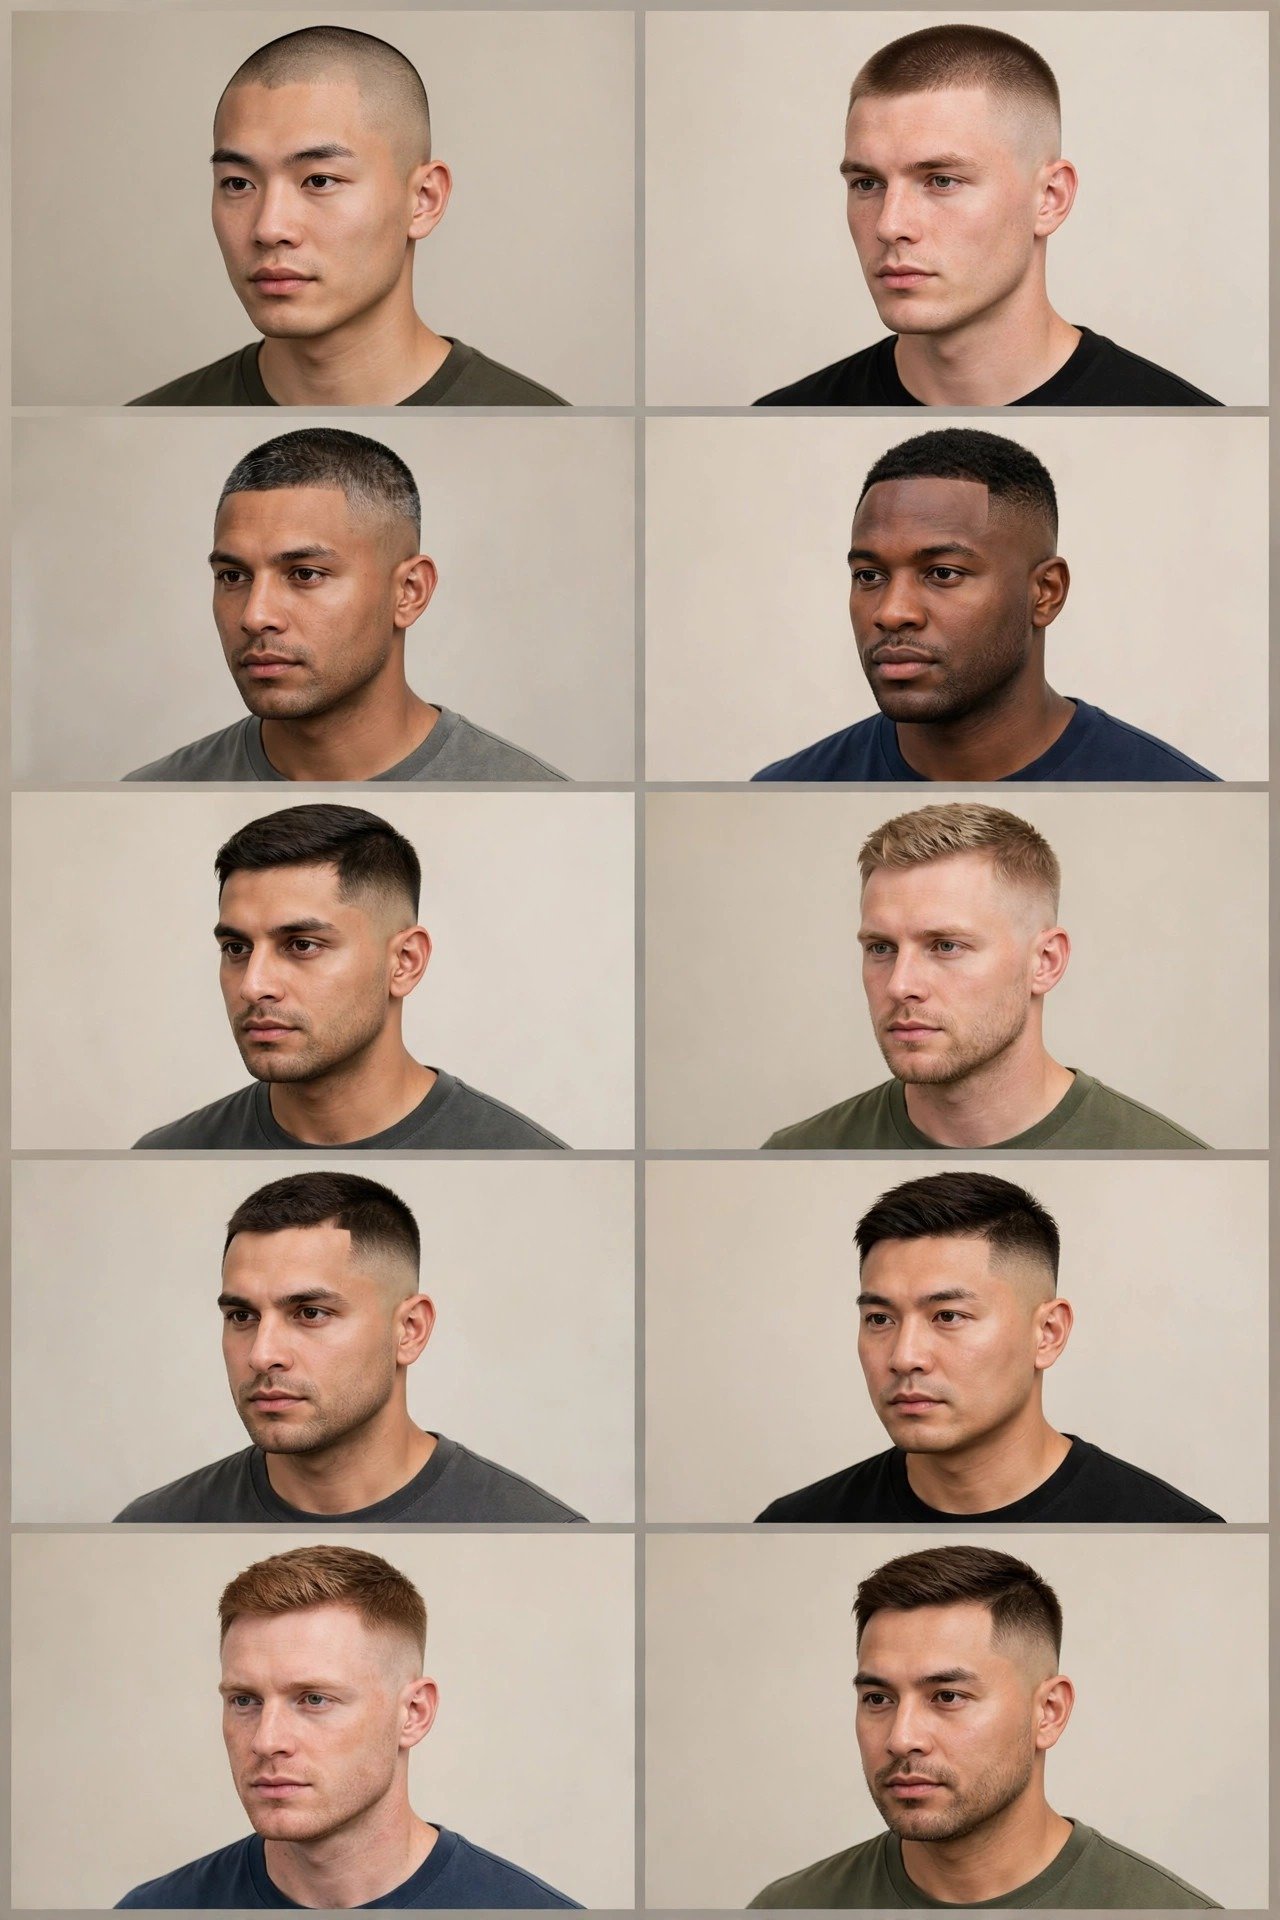
Not all buzz fades are the same animal. The variation you choose changes the whole personality of the cut — some are pure military discipline, some are vintage Americana, some are modern streetwear-adjacent. Here are the ten that actually get requested in real shops, in rough order from shortest to longest. First, the induction cut: no guard, bare blade, everything to stubble. This is the boot camp cut, and honestly, as a style choice it’s brutal — it only works if your head is near-perfect and you’re going for maximum intensity. Most civilians who ask for it are making a statement, not a fashion choice. Second, the burr cut: a #1 or #2 (3–6mm) all over, no fade or a very soft one. This was the Ivy League athletic cut of the ’50s and ’60s — think old football programs. It’s honest and clean, and it’s the best “first buzz” because it’s short enough to feel like a real change but long enough to hide minor head-shape quirks.
Third, the butch cut: a #3 or #4 (10–13mm) on top with the sides slightly shorter. The butch is the gentleman of buzz cuts — it’s what your grandfather’s barber called a proper short cut, and it’s quietly the most versatile variation here because at 10–13mm the top has enough length to show texture and even a hint of direction. Fourth, the high and tight: this is the signature military style — the top stays a #2 or #3 while the sides are taken high and tight down to skin, with the fade starting well above the temples. The defining feature is the stark contrast between the top and the nearly-bare sides. It looks aggressive and athletic, and it’s the variation most guys mean when they say “military cut.” Fifth, the recon: like a high and tight but even more extreme — the top is a narrow strip down the center, almost a mohawk’s disciplined cousin, with everything else faded to skin. Rare in civilian life, but it exists, and it gets asked for more than you’d think by guys in tactical professions.
Sixth, the crew cut with fade: a longer top (#5–#6, 16–19mm) that’s slightly longer in front and tapers toward the crown, with faded sides. The crew is the thinking man’s buzz — it’s short but it has shape, and the front can be styled up slightly for that classic collegiate look. Seventh, the textured buzz fade: the 2026 flagship. Top at #3–#4 with point-cut texture worked through it, mid skin fade on the sides. The texture breaks up the uniformity and adds dimension, which is why it photographs so well and why it’s the most-requested version in my chair right now. Eighth, the buzz cut with line-up: any buzz length paired with a razor-sharp hairline — squared temples, crisp forehead corners, defined sideburns. This variation lives or dies on the line-up; the top can be a #1 or a #4, but the edges have to be laser-straight. It’s the dominant style in Black barbering culture and it looks phenomenal when the lines are fresh — just know they grow out in days, not weeks.
Ninth, the low fade buzz: top at your chosen length, but the fade stays low — it only starts right around the ears and the nape, keeping most of the side at the longer length. This is the conservative professional’s version: it looks sharp from the front but doesn’t scream “fade” in a boardroom. Tenth, the buzz with hard part or design: a buzzed top with a shaved line (a hard part) or a simple design etched into the fade. Designs in fades have been a barbershop staple for years, and in 2026 they’re cleaner and more geometric — single lines, sharp angles, minimal flourishes. The trick is restraint: one well-placed line beats five competing squiggles. As a rule of thumb: if you want timeless, pick the butch or the textured buzz fade; if you want military, pick the high and tight; if you want edge, pick the line-up or a single hard part. Everything else is a variation on those decisions.
Best Face and Head Shapes for the Buzz Cut (The Honest Version)
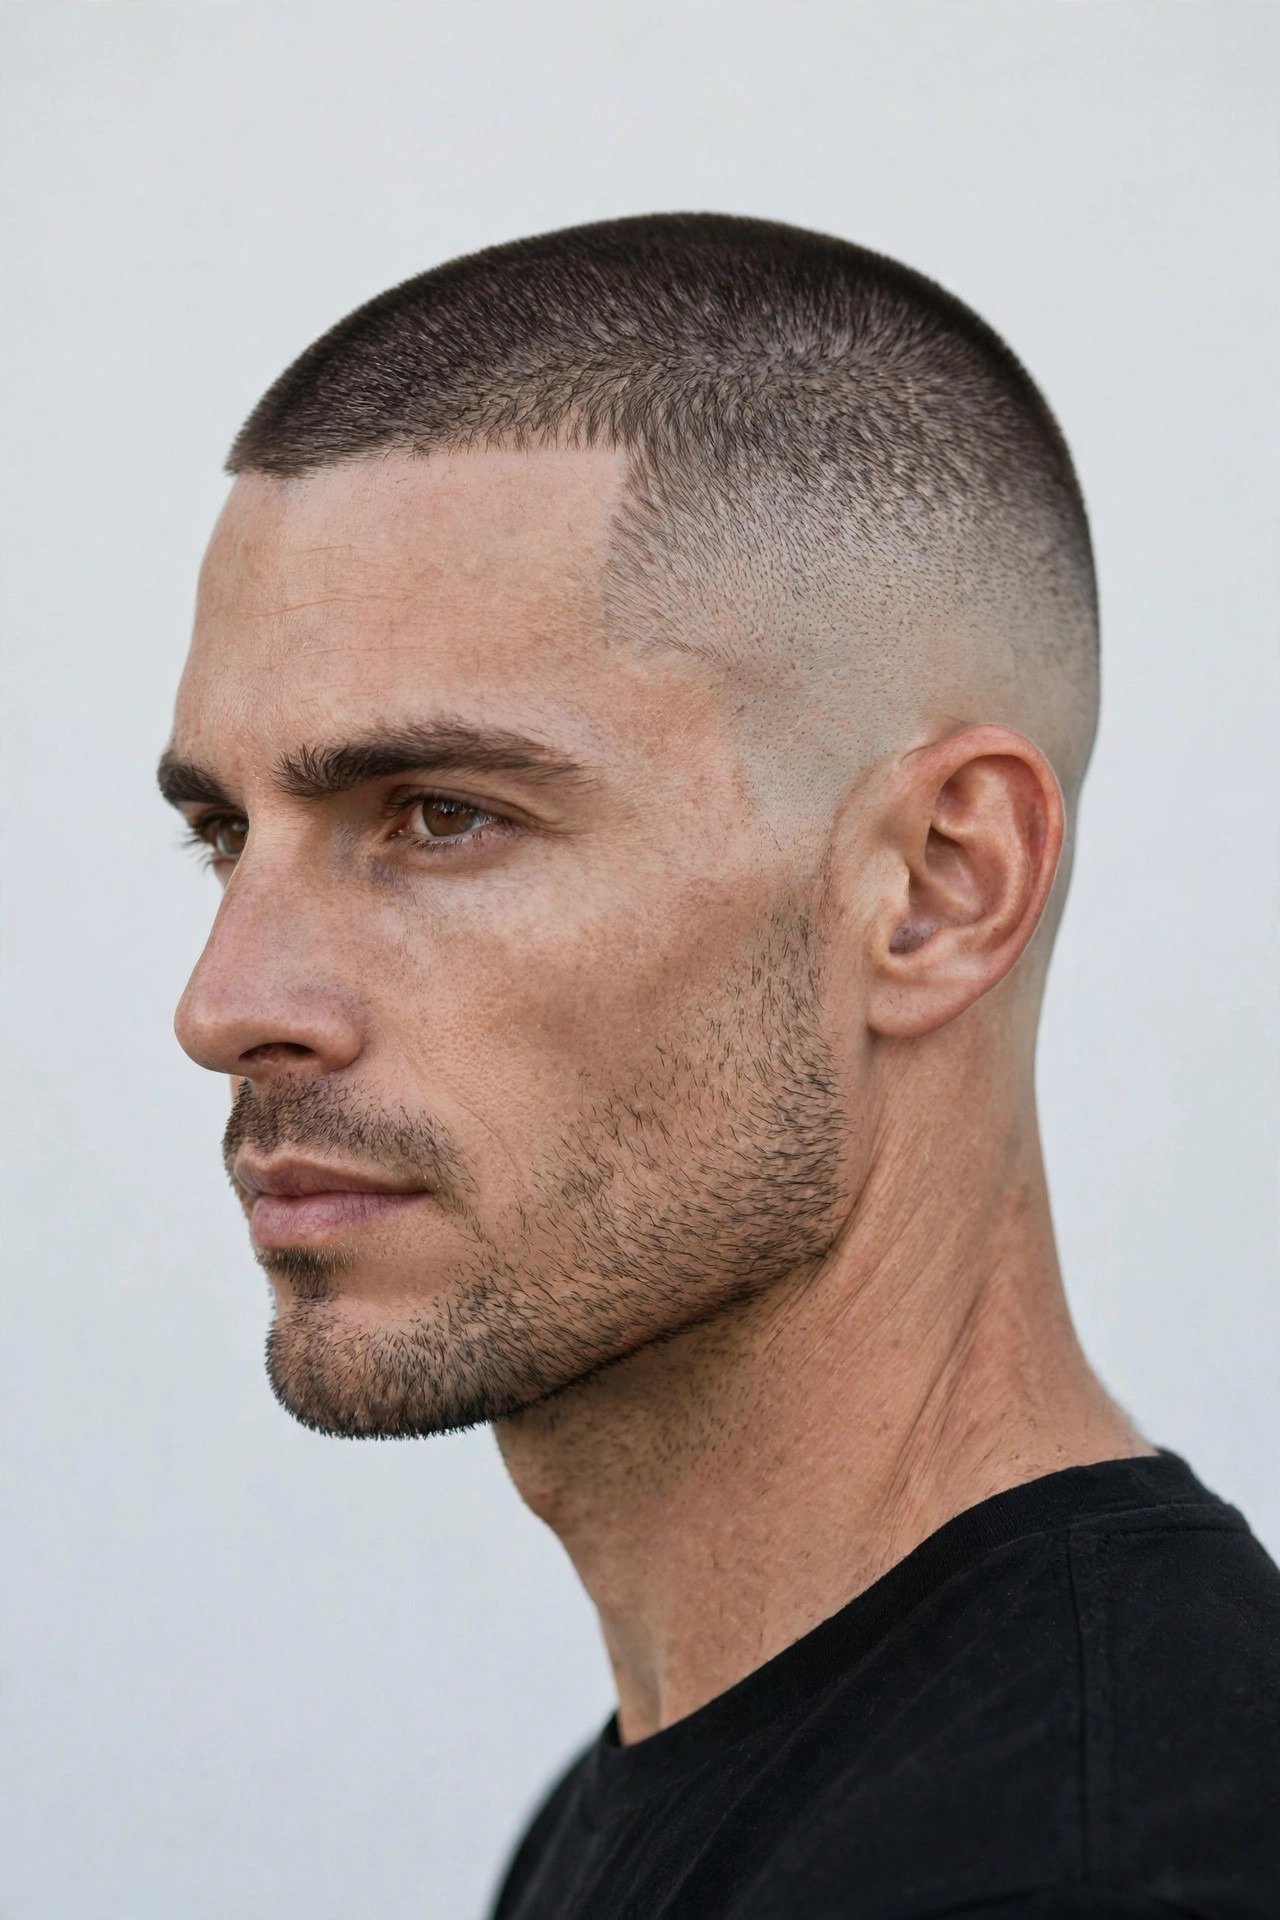
Alright, this is the section other guides soft-pedal, so I’m going to be straight with you: the buzz cut fade exposes your head shape completely, and head shapes are not all equal. The ideal canvas is an oval head — symmetrical, no major flat spots, crown that rounds smoothly, no dramatic bumps. On an oval head, a buzz fade looks like it was designed by geometry itself. Everything else is workable but comes with trade-offs you should know before you commit. Round faces do well with a high fade and some length on top, because the height adds verticality that counteracts the roundness — keep the sides tight and the top a #3 or longer, never a #1 all over, which just makes the head look like a bowling ball. Square faces are arguably the best match after oval: the strong jaw plus a clean fade is the classic masculine combination, and almost any buzz variation works.
Oblong or long faces need caution with high fades — taking the sides up high elongates the head further and can make a long face look gaunt. Stick with a low or mid fade and keep some length on top to add width rather than height. Heart-shaped faces (wide forehead, narrow chin) benefit from a mid fade that adds visual weight to the lower half of the head while the buzzed top doesn’t add more bulk to the forehead. Diamond faces (narrow forehead and chin, wide cheekbones) pair well with a textured top that softens the angles and a fade that doesn’t climb too high. None of these are deal-breakers — they’re tuning knobs. The real deal-breakers are on the skull itself, and this is the part nobody wants to hear.
Head-shape issues that matter: a flat spot on the back of the head (very common — it’s often from sleeping position as an infant) becomes obvious below about a #3, because there’s no hair length to round out the profile. Crown bumps and ridges — the parietal ridges along the sides of the skull — catch light differently at short lengths and can look like dents. Asymmetry — one side of the head flatter or higher than the other — shows up the shorter you go. And scars, especially surgical scars on the scalp, are fully visible under a #1. Here’s my practical advice: before you commit, do the hand test. Wet your hair, slick it flat against your head, and look at your profile in a mirror — or better, take a phone photo from the side and the back. That flattened profile is roughly what a #1 buzz will reveal. If you see major flat spots or asymmetry that bothers you, stay at #3 or longer, where the hair has enough body to smooth the silhouette. There’s no shame in this — it’s just physics.
Hairline matters too, and it matters more than most guys expect. A straight, defined hairline is the buzz cut’s best friend — it frames the whole thing. A receding hairline is actually not the disaster people assume: a short buzz with a fade minimizes the contrast between thinning areas and thick areas, which is why it’s the go-to recommendation for early hair loss. What looks bad is long thin hair combed over a bald spot — a buzz just evens the playing field. A widow’s peak looks great with a buzz; it adds character to the hairline. The one situation that needs real honesty is advanced thinning on the crown: below a certain density, a buzz doesn’t hide it — it frames it. If your crown is significantly thinner than your sides, going very short can actually draw more attention to the difference. In that case, either keep enough length to blend the densities or have the real conversation with your barber about whether it’s time to embrace the fully shaved look, which is its own kind of sharp.
Ears, neck, and moles are the last honest notes. Prominent ears stick out more with faded sides — a low fade keeps more coverage around the ear and helps. Moles, birthmarks, and skin tags on the scalp become visible; most guys don’t care, but if you’ve got something you’re self-conscious about, show your barber and ask them to leave a touch more length in that zone — a good barber will fade around it rather than over it. And head tattoos: a buzz cut is the only way to show them off properly, and a fade that clears the sides is basically a frame for the ink. I’ve cut several guys whose entire style is built around scalp tattoos, and the buzz fade is the gallery wall. The bottom line on all of this: know your head before you buzz it. Five minutes with a mirror and honest eyes saves you from the surprise of seeing your skull’s autobiography for the first time in the barbershop mirror.
DIY vs Barbershop: Can You Actually Buzz Your Own Head?
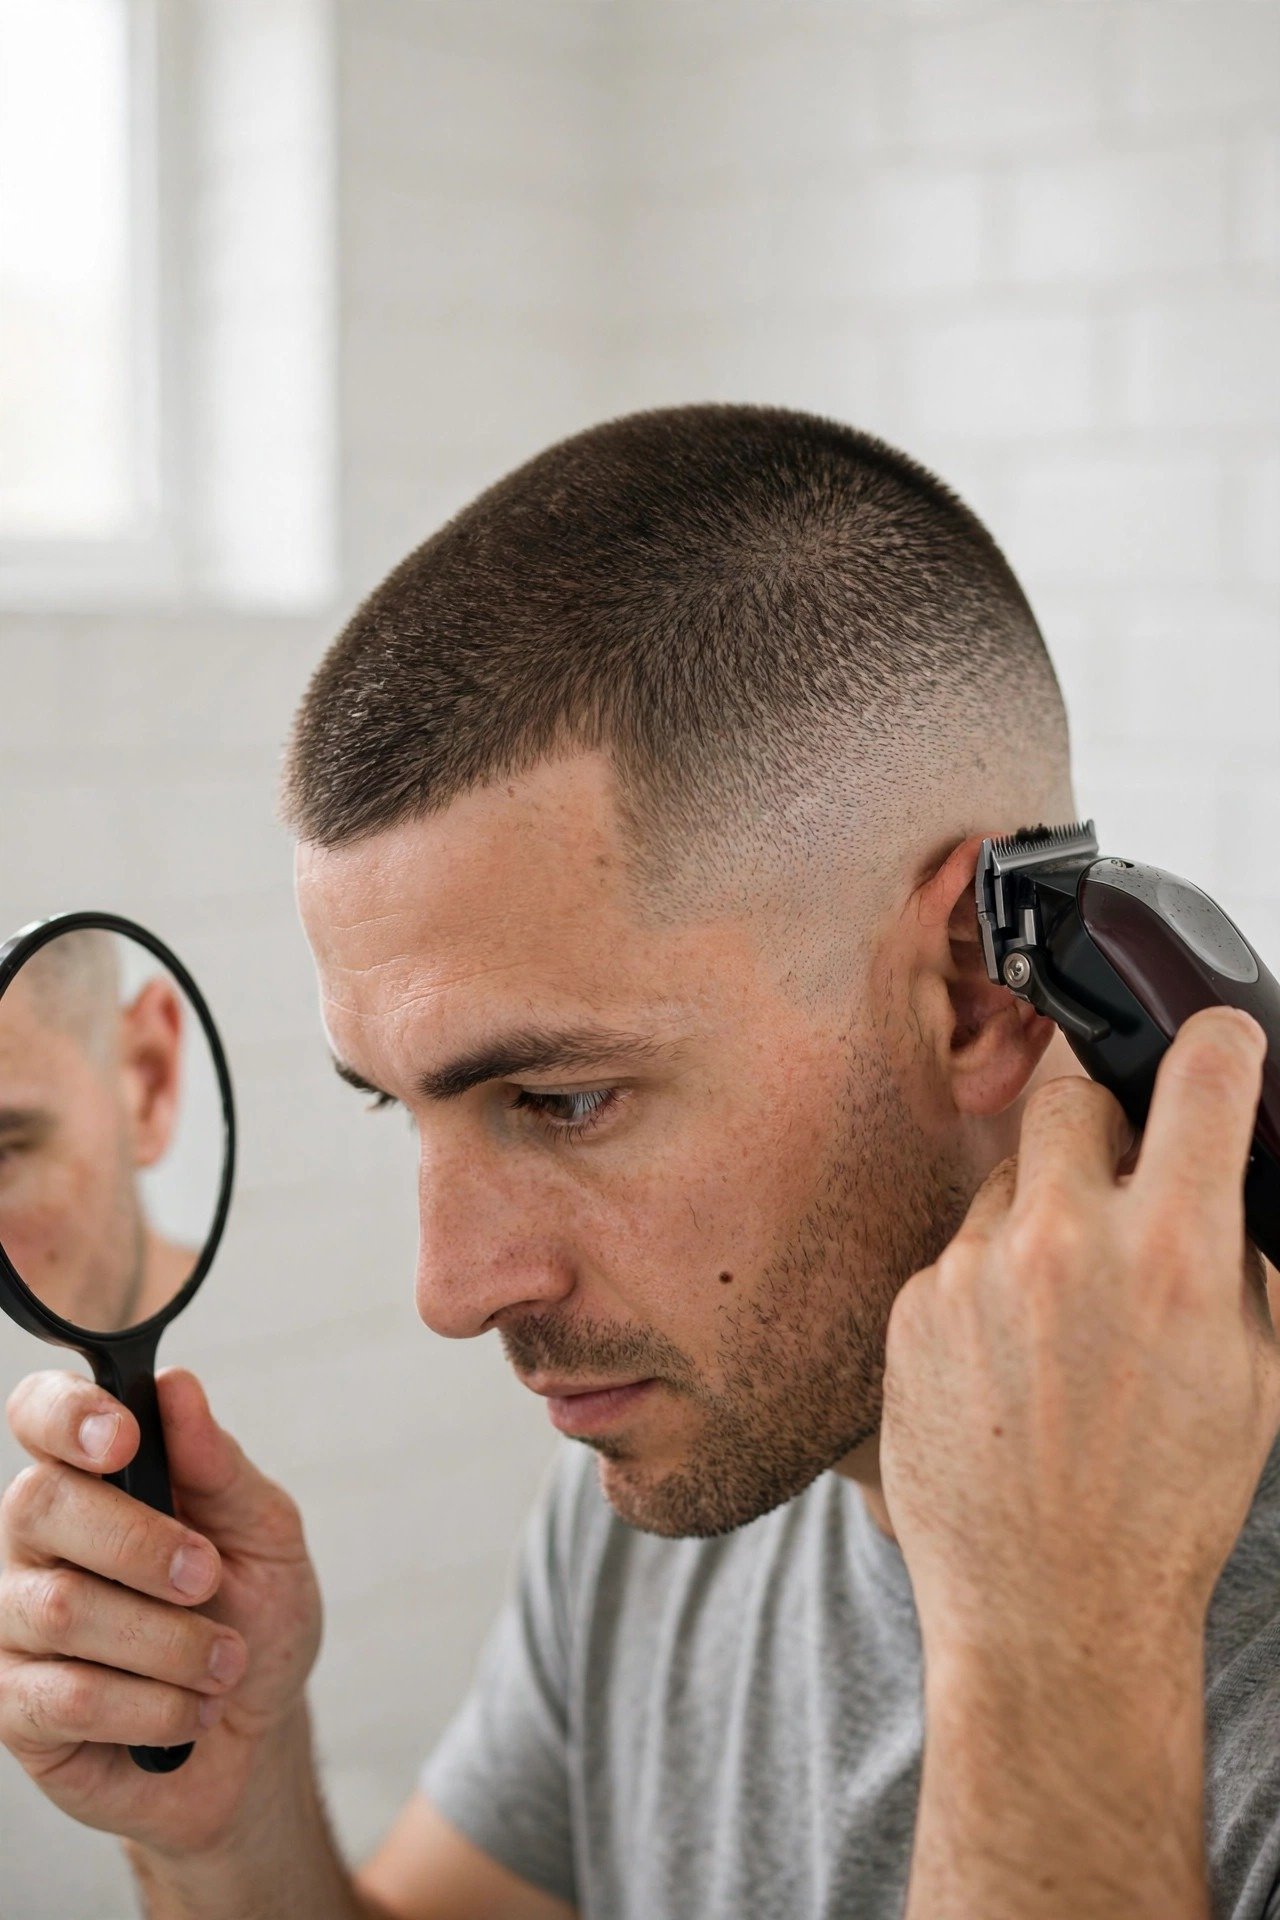
Short answer: yes, you can buzz your own head — but whether you can fade your own head is a different question, and I want to be honest about the gap between the two. A one-length buzz (same guard all over) is genuinely easy. It’s the first haircut I teach anyone: pick your guard, go against the grain, overlap your strokes, check with a hand mirror, done. Takes fifteen minutes, costs nothing, looks clean. I’ve had clients do their own #3 buzz for years and look perfectly fine. The fade is where the difficulty spikes, because fading requires you to cut in zones you can’t see — the back of your head — while judging blend lines in a mirror, backwards, with your arms over your head. It’s doable. It’s just a skill with a learning curve, and your first two or three attempts will have flaws you’ll be able to see. Plan your first DIY fade for a week when you don’t have anything important.
The DIY fade method that actually works is the three-mirror setup plus the band system. You need a big bathroom mirror, a hand mirror, and decent lighting — ideally daylight or a bright white bulb, because yellow bathroom light hides blend lines until you’re outside and it’s too late. Work in this order: first, buzz the entire head with your top guard (say #4) to establish the base. Second, decide your fade height and use your shortest guard (say #1) to cut a band from the baseline up to where the fade will start — about an inch for a low fade, two for a mid. Third, with a middle guard (#2), cut a band just above the #1 band, overlapping slightly. Fourth, blend: go back over each transition line with the half-guard between them (#1.5 between #1 and #2), using an upward flicking motion — start on the skin and flick the clipper away from the head as you move up, so the teeth only bite at the bottom of the stroke. The flick is the whole technique. Without it, you’re just making new lines.
The back of the head is the crux, and here’s how to handle it: sit with your back to the big mirror, hold the hand mirror in front of you angled so you can see the reflection of your back, and work slowly. The hand-mirror image is reversed, which scrambles your instincts — your hand wants to move left when it should move right. Go slow, make small passes, and check constantly. The nape area is the hardest part because the hair grows in swirls there and the skin curves; use your free hand to stretch the skin flat while you cut. For the neckline, most DIY guys do best with a natural tapered finish rather than trying to carve a hard line freehand — a hard line drawn blind is how you end up with a crooked neckline that takes two weeks to grow out. If you want the crisp line, that’s what the barbershop visit is for: get the shape-up from a pro every few cuts and maintain the length yourself in between.
When should you just go to the barbershop? Three situations. One: it’s your first fade ever — get it cut by a pro once so you have a template to maintain; maintaining an existing fade is dramatically easier than creating one from scratch. Two: you have an event — wedding, interview, photos, anything where you’ll be photographed. Your DIY fade might be 90% as good, but the last 10% is what the camera sees. Three: you want a skin fade — taking the baseline down to true bald with a foil shaver and blending up from there is genuinely hard to do on yourself, because the margin for error at the baseline is zero and you can’t see what you’re doing. Plenty of guys run a hybrid system: barbershop every 4–6 weeks for the architecture, DIY touch-ups in between for the length. That’s the smart money, and it’s what I’d do if I couldn’t cut my own hair.
The economics are worth laying out plainly. A good home clipper setup runs $70–$170 (models and prices in the next section), plus maybe $20 in guards and a $15 hand mirror if you don’t own one — call it $100–$200 all-in. A barbershop fade runs $30–$60 depending on your city, and you need one every 2–3 weeks to keep it sharp, so that’s roughly $600–$1,200 a year. The clippers pay for themselves by the third haircut. But — and this is the part the DIY evangelists skip — your time has value, and a DIY fade takes 45–60 minutes when you’re learning versus 20 minutes in the chair. There’s also the error cost: a bad DIY fade can’t be fixed except by going shorter, and going shorter than you wanted for two weeks is its own kind of price. My honest recommendation: learn the one-length buzz yourself immediately (it’s free money), attempt the fade at home only after you’ve watched a pro do yours at least twice, and keep a barber in your phone for the moments that matter.
How to Ask Your Barber for the Perfect Buzz Fade
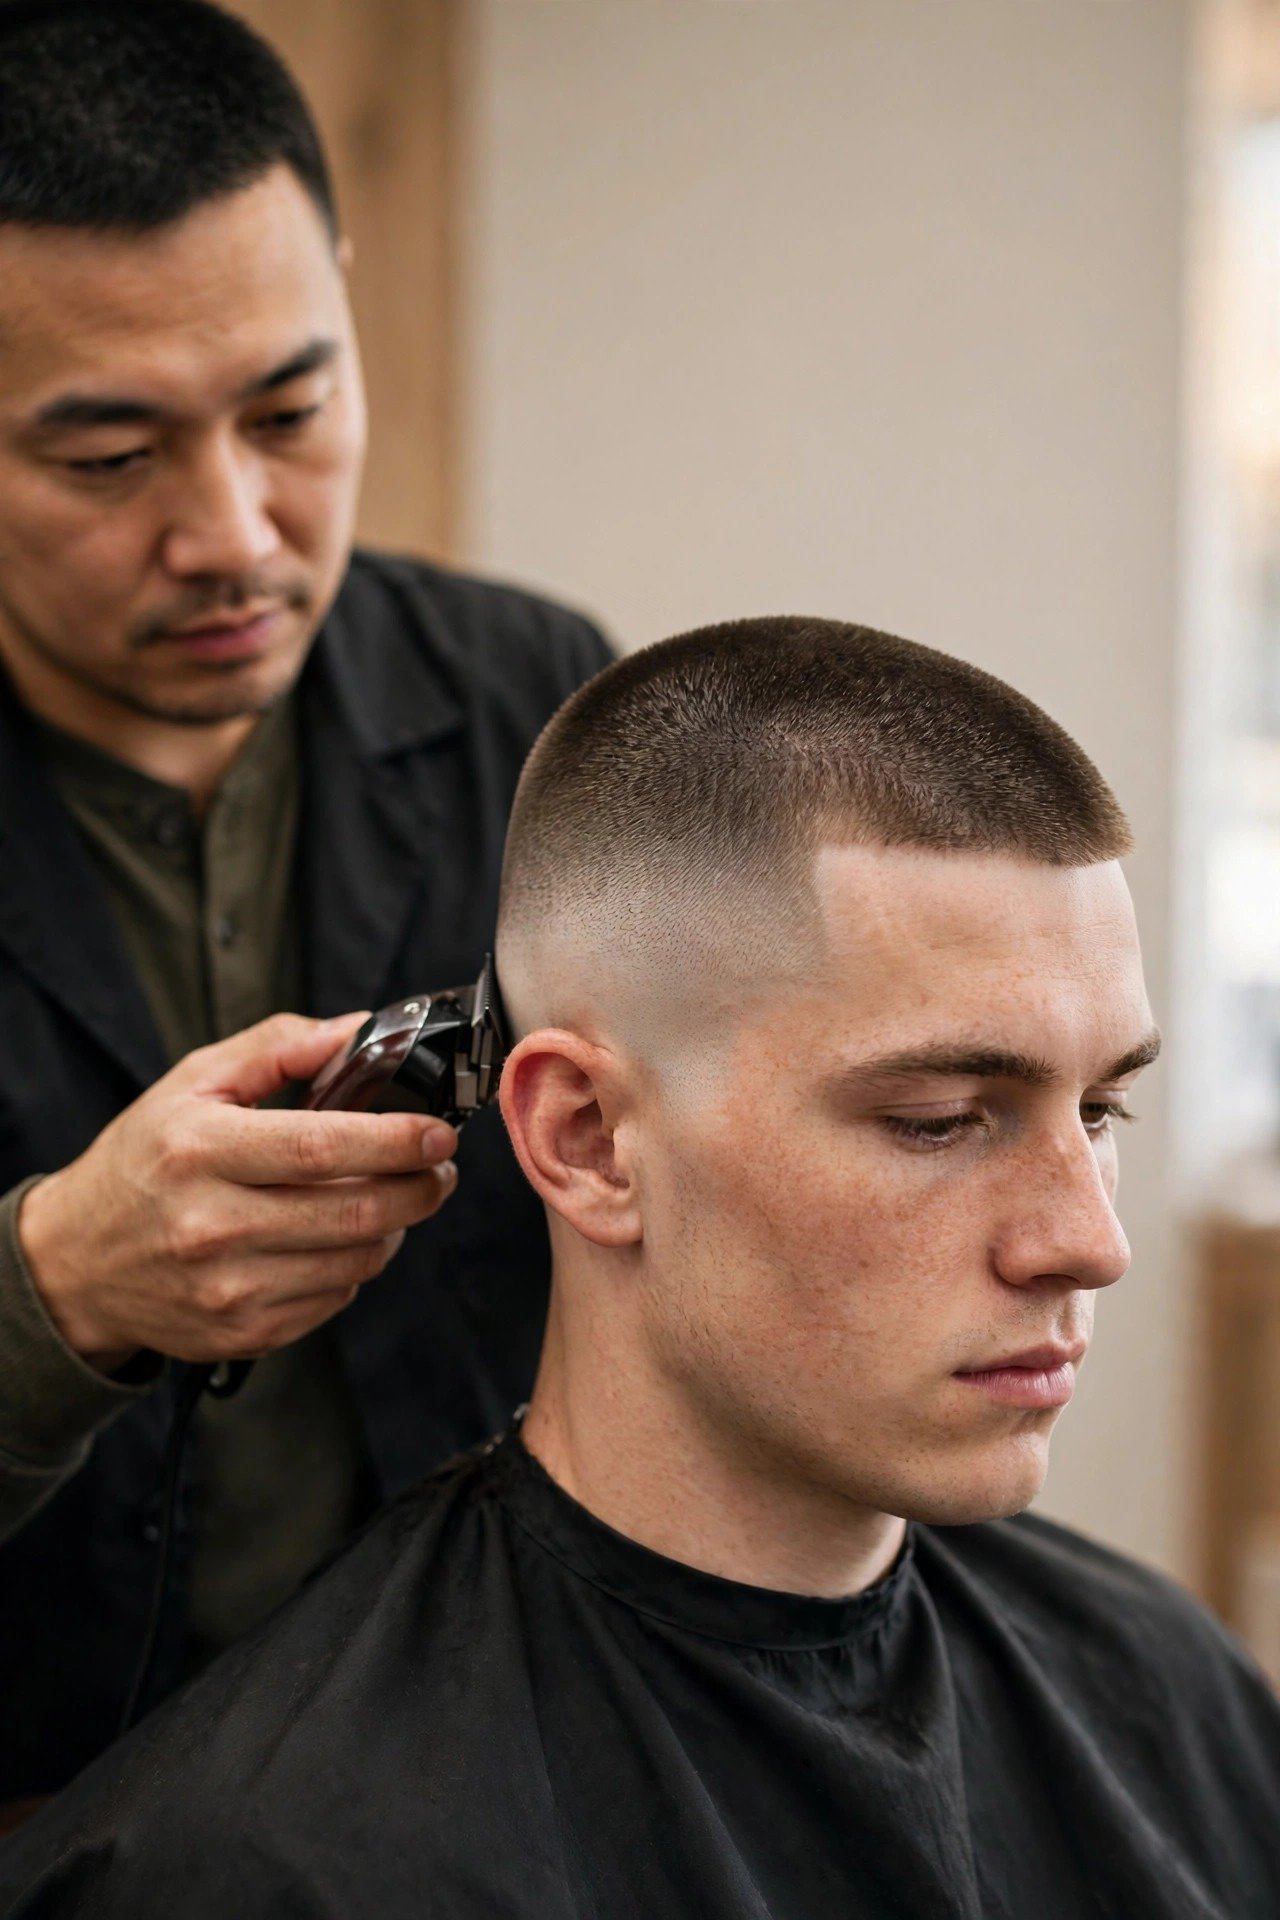
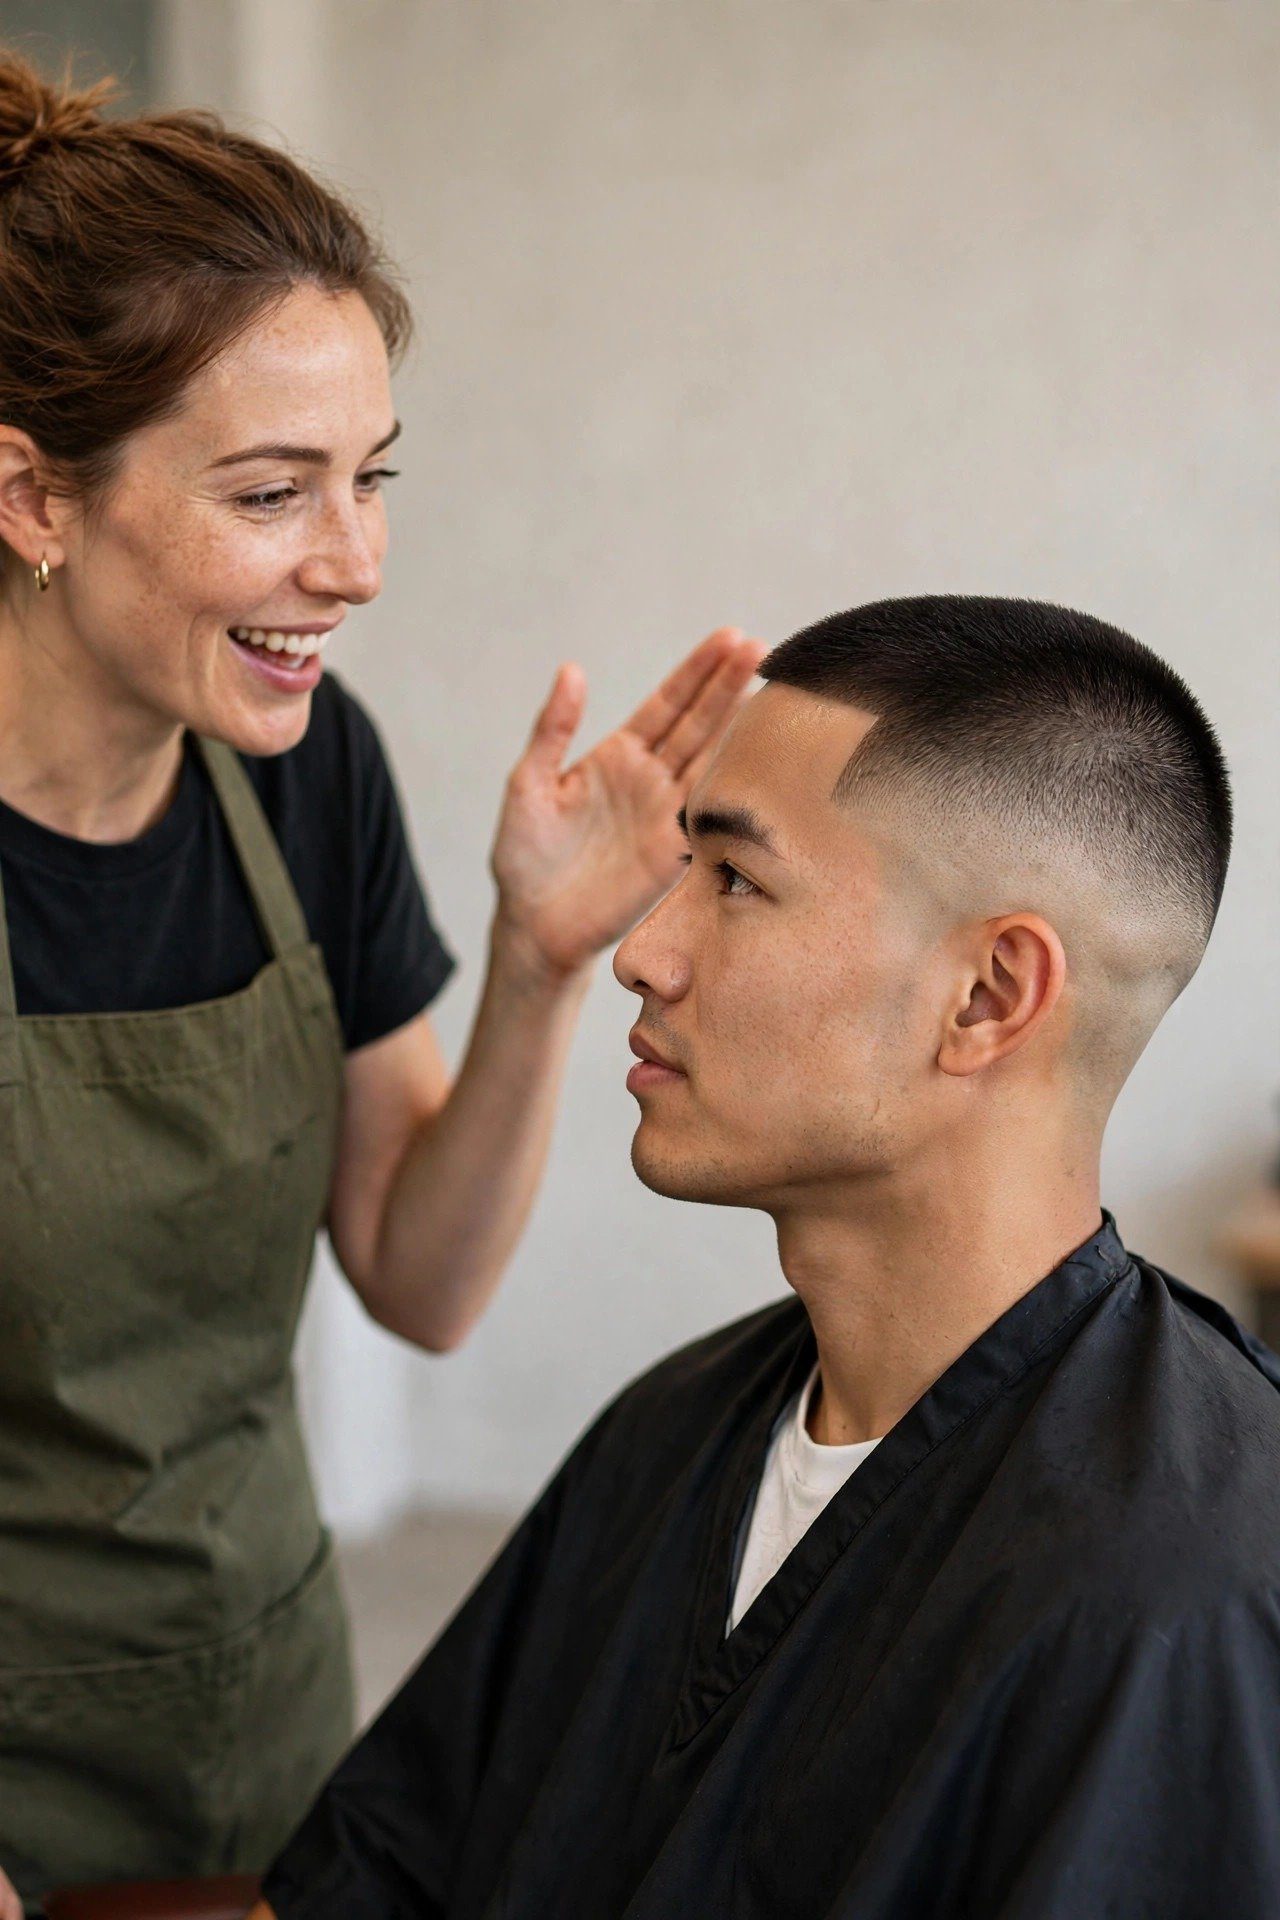
The number one reason guys walk out disappointed isn’t a bad barber — it’s a bad consultation. “Short on top, fade the sides” means ten different things to ten different barbers, and if you don’t specify, you’re getting whichever one your barber feels like that day. Here’s the script that works. Walk in and say: “I want a buzz cut fade. Take the top down to a [#3], mid skin fade on the sides, blended up into the top, and clean up the neckline with a [natural taper / hard line].” That’s it — four decisions communicated in one sentence: top length (guard number), fade height (low/mid/high), fade type (skin/taper/shadow), and neckline finish. A good barber will nod and might ask one follow-up. A mediocre barber will look relieved that you actually knew what you wanted.
Bring a reference photo, and bring the right kind. One photo of the cut you want, from the front or three-quarter angle, on someone with roughly your hair texture and head shape — not a photo of a celebrity whose bone structure you don’t share. Two photos maximum; more than that and you’re giving the barber conflicting instructions. Show it at the start of the cut, not halfway through, and say what you like about it: “I like how tight the sides are here” or “I want the top about this length.” This matters because the same photo reads differently to different eyes — telling the barber what you’re seeing in it removes the guesswork. And here’s the insider tip: also know what you don’t want. “I don’t want the fade to go too high” or “don’t take the top below a #2” gives the barber guardrails, and guardrails are how you avoid the “it’s shorter than I expected” regret.
Learn the vocabulary so you can speak the language. Skin fade / bald fade: the bottom of the fade goes to bare skin. Taper fade: the fade is subtle, the shortest length is still visible hair (usually #0 or #0.5), more conservative. Shadow fade: a soft, low-contrast fade that never goes fully bald — good for professional settings. Drop fade: the fade line curves down behind the ear following the head’s natural shape instead of running straight around — very popular in 2026 because it looks more natural from the side. Temple fade / Brooklyn fade: the fade is concentrated at the temples with more length kept elsewhere — a stylistic choice that frames the face. Blended / melted: no visible lines between lengths, the goal of every good fade. Line-up / shape-up / edge-up: the hairline, temples, and sideburns carved into sharp straight lines. Neckline: tapered (fades out naturally), blocked/squared (hard horizontal line), or rounded (soft curve). When you can name these, the consultation takes ninety seconds and the result matches the picture in your head.
Also, manage the hairline conversation explicitly, because this is where silent misunderstandings happen. If you want your natural hairline left alone, say so: “keep my hairline natural, just clean up the strays.” If you want it sharpened, say “shape up the hairline.” Some barbers default to pushing the hairline back slightly to make it look “cleaner” — over time, repeated push-backs visibly recede your hairline, and I’ve seen guys lose a centimeter of forehead to an overzealous barber across a year of cuts. If your barber reaches for the razor at your hairline without asking, that’s your cue to speak up. The same goes for the neckline: a blocked neckline grows out with a harsh visible line within a week; a tapered neckline grows out gracefully. For longer intervals between cuts, tapered is the smarter choice, and any barber worth the chair fee will tell you that if you ask.
Finally, the etiquette and practical stuff. Book the right service — many shops list “buzz cut” cheaper than “skin fade” because a one-length buzz takes ten minutes and a skin fade takes twenty-five; booking the cheaper service and asking for a fade is how you get rushed work. Arrive with clean, dry hair — product and sweat make clipper work harder and the cut less precise. Tip properly: 20% is standard in the US, and for a $40 fade that’s $8 — the cost of being remembered fondly next time you need a squeeze-in appointment. And build the relationship: once a barber knows your head, your hair growth patterns, and your preferences, every cut gets better and faster. The guys with the best hair in any city aren’t finding a new barber each time — they’re sitting in the same chair every two weeks, and the barber barely needs instructions anymore. That’s the endgame, and it starts with one good consultation.
Best Clippers for Home Buzz Cuts (2026 Picks with Real Prices)
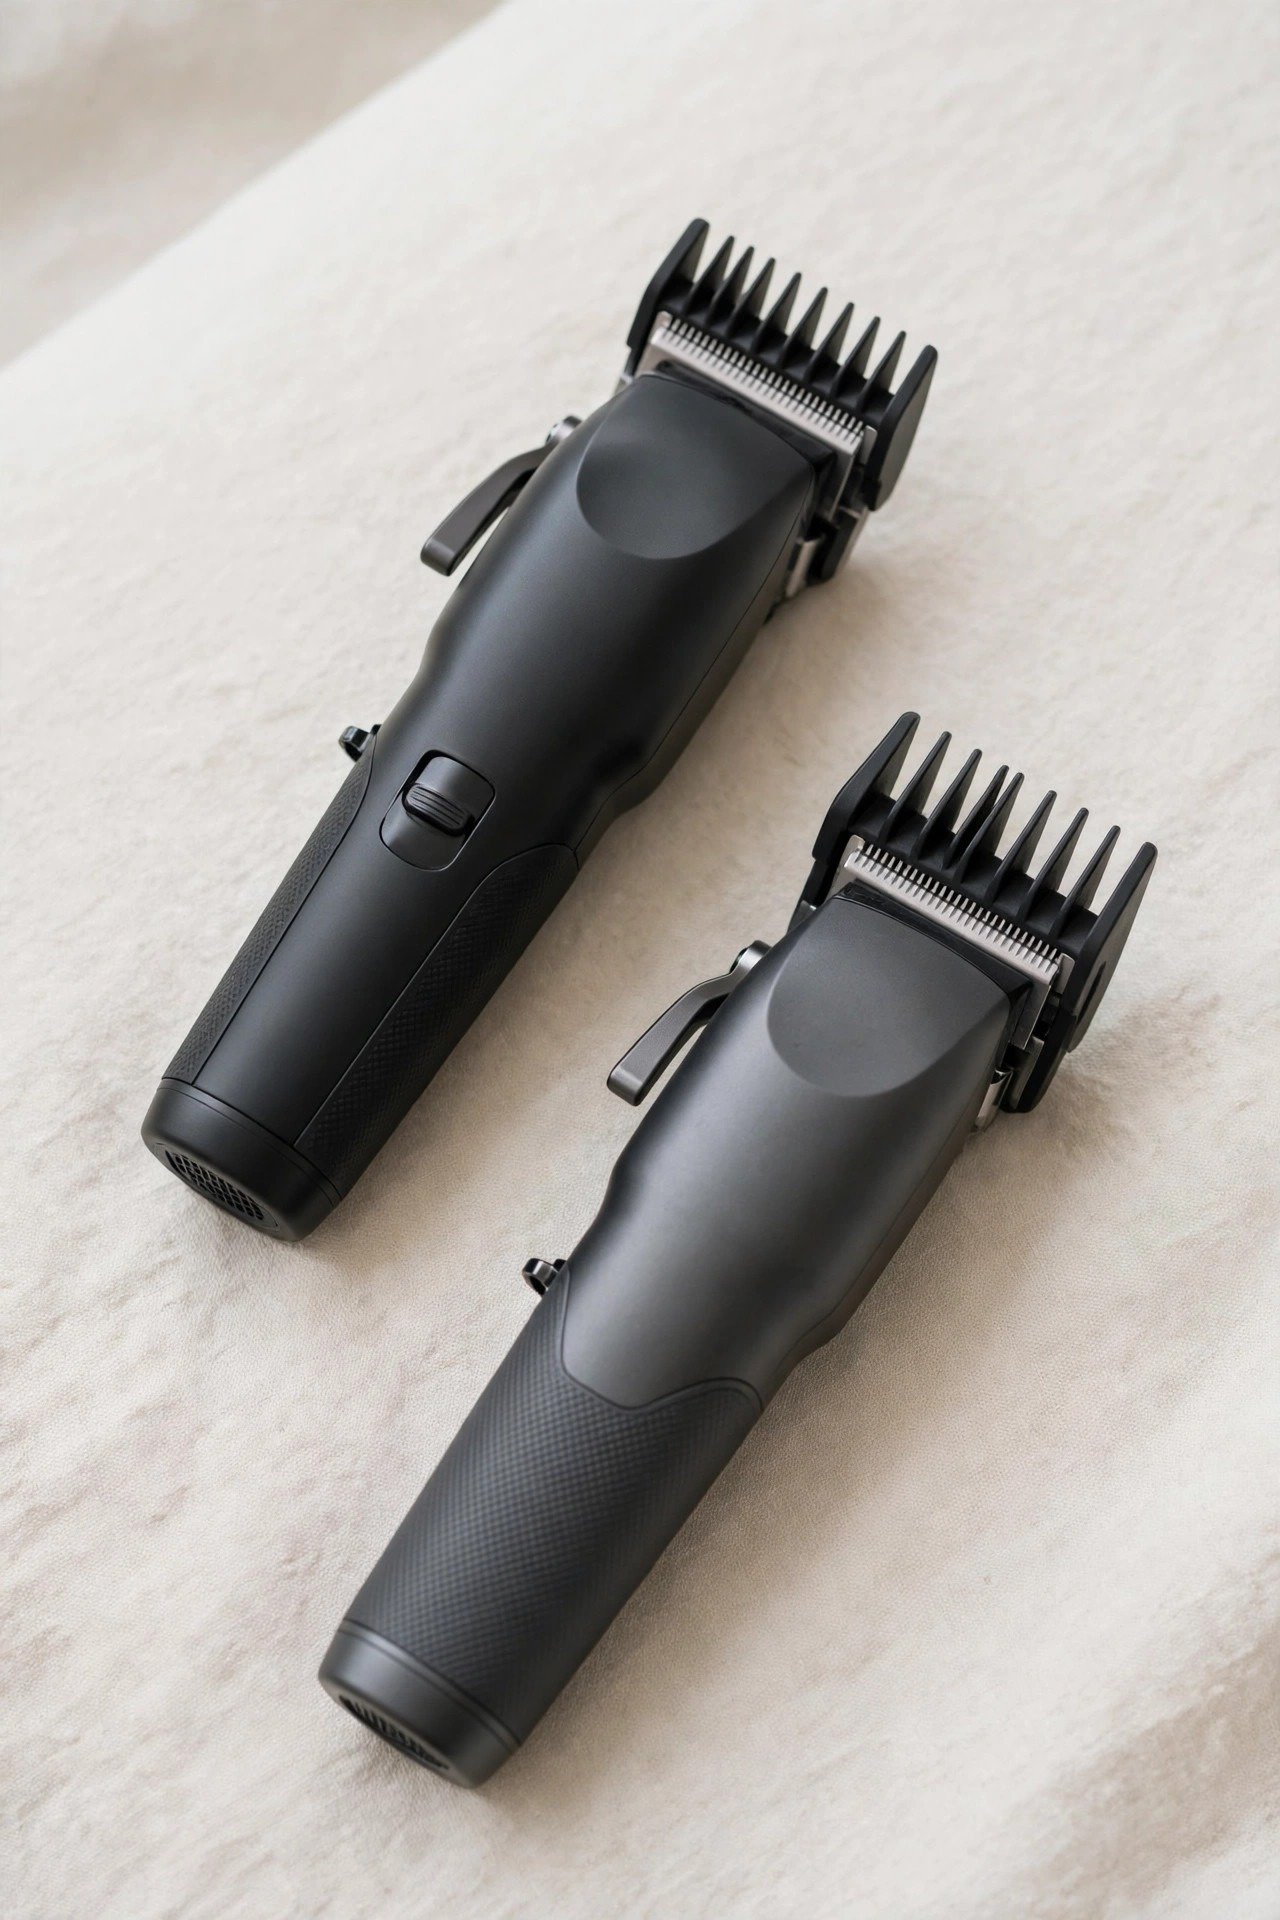
If you’re going to buzz your own head, the clipper is everything — and the market is full of junk that will chew your scalp and die in six months. I’ve put hundreds of hours on the models that matter, so here’s the honest breakdown at 2026 prices. The Wahl Magic Clip (~$70) is the best value in the entire industry and the clipper I’d recommend to nine out of ten DIY guys. It’s cordless, the stagger-tooth blade cuts cooler and feeds hair better than a standard blade, the taper lever is smooth and precise for fading, and the battery genuinely lasts through multiple cuts. It comes with a solid guard set. The only knock: the stock blade needs occasional oiling and the motor, while strong, isn’t the beast that the pro corded models pack. For buzz cuts and home fades, though, it’s more than enough — this is the clipper sitting in half the barbershops in America as the daily driver.
Step up to the Wahl Senior (~$130–$150 cordless) and you get the heavyweight: a more powerful motor that plows through thick, coarse, or curly hair without bogging down, a metal body that feels indestructible, and the same excellent taper lever. If your hair is thick enough to stall a Magic Clip, the Senior is your answer. The Andis Master (~$170) is the old-school legend — all-metal, adjustable blade (no guards needed for the shortest lengths, the blade itself adjusts from #0 to #1), and a motor that has been essentially unchanged for decades because it never needed changing. Barbers who learned in the ’90s swear by it. The trade-offs: it’s corded only, it’s heavy, and the adjustable blade runs hot — you need cooling spray or blade wash. For a DIY guy doing one head every couple of weeks, the Master is overkill in the best way: you’ll hand it to your kids.
On a budget, the Wahl Color Pro (~$30–$40) is the surprise pick. It’s not a pro tool — the motor is weaker, the lever is less precise — but the color-coded guards make it dead simple for a beginner doing one-length buzzes, and at thirty bucks it’s nearly disposable. Just know its limits: don’t attempt skin fades with it; the motor will snag on the shortest lengths and the blend will suffer. Whatever you buy, you also need three accessories: a foil shaver (~$30–$60, the Wahl Finale or Andis ProFoil) for taking the baseline to true skin — clippers alone can’t get truly bald; half guards (#0.5 and #1.5) if your set doesn’t include them, about $8–$10; and clipper oil and a cleaning brush, because a dry blade pulls hair and a dirty blade cuts unevenly. Oil the blade before every single cut — three drops across the teeth, run it for ten seconds, wipe the excess. That thirty-second ritual doubles blade life.
Maintenance is the part everyone skips and then wonders why their $70 clipper cuts like a $20 one after a year. After each cut: brush the hair out of the blade teeth, wipe the body down, oil the blade. Every few months: remove the blade (two screws), clean underneath it, check the blade alignment — the moving cutter tooth should sit just inside the stationary tooth, not sticking out past it, or you’ll nick skin. Once a year for heavy users: replace the blade ($20–$35 depending on model) rather than buying a whole new clipper. Cordless models need battery care too: don’t leave them on the charger for days, and run them down fully once every couple of months to keep the lithium cell healthy. A maintained Magic Clip lasts five-plus years of home use. A neglected one lasts eighteen months and gives you a rash the whole way down.
One more buying note for 2026: ignore the Amazon no-name clippers with five-star reviews and names like “PROFESSIONAL TITANIUM X9000.” They’re rebadged generic motors with terrible blades, and the reviews are gamed. Stick to Wahl, Andis, or Oster — the three brands that actual barbershops buy, which means replacement blades and guards will still exist in five years. Buy from a real retailer or the manufacturer’s site, not a random marketplace seller, because counterfeit Wahl clippers are genuinely a thing and a fake blade will butcher your scalp. And if you’re on the fence between the Magic Clip and the Senior: get the Magic Clip unless your hair is genuinely thick enough to slow it down. The $60–$80 you save buys the foil shaver, which will improve your fades more than the motor upgrade will.
Scalp Care: The Skincare Routine Your Head Has Been Waiting For

Here’s the thing nobody tells you before your first real buzz: your scalp is skin, and it’s been living under a thatch of hair its whole life. Take the thatch away and it reacts like any skin suddenly exposed to the world — it dries out, it burns, it flakes, and it gets irritated. Every guy goes through a two-week adjustment period where his head feels weird: tight, itchy, maybe a little bumpy. That’s normal. What’s not normal is ignoring it for months and wondering why your buzz looks dull and your scalp is a flaky mess. A buzz cut doesn’t eliminate hair care — it converts it into scalp care, and the routine is simpler than you’d think.
Sunscreen is non-negotiable. I’m putting this first because it’s the one guys skip and it’s the one with real consequences. A #1 buzz leaves 3mm of hair, which blocks essentially zero UV. Your scalp will burn faster than any other skin on your body because it’s never been exposed — first-degree scalp sunburn on a fresh buzz is genuinely miserable, and chronic exposure is a skin-cancer risk on skin that rarely gets checked. Use a dedicated SPF 30+ on the scalp every morning: mineral or chemical, doesn’t matter, but pick one that doesn’t leave a white cast or a grease slick. Sport and “dry touch” formulations work best on a buzz — they don’t run into your eyes when you sweat. Reapply if you’re outside for hours. A hat works too, but sunscreen is the daily baseline. This is the single highest-value habit in this entire guide, and it costs about ten dollars every two months.
Moisturizer comes second. The scalp produces oil, but a buzzed head loses moisture fast — especially in winter, especially after hot showers. A dry scalp flakes, and flakes on a buzz cut are brutally visible: little white specks sitting on 3mm of hair, obvious from across the room. After your morning shower, while the skin is still slightly damp, work in a light, fragrance-free moisturizer — the same kind you’d use on your face works fine. CeraVe, Neutrogena, whatever you already trust. At night, if your scalp runs dry, a few drops of jojoba oil massaged in does wonders; jojoba mimics the skin’s natural sebum, so it absorbs without greasiness. Avoid heavy pomades and waxes on the scalp itself — they’re made for hair shafts, not skin, and on a buzz they’ll clog pores and cause breakouts along the hairline and nape.
Washing needs a rethink. Stop shampooing like you have a full head of hair — you don’t, and daily shampooing strips the scalp’s oils and triggers rebound oiliness and flaking. For a buzz, rinse with water most days and shampoo two to three times a week with a gentle, sulfate-free shampoo. If you get dandruff or flakes, a shampoo with zinc pyrithione or ketoconazole used twice a week handles it for most guys; use it consistently for a month before judging. Exfoliate the scalp once a week — a soft silicone scalp scrubber in the shower ($8, lasts forever) lifts dead skin and product residue and stimulates the skin. It feels great and it prevents the ingrown hairs that plague the nape area on short cuts. And go easy on the hot water: lukewarm is kinder to exposed scalp than a scalding shower.
The last piece is troubleshooting the common complaints. Itchy scalp in the first two weeks: normal, it’s the skin adjusting — moisturizer and time fix it. Bumps along the neckline and behind the ears: usually irritation from the clipper or razor, sometimes ingrown hairs — exfoliate, don’t pick, and make sure your barber (or you) isn’t pressing the foil shaver too hard. Shiny scalp: some guys’ heads go glossy with a buzz, especially under lights — a mattifying moisturizer or a light dusting of translucent powder handles it if it bothers you. Dry patches or eczema: see a dermatologist rather than cycling through products blindly; scalp psoriasis and seborrheic dermatitis are common, treatable, and nothing to be embarrassed about. Treat your scalp like the skin it is — cleanse gently, moisturize, protect from the sun — and it’ll reward you with a buzz that looks healthy instead of just short.
Buzz Cut with Beard: The Full Combination Guide
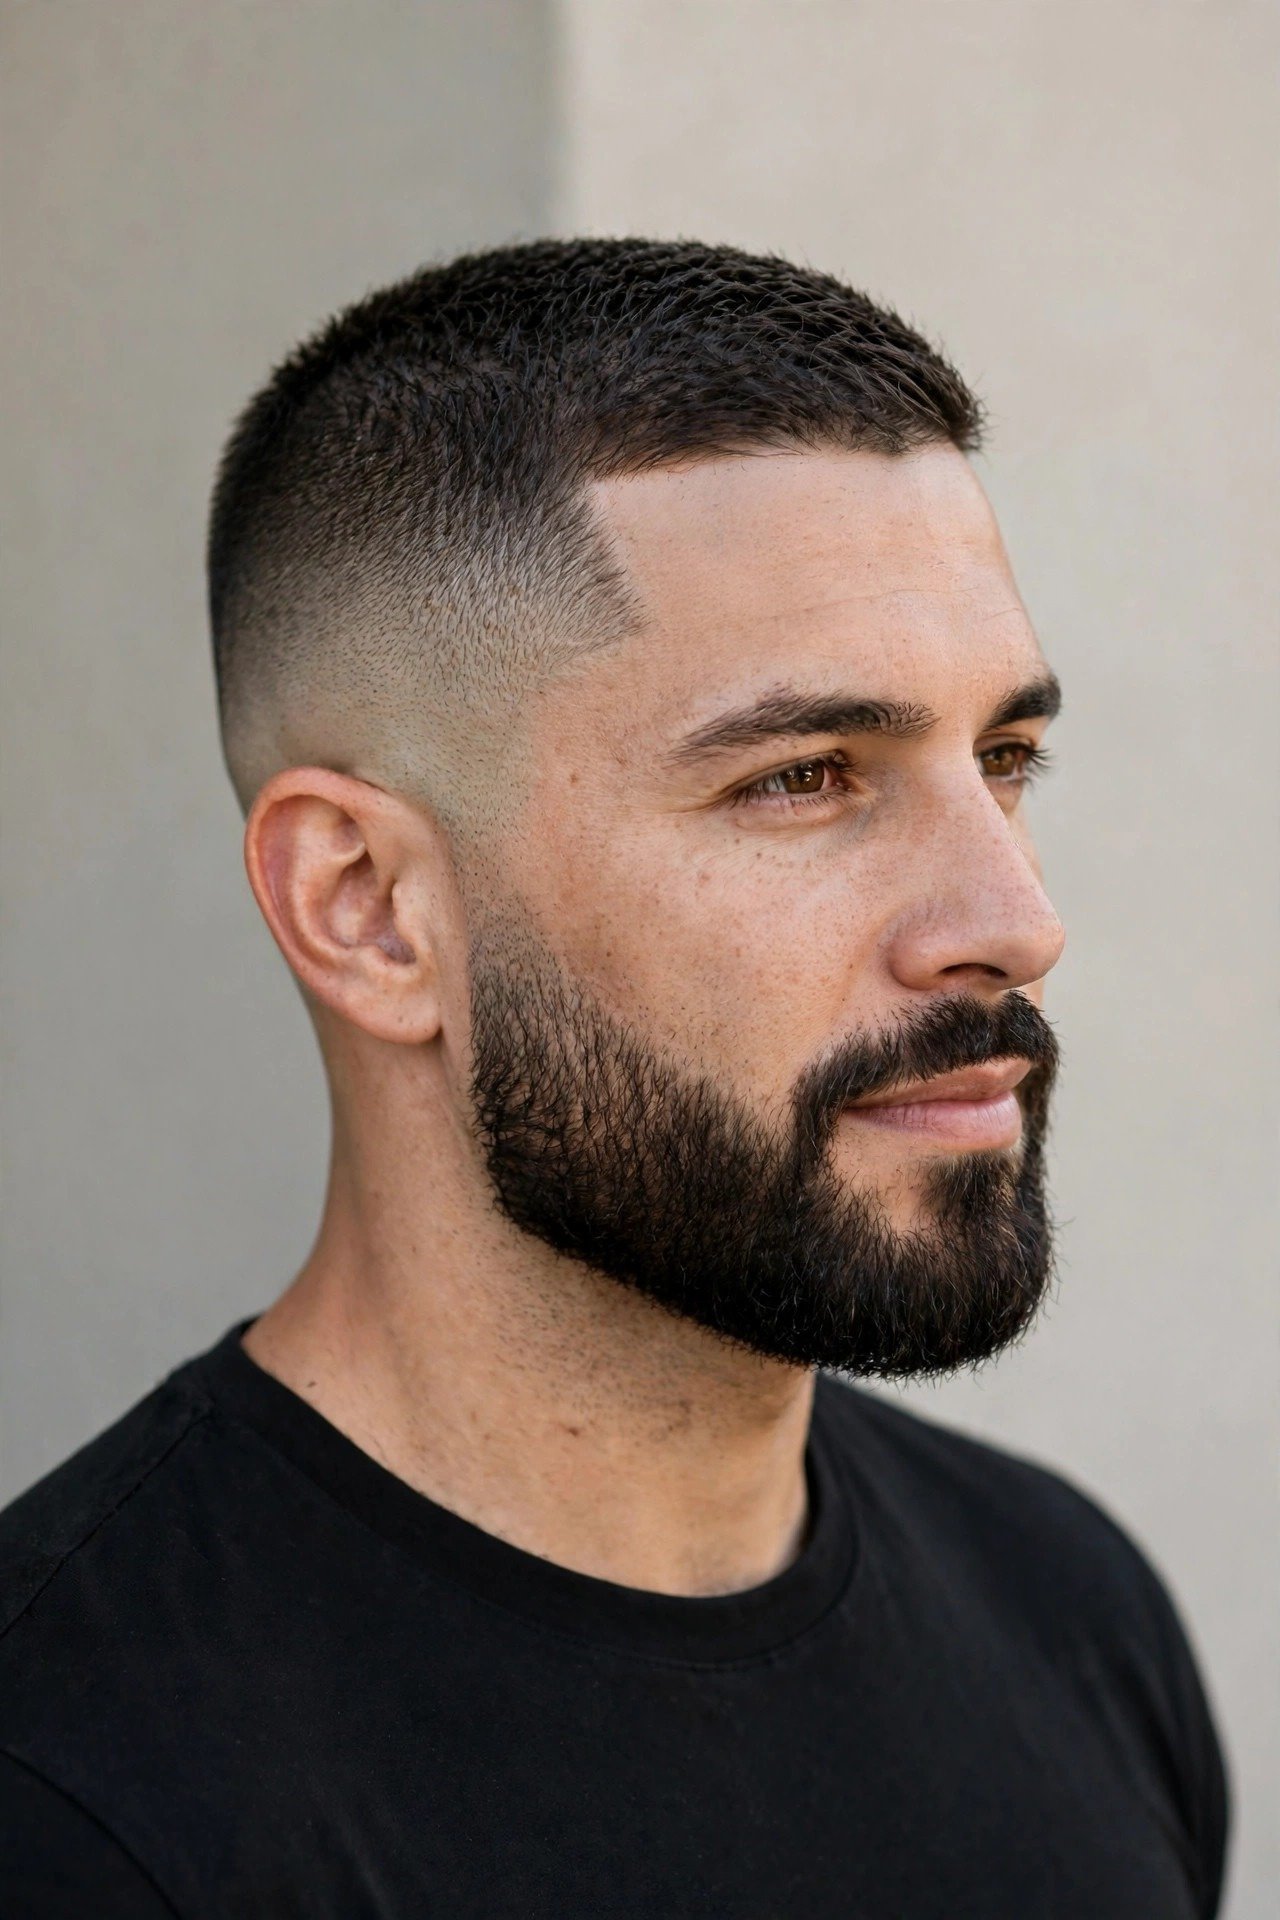
The buzz cut fade plus beard is one of the great combinations in men’s style — short on top, strong on the bottom, the whole head framed in a way that makes the jawline look carved. It works because of contrast and balance: the buzz keeps the top minimal while the beard adds mass and structure to the lower face, and the fade creates a transition zone between them at the sideburns and temples. But the combination has rules, because getting the proportions wrong is easy. The core principle: the shorter the buzz, the more deliberate the beard needs to be. A #1 buzz with a wild, untrimmed beard looks like you only groom from the nose down. A #1 buzz with a shaped, defined beard looks like a style choice. The buzz exposes everything, so the beard has to be intentional.
Proportion is the whole game. The classic mistake is a heavy, long beard with a very short buzz — the visual weight sits entirely on the bottom half of the face and the head looks top-heavy in reverse, like an upside-down triangle. The fix is either lengthening the buzz (a #3 or #4 top balances a fuller beard) or keeping the beard tighter and more sculpted when the buzz is very short. As a rule of thumb: match the energy. Skin fade with a #1 top pairs best with a short boxed beard or heavy stubble — both sharp, both controlled. A #3–#4 textured buzz gives you room for a fuller beard because there’s more hair up top to balance it. The guys who nail this combination almost always have one thing in common: the beard’s cheek line and neckline are as crisp as the fade. A faded head with a neckbeard creeping down the throat undoes the entire effect.
The connection point — where the sideburn meets the fade — is the technical crux, and it’s where barbers earn their money. There are two schools: blend it, where the sideburn fades seamlessly into the beard so the whole thing reads as one continuous shape, or disconnect it, where a clean shaved gap separates the fade from the beard for a sharper, more graphic look. The blended version is more natural and more forgiving as it grows out; the disconnected version looks bolder but needs maintenance every few days to keep the gap clean. Tell your barber which you want — “blend the sideburns into the beard” versus “keep a clean separation” — because guessing wrong here changes the whole face. For DIY guys: maintaining the blend is hard; maintaining the disconnect is just a matter of shaving the gap every few days, which is honestly easier at home.
Beard length and style pairings worth knowing: heavy stubble (5–10mm) with a mid skin fade is the 2026 sweet spot — rugged but groomed, works in every setting from the gym to the office. Short boxed beard (1–2cm, sharp cheek lines, defined neckline) with a #2–#3 buzz is the professional’s combination — it reads authoritative without reading aggressive. Full beard (3cm+) needs a longer buzz (#4+) or it overwhelms the face; keep the cheeks clean and the neckline two fingers above the Adam’s apple. Goatee or circle beard with a buzz works if the fade is clean — it concentrates the facial hair at the chin, which pairs well with the minimal top, but keep it tight or it looks dated. And the chin strap: just don’t. It had its moment two decades ago and the moment passed. Whatever style you choose, the beard needs the same maintenance rhythm as the fade — which brings us to the schedule.
Maintenance for the combo is a two-track system. The buzz fade needs attention every 2–3 weeks (full schedule in the final section); the beard needs attention every 2–3 days — cheek lines, neckline, stray hairs. The daily beard routine: wash it when you wash your face (beard shampoo 2–3 times a week, not daily — same scalp logic applies), work in a few drops of beard oil while it’s damp, brush it down with a boar-bristle brush to train the direction. The oil matters more than guys expect — it softens the hair, kills the itch, and keeps the skin underneath from flaking, which is visible in a way it isn’t under longer hair. Keep a small trimmer (a detail trimmer or your clipper’s T-blade attachment) in the bathroom for the every-few-days edge cleanup. Ten minutes, twice a week, and the combination stays sharp indefinitely. Neglect either track and the whole thing falls apart — a crisp fade can’t save a scraggly beard, and a perfect beard can’t save a grown-out fade.
Growing It Out: Transition Styles Week by Week
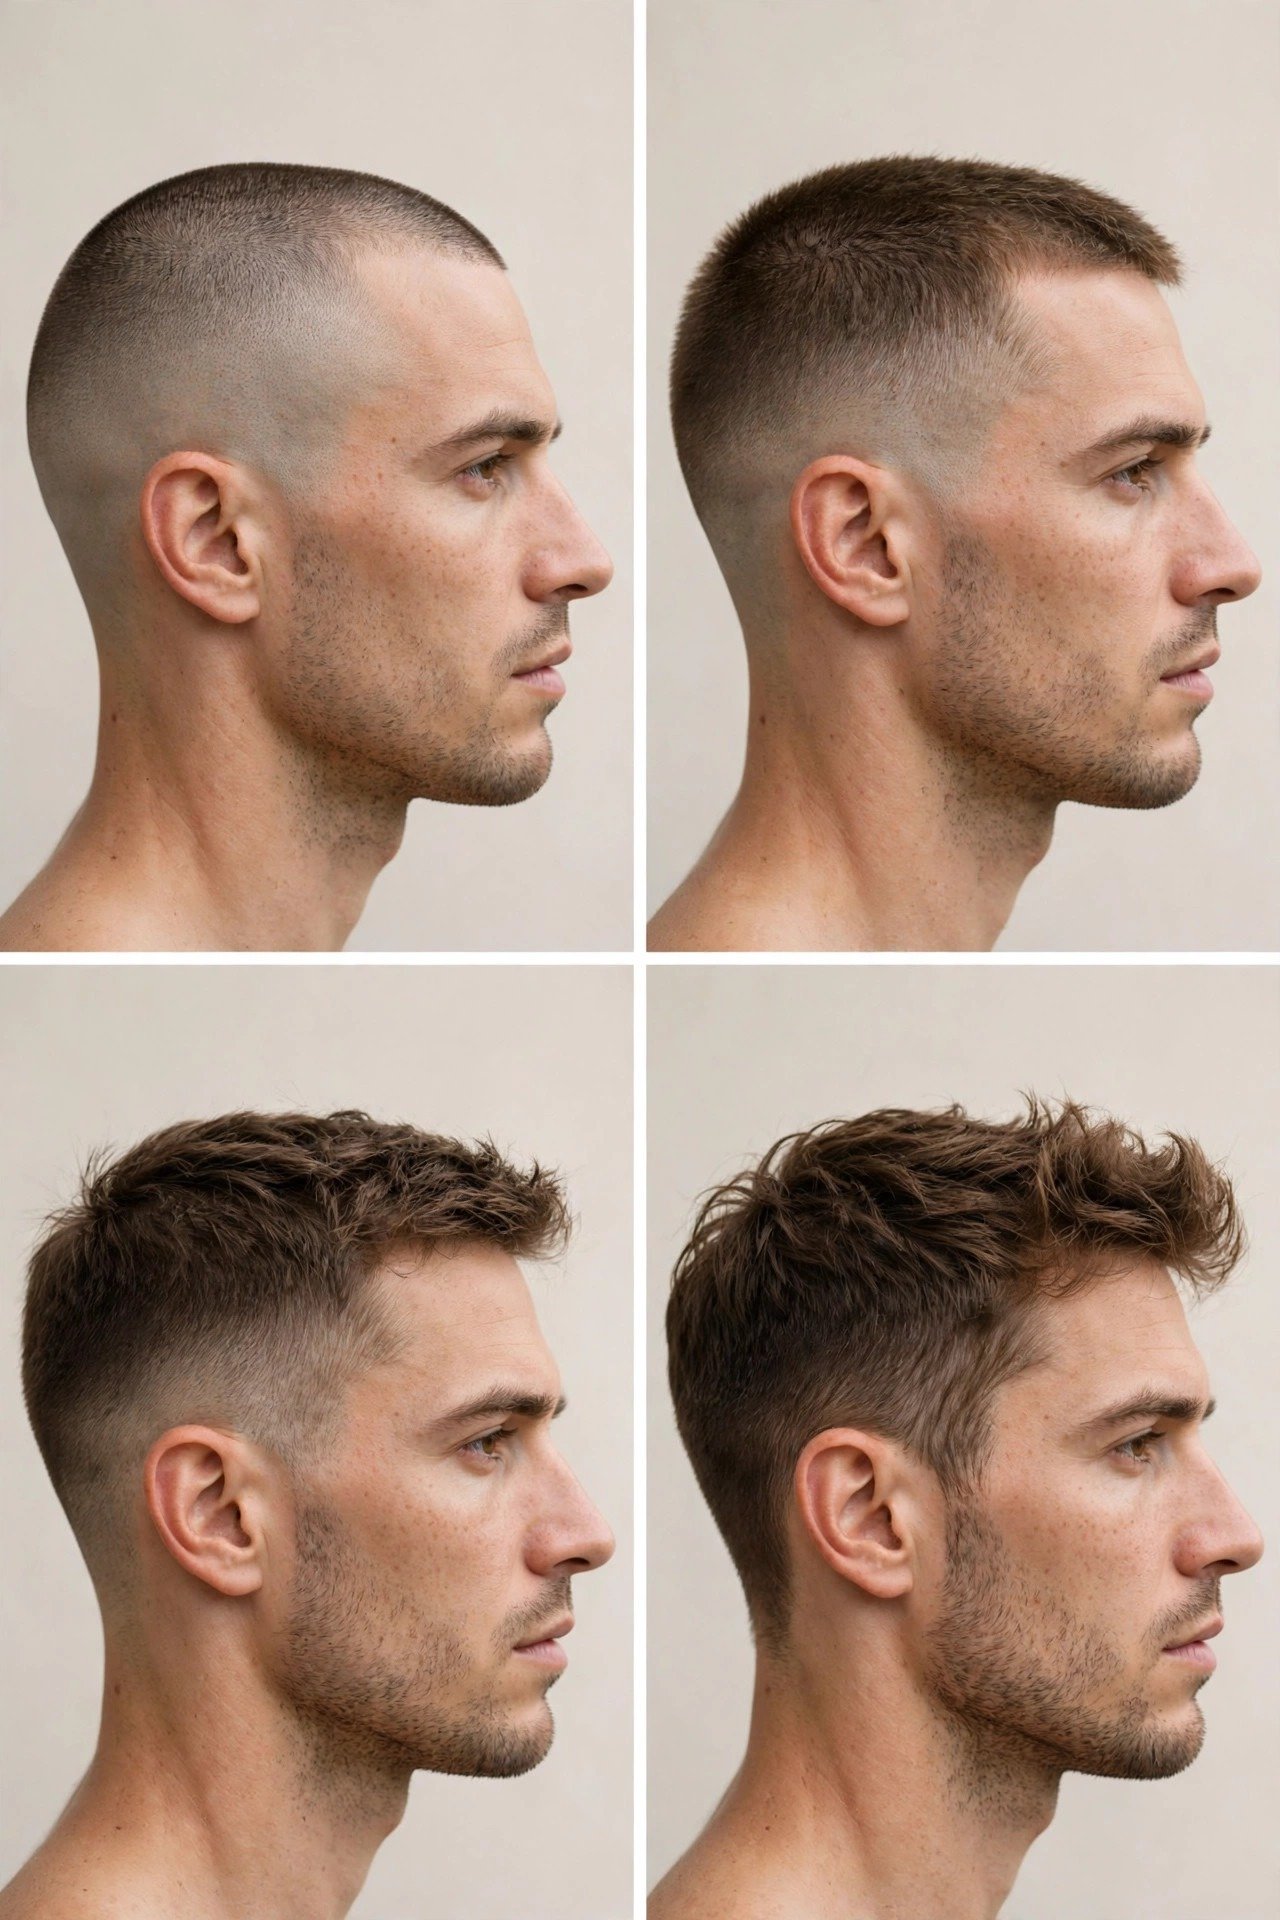
Every buzz cut ends the same way: one morning you look in the mirror and think, maybe I’ll grow it out. And then comes the awkward phase — the weeks where it’s too long to look like a buzz and too short to look like anything else. The good news: growing out a buzz fade is one of the more forgiving grow-outs in men’s hair, because you’re starting from a clean, even baseline. The bad news: it’ll take about three to four months to reach a proper short style, and there will be a rough patch around weeks four through eight. Here’s the honest week-by-week map so you know what’s coming and what to do at each stage.
Weeks 1–2: The buzz is just getting fuzzy. The fade’s crisp lines soften, the top loses its edge. This is the easiest stage — it still basically looks like a buzz, just a slightly grown-out one. Do nothing except keep the neckline clean; a quick pass with a trimmer on the nape keeps it looking intentional rather than neglected. Weeks 3–4: The top is now around 15–20mm and starting to show your hair’s natural behavior — cowlicks appear, the crown might stick up, the sides start to puff out instead of lying flat. This is where most guys panic. Don’t. The fix is a single barbershop visit: ask for a “grow-out cleanup” — the barber takes the sides back down slightly, cleans up the neckline and edges, and leaves the top alone. It buys you another three weeks of looking deliberate. This one maintenance cut is the difference between a graceful grow-out and the awkward phase everyone dreads.
Weeks 5–8: The true awkward phase. The top is 25–35mm — long enough to flop, short enough to flop badly. The sides, growing from the fade, are at that in-between length where they stick out sideways. Your hair’s texture fully reveals itself now: wavy hair gets wavy, curly hair starts to curl, straight hair lies flat and shows every uneven spot. Strategy: get the sides cleaned up again (a light taper, not a full fade — you’re done with fades for now), and start training the top. If you want to end up with a textured crop or French crop, start pushing the top forward; if you’re heading toward a side part or quiff, start training it in that direction with a light matte product. Direction-training takes weeks, so start now — hair has memory, and you’re building it. A pea-sized amount of matte clay, worked through damp hair, gives the top enough control to look styled rather than accidental.
Weeks 9–12: You’re through the worst of it. The top is 40–50mm — legitimate short-hair territory — and the sides have enough length to lie flat. This is when the destination styles come into reach: a textured French crop, a short crew cut, a neat side part, or a messy short quiff are all cuttable now. Book a real cut (not a cleanup) and bring reference photos of where you’re headed — the barber reshapes everything into the new style’s foundation. One thing to watch: the back and sides grew from different starting lengths (the fade), so there may be unevenness in growth rates — the crown area often lags. A good barber evens this out in the reshape cut. Weeks 13–16: You’re there. The buzz is a memory, the new style is established, and you’re on a normal 4–6 week haircut cycle. Total journey: about four months from #2 buzz to styled short hair.
A few grow-out survival notes from guys who’ve done it. First, resist the urge to cut it all off again at week six — that’s the peak awkwardness talking, and it’s temporary. Second, hats are your friend during weeks 4–8; a clean cap or beanie covers the in-between stage completely and nobody thinks twice. Third, product becomes necessary in a way it wasn’t with the buzz — invest in one good matte clay or paste, because fighting 30mm of hair with nothing in it is a losing battle. Fourth, the neckline is the tell: keep it trimmed throughout the grow-out and the whole thing reads as “growing out deliberately” instead of “hasn’t been to a barber in two months.” And finally, take a photo every two weeks — partly for the satisfaction of watching the progress, partly because if you ever buzz it again, you’ll have the full map of how your hair behaves at every length. Knowledge compounds.
Maintenance Schedule and Cost Breakdown: DIY vs Barbershop

A buzz cut fade is the lowest-maintenance serious haircut in existence — but “low maintenance” doesn’t mean “no maintenance,” and the difference between a sharp fade and a grown-out one is about ten days. Here’s the real schedule. The fade itself lasts 2–3 weeks before the blend lines start to visibly grow out and the baseline loses its crispness. At week two, a skin fade starts looking like a taper fade; at week three, it starts looking like you just have short hair. The top lasts 3–4 weeks — going from a #2 to effectively a #3 in length is a slower visual change than the fade’s degradation. The neckline needs weekly attention — it’s the fastest visible grow-out on the whole head, and a fuzzy nape ruins the effect faster than anything else. The line-up (if you get one) lasts 5–7 days — hairline edges blur fast, which is why line-up guys are in the chair so often.
The barbershop schedule that keeps you permanently sharp: full cut every 2–3 weeks, with a neckline cleanup in between if needed (many shops do a quick nape tidy for free or cheap between cuts — ask yours). If you’re on the line-up train, you’re looking at weekly or bi-weekly visits. Now the money. A skin fade at a decent shop runs $35–$60 in most US cities in 2026 — call it $45 average. Every three weeks, that’s roughly 17 cuts a year: ~$765/year, plus tips (~$150), so call it $900–$950 all-in annually. Premium shops in major metros charge $60–$80, which pushes the annual number past $1,200. Budget shops and smaller towns run $25–$35, bringing it under $600. Your city’s pricing is what it is — but whatever it is, multiply by 17 and that’s your number. It’s the real cost of a permanently sharp fade, and it’s worth knowing before you commit to the style.
The DIY schedule and cost tell a different story. Upfront: $100–$200 for the clipper setup (Magic Clip ~$70, foil shaver ~$40, half guards ~$10, oil and brush ~$10 — or less if you go budget). Ongoing: essentially $0 — blade oil is pennies per cut, replacement blades every year or two run $20–$35, and electricity is negligible. First-year DIY cost: ~$150–$235. Annual cost after that: ~$20–$40. Over three years, DIY runs you maybe $250 total versus $2,700+ at the barbershop. The savings are enormous — roughly a 90% cost reduction — which is exactly why so many buzz guys go DIY. But the honest accounting includes time: a DIY fade takes 45–60 minutes while you’re learning, 25–35 once you’re competent, versus 20 minutes in the chair plus travel. And it includes quality variance: your tenth DIY fade will look good; your first three will have flaws. Price those in.
The hybrid approach is what I’d actually recommend to most guys, and it’s what a lot of my long-term clients do: barbershop every 4–6 weeks for the architecture, DIY maintenance in between. The pro cut establishes the fade shape, the blend, the neckline design; your home touch-ups every 10–14 days just take the length down with the top guard and clean the baseline. You get 80% of the sharpness at about 40% of the cost — roughly $500–$600 a year instead of $900+. The key skill for the hybrid is restraint: in your touch-ups, only maintain what’s there — don’t try to re-cut the fade zones or redesign anything. Take the top down, tidy the edges, stop. The moment you start “improving” the blend is the moment you create the problem you’ll pay a barber to fix. Discipline is the whole technique.
One last cost note: the mistake tax. Every DIY guy pays it at least once — the fade that went too high, the patch that went too short, the neckline that went crooked. The fix is always the same: go shorter everywhere to even it out, live with it for two weeks. There’s no product that fixes a bad cut, no styling trick — just time and shorter hair. Budget for one mistake cut per year in your mental accounting, and schedule your first DIY attempts for low-stakes weeks. And keep a barber’s number in your phone regardless of which path you choose — for weddings, interviews, photos, and the day you look in the mirror and think “I should not have tried that.” Knowing when to hand it to a professional isn’t weakness; it’s the most advanced grooming skill there is.
Buzz Cut Fade FAQ: Real Questions, Straight Answers
How often should I get a buzz cut fade touched up?
Every two to three weeks for the full cut if you want it permanently sharp — that’s how long a skin fade holds its crisp blend before the grow-out softens the lines. The neckline goes first, usually within a week, so a quick nape tidy between cuts keeps the whole thing looking fresh. If you’re doing it yourself at home, the same rhythm applies: a full re-cut every 2–3 weeks, with a five-minute neckline cleanup on the off weeks. Guys who stretch it to four or five weeks aren’t doing anything wrong — the cut just transitions from “sharp fade” to “short haircut,” which is a fine look in its own right, just a different one. The honest answer depends on your standards: if you notice the grow-out, it’s time. Most guys feel it around day 14–18, when the baseline starts looking fuzzy in the mirror.
Will a buzz cut fade suit me if I have a big forehead?
A bigger forehead is actually one of the situations where a buzz cut can help rather than hurt — but the details matter. Long hair with volume on top emphasizes forehead height by adding more mass above it; a buzz removes that and lets the forehead just be part of the face. The key is the hairline: keep it natural and don’t let the barber push it back, because every millimeter of push-back adds to the forehead visually. A textured top (a #3–#4 with some point-cut texture) is more flattering than a #1 here, because the slight texture breaks up the expanse. And the fade height matters: a mid fade keeps the proportions balanced, while a very high fade can elongate the face further. Pair it with a beard or even heavy stubble if you want to add visual weight to the lower face and balance the whole composition. Plenty of guys with prominent foreheads wear buzz fades extremely well — it’s about the hairline honesty and the proportions, not the forehead itself.
Does a buzz cut make thinning hair look better or worse?
Better — in almost every case of early to moderate thinning, and this is one of the most common reasons guys come to my chair. The logic is simple: thinning looks bad when there’s high contrast between thick areas and thin areas — the classic combover effect, where long thin hair next to dense hair just advertises the difference. A buzz cut drops everything to a uniform short length, which minimizes that contrast dramatically. A #2 or #3 buzz on a thinning crown looks like a deliberate style; the same head with longer hair looks like hair loss. The exception is advanced thinning where the scalp shows through significantly even at short lengths — below a certain density, going shorter just frames the baldness more clearly. In that case the options are: keep enough length to blend (a #4–#5), or go fully shaved, which is its own sharp look. If you’re on the fence, try a #3 first — it’s the length that hides the most while still reading as a buzz.
Can I get a buzz cut fade with curly or coily hair?
Absolutely — and some of the best buzz fades I’ve ever cut were on curly and coily hair, because the texture adds dimension that straight hair can’t. The main adjustment is guard selection: curly hair springs up, so a #2 on curly hair stands taller and looks fuller than a #2 on straight hair — you can often go one guard shorter than you think and still have coverage. For coily (type 4) hair, the fade technique shifts slightly: barbers often use the clipper-over-comb method more and rely on the natural texture for the blend, and the line-up becomes a bigger part of the style since the hairline definition carries so much of the look. One caution: very short curls can feel rough and pick up lint — a light moisturizer on the top keeps it soft. And if you’re growing it out from the buzz later, curly hair’s grow-out is actually easier than straight hair’s, because the curl disguises uneven growth. The textured buzz fade was practically designed for curly hair.
How do I avoid clipper bumps and irritation on my neck?
Clipper bumps — those red irritated dots along the neckline and behind the ears — come from three things: a hot or dull blade, too much pressure, and cutting dirty or dry skin. The fixes: oil your blade before every cut (a dry blade drags and pulls instead of cutting cleanly), don’t press the clipper into the skin — let the teeth do the work with light, flat contact, and stretch the skin taut with your free hand so the blade glides over a flat surface instead of catching on folds. If you’re finishing the baseline with a foil shaver, keep it moving — parking a running foil in one spot is how you get razor burn. After the cut, rinse with cool water and apply a light, fragrance-free moisturizer or a post-shave balm; skip the alcohol-based aftershaves on freshly buzzed skin unless you enjoy pain. If bumps persist despite good technique, exfoliate the neck area twice a week with a gentle scrub — most recurring bumps are ingrown hairs, and exfoliation prevents them. And if you’re getting cut at a shop, there’s no shame in telling the barber your neck is sensitive — a good one adjusts pressure without being asked twice.
What’s the difference between a taper fade and a skin fade on a buzz cut?
The difference is where the shortest point ends up. A skin fade (bald fade) takes the baseline all the way down to bare skin — zero hair, usually finished with a foil shaver or razor — and then blends upward through the guards. It’s the highest-contrast, sharpest-looking fade, and it’s what most people picture when they hear “fade.” A taper fade is subtler: the shortest length is still visible hair (usually a #0 or #0.5, about 0.8–1.5mm), and the fade zone is typically smaller — concentrated around the ears and nape rather than running high up the head. The taper looks more conservative and grows out more gracefully, since there’s no harsh skin-to-hair transition expanding as it grows. On a buzz cut specifically: pair a skin fade with a very short top (#1–#2) for maximum military sharpness, or pair a taper with a longer top (#3–#4) for the professional, boardroom-friendly version. Neither is better — they’re different tools. The skin fade makes a statement; the taper whispers it.
How long does it take to grow out a buzz cut to a normal short haircut?
Hair grows about half an inch (13mm) per month on average, so the math is straightforward. From a #2 buzz (6mm) to a textured crop at 40–50mm is roughly 35–44mm of growth — about three months. From a #1 (3mm), add another few weeks. But “normal short haircut” covers a range: you’ll hit a presentable short style around week 9–10, and a fully established style with proper shape around week 12–16. The awkward phase sits in weeks 4–8, when it’s too long to be a buzz and too short to style — plan one or two barbershop cleanups during that window (sides tapered, neckline cleaned, top untouched) and it stays looking deliberate the whole way. Curly hair often looks acceptable sooner because the texture hides uneven growth; straight hair shows every stage. And remember the growth isn’t even — the top and the faded sides started at different lengths, so the sides may need trimming back once or twice while the top catches up. Four months, two cleanup cuts, one bottle of matte clay: that’s the full grow-out budget.
Conclusion: The Sharpest Decision You’ll Make This Year
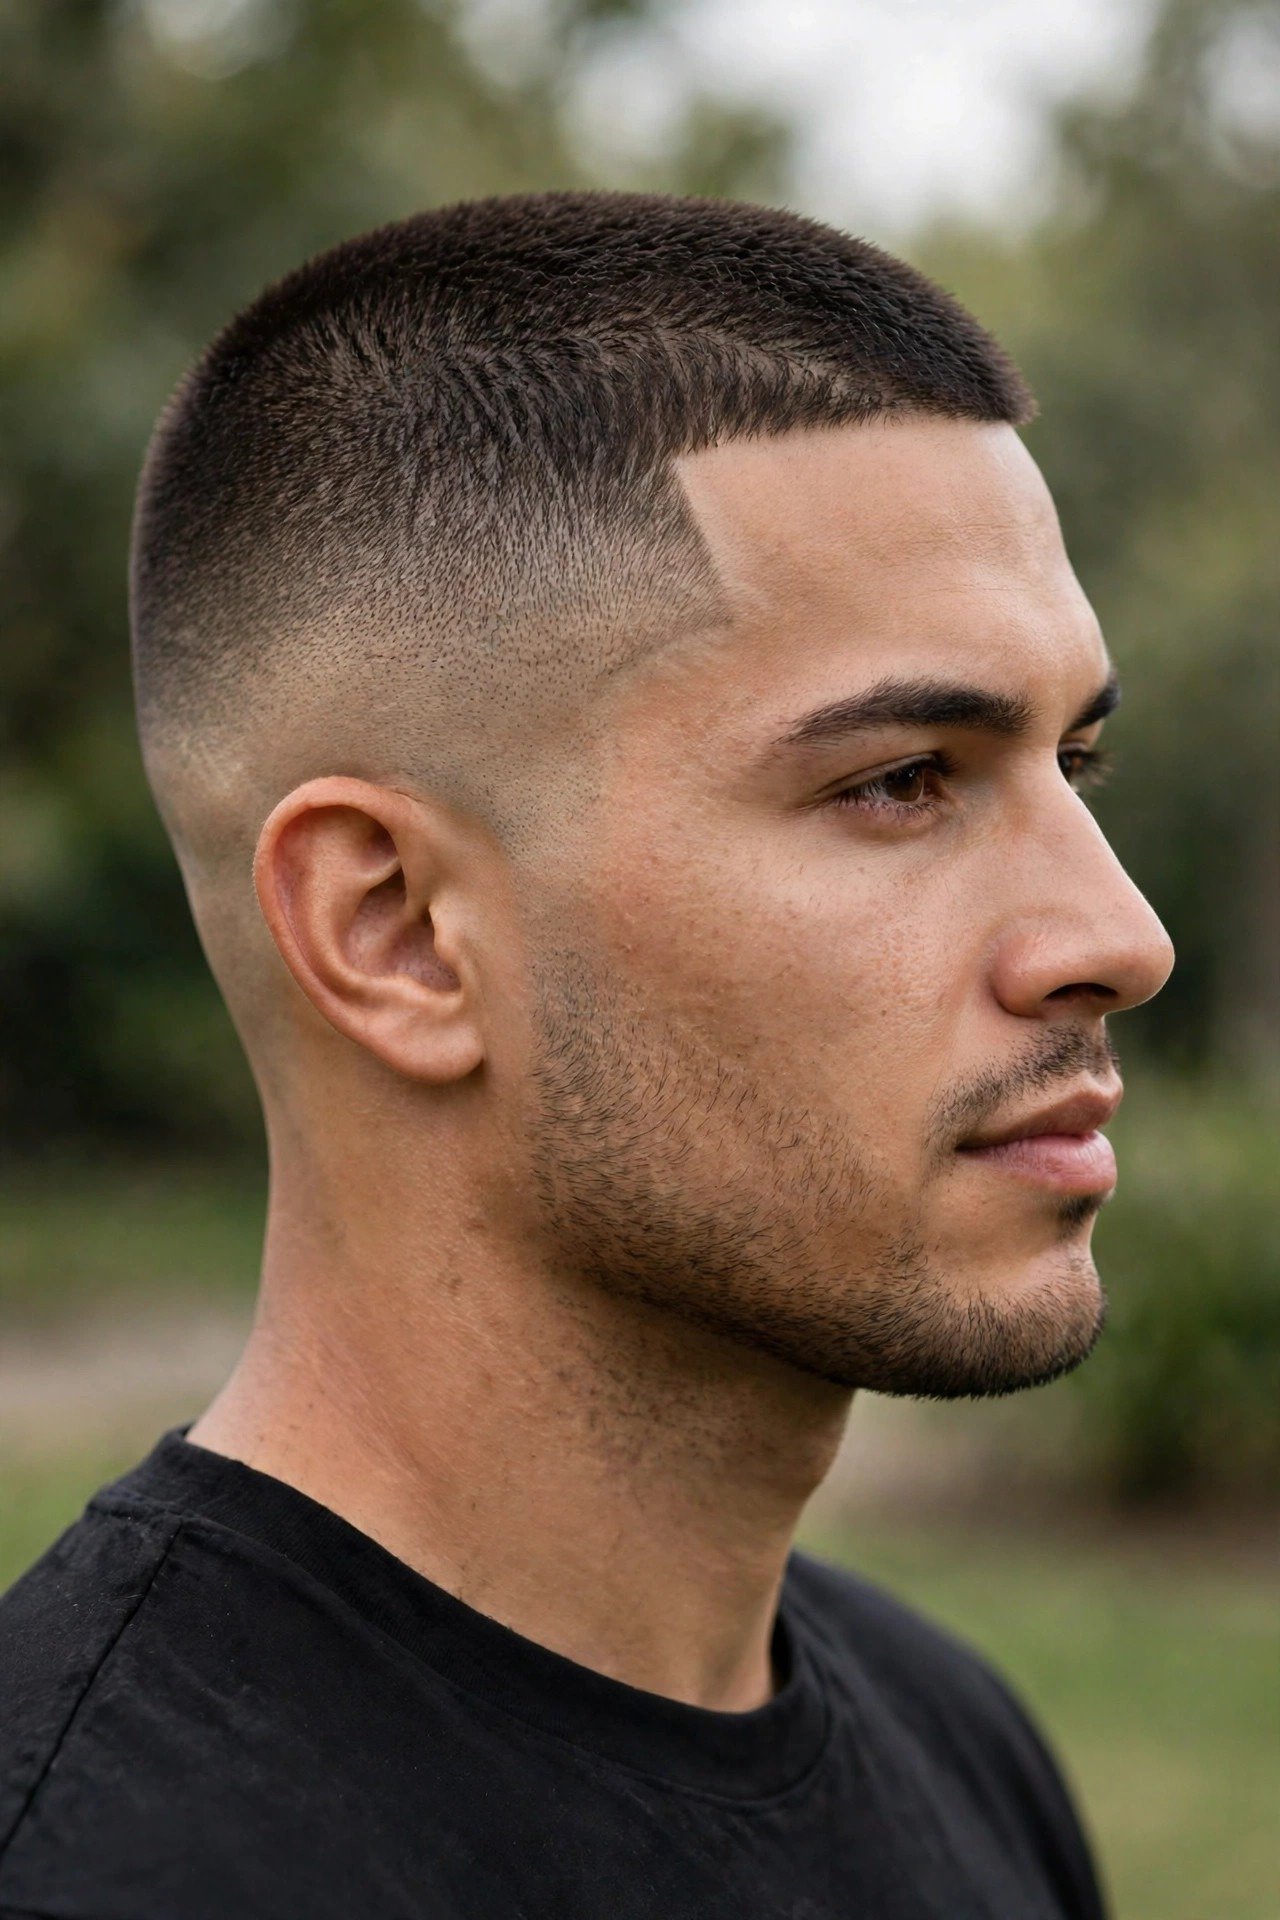
Here’s what I want you to take away from all of this: the buzz cut fade isn’t the absence of a hairstyle — it’s one of the most deliberate choices a man can make about his appearance. It says you’ve looked at your face, your head, your life, and decided that clean and sharp beats complicated every time. In 2026, with fade technique at the level it’s at and the textured variations giving you more options than ever, there’s never been a better moment to get it cut. You now know the guard numbers, the ten variations, the honest head-shape assessment, the barbershop script, the clipper models and their real prices, the scalp routine, the beard pairing rules, the grow-out map, and the true cost of keeping it sharp. That’s more than most guys learn in years of sitting in the chair.
My parting advice is simple: start conservative. If this is your first buzz, go a #3 on top with a mid taper fade — it’s flattering on nearly everyone, it hides minor head-shape quirks, and it grows out gracefully if you change your mind. You can always go shorter next time; the guys who regret their first buzz are almost always the ones who went straight to a #1 skin fade on day one. Find a barber who listens — use the script from this guide, bring one good photo, and pay attention to how the consultation feels. The right barber asks questions; the wrong one just starts cutting. And whether you go DIY or stay in the chair, commit to the maintenance rhythm — a buzz fade is a 20-minute haircut that demands 20 minutes of discipline every couple of weeks, and that discipline is the entire look.
The best haircut is the one you stop thinking about — the one that just works, every morning, with zero effort, while you get on with your life. For a lot of men, that’s exactly what the buzz cut fade becomes: not a style they wear, but the background their life happens against. Sharp in the mirror, invisible in the routine, unmistakable to everyone else. Get it cut, keep it tight, protect your scalp, and enjoy the simplest great haircut in the book. I’ll see you in the chair in three weeks.


One Comment