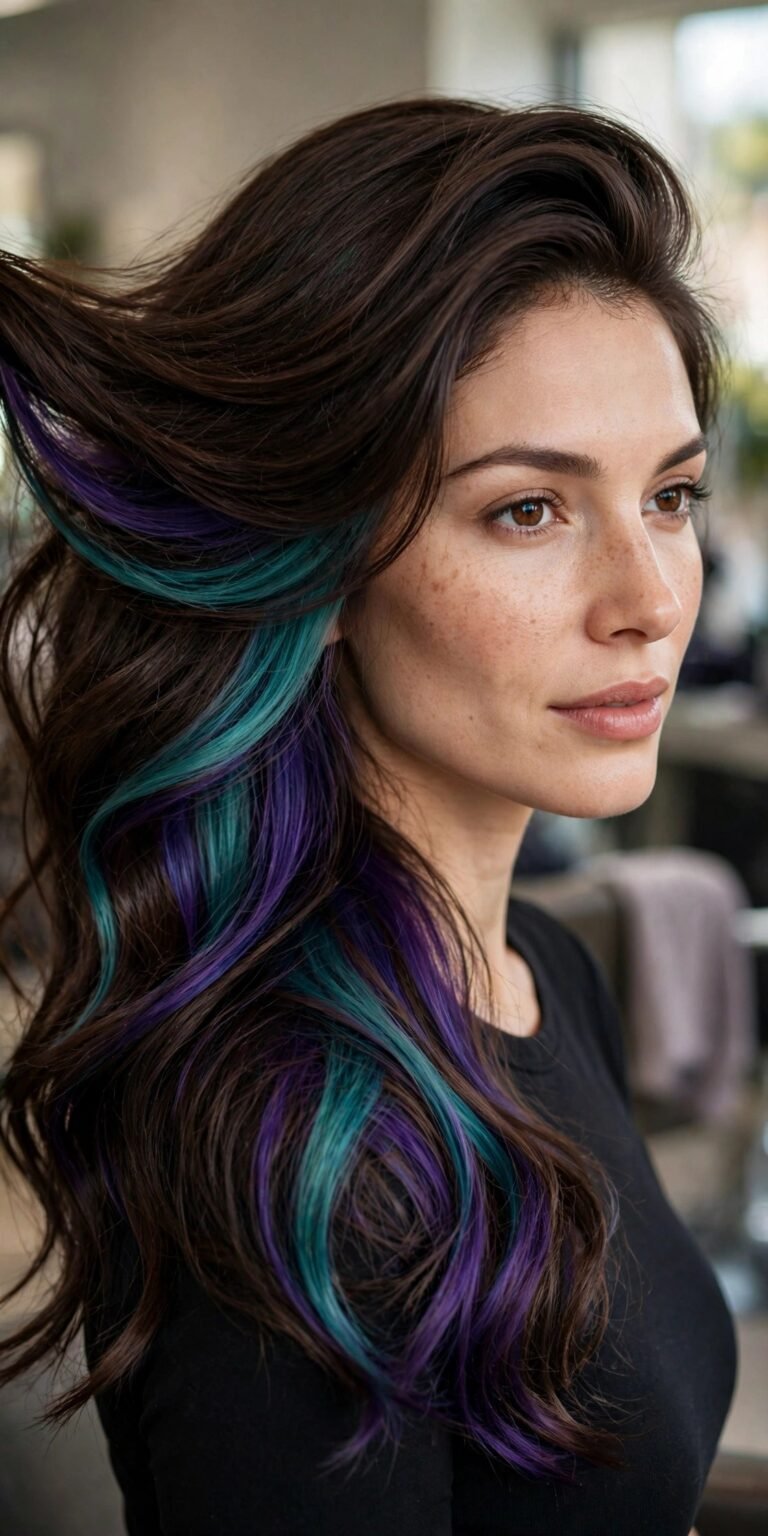
Kitty Cut Women 2026: 16 Soft Viral Layered Styles
The Kitty Cut: 2026’s Softest Viral Haircut
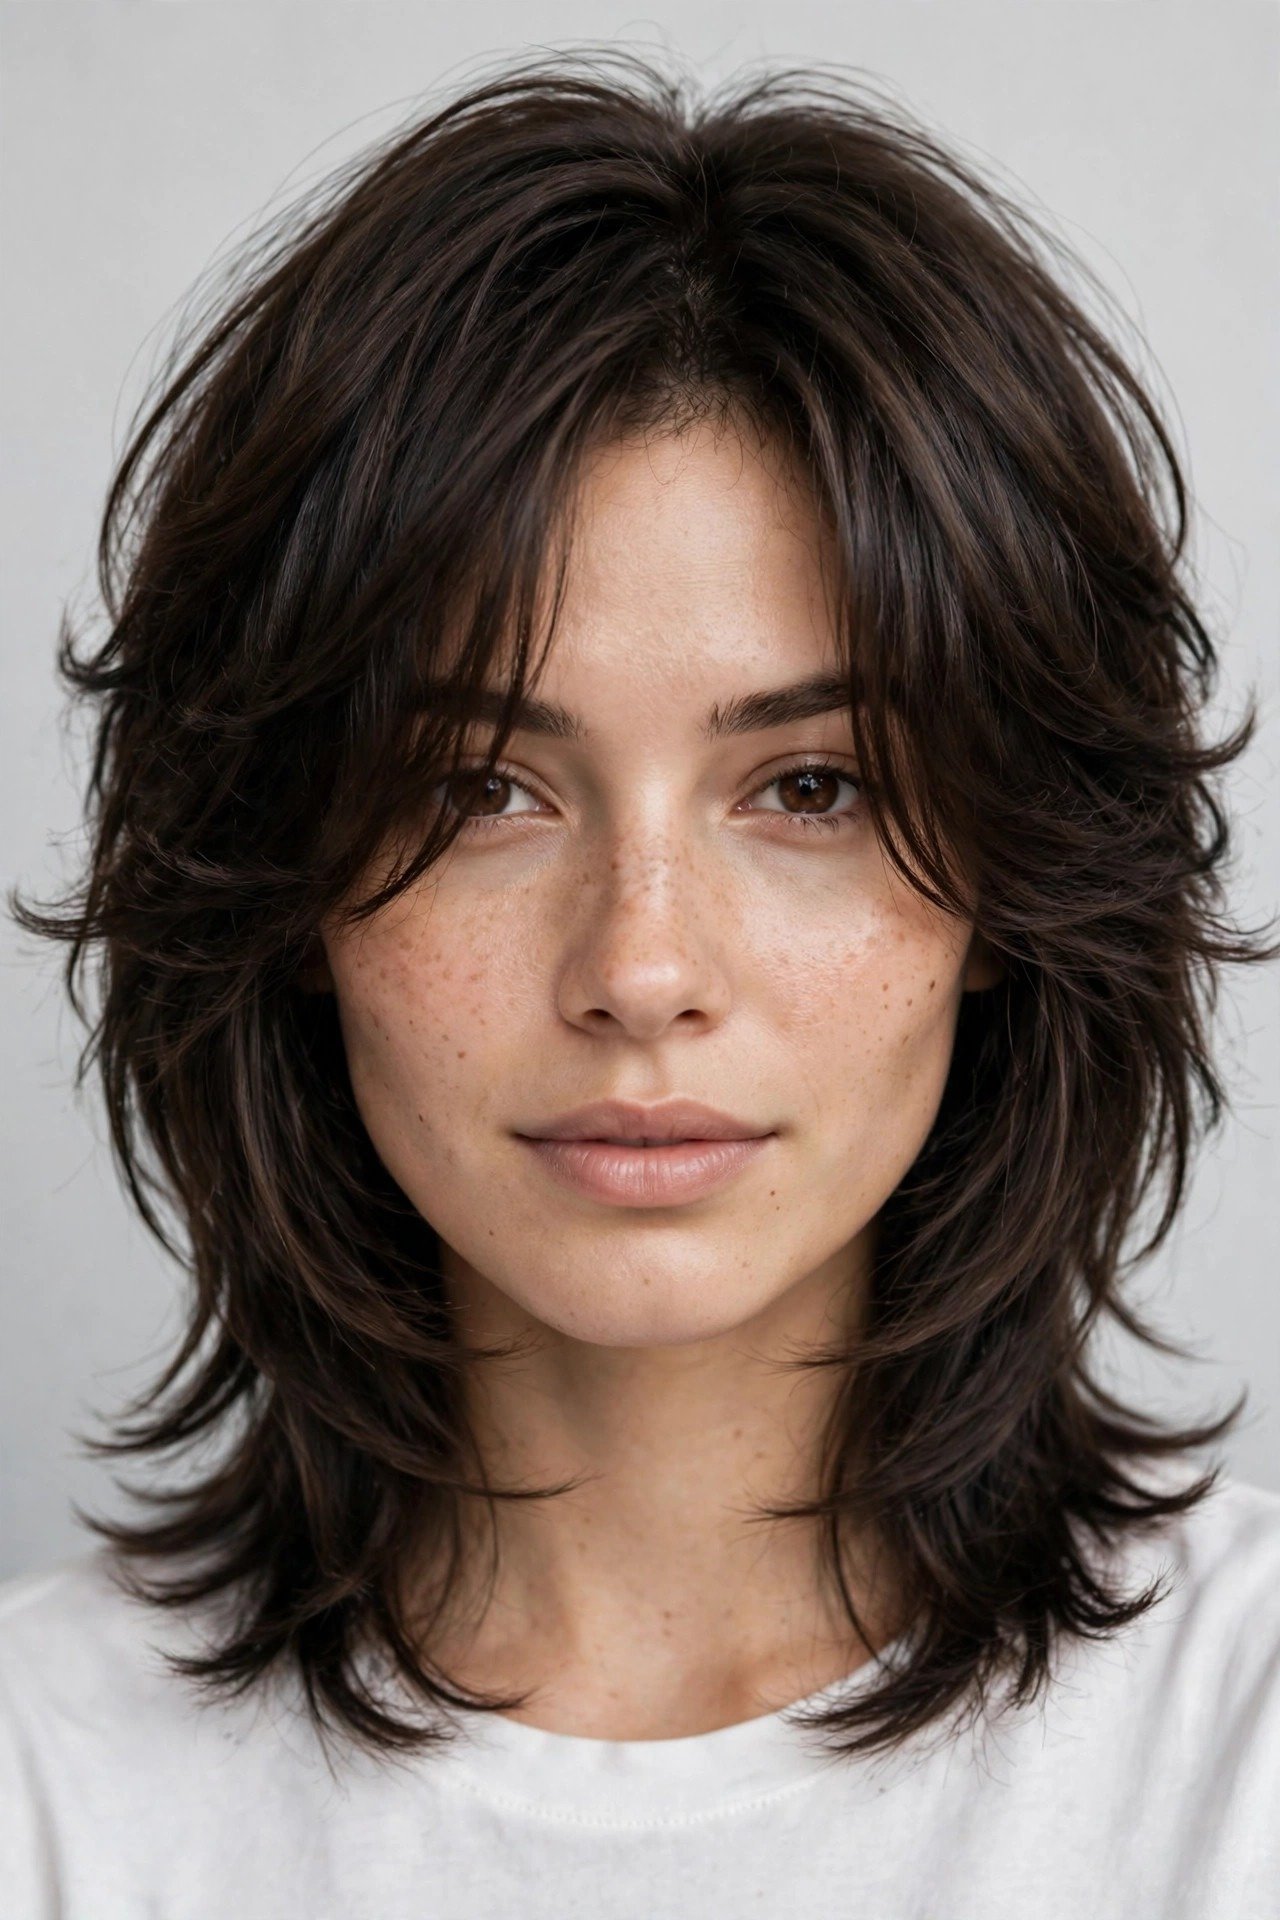
The kitty cut is the haircut that broke the internet’s brain in the gentlest possible way. After years of aggressive, high-contrast layering — the wolf cut’s shaggy rebellion, the butterfly cut’s dramatic wings — 2026 answered with a whisper: the kitty cut, a soft, seamless, feathery layered cut that moves like water and flatters like a filter. It went viral not because it shouts, but because it solves the problem every layered-cut lover secretly has: how to get movement and softness without the maintenance drama.
So what is the kitty cut, exactly? It is a medium-length layered haircut — typically falling between the collarbone and the chest — built from long, soft, blended layers with feathered ends and gentle face-framing. Unlike the wolf cut, which disconnects short crown layers from long lengths for deliberate contrast, the kitty cut’s layers graduate smoothly; unlike the butterfly cut, which creates distinct shorter “wings” around the face, the kitty cut’s face-framing melts into the overall shape. Think of it as the wolf cut’s well-mannered younger sister: all the movement, none of the edge.
This guide gives you sixteen kitty cut variations for 2026, each with the full professional breakdown: who it suits (face shape, hair texture, density), exactly what to tell your stylist so you get a kitty cut and not an accidental wolf cut, step-by-step styling for the signature soft movement, the products that create the feathered finish, maintenance schedules, and the mistakes that turn soft layers into stringy ones. You will also get the definitive kitty cut vs. wolf cut vs. butterfly cut comparison, so you can walk into the salon speaking fluent stylist.
One thing to understand upfront: the kitty cut’s softness is engineered, not accidental. Those seamless layers require a stylist who understands graduation and weight distribution — a choppy-layer specialist will give you a wolf cut wearing a kitty cut’s name tag. If you are exploring the layered-cut family, our wolf cut collection is the essential companion read: knowing the wolf cut’s architecture is what lets you articulate exactly how the kitty cut differs.
16 Soft Viral Kitty Cut Styles for 2026
Sixteen variations on softness — but first, the kitty cut litmus test. Show your stylist this sentence: “I want long, soft, blended layers with feathered ends and gentle face-framing — movement without disconnection, nothing choppy, nothing shaggy.” If they reach for the thinning shears with excitement, you are in the wrong chair. The kitty cut is cut primarily with scissors, blended meticulously, and finished to move as one fluid shape. Now, the sixteen.
1. The Classic Kitty Cut
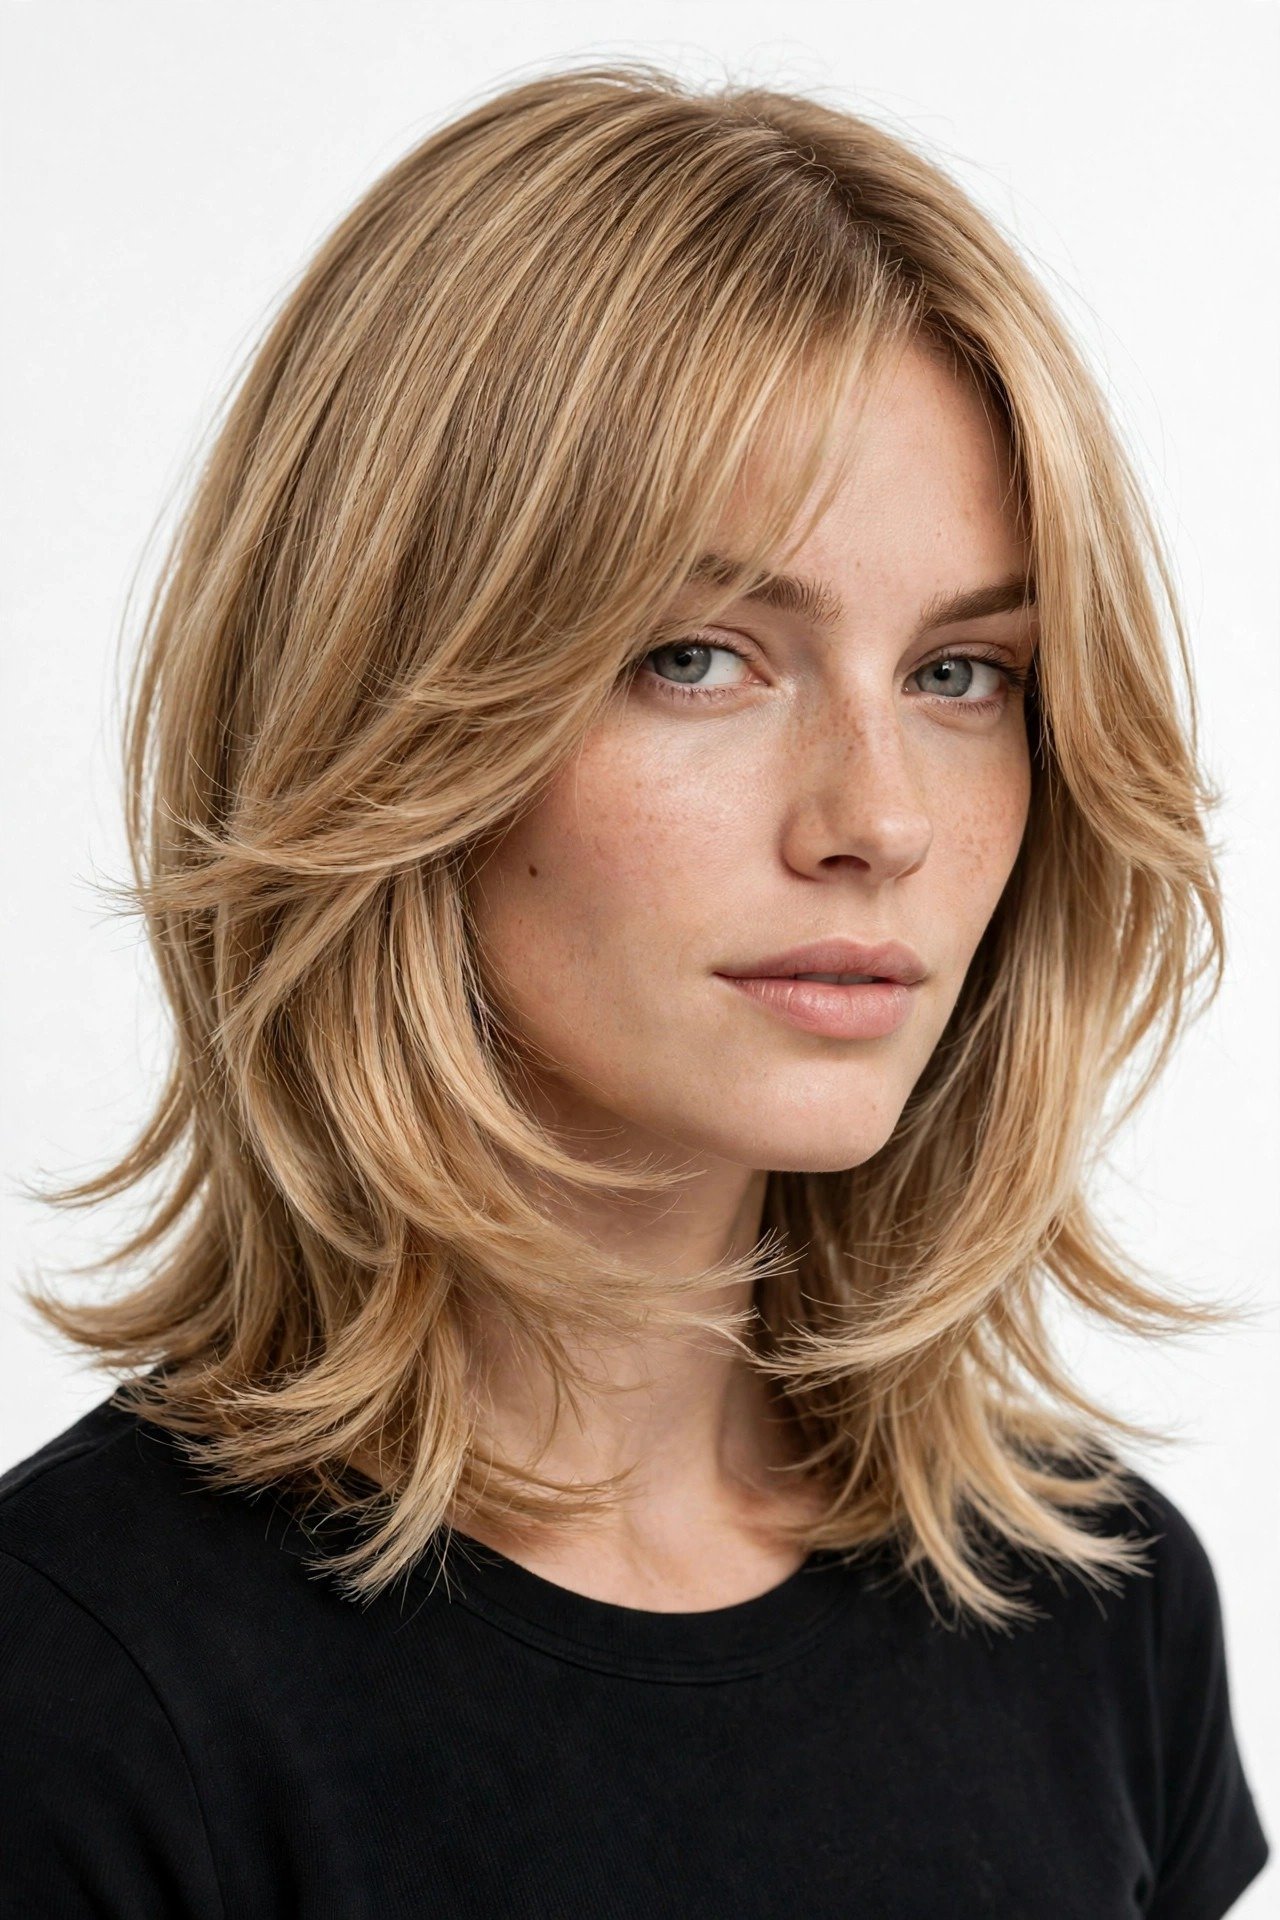
Who it suits: The classic kitty cut — collarbone to chest length, long blended layers, feathered ends, soft face-framing — is the most universally flattering layered cut of 2026. It suits oval, round, square, and heart faces because the face-framing can be adjusted to each: longer framing for round faces, curved framing for square jawlines. Medium-density straight to wavy hair (1B–2C) is the sweet spot; the cut’s softness shows best on hair with natural movement.
What to ask your stylist: “A kitty cut — long, soft, blended layers, length between collarbone and chest, feathered ends, gentle face-framing starting at the chin. No disconnection, no choppy layers, no thinning shears on the ends.” The “no thinning shears” instruction matters: some stylists thin the ends of every layered cut by habit, but the kitty cut’s feathered finish comes from point-cutting, not thinning — thinned ends look wispy, point-cut ends look soft.
Step-by-step styling: 1) Apply a smoothing blowout cream to damp hair. 2) Blow-dry with a large round brush, turning the brush at the ends to create the signature soft bend — the kitty cut’s movement comes from this bend, not from irons. 3) Direct the face-framing sections forward and under for the feathered curve. 4) Once dry, touch up only the face frame with a 1.5-inch iron if needed. 5) Finish with a light serum on the ends — the feathered finish needs separation without frizz.
Products: Smoothing blowout cream, large round brush, 1.5-inch iron (for touch-ups only), light serum. The kitty cut is a blowout cut — the dryer and brush do 80% of the work.
Maintenance: Trims every 8–10 weeks — the blended layers grow out gracefully, which is the cut’s great practical virtue. Refresh the face-framing every 6 weeks if it grows past its sweet spot.
Common mistakes: Asking for “layers” without specifying soft and blended (you’ll get a wolf cut); letting a stylist thin the ends (wispy, not feathered); and flat-ironing the whole cut straight daily — the kitty cut needs its soft bend, and pin-straight styling erases its identity.
2. The Kitty Cut with Curtain Bangs
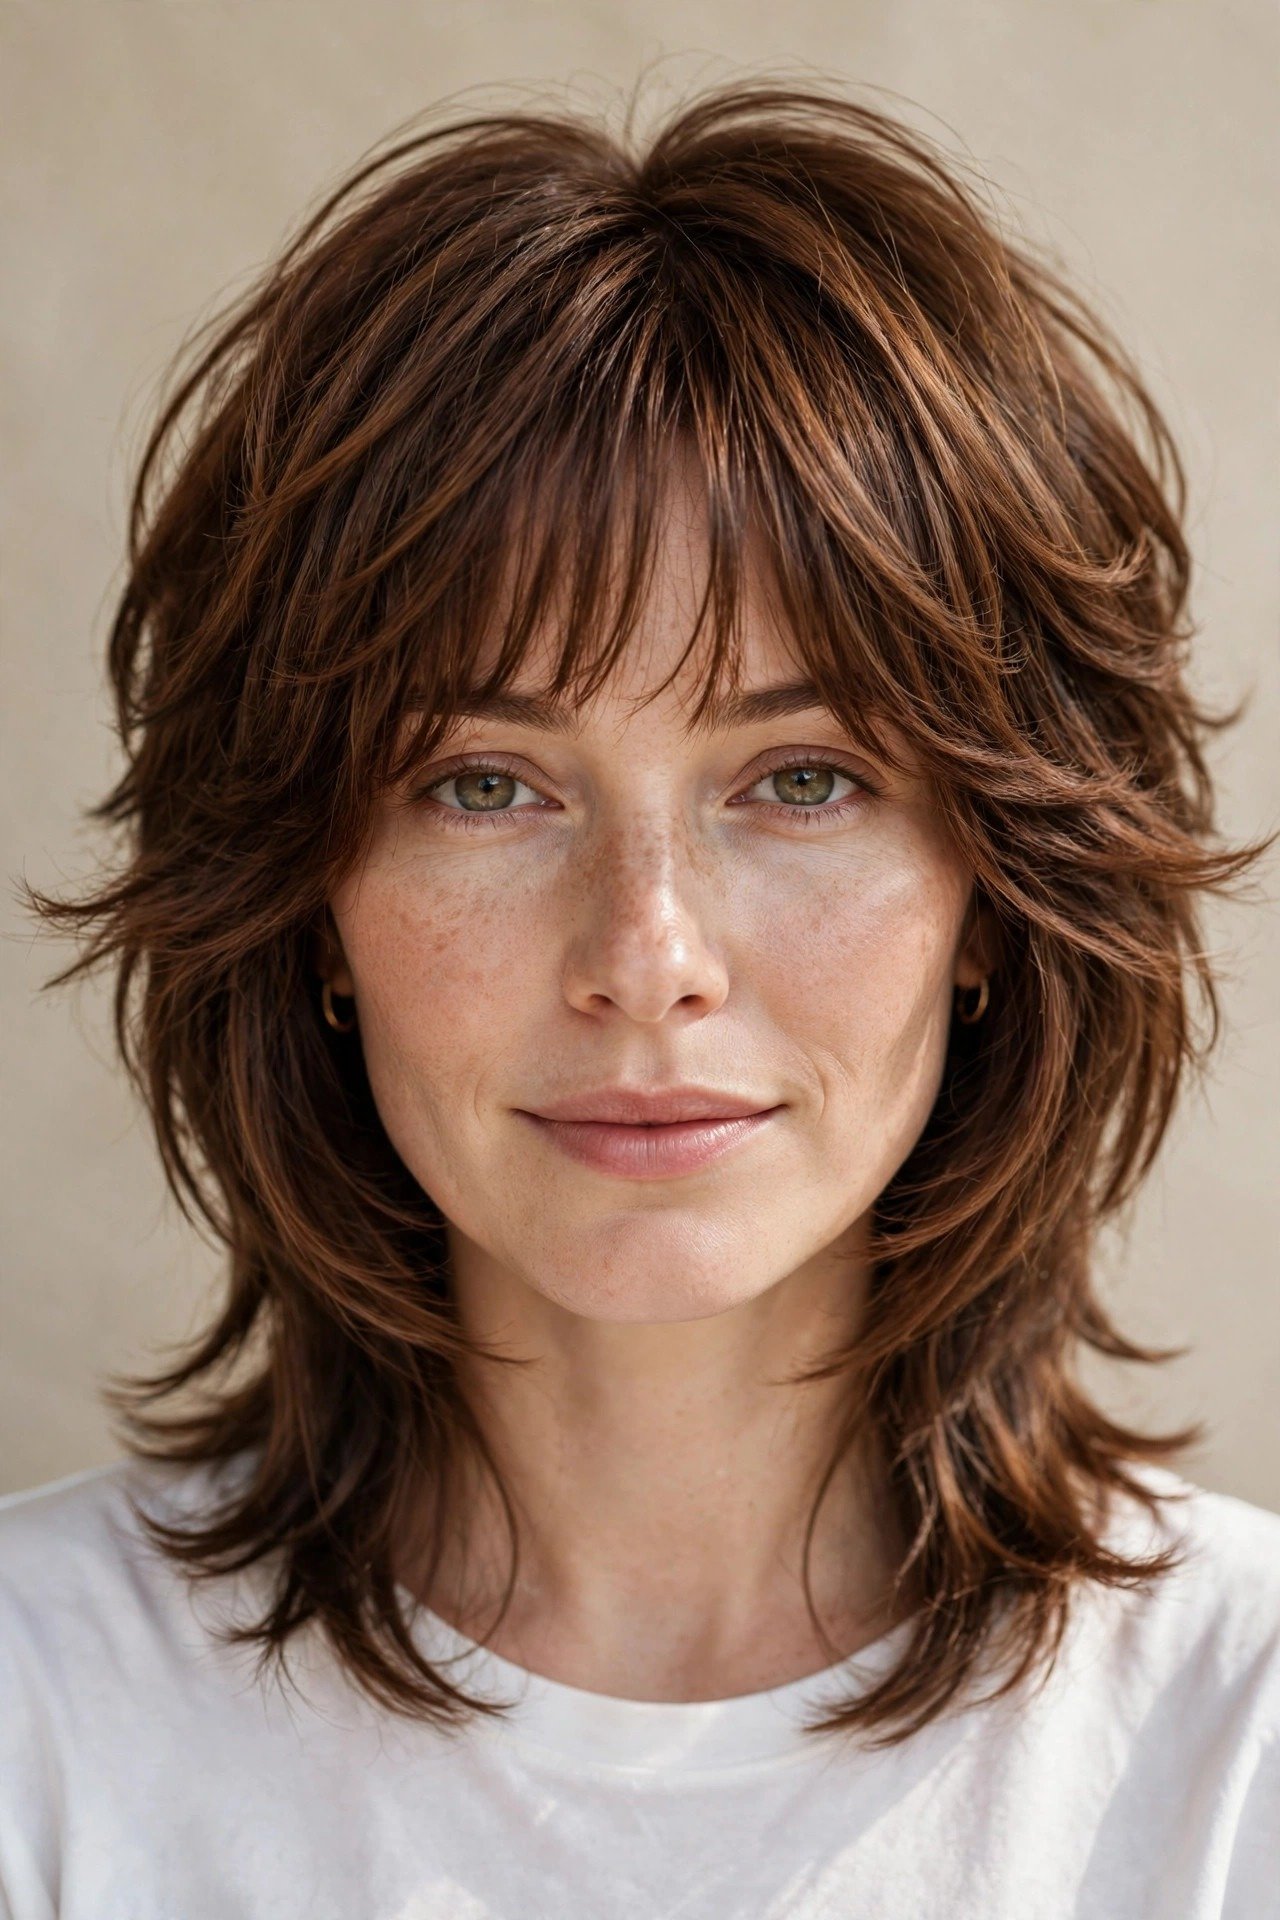
Who it suits: Curtain bangs are the kitty cut’s soulmate — the parted fringe flows directly into the face-framing layers, creating one continuous soft line from forehead to chest. It suits high foreheads and long faces (the bangs shorten visually), and it is the best kitty cut for fine hair, because the bangs add density illusion at the front where fine hair looks sparsest.
What to ask your stylist: “A kitty cut with curtain bangs that blend into the face-framing — bangs parted in the center, curving from cheekbone into the layers.” Ask for the bangs to be cut to connect: the shortest bang piece should meet the longest face-framing layer with no gap. Specify the bang length (cheekbone is classic) and ask for them to be cut dry so the fall is accurate.
Step-by-step styling: 1) Style the bangs first: blow-dry with a round brush, curving away from the face on each side. 2) Blow-dry the kitty cut’s lengths with the large round brush, bending the ends under. 3) Connect the bangs to the layers by directing the bang ends into the face-framing curve. 4) Set the bangs with flexible spray — they move independently and need their own hold.
Products: Round brush (medium for bangs, large for lengths), blowout cream, flexible spray, dry shampoo for the bangs (they need it every 1–2 days).
Maintenance: Cut trims every 8–10 weeks; bang trims every 4–6 weeks to keep the blend. The bangs are the only high-maintenance element — everything else grows out softly.
Common mistakes: Cutting bangs that don’t connect to the layers (two separate haircuts sharing a head); styling bangs flat while the layers are bouncy (the textures must match); and growing the bangs out without reshaping — they become awkward mid-length pieces instead of flowing into the cut.
3. The Long Kitty Cut
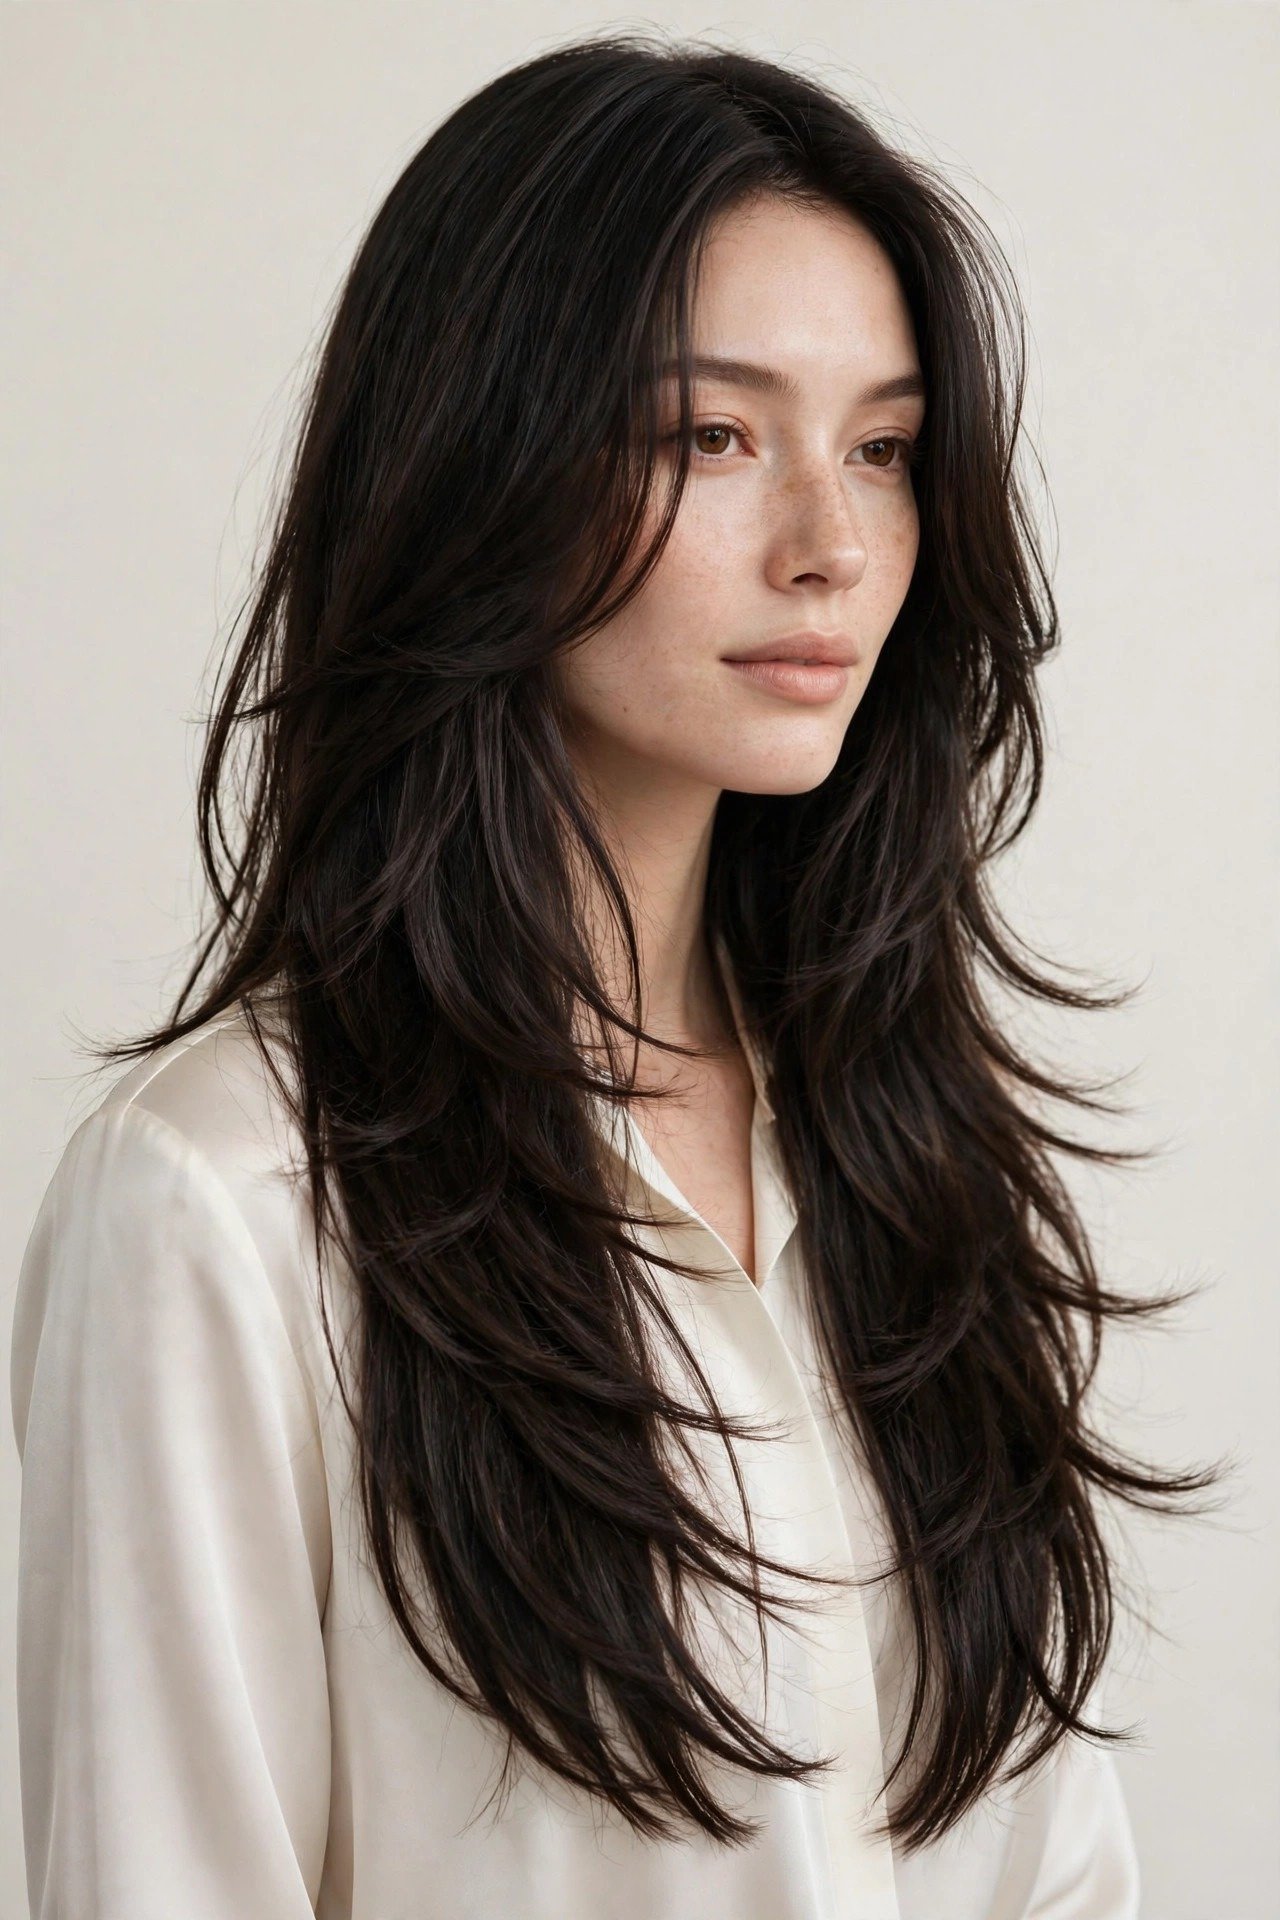
Who it suits: The long kitty cut extends the philosophy to waist-adjacent lengths — soft, blended layers on long hair that move as one fluid mass. It suits women who won’t sacrifice length but want the kitty cut’s softness; thick hair especially, because long layers remove weight without the choppiness of a wolf cut. All face shapes work — the length gives the stylist room to customize the framing.
What to ask your stylist: “A long kitty cut — keep my length, add long soft blended layers starting at the collarbone, feathered ends, face-framing that blends.” Specify where the shortest layer starts: collarbone is the kitty cut standard; higher starts drifting toward butterfly territory. Ask for the layers to be cut to encourage the hair to fall forward over the shoulders — long kitty cuts look best worn forward, not pushed back.
Step-by-step styling: 1) Apply blowout cream and a heat protectant. 2) Blow-dry in sections with the large round brush — long hair needs sectioning or the underlayers stay damp. 3) Create the soft bend at the ends of each section. 4) For extra movement, wrap the face-framing sections around a 1.5-inch iron away from the face. 5) Serum on the ends, light spray overall.
Products: Blowout cream, heat protectant, large round brush, 1.5-inch iron, serum. Long hair drinks product — don’t under-apply.
Maintenance: Trims every 10–12 weeks — long layered cuts are the most grow-out-forgiving. Dust the ends between cuts if they start looking thin.
Common mistakes: Layering too high (the cut becomes a butterfly — keep the shortest layer at collarbone or below); under-drying the underlayers (damp underlayers = frizz and collapse by noon); and skipping heat protectant on the lengths — long hair’s ends are years old and need protection.
4. The Short Kitty Cut
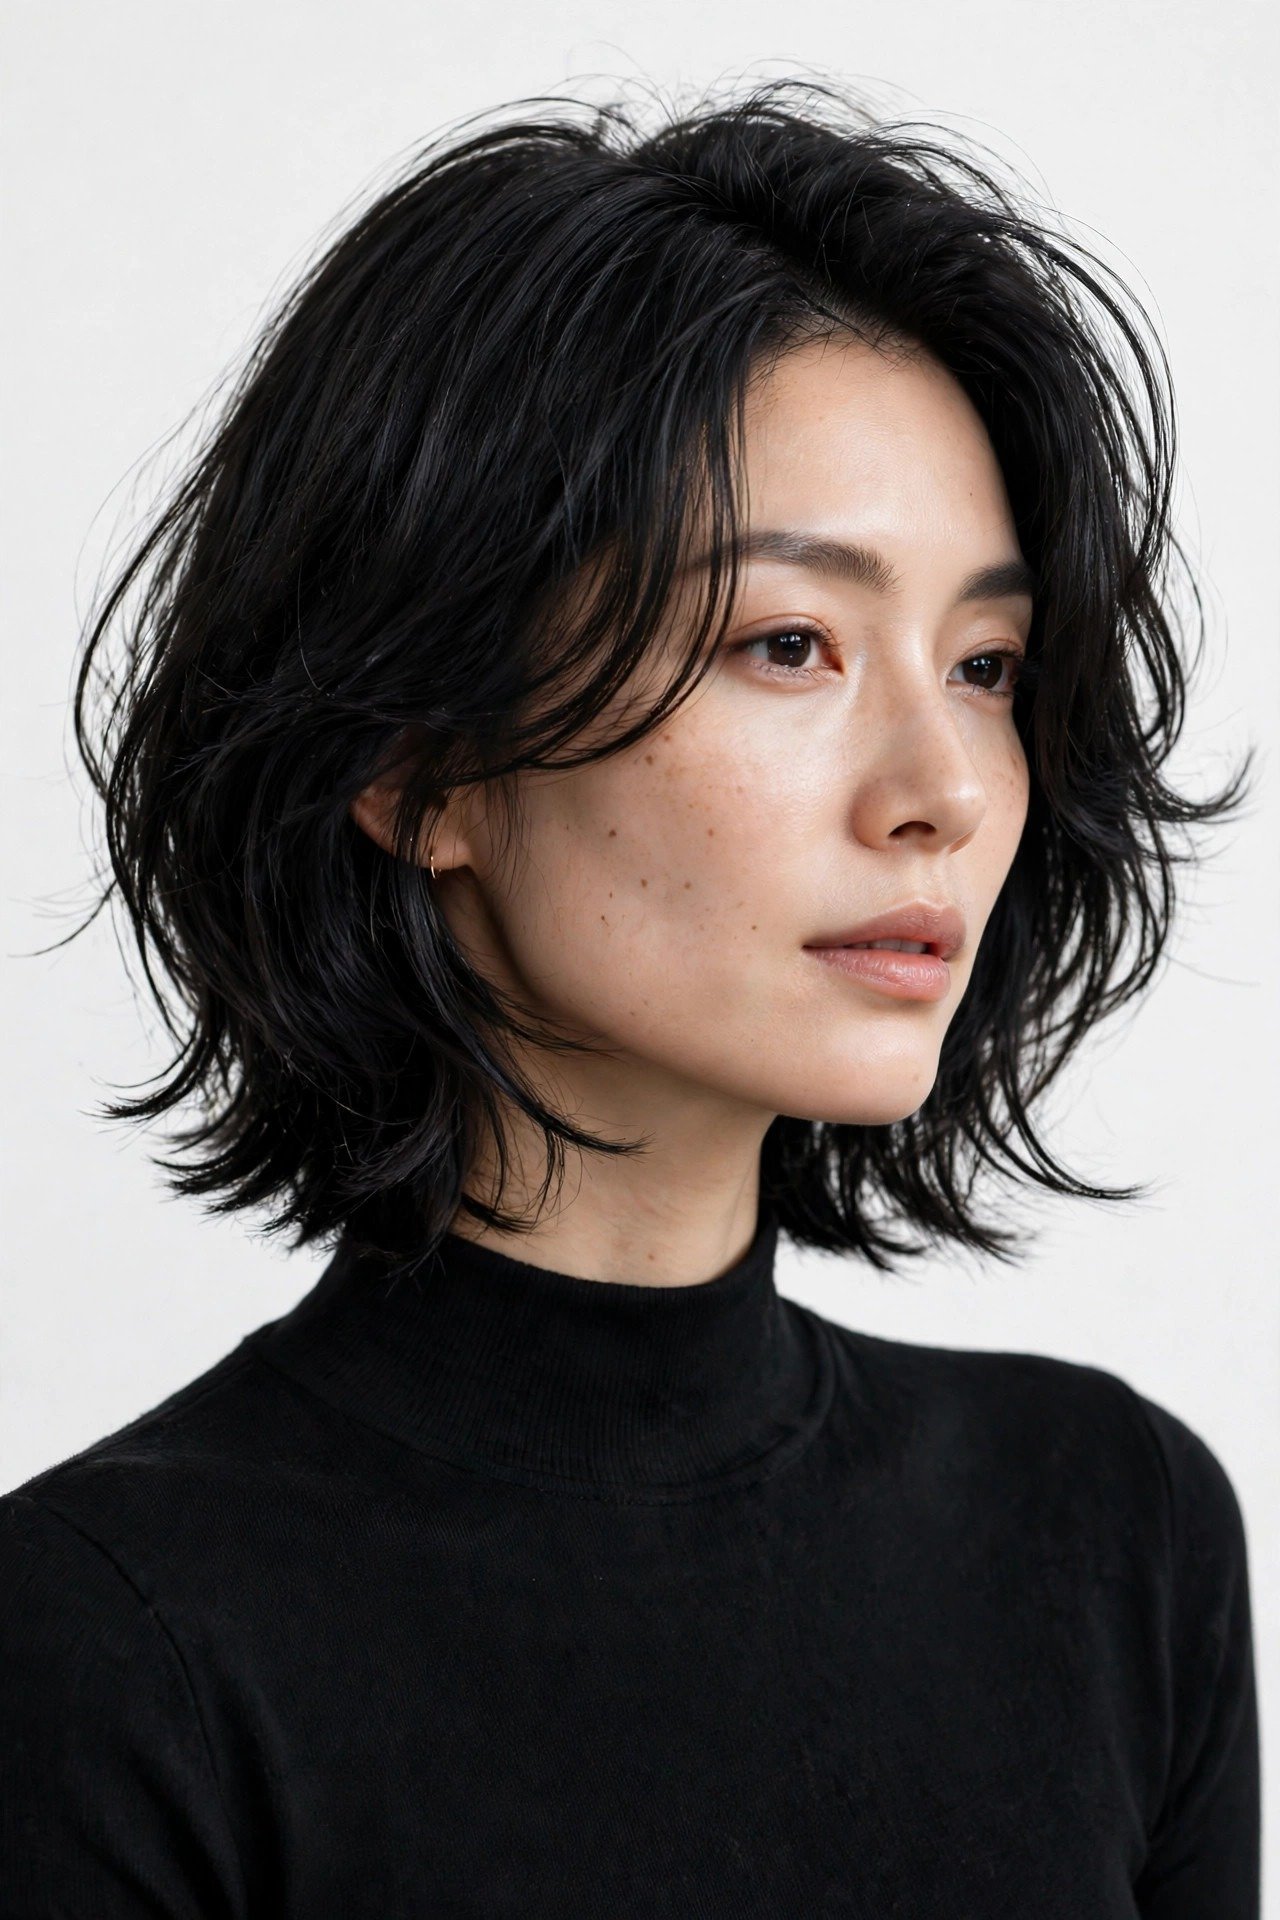
Who it suits: The short kitty cut compresses the philosophy to collarbone length — a soft, bouncy, feathered cut that sits between a bob and a mid-length. It suits petite women (the proportions flatter smaller frames), fine to medium hair (the shorter length creates bounce that longer lengths can’t), and round faces (the collarbone length elongates). It is the lowest-commitment entry into the kitty cut family.
What to ask your stylist: “A short kitty cut — collarbone length, soft blended layers, feathered ends, face-framing from the chin.” Ask for the back to be cut slightly shorter than the front (a whisper of graduation, not an inverted bob) — this creates the forward-falling movement that defines the short version. Specify bounce: “I want it to move and bounce, not lie flat.”
Step-by-step styling: 1) Apply volumizing mousse at the roots. 2) Blow-dry with the large round brush, lifting at the roots and bending the ends under — the short kitty cut is all about the bouncy blowout. 3) Flip your head upside down and blast the roots for extra lift, then flip back and smooth the surface. 4) Light serum on the ends only — keep product off the roots or the bounce collapses.
Products: Volumizing mousse, large round brush, light serum (ends only), flexible spray. Root lift is the style’s engine.
Maintenance: Trims every 6–8 weeks — the collarbone length grows out into an awkward mid-length faster than longer versions. The bounce depends on the cut’s freshness.
Common mistakes: Cutting it to bob length (that’s a layered bob, not a short kitty cut — the kitty needs collarbone length to show its layering); over-layering (too many short layers at this length = shag, not kitty); and weighing it down with heavy products — the short kitty cut must stay light to bounce.
5. The Kitty Cut with Face-Framing Highlights

Who it suits: Face-framing highlights (the brighter, more blended cousin of the money piece) electrify the kitty cut’s softness with light exactly where the layers move most. It suits dark bases — brunette, black, deep brown — where the contrast sculpts the face, and it flatters every face shape because the brightness follows the framing’s curve. If your kitty cut feels one-dimensional, this is the fastest upgrade.
What to ask your colorist: “Soft face-framing highlights on my kitty cut — brightness concentrated around the face, melting into the base, no harsh lines.” Specify the tone (honey, caramel, beige-blonde) and the intensity: “kissed” (subtle) versus “bold” (high contrast). Ask for the highlights to be placed to follow the face-framing layers — the color should move with the cut, not sit on top of it. Get the color after the cut so the brightness follows the finished shape.
Step-by-step styling: 1) Style the kitty cut with the signature blowout. 2) The highlighted pieces need extra gloss: apply shine serum specifically to the face-framing sections. 3) When touching up with the iron, run it over the highlighted pieces last — they should be the smoothest, glossiest part. 4) Weekly toning treatment keeps the brightness from going brassy.
Products: Color-safe shampoo, weekly toning mask, shine serum, heat protectant. Highlighted hair is more porous — it needs more moisture than the uncolored lengths.
Maintenance: Toner refresh every 6–8 weeks; highlight touch-up every 10–14 weeks. Face-framing highlights grow out more gracefully than full foils — the brightness diffuses softly.
Common mistakes: Going too chunky (the kitty cut’s softness demands blended, not striped, brightness); skipping toner (brassy face-framers cheapen the cut); and highlighting before the cut is finalized — the color must follow the finished layering. For more dimensional color ideas, explore our butterfly haircut guide, which pairs beautifully with face-framing color.
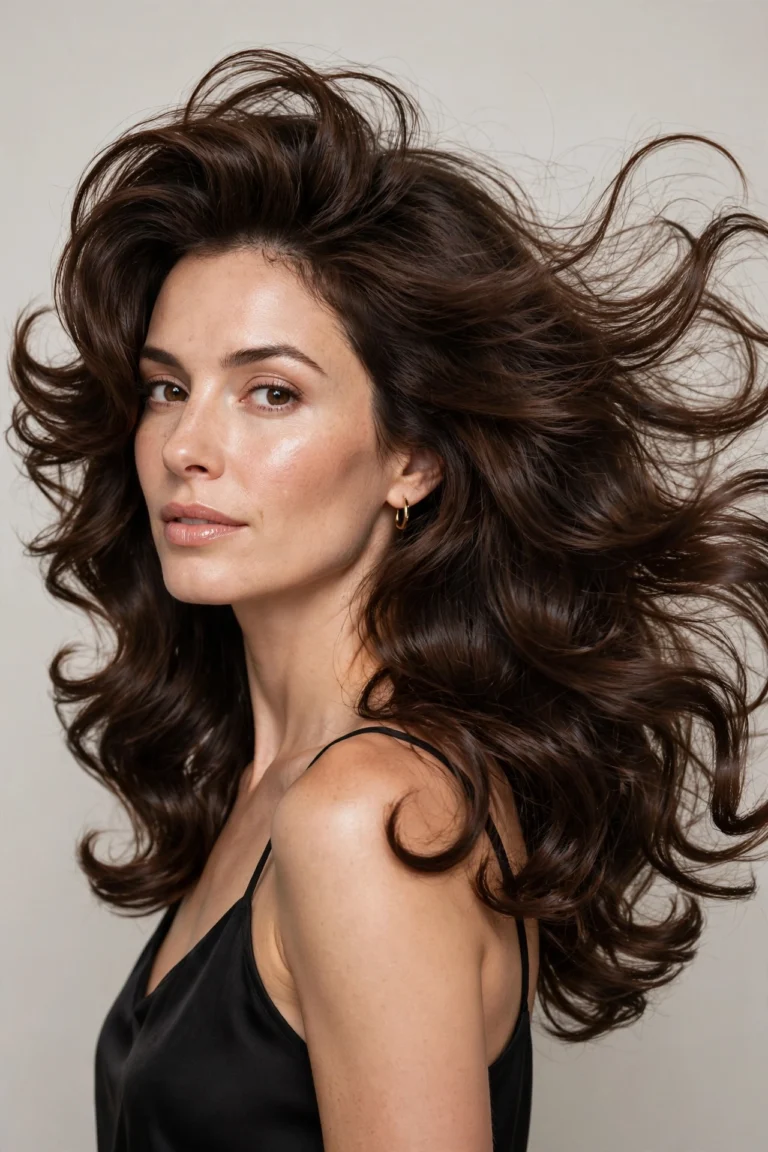
6. The Voluminous Bouncy Kitty Cut
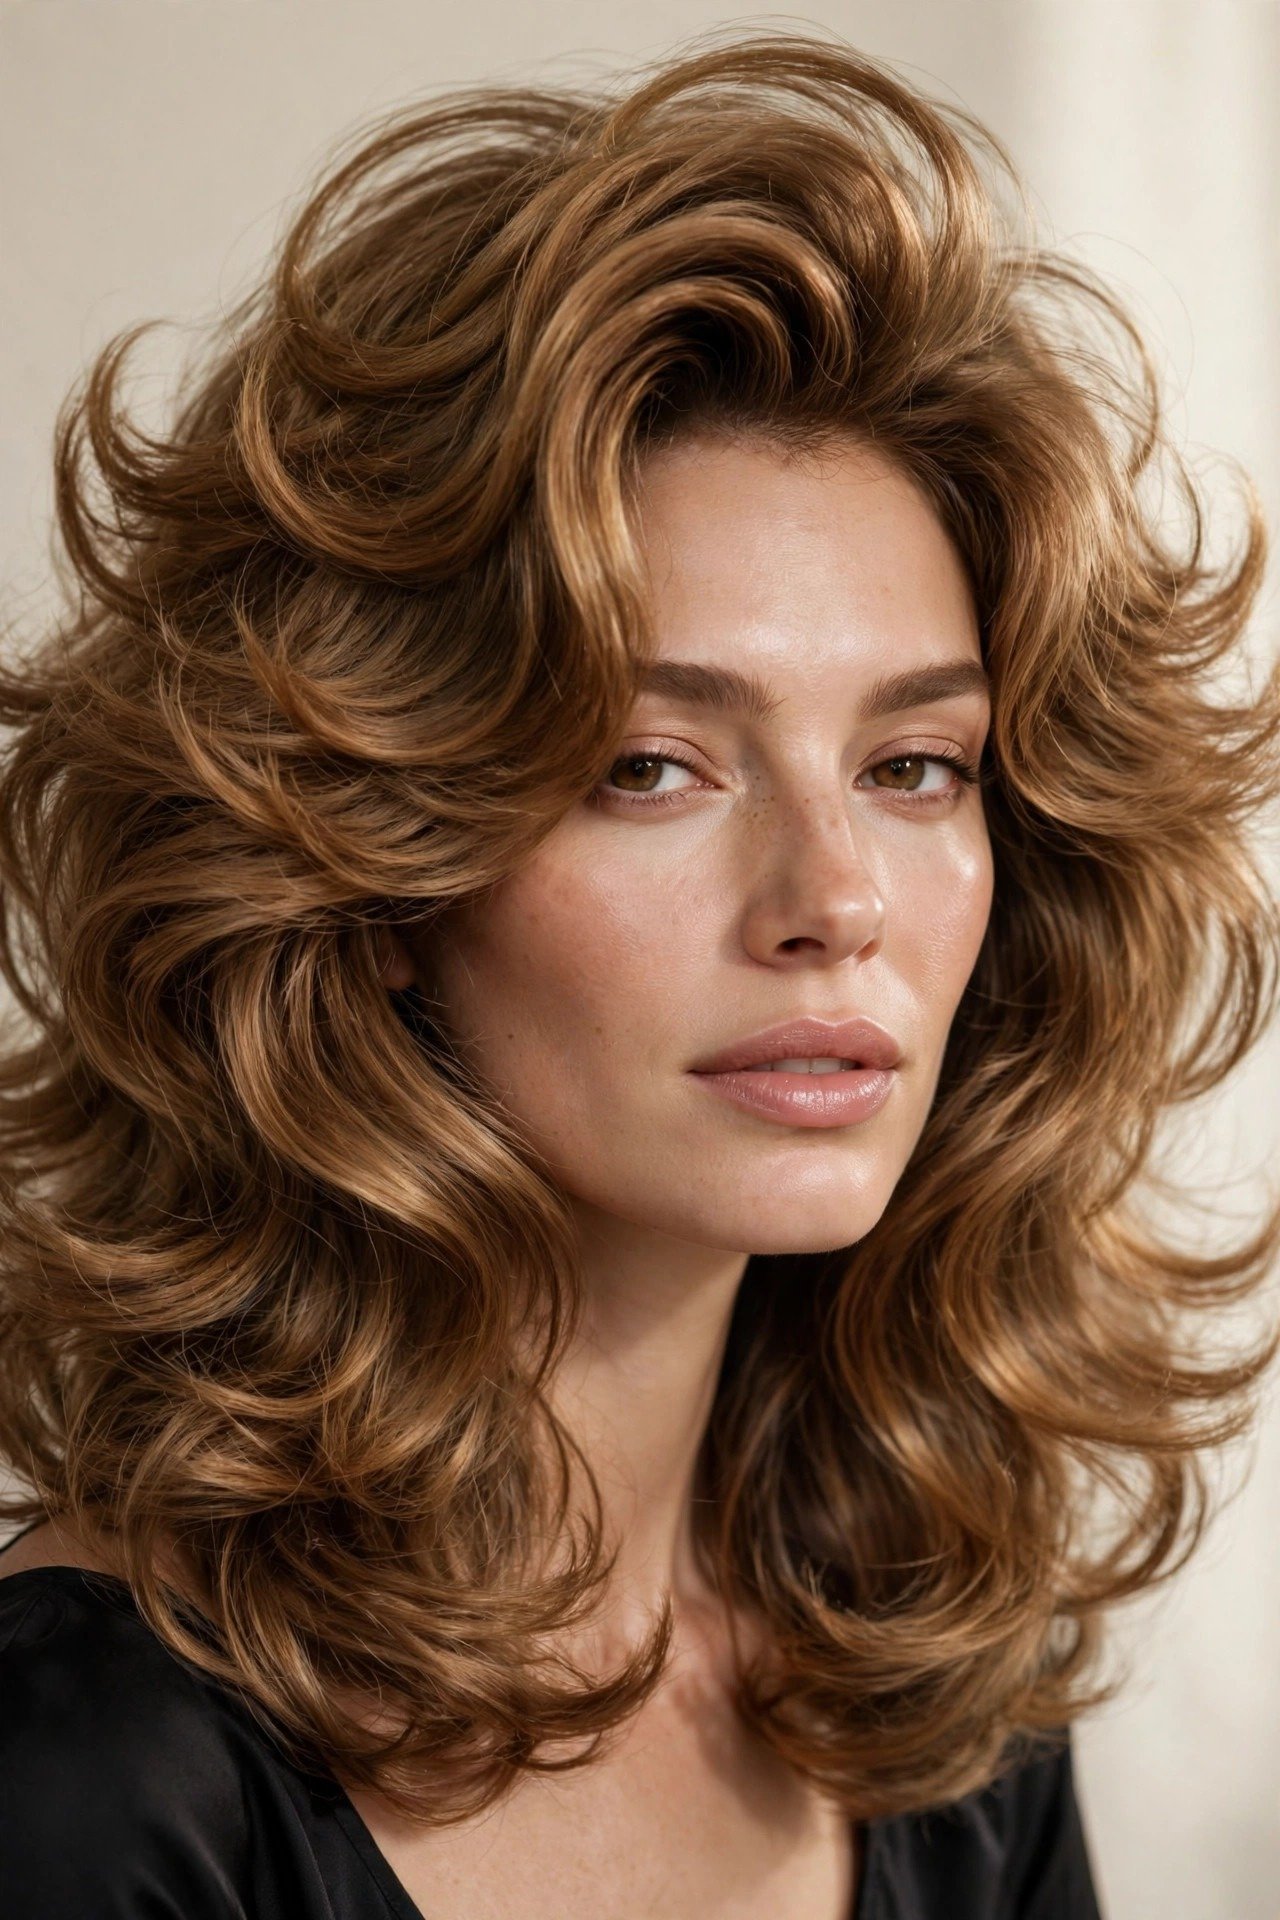
Who it suits: The bouncy kitty cut maximizes the cut’s natural volume — big, soft, supermodel blowout energy on the kitty cut’s seamless layers. It suits medium to thick hair with natural body; fine hair can achieve it with the right prep but won’t hold it as long. Oval and heart faces wear the volume best; on round faces, keep the volume at the ends rather than the sides to avoid widening.
What to ask your stylist: “A kitty cut styled for maximum bounce — layers cut to encourage lift, and please show me the blowout technique.” The cut itself is the classic kitty cut; the bounce is 70% styling. Ask your stylist to teach you the round-brush method during the appointment — a five-minute lesson that pays off for months. Ask whether your hair needs long layers or medium layers for bounce: finer hair bounces better with slightly shorter layers.
Step-by-step styling: 1) Apply volumizing mousse generously to damp roots and a blowout cream to the lengths. 2) Rough-dry to 80%, then switch to the large round brush. 3) Working in sections, wrap hair around the brush, blast with heat, then — the pro secret — leave each section wrapped around the brush to cool for 30 seconds before releasing. Cooling sets the bend. 4) Once all sections are done, flip your head upside down, shake gently, and flip back. 5) Finish with flexible spray — never strong hold, which kills bounce.
Products: Volumizing mousse, blowout cream, large round brush, flexible-hold spray. Velcro rollers on the crown (10 minutes while you do makeup) add next-level volume.
Maintenance: The cut needs trims every 8–10 weeks; the bounce is daily styling. Second-day bounce refreshes with dry shampoo at the roots and a quick round-brush touch-up on the face frame.
Common mistakes: Releasing brush sections while still hot (the bend falls out immediately — cooling is structural); using strong-hold spray (bounce needs flexibility); and overloading the ends with serum (heavy ends drag the bounce down — serum on the last inch only).
7. The Kitty Cut for Thick Hair
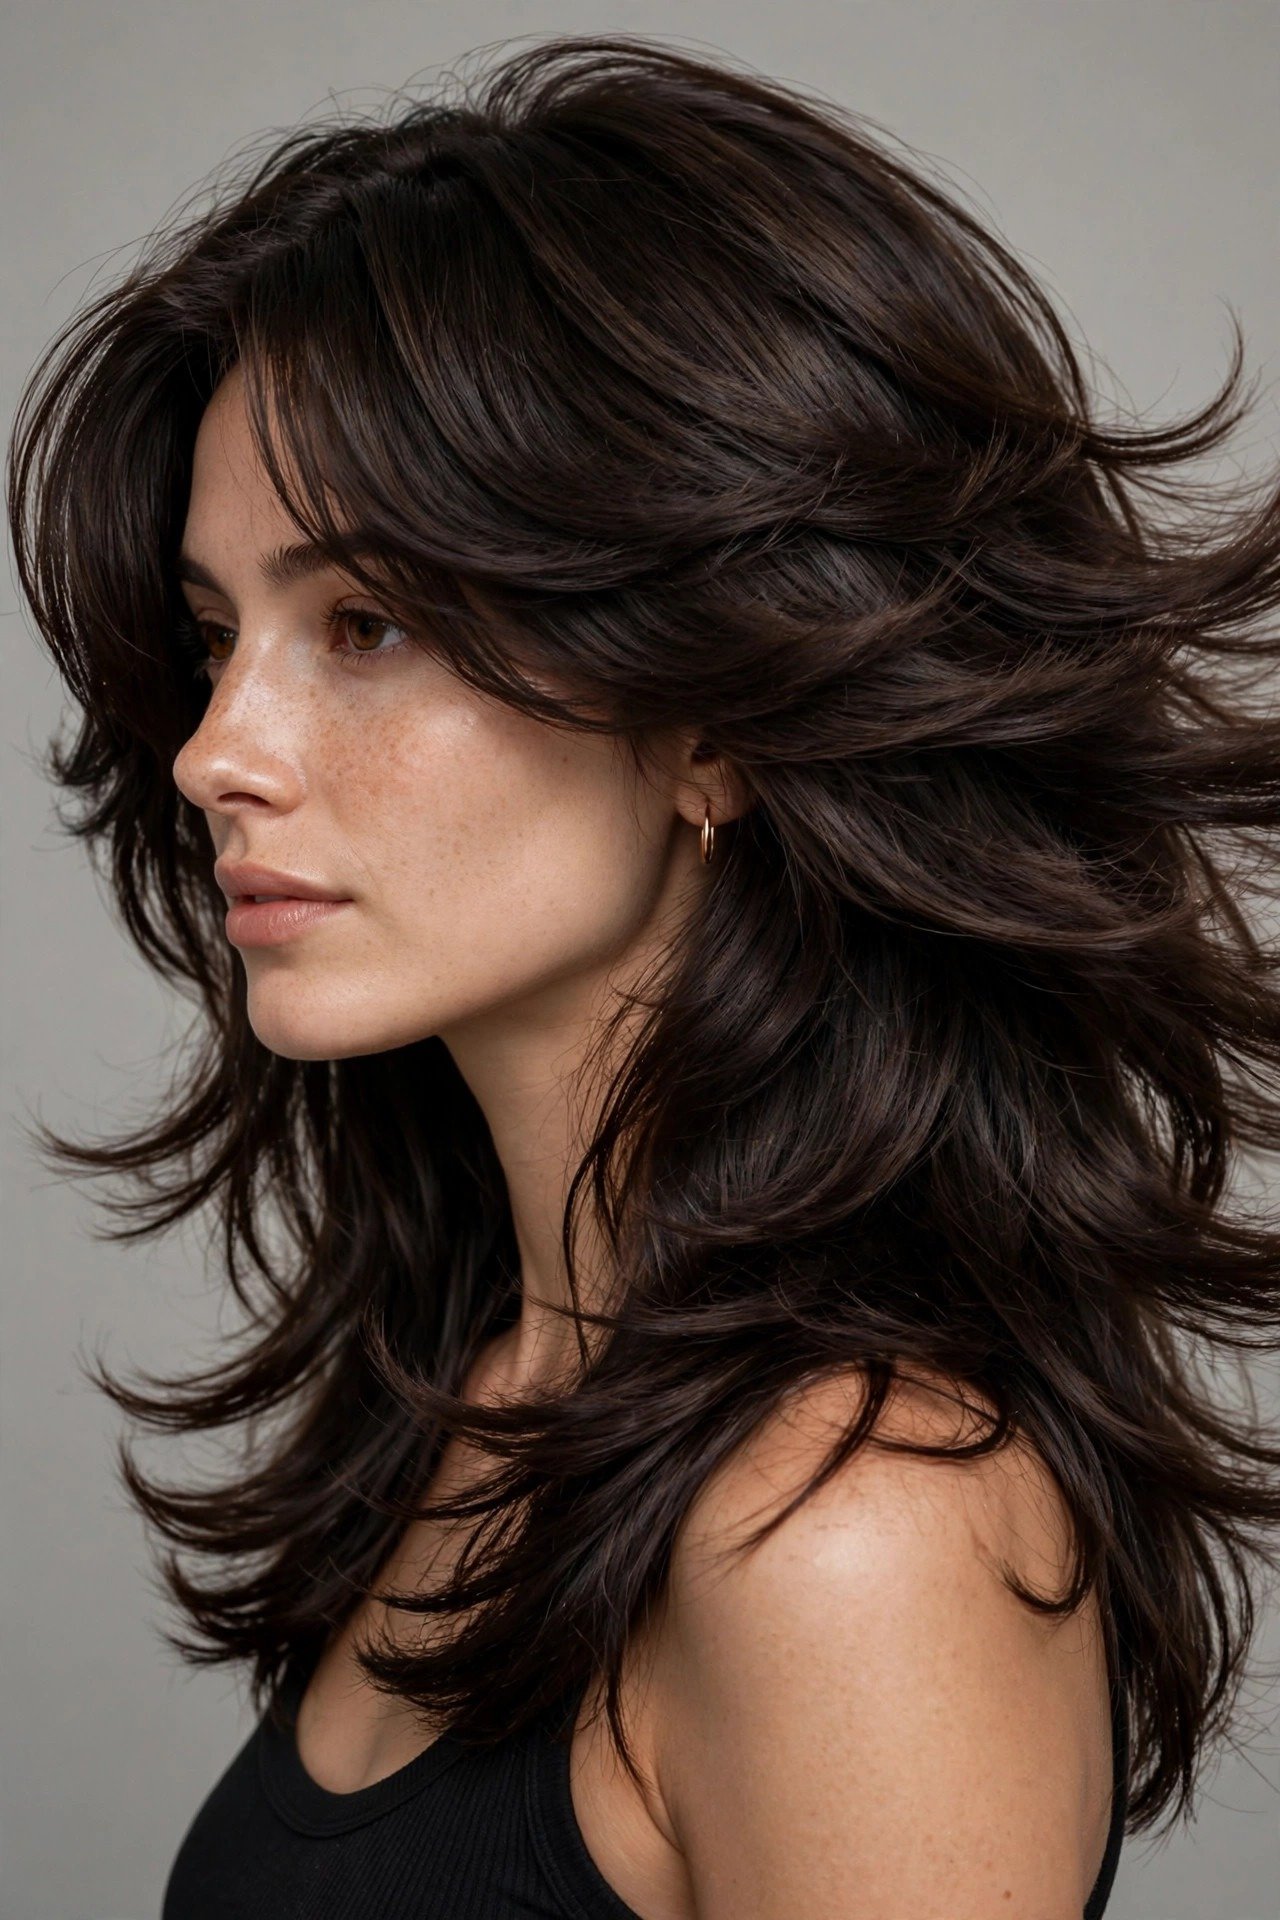
Who it suits: Thick, dense hair is the kitty cut’s secret best friend — the cut’s long blended layers remove weight while keeping the luxurious fullness. It suits anyone whose hair overwhelms most cuts: the kitty cut’s graduation distributes density so the hair moves instead of sitting like a curtain. All face shapes work; the stylist adjusts the framing.
What to ask your stylist: “A kitty cut for thick hair — long blended layers to remove weight, interior layering to create movement, but keep the perimeter full.” The critical instruction: remove weight without removing length or creating visible steps. Ask whether they recommend slide-cutting for the interior (it removes bulk while keeping the surface smooth) — on thick hair, this technique is transformative. Specify that you want the ends to look thick, not thinned — weight removal happens in the interior, not at the perimeter.
Step-by-step styling: 1) Thick hair must be sectioned for blow-drying — work in four quadrants or the underlayers stay damp. 2) Apply smoothing cream generously; thick hair drinks product. 3) Blow-dry each section with the large round brush, bending the ends. 4) The face-framing sections get extra attention — they’re the visible part. 5) Finish with serum on the mid-lengths and ends to control the volume.
Products: Smoothing cream (generous amount), large round brush, serum, light oil for the ends. Thick hair needs more of everything — don’t under-apply.
Maintenance: Trims every 8–10 weeks; interior weight may need refreshing at 6 weeks if the hair starts feeling heavy. The perimeter stays full longer on thick hair.
Common mistakes: Thinning the ends (destroys the kitty cut’s lush perimeter — thin the interior instead); under-sectioning during blow-dry (damp underlayers collapse the style); and choosing a stylist who fears thick hair — you need someone who reaches for the slide-cutting technique with confidence, not hesitation.
8. The Fine-Hair Kitty Cut
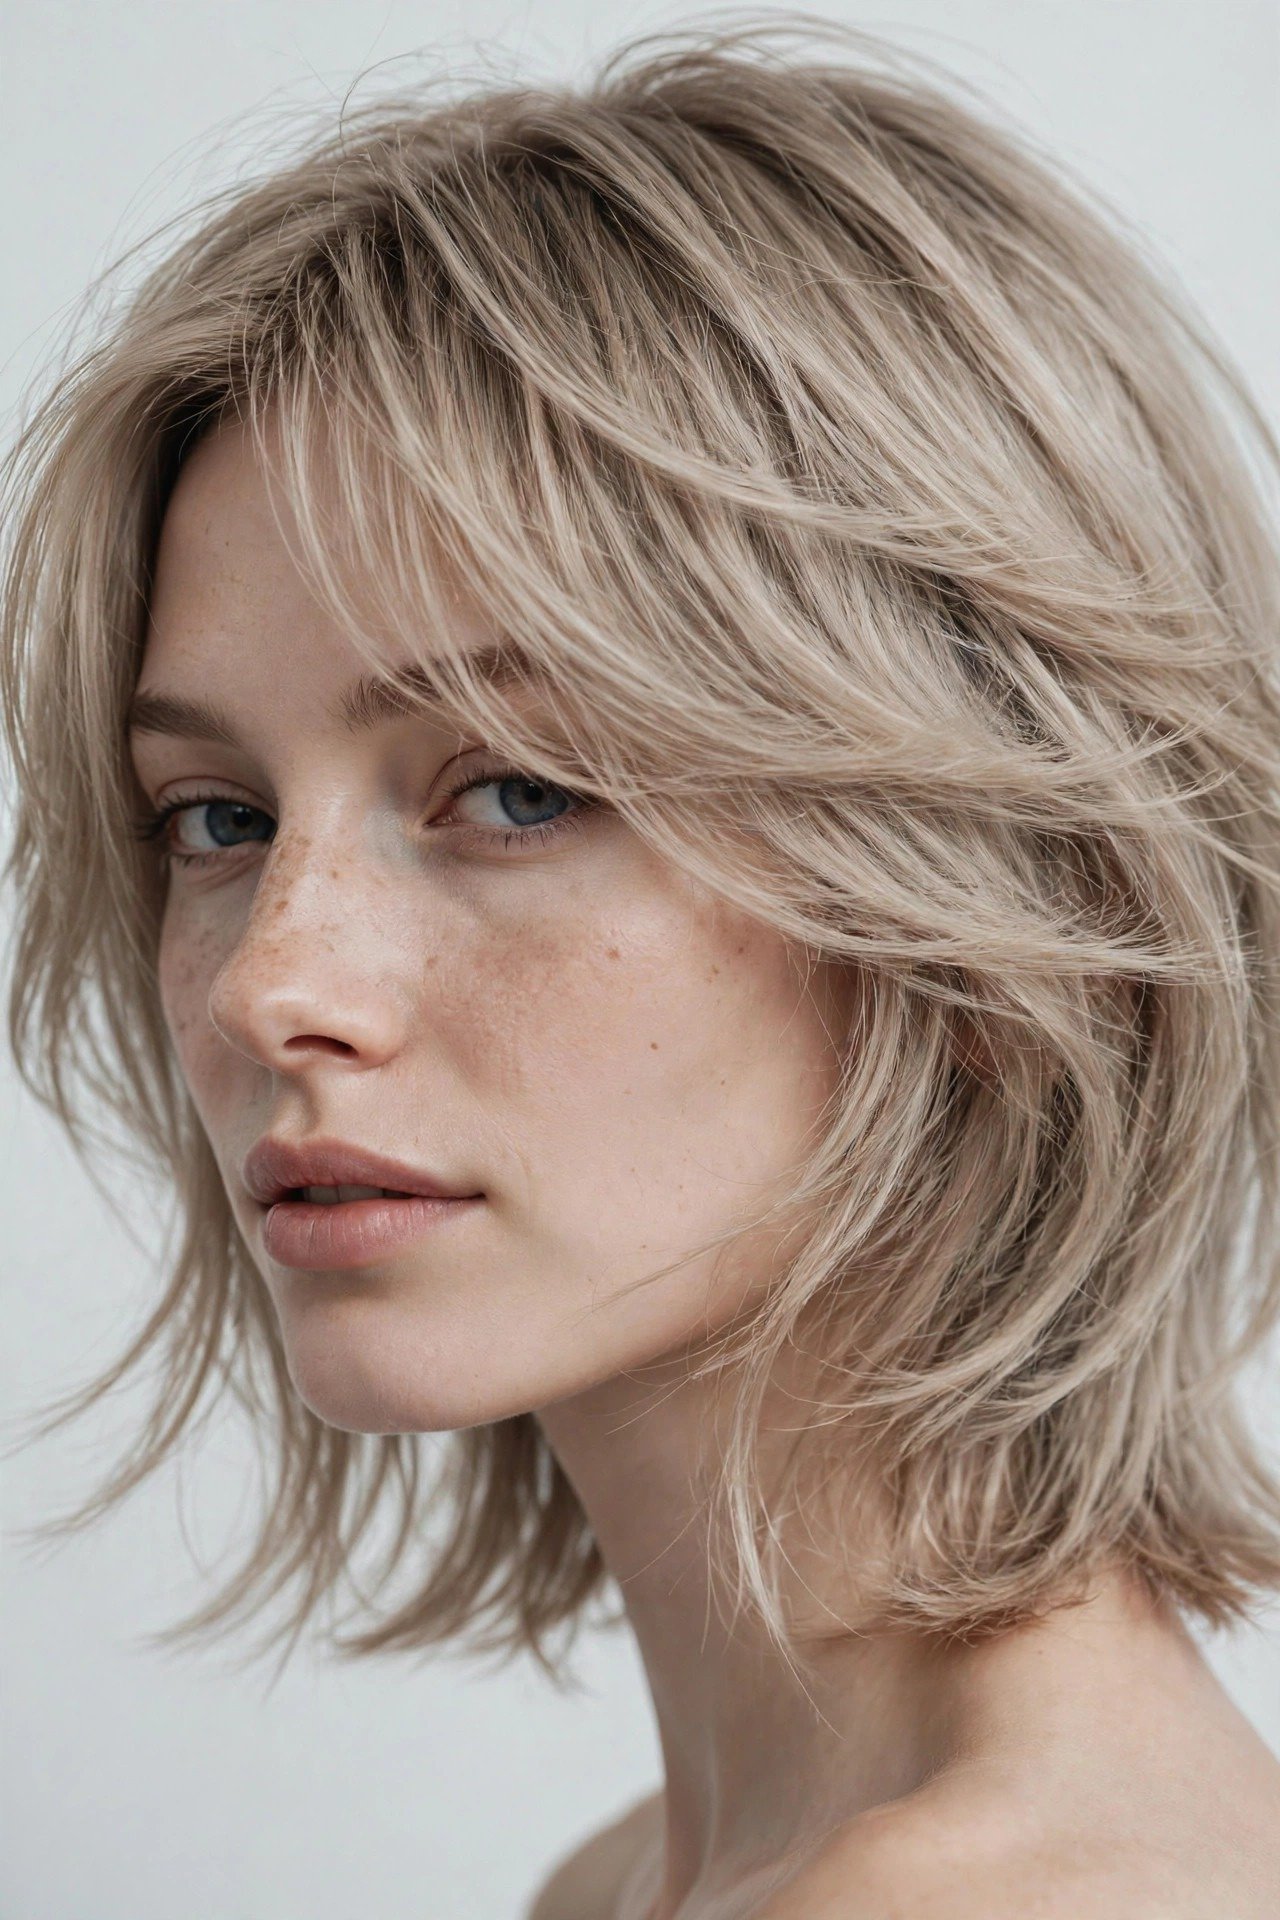
Who it suits: Fine hair needs the kitty cut’s softness engineered carefully — too many layers and the ends disappear; too few and it lies flat. Done right, the kitty cut gives fine hair its best possible movement: the feathered ends create the illusion of more hair, and the face-framing adds interest where fine hair looks sparsest. Best on straight to slightly wavy fine hair (1A–2A).
What to ask your stylist: “A kitty cut for fine hair — fewer, longer layers, blunt-ish perimeter to keep the ends looking full, feathering only at the very ends.” The key phrases: “keep the perimeter strong” and “minimal layering.” Ask for point-cutting only (never thinning shears — they devastate fine hair) and for the face-framing to start no higher than the chin (shorter framing removes too much density from the front).
Step-by-step styling: 1) Apply volumizing mousse to damp roots — fine hair’s styling starts at the root. 2) Blow-dry with the round brush, lifting at the roots for volume. 3) Bend the ends under for the kitty softness. 4) A light texturizing spray (not heavy wax) on the ends creates separation without weight. 5) Keep all heavy products away — fine hair’s enemy is weight.
Products: Volumizing mousse, light texturizing spray, dry shampoo (fine hair’s best friend — it adds grip and volume simultaneously). Avoid: heavy serums, oils, thick creams.
Maintenance: Trims every 6–8 weeks — fine hair’s ends thin out faster and need regular refreshing to maintain the illusion of fullness.
Common mistakes: Too many layers (the ends vanish); thinning shears (never on fine hair); heavy products (collapse what little volume exists); and growing it too long — fine hair’s kitty cut looks best at collarbone to upper-chest length, where the ends still read as full.
9. The Kitty Cut with Wispy Bangs
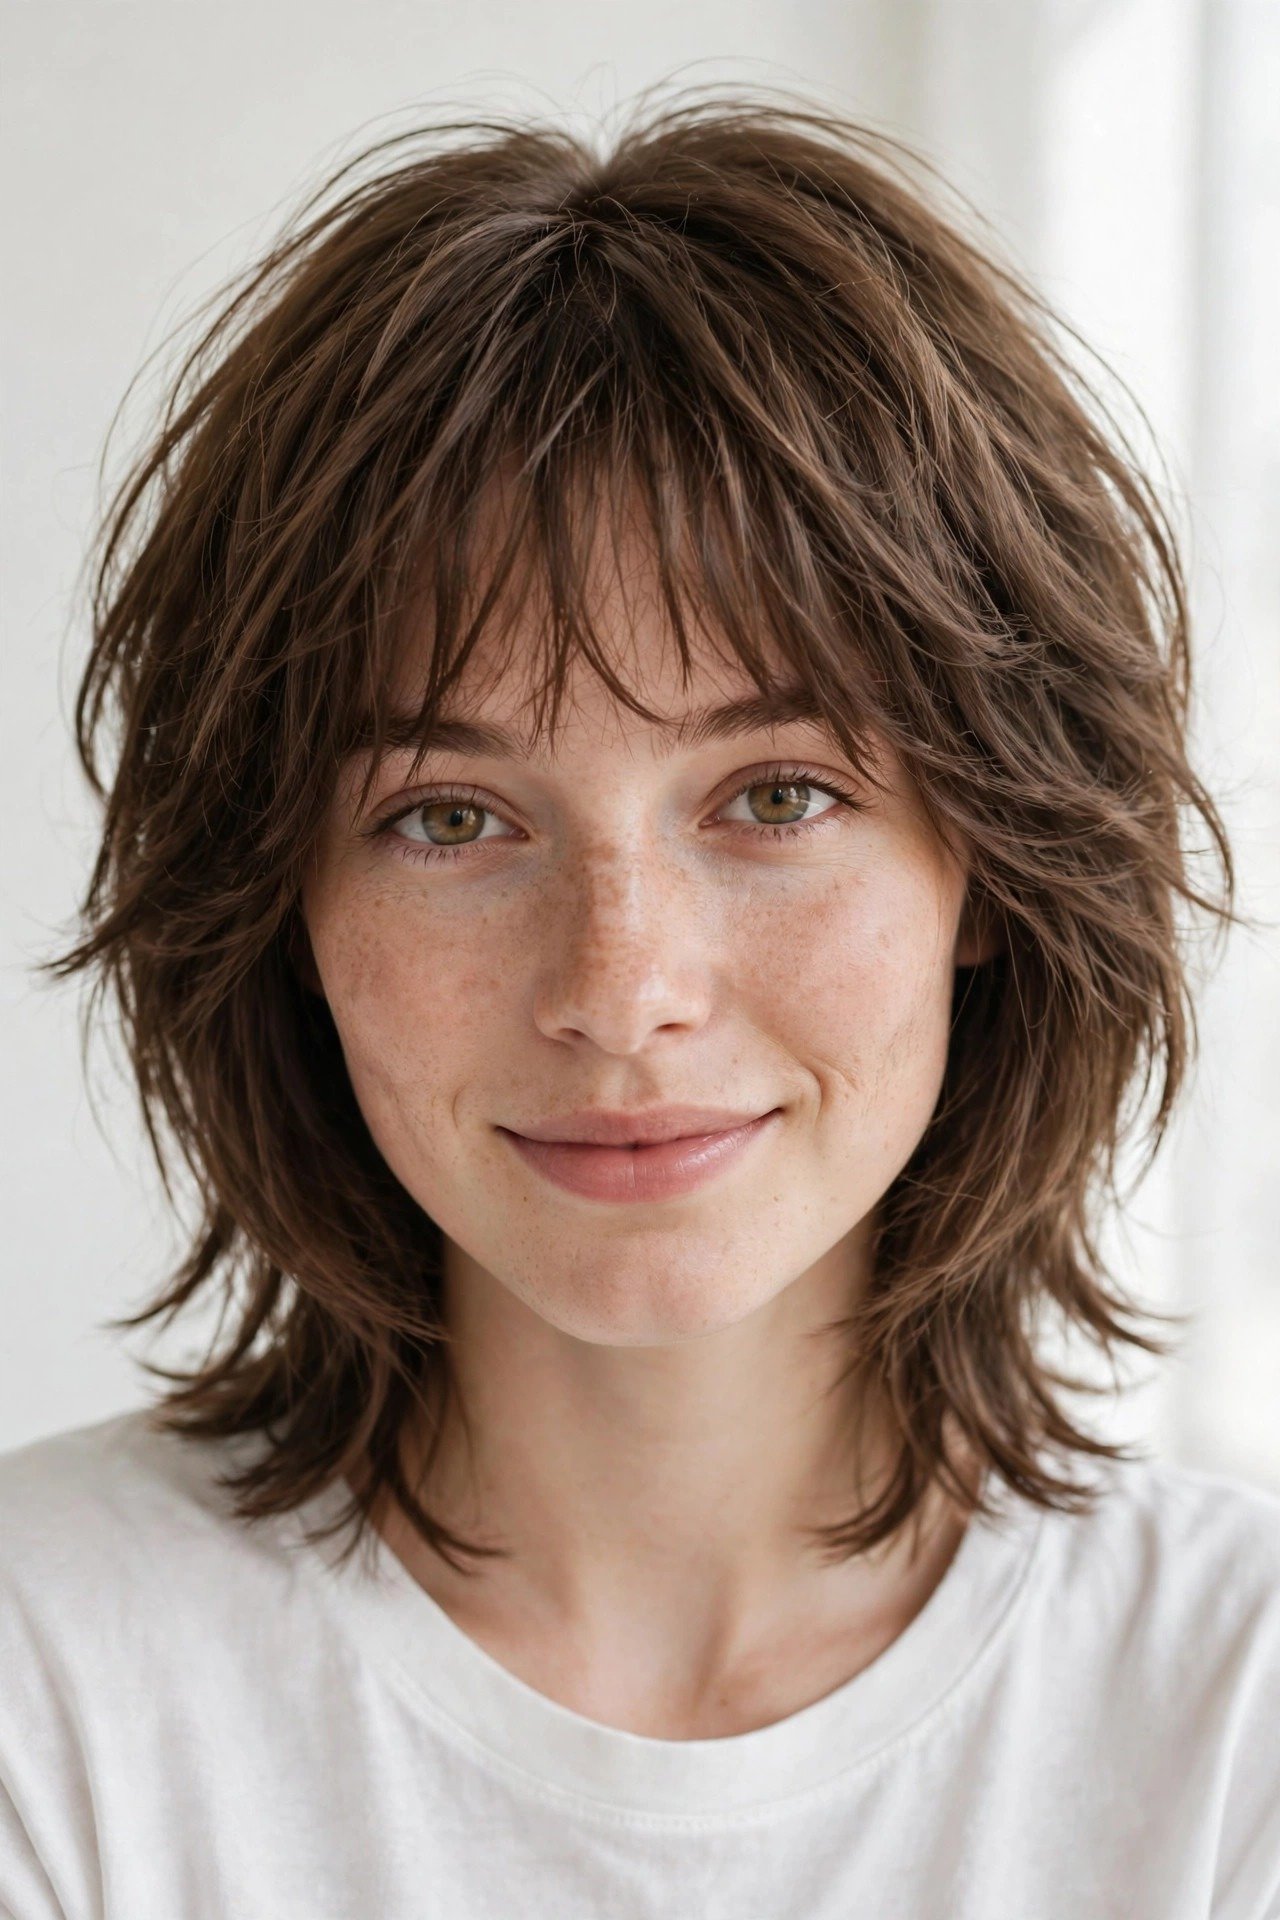
Who it suits: Wispy bangs — the sheer, feathery, see-through fringe — pair with the kitty cut’s softness like they were designed together. It suits high foreheads (sheer coverage without heaviness), long faces (the horizontal line shortens), and anyone who wants bangs without the commitment of a full fringe. The wispiness means grow-out is graceful — the bangs simply blend into the face-framing.
What to ask your stylist: “A kitty cut with wispy bangs — sheer, textured fringe that I can see through, blending into the face-framing layers.” Specify the density: “barely-there” versus “soft but present.” Ask for the bangs to be point-cut (never blunt — blunt defeats the wispiness) and cut dry so the true fall is visible. The bangs should be longest at the temples, shortest in the center — a gentle curve, not a straight line.
Step-by-step styling: 1) Blow-dry the bangs with a small round brush or your fingers, directing them forward and slightly to each side. 2) The key: don’t over-style wispy bangs — their charm is their lightness. 3) Style the kitty cut’s lengths as usual. 4) If the bangs separate too much, a tiny amount of pomade on the fingertips pieces them deliberately.
Products: Small round brush or just fingers, light pomade (fingertip amount), dry shampoo for bang refresh. Wispy bangs need almost nothing — that’s their virtue.
Maintenance: Cut trims every 8–10 weeks; bang trims every 5–6 weeks (wispy bangs grow out more gracefully than blunt ones, so the cycle is gentler).
Common mistakes: Cutting them too thick (they’re no longer wispy — they’re just bangs); over-styling into stiffness (wispy means mobile); and pairing them with a severe cut — wispy bangs need the kitty cut’s softness around them to make sense.
10. The Copper Kitty Cut
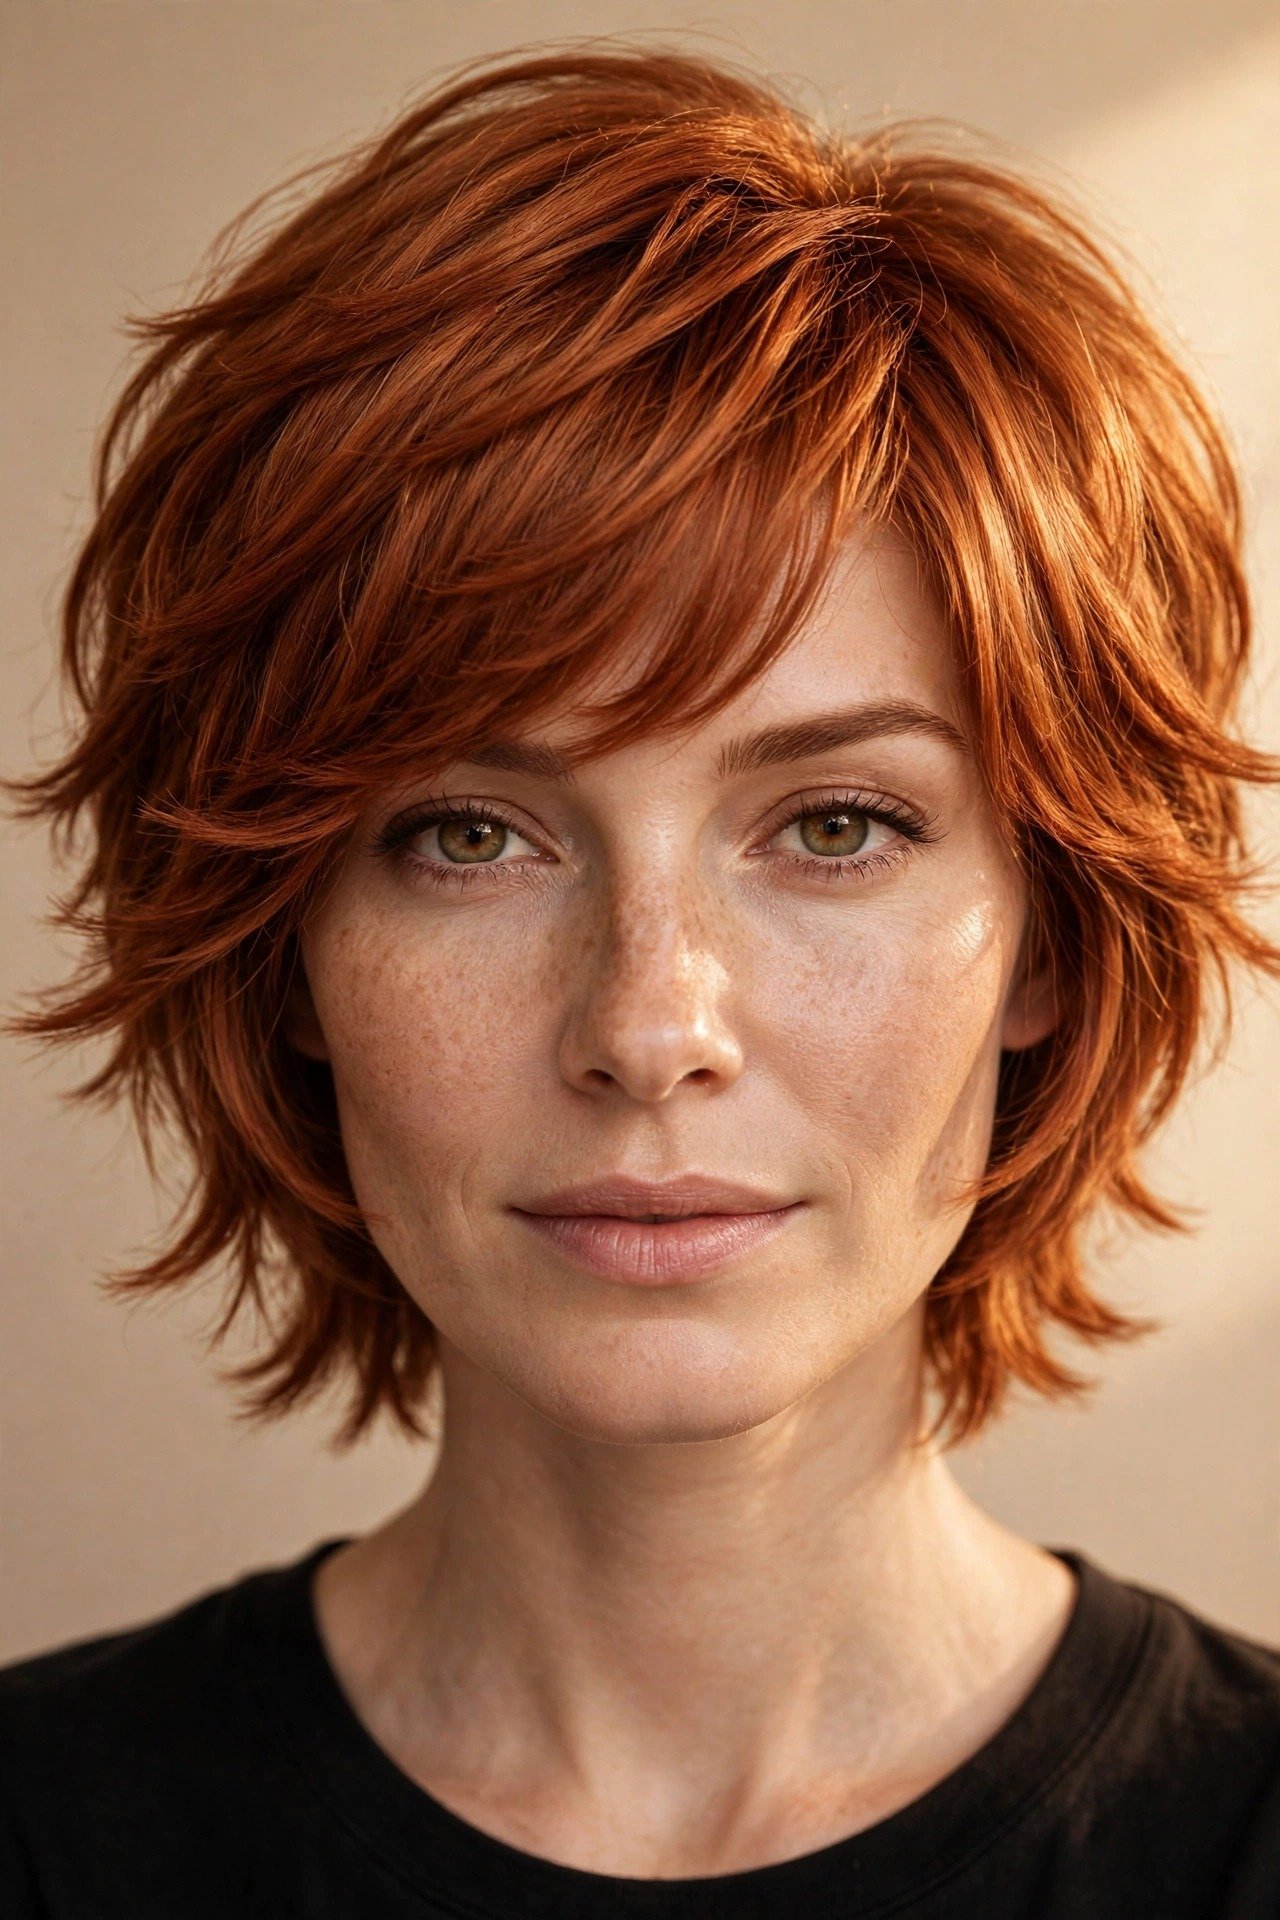
Who it suits: Copper’s warmth and the kitty cut’s softness are a natural pairing — the dimensional red catches light in every layer, making the cut’s movement visible in a way solid colors can’t. It suits fair to medium warm-toned skin and green/hazel eyes. The color adds perceived thickness, so fine-haired kitty cuts benefit doubly.
What to ask your colorist: “A dimensional copper on my kitty cut — rich copper base with lighter copper ribbons following the layers.” Specify the copper family: true copper (bright), cowboy copper (brown-based, more wearable), or auburn copper (deeper). Ask for a gloss — copper’s beauty is reflectivity. Get the color after the cut so the dimension follows the finished layering.
Step-by-step styling: 1) Style with the signature kitty blowout — copper shows best on smooth, bouncy hair. 2) Use color-safe, sulfate-free products exclusively. 3) Weekly copper-depositing mask keeps the tone rich. 4) Shine serum is mandatory — copper without shine looks flat within days.
Products: Sulfate-free color-safe shampoo, copper-depositing mask (weekly), heat protectant, shine serum. Cool-water washing extends the color’s life measurably.
Maintenance: Gloss refresh every 4–6 weeks; full color every 6–8 weeks. Copper fades faster than any other fashion tone — the depositing mask is not optional.
Common mistakes: Choosing copper on strongly cool skin without neutralizing (it clashes); hot-water washing (strips the color); and skipping gloss — matte copper reads as dull orange, glossed copper reads as expensive. Our copper color guide maps every shade.
11. The Wavy Kitty Cut
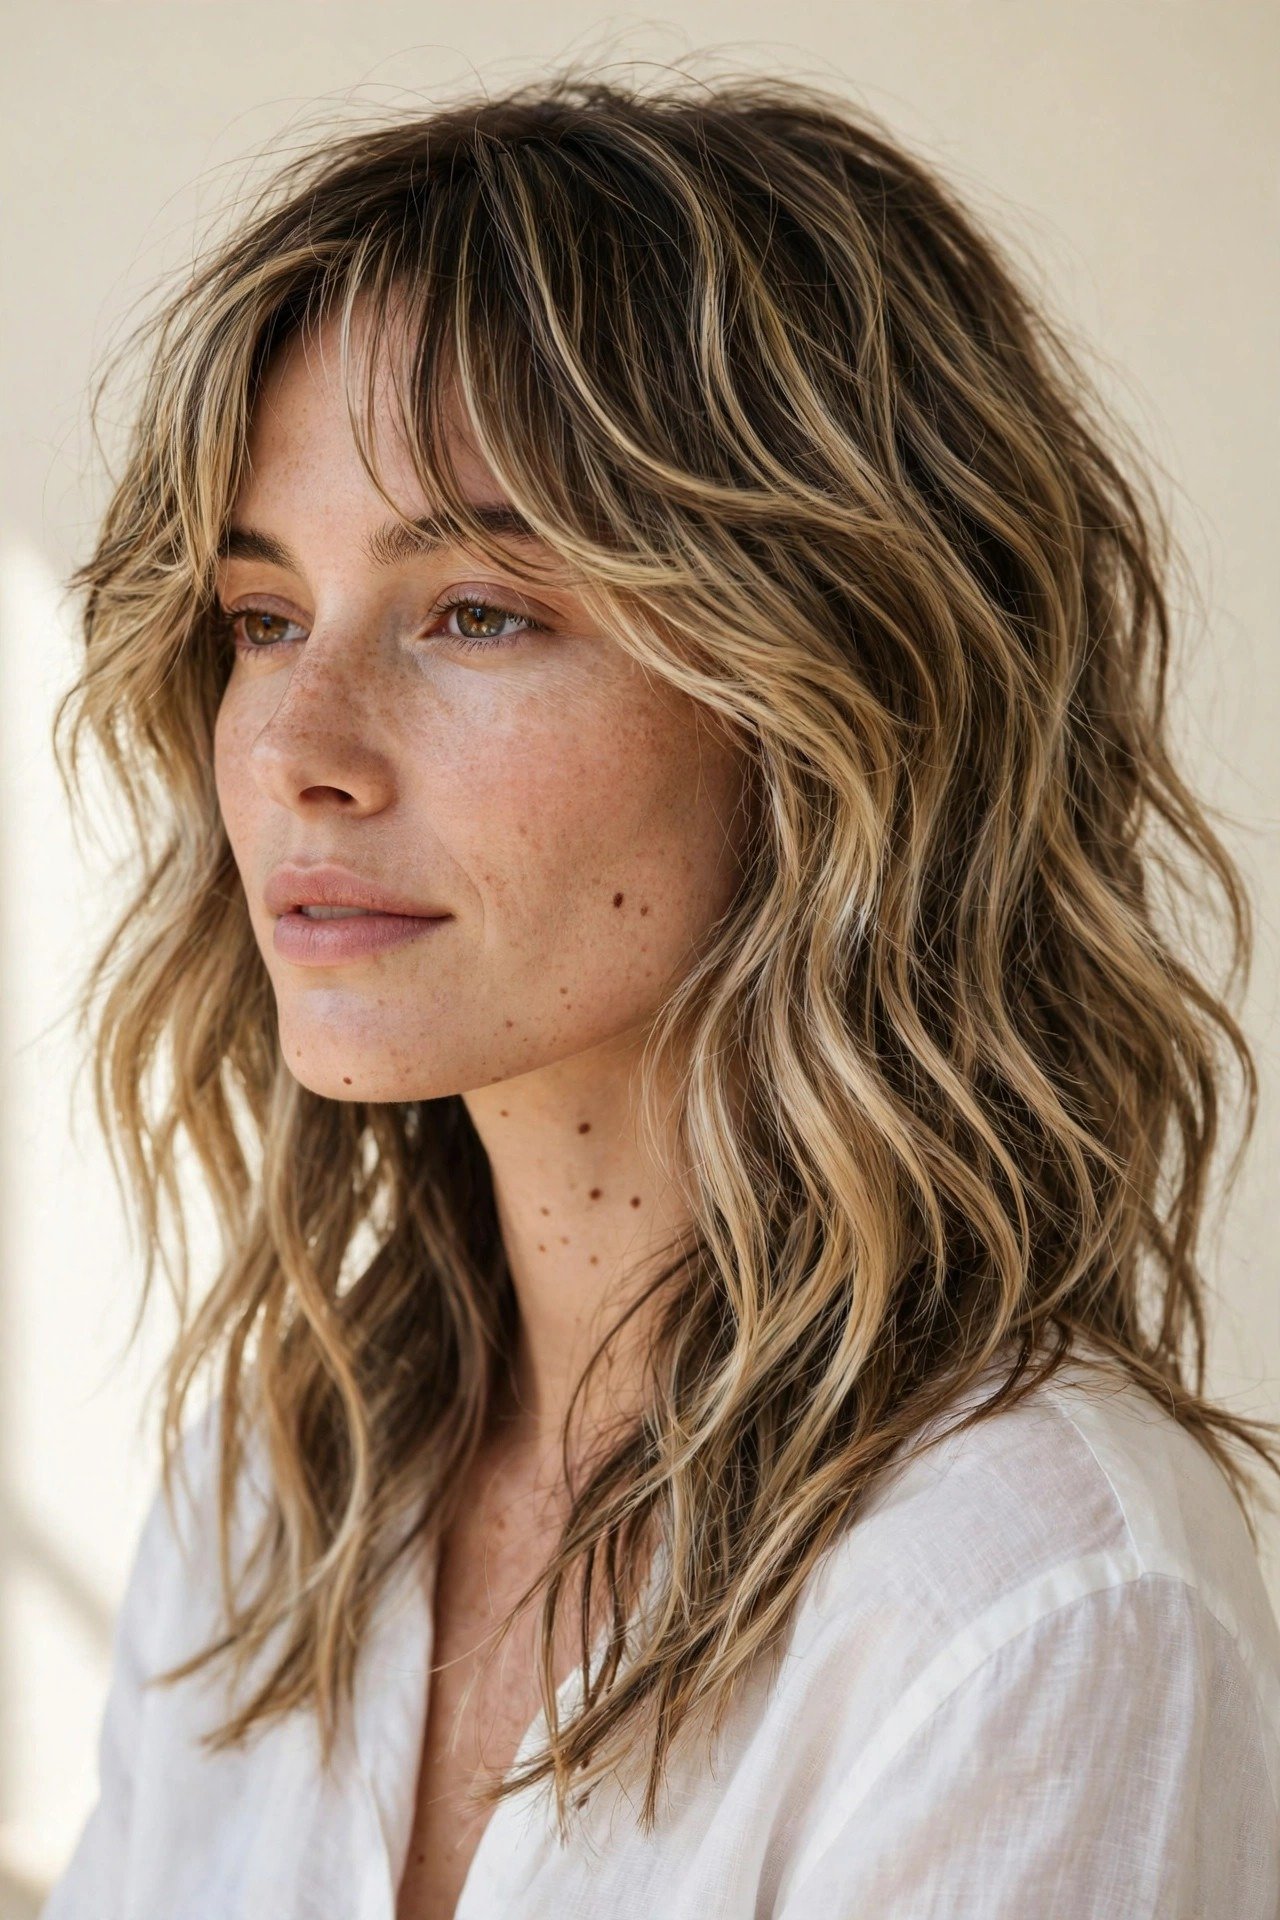
Who it suits: The wavy kitty cut lets natural texture do the talking — soft waves flowing through the seamless layers create the cut’s most relaxed expression. It suits naturally wavy hair (2A–2C) perfectly; the cut is designed to enhance wave rather than fight it. All face shapes work — waves soften everything they touch.
What to ask your stylist: “A kitty cut for wavy hair — layers cut to enhance my natural wave, dried naturally so you can see the true fall.” Come with air-dried hair so the stylist cuts your real texture. Ask for the layers to be cut to encourage the wave’s natural grouping — wavy hair should be cut to fall in its wave families, not chopped across them.
Step-by-step styling: 1) Apply wave cream to damp hair. 2) Scrunch and air-dry or diffuse — no round brush, which disrupts the wave pattern. 3) Once dry, define the face-framing pieces by twisting them around your finger. 4) Break up with dry texture spray. The wavy kitty cut should look like the ocean styled it.
Products: Wave-enhancing cream, diffuser, dry texture spray. Minimal heat, maximum texture.
Maintenance: Trims every 8–10 weeks. Wavy hair’s grow-out is forgiving; refresh the face-framing when it loses its curve.
Common mistakes: Blow-drying it straight daily (fights the cut’s nature — if you want sleek, get the sleek version cut for it); cutting it on straightened hair (the layers won’t match the natural fall); and over-diffusing into frizz — low heat, patience, scrunch.
12. The Sleek Straight Kitty Cut
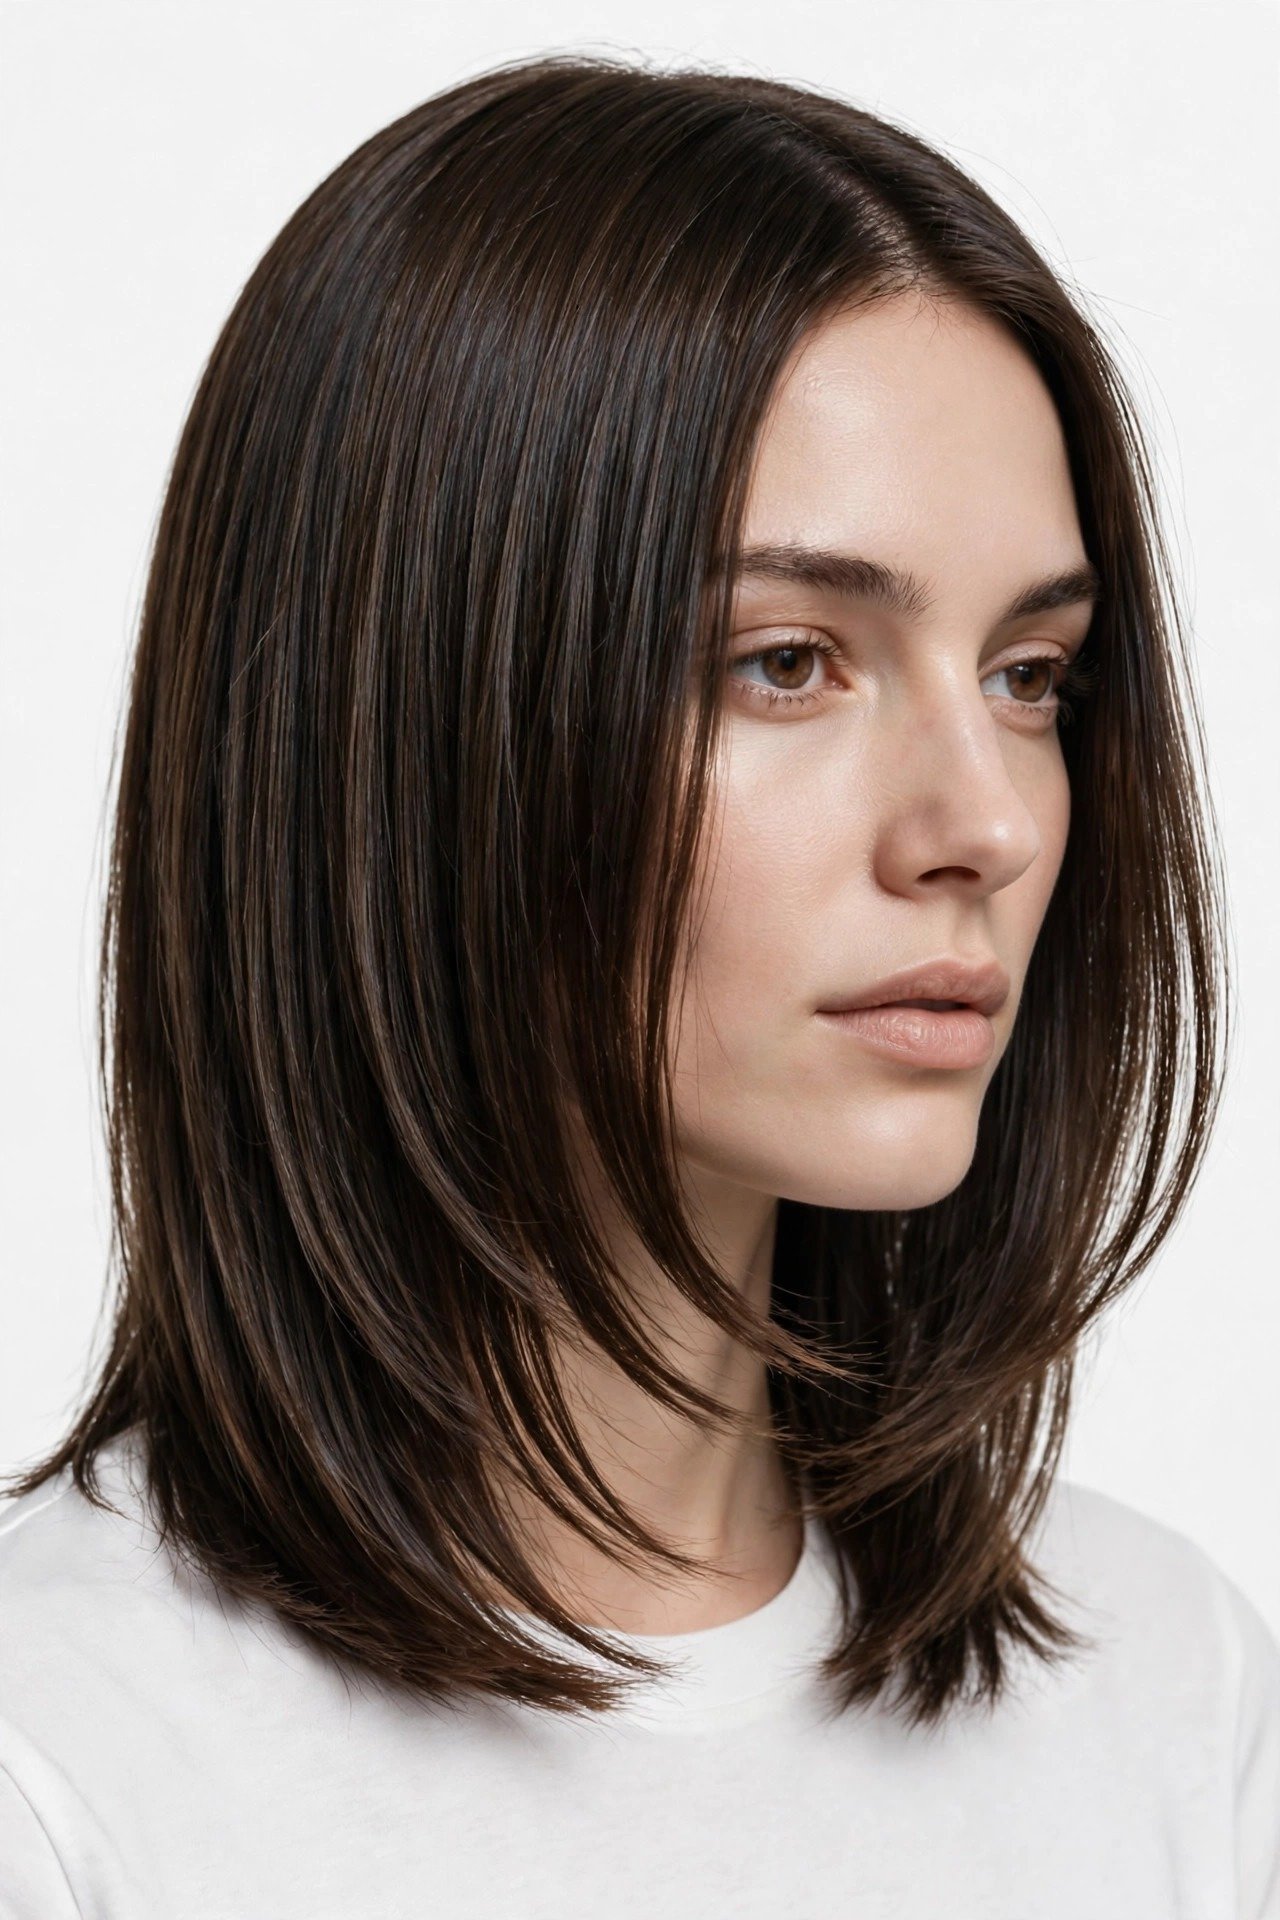
Who it suits: The sleek kitty cut proves softness doesn’t require waves — pin-straight, glassy, with the layers visible as subtle movement rather than bounce. It suits naturally straight hair (1A–1B) and anyone whose lifestyle demands polish: the sleek kitty cut is boardroom-ready in a way the bouncy version isn’t. Oval and heart faces wear the severity well.
What to ask your stylist: “A kitty cut worn sleek — soft layers, but I want the option of a glassy straight finish, so keep the ends strong.” The instruction matters because some kitty cuts are layered to require bend; ask for layers that also lie flat beautifully. Specify that you want the perimeter clean enough for a straight finish — no wispy ends that frizz when straightened.
Step-by-step styling: 1) Apply heat protectant and smoothing serum to damp hair. 2) Blow-dry straight with a paddle brush — no round brush bend this time. 3) Flat-iron in sections, one slow pass each, at appropriate heat. 4) The layers will show as subtle shifts of light rather than waves — that’s the sleek kitty’s signature. 5) Shine spray to finish.
Products: Heat protectant, smoothing serum, flat iron, shine spray. The sleek kitty cut is a heat-styling commitment — protect accordingly.
Maintenance: Trims every 6–8 weeks; sleek styles show grown-out ends faster. Weekly deep conditioning offsets the heat styling.
Common mistakes: Skipping heat protectant (daily ironing destroys the shine you’re creating); using the round-brush bend out of habit (this version is straight — commit); and choosing this version on wavy hair without accepting the daily heat routine — be honest about your mornings.
13. The Kitty Cut for Round Faces

Who it suits: Round faces need the kitty cut customized: longer face-framing (starting below the chin, never at the cheek), length past the collarbone to elongate, and volume at the crown rather than the sides. Done right, the kitty cut is one of the most slimming cuts for round faces — the vertical lines of the long framing draw the eye down, not out.
What to ask your stylist: “A kitty cut for a round face — face-framing starting below the chin, length past the collarbone, crown volume, no width at the cheeks.” The critical instruction: “no short layers around the face” — cheek-length framing widens round faces. Ask for the shortest framing piece to hit at least an inch below the chin. Request long layers over short ones throughout.
Step-by-step styling: 1) Apply volumizing mousse at the crown. 2) Blow-dry with lift at the roots — crown height elongates the face. 3) Direct the face-framing pieces forward and down (never flipped out — outward flips widen). 4) Keep the sides smooth and close to the head; all the volume goes up top and at the ends. 5) A center or deep side part both work — avoid styling that adds side width.
Products: Volumizing mousse (crown), smoothing cream (sides), round brush. The styling mantra: height up top, sleek at the sides.
Maintenance: Trims every 8 weeks; the face-framing is the critical element — when it grows past its elongating zone, have it reshaped.
Common mistakes: Cheek-length framing (widens); side volume (widens); curling the framing outward (widens — always curve inward or straight down); and cutting the overall length too short — round faces need the kitty cut at chest length minimum for the elongating effect.
14. The Expensive Brunette Kitty Cut
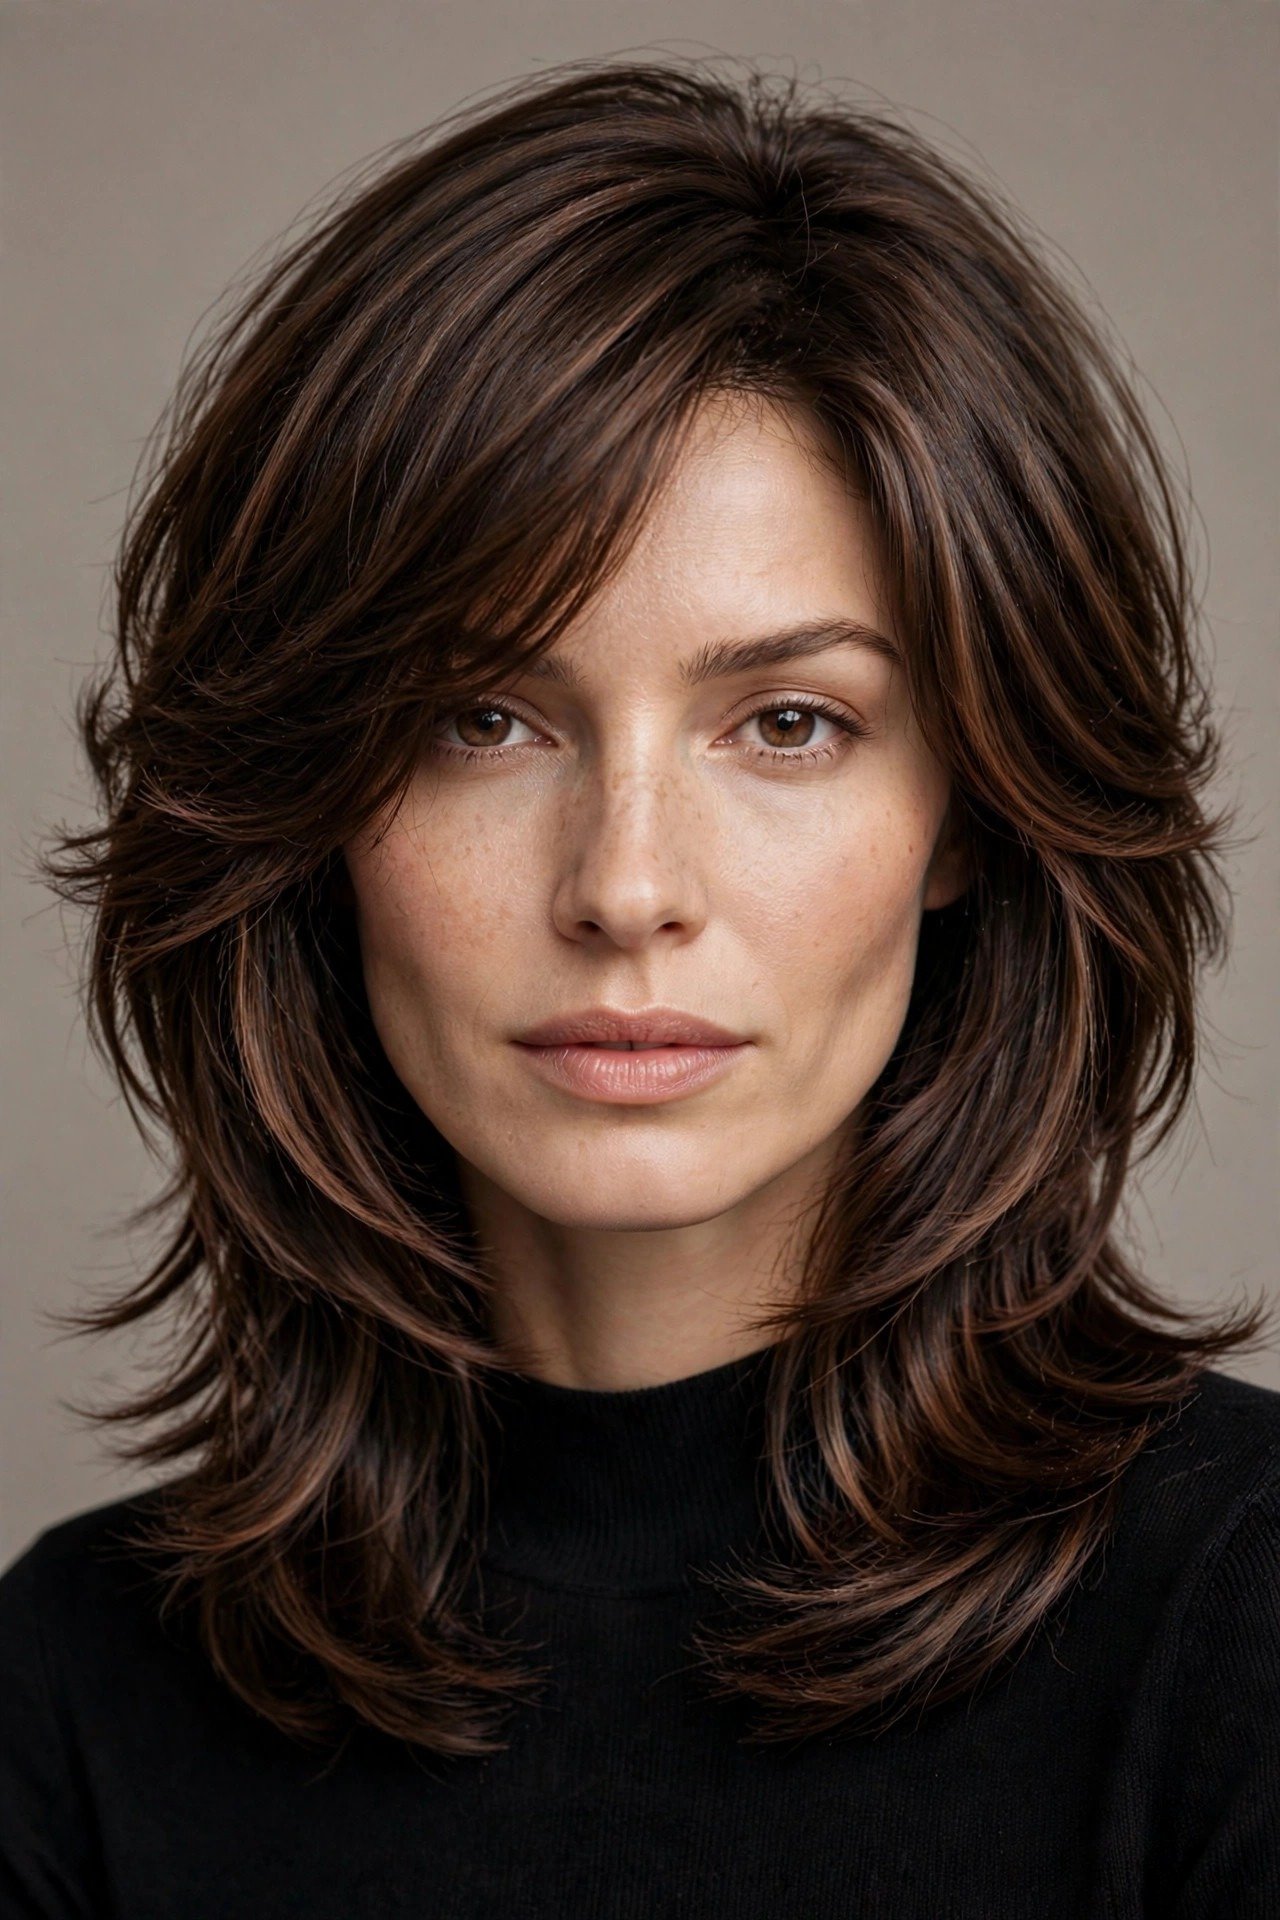
Who it suits: The expensive brunette — deep, dimensional, glossy brown with subtle ribbons of lighter tone — is the kitty cut’s luxury color pairing. It suits medium to deep skin tones and anyone whose natural color is brown: the technique enhances what you have rather than fighting it. The dimension makes every layer visible, turning the cut’s softness into visible movement.
What to ask your colorist: “An expensive brunette on my kitty cut — rich chocolate base, subtle lighter ribbons following the layers, high-gloss finish.” Specify: no harsh highlights, no ombre line — the dimension should look like light hitting natural hair. Ask for a gloss treatment — the “expensive” in expensive brunette is literally shine. Get the color after the cut so the ribbons follow the finished layering.
Step-by-step styling: 1) Style with the signature kitty blowout — dimension shows best on smooth, bouncy hair. 2) Shine serum is the star product: apply to mid-lengths and ends. 3) A boar-bristle brush pass before going out distributes natural oils and maximizes gloss. 4) Shine spray as the final step — the expensive brunette should reflect light.
Products: Color-safe shampoo, weekly glossing treatment, shine serum, boar-bristle brush. Brunette dimension fades into dullness without gloss maintenance.
Maintenance: Gloss refresh every 6–8 weeks; the base color needs less frequent attention than blonde. This is one of the lowest-maintenance luxury colors — part of its appeal.
Common mistakes: Going too dark and flat (one-tone dark brown absorbs light — dimension is mandatory); skipping gloss (matte brunette looks dull, not expensive); and over-washing — brunette dimension lasts longer with 2–3 washes per week maximum. Our expensive brunette guide covers the full technique.
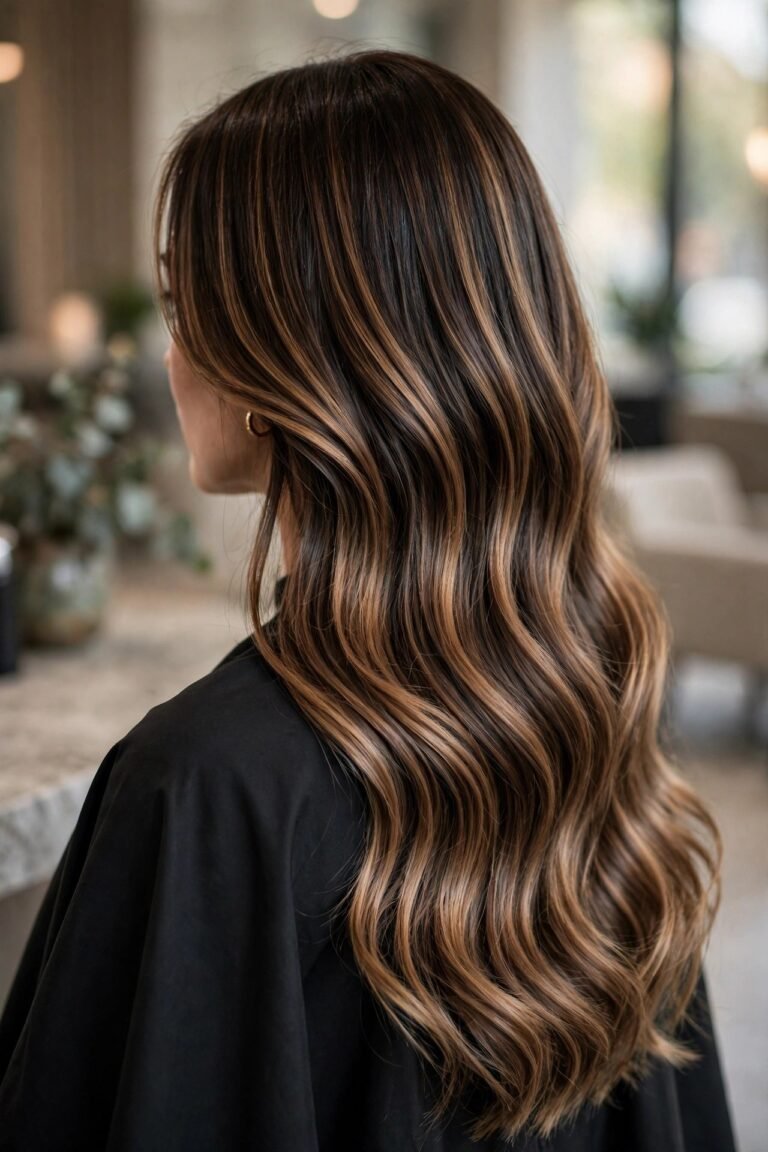
15. The Kitty Cut with Balayage
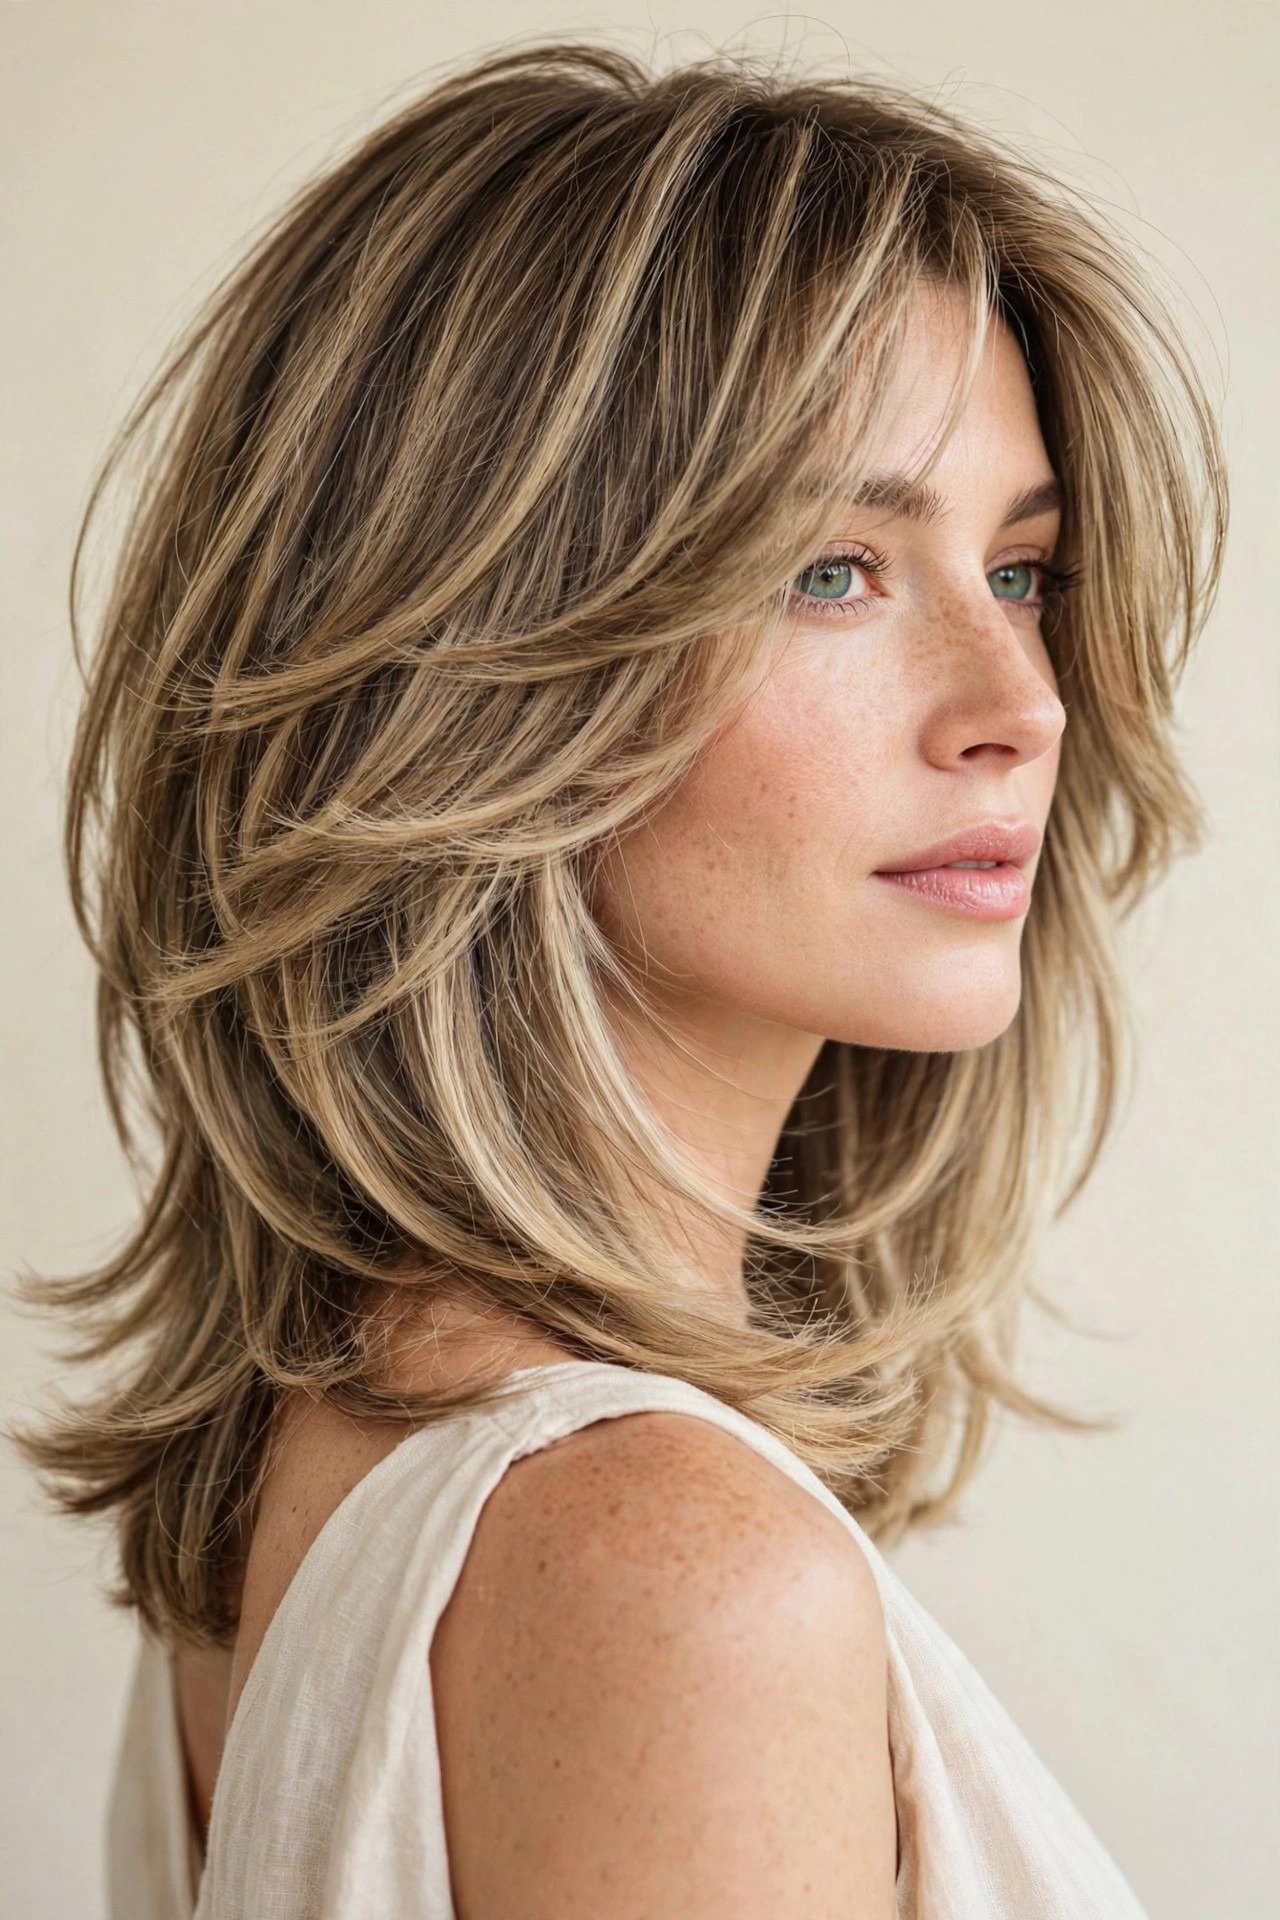
Who it suits: Balayage — hand-painted, sun-kissed lightness concentrated through the mid-lengths and ends — was made for the kitty cut’s layers. The painted lightness follows each layer’s movement, making the cut’s softness visible in color as well as shape. It suits anyone wanting dimension without the maintenance of foils; all base colors work, from dark brown to blonde.
What to ask your colorist: “A soft balayage on my kitty cut — hand-painted lightness through the mid-lengths and ends, following the layers, natural grow-out.” Specify the lightness level (two to three levels lighter than base is the natural-looking range) and the tone (warm honey, neutral beige, or cool ash — match it to your skin). Ask for the balayage to be painted to enhance the layering: lighter pieces where the layers turn and catch light.
Step-by-step styling: 1) The kitty blowout shows off balayage best — smooth hair displays painted dimension most clearly. 2) Shine serum on the lightened ends (they’re more porous and need extra care). 3) When the color is fresh, style sleek for the first week to show off the painting; after that, wear it any way you like.
Products: Color-safe shampoo, purple or toning mask (if blonde balayage — weekly), bond-building treatment (lightened hair needs it), heat protectant.
Maintenance: Balayage touch-up every 12–16 weeks — the soft grow-out is the technique’s signature advantage. Toner refresh every 6–8 weeks keeps the tone clean.
Common mistakes: Foil highlights mislabeled as balayage (foils create a different grow-out — ask specifically for hand-painted); going too light too fast (balayage should be gradual — dramatic lightness in one session damages); and neglecting bond-building — painted hair is still lightened hair.
16. The Grown-Out Kitty Cut
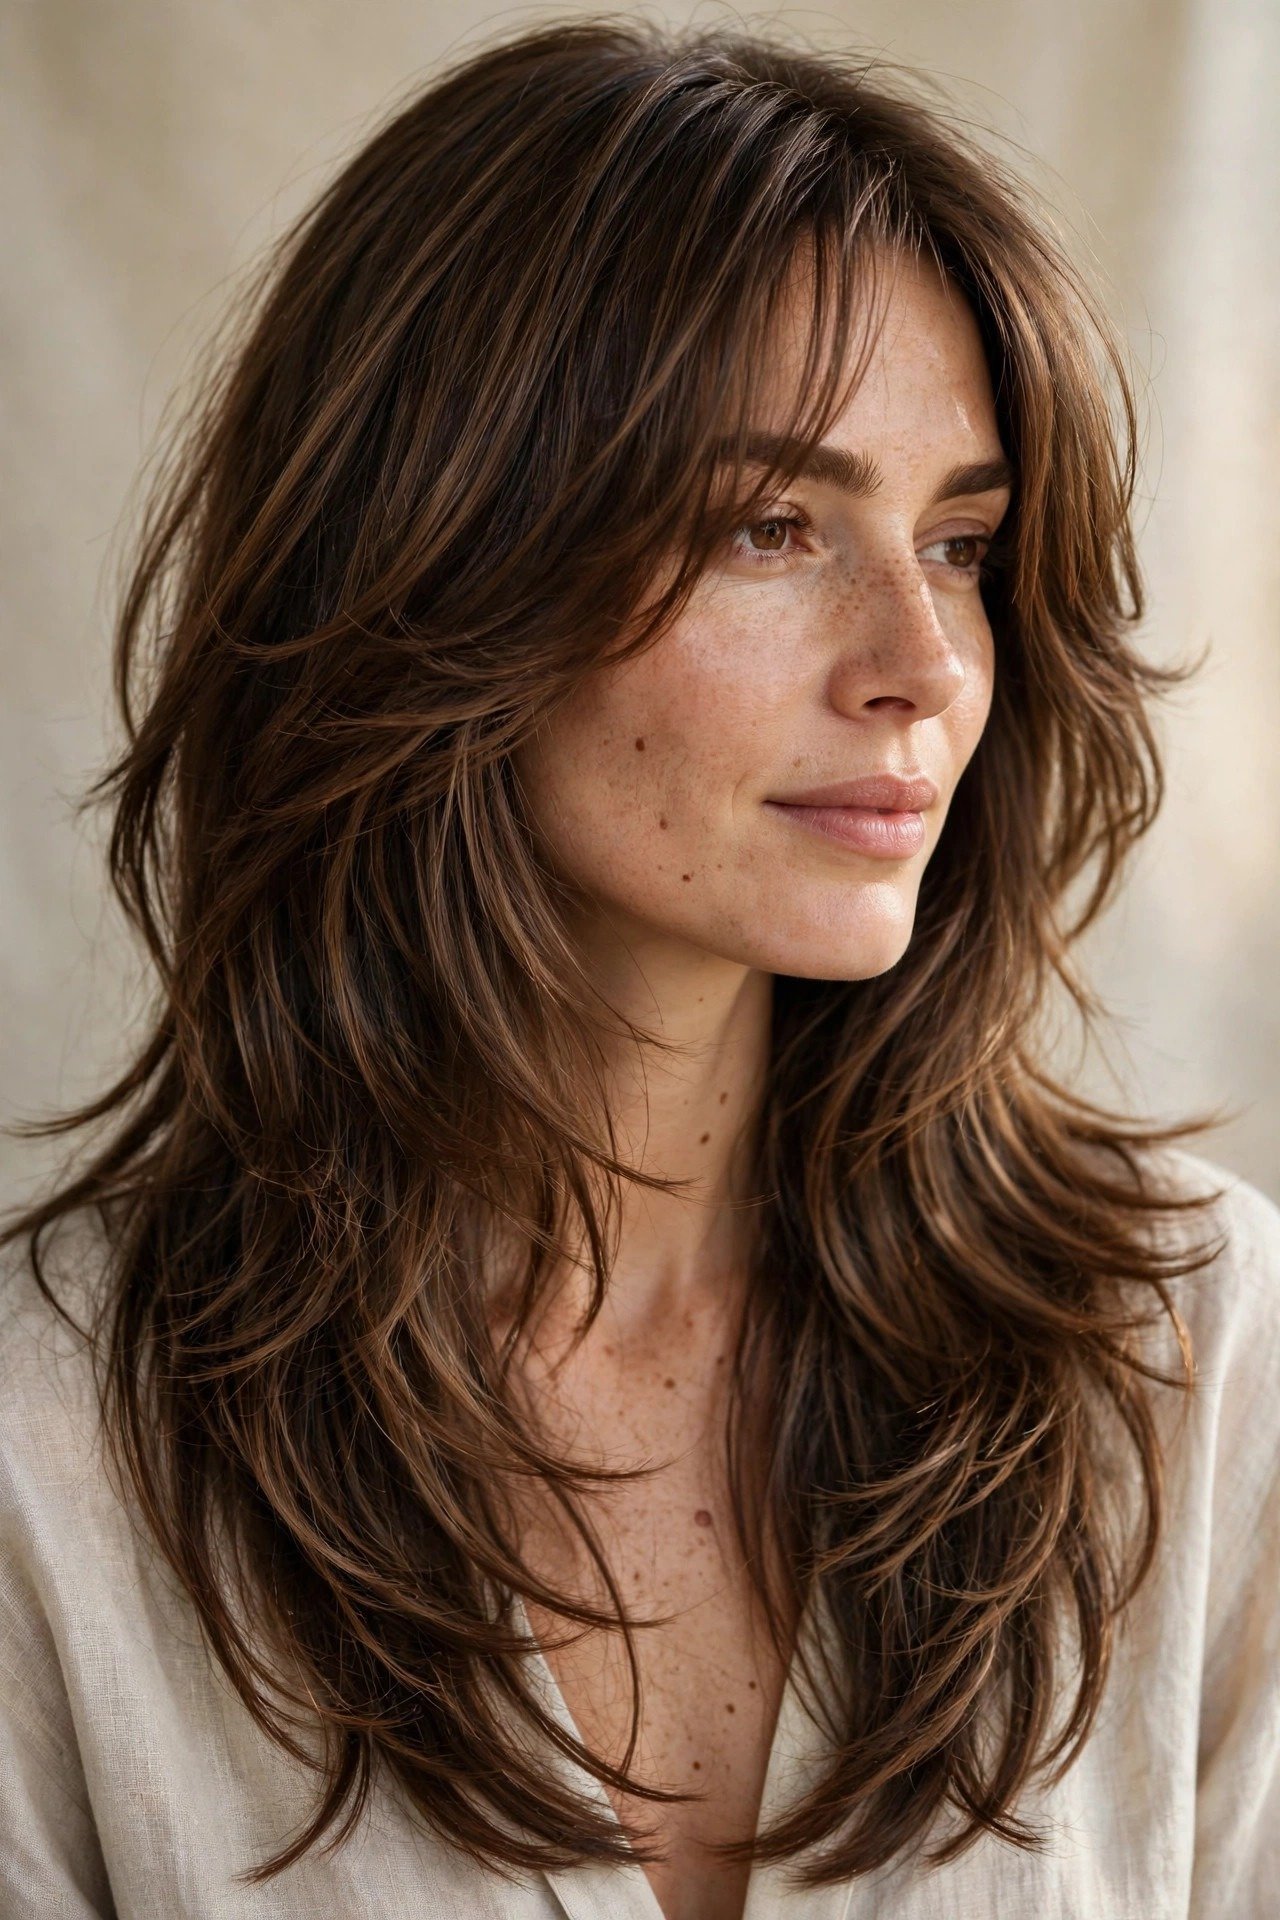
Who it suits: The grown-out kitty cut isn’t a style you book — it’s what the kitty cut becomes at 4–6 months, and it’s genuinely beautiful: the layers soften into long, fluid movement that looks like expensive long hair. It suits anyone who got a kitty cut and fell in love with the grow-out; many women maintain this phase intentionally with dusting trims.
What to ask your stylist: “I want to grow out my kitty cut — dust the ends every 10–12 weeks, reshape the face-framing as needed, but preserve the length.” The grow-out strategy: micro-trims (quarter-inch dustings) keep the ends healthy without sacrificing length, while the face-framing gets reshaped to stay flattering as it lengthens. Ask at what point the layers will need re-cutting versus just dusting — usually around month five.
Step-by-step styling: 1) The grown-out kitty cut styles like long layered hair: blowout cream, round brush, soft bend at the ends. 2) The face-framing is now longer — style it to blend into the lengths. 3) Deep-condition weekly; the ends are the oldest part of the cut and need support. 4) Enjoy the lowest-maintenance phase of the kitty cut’s life.
Products: Blowout cream, deep conditioner (weekly), serum on the ends, heat protectant. Long hair’s ends need the most care.
Maintenance: Dusting trims every 10–12 weeks; face-framing reshape every 8 weeks. This is the kitty cut’s most forgiving phase — the shape holds for months.
Common mistakes: Never trimming (split ends travel up and destroy the grow-out); letting the face-framing grow into curtain-less limbo (reshape it — don’t ignore it); and treating grown-out hair like fresh hair — the ends are months old and need more conditioning than the roots.
Kitty Cut vs. Wolf Cut vs. Butterfly Cut: The Definitive Comparison
These three cuts are constantly confused, so here is the professional breakdown. The wolf cut is defined by disconnection: short, choppy crown layers deliberately disconnected from long lengths, heavy texture, often with a mullet-ish silhouette. It is edgy, high-contrast, and high-maintenance. The butterfly cut is defined by its “wings”: distinct shorter layers around the face (chin to shoulder) that separate visually from the long lengths behind, creating a winged effect. It is dramatic and face-framing-forward. The kitty cut is defined by seamlessness: long, blended layers that graduate smoothly with no visible disconnection, feathered ends, and soft face-framing that melts into the whole. It is soft, fluid, and the lowest-maintenance of the three.
The decision framework: choose the wolf cut if you want edge and don’t mind styling texture daily; choose the butterfly if you want dramatic face-framing with long length; choose the kitty cut if you want movement and softness with minimal styling effort. If you show your stylist a wolf cut photo but describe kitty cut softness, you will get a wolf cut — the photo always wins over words. Bring photos of the actual cut you want, and use the comparison above to articulate why.
For the record, the hush cut sits between the kitty and the wolf — softer than the wolf, more textured than the kitty. If the kitty cut feels too polished and the wolf too wild, the hush cut is your middle ground.
What to Ask Your Stylist: The Exact Script
The kitty cut lives or dies on communication — “soft layers” means different things to different stylists. Use this script: “I’d like a kitty cut — long, soft, blended layers with feathered ends, length [collarbone/chest], gentle face-framing starting at [chin/cheekbone]. I want movement without disconnection — nothing choppy, nothing shaggy, no thinning shears on the ends. I’ll be wearing it [with a blowout / air-dried / sleek], so please cut it for that.”
Bring two reference photos (saved from Pinterest): one showing the overall softness and length, one close-up showing the feathered ends. Ask the stylist to confirm they understand “blended, not disconnected” — if they look confused, find another stylist. Ask for the cut to be checked dry, because the kitty cut’s softness is a dry-hair phenomenon. Expect to pay $70–$160 for a layered cut of this caliber; the blending work is skilled labor. And book a 10-minute follow-up at 3 weeks if you’re nervous — a good stylist will adjust the framing for free.
Kitty Cut Maintenance: Keeping the Softness
The kitty cut is refreshingly low-maintenance for a layered cut, but “low” doesn’t mean “none.” Trims: every 8–10 weeks for the classic cut (6–8 for short/fine versions, 10–12 for long versions). The trim refreshes the feathered ends — when ends start looking blunt or stringy, the cut has lost its kitty identity. Daily: the blowout is the style’s engine. On non-wash days, refresh with dry shampoo at the roots and a quick round-brush pass over the face-framing — five minutes restores the shape. Weekly: deep-condition, because layered ends are the oldest, most fragile part of the cut. The grow-out: embrace it — the kitty cut’s grow-out (style 16) is genuinely beautiful, and many women extend their trim cycle intentionally once they see it.
The one maintenance rule that matters most: never let anyone “thin it out” at a trim unless you specifically ask. Thinning is the kitty cut’s kryptonite — it turns feathered into wispy, and wispy into stringy. Point-cutting refreshes the softness; thinning destroys it.
Kitty Cut FAQs

What is the kitty cut, exactly?
The kitty cut is a medium-length layered haircut with long, soft, blended layers, feathered ends, and gentle face-framing — designed for fluid movement without choppy disconnection.
It sits between the wolf cut (edgy, disconnected, textured) and the butterfly cut (dramatic face-framing wings): softer than both, with layers that graduate seamlessly. Length typically falls between the collarbone and chest. It went viral in 2026 as the answer to layered-cut fatigue — all the movement of textured cuts, none of the styling drama.
What’s the difference between a kitty cut and a wolf cut?
The wolf cut uses short, choppy, disconnected crown layers for deliberate edgy contrast; the kitty cut uses long, soft, blended layers for seamless fluid movement — they are opposites in texture philosophy.
The wolf cut is high-contrast and high-maintenance (it needs daily texture styling); the kitty cut is low-contrast and lower-maintenance (a blowout is the main styling). If you want edge, get the wolf cut. If you want softness, get the kitty cut. Showing a wolf cut photo while describing kitty softness gets you a wolf cut — the photo always wins, so bring the right references.
Does the kitty cut work on fine hair?
Yes, with the right engineering: fewer and longer layers, a strong perimeter, point-cutting only (never thinning shears), and face-framing that starts no higher than the chin.
The fine-hair kitty cut (style 8) creates the illusion of fullness through feathered ends and root-volume styling. What destroys it: too many layers (ends vanish), thinning shears (devastating on fine hair), and heavy products (collapse volume). Keep the length at collarbone to upper-chest — fine hair’s kitty cut looks fullest in that range.
How often does a kitty cut need trimming?
Every 8–10 weeks for the classic version — the blended layers grow out gracefully, making this one of the most forgiving layered cuts.
Short and fine-hair versions need trims every 6–8 weeks (the shape depends on freshness); long versions stretch to 10–12 weeks. The face-framing may need reshaping at 6 weeks even when the overall cut doesn’t. Between trims, the grow-out phase (style 16) is genuinely wearable — many women extend their cycle intentionally.
Can I get a kitty cut if I have curly hair?
Yes — the kitty cut’s soft-layering philosophy adapts beautifully to curls, but it must be cut dry, curl by curl, to respect the natural curl pattern.
On curly hair, the “seamless layers” become soft curl layers that encourage clumping and movement; the face-framing follows the curls’ natural fall. Find a curl-specialist stylist, come with your natural texture (not straightened), and account for shrinkage in the length. The wavy kitty cut (style 11) shows the texture-forward approach — curly versions follow the same principles with more customization.
Conclusion
The kitty cut earned its viral moment by being the rare trend that’s genuinely better than what it replaced: softer than the wolf cut, more wearable than the butterfly, more flattering than a one-length cut, and lower-maintenance than all of them. Its sixteen variations prove the philosophy scales — from the collarbone-bouncing short version to the waist-grazing long version, from glassy sleek to undone wavy, the kitty cut adapts to your hair instead of demanding your hair adapt to it.
The two decisions that determine your result: a stylist who understands blended layering (not just choppy texture — ask, and watch their reaction to “no thinning shears”), and honest communication about how you’ll actually style it (blowout, air-dried, or sleek — the cut should be built for your real mornings). Get those right, and the kitty cut repays you daily: soft, fluid, flattering hair that looks like you tried, even on the mornings you barely did.