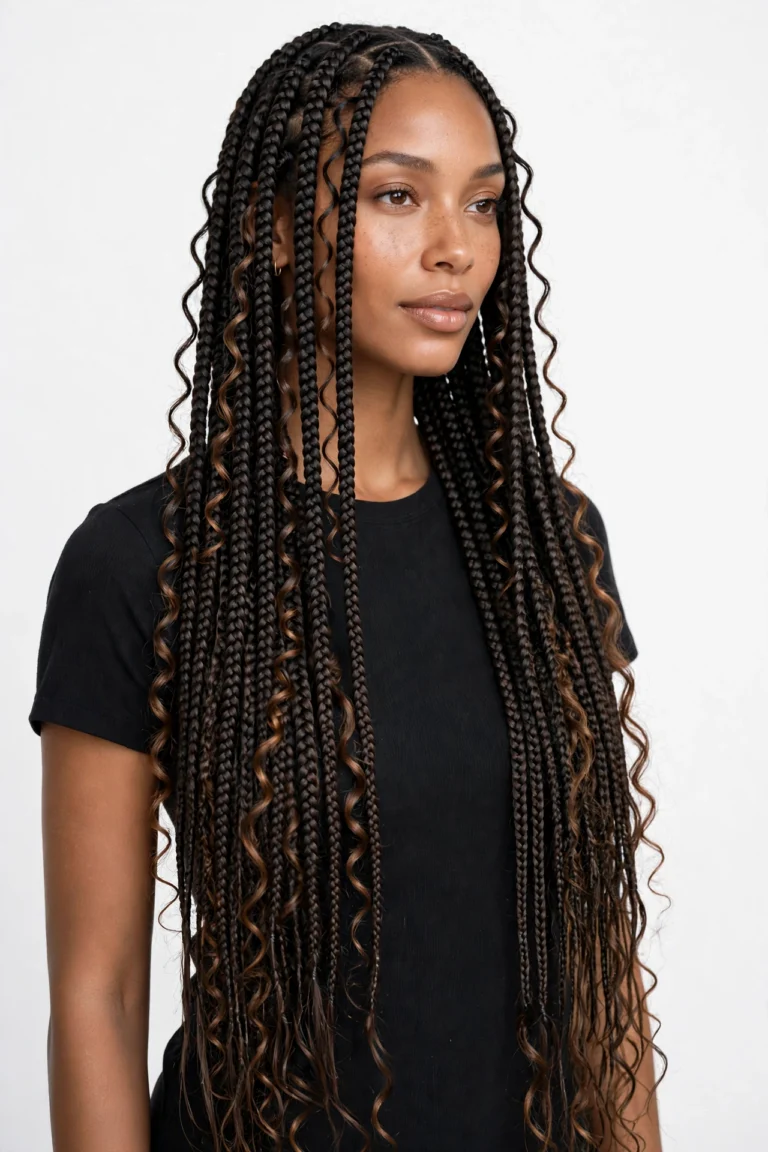
Bow Hairstyles 2026: 15 Coquette Looks With Ribbons & Bows
Bow Hairstyles 2026: The Sweetest Way to Wear Your Hair This Year
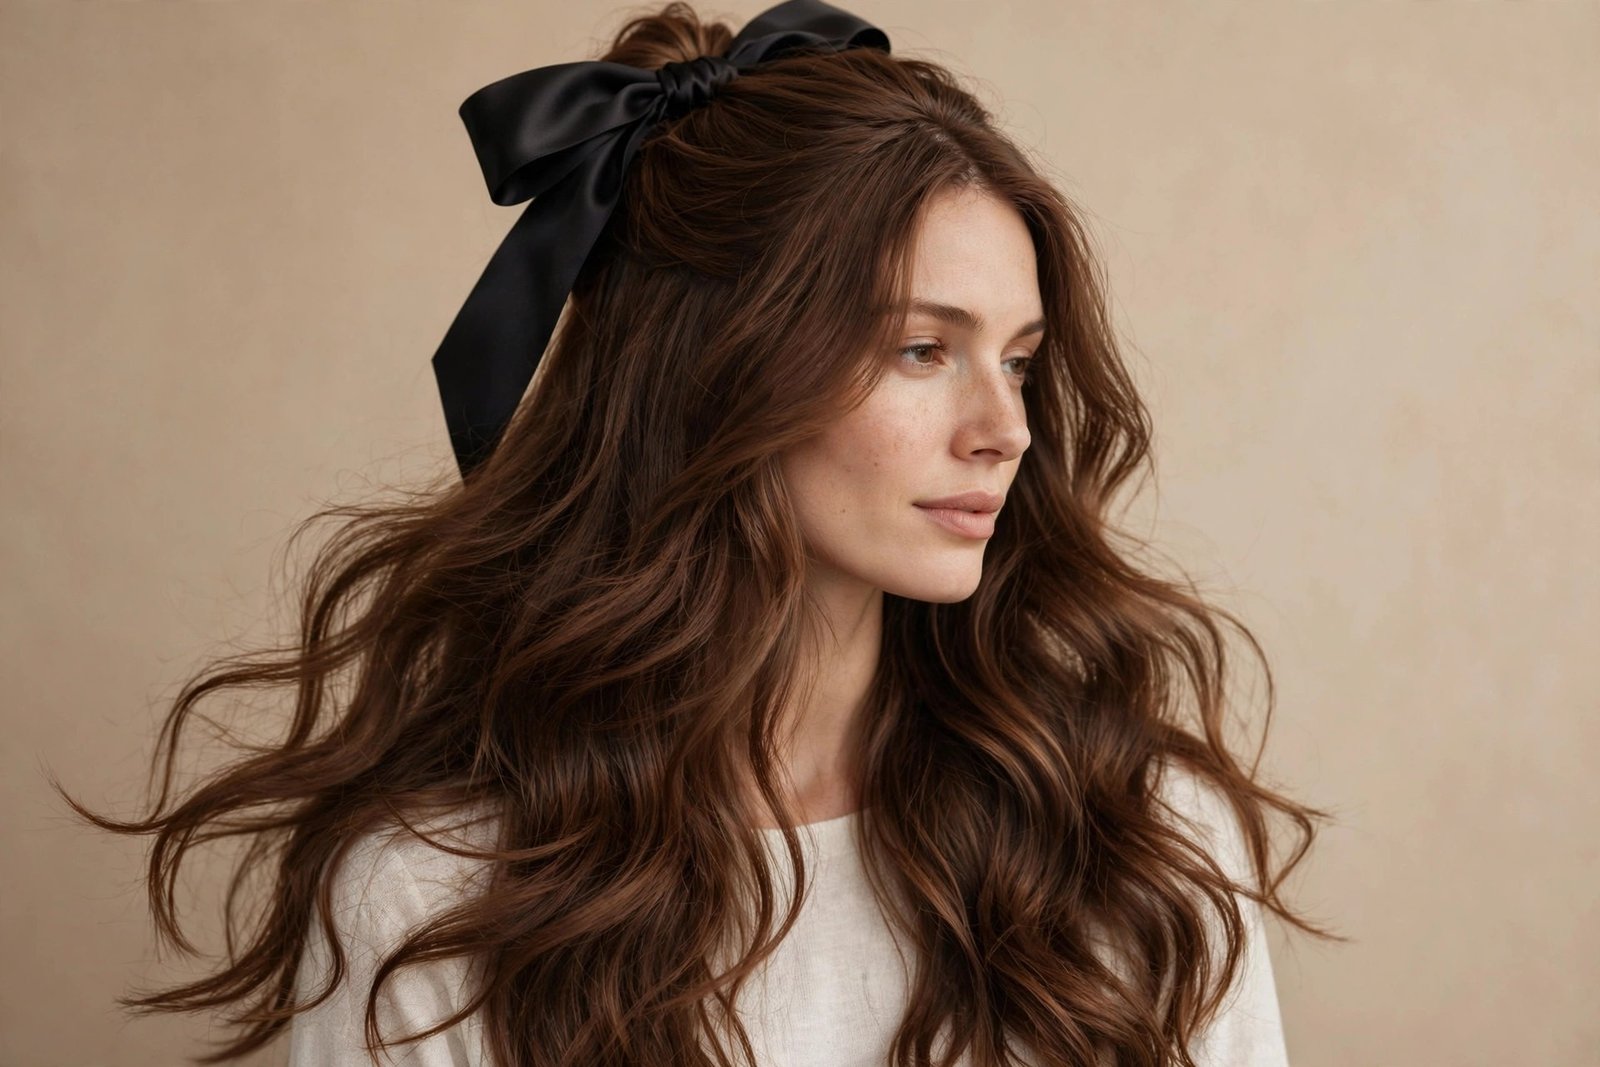
There is something about bow hairstyles that just makes people smile. A ribbon tied into a perfect bow takes an ordinary ponytail and turns it into something that looks straight out of a storybook — sweet, feminine, a little playful, and completely irresistible. I have been styling hair for years, and I can tell you honestly: no accessory works harder than a simple bow. It costs almost nothing, takes thirty seconds to tie, and somehow makes every hairstyle underneath it look like you tried three times harder than you did.
The coquette wave of the last few years pushed bows from occasional ballet-recital territory into everyday fashion, and in 2026 they have fully settled in as a staple rather than a trend. What I love about this year’s bow hairstyles is how grown-up they feel. Yes, the tiny ribbon ponytail of 2024 is still around, but now we are seeing oversized velvet bows at weddings, ribbon-woven braids on runways, and soft silk bows paired with glass-smooth bobs in the most elegant way possible. The bow grew up — and it looks better than ever.
And here is the thing most tutorials skip: bows are forgiving. Bad hair day? Tie the top half up with a bow and suddenly it looks intentional. Second-day hair that won’t cooperate? A low bun with a velvet bow hides everything. Bows add structure and polish to hair that is otherwise having a personality crisis. In this guide I am walking you through fifteen distinct bow hairstyles for 2026 — each one with honest styling advice, who it actually suits (not the fluff), the maintenance reality, and the little mistakes to avoid. Plus a full routine section on ribbon care, a FAQ that answers the questions I get asked most, and styling secrets that make the difference between a bow that looks darling and one that looks like it is barely hanging on.
Table of Contents
- Why Bow Hairstyles Are Everywhere in 2026
- 15 Bow Hairstyles to Try in 2026
- Ribbon Care & Styling Routine
- Frequently Asked Questions
- Conclusion
What Exactly Counts as a Bow Hairstyle?
Fair question, because “bow hairstyle” gets thrown around for a lot of different things. In this guide I am talking about any hairstyle where a bow — tied from a ribbon, a fabric strip, a scrunchie with bow tails, or even a pre-tied bow clip — is a visible, deliberate part of the look. That covers everything from a ponytail wrapped with a thin satin ribbon to an updo finished with a giant velvet bow. What it does NOT cover is cutting your actual hair into a bow shape (yes, some people search for that, and no, we are not doing that here).
The bow can do three jobs in a hairstyle. Sometimes it is the star — the whole point of the look, like an oversized bow on a simple low ponytail. Sometimes it is the finishing touch — a small ribbon bow at the base of a braid that takes it from pretty to precious. And sometimes it is doing actual work, like holding a half-up section in place. The best bow hairstyles, the ones that photograph beautifully and last all day, usually let the bow do at least two of these jobs at once. A bow that is purely decorative and not anchored to anything is a bow that will be on the floor by noon. I will be honest with you: half of all “bow fails” I see come down to the bow not being properly secured, not the bow itself.
Ribbons come in personalities, by the way. Satin is the classic — shiny, smooth, photographs like a dream, but slippery and needs pinning. Velvet is the 2026 favorite — rich, holds its shape, grips hair naturally, and looks expensive even from a craft store. Grosgrain is the sturdy one — ribbed texture, holds a knot like nothing else, great for active days. Organza and tulle are the dreamy ones — sheer, floaty, gorgeous for weddings but they tangle if you look at them wrong. Silk is the luxury option — beautiful drape, but it creases and it costs. Knowing your ribbon’s personality saves you from buying the wrong one for the job, and I will match ribbon types to each of the fifteen styles below.
Why Bows Exploded in 2026 (and Why They Are Staying)
Let me give you the honest version, not the fashion-magazine version. Bows blew up because they hit the perfect sweet spot between effort and impact. Social media rewarded the look — a bow hairstyle photographs unmistakably, reads instantly in a thumbnail, and looks intentional even in a mirror selfie. But the reason bows STAYED, the reason I am confident writing a 2026 guide and not a 2024 nostalgia piece, is that the look evolved past its origins. The coquette aesthetic gave bows their opening, but what kept them was versatility.
Think about it: what other accessory works on a five-year-old and a fifty-year-old? On beachy waves and a glass-smooth bob? At a wedding and at the grocery store? A bow scales. Make it small and black and it is chic. Make it big and velvet and it is dramatic. Make it sheer and ivory and it is bridal. The same basic technique — tie a bow — produces wildly different results depending on ribbon choice, placement, and the hairstyle underneath. That is rare in hair accessories. Headbands have a vibe. Claw clips have a vibe. Bows have whatever vibe you decide.
There is also a quiet practical reason. Hair in 2026 is long — the extensions era, the boho braids era, the general return of length. Long hair needs management, and a bow is management that looks like decoration. It holds, it finishes, it distracts from the frizz at your crown, and it takes seconds. I have watched clients go from “I could never” to wearing a bow three days a week within a month. The learning curve is a gentle slope, and once you have tied three bows, you have tied them all.
Who Do Bow Hairstyles Actually Suit?
Here is my honest take: almost everyone, with the right bow. The bow is not the problem — the bow SIZE and PLACEMENT are the problem. Petite faces can get swallowed by an oversized bow; the fix is a smaller bow placed slightly off-center or higher up. Round faces do beautifully with bows placed at the crown, because the vertical lift draws the eye up. If you have a long face, a side-placed bow or a low bow at the nape balances things out instead of adding more height.
Hair type matters less than people think, but it changes the technique. Fine hair needs texture — a little dry shampoo or texturizing spray at the roots — or the bow slides straight off by lunch. Thick hair needs a bigger, sturdier bow and stronger anchoring; a tiny thin ribbon on very thick hair looks lost, like a postage stamp on a package. Curly and coily hair? Bows are GORGEOUS on texture — the contrast between defined curls and a smooth ribbon is genuinely striking. Just make sure the ribbon is wide enough to read against the volume, and anchor it with pins rather than relying on a hair tie alone.
Age is the question I get most, usually whispered: “Am I too old for bows?” No. You are too old for a bow that does not match your personal style, and that is a different thing entirely. A sleek low bun with a black velvet bow at forty-five looks sophisticated. A messy topknot with a gingham bow at twenty-two looks fun. The bow follows the energy of the hairstyle underneath it. Match the bow to your outfit’s formality, keep the rest of your look intentional, and nobody is thinking about your age — they are thinking about how good your hair looks. I have put bows on brides, on CEOs, on grandmothers, and on teenagers, and the only failures were bows fighting the outfit, never the person.
15 Bow Hairstyles to Try in 2026
Alright, the main event. Fifteen bow hairstyles, each one a complete look you can actually wear — not runway fantasy, real-life hair. I have ordered them from easiest to most involved, so if you are new to bows, start at the top and work down. Every style gets the full treatment: what it is, who it flatters, exactly how to do it, how it holds up through a real day, and the honest downsides nobody mentions. Grab your ribbons.
1. The Classic Coquette Bow Ponytail
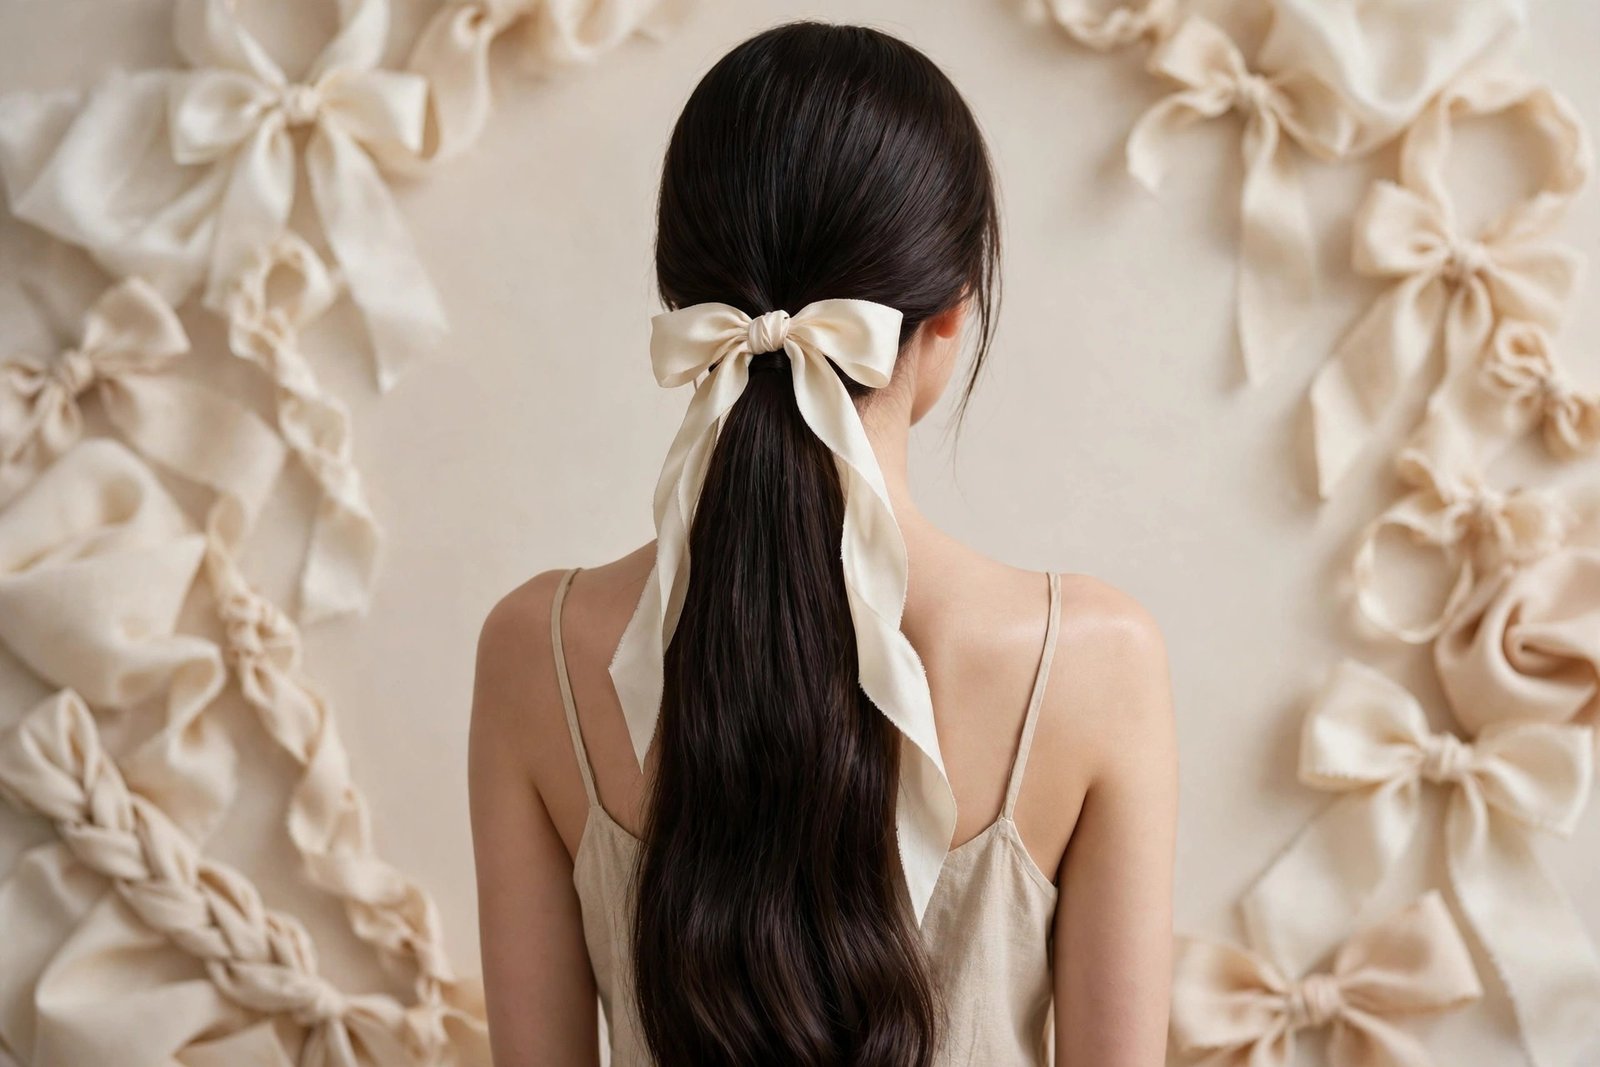
This is the one that started it all, and I will defend it forever: a simple ponytail — mid-height is the sweet spot — with a ribbon tied in a bow right at the base where the hair tie sits. It sounds almost too simple to be a “style,” but that is exactly its power. The bow covers the elastic, adds a focal point, and turns the most basic hairstyle in existence into something that looks considered. In 2026 the updated version uses a slightly wider ribbon than the 2024 original — about an inch to an inch and a half — and the tails are left long, falling alongside the ponytail.
Who it suits: genuinely everyone. This is the universal donor of bow hairstyles. It works on straight, wavy, and curly hair; on fine hair it adds the illusion of fullness at the base; on thick hair it tames the bulk into something polished. Face-shape-wise, mid-height placement is neutral — it neither elongates nor shortens dramatically. If your ponytail game is strong, this is your look. If your ponytail game is weak — lumps, bumps, that weird dent — the bow actually helps by drawing the eye to the base and away from imperfections. Funny how that works.
How to do it: Brush your hair back into a ponytail at mid-height (about ear level) and secure with an elastic that matches your hair color. Smooth the top with a light touch of serum if you have flyaways. Take a ribbon about 24 inches long, wrap it around the base of the ponytail, and tie a proper bow — not a knot, a bow, with two loops. Here is the trick barbers and stylists use: tie the bow, then slide two bobby pins through the back of the bow’s knot, crossed in an X, into the hair at the base. That X is what keeps it from migrating south by 3 PM. Arrange the tails so they fall naturally, trim them at an angle if they are too long, and you are done. Total time: under two minutes once you have done it twice.
Maintenance and real talk: this is a low-maintenance look during the day — the ponytail holds itself, the bow is pinned. The honest downside is ribbon choice. Satin looks best in photos but is the slipperiest; if you use satin, those bobby pins are non-negotiable. Grosgrain holds better for long days. And a small thing nobody tells you: if your ribbon is too long, the tails get caught in bag straps and car seatbelts. Ask me how I know. Keep tails around six to eight inches for daily wear, longer only for occasions. Refresh it the next day by retying — ribbons remember their creases, so flip the ribbon over for a fresh look.
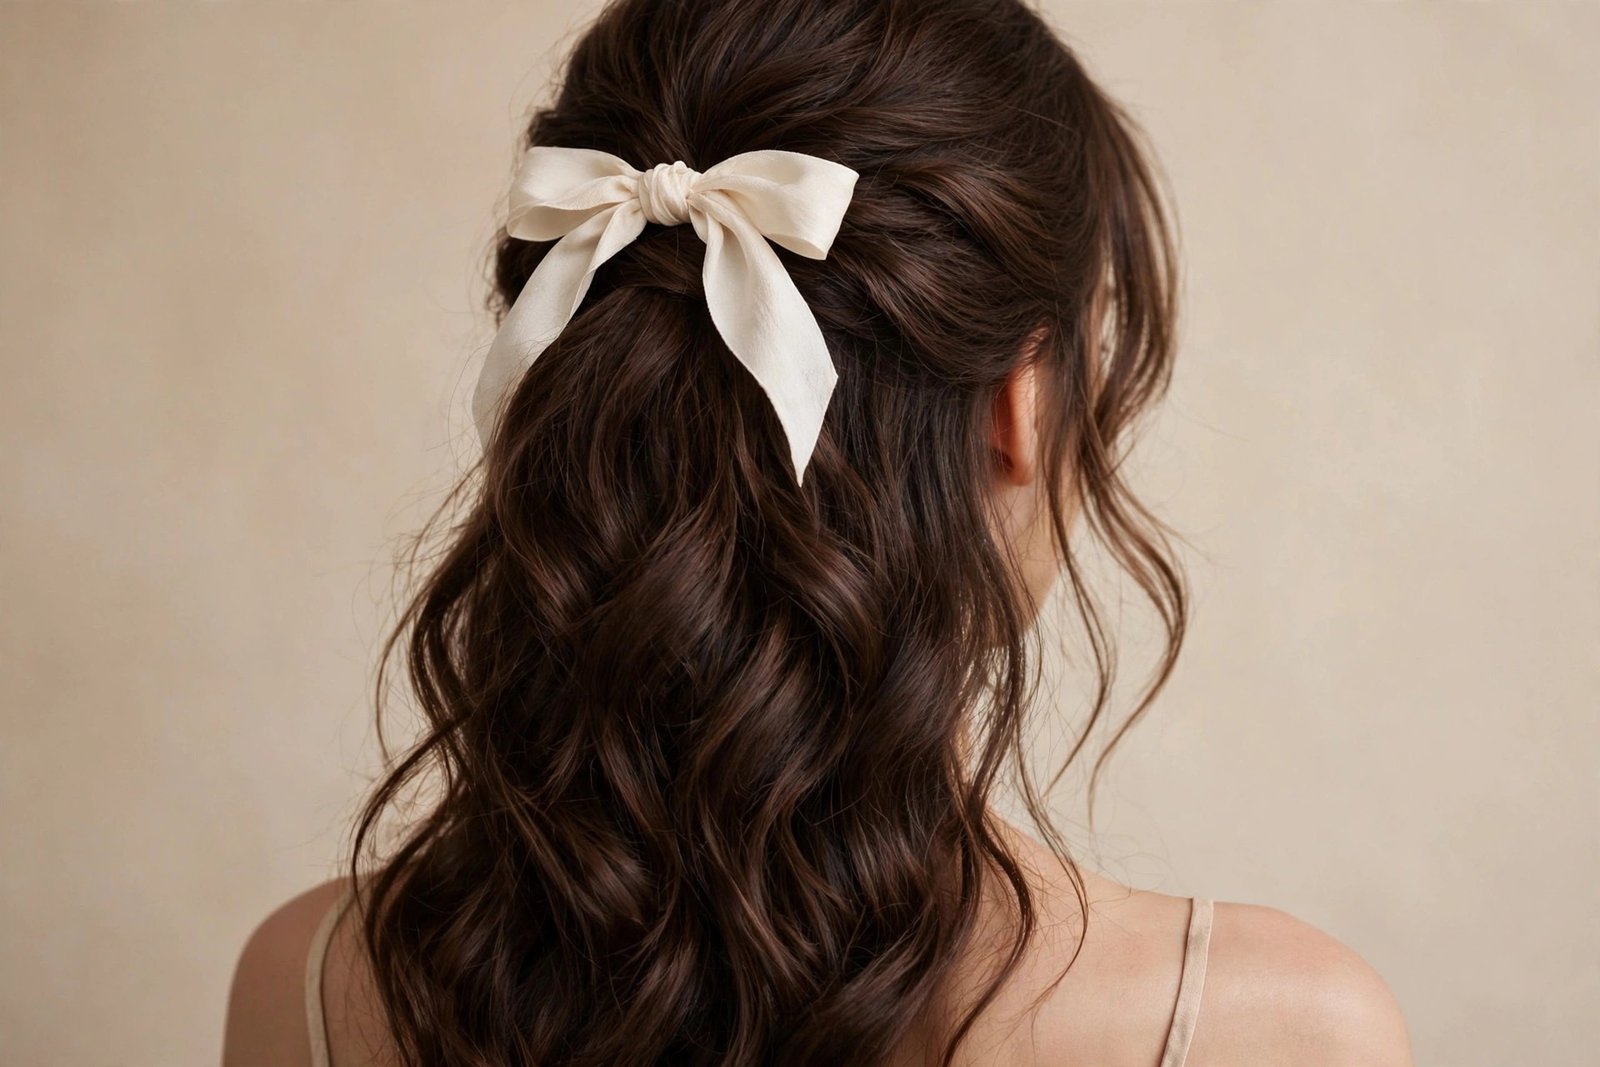
2. Half-Up Bow with Loose Waves
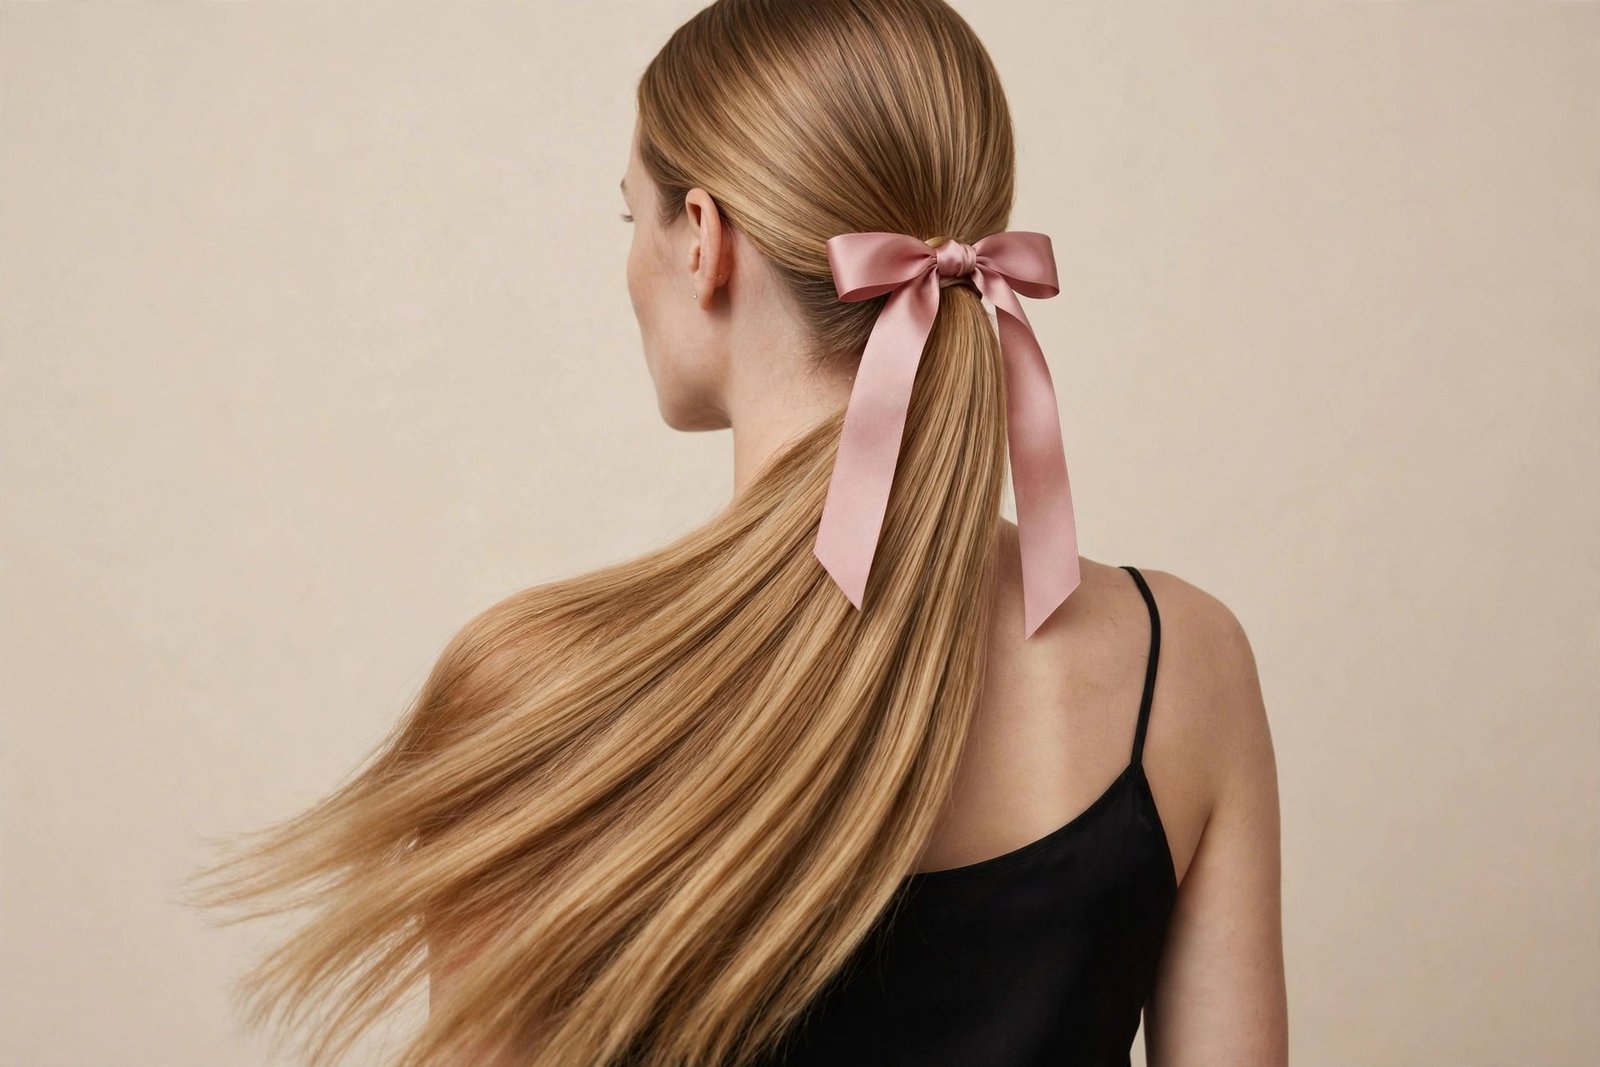
If the ponytail is the bow’s everyday uniform, the half-up bow with loose waves is its evening gown. You take the top section of your hair — roughly from temple to temple — pull it back, and secure it with a bow, leaving the rest cascading down in soft waves. The contrast is what makes it: structured, sweet bow on top; effortless, touchable waves below. It is romantic without trying too hard, and it photographs from every single angle, which is why it dominates wedding guest photos and date-night selfies alike.
Who it suits: this is a dream on medium to long hair — you need enough length in the bottom section for the waves to actually read as waves. Shoulder-length can work if the waves are defined. It is especially flattering on oval and heart-shaped faces because the half-up section lifts the crown while the loose hair softens the jawline. Wavy and curly hair types get this almost for free — your natural texture IS the bottom half. Straight-haired girls, you will want a curling wand or overnight braids to create the wave; pin-straight hair under a half-up bow can look a little severe, a little “school photo day.” The waves are doing important softening work here, so do not skip them.
How to do it: Create your waves first — a large-barrel curling iron, curling away from the face, then brush through gently with your fingers for that lived-in finish. A light mist of texturizing spray gives grip. Section off the top third of your hair, from about temple to temple, and gather it at the back of your crown. Secure with a small clear elastic first — this is your safety net. Then wrap your ribbon around the elastic and tie your bow. The bow should sit right at the crown, slightly tilted is fine, perfect symmetry is not required and honestly looks less natural. Pull a few face-framing pieces loose in front, tug gently at the crown for a little volume, and finish with a flexible-hold hairspray. The whole thing takes ten minutes, most of it the waves.
Maintenance and real talk: this holds well because the elastic does the structural work and the bow is decoration. The honest downside: on very fine hair, the top section can look thin under the bow. Fix it with a little teasing at the crown before you gather, or use a small volumizing powder at the roots. Another real-world note — if your waves fall flat by evening, the look loses its magic, so this is a “style the waves well” situation. A beachy wave technique with proper heat protectant and a cool-shot finish lasts noticeably longer. And keep the bow proportional: a huge bow on a small half-up section looks top-heavy. Medium bows for medium sections.
3. Double Ribbon Pigtails
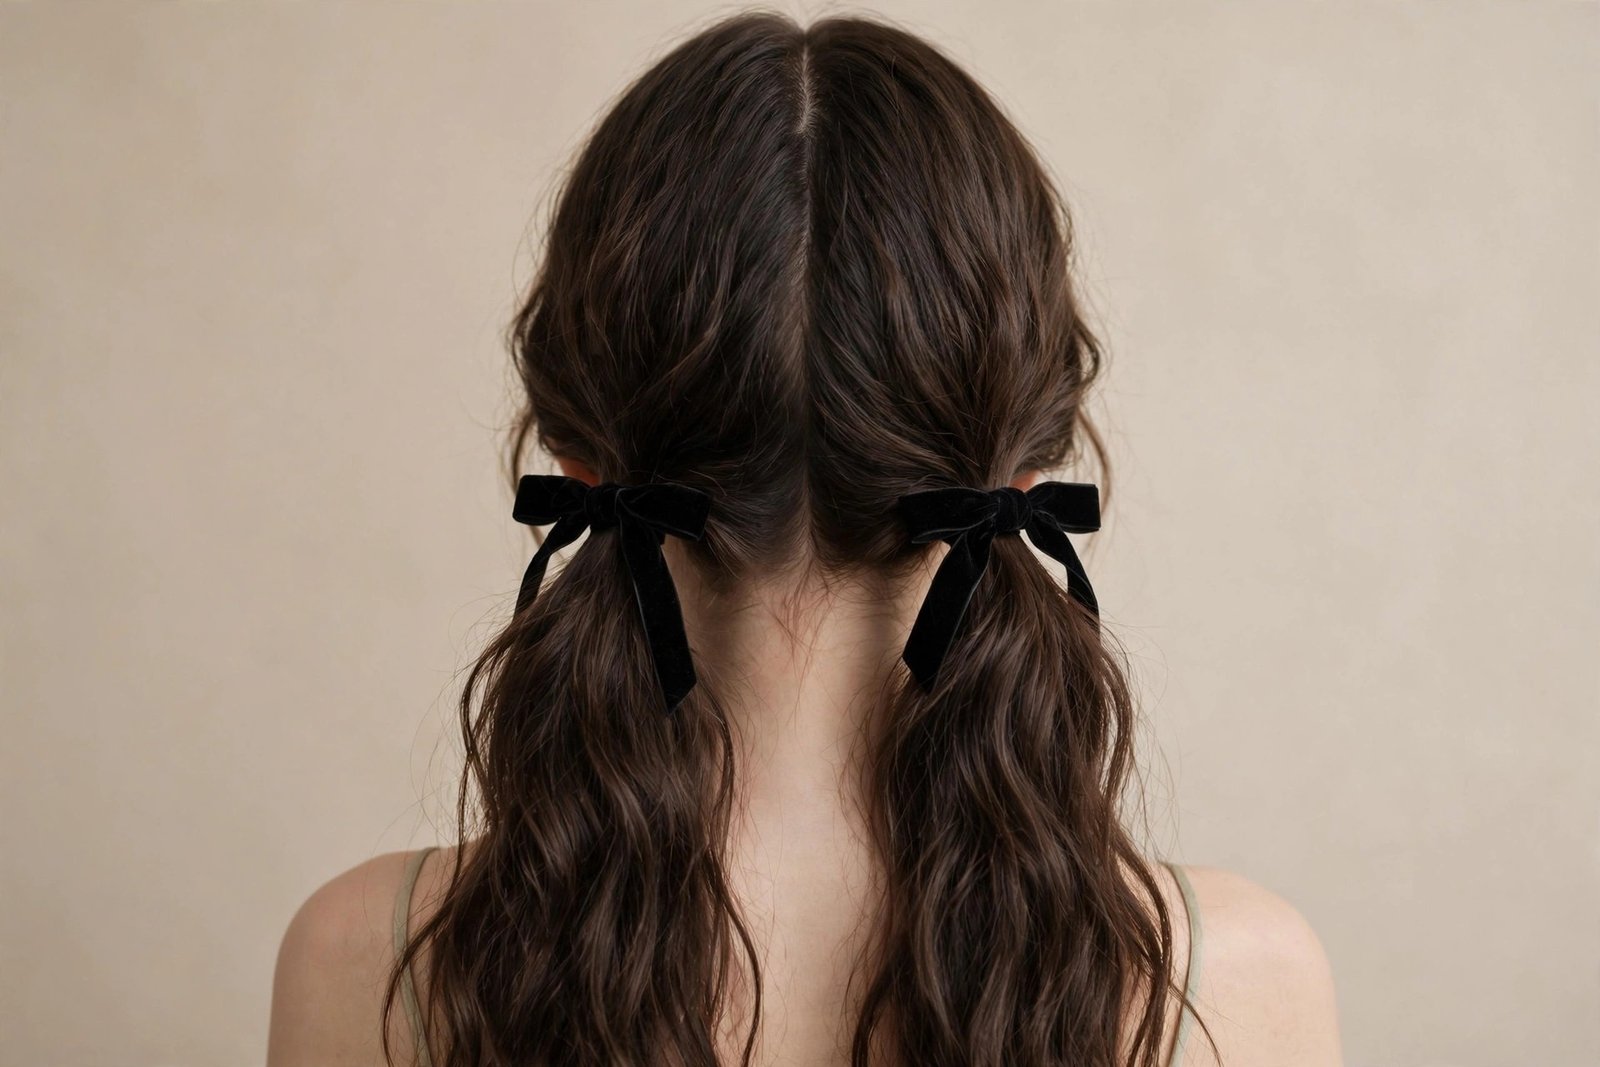
Two pigtails, two bows — maximum charm. Before you dismiss this as “too young,” hear me out, because the 2026 version of double pigtails is not the playground version. These are low, loose pigtails worn at the nape or just behind the ears, with soft texture and medium-sized bows. The vibe is playful-feminine, not childish, and it is enormous on social media right now for a reason: it is fun, it is photogenic, and on the right person it is genuinely striking. I have seen this look absolutely steal a room at casual parties.
Who it suits: this favors younger faces and softer personal styles, I will be straight with you. It is hardest to pull off with very sharp, severe styling elsewhere — if your makeup is dramatic and your outfit is all edges, pigtails can clash. But paired with soft makeup and relaxed clothes, it works across ages better than people expect. Hair-wise, medium to long hair is ideal; the pigtails need enough length to drape. It is fantastic on thick hair because the volume makes each pigtail look lush. Fine-haired girls can absolutely do it — just add waves or texture first so the pigtails do not look stringy. Round faces: keep the pigtails low and slightly forward over the shoulders, which slims visually.
How to do it: Part your hair down the middle — a clean center part is important here, it is the backbone of the symmetry. Create loose waves or at least some bend through the lengths for texture. Gather each side into a low pigtail, positioned just behind the ear or at the nape, and secure with elastics. Here is the key detail: do not pull them tight. Slightly loose, slightly imperfect pigtails are the 2026 way; tight pigtails are what make it read childish. Tie a bow at the base of each one — matching ribbons, same size, mirrored placement. Pin each bow with a bobby pin for security. Pull out a few wisps around the face, and gently tug the hair above each elastic to relax it. Done in five minutes.
Maintenance and real talk: low pigtails are comfortable — no headache, no tension. The honest downside is symmetry anxiety. If one pigtail sits higher than the other, it is noticeable in photos. My trick: do them in front of a mirror, check from the front, then have someone glance at the back or use your phone camera. Also, bows at the nape can get squished if you lean back in a chair all day — velvet or grosgrain bows bounce back, satin creases. For all-day wear, pick a resilient ribbon. And this look does attract attention — it is a statement. If you want to blend in, this is not your style. Own it or skip it.
4. Low Bow Bun
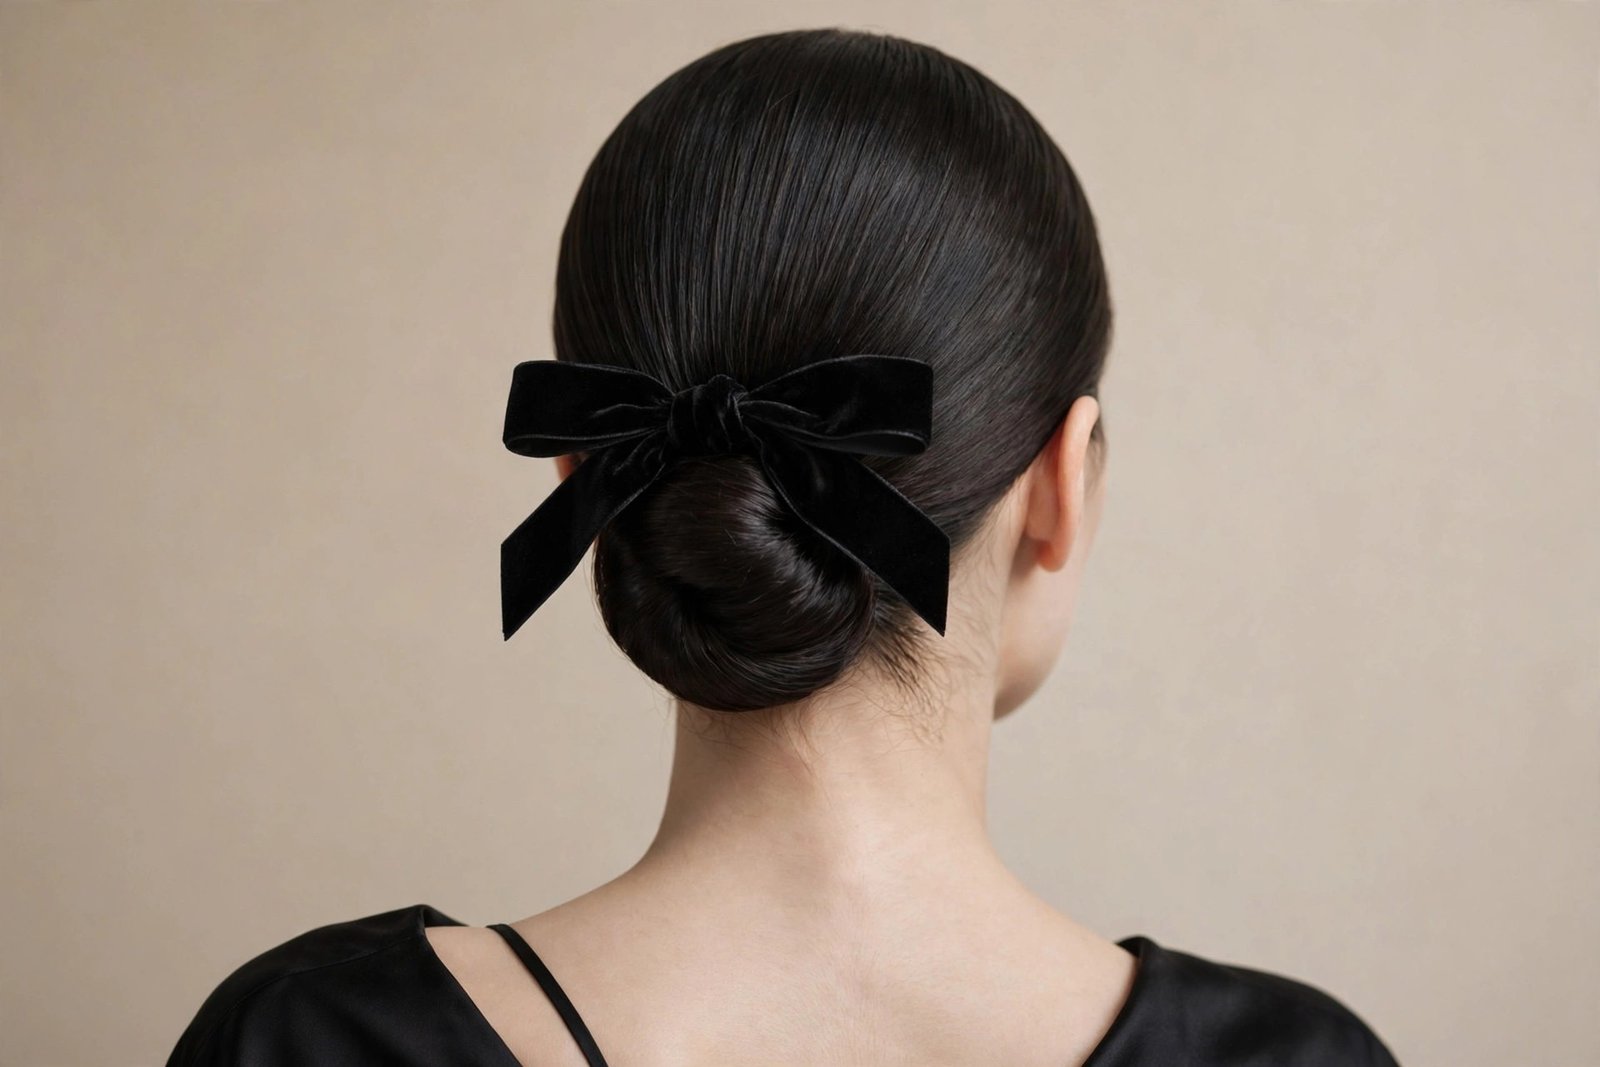
The low bow bun is the quiet luxury of bow hairstyles. A smooth, low bun sitting at the nape, finished with a bow — usually velvet or satin — placed just above it or wrapped around its base. It is the hairstyle equivalent of a perfectly tailored blazer: understated, polished, and appropriate almost everywhere. Brides wear it. Executives wear it. Women who have exactly six minutes to get ready wear it. If you only learn one bow hairstyle from this entire guide, make it this one, because its cost-to-impact ratio is unbeatable.
Who it suits: everyone, genuinely, but it shines brightest on people who want polish without fuss. It is superb for work — professional, neat, stays put through long days. Oval, square, and heart faces all do well; the low placement does not add height, so long faces are safe too. Hair length: you need enough to form a bun, so medium and up. Very long, heavy hair can make the bun bulky — go for a twisted bun rather than a wrapped one to keep it sleek. Fine hair benefits enormously because the bow adds visual weight exactly where fine buns look sparse. Curly girls: a low curly bun with a velvet bow is one of the most elegant things I have ever seen. Do not straighten for this — let the texture live.
How to do it: Brush hair smooth into a low ponytail at the nape and secure. Twist the ponytail and wrap it around its base to form a bun, pinning as you go — four to six bobby pins, pushed in from different angles, is usually enough. The bun should be neat but not shellacked; a little softness around the hairline keeps it modern. Now the bow: either tie your ribbon in a bow and pin it directly above the bun, or wrap the ribbon around the bun’s base and tie the bow on top. Above-the-bun placement reads classic; wrapped-around reads a bit more fashion. Both are correct. Finish with a medium-hold hairspray, especially around the hairline. Seven minutes, and you look like you have your life together.
Maintenance and real talk: this is an all-day, no-touch hairstyle — that is its superpower. The honest downsides are few but real. First, a too-tight low bun gives some people a headache by afternoon; keep the ponytail firm but not strangling. Second, the bow can rotate during the day if it is only pinned at one point — two pins minimum, crossed. Third, and this is the one nobody mentions: a low bun plus a bow at the very back of your head is invisible to YOU all day, so check it in a mirror before important moments. A quick glance before you walk into the meeting. Otherwise, this is as close to set-and-forget as bow hairstyles get. For evening versions, swap to a larger bow or a richer fabric — same technique, dressier ribbon.
5. Oversized Statement Bow
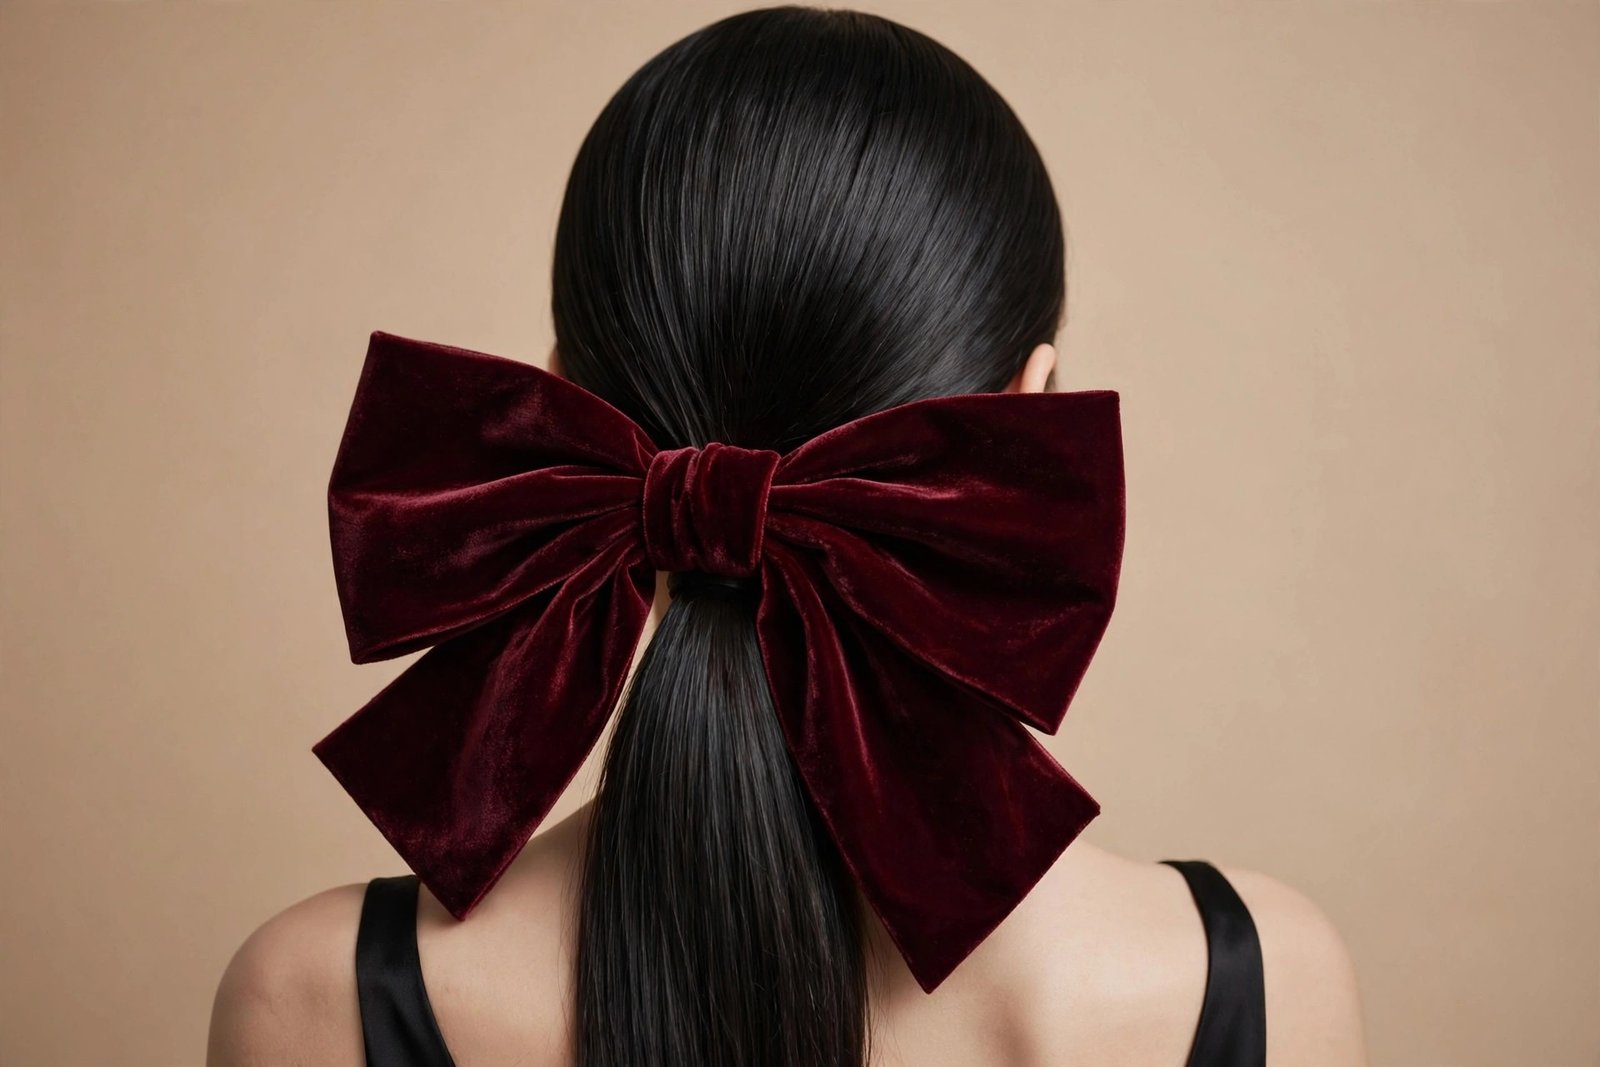
Now we go big. The oversized statement bow is exactly what it sounds like: a large, dramatic bow — we’re talking hand-sized or bigger — as the centerpiece of a simple hairstyle, usually a low ponytail, a sleek bun, or half-up hair. This is the 2026 red-carpet move, the wedding-guest power play, the “I am the moment” choice. When the bow is this big, the hair underneath stays deliberately simple, because the bow IS the hairstyle. And honestly? It works. A giant velvet bow on sleek hair is one of the most photographed looks of the year for a reason.
Who it suits: confidence is the main requirement — this bow does not whisper. Physically, it favors medium to long hair with enough presence to balance the bow; very fine, short hair can get overwhelmed. Taller frames and longer necks carry oversized bows beautifully. Petite women can absolutely wear it — just scale the bow to about the width of your face rather than bigger, and keep placement high (crown or high ponytail) so it lifts rather than drags. Face shape is flexible since the hair stays simple. The real question is occasion: this is for events, parties, photoshoots, weddings — days when you want to be remembered. Wearing it to the dentist is a choice, and I respect it, but know what you are signing up for.
How to do it: Style the base first — a sleek low ponytail, a polished bun, or smooth half-up hair. The base must be CLEAN because all eyes go to the bow and messy surroundings will show. For the bow itself, you have two routes. Route one: buy a pre-tied oversized bow clip or barrette — no shame in this, the good ones are structured with wire edges and look flawless. Route two: make it from wide ribbon (3-4 inches wide), forming big loops and securing the center with a wrapped band, then attach with a clip or pins. Either way, anchor it like you mean it: large bows are heavy, and gravity is undefeated. I use a combination — a small ponytail elastic at the base, the bow clipped over it, plus two bobby pins through the bow’s center into the hair. Test it: shake your head. If it shifts, add another pin.
Maintenance and real talk: the honest downside of statement bows is that they are high-maintenance accessories on a low-maintenance base. You will be aware of it all day — doorways, car headrests, hugs from tall people, wind. Velvet and wired-edge ribbons hold their shape best; unwired satin in oversized form goes limp by evening and looks sad. Also, sitting back in chairs squishes it — plan accordingly at dinner. But here is the upside nobody talks about: an oversized bow means you can keep the rest of your getting-ready routine minimal. Simple hair, simple makeup, one giant bow — you look styled with a fraction of the effort. It is maximalism as a shortcut, and I am here for it.
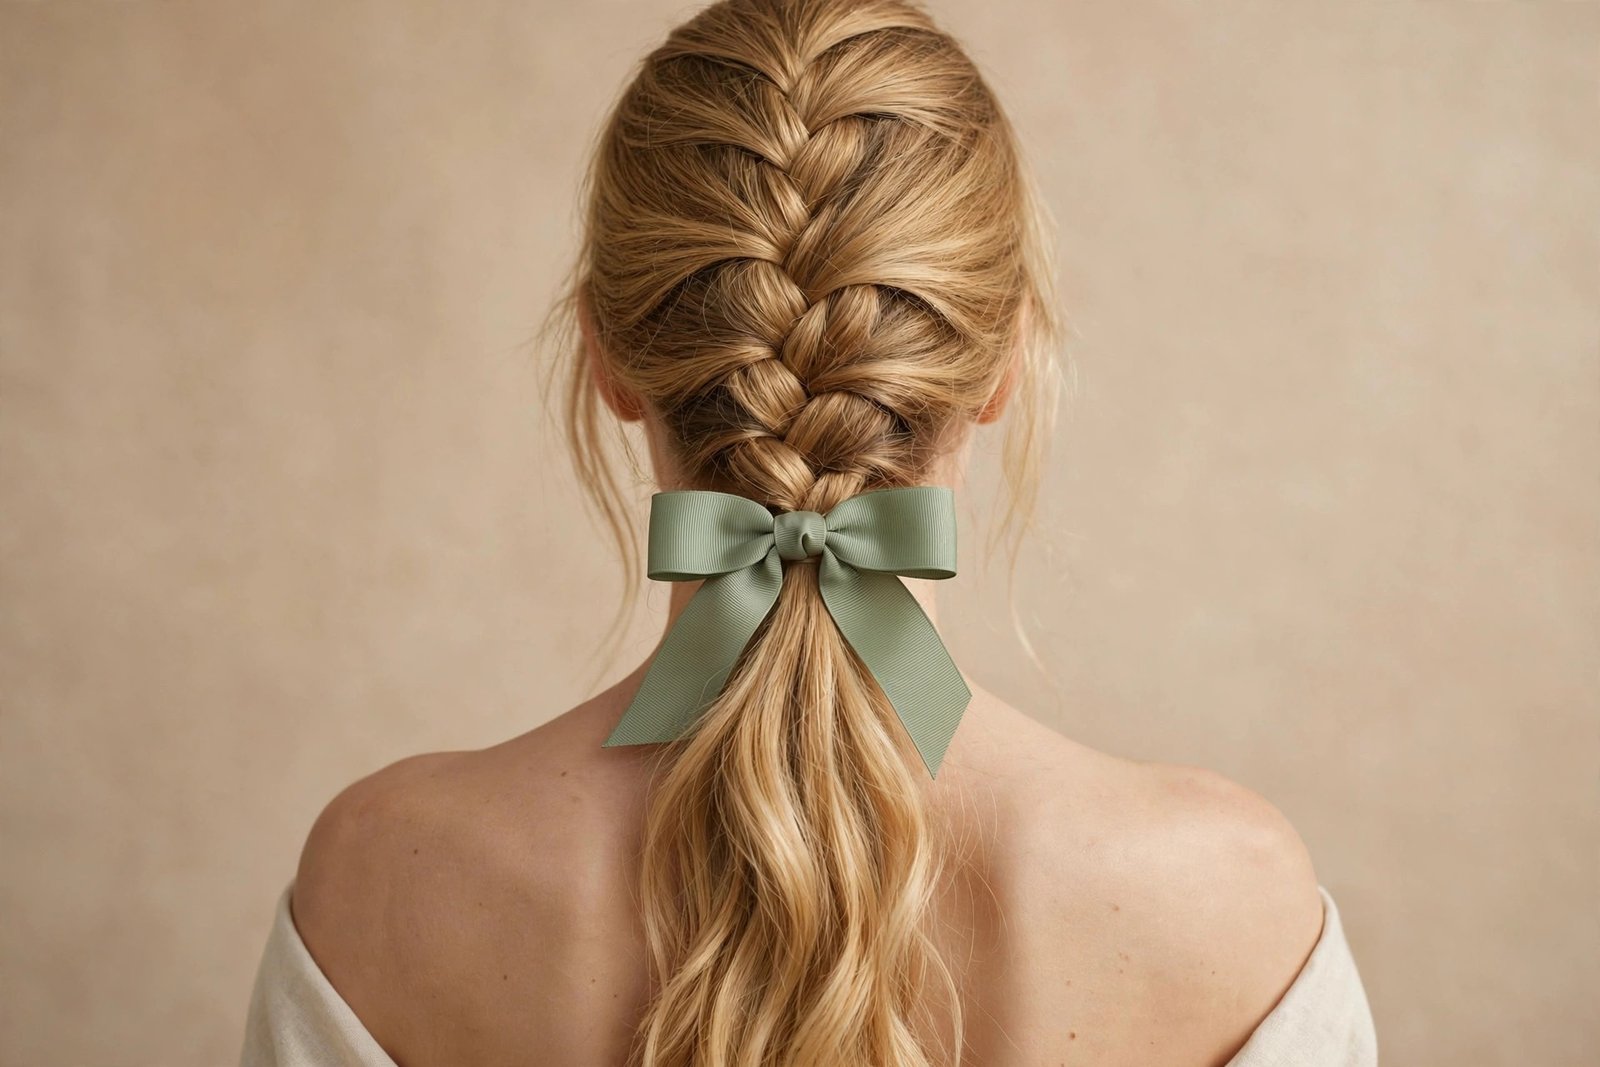
6. Bow-Topped Braided Ponytail
A braid flowing into a ponytail, finished with a bow at the transition point — this is texture meets sweetness, and it is criminally underrated. Usually it is a French or Dutch braid from the crown that gathers into a ponytail, with the bow tied right where the braid ends and the pony begins. The bow marks the spot, covers the elastic, and adds a soft counterpoint to the braid’s structure. Athletes wear versions of this. Bridesmaids wear versions of this. It is one of those rare styles that is genuinely practical AND genuinely pretty.
Who it suits: long hair is the canvas here — you need length for both the braid and the ponytail to exist. Medium hair can do a shorter version with the bow sitting higher. It is excellent for thick hair because braiding contains the volume beautifully. Fine hair works too, especially with a Dutch braid (which sits on top of the hair and looks fuller) plus a little pancaking — gently tugging the braid edges wider. Face-wise, the braided crown adds height, which flatters round faces; if your face is long, keep the braid looser and lower. This is also a genuinely good sports-and-activity hairstyle — the braid keeps everything controlled, the bow keeps it cute, and nothing is in your face.
How to do it: Start with a French or Dutch braid from your hairline, working back toward the crown — include hair from both sides as you go. When you reach the point where you want the ponytail to start (mid-head is classic), stop braiding and gather everything — the braid tail plus all remaining hair — into a ponytail. Secure firmly; this junction takes stress. Tie your bow around the elastic. Grosgrain or velvet works best here because the braid texture gives the ribbon something to grip. Pancake the braid gently for fullness, tug a few face-framing pieces loose, and you are done. Ten to fifteen minutes depending on your braiding speed. If braiding is not your skill yet, a simple three-strand braid down the center back works with the same bow finish.
Maintenance and real talk: this is a WORKHORSE — it genuinely lasts all day, through workouts, through wind, through long events. The honest downside is the braid-to-ponytail junction: if the elastic is not tight enough, the whole thing sags by afternoon and the bow slides down with it. Anchor that elastic properly. Second downside: taking it out at night requires patience — braids plus a bow plus a day of wear means tangles at the junction. Work a little detangling spray in before you undo it. And a styling note: this looks best when the bow echoes the braid’s energy — a neat bow for a neat braid, a relaxed bow for a messy braid. Mismatched formality is the most common mistake I see with this one.
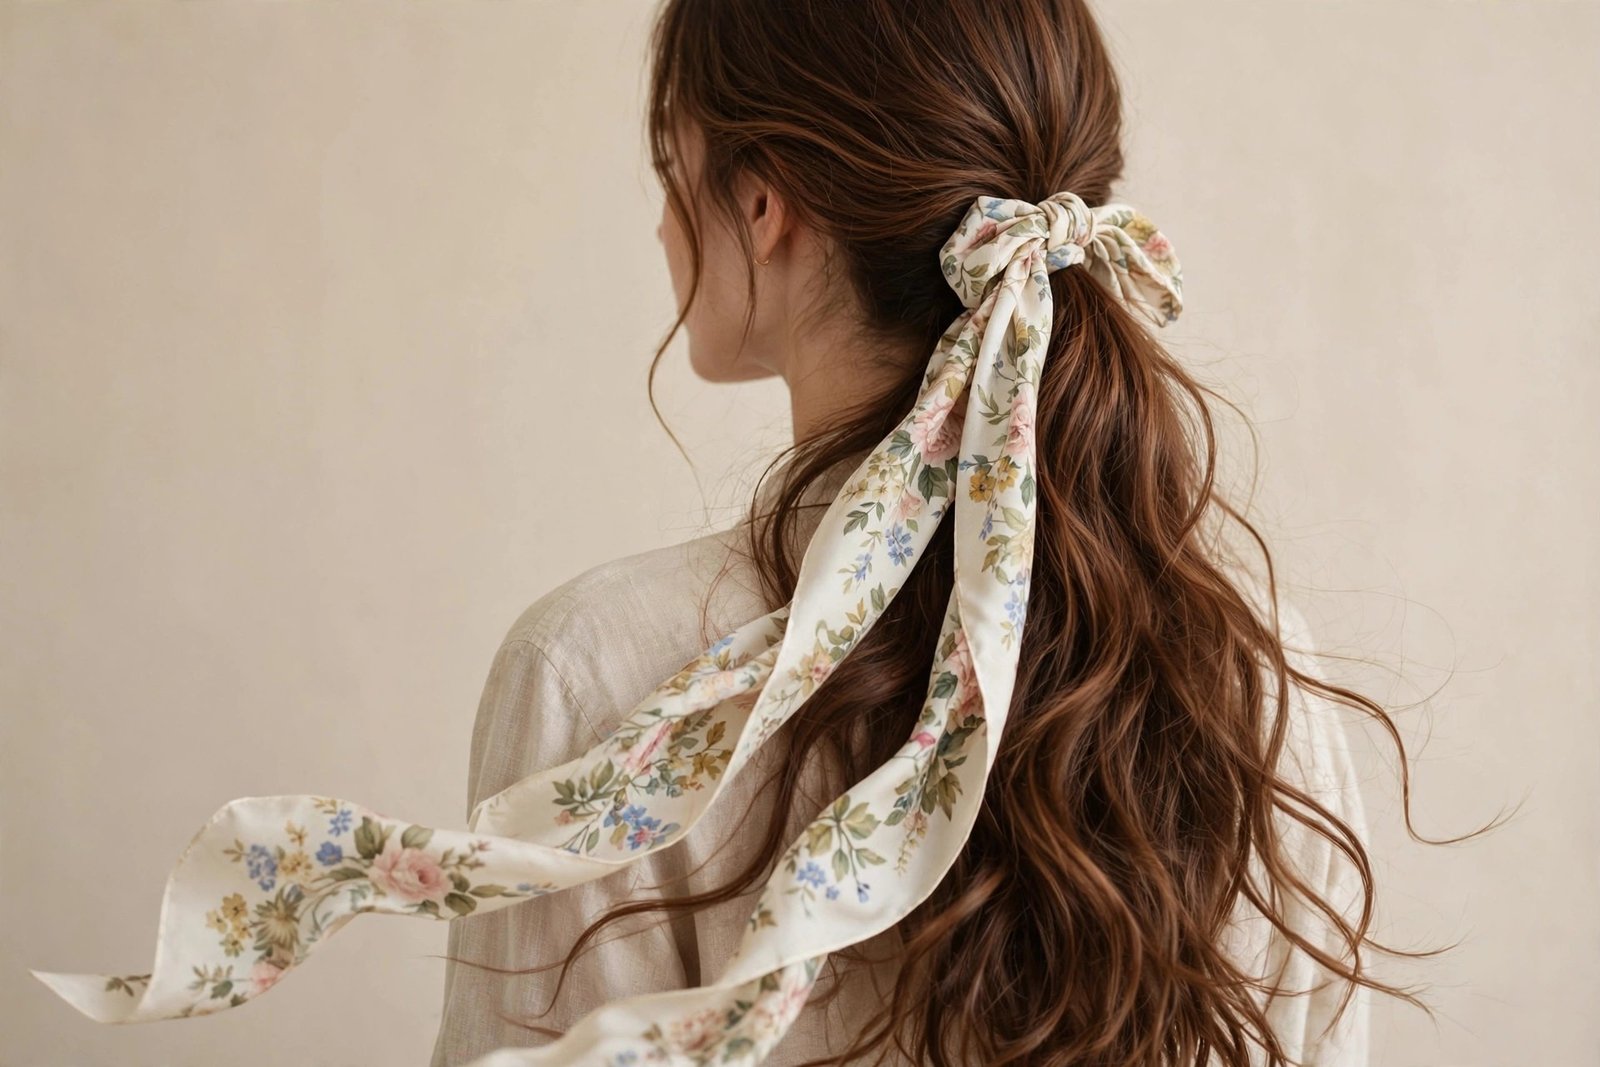
7. Silk Scarf Bow Wrap
This one is for the romantics: instead of a narrow ribbon, you tie a silk scarf — a square or long rectangular scarf — into a bow, and the scarf becomes part of the hairstyle. Wrapped around a ponytail base, woven into a bun, or tied at the crown over half-up hair, a scarf bow brings pattern, color, and movement that a plain ribbon cannot. Florals, polka dots, vintage prints — the scarf is doing fashion work while the bow does hair work. It is very 2026, very European-summer, and it photographs like an absolute dream in motion.
Who it suits: this is a personality look — it suits people who already wear prints and color, who treat accessories as part of the outfit. If your wardrobe is all neutrals, a scarf bow can still work as your single statement piece; just pick a scarf with colors that echo something else you are wearing. Hair-wise, it is versatile — ponytails, buns, half-up styles all take a scarf bow well. Longer hair shows off the scarf tails better. One honest note: scarf bows add visual busyness, so they pair best with simpler hairstyles underneath. A scarf bow on top of an intricate braided updo is too much happening. Simple base, statement scarf — that is the formula.
How to do it: Fold a square scarf diagonally into a long band, or use a long rectangular scarf as-is. Style your base — let’s say a low ponytail. Wrap the scarf band around the ponytail base twice, then tie a bow with the ends. The bow will be bigger and softer than a ribbon bow — embrace that, it is the charm. Arrange the scarf tails to drape nicely; they can be different lengths, asymmetry looks natural here. Pin the knot with a bobby pin for security — silk is slippery and scarves are heavier than ribbons. Alternative placement: wrap the scarf around a low bun like a headband, tie the bow on top of the bun. Ten minutes, and you look like you summer in the south of France.
Maintenance and real talk: silk scarves are slippery — I cannot stress the pinning enough. One bobby pin through the knot is the minimum; two is better. The honest downside is that scarves absorb hair products and get dirty faster than ribbons, so do not use your good silk scarf on freshly oiled hair. Also, wind is the enemy — scarf tails catch wind beautifully in photos and annoyingly in real life. For windy days, tuck the tails shorter. On the plus side, a scarf bow is endlessly re-wearable across outfits, it packs flat for travel, and it doubles as a neck scarf or bag accessory. Cost-per-wear is excellent. Hand-wash your scarves; the washing machine murders silk.
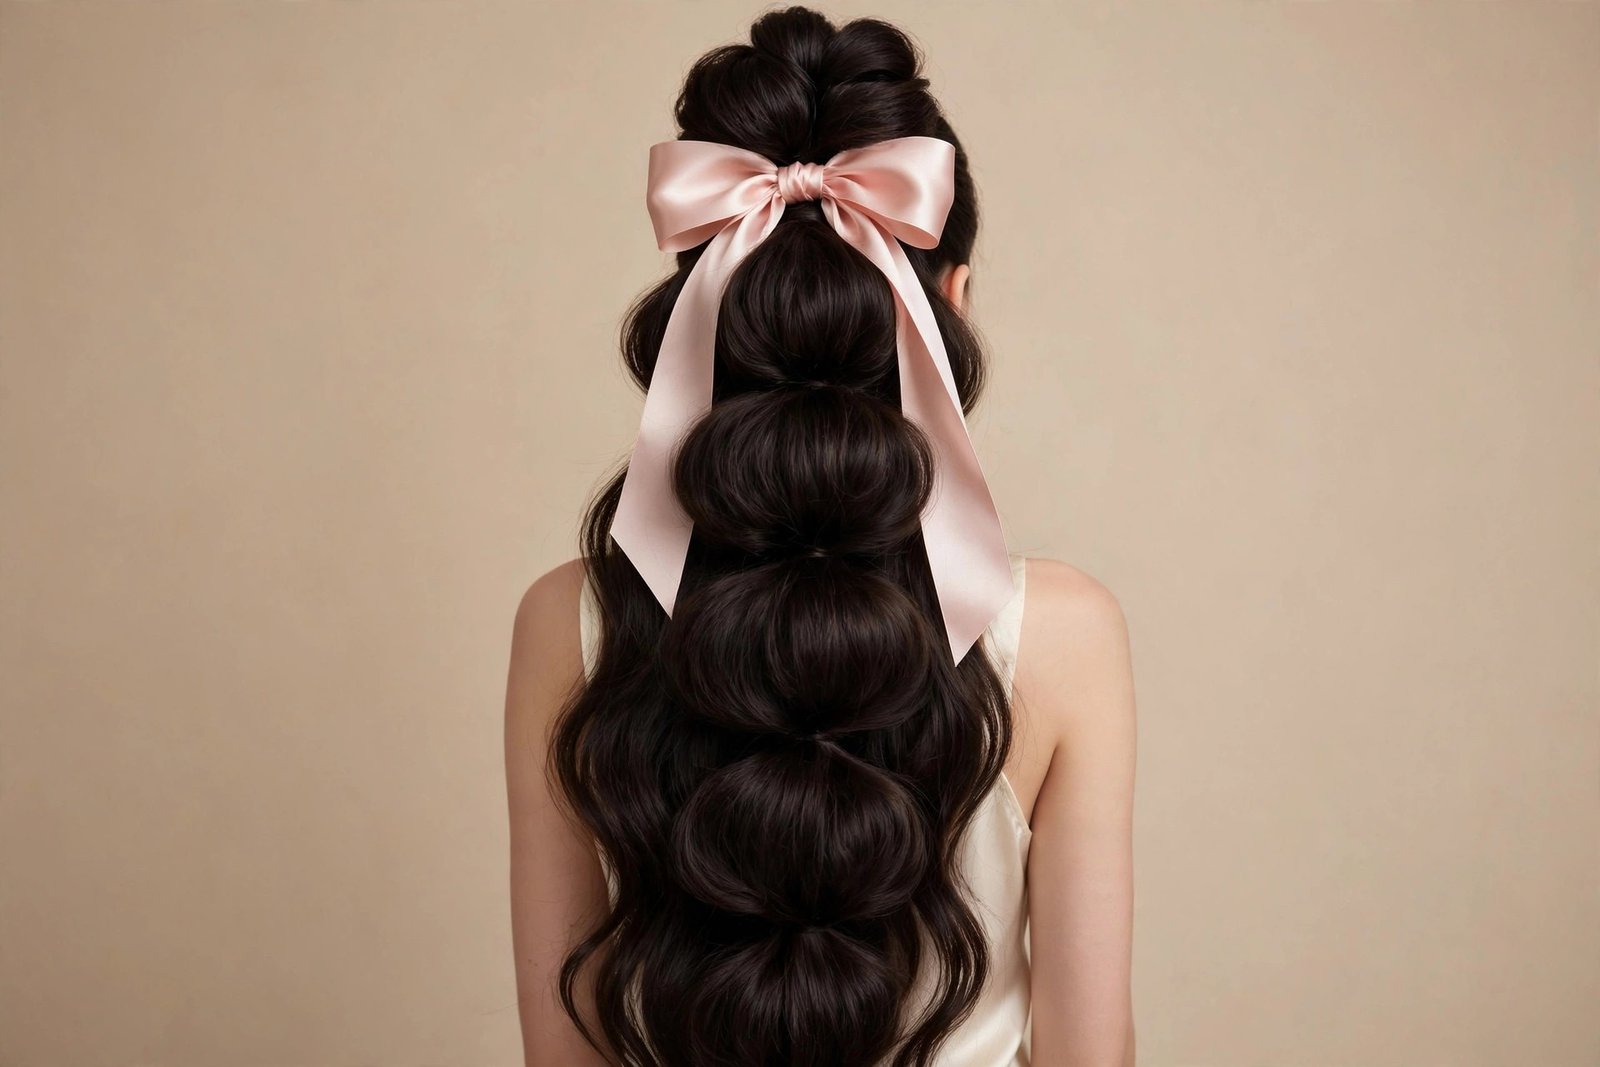
8. Bow-Adorned Bubble Braid
The bubble braid — that series of puffs created by spacing elastics down a ponytail — gets a bow at the top, and sometimes tiny bows between bubbles, and the result is pure playful charm. This is a young, fun, high-energy look. The bubbles give incredible volume and shape, the bow gives sweetness, and together they create something that looks far more complicated than it is. I love recommending this to people who want a “wow” hairstyle without braiding skills, because there is zero braiding involved — it is just elastics and puffs.
Who it suits: long hair is essential — you need length to make multiple bubbles. The more hair, the more bubbles, the better it looks. It is fantastic for thick hair (maximum bubble volume) and very workable for fine hair with texturizing spray (the technique itself creates fullness). This skews young and casual — it is a festival look, a party look, a photoshoot look. I will be honest: it is hard to make bubble braids read professional, so save this for fun contexts. Round and oval faces do great; the vertical line of bubbles elongates. If you have a very long face, keep the bubbles wider rather than longer to avoid adding more length visually.
How to do it: Pull hair into a high or mid ponytail and secure. Then place small elastics every two to three inches down the ponytail. Between each pair of elastics, gently tug the hair outward to create the “bubble” — work around the whole circumference for round, even puffs. This is the whole technique; it takes five minutes and looks like sorcery. Tie your main bow at the base of the ponytail where it meets the head. Optional and adorable: tie tiny bows (thin ribbon, small loops) at one or two of the elastic points down the length. Pin the main bow securely — bubble braids bounce when you move, and an unpinned bow will migrate. Finish with a light hairspray to control flyaways between bubbles.
Maintenance and real talk: bubble braids are surprisingly durable — the multiple elastics distribute tension, so it does not sag like a single ponytail can. The honest downsides: removing all those elastics at night without breakage requires care — use a drop of oil on each elastic and slide them off rather than pulling. Also, the bubbles can deflate in humidity; a little hairspray between sections helps. And the tiny-bows-between-bubbles version, while adorable, adds fiddly work — each mini bow needs its own pin or it twists around. For a first attempt, do the single statement bow at the top only. You can always add more bows once you see how the base behaves through a day.
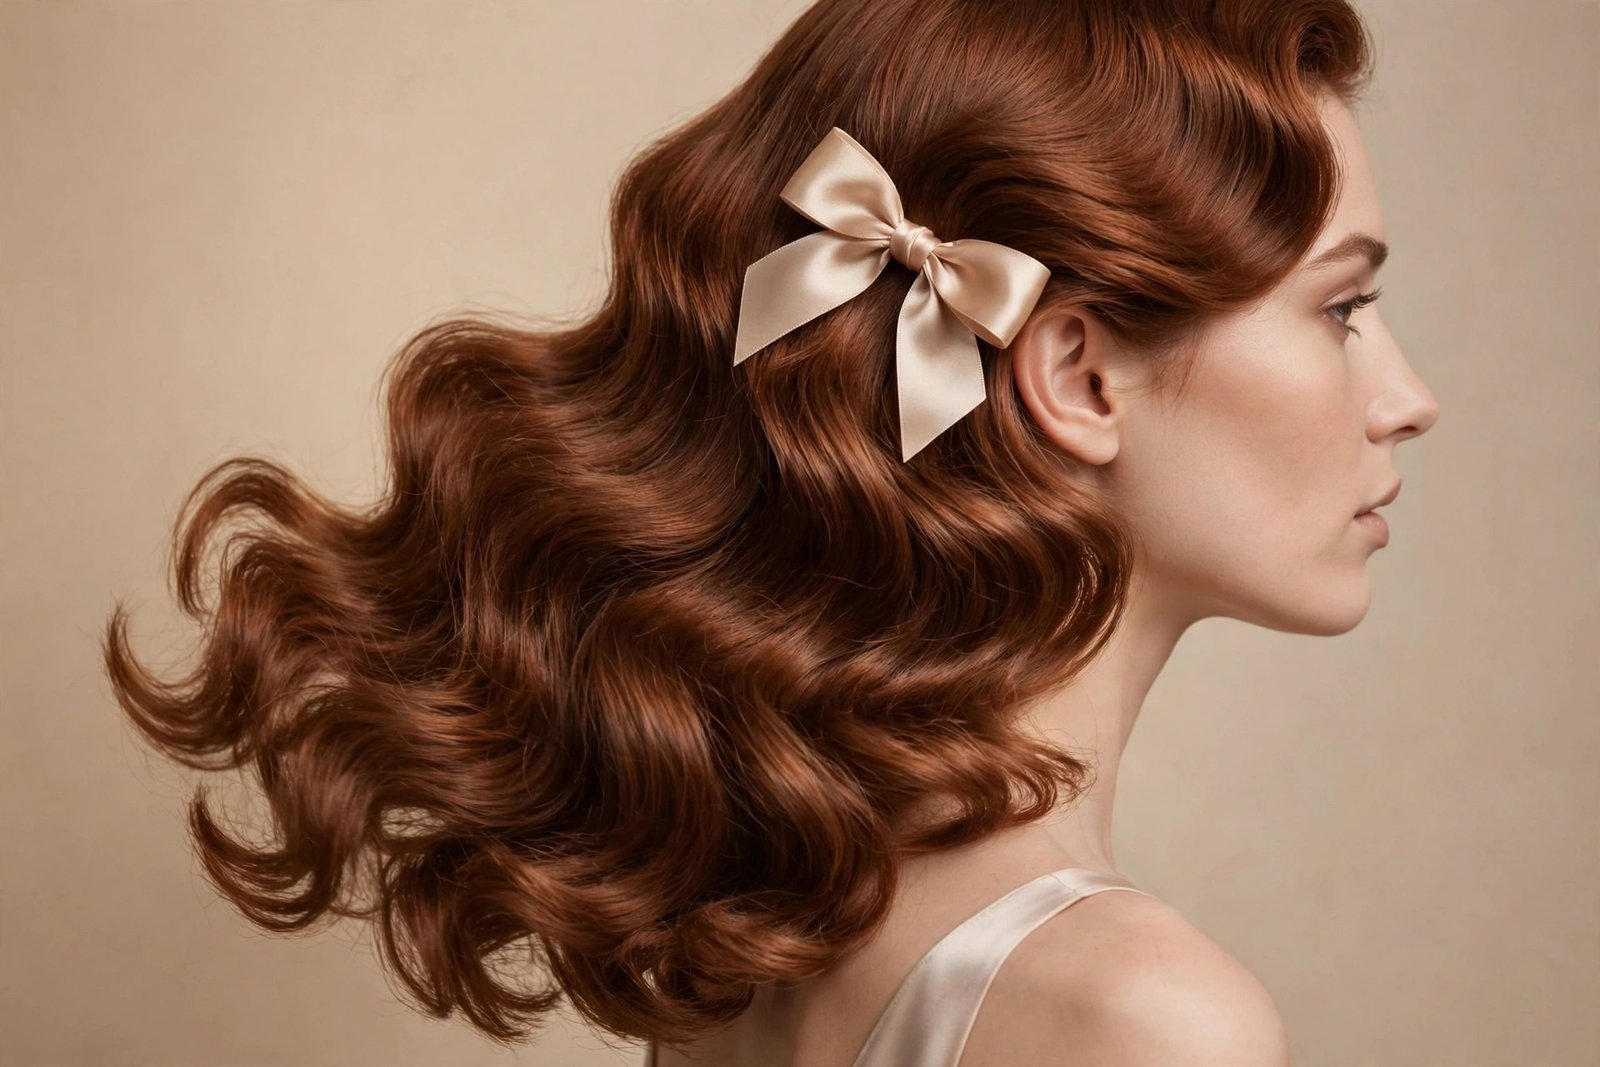
9. Soft Romantic Side Bow
Not every bow belongs dead-center. The side bow — placed just above one ear, or at the side of a low side-part — is the asymmetric, editorial take on the trend. It is softer, a little unexpected, and it photographs with beautiful dimension because the asymmetry creates visual interest. Think loose side-swept hair or a low side ponytail with a medium bow tucked at the temple. It has a vintage whisper to it — 1940s starlet meets 2026 coquette — and I find it incredibly flattering because asymmetry is naturally slimming and dynamic.
Who it suits: this is a secret weapon for round faces — the off-center placement breaks up facial symmetry in the most flattering way. It is also lovely on square faces, softening the jawline on the bow side. Hair length is flexible: it works on bobs (a small bow above the ear on sleek hair is chic), lobs, and long hair. For short hair, this might be THE bow hairstyle — centered bows can overwhelm a bob, but a side bow sits in perfect proportion. The vibe is romantic and slightly dressy, so it fits date nights, dinners, and events better than gym sessions. If your style leans feminine-classic, this will feel like home.
How to do it: Create a deep side part. Style your hair with soft waves or a smooth blowout — the side bow needs a polished canvas. Gather the hair on the fuller side loosely back, or simply leave it down and place the bow as an accent. The bow itself: tie a medium ribbon bow and pin it just above the ear on the side with less hair (the deep-part side), or at the base of a low side ponytail. Placement precision matters here — too high looks costumey, too low disappears. Aim for temple-to-ear level. Two bobby pins in an X through the knot. Tuck a small section of hair over the pins to hide them. Finish with shine spray for that starlet glow. Eight minutes, most of it the blowout.
Maintenance and real talk: side placement means the bow is visible to you in mirrors all day, which is actually nice — you will notice immediately if it shifts. The honest downside: side bows take more abuse. They catch on bag straps, seatbelts, coat collars, and phone-holding shoulders. Everything in life happens on the side of your head. A well-pinned grosgrain or velvet bow survives; a loosely tied satin bow will need retying by evening. Also, sleeping is not an option with a side bow unless you want to wake up to a crushed ribbon — this is a daytime/evening look, full stop. Take it out before bed, always.
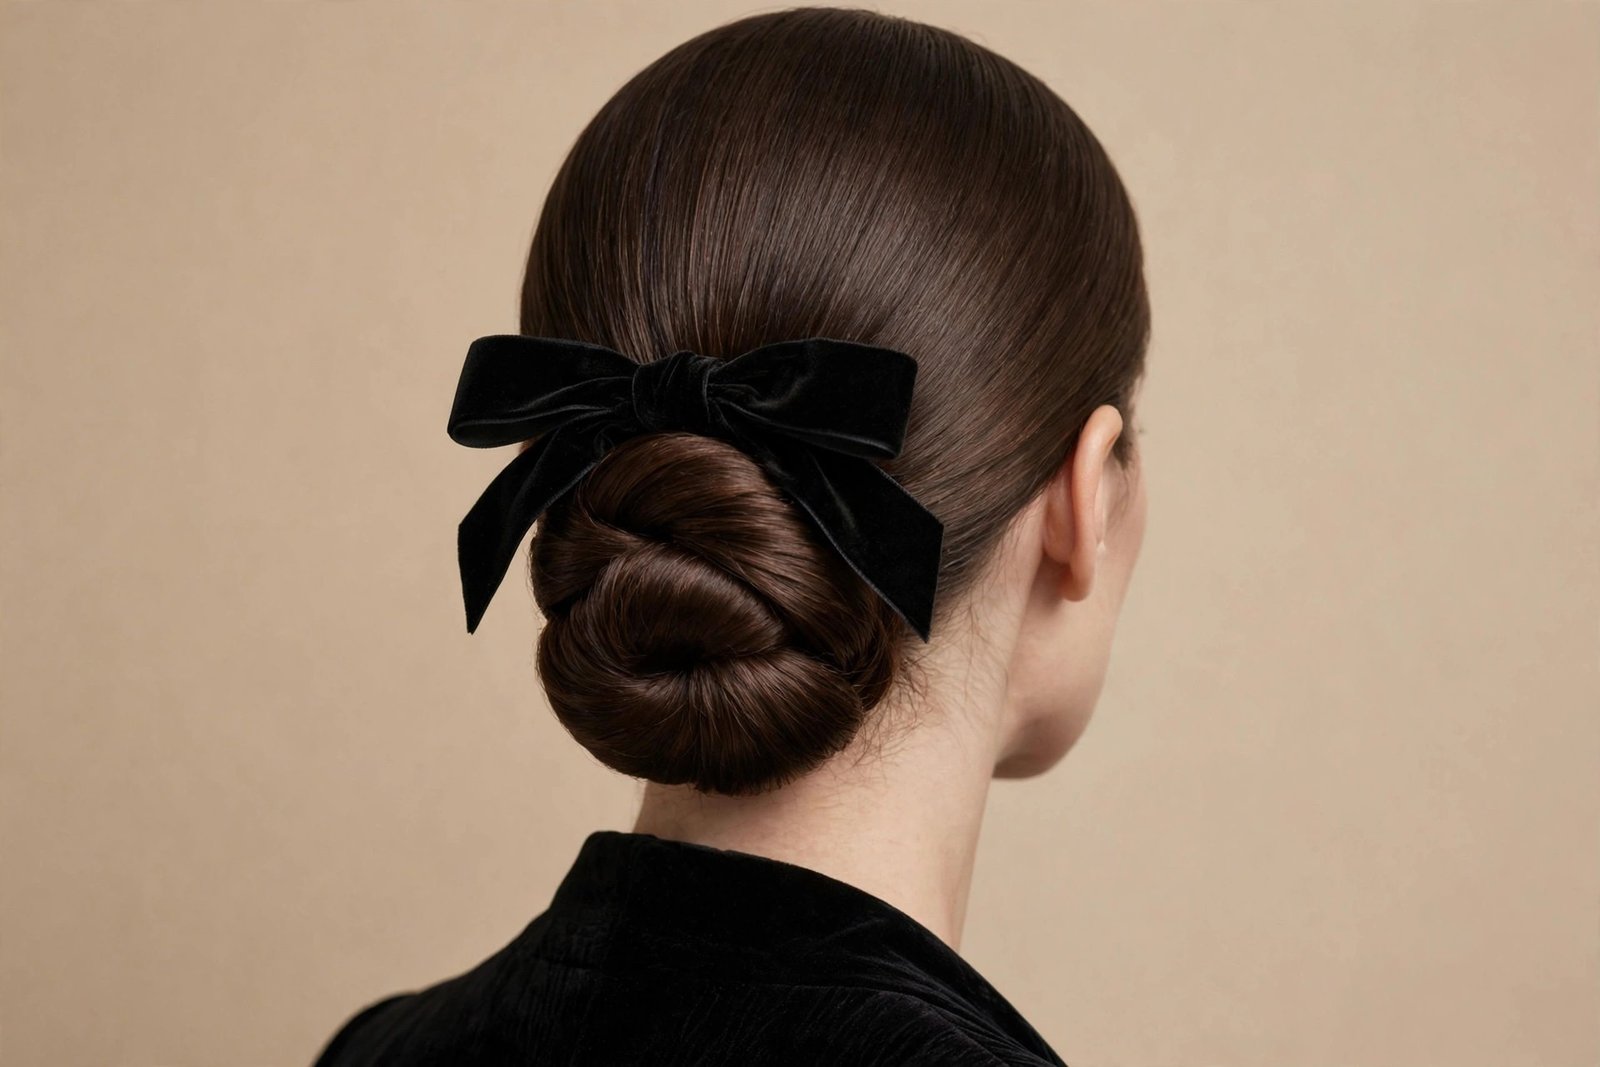
10. Velvet Bow Chignon
The chignon — that classic rolled or twisted bun at the nape — paired with a velvet bow is old-money elegance in hairstyle form. This is the look for weddings (as guest or bride), galas, important dinners, and any occasion where “effortlessly expensive” is the goal. The chignon itself is timeless; the velvet bow is what makes it 2026. Velvet against smooth, polished hair is a texture contrast that reads luxurious in person and in photos. I have done this look for countless formal events, and it never, ever misses.
Who it suits: this is the most universally flattering formal bow hairstyle I know. The low, centered placement suits every face shape — it adds no height, creates no asymmetry, just clean polish. It is exceptional on dark hair, where black or deep-toned velvet creates a rich tonal effect, and equally beautiful on blonde hair with a contrasting bow (black velvet on blonde hair is iconic). Hair needs to be medium length or longer to form a proper chignon. Fine hair: the chignon can look small, so use a hair donut or padding underneath for shape — nobody will know, I promise. This is an adult look — it reads sophisticated, so it fits anyone who wants to project polish.
How to do it: This one rewards prep. Blow out hair smooth, or flat-iron for glass-like finish — the chignon’s elegance depends on smooth hair. Gather into a low ponytail at the nape. Twist the ponytail and coil it into a chignon, tucking the ends under, pinning generously — this is a pinned style, not a twisted-and-hope style. Eight to ten pins is normal. The surface should be smooth; use a soft bristle brush to polish. Now place your velvet bow: the classic position is directly above the chignon, centered. Alternatively, a slightly smaller bow can sit to one side of the chignon for a modern twist. Pin the bow with at least two pins through the knot. Mist with strong-hold hairspray. Twenty minutes, but it lasts all night.
Maintenance and real talk: a well-pinned chignon is bulletproof — it will outlast the event, the afterparty, and possibly your will to keep going. The honest downsides: it is the highest-effort style in this guide, and it shows if you rush it. A lumpy chignon with a beautiful bow is worse than no bow at all — the bow draws the eye to the bun, so the bun must be good. Practice once before the event. Second: velvet shows every fingerprint and dust speck — keep a lint roller in your bag, I am serious. Third: this is not a dance-all-night style unless your pinning is excellent. For high-movement events, add a light hairnet over the chignon (nude color, invisible in photos) as insurance. Your future self will thank you.
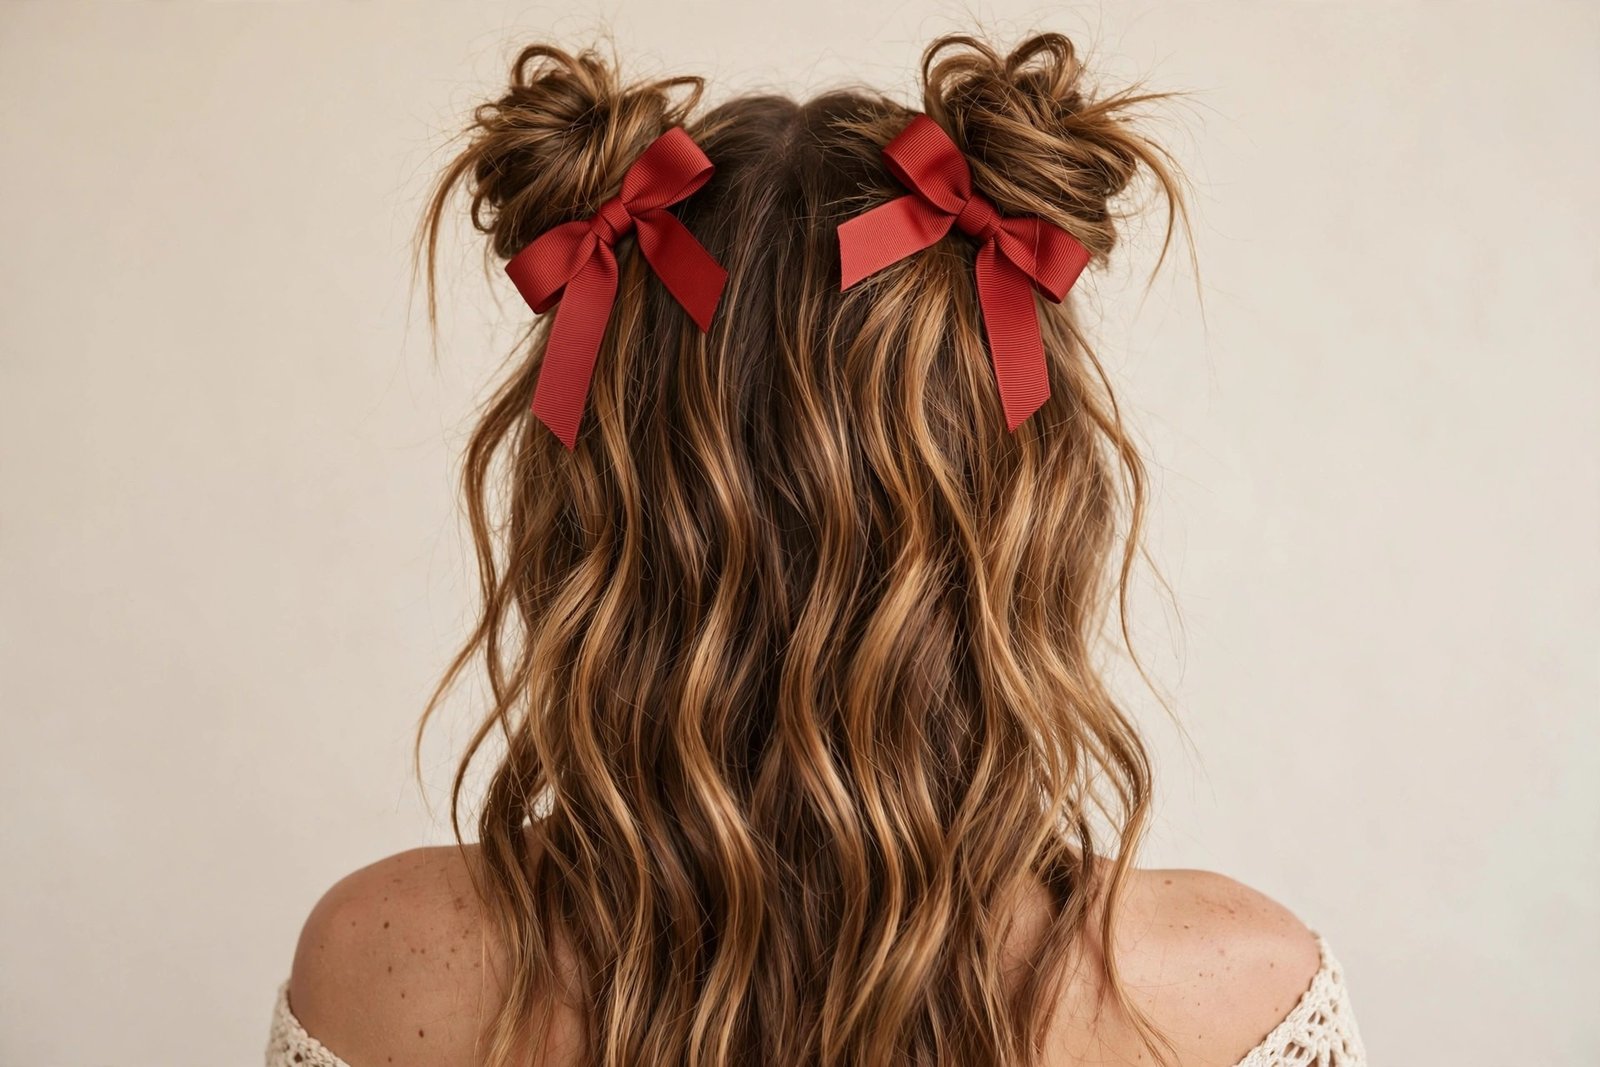
11. Bow-Tied Space Buns
Two top buns, two bows — the space bun gets the coquette treatment. This is unapologetically fun: youthful, festival-ready, and full of personality. Each bun gets its own bow, either wrapped around the bun’s base or perched on top like a cherry. In 2026 the grown-up version keeps the buns slightly messy and textured rather than perfect spheres, and the bows medium-sized rather than tiny — it is playful, not juvenile. I love this look for concerts, festivals, themed parties, and any day that needs more joy.
Who it suits: let’s be real — this is the youngest-skewing look in the guide. It suits youthful energy more than an age number; I have seen stunning space buns on women in their thirties at festivals. It favors oval and heart faces (the height balances), and it is genuinely great for thick hair because each bun has real substance. Fine hair can do it with texture spray and maybe a little backcombing in each section — or embrace smaller, cuter buns, which honestly suit the look. Round faces: place the buns higher and slightly outward rather than dead-center-top, which elongates. This is not a boardroom look and does not pretend to be. It is a happiness look.
How to do it: Part hair down the middle. Gather each half into a high pigtail — placement is everything, so check symmetry in the mirror. Twist each pigtail and wrap into a bun, pinning as you go. The 2026 way is slightly undone: pull a few pieces loose, do not aim for perfection. Tie a bow for each bun — matching ribbons, mirrored. Placement options: wrapped around the base of each bun (classic), perched on top of each bun (extra cute), or tied at the front of each bun facing forward (maximum visibility in selfies). Pin each bow with two pins. Pull out face-framing wisps, add a little texture spray for piece-y-ness, and you are festival-ready in about fifteen minutes.
Maintenance and real talk: space buns are comfortable and stay put — the weight is distributed, no single pressure point. The honest downside is the double-bow symmetry challenge: two bows means two chances for one to look different. Tie both bows before attaching, compare them side by side, adjust until they match. Second downside: buns on top of the head plus bows means clearance issues — car roofs, low doorways, airplane seats. You will duck more. It is funny until it is not. Third: this look gets attention and commentary — mostly delighted, occasionally confused. Wear it on days when you have the energy for that. On low-energy days, pick the low bow bun instead. Know thyself.
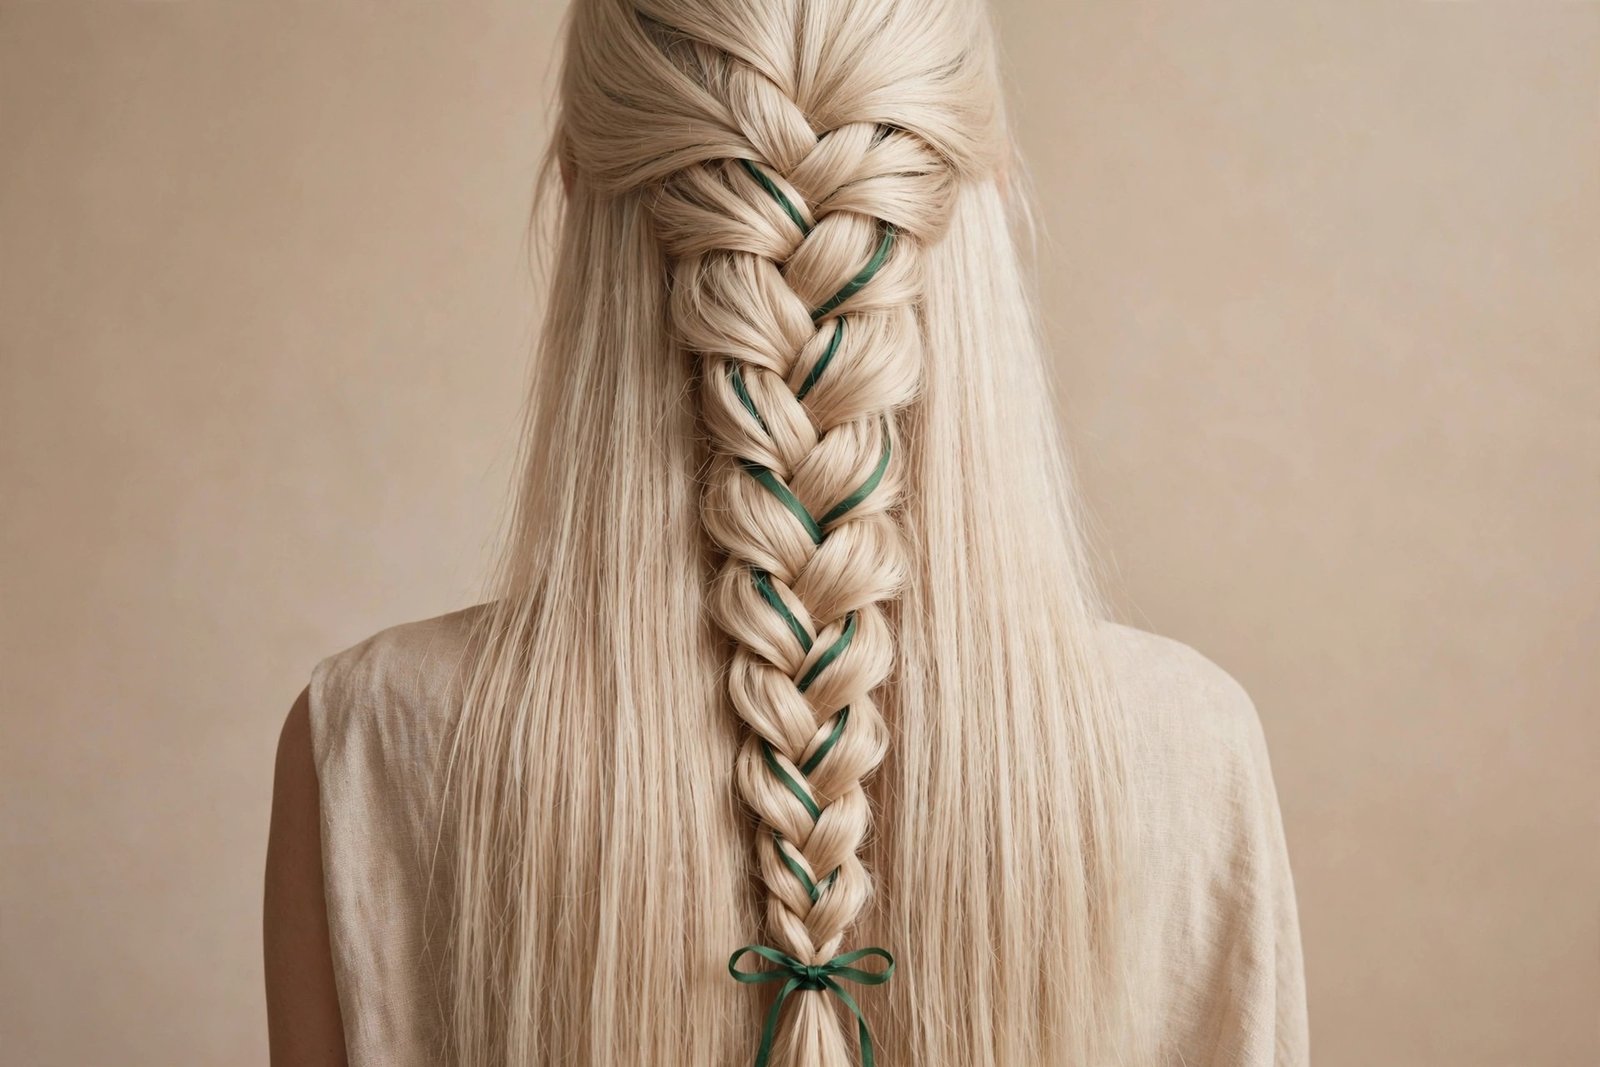
12. Ribbon-Woven French Braid
This is the craft project of bow hairstyles, and I mean that as the highest compliment: a French braid with a ribbon woven through it, finished with a bow at the end. The ribbon threads through the braid as you weave, creating stripes of color running through the hair, and the remaining ribbon ties into a bow at the bottom. The effect is intricate, colorful, and completely mesmerizing — people will ask how you did it. The answer is patience, which is also the honest cost of this look.
Who it suits: long hair is non-negotiable — you need serious length for the weave to show. This is spectacular on straight or slightly wavy hair where the ribbon stripes read clearly; very curly hair can swallow the ribbon visually. It suits anyone with the patience to execute it, which skews toward people who enjoy hairstyling as a ritual. Occasion-wise, it is versatile: a neutral ribbon makes it everyday-pretty, a colorful ribbon makes it festive. It is gorgeous on kids, teens, and adults alike — the technique is the star, not the age. If you can French braid confidently, you can do this. If you cannot French braid yet, learn that first — this is not the project to learn on.
How to do it: Tie your ribbon to a small elastic or pin it at the crown where your braid will start — it needs to be anchored before you begin. The ribbon acts as a fourth strand alongside your three hair sections. French braid as normal, incorporating the ribbon: each time you cross a section, bring the ribbon along with one of the side sections, alternating which side it travels with so it weaves visibly. Keep tension even — the ribbon should lie flat, not bunch. When you run out of hair to incorporate, finish with a regular three-strand braid including the ribbon, secure with an elastic, and tie the remaining ribbon into a bow at the end. Trim the ribbon tails at an angle. Twenty to thirty minutes, and worth every one.
Maintenance and real talk: the honest downside is time — this is the longest style in the guide to execute, and re-doing it midday is not happening. So it needs to last: use a ribbon with grip (grosgrain), keep the braid snug, and finish with hairspray. The second downside: ribbon woven through hair tangles more than plain braids. Undo it gently at night, working from the bottom up, and expect to spend a few minutes. The upside is real, though — this braid holds its shape beautifully all day, the ribbon adds color without dye, and it is genuinely a showstopper. For special occasions, use a wider ribbon or even two thin ribbons in complementary colors. Just know what you are committing to before you start.
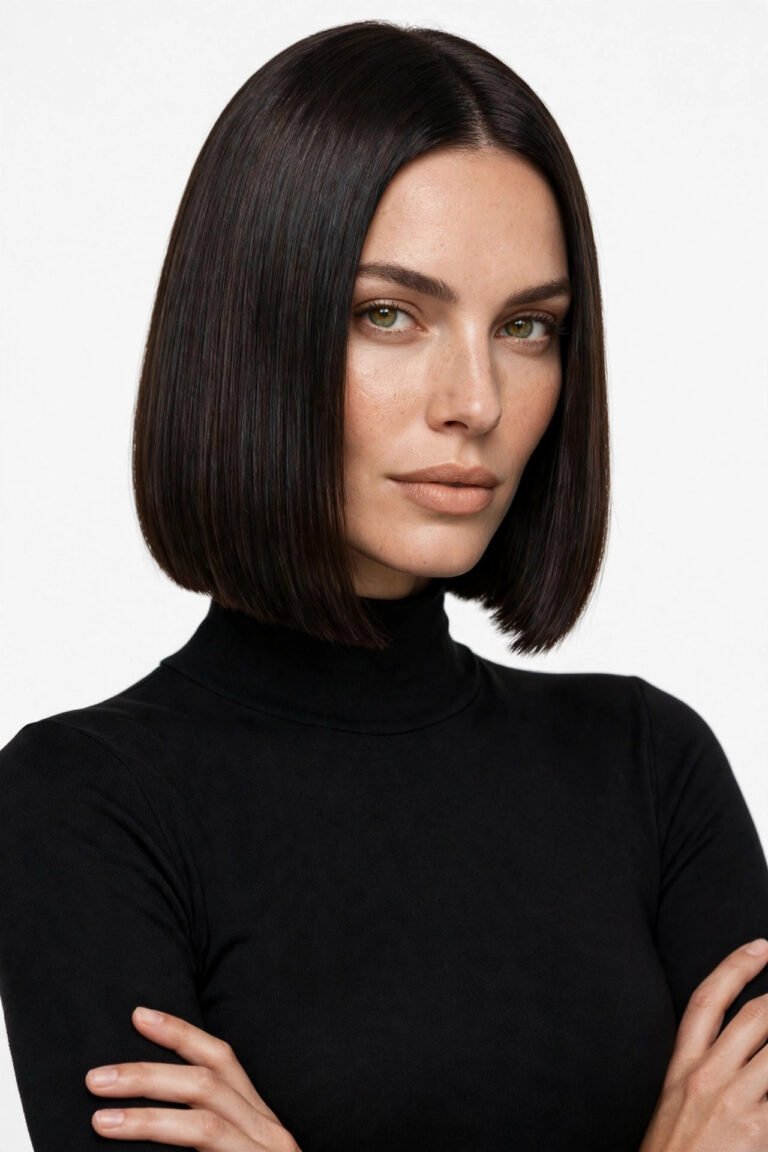
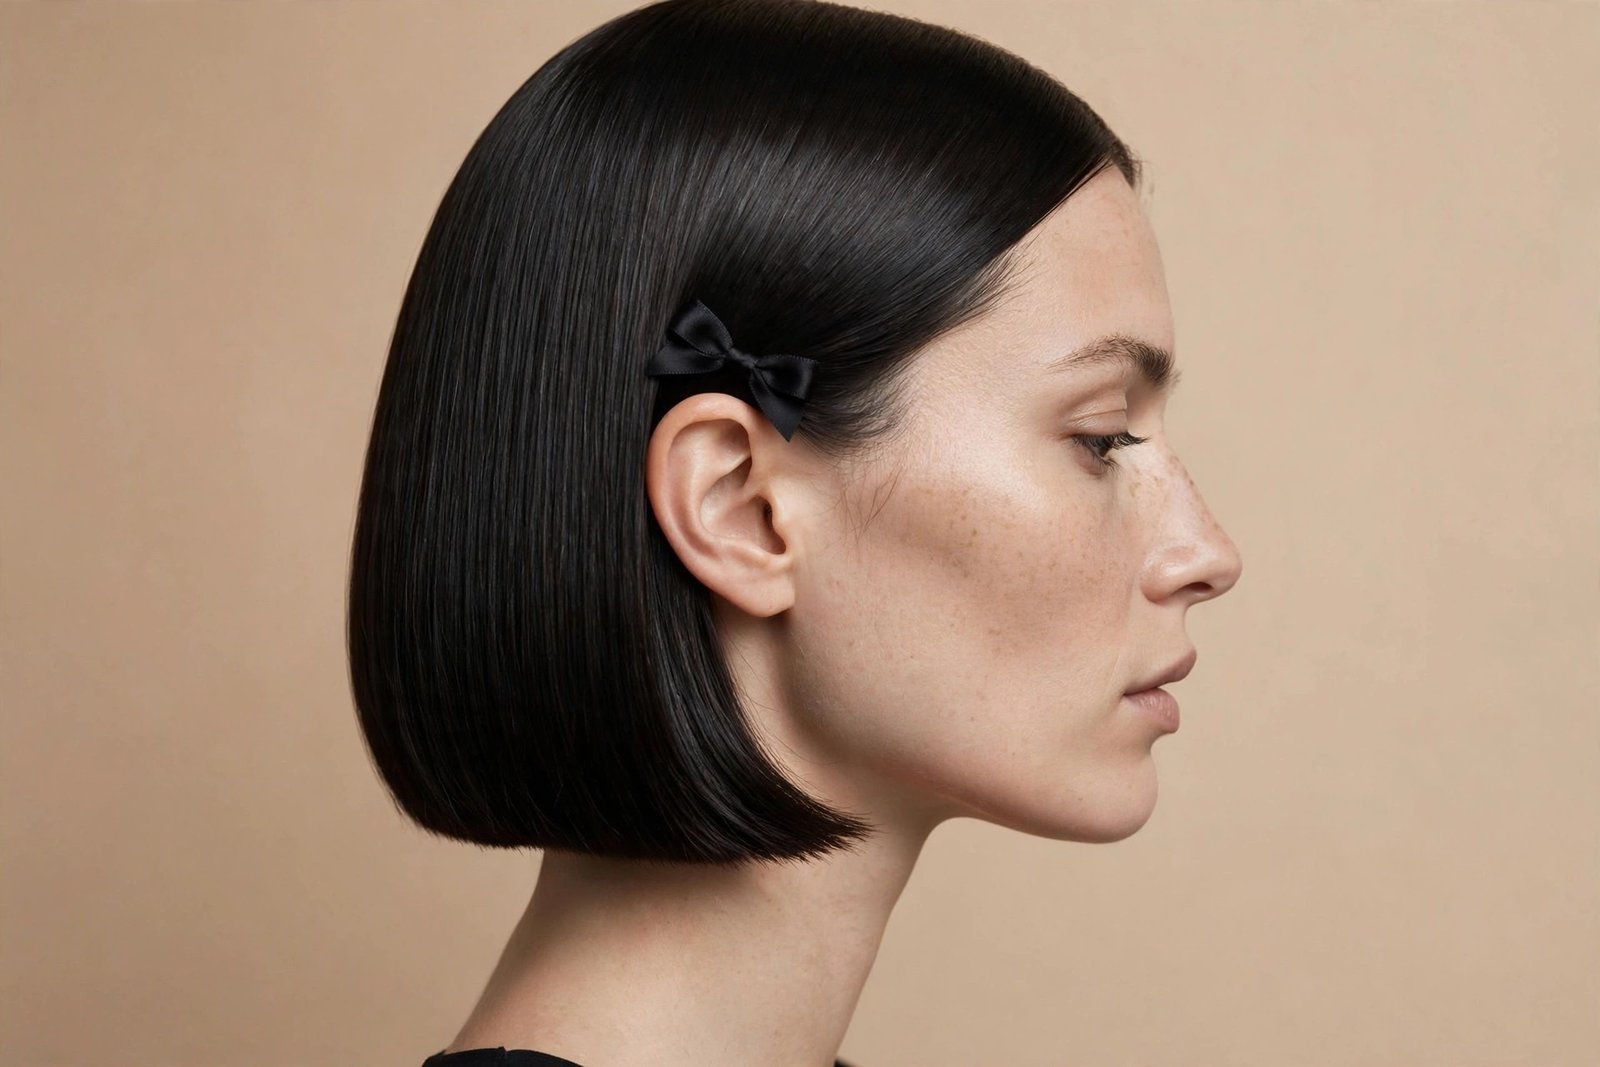
13. Bow Accent on Glass Hair Bob
Glass hair — that ultra-sleek, high-shine, blunt bob — meets a small, precise bow, and the result is minimalism with a wink. A tiny bow clipped just above one ear or at the side of a center-parted bob, on hair so smooth it reflects light. The contrast is the whole point: severe, polished hair softened by one small sweet detail. This is the fashion-editor bow, the one that shows up in magazine shoots, and in 2026 it has crossed fully into real life because it is so easy and so striking.
Who it suits: this is THE bow hairstyle for short hair — bobs, lobs, even pixies with enough length to clip. It is made for straight hair; the glass finish is the foundation, so curly girls would need to straighten (and honestly, the look loses its point on texture — the contrast needs sleekness). Face-wise, it is versatile, but it is especially chic on angular faces where the softness of the bow balances sharp lines. The vibe is polished and intentional — it suits minimalists, professionals, anyone whose style is “effortless but actually very considered.” Age-wise, it is ageless: a small black bow on a silver bob is one of the most elegant things I have ever seen.
How to do it: The hair comes first and it must be right — flat-iron in small sections, use a heat protectant and a shine serum, and get that glass finish. A center or deep side part both work. The bow should be SMALL — this is crucial. A big bow on a bob looks like costume; a small bow looks like jewelry. Use a pre-tied small bow on a clip, or tie a tiny bow from narrow ribbon (half-inch) and attach it to a small barrette. Placement: just above one ear, or at the temple on the deep-part side. Clip it in, making sure it grips enough hair to stay — on very sleek hair, clips slide, so backcomb a tiny section underneath for grip, or use a clip with teeth. Five minutes plus straightening time.
Maintenance and real talk: the honest downside is that glass hair is high-maintenance and the bow adds nothing structurally — it is pure decoration. If your sleek blowout falls, the look falls with it. Humidity is the enemy; this is not a rainy-day style. Carry a mini flat iron or plan for touch-ups. Second downside: small bows on sleek hair migrate. Check placement when you pass mirrors. But the upside is significant: this is the lowest-commitment bow in the guide — clip in, clip out, no retying, no pins. It is the perfect starter bow for skeptics. And on the right person, with the right outfit, it is quietly devastating. Sometimes the smallest detail does the most work. For more sleek short-hair inspiration, a glass hair routine guide covers the foundation technique in detail.
14. Bow-Finished Messy Bun
The messy bun is every woman’s emergency hairstyle, and adding a bow is the emergency upgrade. A loose, undone topknot or low messy bun with a ribbon bow tied at its base — suddenly the “I gave up” bun looks like the “effortless French girl” bun. This works because the bow adds intention: it signals that the messiness is a choice. I recommend this to every client who lives in messy buns, because it takes the same sixty seconds plus thirty more, and the difference in how polished you look is absurd.
Who it suits: everyone who wears messy buns, which is everyone. It is particularly great for second- and third-day hair — the texture that makes a messy bun work also grips the ribbon well. All face shapes, all ages, all hair types. Curly girls: your messy bun is already perfect for this; the bow just crowns it. Fine hair: the bow adds visual interest that distracts from a smaller bun — no shame, just strategy. The vibe is casual-cool: weekend errands, coffee dates, travel days, work-from-home video calls where you want to look put-together from the shoulders up. It is not formal, and that is its charm.
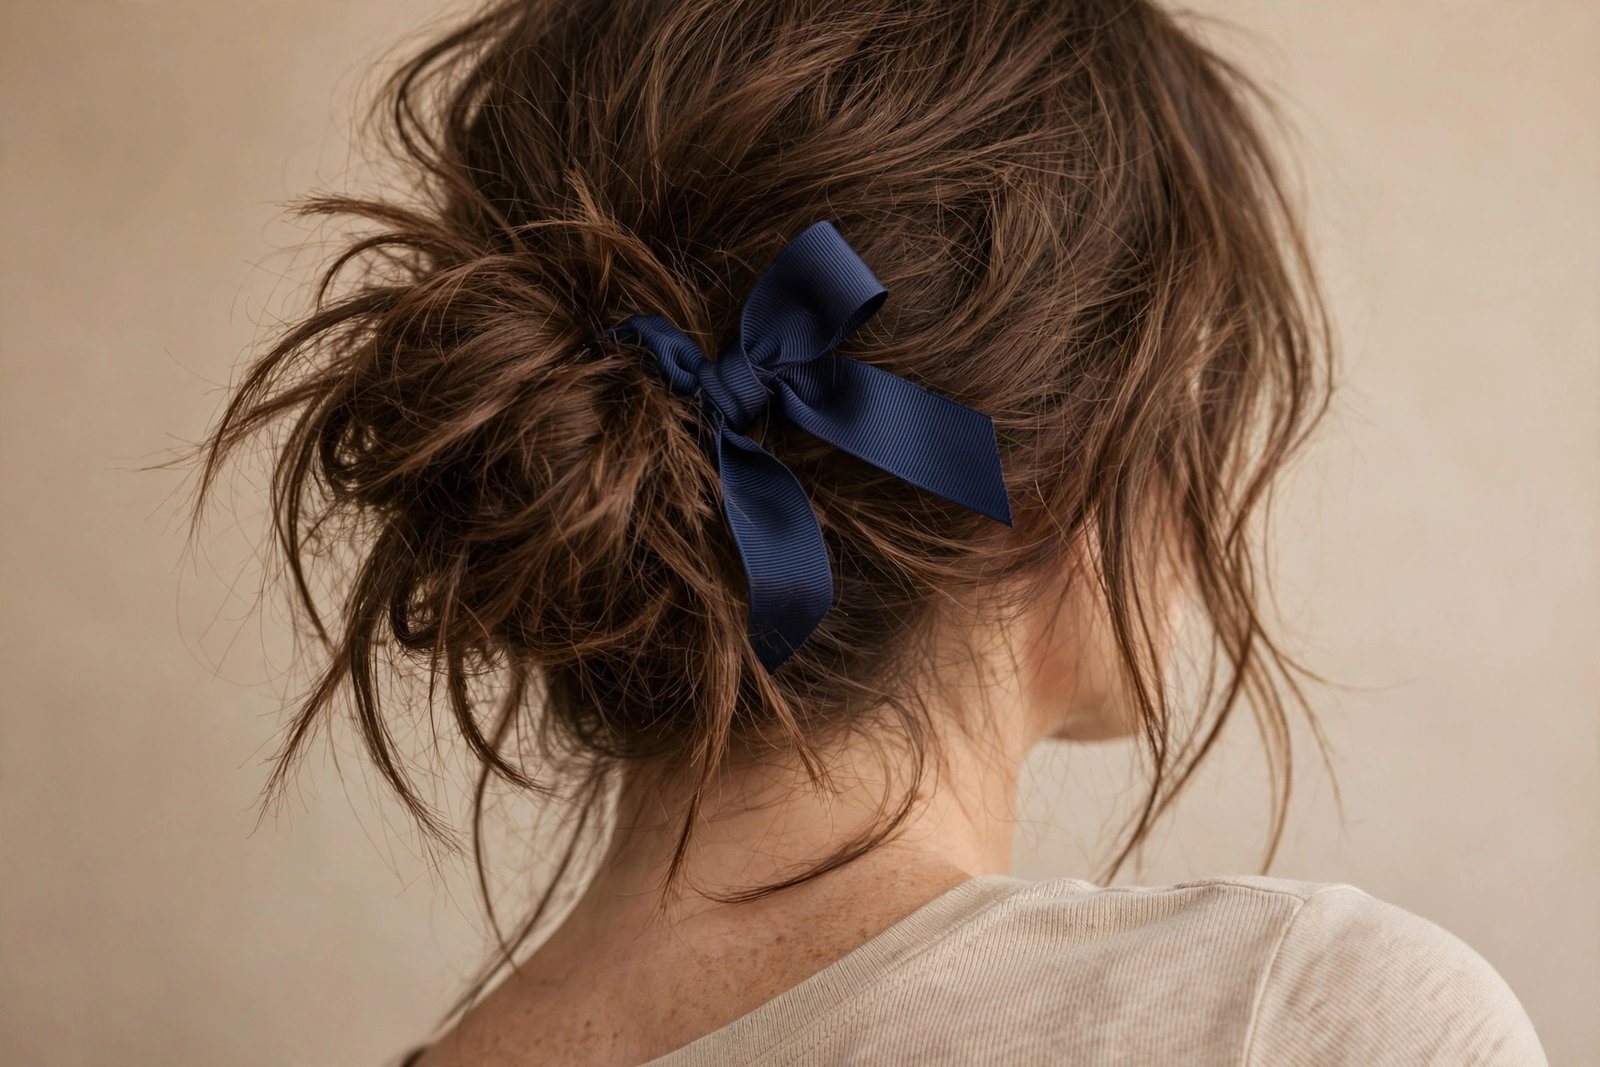
How to do it: Gather your hair into a high or mid ponytail — do not brush it perfect, the texture is the point. Twist loosely and wrap into a bun, pinning with three or four pins. Pull pieces loose: around the face, at the nape, a little at the crown. The messier the better, within reason — you want “artful,” not “bird’s nest.” Tie your ribbon in a bow and pin it at the base of the bun, slightly off-center for that effortless feel. Velvet, grosgrain, or even a casual cotton ribbon all work here — the look is relaxed, so the ribbon can be too. Tug the bow loops a little uneven for charm. Two minutes, genuinely. This is the fastest style in the guide.
Maintenance and real talk: messy buns loosen through the day — that is their nature. The honest downside: as the bun loosens, the bow can end up in a weird position by evening. The fix is easy — just reposition and re-pin, thirty seconds. Second downside: on very slippery clean hair, messy buns fall apart fast; this style genuinely works better on day-old hair, so plan accordingly or add texture spray. But here is what I love: this is the most forgiving bow hairstyle. There is no wrong way to do it. Lopsided bow? Charming. Uneven bun? Intentional. It is the only style in this guide where imperfection is the technique. If bows intimidate you, start here — you literally cannot mess it up.
15. Wedding-Day Bow Updo
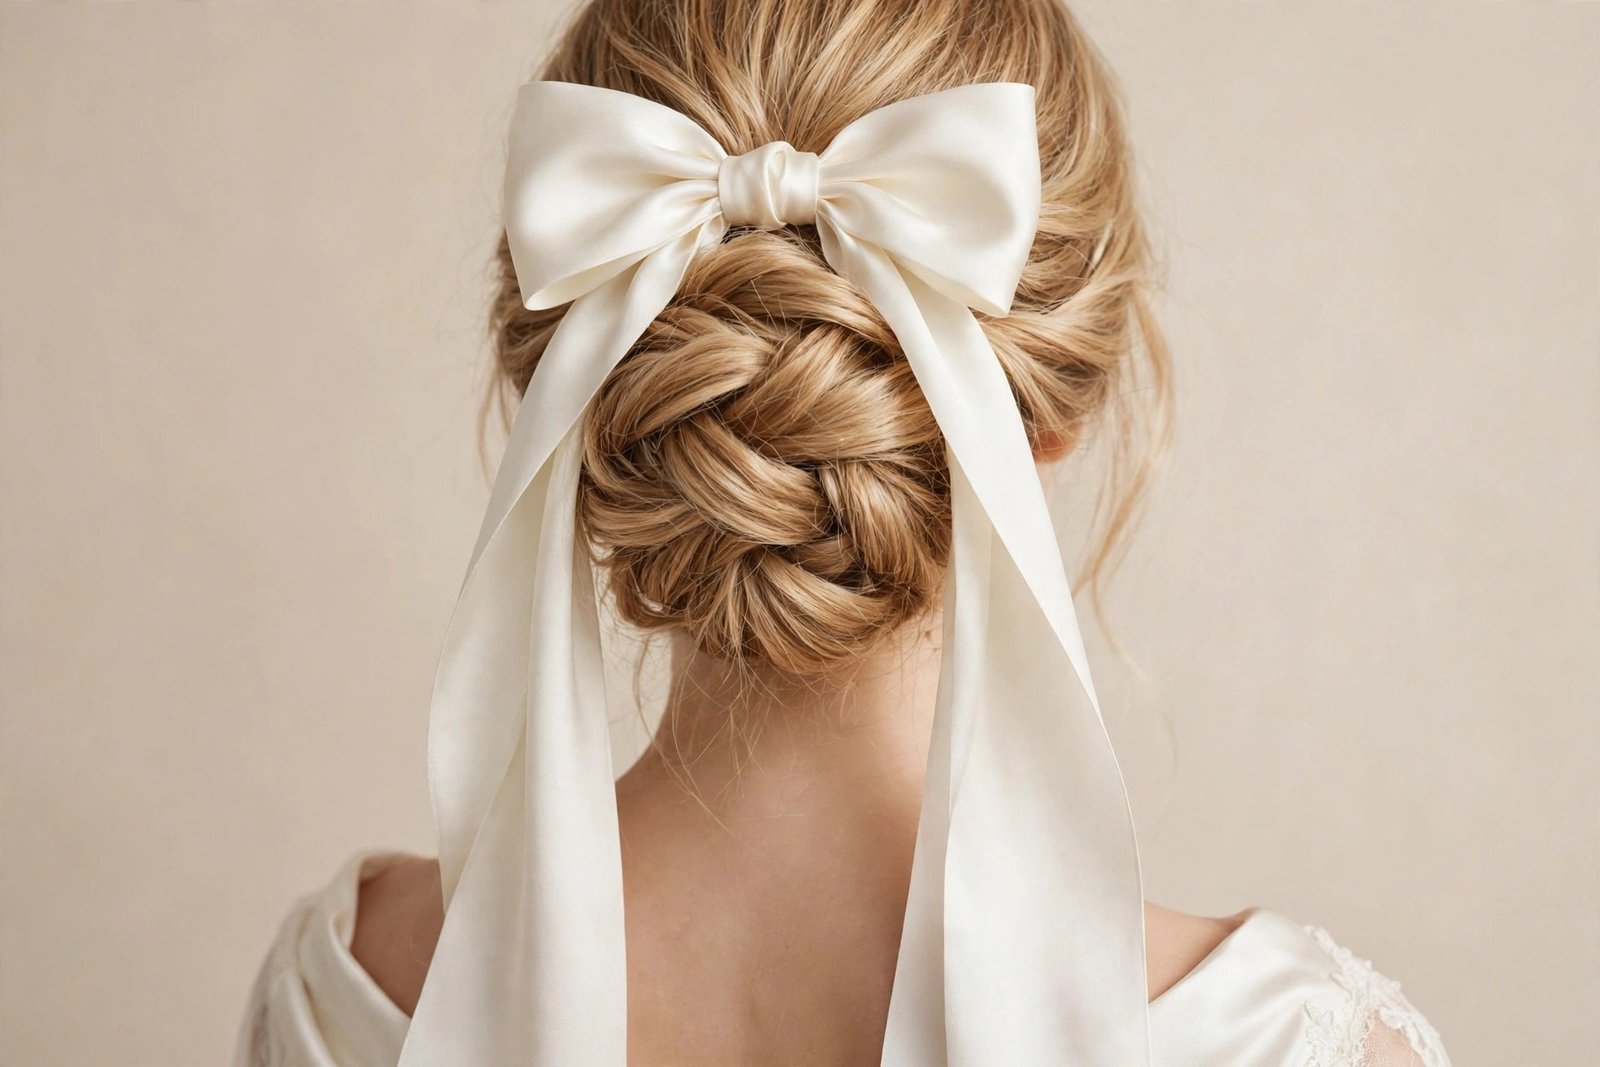
We end with the most special: a bridal (or formal-event) updo finished with a bow — usually an elegant low twisted updo or soft chignon with a silk, organza, or satin bow as the crowning detail. In 2026, bows have fully arrived in bridal hair, replacing the decade-long reign of fresh flowers and crystal pins for many brides. A bow is timeless in photos — flowers wilt, crystals date, but a beautiful bow looks as right in twenty years as it does today. I have styled this for brides, and the photos are always, always stunning.
Who it suits: brides, bridesmaids, mothers of the bride, gala guests — anyone dressing for the most-photographed day. The updo underneath should match the formality: soft twists, romantic chignons, polished low buns. It suits all face shapes when the updo is done well — work with your stylist on the base, because the base carries the look. Hair length: medium to long for most updos; extensions are completely normal in bridal styling and nobody will know. The bow itself is usually ivory, champagne, white, or black for contrast — colored bows are for themed weddings. This is a professional-stylist situation for most brides; the bow is the easy part, the updo is the skill.
How to do it (the overview — hire a stylist for the real thing): The updo is built first — twists, rolls, or a chignon, pinned to last twelve hours. The bow goes on last, placed to complement the updo’s lines: above a low chignon, to the side of twisted hair, or at the crown of a half-up bridal style. Bridal bows are often larger and made from luxurious fabric — silk, organza, or high-quality satin — with long flowing tails that move beautifully in photos. Beauty editors at Allure have long championed timeless bridal accessories over fleeting trends, and the bow fits that philosophy perfectly. The bow must be wired or structured so it holds its shape all day; a floppy bow in wedding photos is heartbreaking. Anchor with multiple pins AND a small comb base if possible. Trial run before the wedding day — non-negotiable. You need to see it in photos, in your dress, from the back.
Maintenance and real talk: the honest truth about wedding-day hair is that it needs to survive twelve-plus hours of emotion, hugging, dancing, and weather. The bow is actually the LEAST of your worries if the updo is solid — bows do not fall apart, updos do. Invest in the stylist, do the trial, bring your actual bow to the trial. Second honest note: have a backup plan. Bring extra pins, a small sewing kit (for ribbon emergencies — yes, really), and designate a bridesmaid as bow-checker. Third: consider the veil. If you are wearing a veil, plan the bow placement around it — usually the veil goes under or above the bow, decided at the trial. Done right, this is the most memorable look in the guide. Bows at weddings make people cry happy tears. I have seen it.
Ribbon Care & Bow Styling Routine
You have got the styles — now let’s talk about keeping the bows themselves beautiful. Because here is what nobody tells you: the difference between a bow hairstyle that looks expensive and one that looks tired is almost never the hair. It is the ribbon. A crisp, fresh ribbon elevates everything; a wrinkled, limp, fraying ribbon drags the whole look down. The good news is that ribbon care is simple, cheap, and mostly about habits. This is my complete routine: choosing, tying, securing, maintaining, and storing your ribbons like someone who takes bows seriously.
Choosing the Right Ribbon for Each Style
Ribbon shopping is where most bow journeys go wrong, so let’s get it right. Width matters enormously: for most everyday bow hairstyles, a ribbon between three-quarters of an inch and one-and-a-half inches wide is the sweet spot. Narrower than that and the bow disappears on camera; wider and it dominates unless you are going for the statement look. Length: buy ribbons by the yard, not pre-cut. You need about 24 inches for a medium bow with tails, 36 for a large bow with long tails. Having extra is always better — you can trim, you cannot stretch.
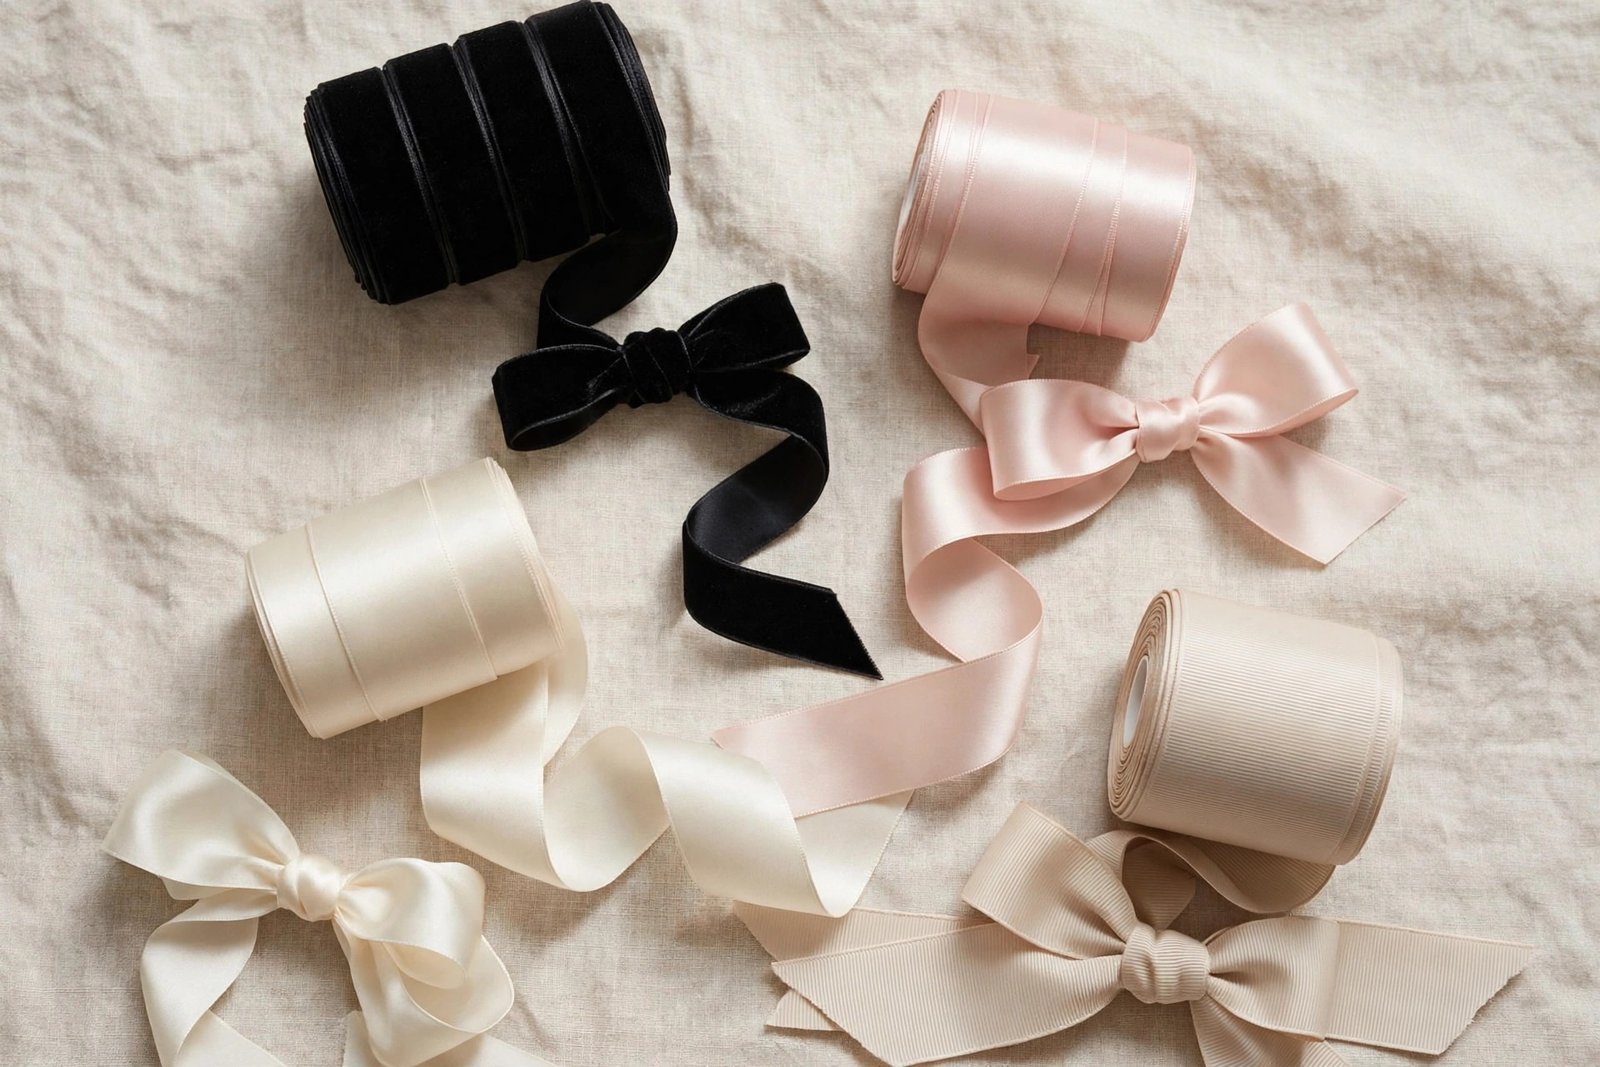
Fabric choice is strategy, not just aesthetics. Satin is the prettiest in photos — that shine catches light beautifully — but it is slippery, creases easily, and needs pinning. It is your special-occasion ribbon. Velvet is the 2026 workhorse: it grips hair naturally, holds its shape, looks rich, and hides creases. If you buy one ribbon type, make it velvet in black and one neutral. Grosgrain is the practical one — ribbed texture, ties the most secure knots, survives bags and long days. It is less shiny, more casual, perfect for everyday. Organza and tulle are for dreamy, bridal, floaty looks — gorgeous, but they snag on everything including your own hair texture, so handle with care. Silk is luxury: beautiful drape, but it wrinkles if you breathe on it and it costs real money. Save silk for events.
Color strategy: black is the most versatile bow color in existence — it works with every hair color, every outfit, every occasion. After black, get a cream or ivory (bridal-adjacent, soft, goes with everything light), then a color that matches your wardrobe’s dominant tones. Match the bow to your outfit OR to your hair — both work, they just create different effects. A bow that matches your hair color looks seamless and elegant; a contrasting bow looks bold and intentional. What does not work is a bow that matches nothing — it looks accidental. And one practical tip: darker ribbons hide dirt and wear; white satin shows everything. If you wear bows daily, lean dark for everyday and save the light colors for fresh-out-of-the-package moments.
The Perfect Bow Tie (and How to Keep It Tied)
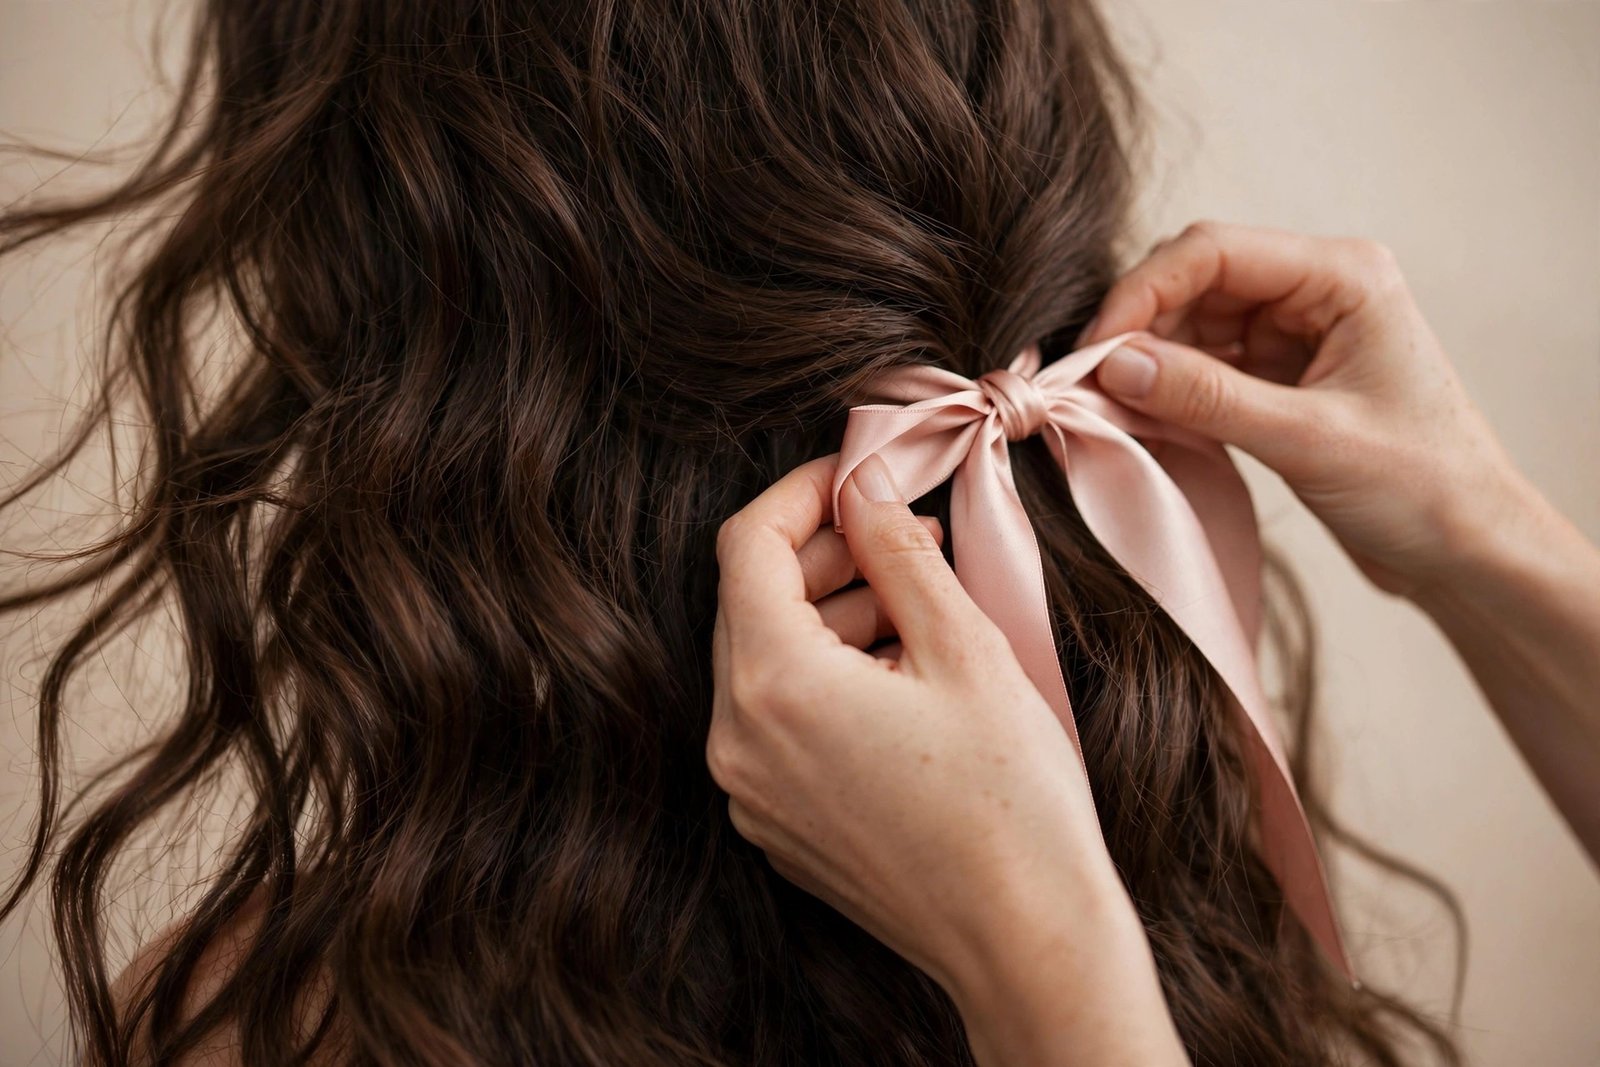
Tying a good bow is a motor skill, and like all motor skills, it feels impossible until suddenly it does not. The basic technique: wrap the ribbon around your anchor point (ponytail base, elastic, bun), bring both ends to the front, and tie exactly like you tie shoelaces — one loop, wrap the other end around, pull through. That is genuinely it. The difference between a sad bow and a beautiful bow is in the adjustments: after tying, tug the LOOPS (not the tails) to tighten, then fluff each loop by gently pulling its edges outward. The knot should be snug; the loops should be full. Most beginners tie too loose at the knot and too tight at the loops, which gives you a bow that is both floppy and small. Tight knot, full loops — tattoo it on your brain.
Now, keeping it tied — this is where bows fail in real life. A bow tied only in ribbon, with no anchoring, will loosen as you move. It is physics: your head moves, the ribbon does not grip, gravity wins. The professional solution is always the same: the ribbon tie is for looks, PINS are for security. After tying your bow, slide two bobby pins through the back of the knot in an X pattern, pushing them into the hair underneath. For heavy or oversized bows, add a small clear elastic around the anchor point first, then tie the ribbon over it — the elastic does the holding, the ribbon does the showing. For all-day events, a tiny dot of fabric-safe double-sided tape between the ribbon knot and the hair adds invisible insurance. I am not embarrassed about any of this. Beautiful hair is engineered, not accidental.
A few tying details that separate good from great: trim ribbon ends at a diagonal (a dovetail or angled cut) — it looks intentional and prevents fraying better than a straight cut. If your ribbon frays, a quick pass with a lighter along the cut edge seals synthetic ribbons (do NOT do this with silk — it burns). For wired-edge ribbon, shape the loops after tying by gently bending the wire — this is how you get those perfect, sculptural bows. And here is my favorite trick: tie the bow, then rotate the whole thing slightly off-center. Perfect symmetry can look stiff; a five-degree tilt looks alive. Your bow should look like it is having a good day, not attending a military inspection.
Daily Maintenance: Keeping Bows Fresh All Day
A bow hairstyle’s day has phases, and knowing them helps you maintain. Morning: everything is fresh, the bow is crisp, life is good. Midday: the bow may have shifted slightly — this is normal, not failure. A quick mirror check and a gentle repositioning (do not untie, just nudge) fixes it. The loops might have deflated a little; refluff them with your fingers. Afternoon: this is when ribbons show creases from movement, especially satin. If you carry a small ribbon in your bag — and bow wearers should — you can retie in sixty seconds for a fully fresh look. Evening: for events, do a full check before you walk in — bow position, loop fullness, tail arrangement, pins hidden. Thirty seconds in a bathroom mirror.
Weather is the real maintenance variable. Humidity makes ribbons limp and hair frizzy — a double challenge. On humid days, choose velvet or grosgrain over satin (they hold shape better), use an anti-humidity spray on the hair, and accept that you will refluff at midday. Wind is the bow’s nemesis: tails whip, loops invert, the whole thing can end up sideways. On windy days, keep tails shorter, pin more aggressively, or choose styles where the bow is sheltered (a low bun bow survives wind better than a high ponytail bow). Rain: just take the bow out. A wet ribbon is a ruined ribbon — the dye can even run onto light-colored hair or clothes. Carry a claw clip as a rain backup. Your bow will forgive you.
Product interaction matters too. Hairspray is your bow’s friend — a light mist over the finished style, including the bow, adds hold and a little stiffness that helps loops keep shape. But heavy oils and serums are the enemy of ribbons: oil stains satin and silk permanently, and makes all ribbons slippery. Apply oils to your hair BEFORE styling, let them absorb, and keep them away from where the ribbon sits. Dry shampoo is neutral — fine around bows. And perfume: spray it on skin, not near the ribbon. Perfume can discolor delicate fabrics over time. These are small habits, but they are the difference between a ribbon collection that lasts years and one that looks tired in a month.
Storing and Refreshing Your Ribbon Collection
Ribbon storage is deeply unglamorous and completely essential. The enemy is creasing: ribbons stuffed in a drawer develop permanent fold lines that no amount of retying hides. The solution is embarrassingly simple — wrap each ribbon around a piece of cardboard, a ribbon spool, or even an empty toilet paper roll, and secure the end with a pin. Stored flat and rolled, ribbons stay smooth indefinitely. Hang the rolls or stand them in a box. Organize by color or by type — whatever makes you actually reach for them. A ribbon you cannot find might as well not exist.
Refreshing wrinkled ribbons is easy: for most synthetic ribbons (polyester satin, grosgrain), a quick pass with a hair straightener on LOW heat smooths wrinkles in seconds — I do this all the time, it works beautifully. Just keep it moving, do not clamp and hold. For silk and delicate ribbons, use a steamer or hang them in a steamy bathroom; direct heat damages silk. Velvet generally does not wrinkle much, which is another point in its favor — a lint roller and a shake is usually all it needs. Washing: hand-wash ribbons in cool water with gentle soap when they get grimy, roll in a towel to remove water, and air dry flat. Never wring a ribbon — wringing creates wrinkles that are genuinely hard to remove.
Build your collection gradually and thoughtfully. Start with the essentials: black velvet (medium width), black satin (for dressy), one cream or ivory, and one color you love. That is four ribbons and you can do every style in this guide. Add from there based on what you actually wear — not what looks pretty in the store. Replace ribbons when they are beyond refreshing: frayed edges that keep fraying, permanent stains, faded color, or loops that will not hold shape anymore. A tired ribbon makes tired hair. And here is a lovely truth: good ribbons are cheap. For the price of one fancy coffee, you can buy ribbon that transforms your hair for months. It is the best value in all of beauty, and I will die on this hill. For keeping the hair underneath your bows healthy too, a solid protective styling routine makes every bow look better — healthy hair holds styles longer and shines through.
Frequently Asked Questions
These are the questions I actually get asked about bow hairstyles — in my chair, in messages, in comments. Real questions, honest answers, no fluff. If you are wondering it, someone else is too.
Will a bow stay in fine, slippery hair?
Yes — with the right prep, absolutely. Fine, slippery hair is the number one bow challenge, and it is completely solvable. The secret is texture before ribbon: a light mist of texturizing spray or dry shampoo at the anchor point gives the ribbon and pins something to grip. Never try to pin a bow into freshly washed, silky hair — it will slide out within the hour, and it is not your fault, it is physics. Second, always anchor with an elastic first, then tie the ribbon over it, then pin through the knot in an X. The elastic does the structural work. Third, choose grosgrain or velvet over satin for slippery hair — the texture grips. I have put bows in the finest, straightest hair imaginable, and with this prep they last all day. Skip the prep and you will be retying by lunch. The prep takes ninety seconds. Do the prep.
Are bow hairstyles appropriate for work?
Completely — it depends on the bow, not the concept. A low bun or sleek ponytail with a small black or navy bow reads as polished and professional in almost every workplace. It is essentially the hair equivalent of a classic accessory — like pearl earrings. What reads unprofessional is not bows in general but specific choices: giant novelty bows, neon colors, or bows paired with otherwise messy styling in a formal office. Match the bow’s formality to your workplace: corporate office, keep it small, dark, and neat; creative workplace, you have much more freedom. I have clients who wear a bow to work daily — it has become their signature, and colleagues associate it with polish, not playfulness. The key is consistency and intention. A neat bow every day is a style choice. A giant glitter bow once is a statement. Know which one you are making.
How do I stop my bow from sliding down during the day?
This is the most common bow complaint in existence, and the fix is always anchoring. A ribbon tied around hair with no pins WILL migrate south — gravity, head movement, and the ribbon’s own smoothness guarantee it. The professional fix has three layers: first, a hair elastic at the anchor point (ponytail base, bun base) that is snug — this is your foundation. Second, tie the ribbon OVER the elastic, snug against it. Third, two bobby pins pushed through the back of the bow’s knot in a crossed X, driven into the hair beneath. For heavy bows, add a third pin or a small jaw clip hidden under the bow. Also, ribbon choice matters: velvet and grosgrain grip; satin slides. If you are doing everything right and it still slides, your elastic is probably too loose or your hair is too silky at the anchor — add texturizing spray at the base. Ninety percent of sliding bows are fixed by tighter elastic plus X pins. It is never the bow’s fault. It is the anchoring.
Can I wear bow hairstyles with short hair?
Yes, and some of the chicest bow looks are on short hair. The rules just change: scale down the bow, and use clips instead of ties. On a bob or lob, a small bow clipped above one ear or at the side is stunning — it is jewelry for your hair. Pixies can work with a tiny bow barrette at the temple, though you need enough length to clip into. What does not work on short hair: big tied bows that need a ponytail or bun to anchor to — there is nothing to wrap. So the short-hair bow toolkit is: small pre-tied bows on clips, barrettes, and pins. Placement is usually at the side rather than centered, which suits shorter proportions. And honestly, short hair plus a bow is a look with real fashion credibility — it is editorial, intentional, and far less common than long-hair bows, which makes it more striking. Do not let length stop you.
What is the best ribbon type for beginners?
Grosgrain, no contest. Here is why: it ties a secure knot that does not slip, it holds its loop shape without wiring, it grips hair instead of sliding, it does not show creases badly, it is inexpensive, and it comes in every color. It is the most forgiving ribbon to learn on. Satin is prettier but punishes beginners — it slips while you are tying, the loops collapse, and it shows every wrinkle. Start with a medium-width grosgrain (about one inch) in black. Practice your bow tie five times — it takes ten minutes total — and you will have the motor skill forever. Once you are comfortable, branch into velvet (gorgeous, easy to handle) and then satin (beautiful, needs pinning skills). Think of it like learning to drive: you do not start in a sports car. Grosgrain is the reliable sedan that teaches you the road.
Do bows damage hair?
Bows themselves do not damage hair — but bad bow habits can. The risks are the same as any hair accessory: tension, friction, and metal. Tension: a ponytail or bun pulled too tight for the bow to sit on causes traction stress, especially at the hairline. Keep bases firm but not painful — if you have a headache, it is too tight. Friction: repeatedly tying rough ribbons in the same spot can rough up the cuticle; rotating placement and using smooth ribbons minimizes this. Metal: cheap bobby pins with rough tips or exposed metal can snag — use quality pins with rounded, coated tips, and never scrape them through hair. Compared to heat styling, chemical treatments, or tight braiding, bows are among the gentlest things you can do to your hair — a point echoed in much of the mainstream hair-health coverage you will find at places like Byrdie. They are a protective style’s best friend — a loose braid with a bow is doing your hair favors, not harm. Just be kind with tension and pins, and your hair will be fine.
How do I match my bow to my outfit?
You have three strategies, and all of them work. Match: pick a bow in a color pulled from your outfit — it creates cohesion and looks intentional. This is the safest choice and it always looks polished. Complement: choose a bow in a color that harmonizes without matching exactly — navy bow with a blue dress, burgundy bow with earth tones. This looks sophisticated and fashion-aware. Contrast: a black bow with everything (the universal answer), or a deliberate pop — red bow with a neutral outfit. Contrast bows are statements; wear them when you want the hair to be part of the outfit’s point. What to avoid: a bow that clashes accidentally — clashing on purpose is a look, clashing by accident is a mistake, and the difference is confidence and repetition. Also consider formality matching: a casual cotton bow with an evening gown confuses the eye, just like stilettos with sweatpants. Match the bow’s fabric formality to the outfit’s formality. Velvet with velvet-season clothes, silk with dressy, grosgrain with casual. When in doubt, black velvet goes with literally everything. It is the white t-shirt of bows.
Conclusion
Here is what I want you to take from this guide: bow hairstyles are not a trend you need permission to wear. They are a tool — the simplest, cheapest, most transformative tool in hairstyling. Fifteen styles, one basic skill, endless variations. Start with the classic ponytail bow or the messy bun upgrade, get comfortable with tying and pinning, and then work your way up to the braids and the chignons and the wedding updos. Every single style here is learnable. None of them require a salon. All of them require is a ribbon, a few pins, and ten minutes of willingness.
And if I can leave you with one piece of stylist wisdom, it is this: the bow is never the point on its own. The point is how it makes you feel when you catch your reflection and think, oh, that is cute. Hair should be fun. In a world of complicated routines and expensive treatments and endless rules about what you should look like, a bow is a small rebellion — a reminder that beauty can be simple, sweet, and a little bit playful. Tie the bow. Wear it to the grocery store or the gala. Let it get a little crooked by evening — that just means you lived in it. The best bow hairstyle is the one you actually wear, so pick your favorite from these fifteen and go tie one on. Your hair will thank you, and honestly, so will your mood.