Stitch Braids 2026: 15 Sleek Styles, Technique & Care Guide
Stitch Braids 2026: The Sleekest Braided Look of the Year
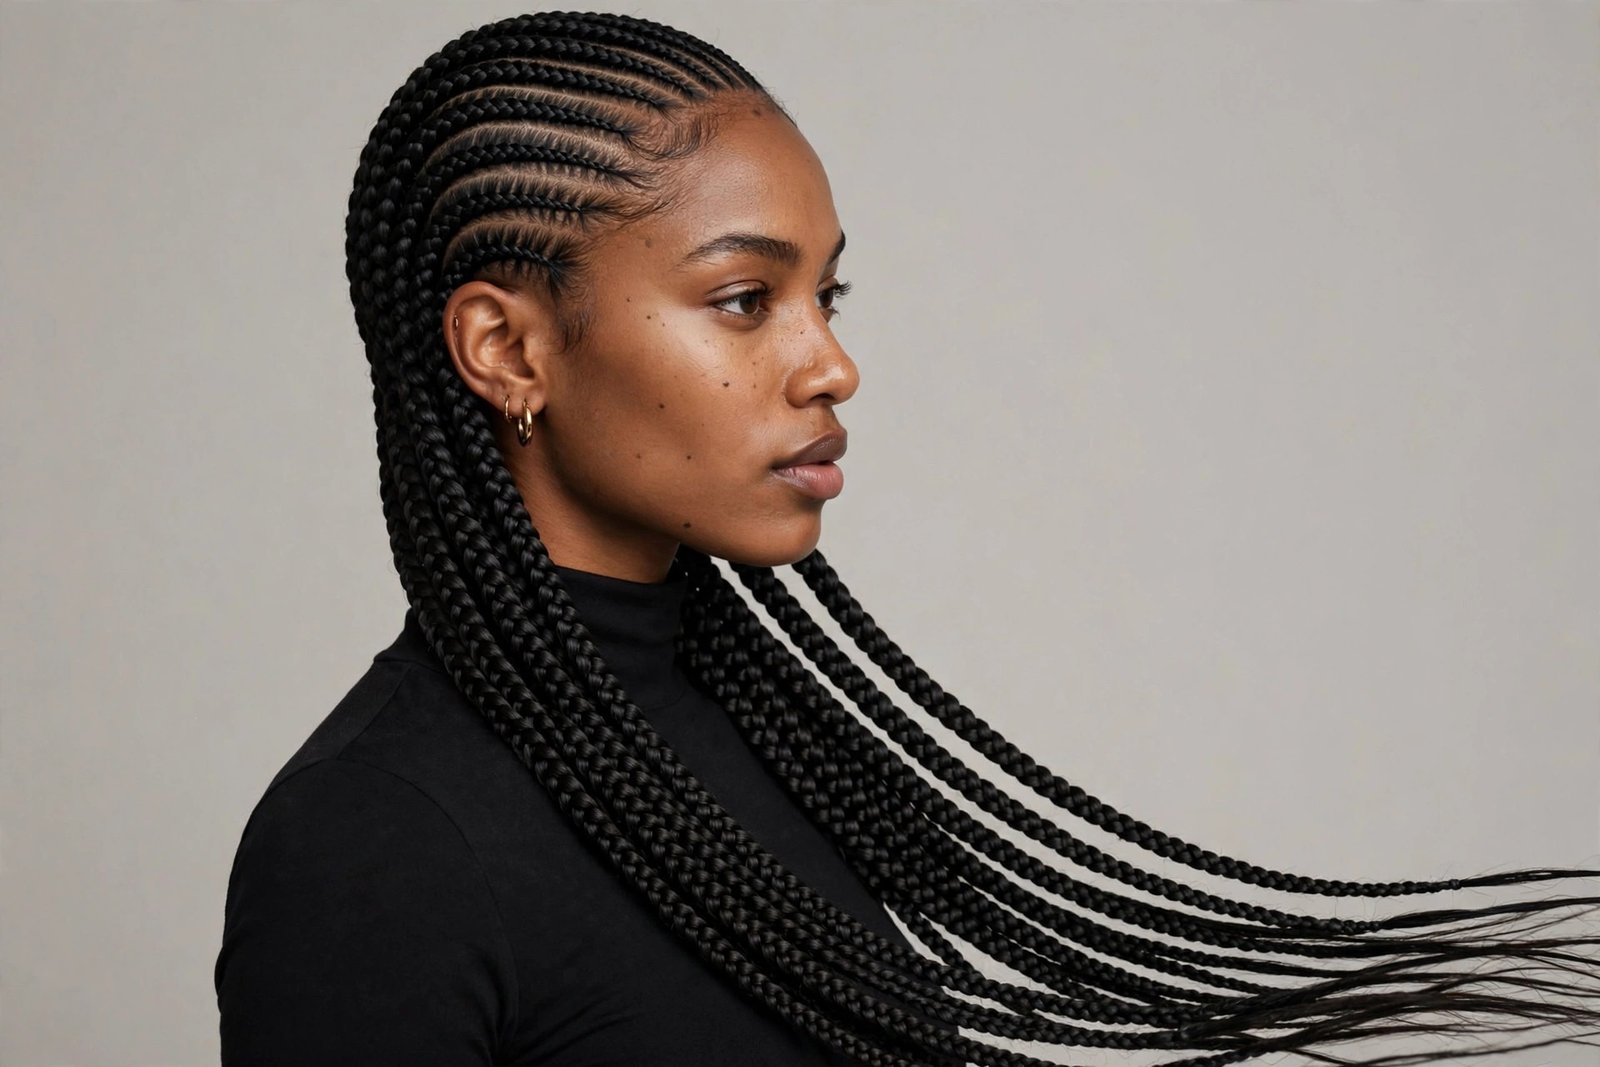
There is a moment, about twenty minutes into a good stitch braid appointment, when you look in the mirror and the rows start clicking into place — razor-clean partings, that signature stitched seam running down each braid like a zipper, everything lying flat and glossy against your scalp. Regular cornrows never did that. Stitch braids are what happens when a braider stops settling for “neat enough” and starts treating every single row like it is going on a billboard. And in 2026, this is the braided style everyone is asking for by name.
Inside this guide: what stitch braids actually are (and what they are not), why they took over 2026, which face shapes and hair types they flatter most, 15 stitch braid styles with real talk on each one — who it suits, how to ask your braider for it, how long it takes, what it costs, and the honest downsides nobody posts about. Then the full technique breakdown, a four-week care routine that keeps them fresh, and answers to the questions I hear in every single stitch braid consultation.
I have watched braided styles cycle in and out for years, and I will tell you straight: most “new” braid trends are old styles with a fresh hashtag. Stitch braids are different. The technique genuinely changed the finish. Traditional cornrows feed hair in continuously and the partings blur a little as the braid grows out. Stitch braiding uses a distinct stitching motion — the braider loops the extension hair under and around in a way that creates a raised, defined seam and keeps each parting line crisp for weeks. It is the difference between a good haircut and a great one. Same ingredients, completely different discipline.
Here is what you should know before you book: stitch braids take longer than regular cornrows (plan for it), they cost more (worth it, if the braider is skilled), and they live or die on the braider’s parting game. A mediocre braider doing “stitch braids” will give you cornrows with extra steps. A great one will give you a style that photographs like art and lasts four to six weeks. This guide will make sure you walk into that appointment knowing exactly what to ask for — and knowing how to spot the difference.
Table of Contents
- Stitch Braids 2026: The Sleekest Braided Look of the Year
- 15 Stitch Braids Styles for Women in 2026
- Stitch Braids Technique, Care & Maintenance
- Frequently Asked Questions
- Conclusion
What Are Stitch Braids, Really?
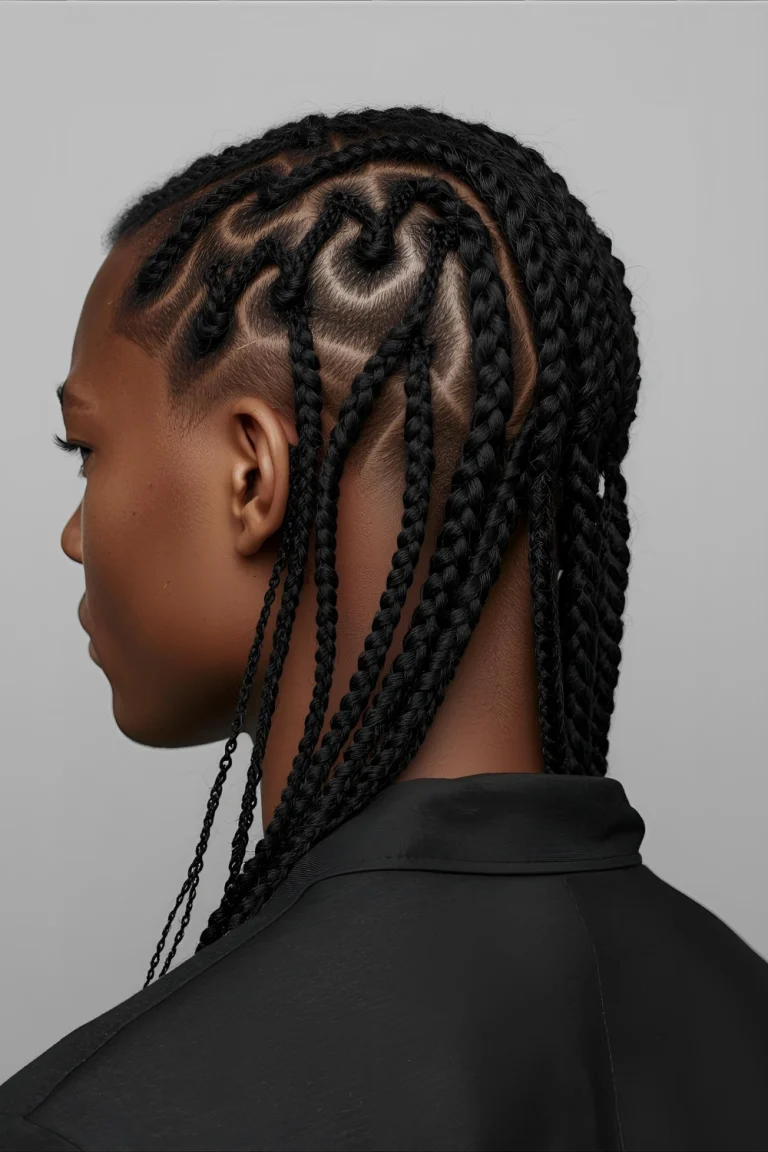
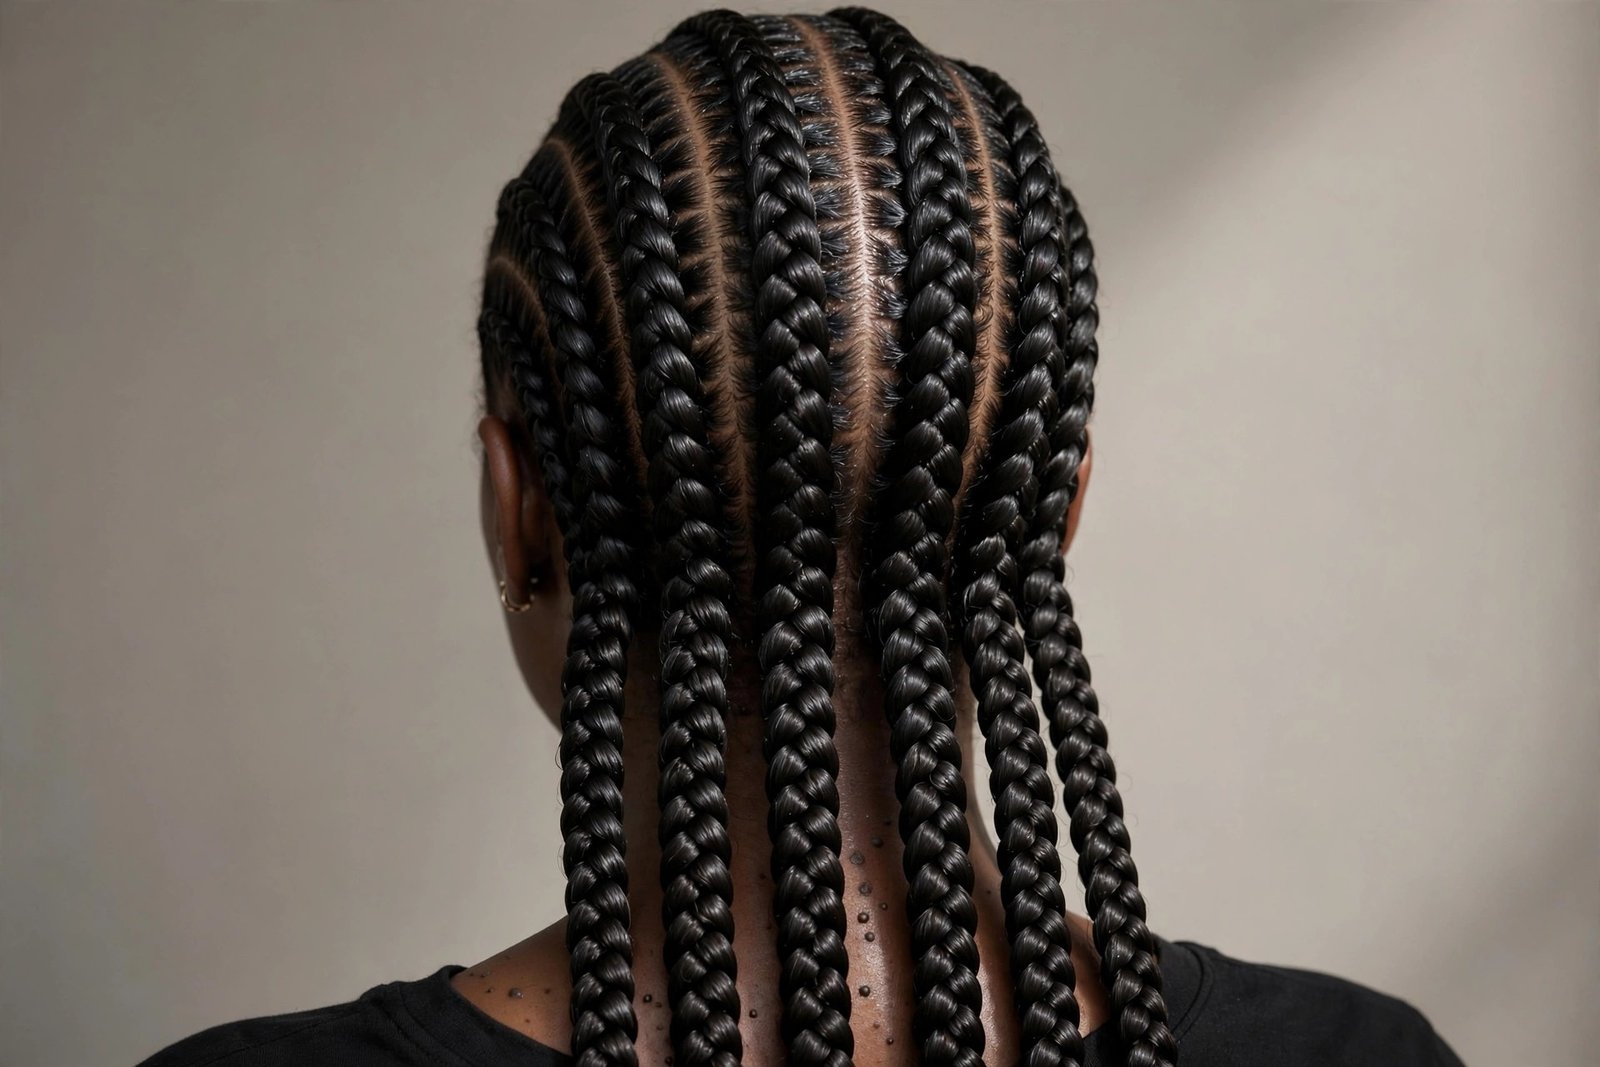
Strip away the social media hype and the definition is simple: stitch braids are feed-in cornrows done with a stitching technique that produces a crisp, raised seam along each braid and surgically clean partings between them. The braider parts your hair into precise sections, then adds extension hair in small, controlled pieces — “feeding in” — while using a looping stitch motion rather than the standard three-strand underhand of a classic cornrow. That stitch is the whole story. It sits the braid slightly raised off the scalp with a defined edge on each side, almost like a tiny row of embroidery. The partings stay sharp because the tension is distributed evenly along the seam instead of pulling at the root.
People ask me constantly whether stitch braids are just cornrows with a new name. I get why — from across the room, they read as very clean cornrows. Up close, the difference is obvious. Standard cornrows have a flatter profile and the hair feeds in so gradually that the braid and the scalp blend. Stitch braids have architecture. Each row has a visible spine. The parts look drawn on with a ruler for the first two to three weeks. If you have ever zoomed in on one of those viral braid photos and thought “how is every line that perfect,” you were looking at the stitch.
The technique has roots in traditional African cornrowing — this is not a style invented on the internet, whatever the algorithm wants you to believe. Braiders have been refining feed-in methods for decades; the stitch variation is a modern refinement that went mainstream when a few celebrity braiders started posting extreme close-ups of the seam work. What changed in the last couple of years is demand: clients started bringing reference photos and saying “I want THAT stitch,” and braiders leveled up their parting and stitching to match. The result is a style with a genuine skill gap — which is why choosing the right braider matters more here than with almost any other protective style.
Practically speaking, here is what to expect: stitch braids are installed on stretched or blow-dried natural hair (the smoother your base, the cleaner the stitch), they use kanekalon or similar braiding hair fed in gradually, and a full head typically takes three to six hours depending on size and length. They are a protective style — your natural hair is tucked away, tension (done right) is even, and you get four to six weeks of wear. Done wrong — too tight, too small, too heavy — they can stress your edges like any braided style. The technique is not magic. It is just excellent.
Why Stitch Braids Are Dominating 2026
Every year has a braid that owns the timeline, and 2026 belongs to the stitch. The reason is almost embarrassingly simple: cameras love them. We live in an era where your hairstyle gets photographed more than it gets touched — selfies, video calls, content, event photos. Stitch braids are engineered for the lens. Those clean partings and raised seams create lines and shadows that read beautifully in photos from every angle. A style that looks good in motion is nice. A style that looks good frozen in a 4K close-up is what gets booked out.
But it is not just aesthetics. Stitch braids solved real complaints people had about cornrows. The number one gripe with traditional cornrows was always the grow-out: by week three the parts blurred, the roots fuzzed, and the whole thing looked tired. The stitch technique holds its structure longer — the seam keeps each row defined even as your natural hair grows, so week three stitch braids still look intentional instead of overdue for takedown. Longevity is the quiet luxury of protective styling, and stitch braids deliver more of it.
Versatility did the rest. The clean base of stitch braids takes beautifully to every variation — beads, cuffs, color, curly ends, buns, ponytails, zigzag parts, heart designs. Braiders treat the stitched row like a canvas, and clients treat it like a signature. I have seen stitch braids styled for weddings, boardrooms, festivals, and gym sessions in the same week. Few protective styles cross that many rooms without looking out of place. That range is why the trend has legs instead of being a three-month moment.
And honestly? There is a pride factor. Getting stitch braids done well feels like commissioning craft. You sit for hours, you watch the rows form, and you leave with something that is unmistakably skilled work. In a beauty culture that is increasingly about visible expertise — the perfect silk press, the flawless install — stitch braids are the braided equivalent of a masterclass. People notice. People ask who did your hair. That word-of-mouth is the real engine behind the 2026 takeover.
Who Stitch Braids Suit (And Who Should Think Twice)
Let us start with the good news: stitch braids are remarkably democratic. They flatter round faces (the vertical lines of straight-back rows lengthen), oval faces (the universal donor of face shapes), square faces (soften the jaw with curved variations or side-swept finishes), and heart-shaped faces (balance a wider forehead with volume at the ends). The parting pattern does most of the face-framing work, which means a good braider can customize the layout to your bone structure — wider parts to elongate, curved rows to soften, a side part to break symmetry. Bring face-shape concerns to your consultation; a skilled braider thinks in these terms.
Hair type matters less than hair health. Stitch braids work on natural hair across the type 3 to 4 spectrum, relaxed hair, and even transitioning hair — the extension hair does the heavy lifting for length and fullness. What matters is that your hair and especially your edges can handle the tension. If your edges are already thinning, be honest about it and ask for larger parts, gentler tension at the hairline, and no tiny braids pulling at the temples. A braider worth your money will adjust without you having to beg. One who insists on micro-tight baby braids at your hairline when your edges are fragile is telling you everything about their priorities.
Lifestyle fit is the part people skip and then regret. Stitch braids are a commitment: three to six hours in the chair, four to six weeks of wear, and a nightly routine to keep them fresh. If you swim daily, do high-sweat training, or you know you will not tie your hair down at night — be real with yourself, because the style punishes neglect faster than box braids do. The crispness that makes stitch braids stunning is also what makes week-four neglect visible. They are also a poor choice if you need to wash your hair frequently for scalp conditions; braided styles and frequent washing are a friction point you should discuss with your braider or dermatologist first.
Age is a non-factor — I have seen stitch braids look incredible on teenagers, on women in their sixties, on everyone between. Kids can wear them too, with gentler tension and shorter wear time. The only real “think twice” cases: severely damaged or breaking hair (protective styling protects; it does not resurrect — get the health right first), and anyone who cannot sit still for a long appointment. There is no shame in that last one. Book a jumbo variation, bring entertainment, and tip for the time. Your braider will remember you fondly.
15 Stitch Braids Styles for Women in 2026
Here is the part you came for. Fifteen stitch braid variations, ranked by nothing but honest usefulness — each one with who it flatters, exactly what to say to your braider, realistic time and cost, and the downside nobody mentions in the comments. Read the downsides. They are the difference between loving your braids at week five and resenting them at week two.
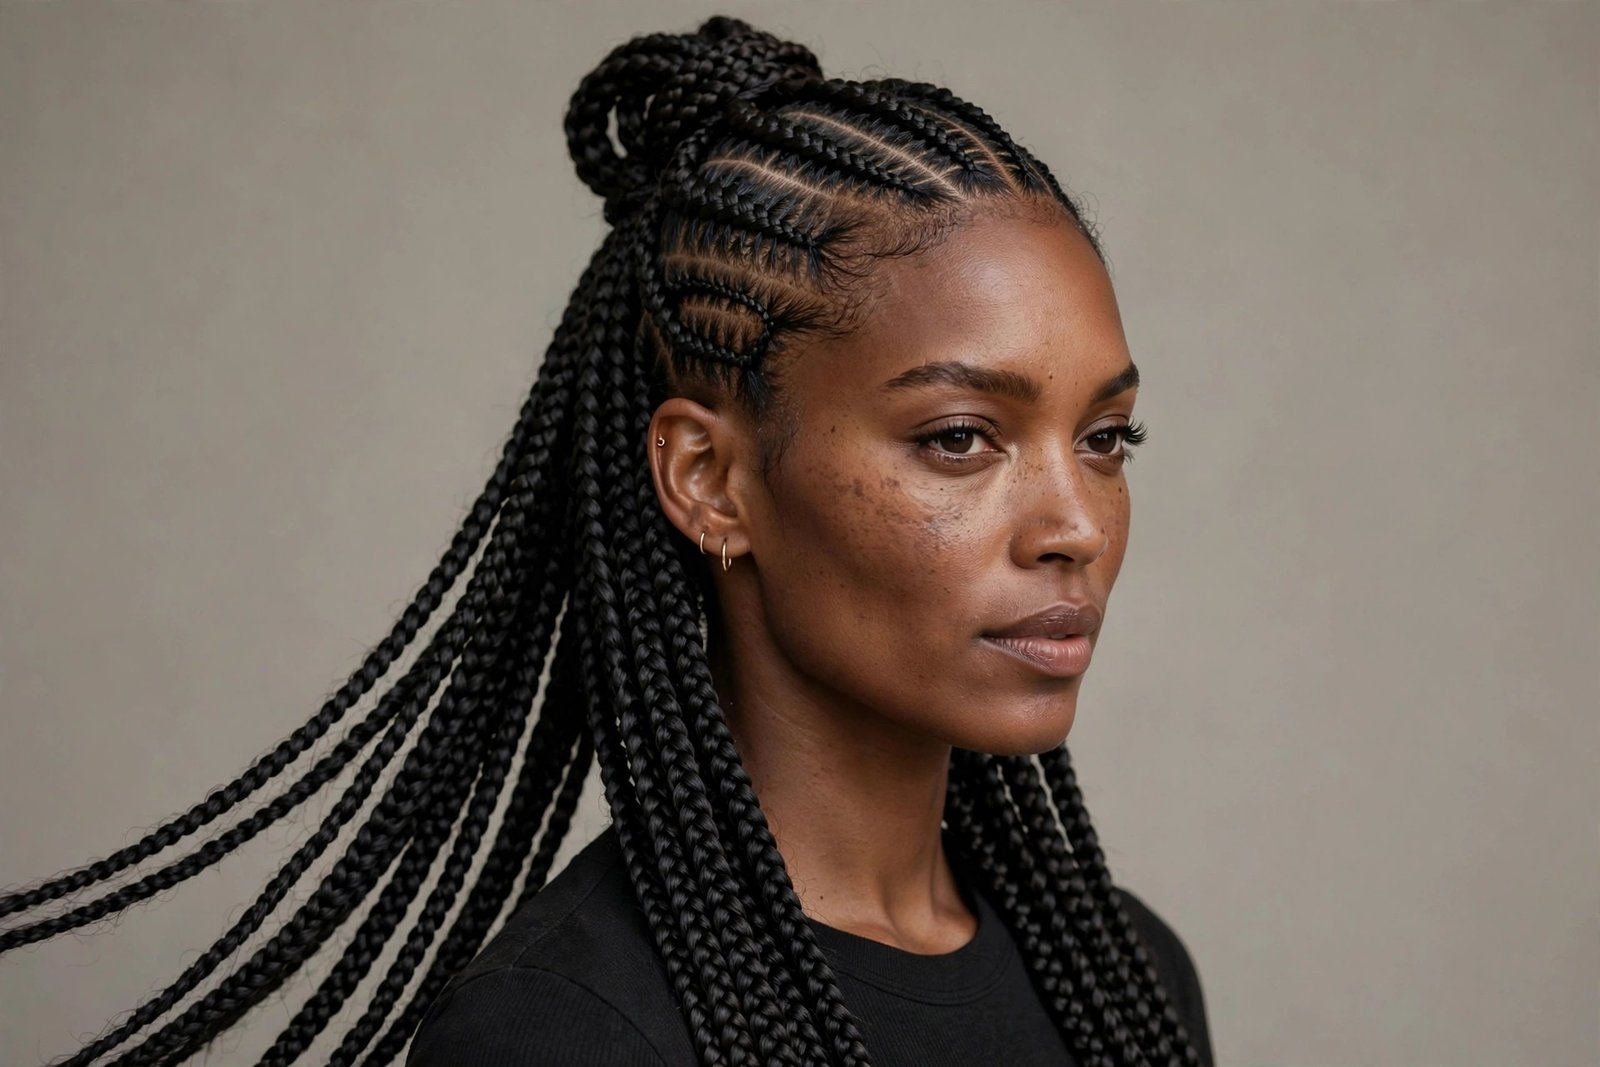
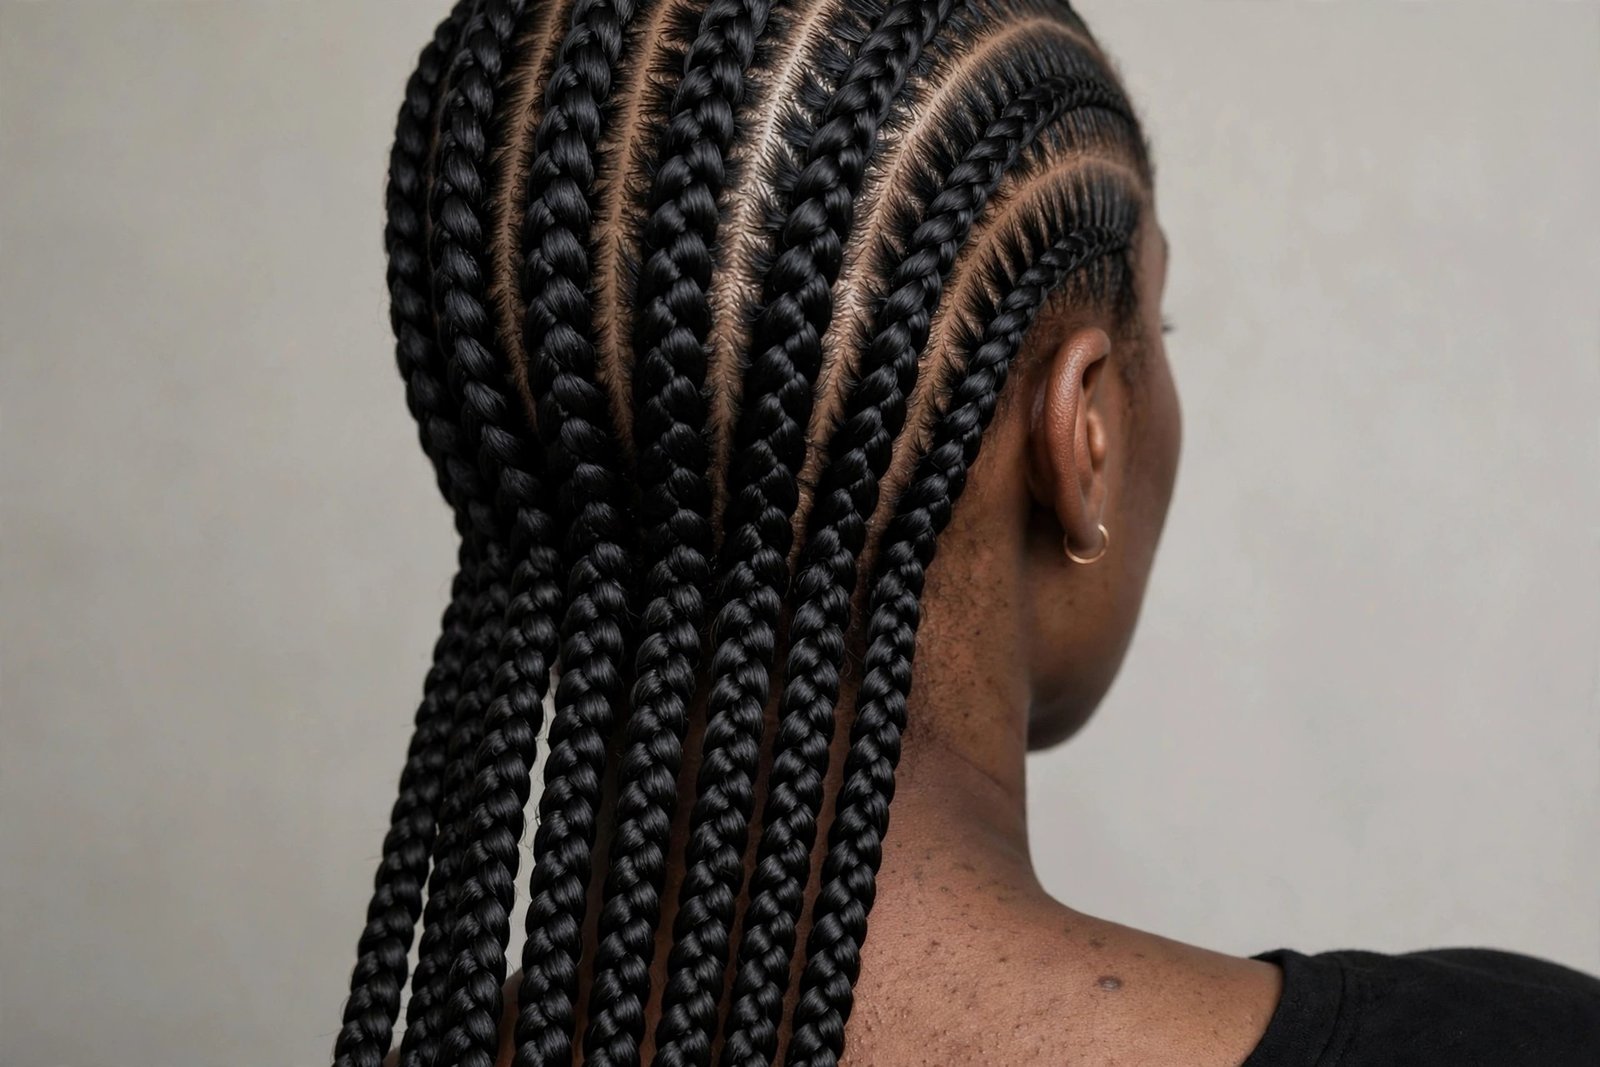
1. Classic Straight-Back Stitch Braids
The blueprint. Straight-back stitch braids run in clean parallel rows from your hairline to your nape, usually six to ten rows depending on how thick you want them, falling to mid-back or waist length. This is the style that made stitch braids famous, and it remains the one I recommend to every first-timer — because if a braider cannot execute perfect straight-backs, they cannot execute anything fancier, and you want to find that out on the simplest canvas.
Who it suits: genuinely everyone. The vertical lines elongate round and square faces; the symmetry flatters oval faces; the clean hairline frames heart-shaped faces beautifully. It is the most office-friendly braided style in existence — conservative enough for corporate, sharp enough for events. Athletes love it because nothing moves. New moms love it because it survives being grabbed by small hands.
What to tell your braider: “Straight-back stitch braids, eight rows, mid-back length, medium size — not jumbo, not small. Clean parts, medium tension.” Bring a photo anyway; “medium” means different things to different braiders. Time: three to four hours. Cost: typically $120–$220 depending on your city and the braider’s level.
Maintenance is beautifully simple: nightly scarf or bonnet, light oil on the scalp two to three times a week, mousse for flyaways in the morning. The honest downside: this is the most-copied style, so do not expect originality points. And because the rows are uniform, any single fuzzy row shows — keep up with the nighttime routine or week four will humble you.
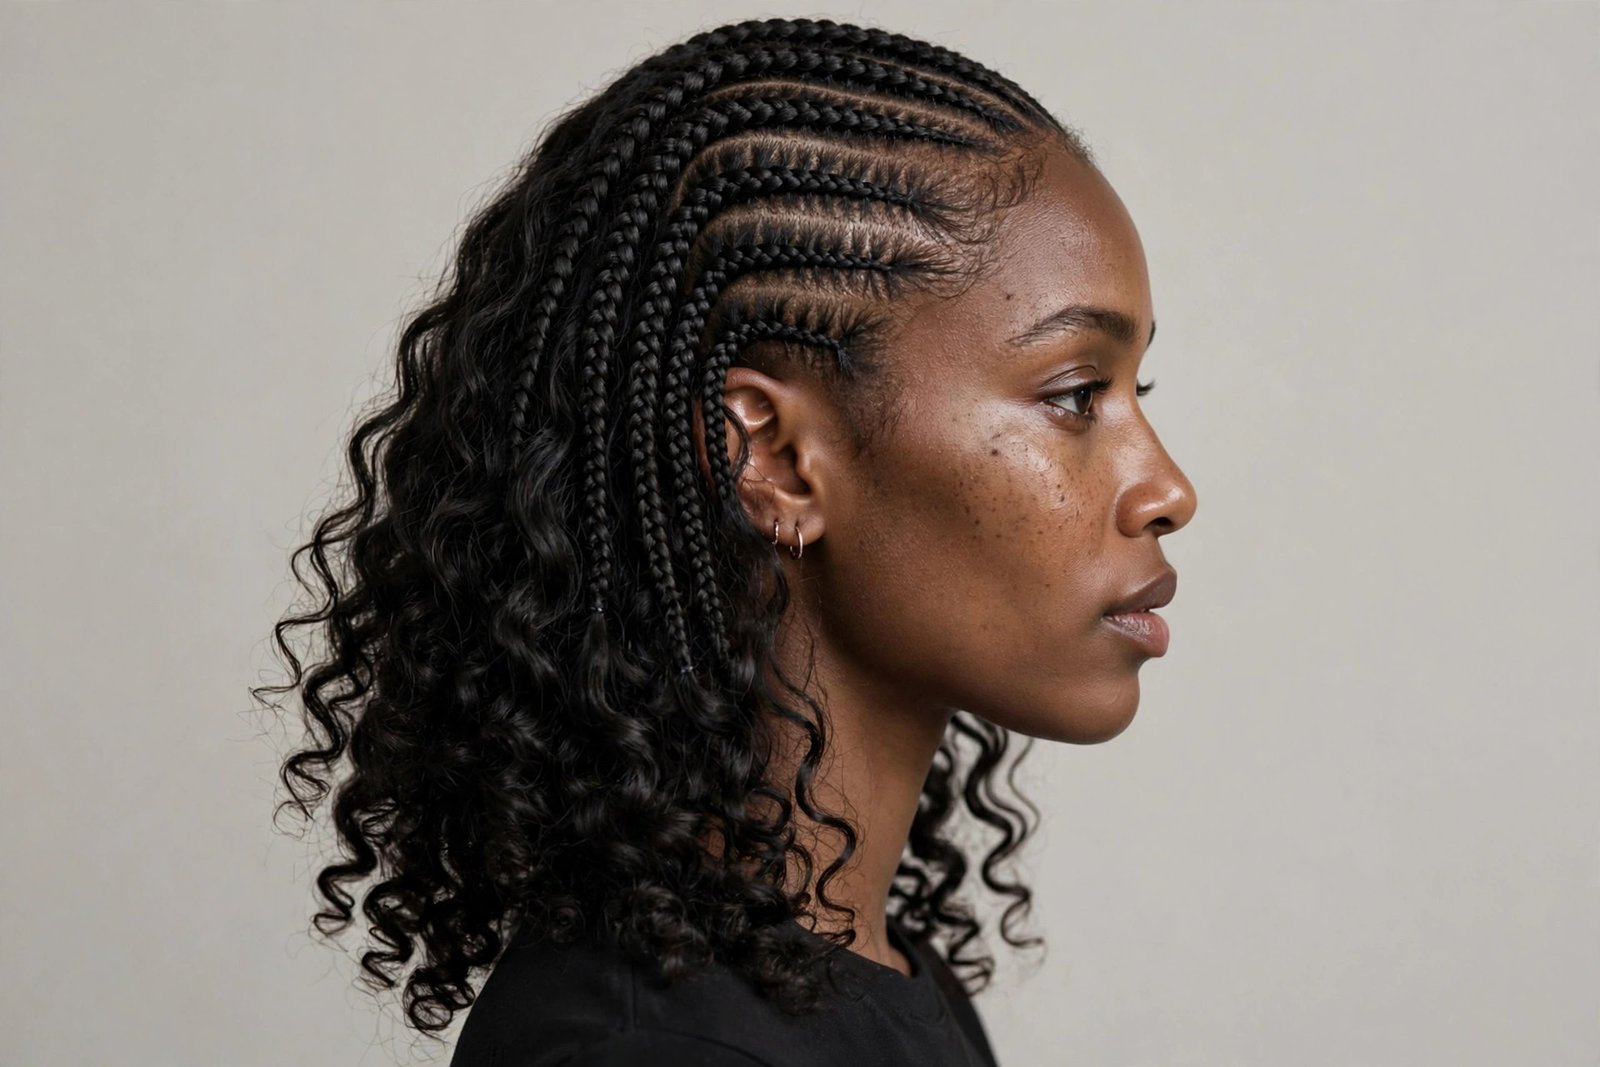
2. Stitch Braids with Curly Ends
Take the classic straight-back, and instead of braiding all the way to the tips, leave the last six to ten inches as loose curls. The contrast is the whole point — sculpted, architectural rows melting into soft, bouncy curls. It is romantic without being fussy, and it photographs like a dream because you get structure and movement in the same frame.
Who it suits: this is a gift for anyone who finds full-length braids a little severe. The curls soften strong jawlines and balance long faces by adding width at the bottom. It is also the friendliest entry point if you are braid-curious but worried about looking “too done” — the curls make the whole style feel more relaxed and wearable day to day.
What to tell your braider: “Straight-back stitch braids with curly ends — braid to mid-back, then curl the ends with flexi rods or leave the braiding hair unraveled and curled.” Specify the curl type: loose waves read elegant, tighter curls read playful. Time: four to five hours (the curls add a step). Cost: $150–$260.
Maintenance note — and this is important: the curly ends need more attention than the braids. They tangle. You will need to finger-detangle with a little leave-in every couple of days and re-twist or re-rod sections that go limp. Sleep with the ends in a loose pineapple under your bonnet. The honest downside: by week four the curls will not match week one no matter what you do. Budget for the braids to outlast the curls, and enjoy the style evolving rather than fighting it.
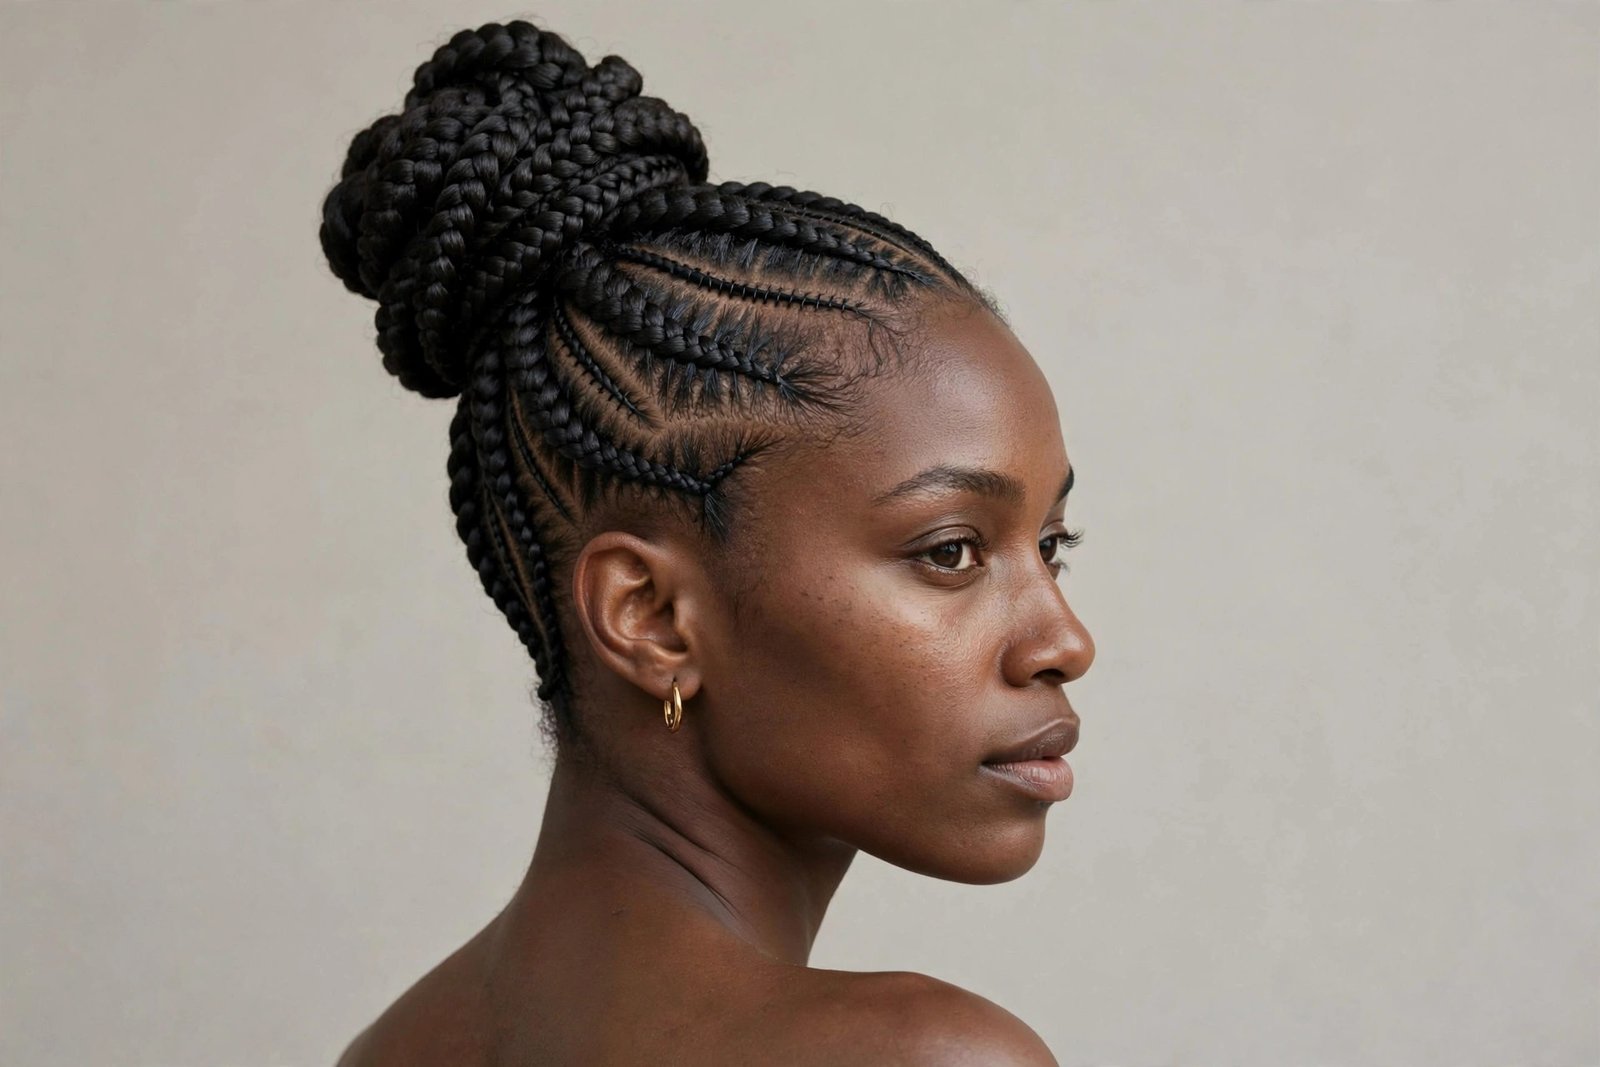
3. The High Stitch-Braid Bun
All the stitch work swept up into a high bun — sometimes braided into the bun itself, sometimes the braids wrapped and pinned around a base. It is regal. There is no other word. A high stitch-braid bun gives you cheekbones you did not know you had and a silhouette that works for weddings, galas, and any room where you need to look like the most put-together person in it.
Who it suits: oval and heart-shaped faces especially — the height elongates, the exposed neck and jawline do the rest. If you have a rounder face, ask your braider to leave the front rows slightly looser or add two thin face-framing braids; a severe high bun on a round face can look harsh without that softness. This is also the best stitch variation for hot weather and workouts — everything off the neck, nothing sticking to you.
What to tell your braider: “Stitch braids pulled into a high bun — I want the braids braided up, not just gathered.” The difference matters: braids that are cornrowed upward into the bun hold for weeks; braids merely gathered into a ponytail and wrapped will loosen. Time: four to five hours. Cost: $160–$280.
The honest downsides are physical. A high bun puts the weight of all that hair on the top of your head, and by evening you will feel it — headaches are common the first few days if the bun is heavy or tight. Ask for a bun that is secure but not strangled, and learn to take it down into a low pony at night to relieve the tension. Also: sleeping in a high bun is awkward. Plan on re-pinning in the morning; it takes three minutes once you learn the motion.
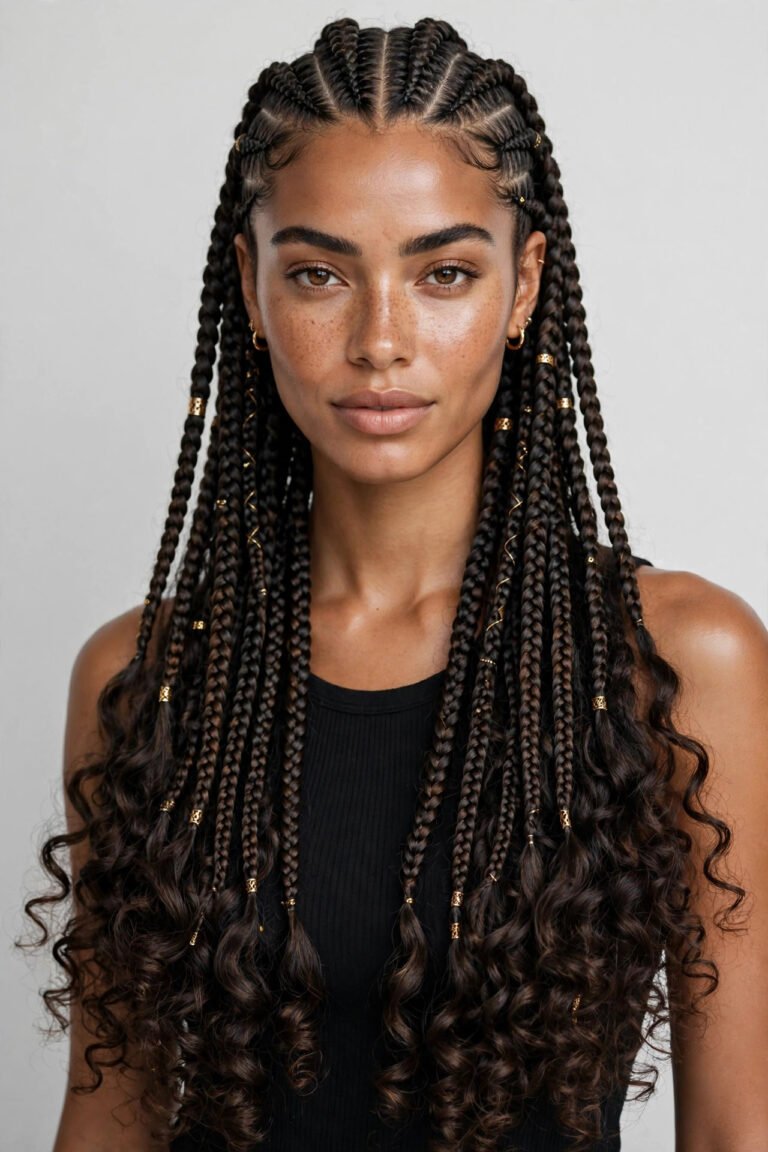
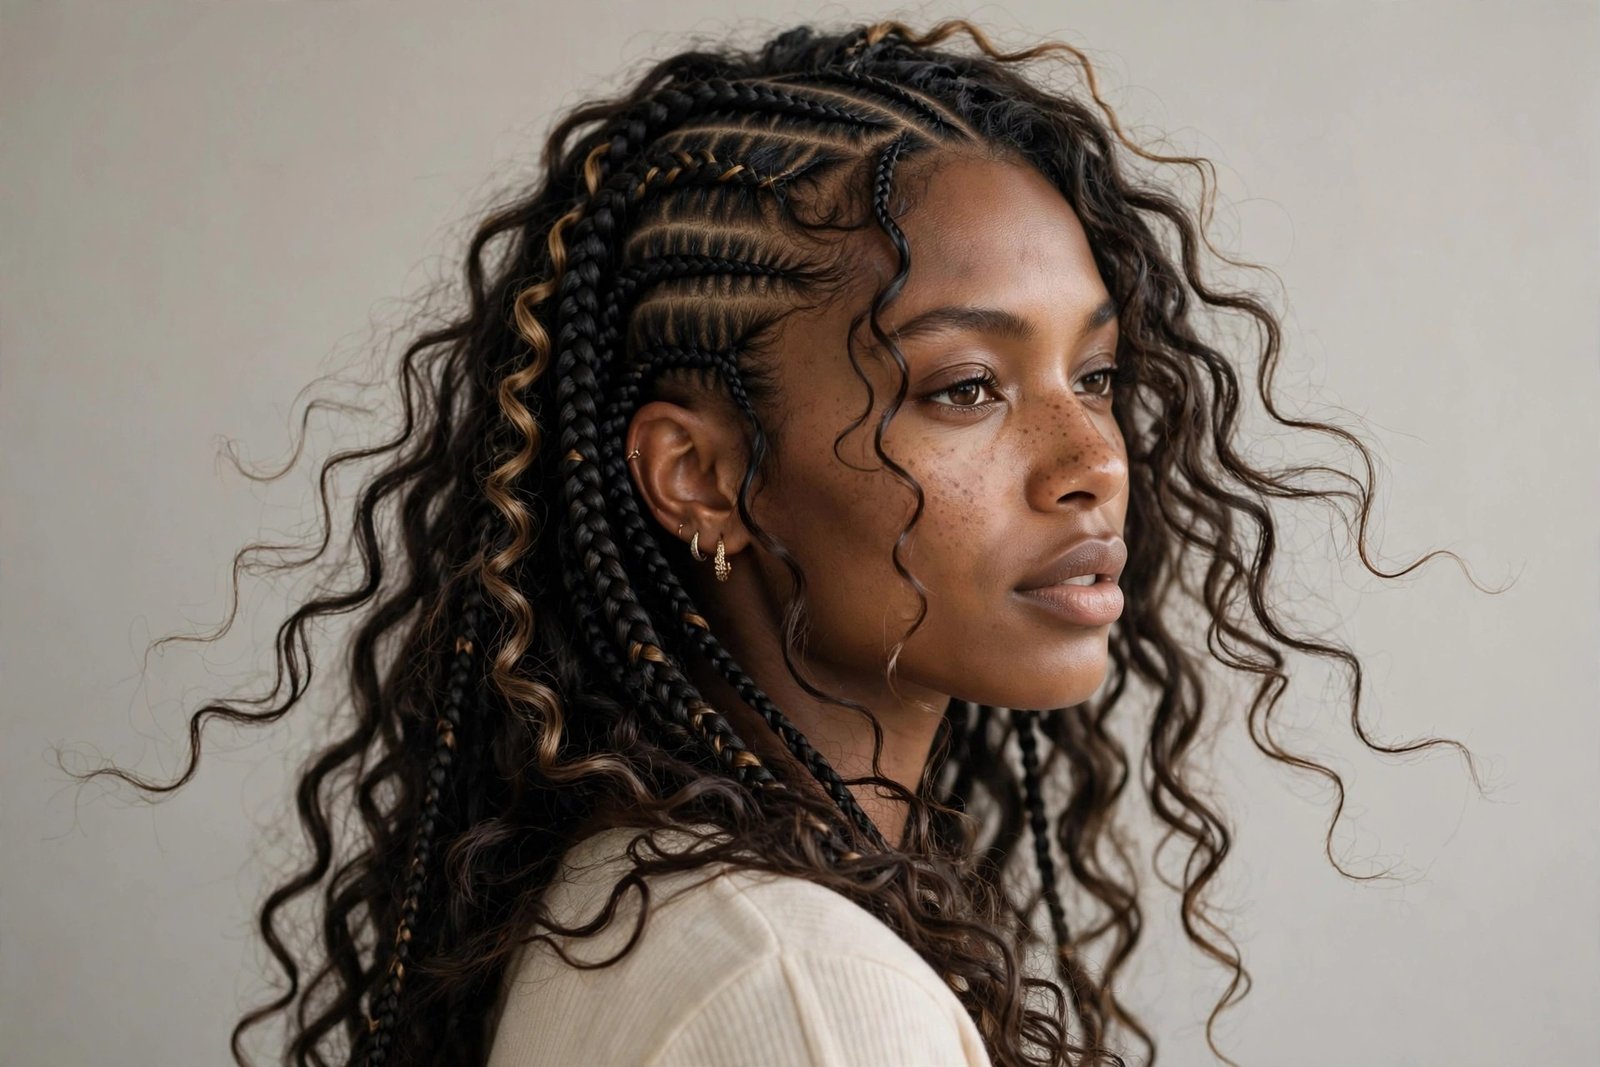
4. Boho Stitch Braids with Curls
Boho stitch braids are the free spirit of the family: the stitched rows stay clean and defined at the scalp, but curly pieces are left out throughout the length — at the partings, along the braids, everywhere. It is controlled chaos, and when it is done right it has this effortless, expensive-festival energy that regular braids cannot touch. If classic stitch braids are architecture, boho stitch braids are architecture with vines growing on it.
Who it suits: anyone who wants stitch braids without the severity. The loose curls add softness around the face, which makes this the most forgiving variation for square and oblong face shapes. It is also the best choice if your personal style leans romantic, artsy, or beachy rather than sleek — the style meets your wardrobe halfway.
What to tell your braider: “Boho stitch braids — clean stitched parts, but leave curly pieces out along the braids and at the crown. I want it full, not sparse.” The density of the left-out curls is the variable that makes or breaks this look; sparse reads messy, full reads intentional. Time: five to six hours — this is one of the longest installs. Cost: $180–$300.
Maintenance is the price of the aesthetic: those loose curls need regular attention — light mousse, finger-coiling, and keeping them moisturized so they do not matte into the braids. The curls will also frizz faster than the braided sections, so this style has a shorter “pristine” window — about two to three weeks of peak beauty, then a graceful bohemian decline. If you loved boho braids, this is their sharper, more structured cousin — same spirit, cleaner foundation.
5. Beaded Stitch Braids
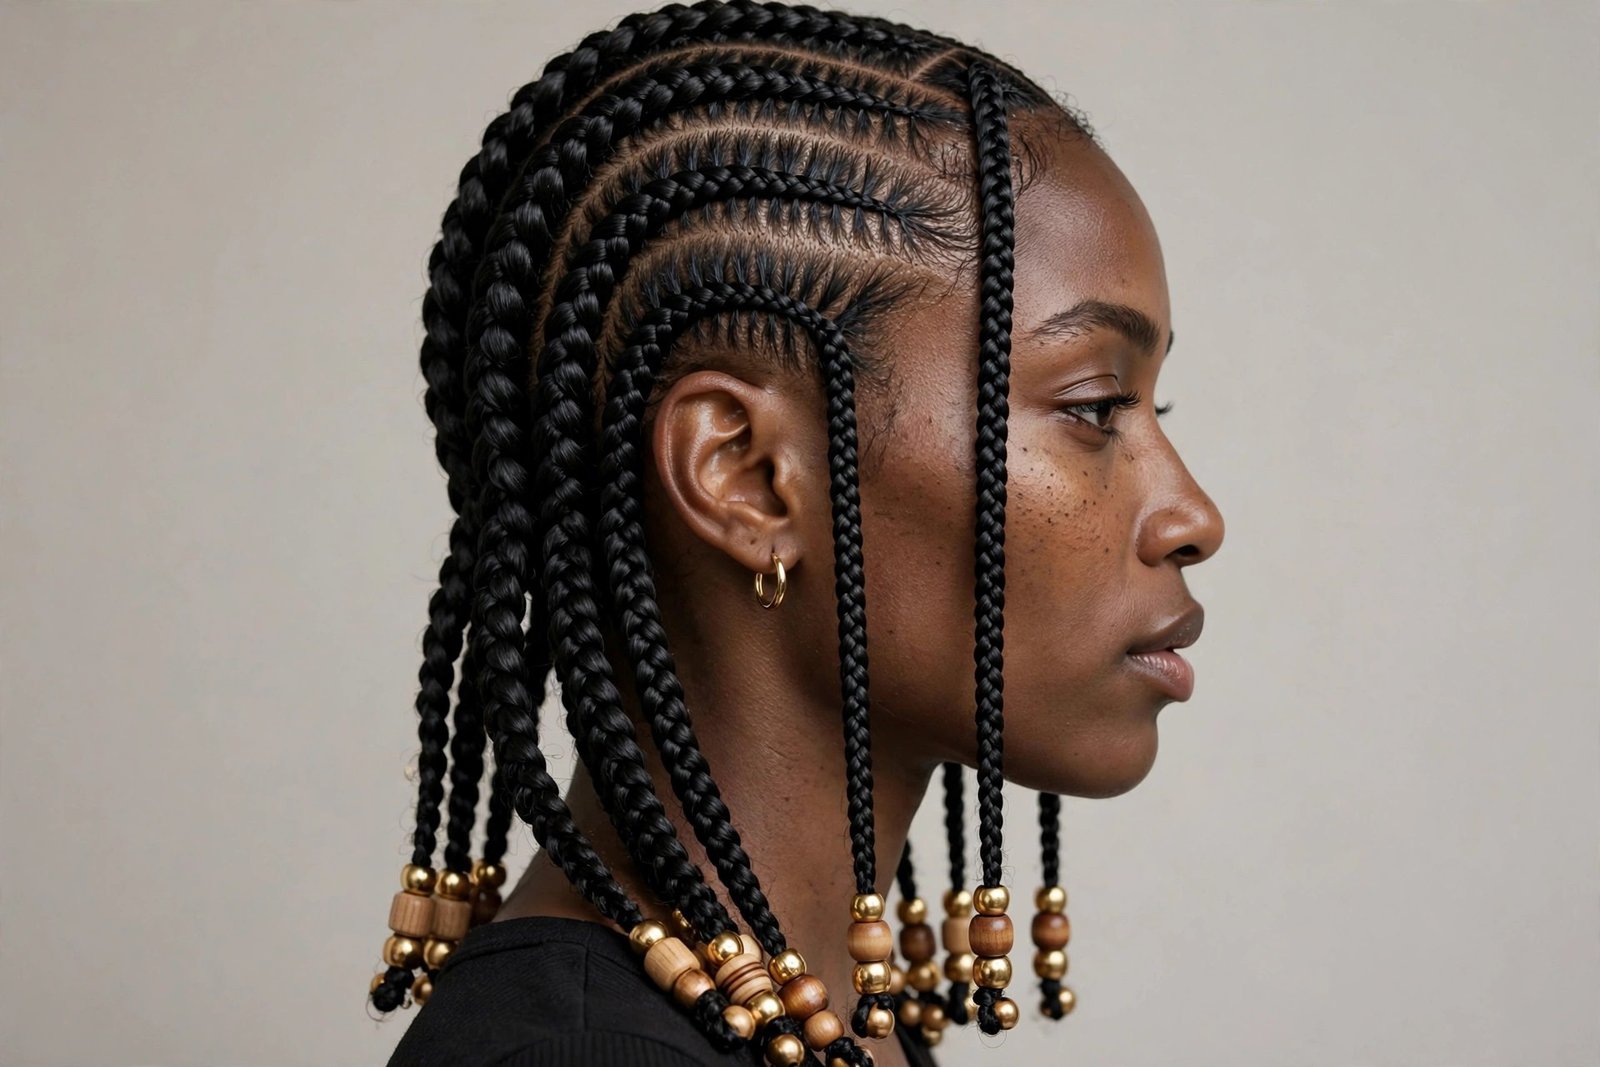
Beads on stitch braids hit differently than beads on any other braid style. Because the rows are so clean, every bead reads as intentional jewelry rather than decoration — gold cuffs at the partings, wooden beads stacked at the ends, a single statement bead on a face-framing row. It is the fastest way to take stitch braids from beautiful to unforgettable, and the customization is endless.
Who it suits: this is for the maximalists, the culture-celebrators, the women whose jewelry box is a personality trait. Beads add visual weight at the ends, which balances longer faces and adds presence to finer facial features. They are also brilliant for events — weddings, festivals, vacations — where your hair needs to perform in photos from fifty feet away.
What to tell your braider: “Straight-back stitch braids with beads — I want [gold cuffs / wooden beads / a mix] at the ends, and maybe two accent beads near the front.” Bring your own beads if you have specific ones; braiders carry basics but not your grandmother’s brass. Time: add thirty to sixty minutes to the base style for beadwork. Cost: $150–$280 including beads.
The honest downsides: beads are heavy and they click. The weight adds up over a full head — if you are sensitive to heavy styles, keep beads to the ends only, not stacked up the length. They clack against each other when you move, which is charming until you are trying to sleep — a satin bonnet muffles it, but light sleepers should know. And beads can snag on knit scarves and seatbelts; tuck them or accept the occasional yank.
6. The Stitch Braid Bob
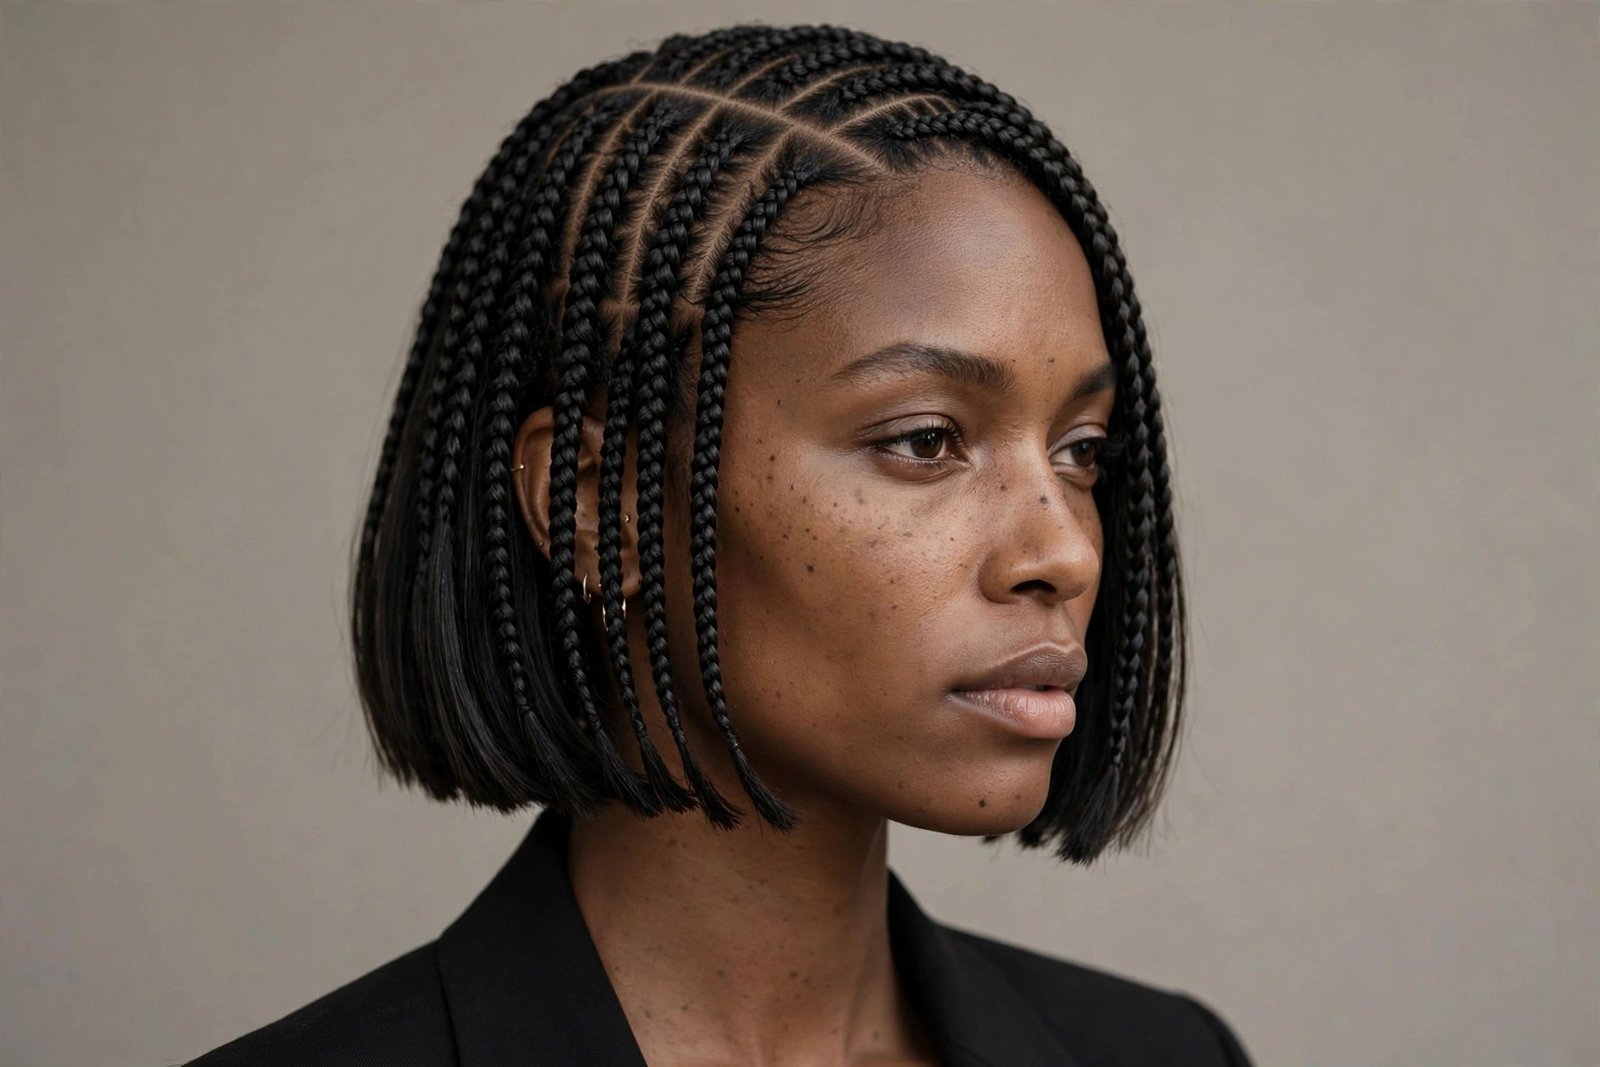
Not everyone wants waist-length hair, and the stitch braid bob is proof that the technique shines at any length. Chin- to shoulder-length stitch braids, cut blunt or with a slight angle, parted with the same surgical precision as the long versions. It is chic in a way long braids are not — more fashion-editorial, less vacation. I have seen this style completely convert women who thought braids “weren’t for them.”
Who it suits: the bob is a face-framing machine. A chin-length stitch bob sharpens jawlines and shows off necks, collarbones, and earrings — if you have great bone structure, this is your billboard. It suits petite women especially well (long braids can overwhelm smaller frames) and anyone whose workplace skews conservative — a neat braided bob reads polished in a way waist-length braids sometimes do not.
What to tell your braider: “Stitch braid bob, chin-length, blunt ends — I want it sharp.” Specify straight-across versus angled (angled, longer in front, is more dramatic). Time: two and a half to three and a half hours — noticeably faster than long installs. Cost: $100–$180.
Maintenance is easy and the grow-out is graceful, but here is the honest trade-off: short braids show new growth faster at the hairline, so the “fresh” window is closer to three weeks than five. The flip side is takedown is quick and reinstallation is cheap, so many bob wearers just refresh more often. Also — blunt ends on braids can flip outward as they age. A little mousse and a scarf at night keeps them behaving.
7. Colored Stitch Braids (Ombre & Two-Tone)
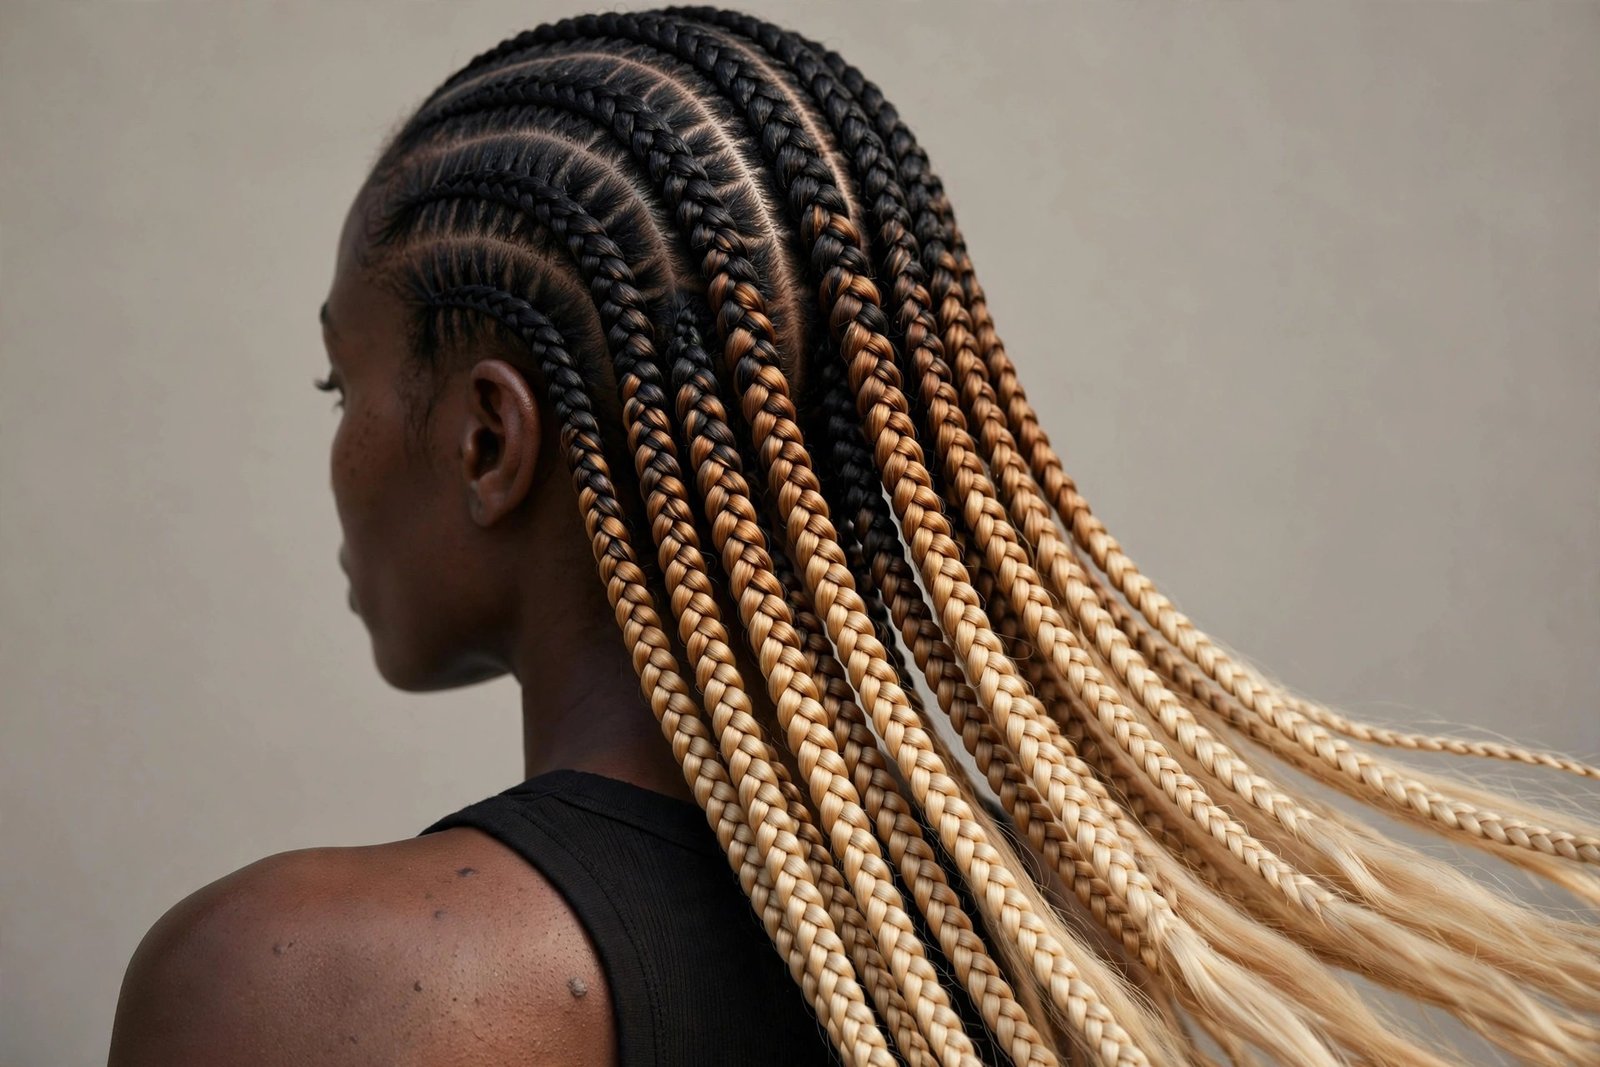
Color is where stitch braids become art. Because the partings are so precise, color placement shows with unusual clarity — an ombre that melts from black to honey blonde along each row, two-tone braids where alternate rows carry different colors, or a money-piece effect with the front rows in a lighter shade. The stitch seams actually catch the light differently on colored hair, which makes the dimension pop even more.
Who it suits: color is about skin tone and courage in equal measure. Warm blondes, coppers, and honey browns glow against deep skin; burgundy, plum, and jet-black-with-blue undertones suit a wide range. If you are color-shy, start with an ombre — dark at the root, color only at the ends — so your natural root area stays low-commitment. If you are not color-shy, alternate-row two-tone is the showstopper.
What to tell your braider: “Stitch braids with [ombre black-to-honey / two-tone black and burgundy / etc.] — I want the color placement clean along the parts.” Color blending in braiding hair varies wildly by brand, so ask to see the actual hair before it goes in your head. Time: three to five hours. Cost: $150–$280; colored braiding hair costs more and the install takes longer.
The honest downsides: colored braiding hair can bleed slightly when wet — the first wash may tint your pillowcase, so use dark bedding the first week. Lighter colors also show frizz and dullness faster than black, so the pristine window shortens by about a week. And here is the one nobody says: bold color plus stitch precision gets you noticed everywhere. If you are not ready for strangers asking about your hair in grocery stores, pick the ombre.
8. The Stitch Braid Ponytail
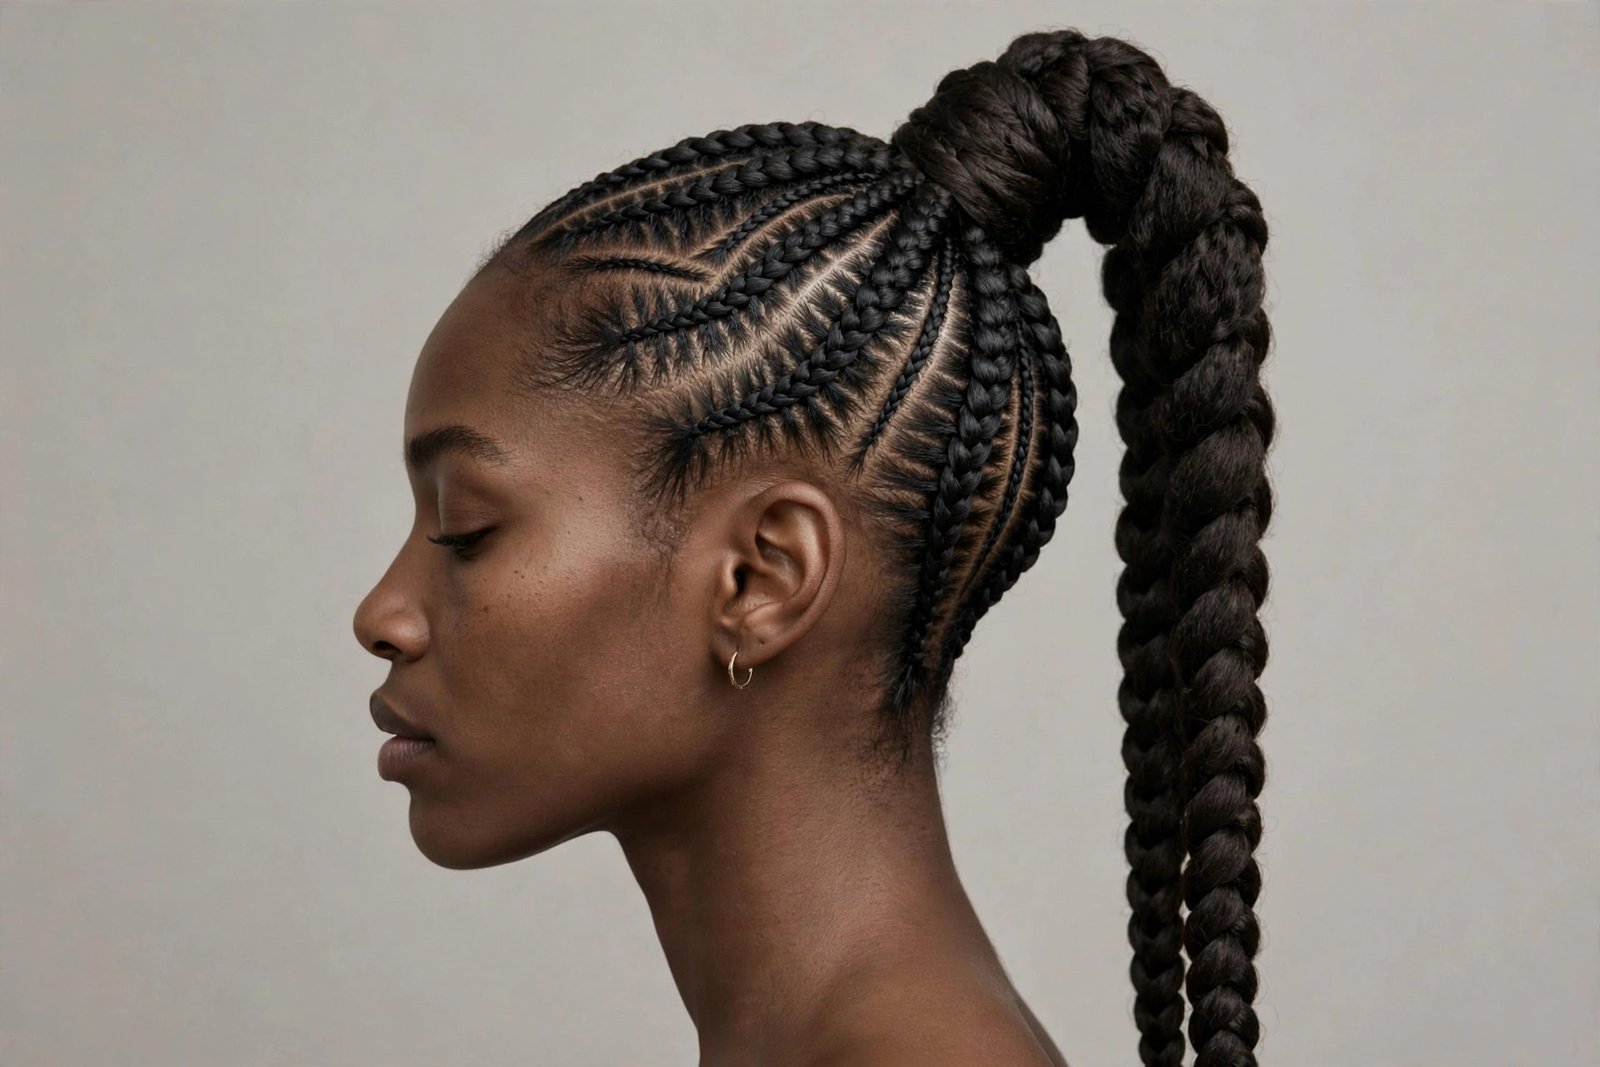
The stitch braid ponytail is what you get when the braids are cornrowed upward and gathered into a high, full ponytail — sometimes with the ponytail itself braided, sometimes left as flowing braided lengths. It is sporty, it is glamorous, it is the style every celebrity wears to the gym and then to dinner. The upward stitch pattern on the scalp is half the beauty here; from the front it looks like sculpture.
Who it suits: high ponytails flatter oval, heart, and diamond face shapes most naturally, but the real question is lifestyle. This is the stitch style for women who move — runners, dancers, busy professionals who need hair completely off their face and neck. It is also the best choice if you love the look of long braids but find them annoying when they fall forward all day.
What to tell your braider: “Stitch braids feeding upward into a high ponytail — I want the rows braided up, not just pulled up.” Again, the construction method determines longevity. Decide on the ponytail finish: braided, wrapped, or curly ends. Time: four to five hours. Cost: $160–$280.
The honest downsides mirror the high bun: weight concentrated at one point on your head, potential for tension headaches the first days, and the ponytail base loosening over time. The fix is the same — do not sleep in the high pony; drop it to a low loose style at night and re-gather in the morning. Also, the upward feed-in puts more tension on the nape and temples than straight-backs do, so speak up during the install if anything pulls. “Beauty is pain” is a lie your edges will bill you for later.
9. Side-Swept Stitch Braids
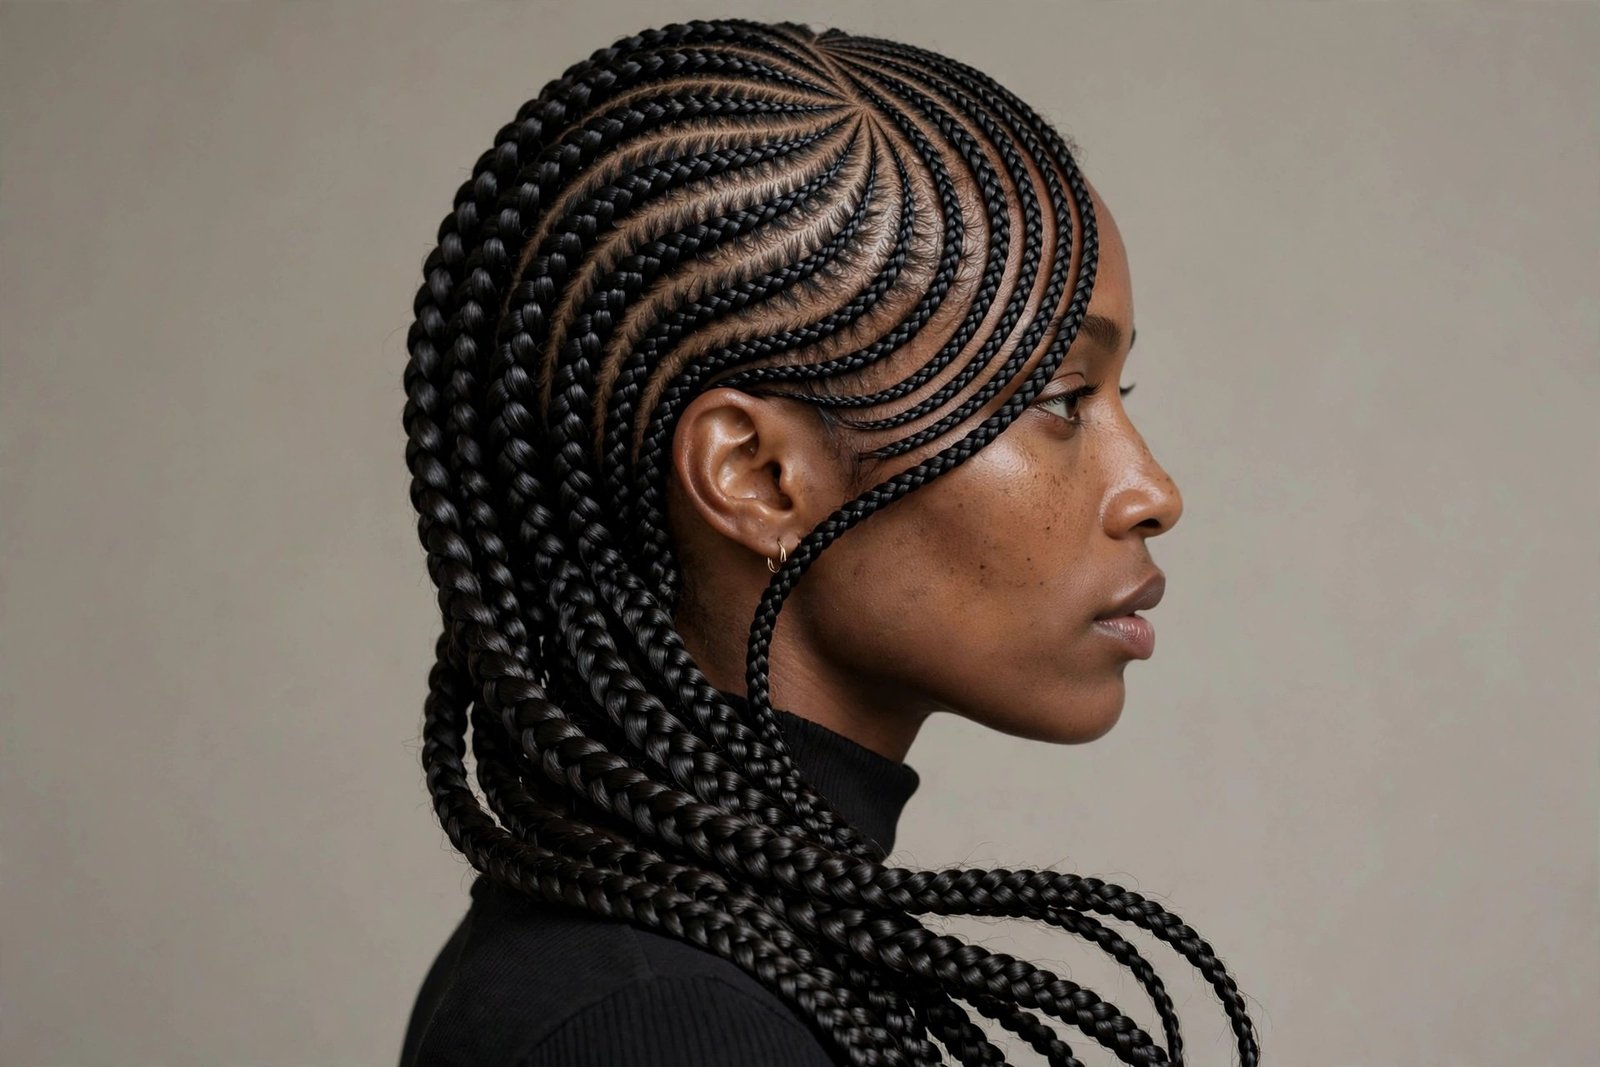
Instead of running straight back, the rows curve and sweep to one side — like a side part taken to its logical extreme. The curved partings are where the stitch technique really shows off, because curved rows expose every wobble; when they are done well, the flowing lines look like water. This is the red-carpet stitch braid, the one that reads “evening” without a single accessory.
Who it suits: asymmetry is a face-shape cheat code. Side-swept rows break up the symmetry of round faces, soften the angles of square faces, and add drama to oval faces that can look plain in straight-backs. If you part your loose hair on the side, this variation will feel instantly like you.
What to tell your braider: “Stitch braids swept to the [left/right] side — I want curved rows, not straight.” Specify how dramatic the sweep: a gentle curve reads elegant, a deep side-sweep reads bold. This style demands a braider with genuinely good freehand parting — ask to see curved work in their portfolio, not just straight rows. Time: four to five hours. Cost: $150–$260.
The honest downside: curved rows grow out less gracefully than straight ones. As your hair grows, the curve distorts faster, so the pristine window is about three weeks. Also, sleeping on the swept side crushes the curve — you will need to be a little precious about positioning at night. Worth it for the look, but go in with eyes open.
10. Jumbo Stitch Braids
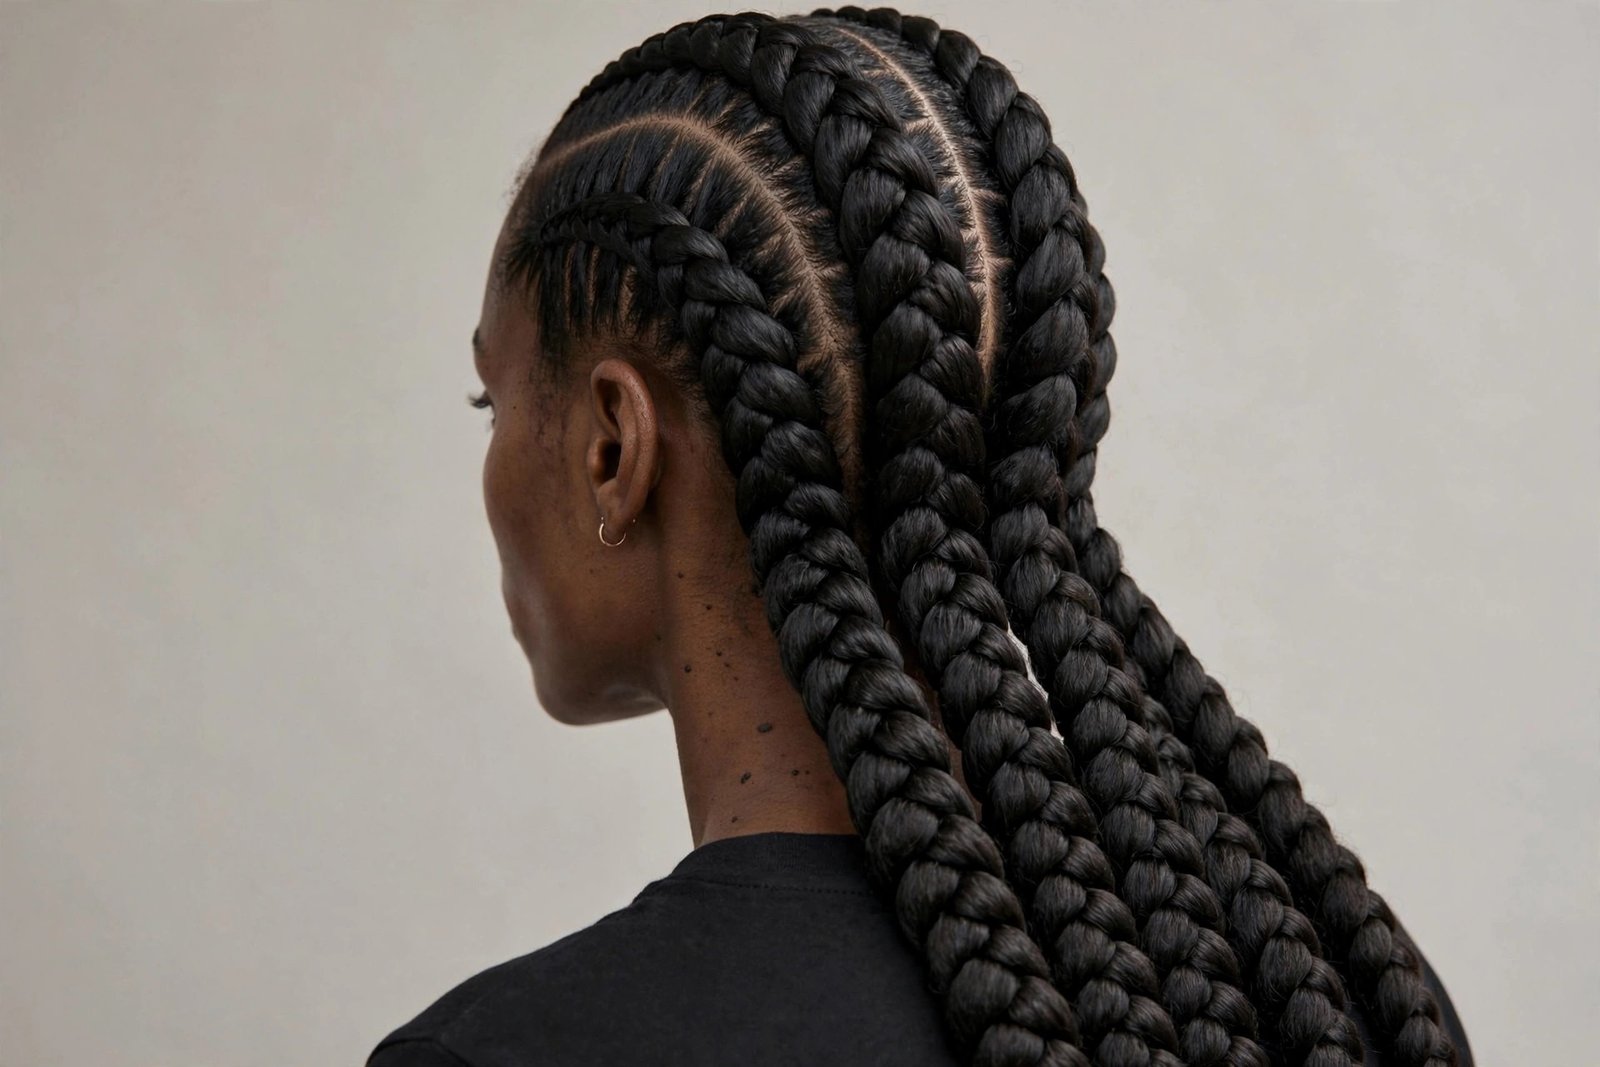
Four to six massive rows instead of eight to ten medium ones. Jumbo stitch braids are a statement — bold, graphic, unapologetic. Each thick row shows off the stitch seam at maximum scale, and the whole style takes a fraction of the time. This is the choice for women who want impact without the six-hour appointment, and honestly, the chunky proportions photograph incredibly well.
Who it suits: jumbo braids love strong features — they hold their own against bold makeup, statement earrings, and confident style. They suit oval and oblong faces particularly well (the width balances length), and they are kind to anyone with a lot of natural hair, since fewer, thicker rows mean less manipulation of your own hair. Petite women should see it in person first — jumbo proportions can overwhelm smaller frames.
What to tell your braider: “Jumbo stitch braids — four to six rows, thick, [mid-back/waist] length.” Fewer rows means each row carries more hair, so discuss weight; jumbo braids are heavier per row than medium ones. Time: two to three hours — the fastest full stitch install. Cost: $100–$180.
The honest downsides: jumbo braids show scalp more between rows, so new growth is visible sooner — expect a three-week prime window. The weight distribution also means each row pulls with more force, so tension at the hairline needs to be conservative; jumbo plus tight equals edge trouble. And styling versatility is lower — you cannot do much besides wear them down or in a simple ponytail. If you like restyling your braids weekly, medium rows give you more options. Fans of box braids who want the same bold energy with a sleeker scalp finish will feel right at home here.
11. Zigzag-Part Stitch Braids
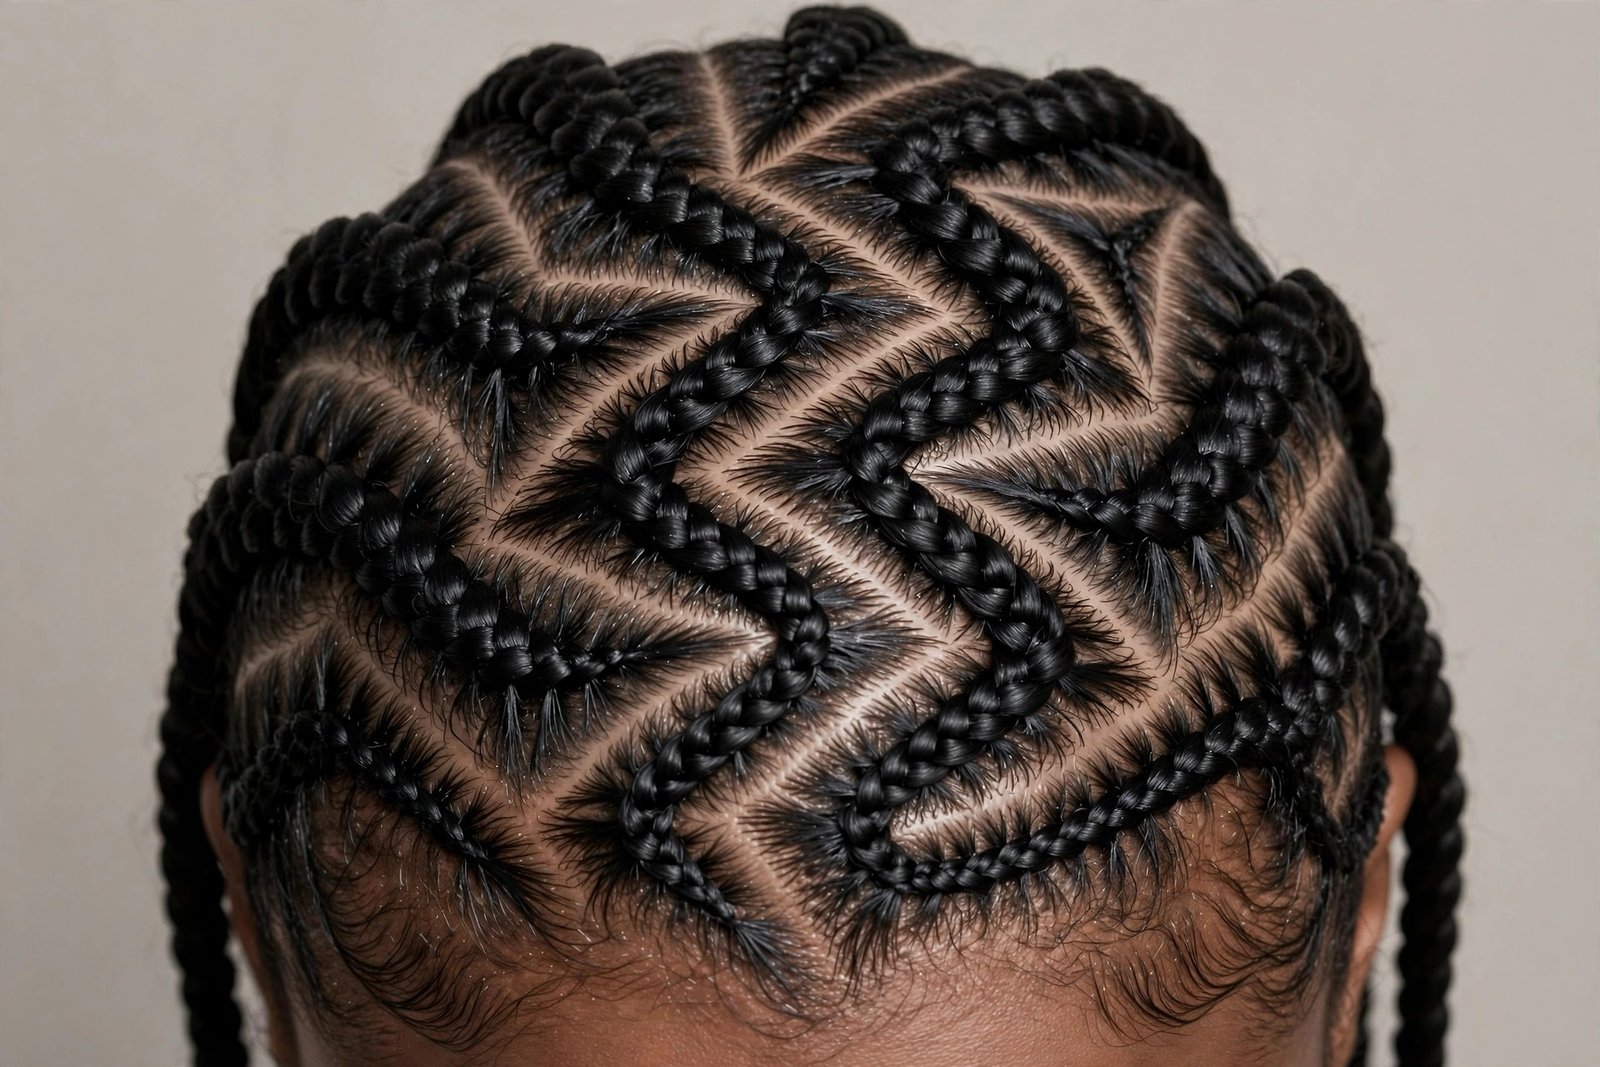
The partings themselves become the design: instead of straight lines, each row is separated by a sharp zigzag. It is playful, it is geometric, and it is one of those details that makes people lean in closer to look. The stitch seams follow the zigzag, which takes serious skill — this is a portfolio piece for your braider as much as a hairstyle for you.
Who it suits: anyone with a bit of edge in their style. Zigzag parts read youthful and creative — they are huge with the under-30 crowd and with women whose aesthetic runs streetwear, festival, or alt. They also cleverly disguise new growth: the zigzag breaks up the regrowth line visually, so this style actually wears longer than straight-part equivalents.
What to tell your braider: “Stitch braids with zigzag parts — sharp zigzags, medium rows.” The zigzag needs to be crisp, not wavy; ask to see zigzag work specifically. This is not a beginner technique. Time: four to six hours — the parting alone adds significant time. Cost: $170–$300.
The honest downside is the obvious one: this lives or dies on precision, and precision costs. A sloppy zigzag looks like a mistake, not a design. Vet your braider hard for this one — check their tagged photos, not just their curated grid. Also, zigzag parts limit restyling: the pattern is the star, so pulling the braids into elaborate updos hides the very thing you paid for. Wear them down and let the geometry talk.
12. Heart-Design Stitch Braids
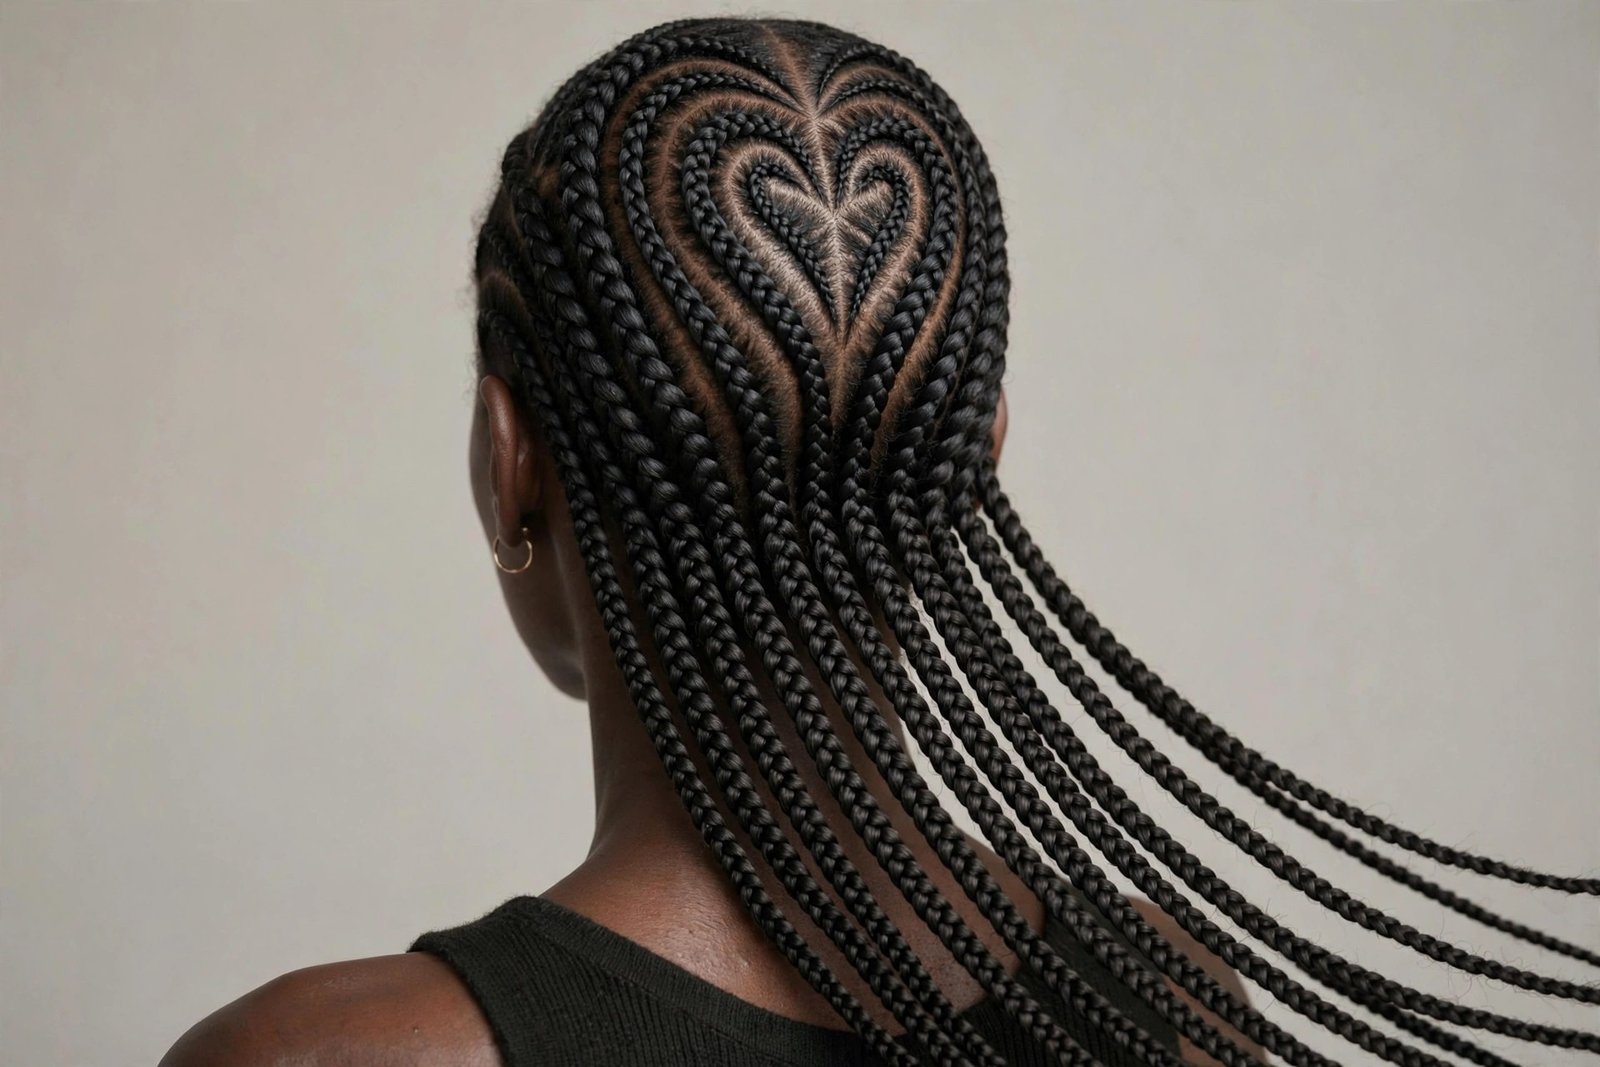
The most romantic entry on this list: the partings are shaped into hearts — usually one large heart at the crown or a series of small hearts along the scalp — with the braids flowing from the design. It is unabashedly sweet, wildly photogenic, and the style most likely to make your phone blow up when you post it. Heart stitch braids are not subtle. They are not trying to be.
Who it suits: this is a mood more than a face shape. Heart designs suit anyone celebrating something — Valentine’s season, anniversaries, birthdays, or just a week where you want your hair to feel like joy. They skew young in perception, but I have seen women in their forties wear a single crown heart with total elegance. Placement matters: one clean heart reads chic; five small hearts read playful.
What to tell your braider: “Stitch braids with a heart design at the crown — one large heart, braids flowing back from it.” Bring reference photos; heart geometry varies and you want to agree on the shape before the first part is drawn. Not every braider does design work — confirm this is in their skill set when you book, not when you sit down. Time: five to six hours. Cost: $180–$320.
The honest downsides: design braids grow out the fastest of any variation — the heart distorts as your hair grows, giving you about two weeks of crisp design before it softens into abstraction. You are paying premium prices for a shorter prime window, so treat this as an occasion style, not a six-week protective style. And like the zigzag, updos hide the design — plan to wear it down.
13. Long Waist-Length Stitch Braids
Maximum drama. Waist-length (sometimes hip-length) stitch braids with the same crisp technique, just more of it — rows that keep going and going. There is a reason this length dominates vacation photos and music videos: long braids move. They swing when you walk, they catch wind, they turn a simple outfit into a look. Nobody forgets waist-length stitch braids.
Who it suits: height helps — longer torsos carry extreme length more naturally — but confidence matters more than inches. Waist-length braids suit anyone who wants their hair to be the main event. They are particularly stunning on taller women and on anyone with a bold personal style; on very petite frames, consider hip-length only if you have seen it on a similar body and loved it.
What to tell your braider: “Waist-length stitch braids, medium rows — and let us talk about weight before you start.” Extreme length means extreme weight; a good braider will distribute it across enough rows and may suggest slightly thicker rows to keep the tension manageable. Time: five to seven hours — the longest standard install. Cost: $200–$350.
The honest downsides are all practical: this much hair gets caught in everything — car doors, zippers, chair backs, gym equipment. It takes longer to dry after washing. It is heavy enough to cause neck tension if you wear it down all day, every day — alternate with updos. And sitting on your own braids gets old by week two; you will develop the sweep-aside reflex. None of this stops anyone. Just know the length is a lifestyle, not just a look.
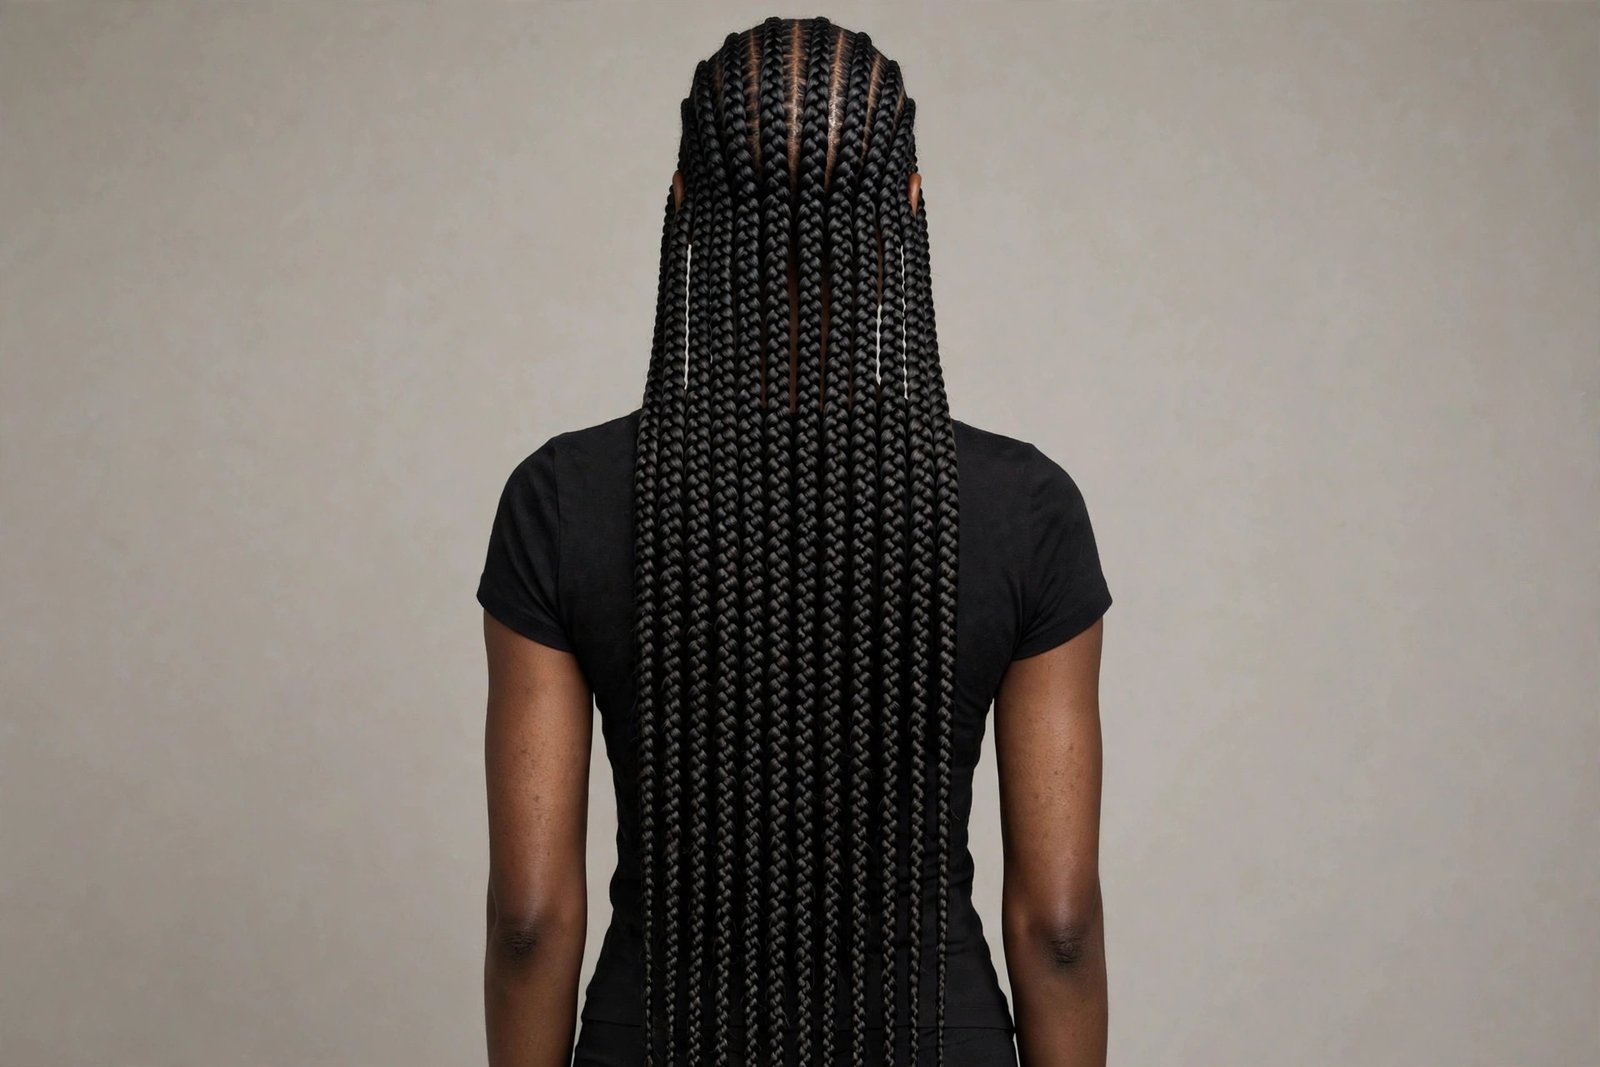
14. Half-Up Half-Down Stitch Braids
The best of both worlds and the most versatile styling option on this list: the top section of stitch braids is gathered — into a small bun, a ponytail, or simply clipped — while the rest flows free. You get the face-opening effect of an updo with the length and movement of wearing it down. It is also the easiest way to refresh the look mid-wear: week-four braids in a half-up style look brand new.
Who it suits: everyone, genuinely. Half-up styles flatter every face shape because they lift the top (adding height, which flatters round and square faces) while the falling braids frame the jaw (softening everything). It is the style I suggest when someone says “I want stitch braids but I do not know which variation” — start with a classic straight-back install and wear it half-up whenever you want variety. No extra cost, no extra commitment.
What to tell your braider: nothing special — this is a styling choice, not an install variation. Get any straight-back or curved stitch install and style it half-up yourself. For a fancier version, ask your braider to show you the half-up before you leave the chair. Time/cost: same as your base install.
The honest downside: there barely is one, which is why this made the list. The only caution — the elastic or clip holding the top section can dent or frizz the braids at the gather point over time. Use satin scrunchies or spiral ties, vary the gather position, and never use a plain rubber band unless you enjoy regret.
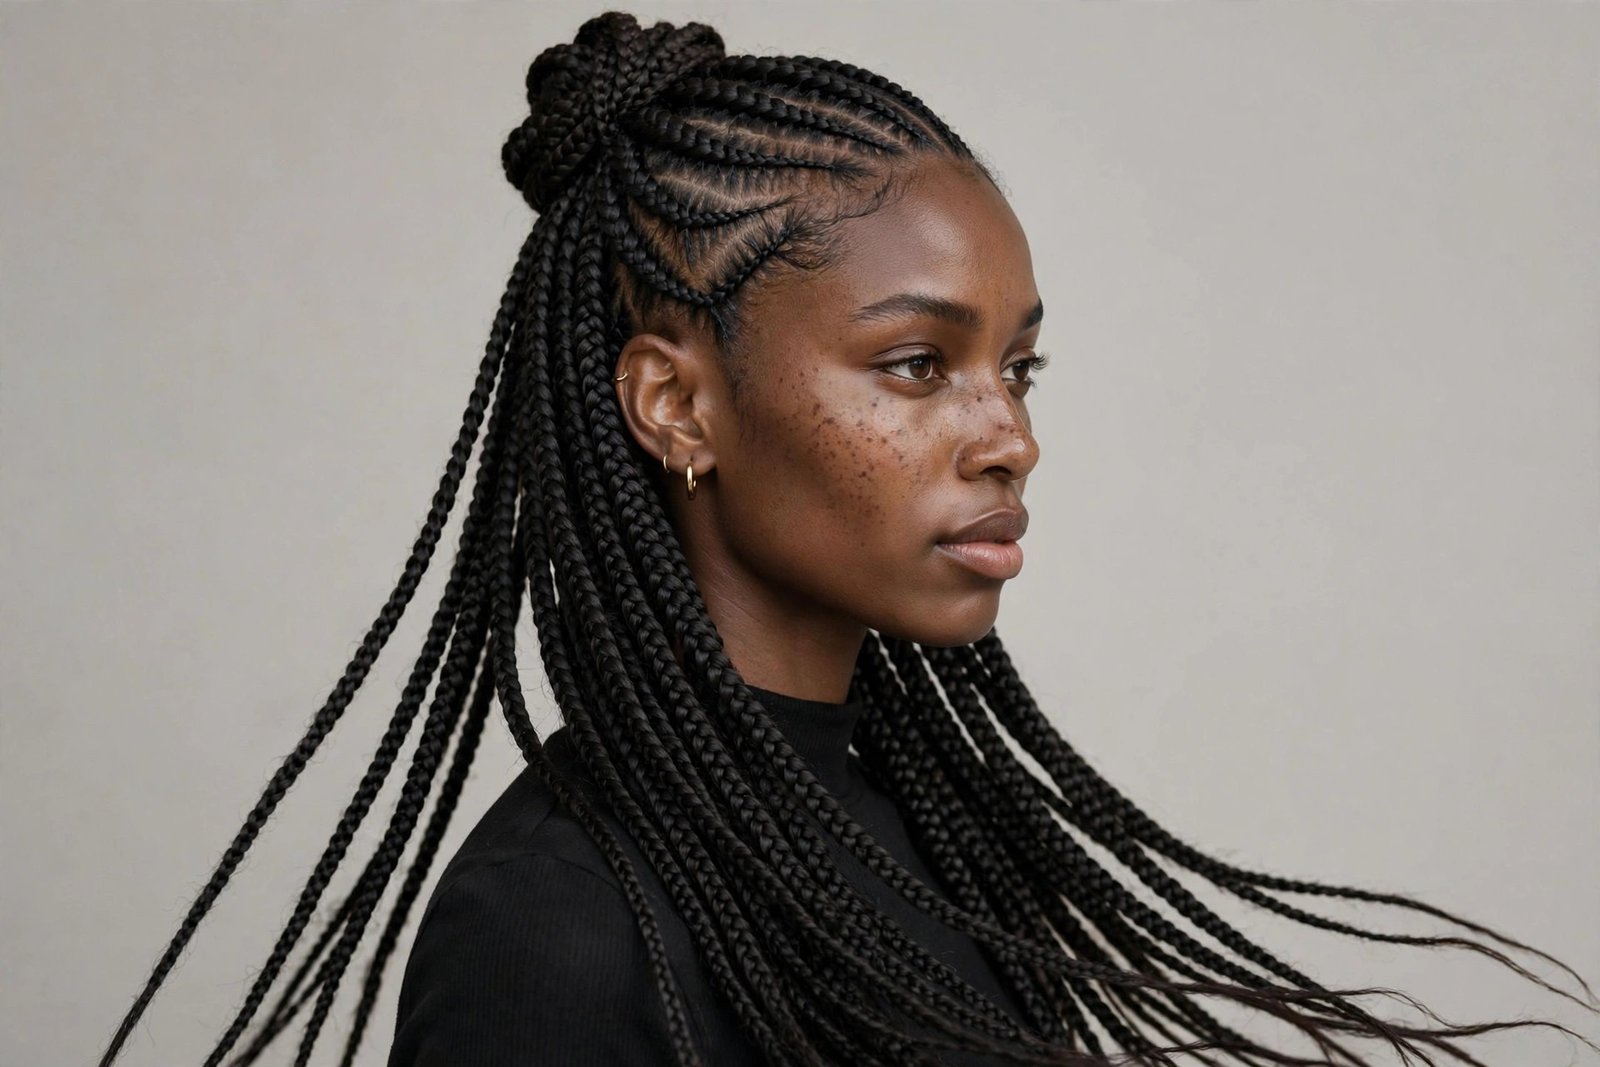
15. Fulani-Inspired Stitch Braids
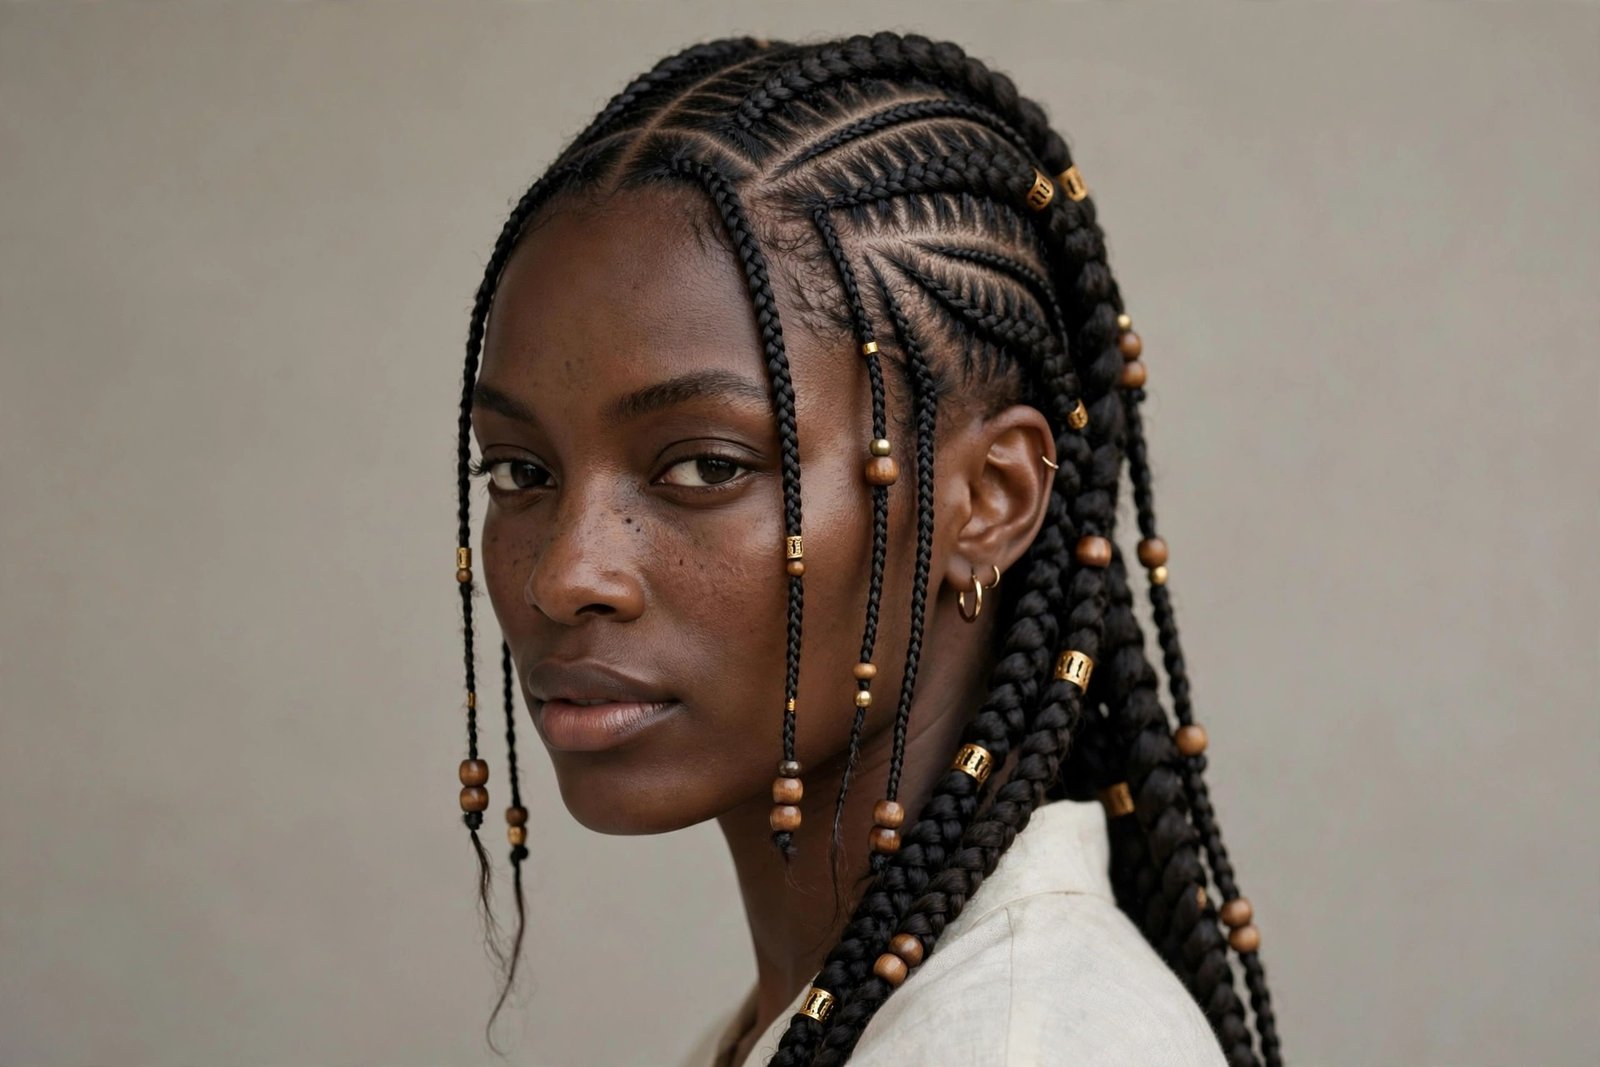
A beautiful collision of two braid traditions: the crisp stitch technique applied to Fulani-style layouts — a center braid or center part with side rows, often with the signature Fulani face-framing braids at the temples, sometimes finished with beads or cowrie accents. It honors the Fulani roots while showing off modern stitch precision. Culturally rich, visually striking, deeply personal for many wearers.
Who it suits: the center-part layout flatters oval, round, and heart-shaped faces; the temple braids draw attention to the eyes and cheekbones. This variation carries cultural significance — Fulani braids originate with the Fulani people of West Africa — so wear it with appreciation and understanding. It is also one of the most customizable layouts: the arrangement of the front braids can be tuned to any face.
What to tell your braider: “Fulani-inspired stitch braids — center part with stitched side rows and two thin face-framing braids.” Decide on beads or cowries in advance. This requires a braider comfortable with both Fulani layouts and stitch technique — confirm both. Time: four to six hours. Cost: $170–$300.
The honest downsides: the intricate front layout grows out faster than simple straight-backs — the temple braids loosen first. And the style is distinctive enough that you will get questions about it; if you wear Fulani-inspired styles, know the history well enough to speak about it with respect. For the full story on the traditional style that inspired this variation, see our guide to Fulani braids — and if you are torn between braid families, our knotless braids guide covers the gentlest tension option available.
Stitch Braids Technique, Care & Maintenance
Beautiful stitch braids are only half the story. The other half is what happens in the chair and in your bathroom for the next month. This section covers the actual stitching technique (so you know what good work looks like), how to prep your hair before the appointment, the nightly and weekly routine that keeps braids fresh, how to wash them without destroying them, and how to take them down without taking your edges with them.
The Stitch Technique, Step by Step
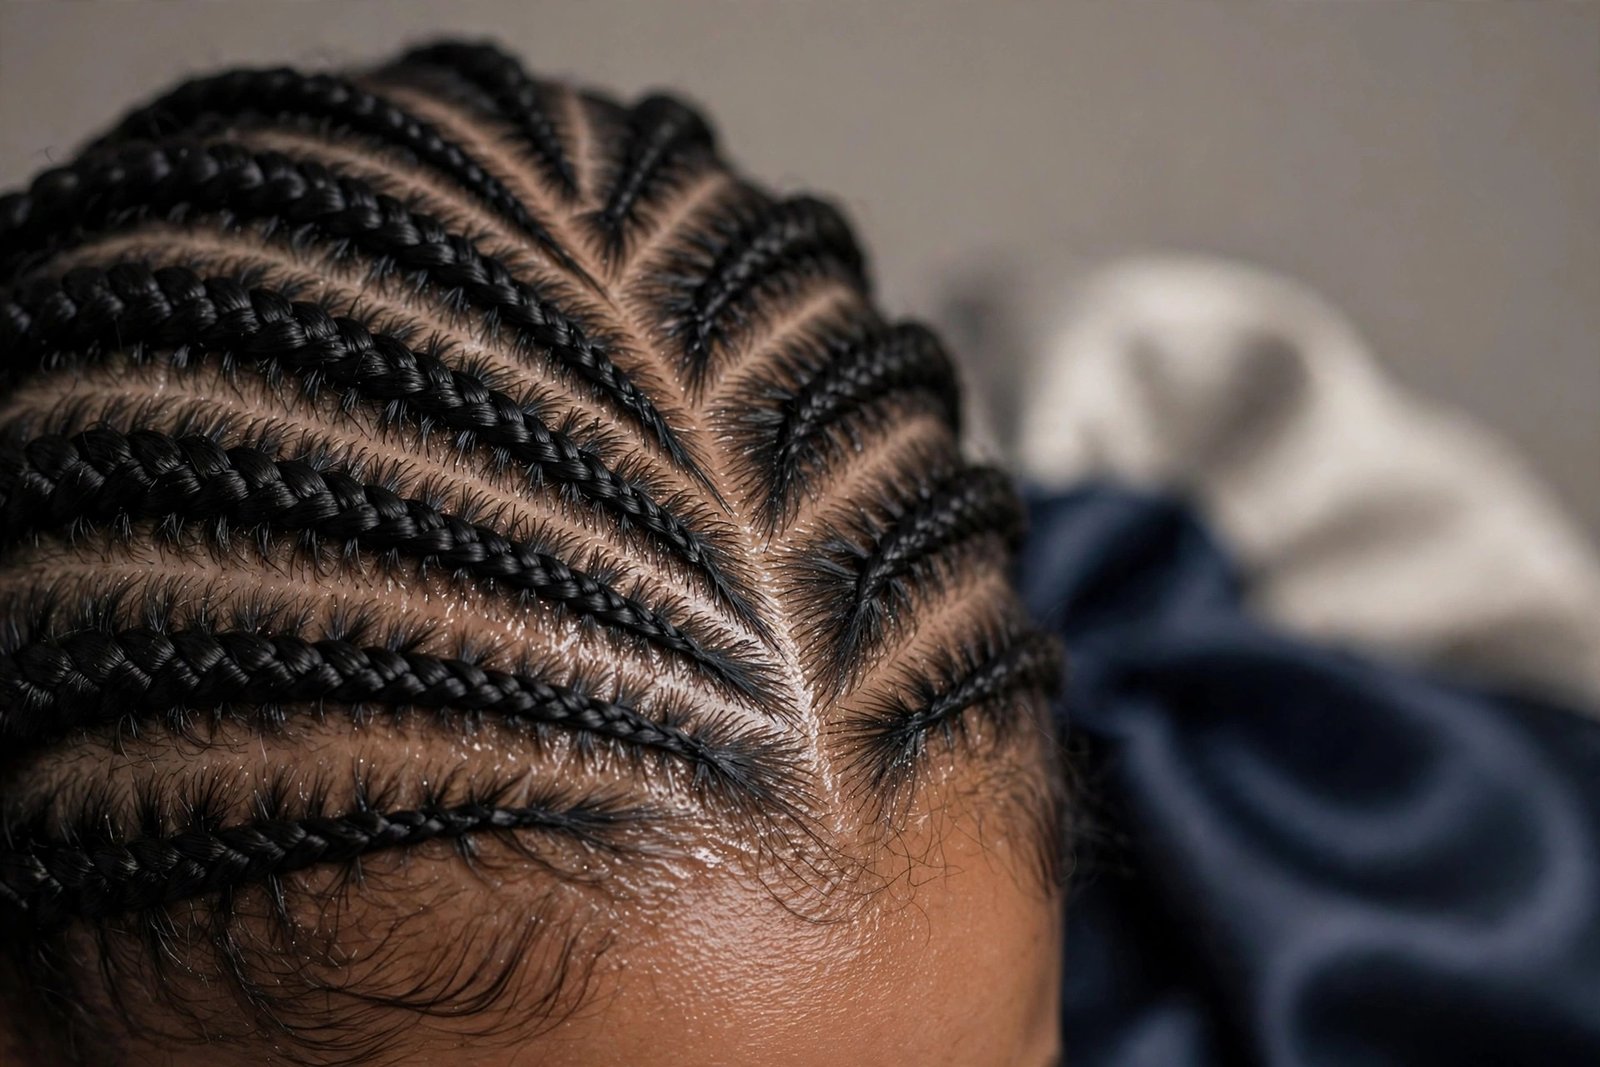
Here is what is actually happening during those hours in the chair. The braider starts by parting your hair into clean sections with a rat-tail comb — this parting stage is where great stitch braids are won or lost, and a meticulous braider may spend forty-five minutes on parts alone. Your natural hair should be stretched (blow-dried or banded) so it lies smooth. Then, for each row, the braider anchors a small piece of extension hair at the front and begins the stitch: instead of the standard cornrow motion where hair feeds in continuously underneath, the braider loops the added hair around the base in a distinct stitching pattern — under, over, and through — creating that raised seam. Extension hair is fed in gradually, a little at a time, which is why the braid stays slim at the root and gains fullness toward the ends instead of bulging at the hairline like old-school added-hair cornrows.
Watch for these quality markers while you sit: parts that stay straight and even from hairline to nape, consistent tension (no single row pulling harder than its neighbors), braids that lie flat against the scalp without buckling, and ends that taper smoothly. Braiding is one of humanity’s oldest hair arts, and the stitch is simply its latest refinement — but refinement demands patience. If your braider rushes the parts, the stitch cannot save the style. If anything hurts sharply during the install, say so immediately; “it will loosen up” is true for mild tightness and a lie for real pain.
Prep: Getting Your Natural Hair Ready
The best stitch braid install starts a week before the appointment. Deep condition your hair — a proper thirty-minute deep conditioning treatment under heat — because your hair is about to be tucked away for a month and you want it going in at its healthiest. Get a trim if your ends are ragged; braids do not fix split ends, they just hide them while they travel upward. Detangle thoroughly the night before, and arrive with your hair clean, stretched, and product-light. Heavy grease or leave-in buildup makes parts slippery and the stitch sloppy.
Do a protein-moisture check honestly: if your hair is mushy and over-moisturized, do a light protein treatment; if it is brittle and snapping, skip protein and load moisture. Your braider can work with most hair, but hair that is actively breaking will break faster under braids — that is physics, not opinion. Also, clarify: if you have product buildup, do a clarifying wash before your moisturizing wash. Clean hair grips extension hair better, which means less slipping, less frizz, and braids that actually last the full six weeks.
The Nightly and Weekly Care Routine
Nightly is non-negotiable: tie your braids down with a satin or silk scarf, or wear a satin bonnet — cotton pillowcases create friction that fuzzes the parts and dulls the braids. If your braids are long, loosely braid them into one or two big plaits before wrapping; this prevents tangling and keeps the rows aligned. In the morning, unwrap, smooth any flyaways with a light mousse or edge control applied sparingly along the parts (not globbed on the scalp), and go.
Weekly, give your scalp attention: apply a light oil — jojoba, grapeseed, or a dedicated braid spray — along the parts two to three times a week, massaging gently with your fingertips. Do not drown the scalp; excess oil attracts dirt and loosens the roots. Once a week, do a refresh pass: wipe the parts with a damp cloth or witch-hazel-dampened cotton pad to lift buildup, re-lay edges if you wear them, and check for any braids loosening at the hairline. For deeper care science on keeping protective styles healthy, Byrdie‘s protective-style guides are a solid reference alongside your braider’s advice.
Washing Stitch Braids Without Ruining Them
Yes, you wash them. The “never wash braids” myth needs to die — a dirty scalp under braids leads to itching, buildup, odor, and eventually breakage. Wash every one to two weeks. The method: dilute sulfate-free shampoo with water in an applicator bottle, apply directly along the parts, massage gently with the pads of your fingers (never nails, never vigorous scrubbing), and rinse thoroughly by letting water run down the length of the braids. Follow with a light leave-in or braid spray — skip heavy conditioners, which leave residue that attracts lint.
Drying is the critical step everyone rushes. Braids hold water deep in their core, and damp braids worn up will mildew — that sour smell is real and it does not wash out easily. After rinsing, squeeze (do not wring) excess water with a microfiber towel, then let the braids air-dry fully down before styling or wrapping. If you are short on time, sit under a hooded dryer on medium for twenty to thirty minutes. Never tie up wet braids. Never sleep on wet braids. Your nose and your hairline will thank you.
Takedown: Removing Braids Without Damage
Takedown day deserves the same care as install day. Do not just yank — set aside real time, put on something good to watch, and work row by row. Cut the extension hair a few inches below where your natural hair ends (so you never accidentally snip your own hair), unravel each braid gently, and finger-detangle as you go. Keep a spray bottle of water mixed with leave-in conditioner handy; damp hair detangles with far less breakage than dry hair.
Expect shedding — and do not panic. You lose fifty to a hundred hairs a day normally; after six weeks in braids, six weeks of shed hair comes out at once. It looks alarming. It is normal. What is not normal: bald patches, tender spots that stay sore, or hair that snaps off in chunks — those signal the style was too tight or worn too long. After takedown, do a full wash, deep condition, and give your hair at least a week of freedom before reinstalling. Your edges need to breathe, and your scalp needs to be seen. Book the next install only when your hair tells you it is ready, not when your calendar does.
Frequently Asked Questions
The questions every braider hears about stitch braids, answered straight — no sales pitch, no hedging.
How long do stitch braids last?
Four to six weeks is the honest range, with most people hitting the sweet spot at four to five. The stitch technique holds its structure longer than regular cornrows — the parts stay crisp for about three weeks and remain presentable through week five with good care. Past six weeks, new growth makes the roots puffy, the parts blur, and the weight starts stressing your hair. Wearing them longer is not “getting your money’s worth” — it is borrowing against your edges. Take them down on time.
Do stitch braids hurt?
They should not hurt sharply, but mild tightness for the first day or two is common — your scalp is adjusting to new tension. The line is clear: tight is a dull, even pressure that fades; painful is sharp pulling, throbbing, or bumps forming at the hairline. If it is painful, go back to your braider within 48 hours and ask them to loosen the offending rows. A good braider will do this without attitude. Protect your edges like they are irreplaceable, because they nearly are.
How long does the appointment take?
Plan for three to seven hours depending on the variation: jumbo and bob styles run two to three hours, classic straight-backs three to four, and intricate designs (zigzag, hearts, boho, waist-length) five to seven. Bring food, water, entertainment, and a charger. Do not book anything important right after — you will be tired, your scalp will be tender, and rushing the final rows is how mistakes happen.
Can stitch braids damage your hair or cause hair loss?
Any braided style can cause traction alopecia if it is too tight, too small, too heavy, or worn too long — stitch braids are not exempt. But done correctly, they are genuinely protective: your ends are tucked away, manipulation drops to near zero, and many women retain significant length. The risk factors are all controllable: reasonable size, sane tension, timely takedown, and a braider who respects fragile edges. If you notice thinning, take a break from braids entirely and see a dermatologist — early traction alopecia is reversible, late is not.
What is the difference between stitch braids and regular cornrows?
The technique and the finish. Regular cornrows use a continuous feed-in underhand braid that lies flatter with softer partings. Stitch braids use a looping stitch motion that creates a raised, defined seam along each braid and keeps partings razor-sharp much longer. Visually, stitch braids look more sculpted and precise; cornrows look softer and more classic. Stitch installs take longer and cost more, but they hold their crispness for weeks longer. Think of cornrows as the timeless original and stitch braids as the high-definition remaster.
How much do stitch braids cost?
Expect $100 to $350 depending on size, length, design complexity, and your city. Simple jumbo or bob installs sit at the lower end ($100–$180); classic straight-backs run $120–$220; intricate designs with color, beads, or extreme length reach $250–$350. Prices have risen with demand — skilled stitch braiders are booked out and charge accordingly. It is worth paying for expertise here more than with almost any other style; a cheap stitch install that damages your edges is the most expensive haircut you will ever get.
Can you swim or work out with stitch braids?
Working out: absolutely — stitch braids are one of the best gym styles, especially buns and ponytails. Rinse sweat from the scalp after heavy sessions and dry thoroughly. Swimming: yes, with precautions. Wet the braids with clean water before getting in (saturated hair absorbs less chlorine/salt), wear a swim cap if you can stand it, and wash with clarifying shampoo afterward. Chlorine dries out both the braiding hair and your natural hair underneath, so a post-swim wash is not optional. Frequent swimmers should expect a shorter wear time — plan for three to four weeks.
Conclusion
Stitch braids earned their 2026 crown the hard way — not through hype, but through a technique that genuinely improved on what came before. Sharper parts, stronger structure, longer wear, endless variation. Whether you go classic straight-back, bold jumbo, romantic heart design, or waist-length drama, you are wearing one of the most skill-intensive styles in modern braiding, and it shows.
The formula for loving your stitch braids is simple: choose your braider like it matters (it does — more here than anywhere), prep your hair properly, commit to the nightly routine, wash on schedule, and take them down on time. Do those five things and you will get six weeks of a style that turns heads in every room. Skip them and you will learn, expensively, why the details matter.
Book the appointment. Bring the reference photos. Speak up about tension. And when those rows start clicking into place in the mirror twenty minutes in — enjoy it. That feeling is exactly why stitch braids are not going anywhere.