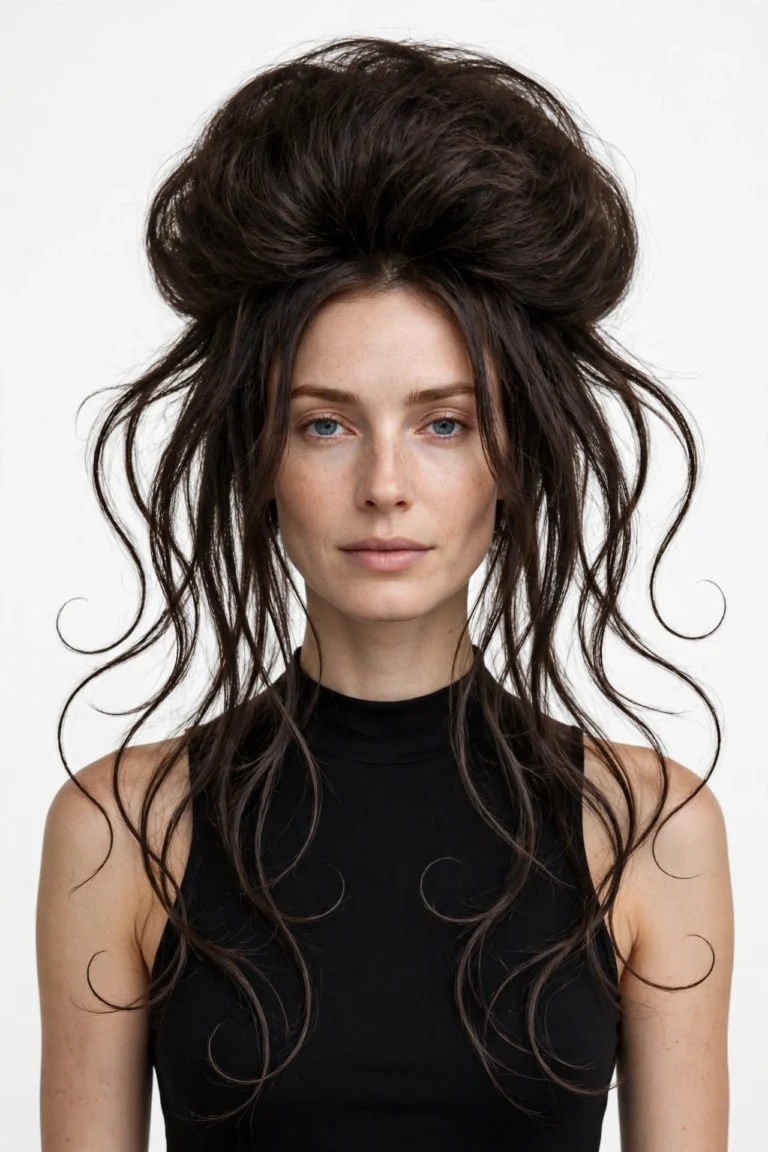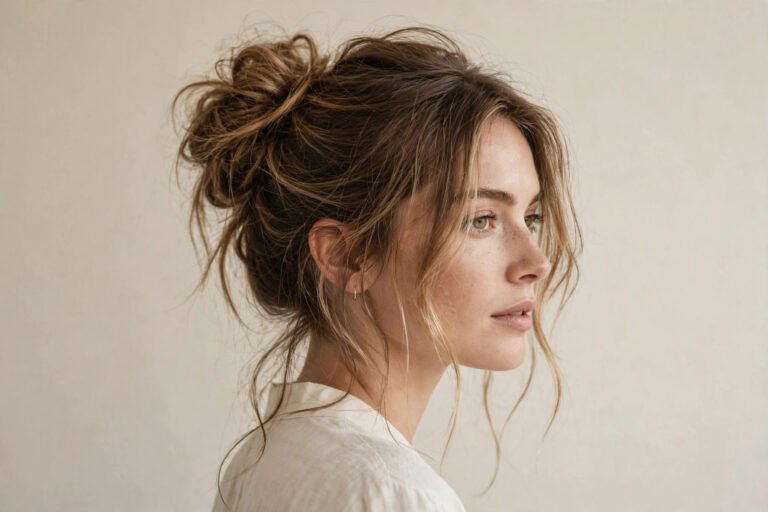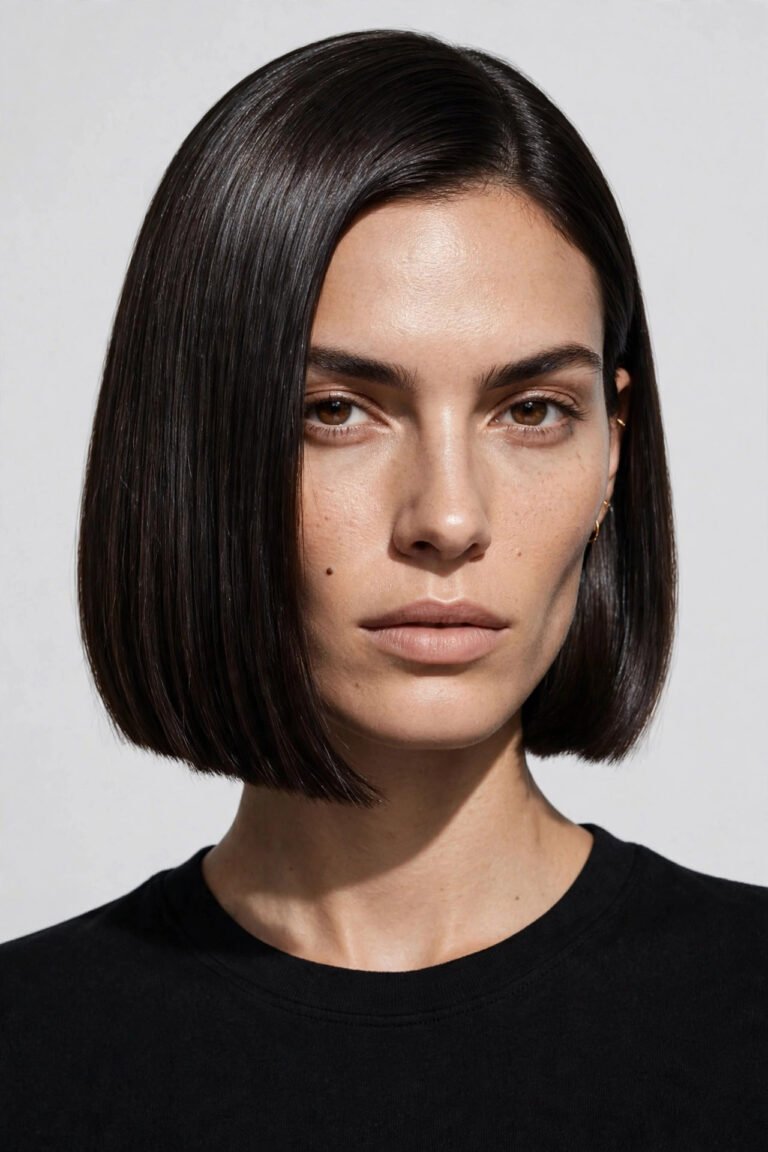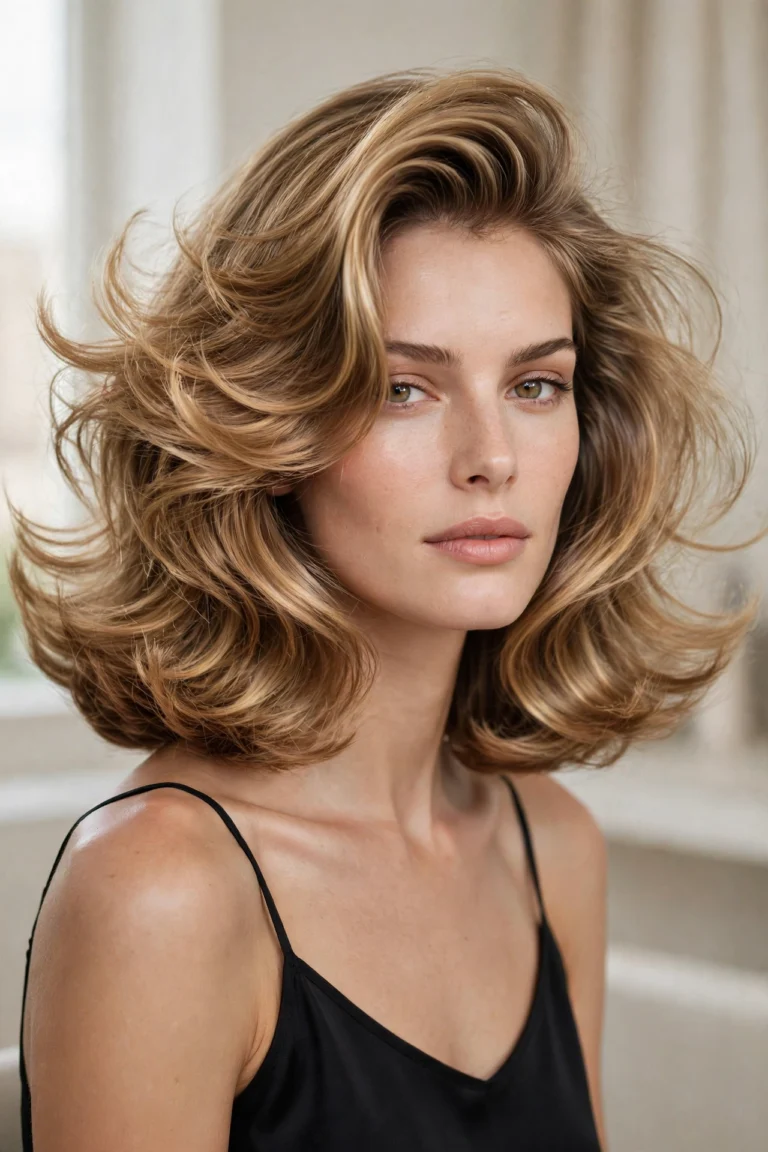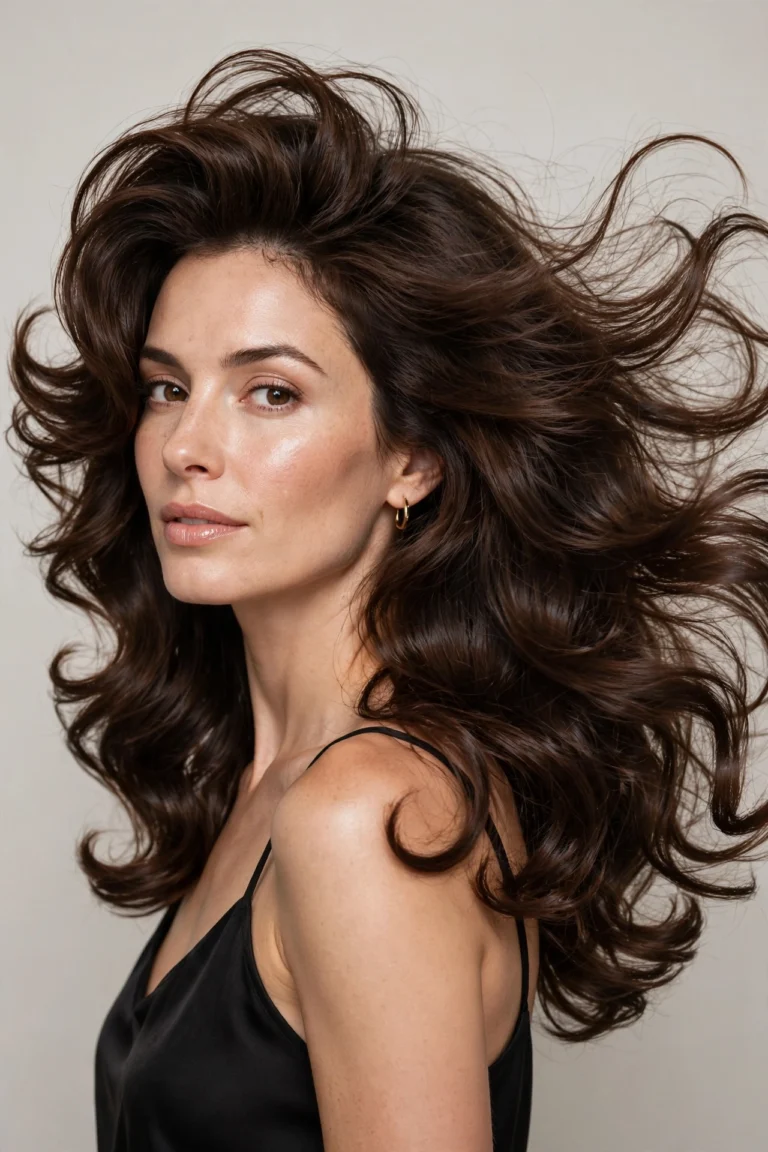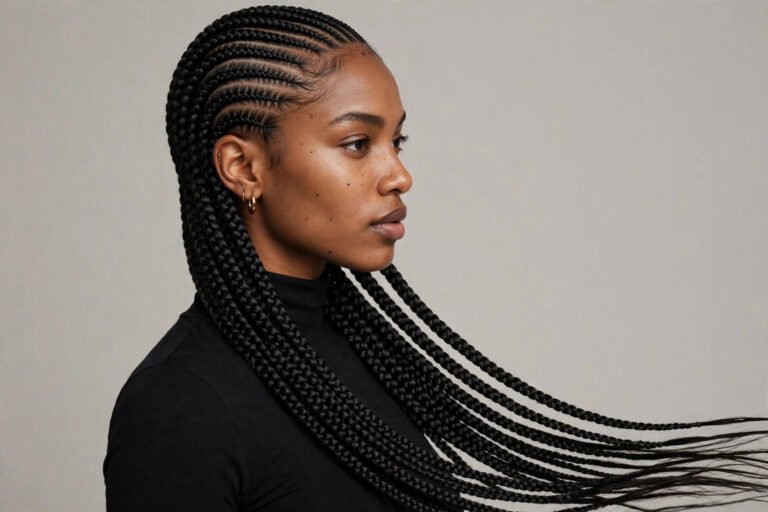
32 Chignon Hairstyles for Women in 2026
The 2026 Chignon Hairstyles Revival: 32 Ways to Wear the Year’s Most Elegant Updo
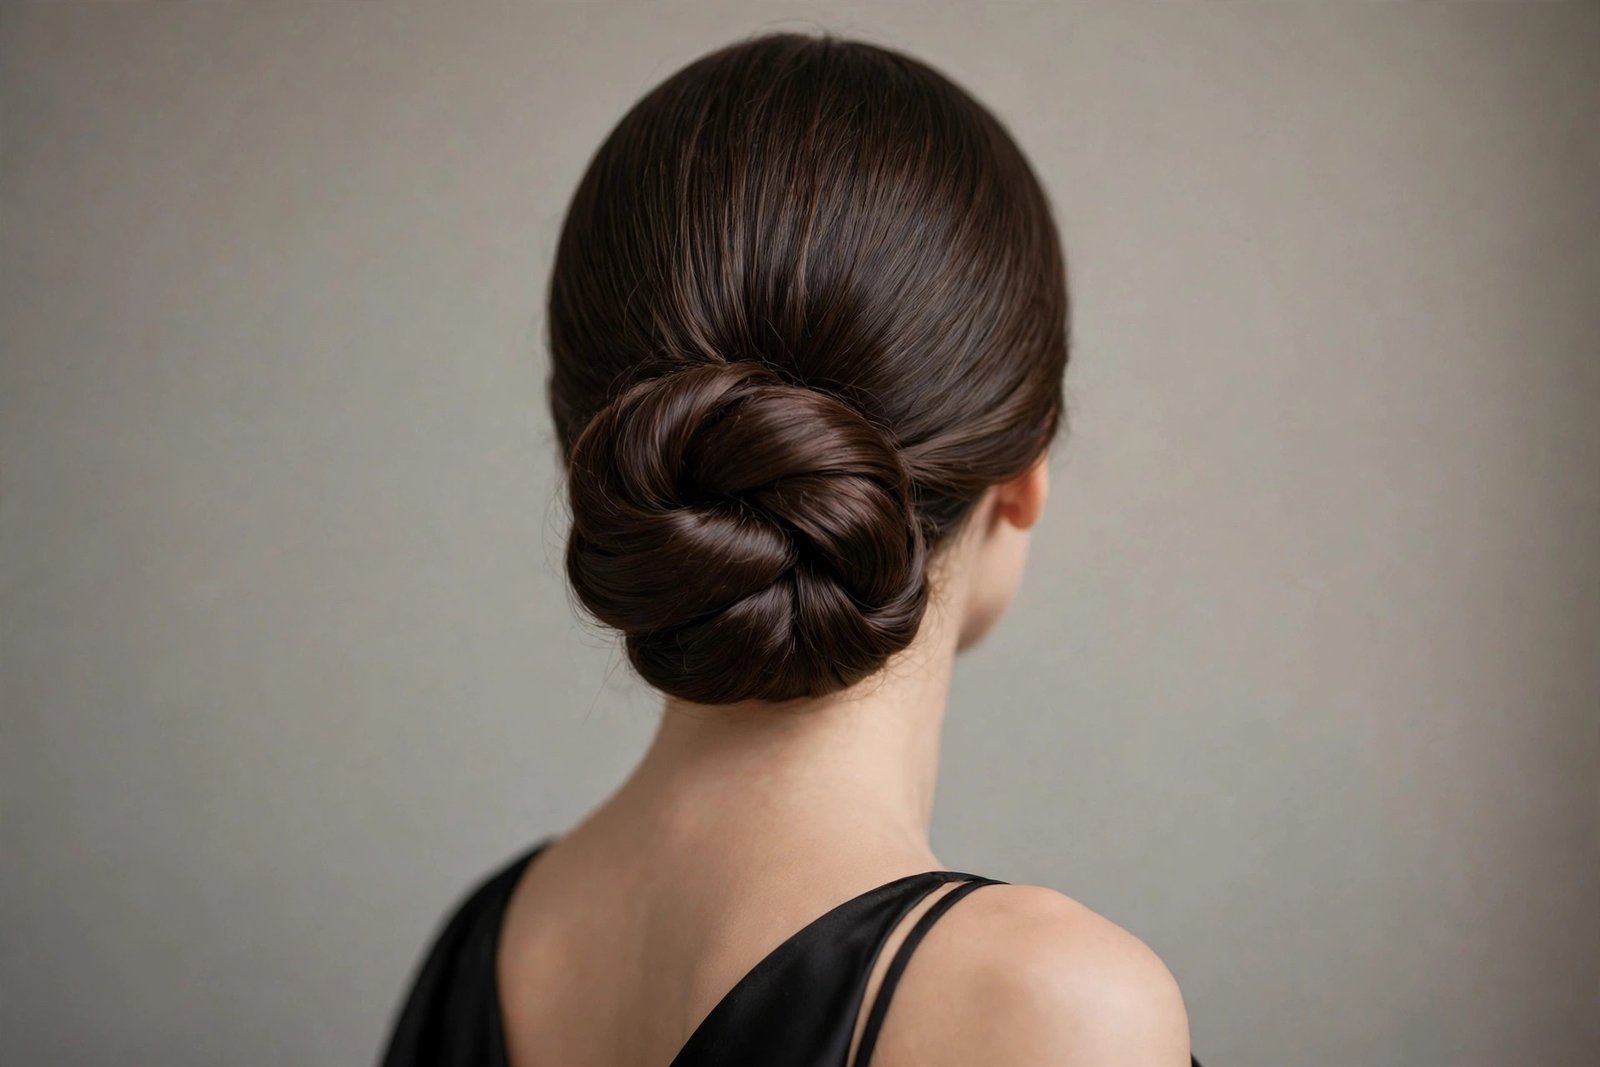
I’ll be honest with you: the chignon never really left, it just went quiet for a while. And now it’s back — louder, softer, and more wearable than it ever was. Chignon hairstyles are having their biggest moment in years, and the 2026 version is nothing like the stiff, sprayed-to-death ballerina buns of a decade ago. This year’s chignon lives on a beautiful spectrum: low and languid at the nape, messy and romantic with tendrils escaping, twisted and ropey with gorgeous texture — showing up everywhere from red carpets to wedding boards to the most-saved gala inspiration on Pinterest. If you’ve been pinning evening looks lately, you’ve already been staring at chignons without realizing it.
Now, one important distinction before we go any further, because I know exactly what you’re thinking: this is NOT the casual messy bun we covered in our messy bun article. A messy bun is the 30-second topknot you throw up before running errands — gloriously chaotic, and honestly it falls apart by lunch. A chignon is its grown-up, elegant cousin: the hair is twisted, looped, rolled, or braided and deliberately pinned into a finished silhouette, usually at the nape or crown. The magic of the 2026 chignon is that it borrows the messy bun’s softness — the lived-in texture, the face-framing pieces — while keeping a structure that holds for 10 hours through a wedding, a gala, or a very long dinner. Polished-to-lived-in is the whole game this year, and the chignon plays it better than any other updo.
What I love most about chignon hairstyles is how democratic they are. You don’t need a team of stylists or a head full of extensions. Medium hair, fine hair, curly hair, straight hair — there’s a chignon below that will work for you, and most of them take 10 to 20 minutes once you’ve practiced twice. Barbers and stylists won’t tell you this, but the chignon is also the most forgiving formal hairstyle there is: slight imperfections read as intention. A bump that would ruin a sleek ponytail just becomes “texture” in a chignon. Below you’ll find 32 chignon hairstyles for 2026 — from the classic low chignon every woman should know how to do, to sculptural red-carpet versions, to the soft romantic styles dominating wedding boards this year. Pick your favorites, practice on a quiet evening, and thank me at your next event.
Table of Contents
- The 2026 Chignon Revival
- What Exactly Is a Chignon?
- 32 Chignon Hairstyles for 2026
- Your Chignon Styling Routine & Maintenance
- Frequently Asked Questions
- Conclusion
What Exactly Is a Chignon?
The word “chignon” comes from the French phrase chignon du cou — literally, the nape of the neck — and that tells you everything about where this style was born. For centuries, women have been gathering their hair into a knot, roll, or twist low on the head, and the chignon is the refined, deliberate version of that instinct. At its core, a chignon is any updo where the hair is secured in a bun-like form at the back of the head — but what separates it from just “a bun” is the construction. Chignons are twisted, looped, folded, or rolled rather than simply wrapped, and they’re pinned so the silhouette looks finished from every angle.
History nerds, this one’s for you: the chignon’s greatest hits include the Gibson Girl tuck of the 1900s, Grace Kelly’s immaculate low chignons in the 1950s, Audrey Hepburn’s sculpted updos, and the ballerina chignons that made the style synonymous with discipline and elegance. Every decade reinterpreted it. The 2026 interpretation is the softest yet — and honestly, the most wearable. Where past chignons demanded poker-straight hair and industrial-strength gel, today’s chignons welcome waves, curls, texture, and a little bit of beautiful chaos. The silhouette says “elegant.” The texture says “I woke up like this.” That tension is the entire appeal.
One more thing worth knowing: the chignon is structurally different from a French twist, though people confuse them constantly. A French twist rolls the hair vertically into a long, narrow column; a chignon coils it into a rounded bun form, usually lower and wider. Our French twist guide covers that style in depth if you’re curious, but for tonight, we’re all about the chignon — low, twisted, messy, sculpted, and everything in between.
Why the Chignon Is Dominating 2026
Trends don’t happen by accident, and the chignon’s comeback has real reasons behind it. First: the pendulum swing. We spent years in the era of undone everything — beach waves, air-dried texture, the great low-maintenance revolution. Gorgeous, but eventually everyone got a little bored, and fashion started craving polish again. The chignon is the perfect answer because it offers polish without the stiffness — it’s the “clean girl” aesthetic grown up and dressed for evening. Red carpets this year are full of low chignons paired with statement earrings and bare shoulders, and that look photographs like a dream.
Second: weddings changed. The 2026 bride is not the 2016 bride. She’s choosing softer timelines, outdoor venues, longer dancing, and hairstyles that survive all of it. The chignon is the bridal workhorse — it holds through hugs, wind, and a four-hour dance floor, and it looks as good in the last photo of the night as the first. Wedding stylists report that low, textured chignons are the most requested bridal style this year, often paired with pearls, fresh flowers, or minimal gold pins. Gala and evening boards on Pinterest tell the same story: twisted chignons, messy chignons, and sleek low chignons are saving at a rate that dwarfs every other updo.
Third — and this is the practical one — the chignon is genuinely easy. Not “easy” in the way beauty articles lie to you, but actually learnable in an evening. The techniques repeat: twist, loop, pin, pull a little for softness. Once your hands learn the muscle memory, you can produce a wedding-guest-worthy chignon in fifteen minutes flat. In a year where everyone’s busy and everyone’s budget-conscious, a hairstyle that looks like a salon visit but costs nothing is always going to win.
Who Suits a Chignon (Spoiler: Almost Everyone)
Here’s the thing about chignons that makes them better than most updos: they’re customizable to the point of being universal. The placement does the heavy lifting. Got a round face? Wear it high with crown volume and you add length to your silhouette instantly. Long face? Keep it low and wide at the nape, with softness at the sides. Heart-shaped face? Tendrils. They’re your best friend — a low, soft chignon with face-framing pieces balances a wider forehead beautifully. Square jaw? A side part and some texture around the face softens everything without hiding your bone structure, which — let’s be real — is doing a lot of the work anyway.
Hair type matters less than you’d think. Straight hair gives you the sleekest, most architectural chignons. Wavy hair is honestly the ideal chignon hair — it holds texture, grips pins, and the finished style has natural dimension. Curly hair makes the most romantic chignons alive; you just pin the curls in sections instead of smoothing them, and the result looks like it took a professional (it didn’t). Fine hair needs a little help — texturizing spray and sometimes a mesh donut for fullness — but fine hair actually holds chignons beautifully because it’s light and stays where pinned. Thick hair is the only type that occasionally fights back, and the fix is simple: more pins, sectioned pinning, and styles that work with your volume instead of against it.
Length-wise, the sweet spot is medium to long — armpit length and beyond gives you every option in this guide. Shoulder-length hair handles most of the low and knotted styles wonderfully. Shorter than that? You’re not out of the game, but you’ll want padding tricks and the twisted variations, which I’ll flag as we go. Age-wise, forget everything you’ve heard about updos being “for older women.” A messy chignon on a 25-year-old in a slip dress is one of the coolest looks of 2026. The chignon doesn’t have an age; it has a mood.
32 Chignon Hairstyles for 2026
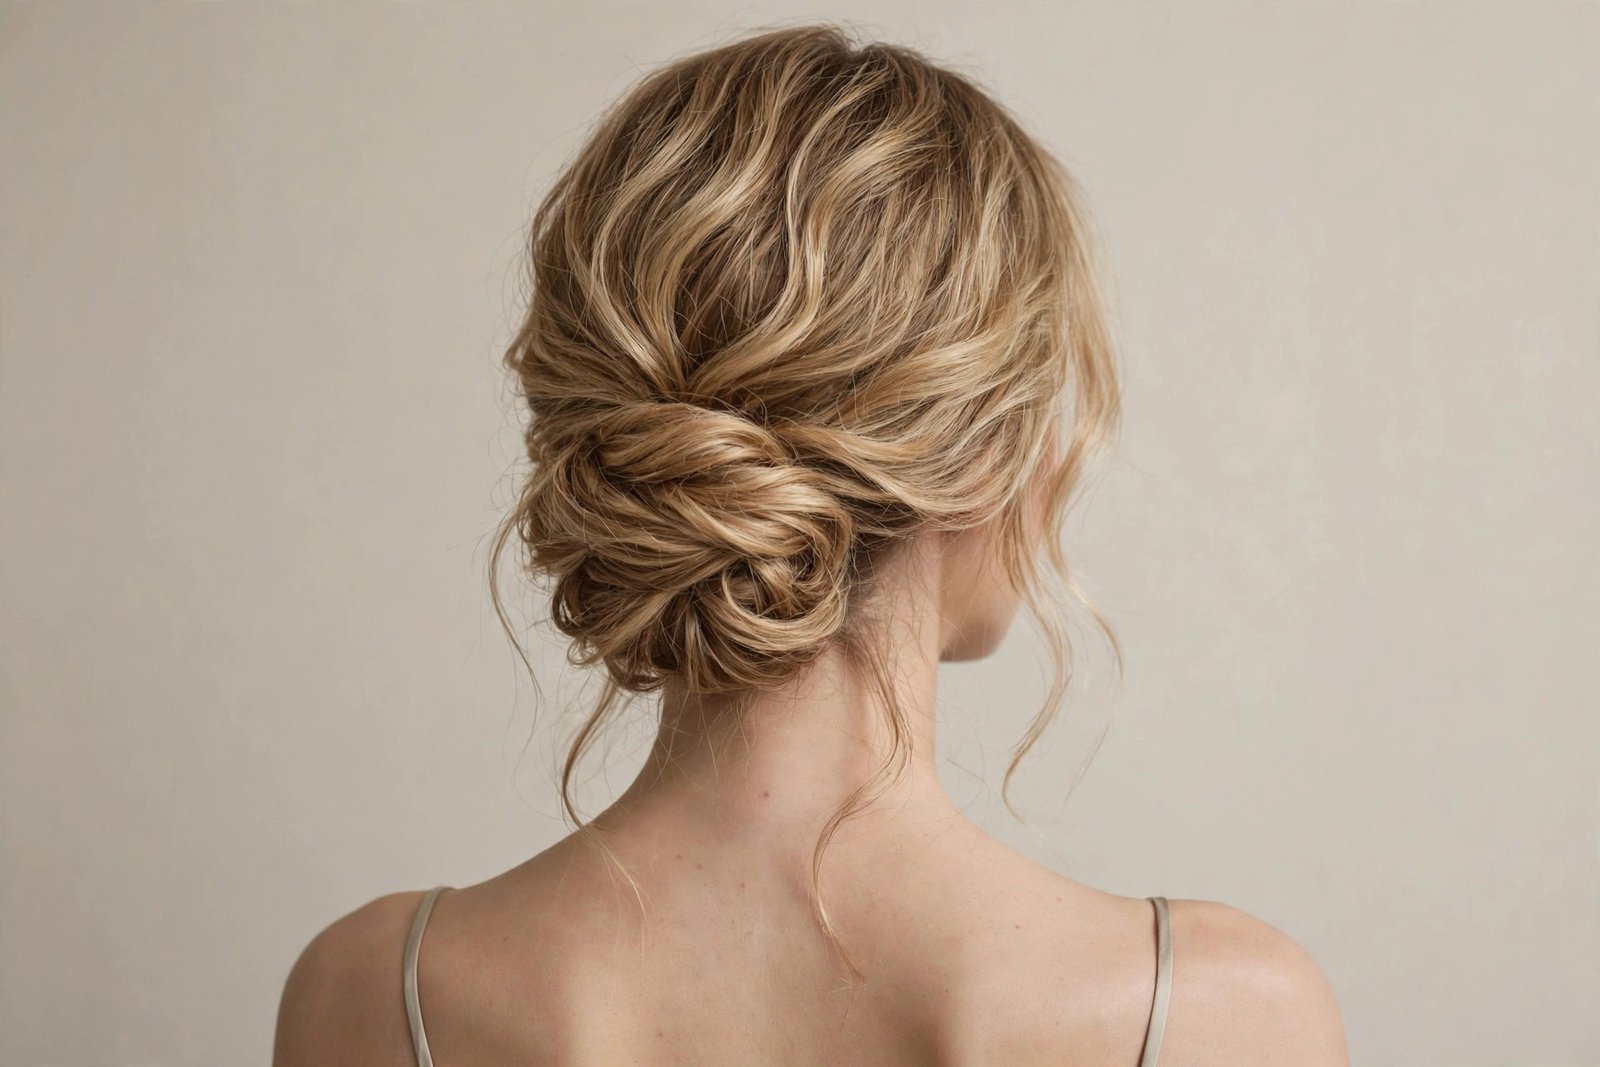
Thirty-two chignon hairstyles, one for every mood, event, and hair type. Each one comes with the honest breakdown: what it is, who it flatters, how to actually do it, and the downsides nobody mentions. Work through them, save your favorites, and remember — slight imperfection is a feature here, not a bug.
1. The Classic Low Chignon
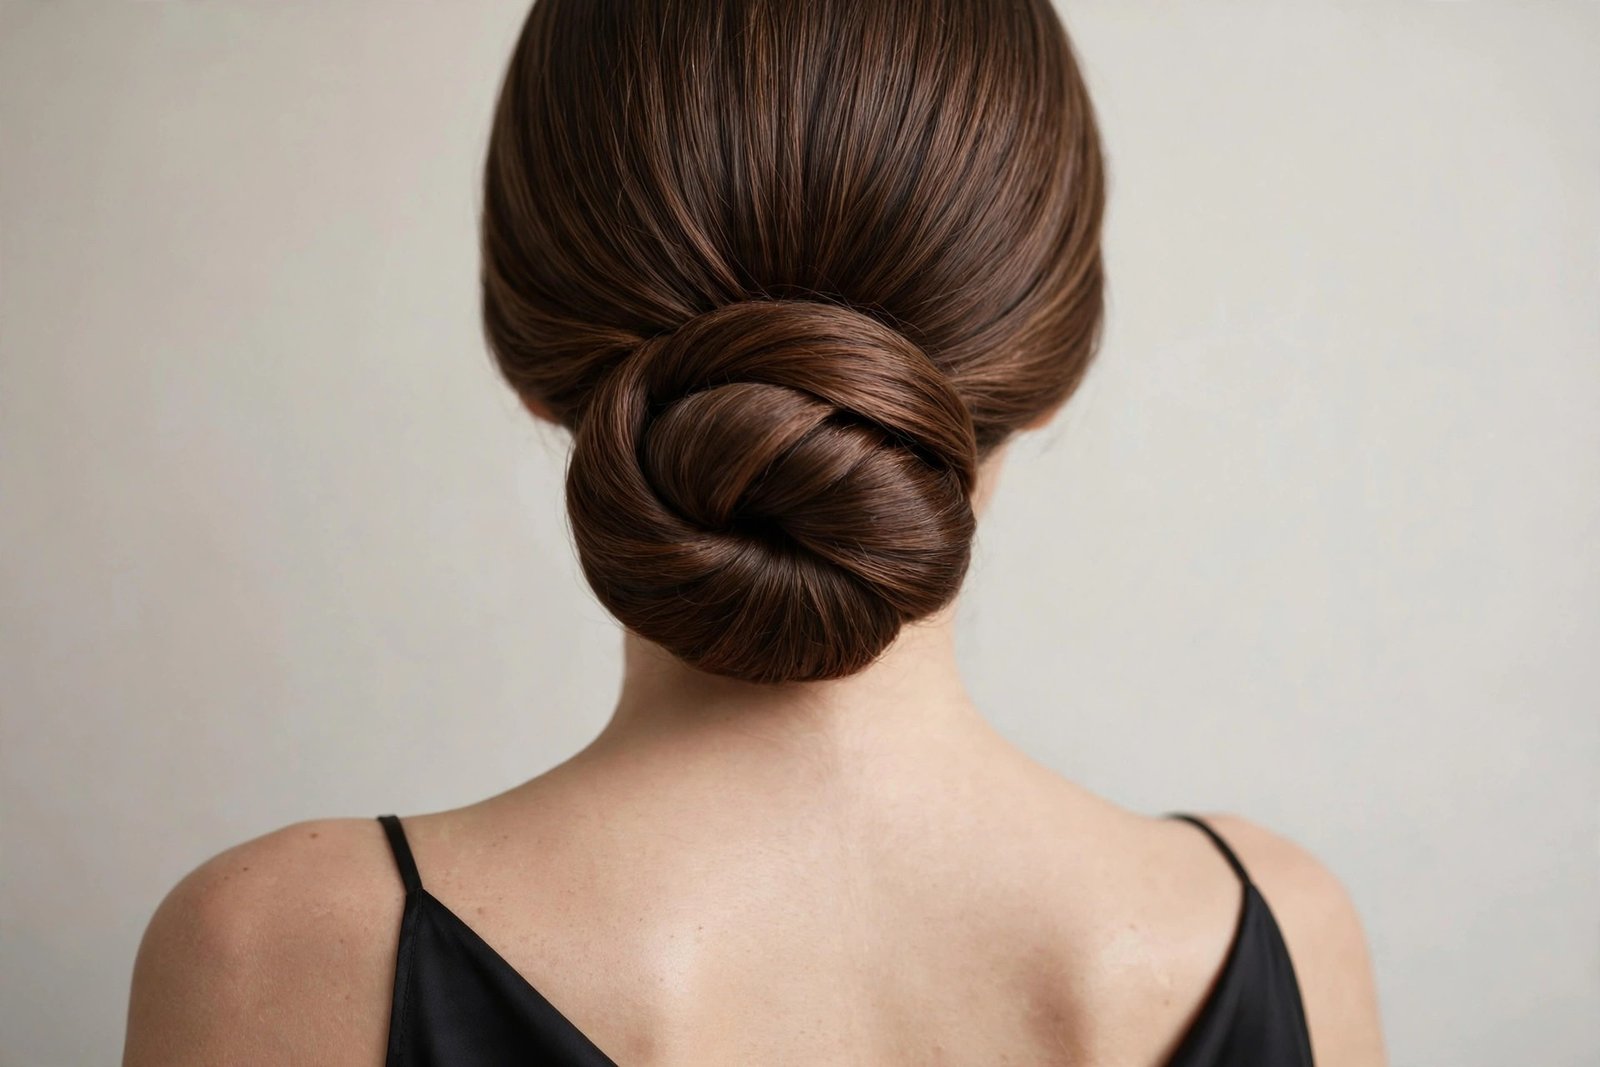
This is the one. The foundation. The chignon every other chignon is a variation of, and the style every woman should know how to do before she learns anything fancier. The classic low chignon sits right at the nape — low, centered, smooth, with the hair twisted or rolled into a neat rounded form and pinned so it looks effortless from every angle. It’s the Audrey Hepburn at the gala, the Grace Kelly at the premiere, the “I have my life together” of updos. And the best part? It takes about ten minutes once you’ve done it twice.
Here’s how it actually works: brush your hair smooth and pull it into a low ponytail at the nape, securing it with an elastic that matches your hair color. Twist the ponytail firmly — really twist it, like you’re wringing out a towel — and coil it around the base. As you coil, tuck the ends under and pin with U-shaped hair pins, pushing them into the coil and catching scalp hair so they actually anchor. The trick stylists swear by is pinning against the direction of the twist; that creates tension that holds. Finish with a light mist of hairspray, smooth any flyaways with a touch of pomade on your fingertips, and you’re done. It sounds simple because it is simple — which is exactly why it never goes out of style.
Who suits it? Honestly, everyone, but it particularly flatters oval and heart-shaped faces, and it’s the gold standard for formal events — weddings, galas, black-tie dinners, job interviews where you need to look unshakeable. The honest downside: on very fine hair it can look a little small without a donut or some teasing at the base, and on freshly washed hair it’s slippery — day-old hair, or a good texturizing spray, makes all the difference. Maintenance is minimal: it holds all day with decent pinning, and taking it down is just a matter of removing pins. Variations: add a center or side part for different moods, or leave two thin tendrils at the front for the 2026 softness update.
2. The Messy Undone Chignon
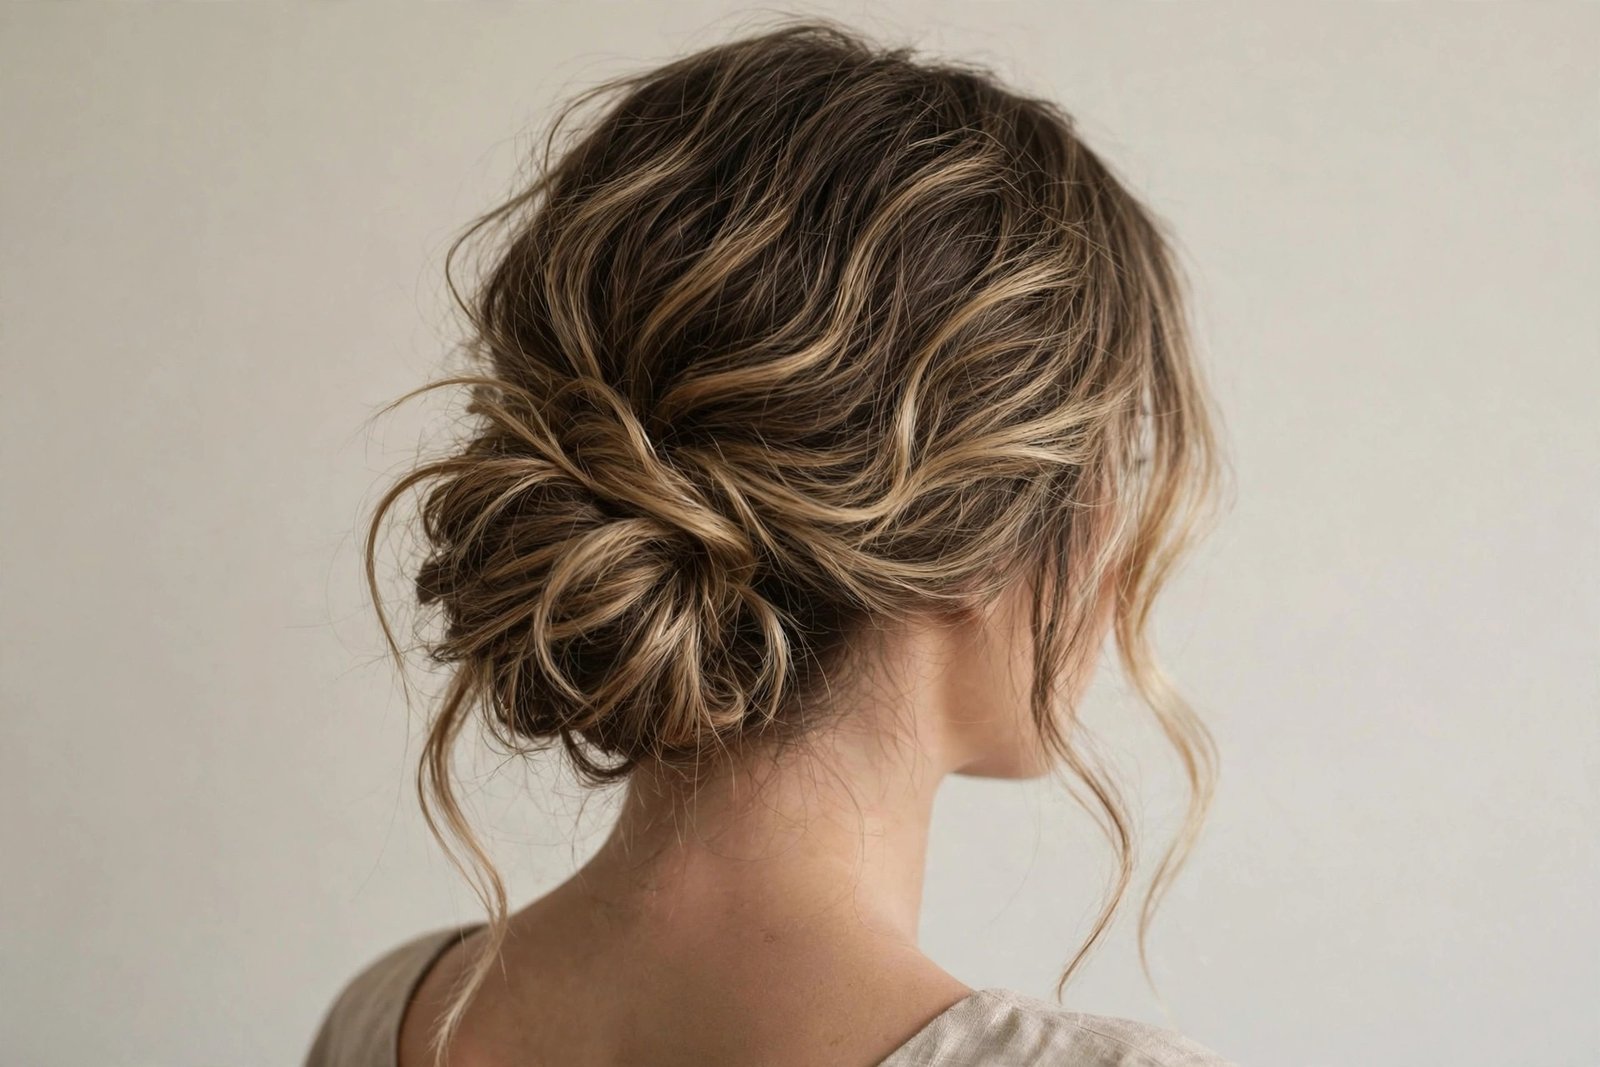
If the classic low chignon is the valedictorian, the messy undone chignon is the cool art student who somehow still gets straight A’s. This is the most-pinned chignon variation of 2026, and it’s the one that confuses people because it looks like you didn’t try — but the difference between this and an actual messy bun is about fifteen minutes and a mirror. The messy chignon has deliberate texture: a loosely twisted or looped base, strategically pulled pieces for volume, and soft tendrils framing the face. It reads as romantic and effortless, but the structure underneath is solid enough to survive a wedding.
The technique is counterintuitive: you build it neatly, then mess it up on purpose. Start with wavy or curled hair — if your hair is straight, add loose waves with a large barrel iron first, because texture is what makes this style. Gather everything into a loose low ponytail, twist it loosely, and coil it into a soft bun at the nape, pinning as you go but leaving it deliberately loose. Now the fun part: gently pull and tug at sections of the coil to create volume and airiness, pull out face-framing pieces at the temples, and let a few wisps escape at the nape. The golden rule is to stop one tug before you think you should — over-pulling is how a messy chignon becomes an actual mess. A light texturizing spray throughout gives it that lived-in grip.
This is the chignon for wavy and curly hair — honestly, if your hair has natural texture, this style was made for you and will take you half the time. It suits round and square faces beautifully because the softness around the face does the flattering work. It’s perfect for outdoor weddings, garden parties, date nights, and anywhere you want to look gorgeous without looking “done.” The honest downside: it’s the least secure of the classic chignons in wind, so carry spare pins for outdoor events, and very straight, fine hair will need serious texturizing product to hold the texture. Variations: pin in a small braid or a pearl pin for bridal, or wear it higher for a more casual feel.
3. The Twisted Rope Chignon
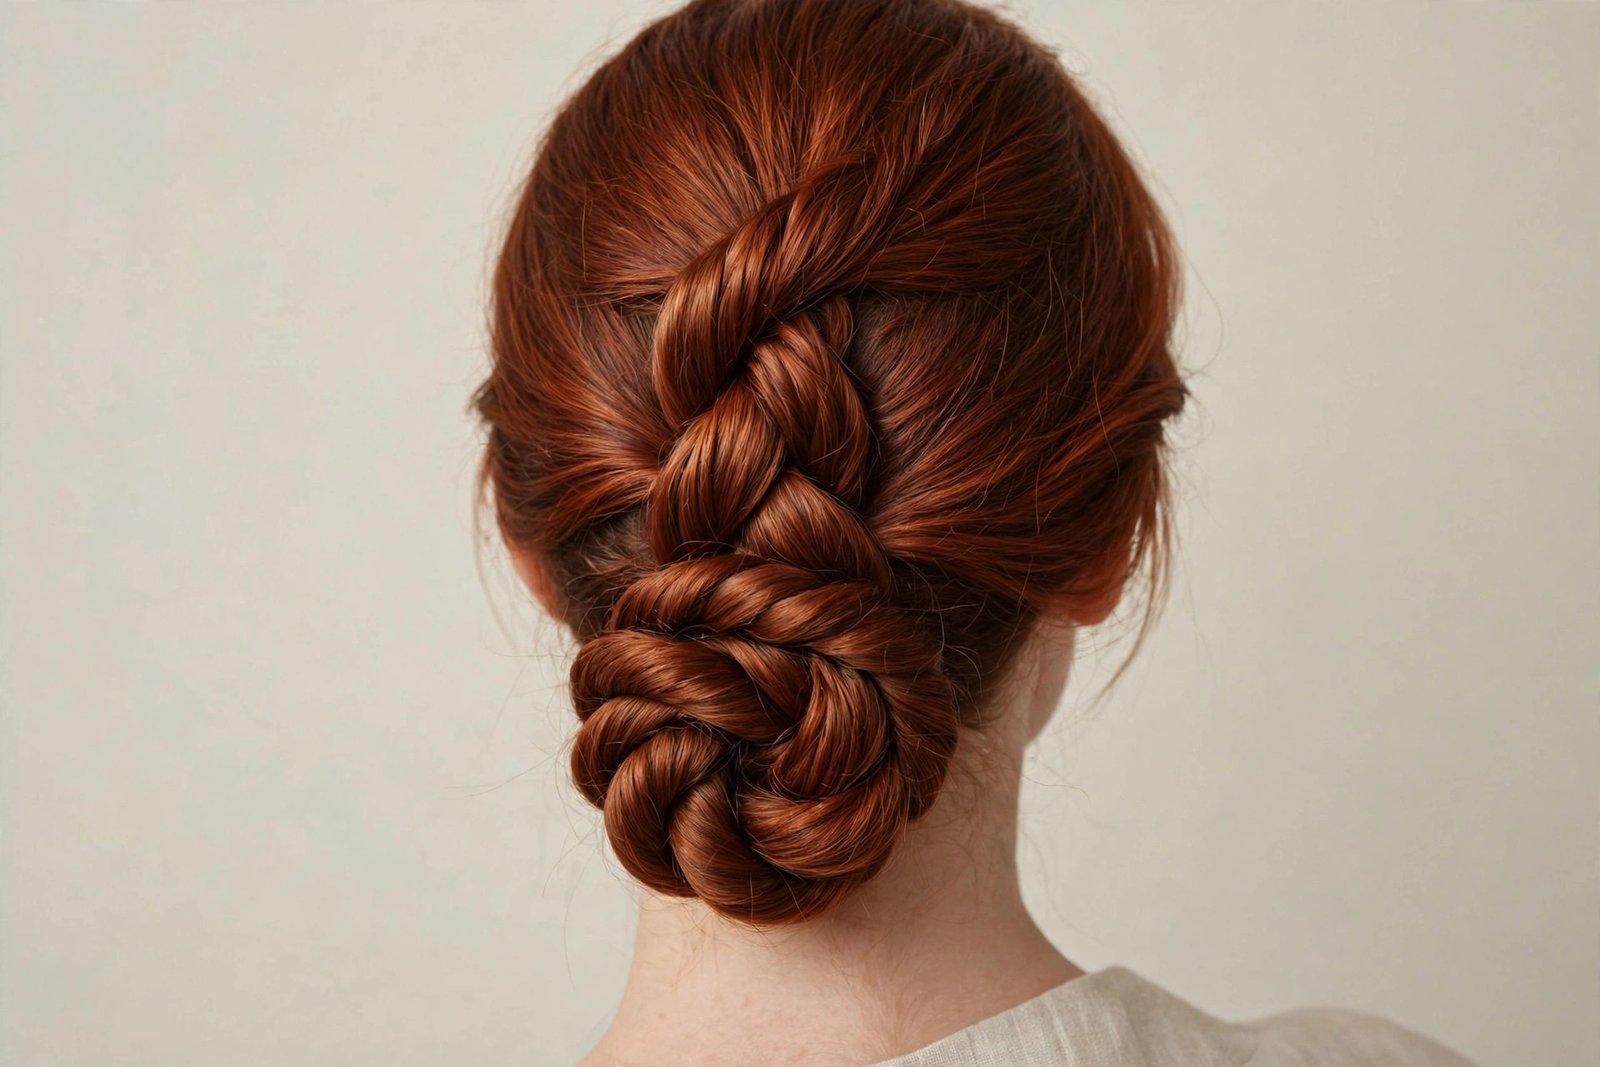
The twisted rope chignon is what happens when a chignon and a rope braid have a very elegant baby. Instead of a smooth coil, the hair is divided into two sections, twisted around each other like a rope, and then coiled into the chignon form. The result has this gorgeous, almost sculptural texture — you can see the twist pattern wrapping around the bun, which gives it dimension that a smooth chignon just doesn’t have. It’s one of the most-saved styles on evening and gala boards this year, and I completely understand why: it looks intricate, but the technique is genuinely beginner-friendly.
Here’s the method: part your hair wherever you like (middle parts look modern, side parts look romantic) and divide the ponytail at the nape into two equal sections. Twist each section in the same direction — say, clockwise — and then twist the two twisted sections around each other in the opposite direction. This counter-twisting is what locks a rope braid so it doesn’t unravel, and it’s the whole secret. Coil the rope around the base, pinning with U-pins as you go, and tuck the ends underneath. Once it’s secure, gently pancake the rope — pull the edges of the twists outward — to make it look fuller and more textured. That pancaking step is what takes it from “neat” to “wow.”
This style is a gift for thick hair, because the rope technique actually manages volume instead of fighting it, and it distributes weight so the style feels secure. It flatters all face shapes, though I particularly love it with a middle part on oval faces — very clean, very editorial. It’s formal enough for weddings and galas but interesting enough that it doesn’t read as “standard updo.” The honest downside: the rope twist eats up length, so you need at least medium-long hair for a full result, and the twisting takes a bit of arm stamina the first time. Practice once on a weekend and you’ll have it. Variations: do a double rope (two ropes coiled together) for extra drama, or twist only the top section and leave the bottom smooth for contrast.
4. The Sleek Ballerina Chignon
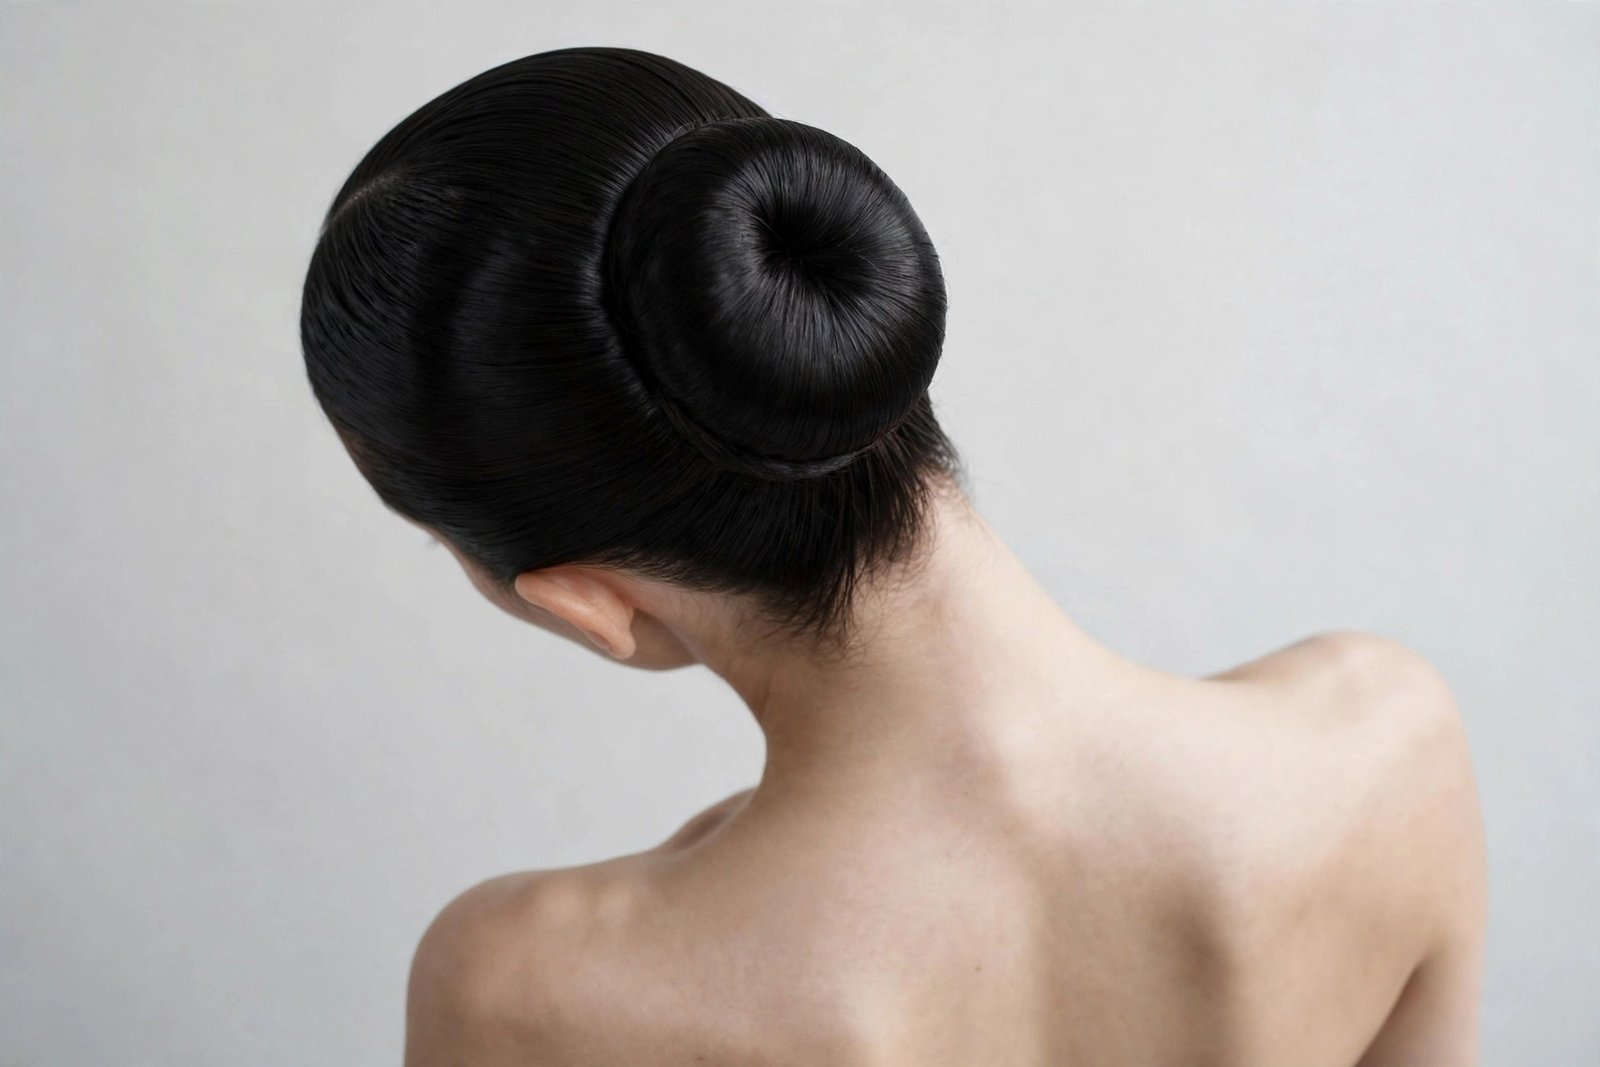
Some styles are trends; the sleek ballerina chignon is architecture. Pulled smooth and tight, sitting high at the crown or just above, coiled into a perfect rounded form — this is the chignon at its most disciplined and, frankly, its most powerful. Dancers have worn it for a century because it doesn’t move, and the fashion world keeps rediscovering it because nothing says “I am in charge here” like a flawless high chignon. The 2026 version softens the edges slightly — a bit of sheen rather than helmet-gel — but the silhouette is as commanding as ever.
The technique demands smoothness, so prep matters more here than in any other chignon. Start with straightened hair or blow it out smooth, and work a smoothing serum through the lengths. Brush everything up into a high ponytail — position it where you want the chignon to sit, usually at the crown — and secure it tightly. A mesh donut matched to your hair color is the cheat code here: slide it over the ponytail, spread your hair over it, and pin the ends underneath for a perfectly round, full chignon. Without a donut, twist and coil tightly, pinning firmly. The non-negotiable finishing step: a clean edge. Use a fine-tooth comb or a soft brush with a little gel to smooth the hairline, and mist with a strong-hold spray. Flyaways are the enemy of this style — hunt them down.
This is the chignon for strong bone structure — it puts your face fully on display, so it flatters oval, heart, and diamond faces beautifully, and it’s the ultimate “good lighting, good angles” style for photos. It’s the pick for galas, performances, formal presentations, and anywhere you need hair that will not move for twelve hours. The honest downside: it’s the least forgiving chignon — every bump shows, tight styles can cause tension headaches if you overdo it, and it can feel severe on very soft, romantic features (fix: leave it a touch looser at the hairline). Don’t sleep in it, and give your hairline a break between wears. Variations: a braided base wrap around the chignon, or a deep side part for a more fashion-forward feel.
5. The High Chignon
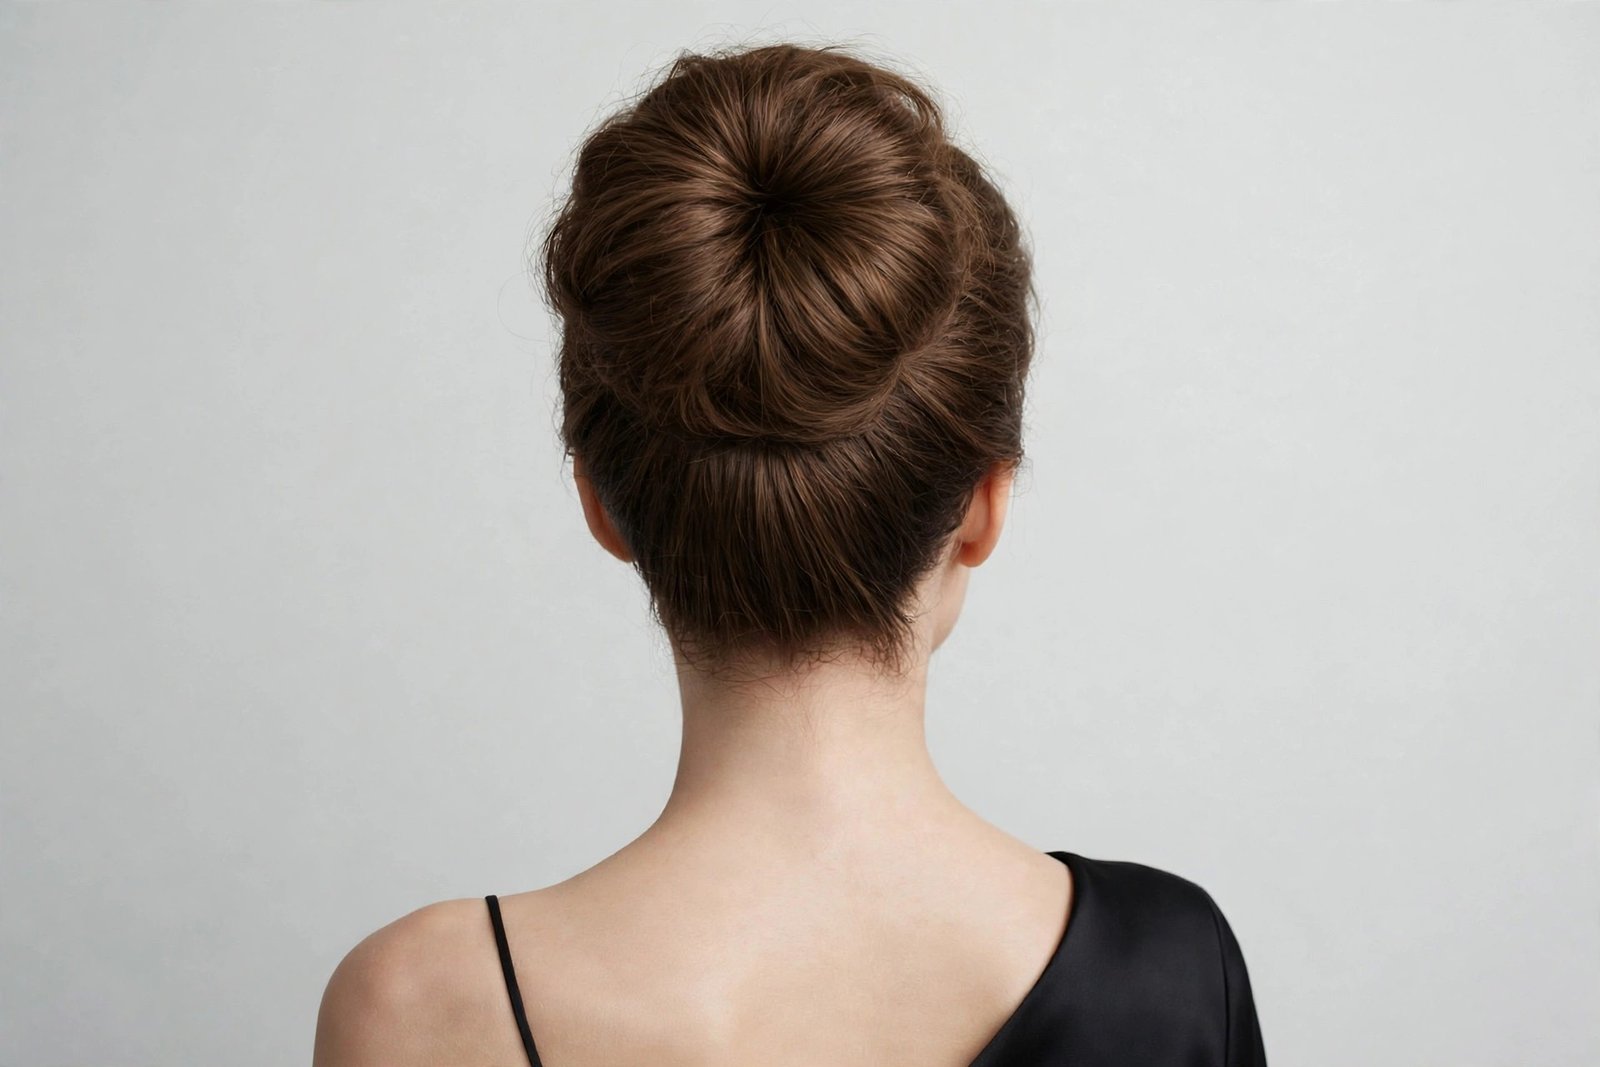
The high chignon is the ballerina’s relaxed sister — same crown placement, but softer, a little looser, and far more wearable for real life. It sits at or just above the crown, coiled into a full rounded form, with the hairline kept smooth but not shellacked. This is the chignon you wear to the wedding when you’re a guest, to the fancy dinner, to the event where you want to look polished but still like yourself. It’s also quietly one of the most flattering styles for round faces, because the height on top visually lengthens the whole silhouette.
Build it like this: flip your head upside down and gather everything into a high ponytail — the upside-down trick gives you natural lift at the crown that you can’t get gathering upright. Secure with a strong elastic, then backcomb the ponytail lightly at the base for fullness (this is the difference between a sad little bun and a proper chignon). Twist the ponytail loosely and coil it around the base, pinning with U-pins and leaving it soft rather than tight. Pull a few pieces at the crown for lift, smooth the hairline with a brush, and finish with medium-hold spray. The goal is “effortlessly regal,” not “military inspection.”
Round and heart-shaped faces, this is your chignon — the vertical lift is genuinely slimming and elongating. It works on medium to long hair, and fine hair benefits from a donut here more than anywhere else. It’s dressy enough for formal events but relaxed enough for a nice dinner out, which makes it one of the most versatile styles in this guide. The honest downside: high placement means gravity is working against you, so pin generously — this style needs more pins than a low chignon — and very heavy, thick hair may feel the weight by evening. A strong elastic base and crisscrossed pins solve most of it. Variations: wrap a thin braid around the base, or pull face-framing tendrils for softness.
6. The Side Chignon
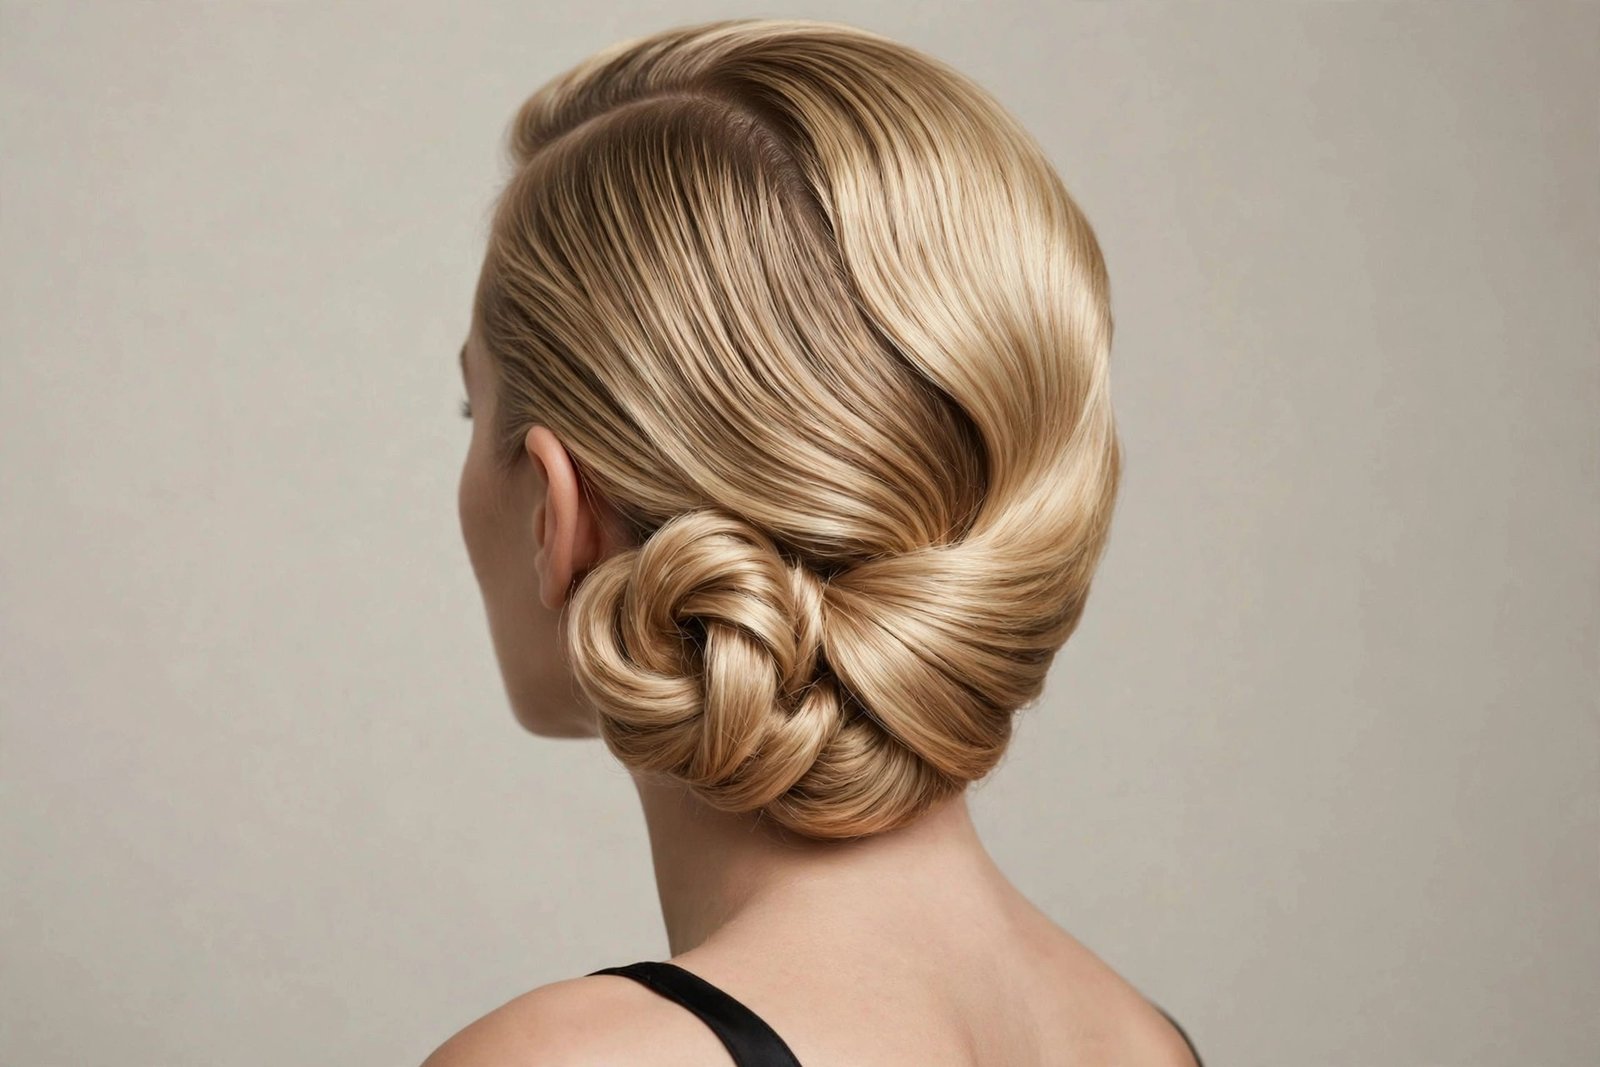
There’s something unapologetically romantic about a chignon that refuses to sit in the middle. The side chignon sweeps all the hair to one side — usually just behind the ear, at the nape — and coils it into an off-center bun that’s pure old-Hollywood glamour. It’s asymmetric, which means it’s instantly more interesting than a centered style, and it has this wonderful way of showing off one earring, one shoulder, one side of a neckline. Bridesmaids, take note: this is the group-photo chignon, because it looks different from every angle and photographs beautifully.
The technique: create a deep side part, then sweep all your hair over to the opposite side — so a left part means the chignon sits on the right. The sweep is the whole style, so take time here: brush smoothly, keeping the top sleek as you direct everything across the nape. Secure into a low side ponytail behind the ear, then twist and coil as usual, pinning firmly. The pinning matters more on a side chignon because the weight is off-center — use extra U-pins on the upper side to counterbalance. Finish by smoothing the swept top with serum and a light spray, and consider a decorative pin or small comb on the opposite side to balance the asymmetry.
Square and heart-shaped faces love the side chignon — the diagonal line across the back of the head softens strong jawlines and balances wider foreheads. It’s a dream for one-shoulder dresses and statement earrings, and it’s a favorite for evening events, proms, and weddings. The honest downside: off-center weight means it can feel lopsided by the end of a long night if your pinning is lazy, and it really needs that smooth sweep on top — bumps in the swept section are very visible. Take the extra two minutes on the sweep. Variations: a braided sweep leading into the chignon, or a messy textured side chignon for a more bohemian feel.
7. The Braided Halo Chignon
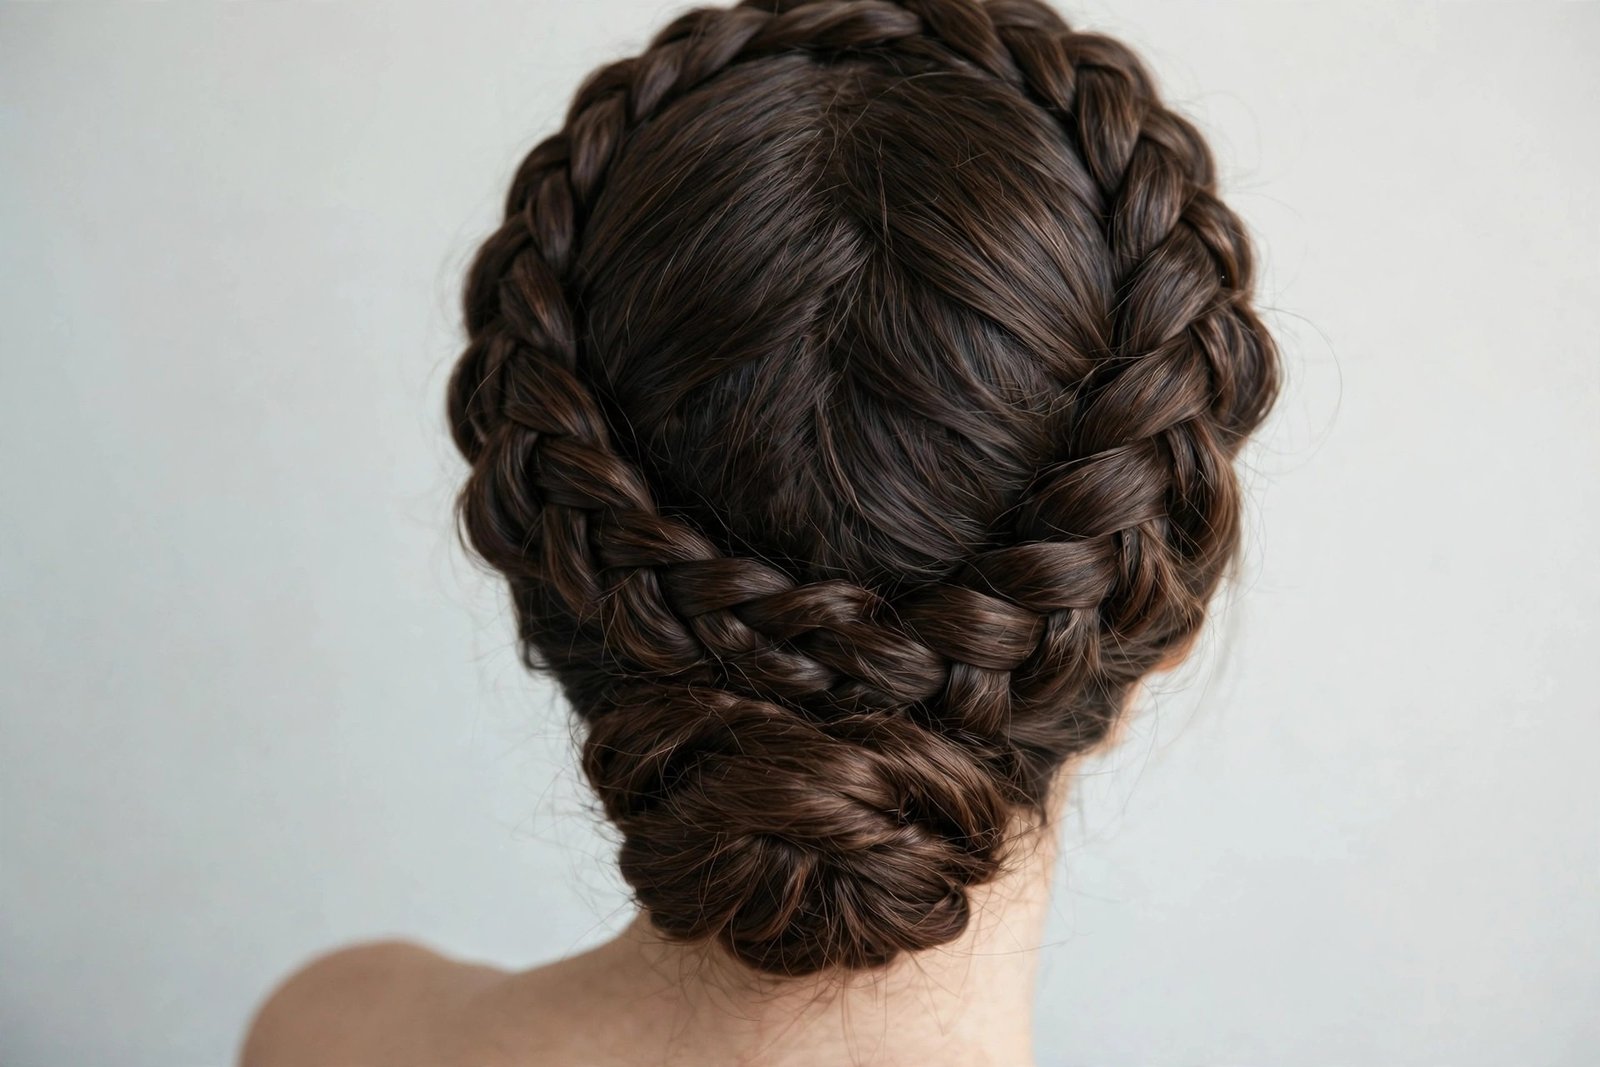
The braided halo chignon is for the woman who wants her updo to look like it took an hour and a stylist — while actually taking twenty minutes and a bit of practice. A braid (or two) wraps around the head like a halo or crown, and the remaining hair coils into a chignon at the nape where the braid ends. It’s intricate, it’s romantic, it’s unapologetically feminine, and it’s one of those styles that makes strangers ask who did your hair. The braid adds texture and visual interest that a plain chignon can’t match, and it photographs like an absolute dream.
Here’s the build: part your hair in the middle or slightly off-center, and Dutch-braid (inside-out French braid) along each side of your head, starting at the temples and working back toward the nape. Secure the two braids together at the nape with an elastic, then take all the remaining hair — including the braid tails — twist it together and coil it into your chignon, pinning as you go. Gently pancake the braids (pull the edges outward) before you finish, because fuller braids look infinitely more expensive than tight skinny ones. Tuck the ends, pin everything, and mist with spray. If Dutch braiding both sides feels ambitious, a single side braid swept into a low chignon gives you 80% of the effect with half the effort.
This is a showstopper for weddings — brides, bridesmaids, mothers of the bride — and for any event where you want maximum impact. It flatters round faces especially well because the braid adds height and structure around the face. Long and thick hair gives the most dramatic result, but medium hair works fine with pancaked braids. The honest downside: it’s the most time-consuming style in this guide (budget 25-30 minutes until you’ve practiced), and braiding your own hair at the back of your head is genuinely awkward the first time — use two mirrors. Variations: a fishtail halo for extra texture, or fresh baby’s breath woven into the braid for a garden wedding.
8. The French Twist Chignon
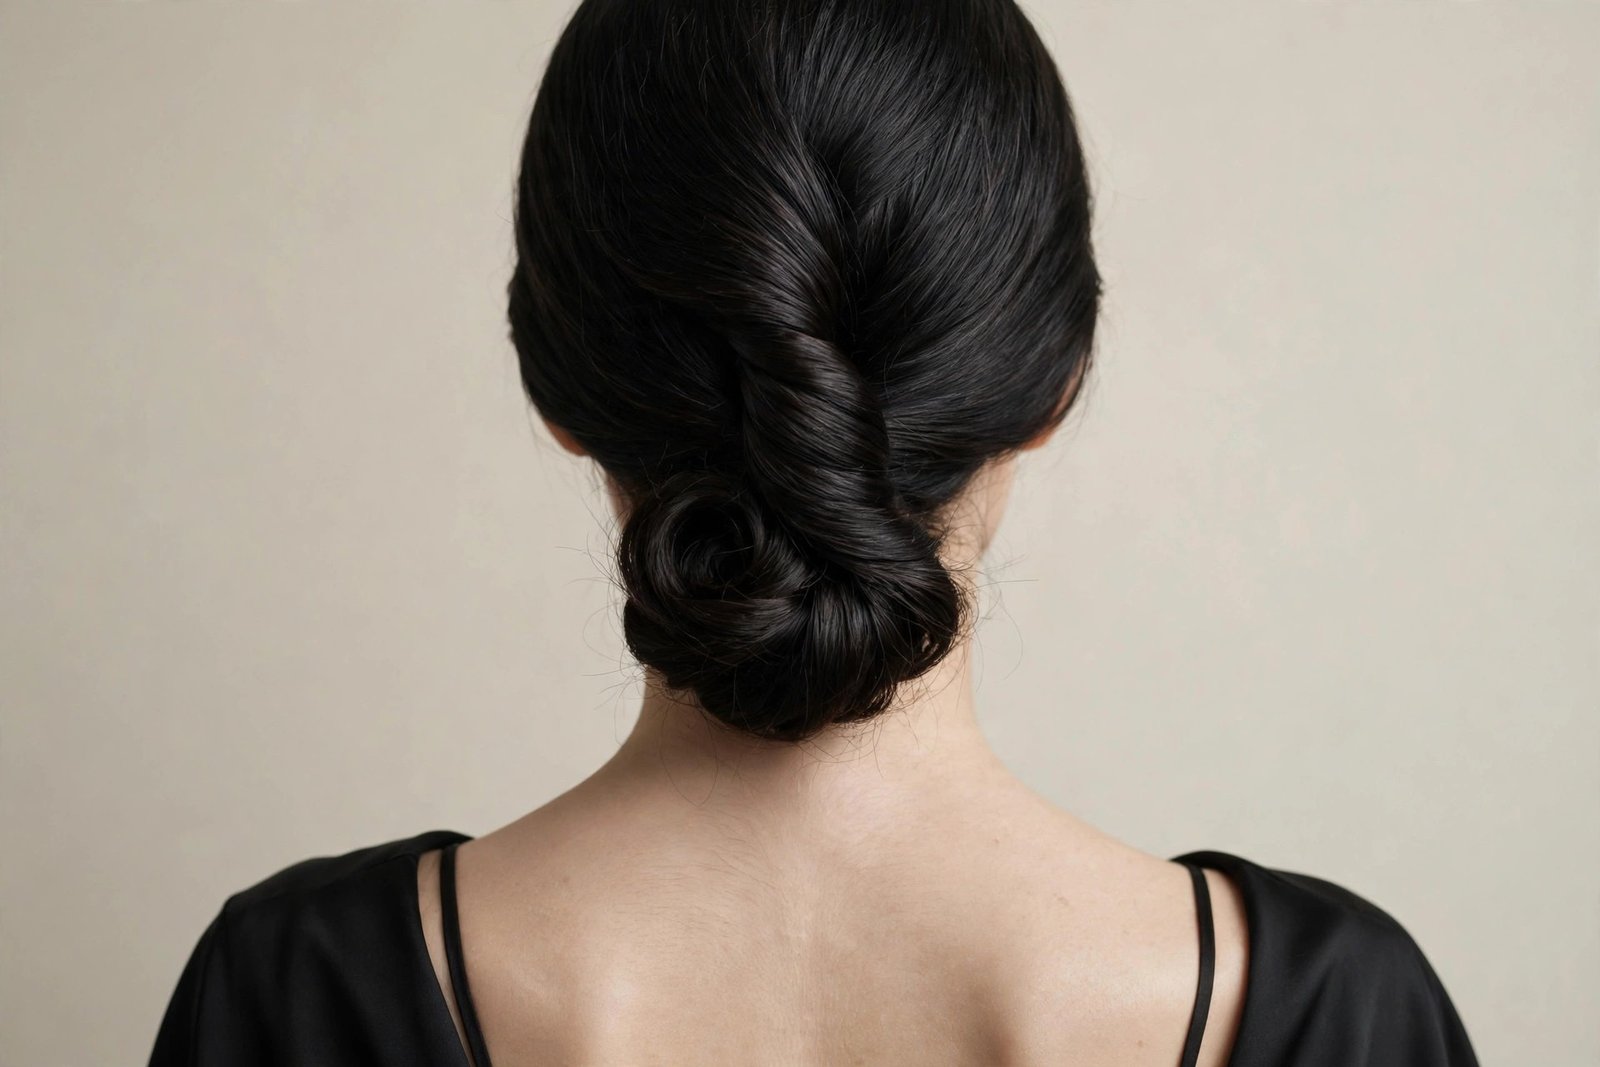
Okay, purists — I know the French twist and the chignon are technically different styles, and I explained the difference earlier. But the hybrid is too good not to include: it’s a French twist through the upper section that resolves into a chignon coil at the nape, giving you the vertical elegance of the twist with the soft fullness of the chignon. Think of it as the best of both worlds, and honestly one of the most sophisticated styles in this entire guide. It has a vintage, almost cinematic quality — very 1960s starlet, very red carpet.
The technique is a two-act play. Act one: gather your hair as if for a French twist — sweep it all to one side, then roll it upward and inward, tucking as you go, pinning the roll vertically along the back of your head. Act two: instead of tucking the ends into the top of the twist (the classic finish), leave the last several inches out, twist them, and coil them into a small chignon at the base of the twist, pinning securely. The result is a long, elegant roll that blooms into a soft bun at the nape. Smooth everything with serum, pin any gaps in the twist, and finish with strong-hold spray — this style needs to be secure because it has moving parts.
Oval and long faces, this one’s for you — the vertical line is incredibly elongating and elegant. It’s the most formal-feeling style in this guide after the ballerina chignon, perfect for black-tie events, galas, and mothers of the bride who want to look timeless. Medium to long hair works best; you need enough length for both the twist and the coil. The honest downside: it’s genuinely the hardest technique here — the French twist alone takes practice, and combining it with a chignon is advanced. Do a trial run before any important event, and don’t attempt it for the first time on a wedding morning. Our French twist guide breaks down the twist technique step by step if you want to master that part first. Variations: a looser, textured version for a more modern feel.
9. The Textured Voluminous Chignon
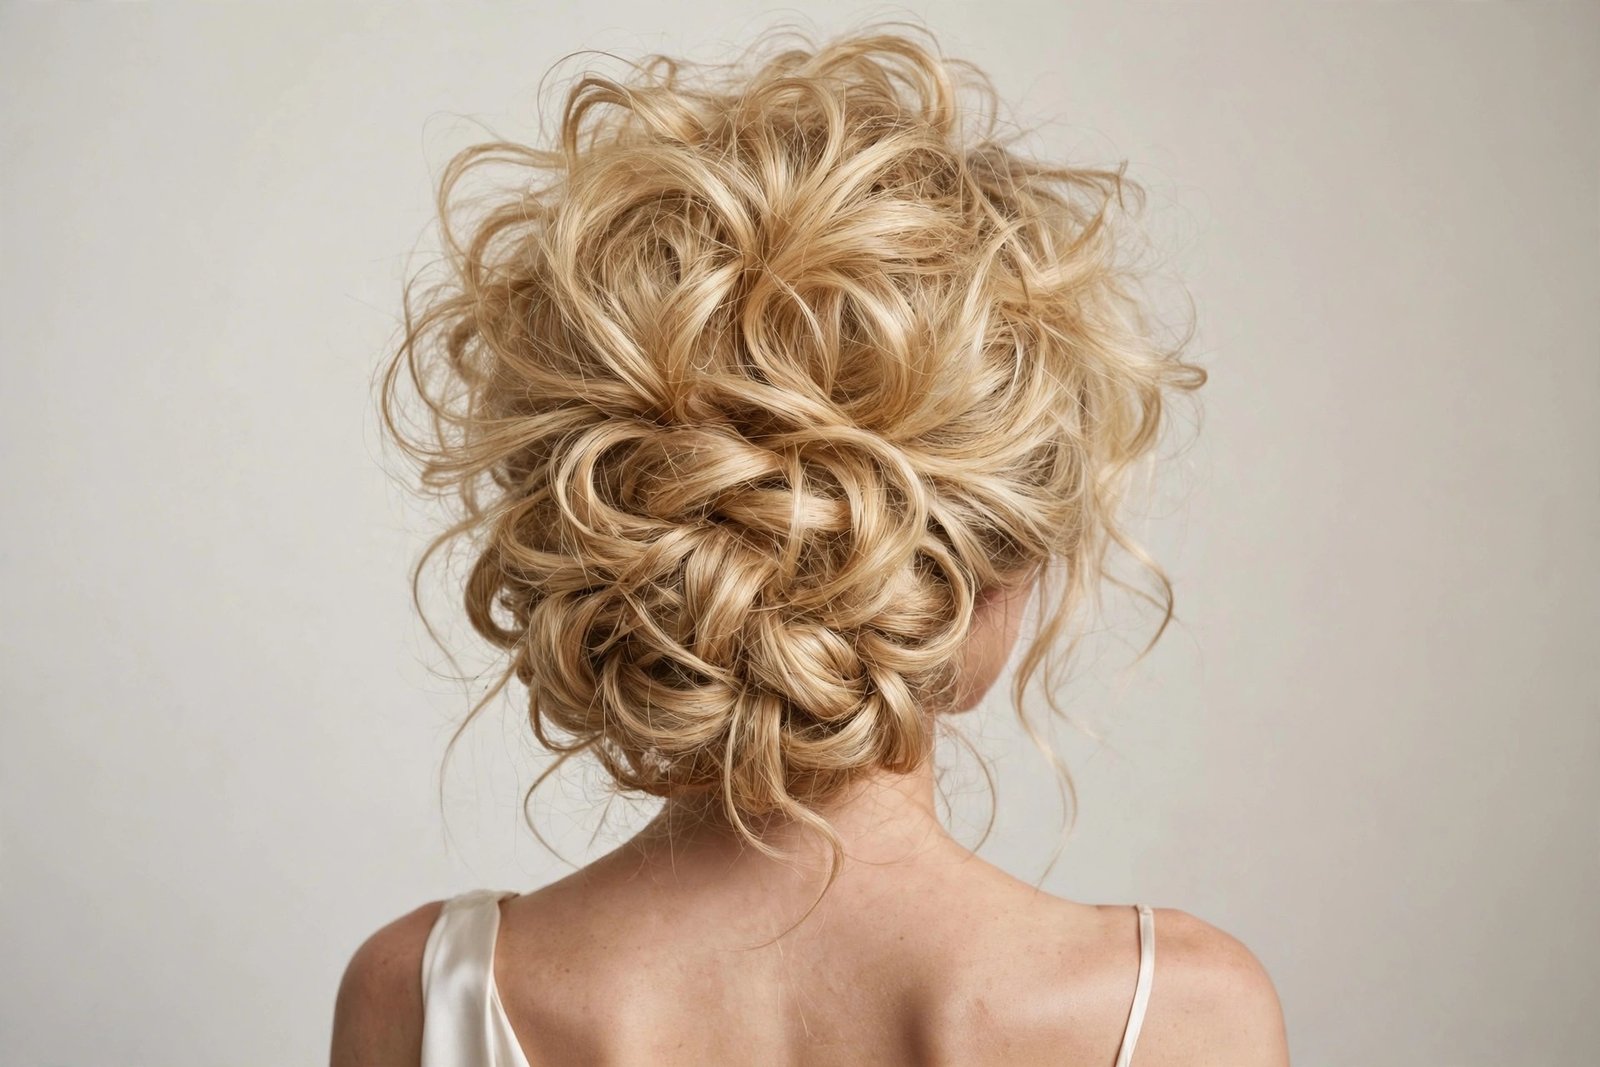
Some chignons whisper; this one makes an entrance. The textured voluminous chignon is all about SIZE — a big, airy, dimensional bun with visible texture, height at the crown, and a presence you can spot across a ballroom. This is the chignon for fine-haired women who are tired of their updos looking small, and for anyone who believes that at a gala, your hair should be doing some of the talking. It’s glamorous without being stiff, and the texture keeps it firmly in 2026 rather than 1986.
Volume is built, not wished for, so the prep is everything. Start with a volumizing mousse on damp hair and blow-dry with your head upside down. Backcomb (tease) the crown section — I know, I know, but trust me — and lightly tease the ponytail itself before coiling. Use a large mesh donut as your foundation: it’s the scaffolding that makes a fine-haired chignon look massive. Spread your hair over the donut, pin the ends under, then pull and pancake sections of the coil to create airiness and texture. A texturizing spray throughout is non-negotiable — it’s what keeps the volume from deflating. Finish with firm-hold spray, because a big style needs big hold.
Fine and medium hair, rejoice — this style was engineered for you, and the donut does the heavy lifting. It flatters round faces (height!) and heart-shaped faces (balance!), and it’s the ultimate special-occasion chignon: galas, milestone birthdays, New Year’s Eve, anywhere maximalism is welcome. The honest downside: teasing plus strong hold means this is a one-night style — you’ll need a proper wash and deep condition after, and don’t try to sleep in it. It’s also the product-heaviest style in this guide. Variations: add a deep side part for drama, or weave in a thin metallic headband at the base for evening sparkle.
10. The Pearl Pinned Bridal Chignon
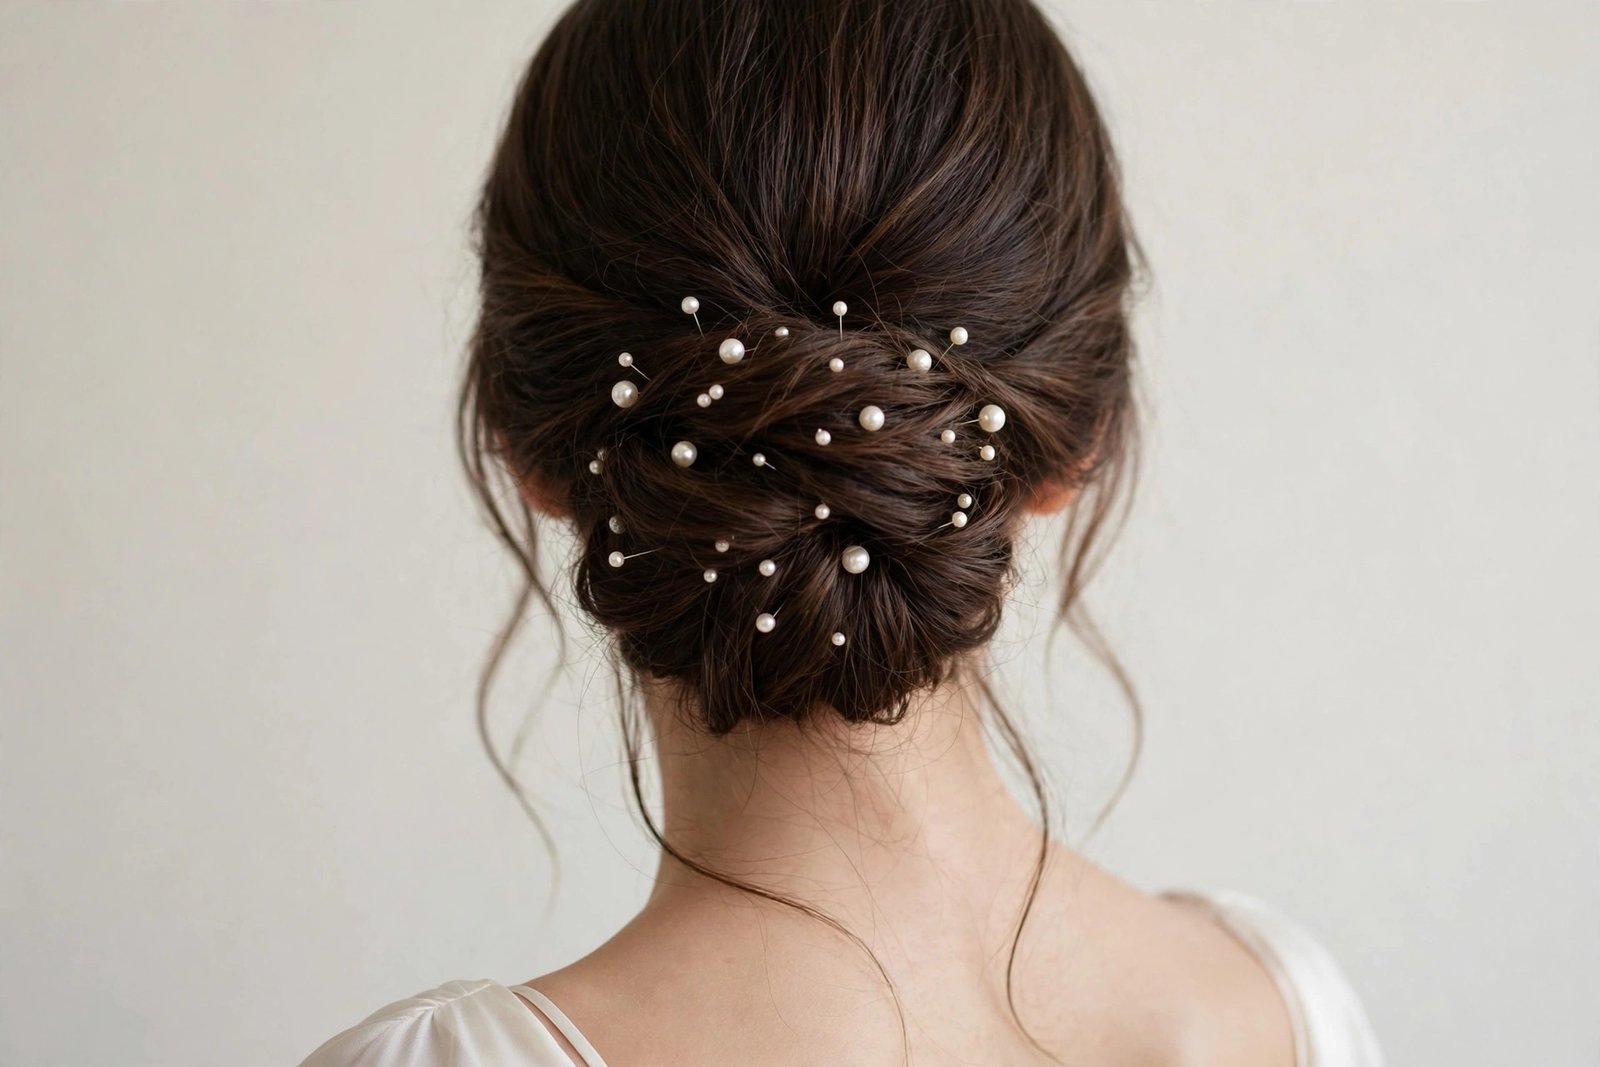
If 2026 has a signature bridal hairstyle, this is it. The pearl pinned bridal chignon takes a soft low chignon — usually the classic or the messy variation — and studs it with pearl pins scattered like stars. It’s the look dominating wedding boards this year: timeless, luminous, and somehow both traditional and completely current. Pearls catch the light in photographs in a way nothing else does, and against hair they read as pure romance. I’ve seen this style on real brides more times than I can count this year, and it never, ever looks wrong.
Build your base first: a soft low chignon, slightly textured, with face-framing tendrils — the pearls need a soft canvas, not a severe one. Then comes the artistry: pearl pins (the kind with a pearl on a U-shaped pin, available everywhere bridal accessories are sold) placed asymmetrically through the chignon. The key word is scattered — a random, constellation-like placement looks modern and expensive; a perfect row looks dated. Vary the pearl sizes if you can, cluster two or three together in spots, and let a few trail toward the tendrils. Step back and look in the mirror from a distance — that’s how your wedding photos will see it. Finish with a flexible-hold spray so the style moves naturally.
Brides, obviously — but also bridesmaids, mothers of the bride, and wedding guests who want to look celebratory without upstaging anyone. It suits every face shape because the base chignon is customizable, and it works on medium to long hair of any texture. The honest downside: good pearl pins cost real money (don’t buy the plastic-looking ones — they photograph badly), and you’ll want to do a trial to get the placement right. Also, if your wedding is outdoors in wind, pin the pearls extra securely — a pearl pin in the grass is a tragedy. Variations: gold pins for a warmer look, crystal pins for evening weddings, or fresh gypsophila tucked in instead of pearls for a garden ceremony.
11. The Gibson Tuck Chignon
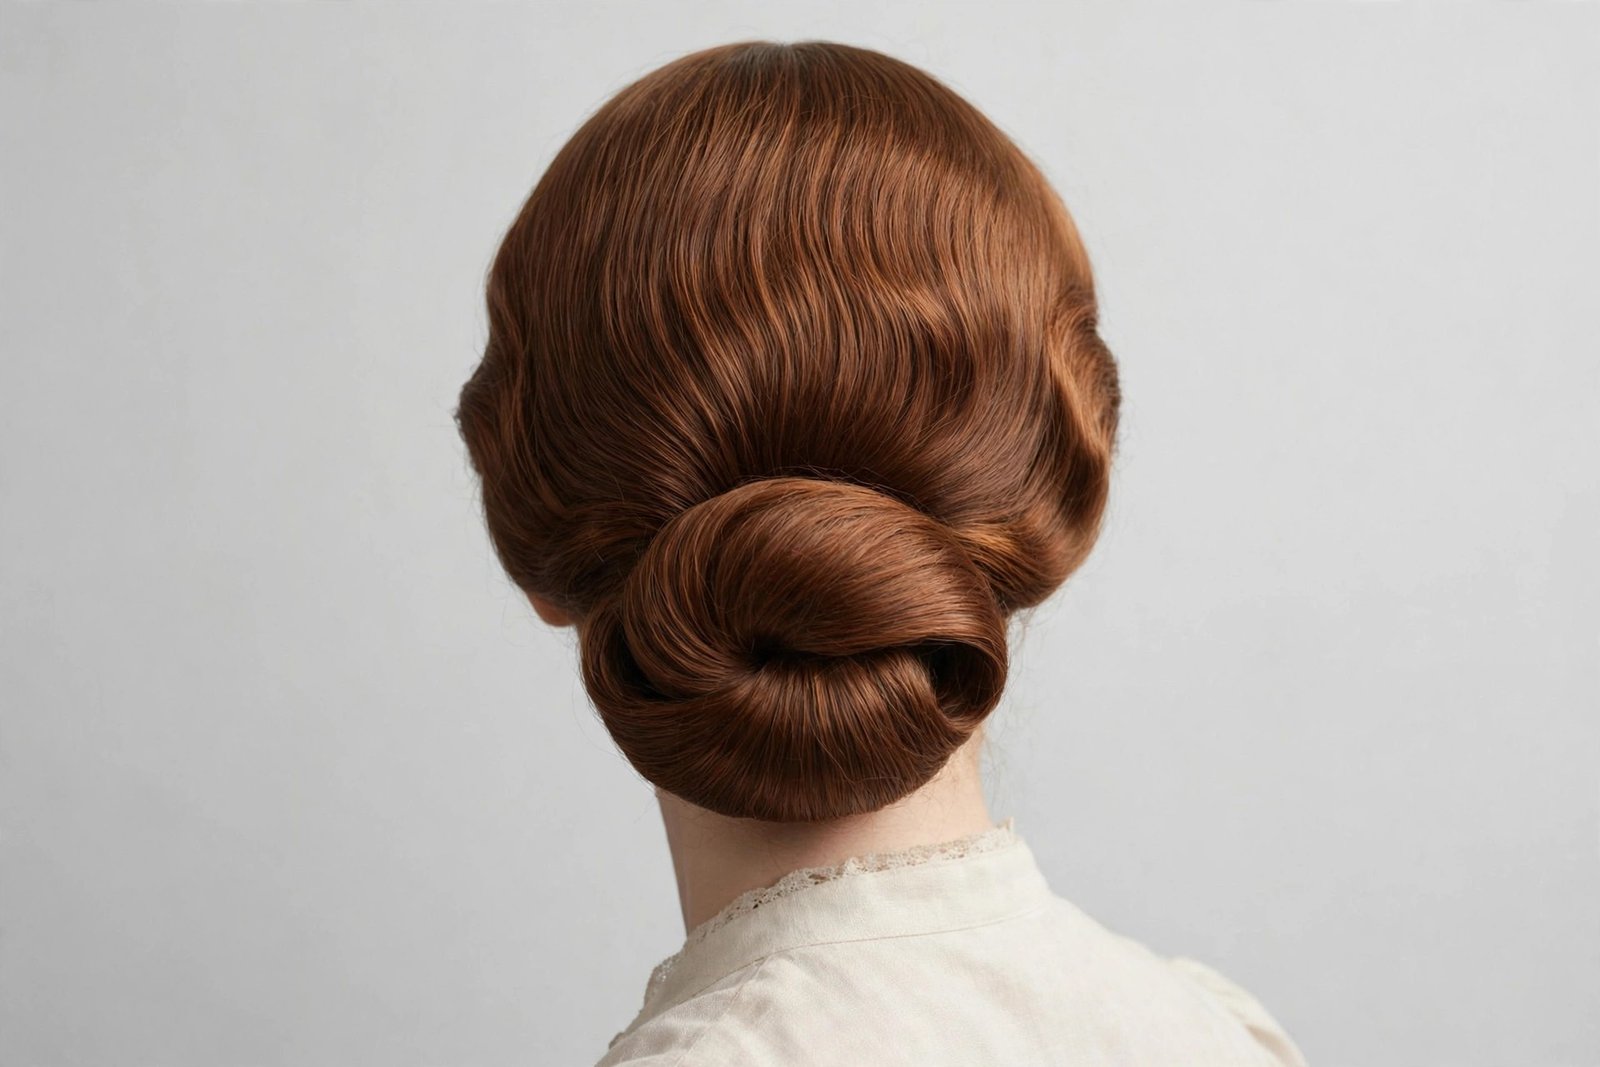
The Gibson tuck is the great-grandmother of the chignon, and she’s still got it. Born in the 1900s with the Gibson Girl illustrations, this style rolls the hair up and tucks it into itself at the nape — no visible coil, no obvious bun, just a smooth, mysterious roll that looks like your hair simply decided to be elegant. It’s the most “how did she DO that” style in this guide, and the answer is: it’s actually one of the easiest. The tuck technique is forgiving, fast, and weirdly satisfying to execute.
Here’s the vintage magic: put on a stretchy headband (or use the classic method with just your hair), positioning it across the crown like a headband. Take sections of hair from the sides and back, and tuck them up and over the band, rolling inward — each tucked section locks the previous one in place. Work your way around until all the hair is tucked into a neat roll at the nape. Pin any loose spots with U-pins, smooth the top, and you’re done — genuinely, that’s the whole style, and it takes about eight minutes. The modern update: skip the headband and use the “tuck into a low ponytail elastic” method — make a low ponytail, create a gap above the elastic, flip the ponytail up through the gap, then roll and tuck the remaining length underneath, pinning as you go.
This is a beautiful style for medium-length hair — shoulder to armpit length is actually ideal, because there’s less to tuck. It flatters oval and long faces with its smooth, continuous line, and it has a vintage romance that suits themed weddings, retro events, and anyone who loves old-Hollywood style. The honest downside: very long, heavy hair can overwhelm the tuck and pull it loose (section and pin more), and very layered hair will poke out — embrace the wisps or pin them, your call. Variations: a deep side part for 1940s glamour, or a braided headband section leading into the tuck.
12. The Double Knot Chignon
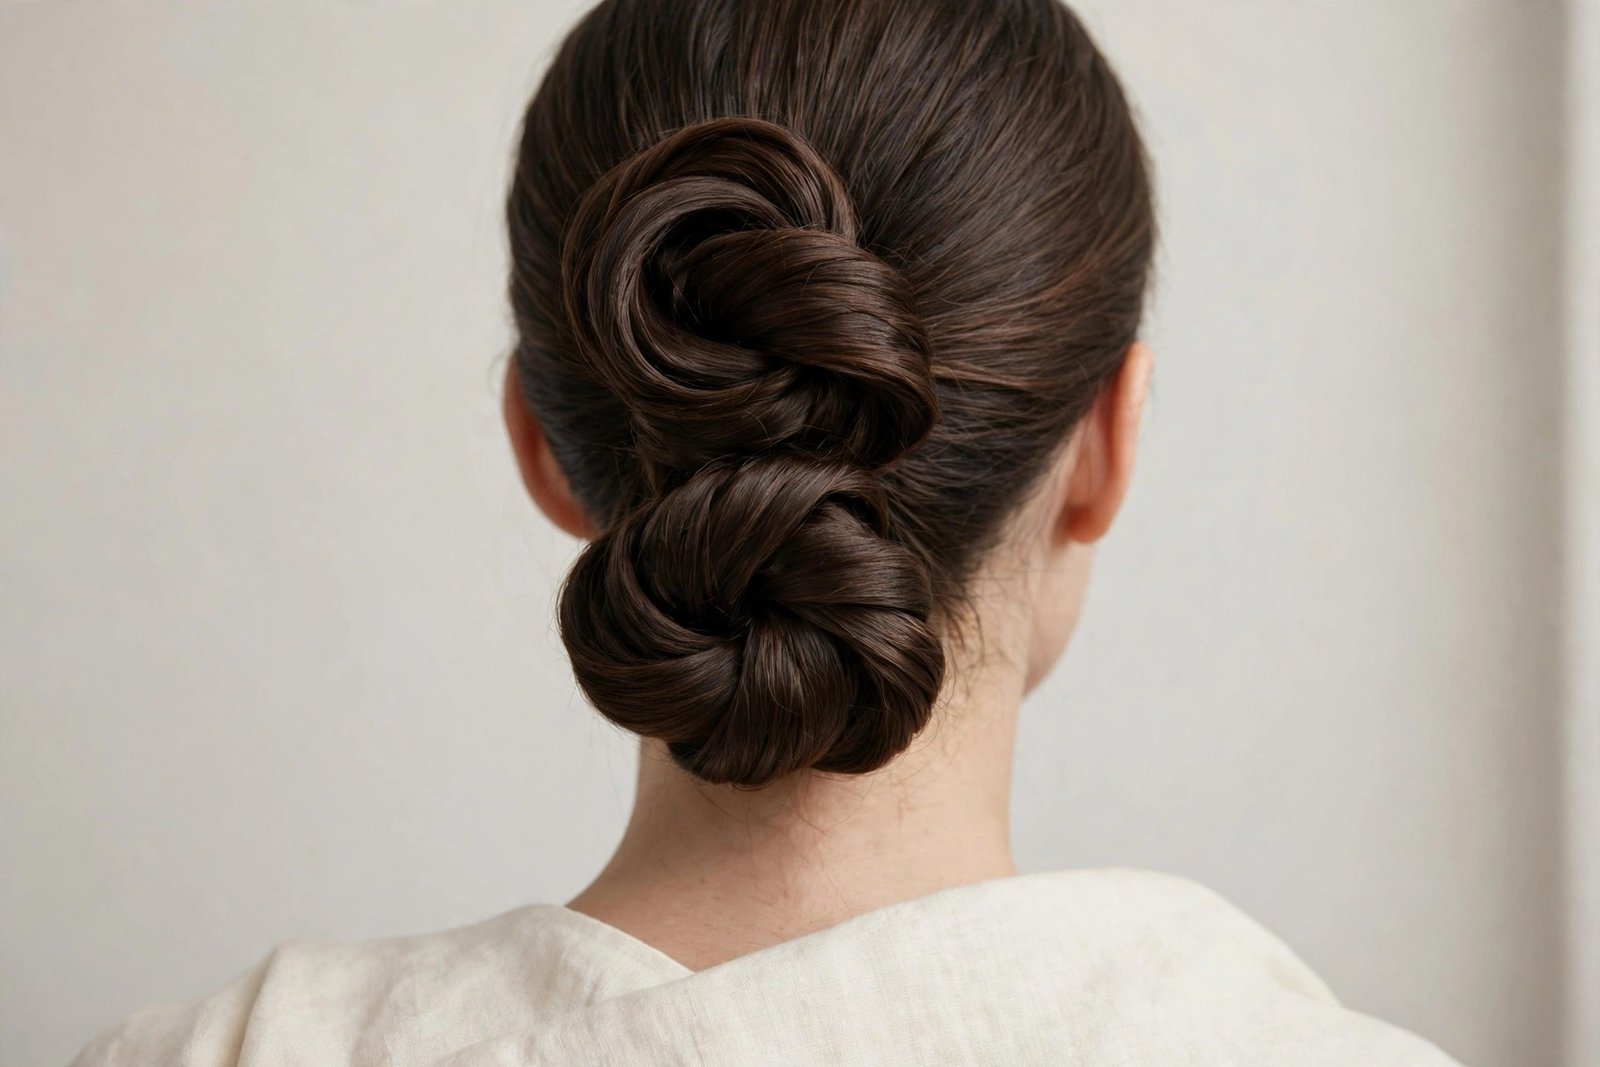
Two buns are better than one — at least when they’re stacked into a double knot chignon. This style divides the hair into two sections, knots each one (literally ties the hair in a knot, like the first step of tying shoelaces), and stacks them at the nape into a sculptural double form. It has a modern, almost architectural quality that sets it apart from every smooth chignon in this guide, and it’s weirdly satisfying to wear — there’s something about a literal knot in your hair that feels cool and a little bit rebellious while still reading as elegant.
The technique is fun: divide your low ponytail into two sections. Take the first section and tie it in a loose overhand knot — yes, like a knot — positioning it at the nape, and pin it securely with the ends tucked. Take the second section and tie a second knot just below or beside the first, pinning it to stack against the first knot. The knots should nest together into one cohesive double form. Tuck all ends, pin generously (knots are heavier than they look), and pull gently at the loops of the knots to make them look fuller. A texturizing spray before you start gives the knots grip and dimension. Finish with medium-hold spray.
This is the chignon for the woman who finds classic updos a bit boring — it’s modern, a little edgy, and very 2026. It works best on medium to long hair (you need length to tie real knots), and it flatters oval and heart-shaped faces with its interesting silhouette. It’s great for fashion events, art openings, date nights — anywhere with a creative dress code. The honest downside: knots eat length aggressively, so short-to-medium hair will struggle; and the style is heavier than it looks, so pin like you mean it. It’s also not the choice for ultra-conservative formal events — know your room. Variations: a triple knot for maximum drama, or a single loose knot for a minimalist take.
13. The Looped Chignon
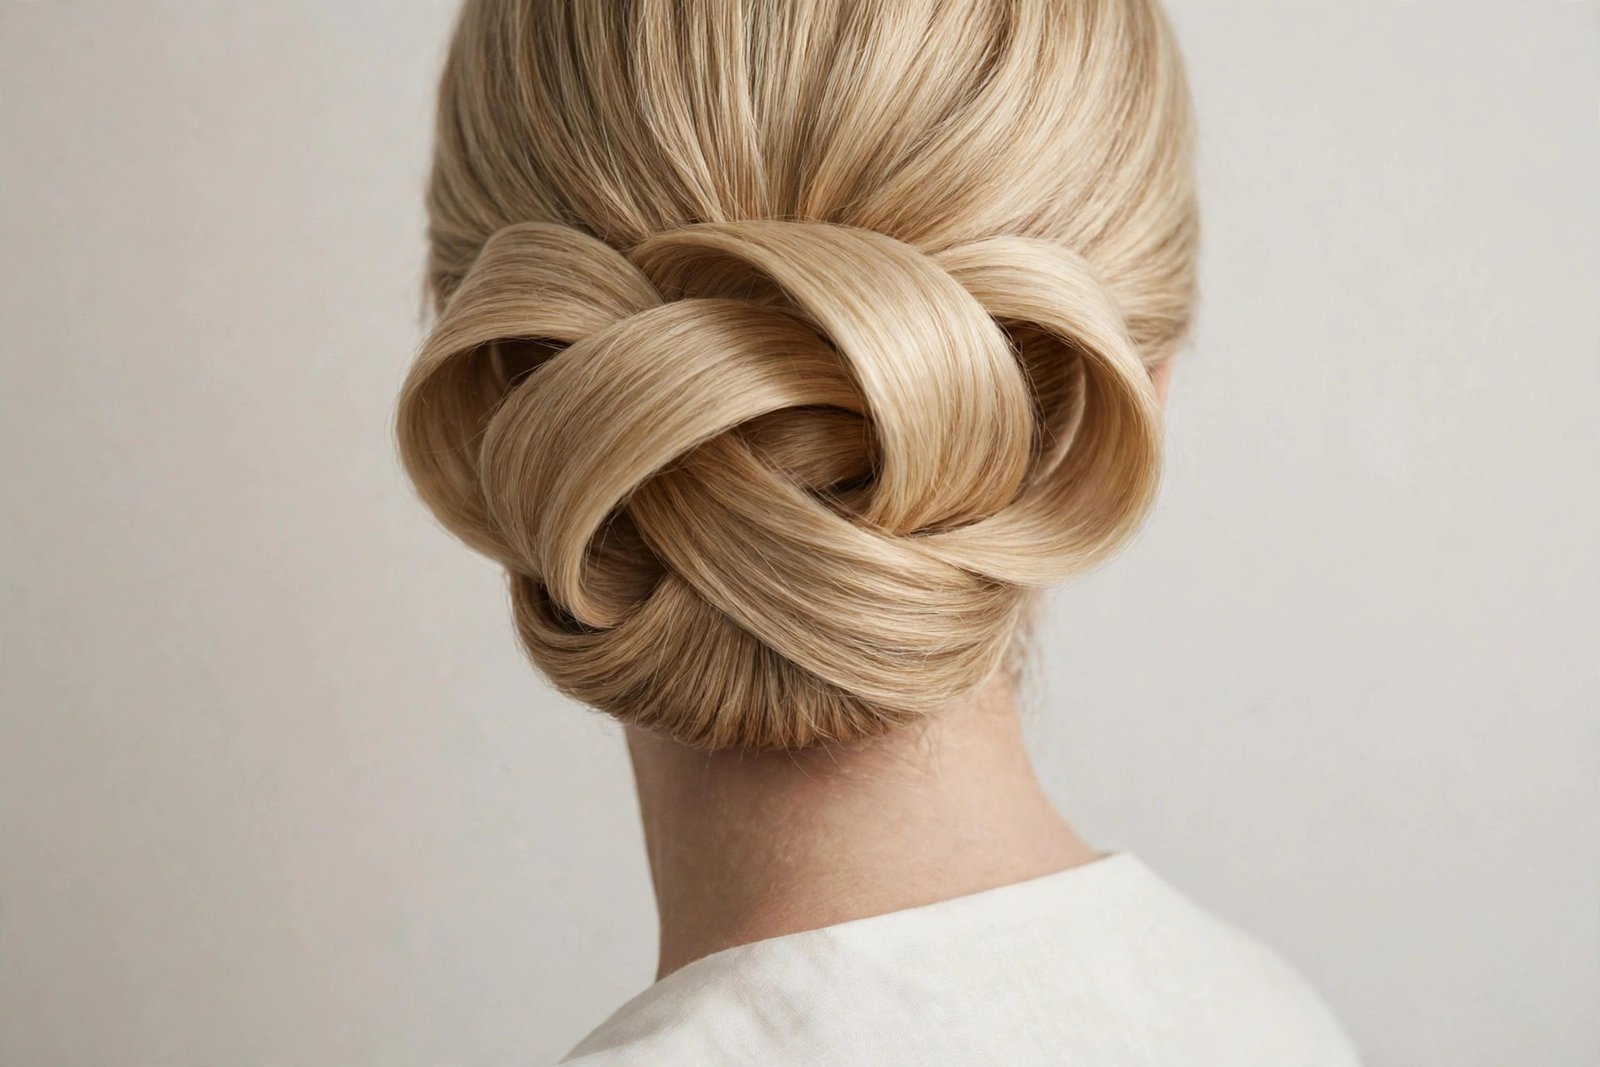
The looped chignon is minimalism at its most beautiful. Instead of twisting or coiling, the hair is folded into soft loops — like ribbon — and pinned into a low, rounded form. The result is incredibly clean and modern, with a softness that twisted chignons don’t have. It’s the chignon equivalent of a perfectly draped silk dress: no fuss, no visible effort, just beautiful form. This is the style for the woman whose aesthetic is quiet luxury, and it’s been all over minimalist wedding inspiration this year.
The method: pull your hair into a low ponytail, but on the last pull-through of the elastic, stop halfway — leaving a loop of hair with the ends hanging. That’s your first loop. Fan the loop out gently to make it wide and soft, pin it to your head, then take the hanging ends, loop them again in the opposite direction, and pin. Continue looping and pinning until all the hair is used, tucking the final ends underneath. The loops should overlap like petals. Gently pull at the loops to widen them — wide, soft loops are the whole aesthetic. Smooth the top with serum, pin any gaps, and finish with a flexible-hold spray that lets the loops keep their softness.
Oval and heart-shaped faces wear this beautifully — the clean lines are very flattering. It’s ideal for minimalist brides, gallery events, and elegant dinners where you want polish without ornament. Medium-length hair is actually perfect for this — long enough to loop, short enough to control. The honest downside: loops are the least secure chignon construction, so this isn’t the choice for a windy outdoor wedding or a night of serious dancing without serious pinning. And very thick hair can make the loops bulky — work in smaller sections. Variations: a single dramatic loop for avant-garde minimalism, or tiny pearl pins at the loop intersections.
14. The Wrapped Low Chignon
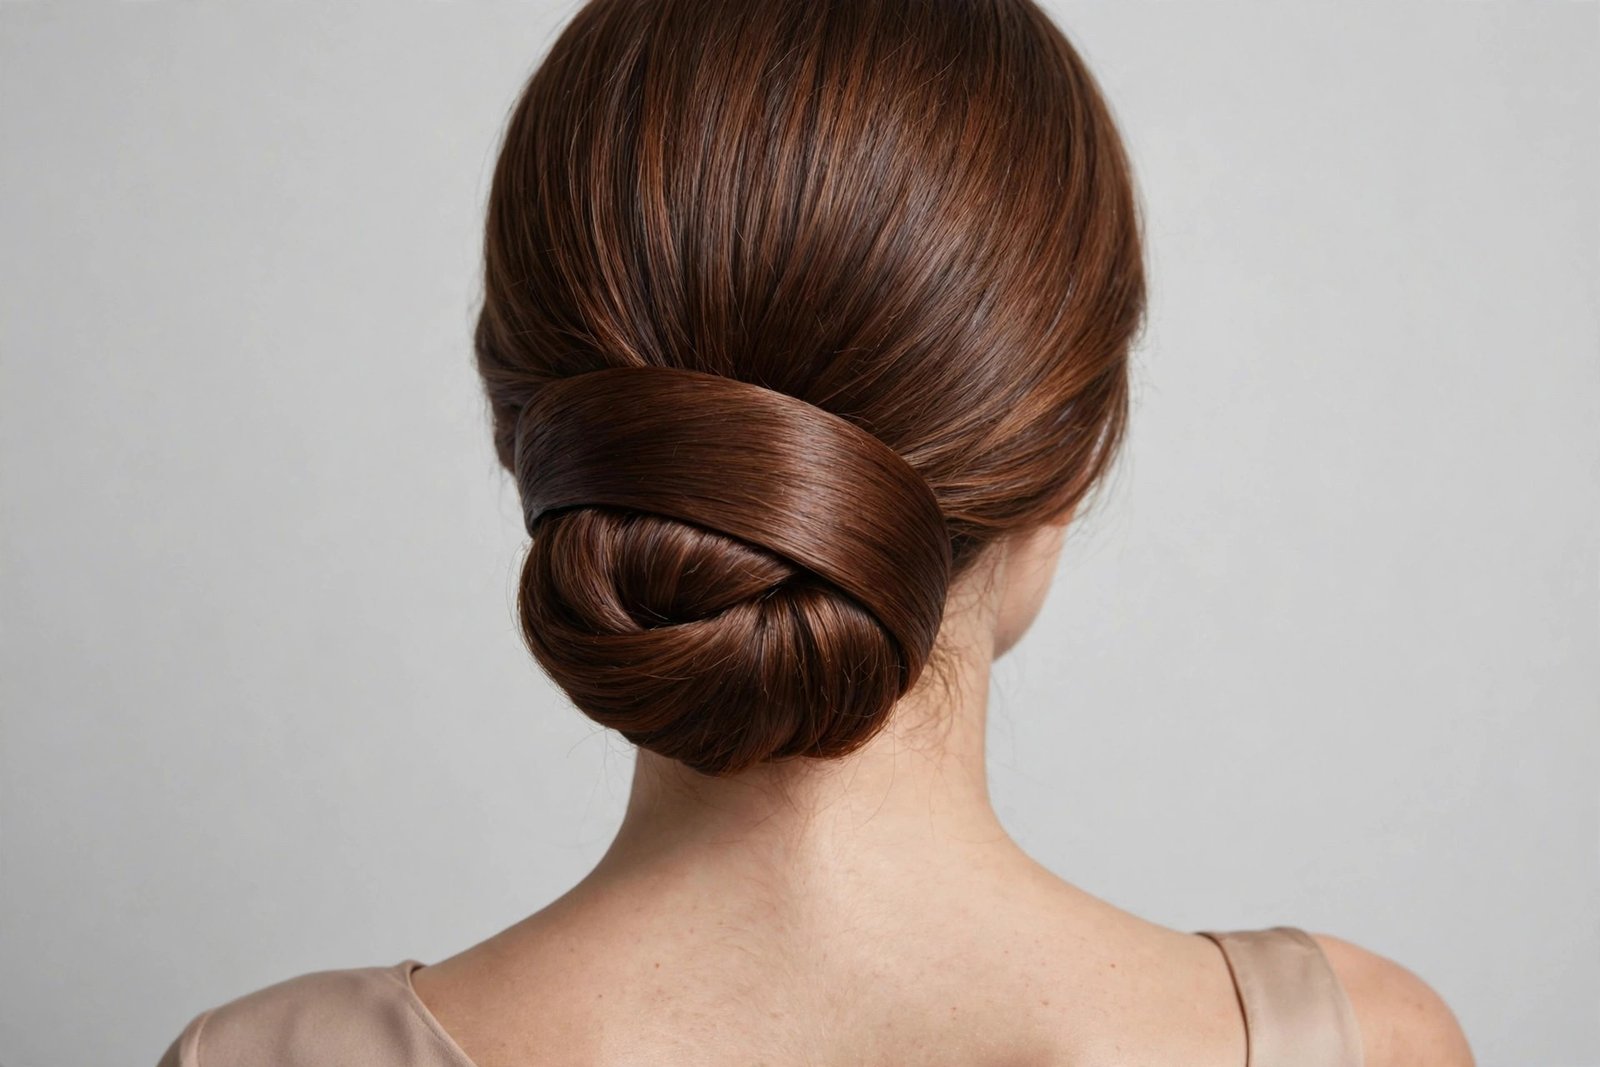
The wrapped low chignon is the classic low chignon’s more polished sibling. The difference is in the finish: after coiling the bun, a smooth section of hair is wrapped around the base to conceal the elastic, the pins, and any construction evidence — leaving a seamless, jewelry-like result. It’s a small detail that makes a massive difference in photographs, because the camera catches everything, and a visible elastic in an updo photo is the kind of thing you notice forever. Stylists do this wrap on nearly every formal chignon; now you know the secret.
Build a standard low chignon first — twist, coil, pin — but before you finish, leave out a one-inch section of hair from underneath the ponytail. Once the chignon is pinned, take that reserved section, smooth it with serum, and wrap it neatly around the base of the chignon, covering the elastic and pin heads. Tuck the end underneath and pin it invisibly. The wrap should lie flat and smooth — this is where a little pomade on your fingertips earns its keep. Some stylists braid the wrapping section for extra texture; a smooth wrap is more classic, a braided wrap is more interesting. Finish with spray, and check the back in a hand mirror — the wrap should look like the chignon simply emerges from your hair with no visible mechanics.
This is the photographer’s chignon — weddings, galas, red carpets, anywhere cameras will be close. It flatters everyone because the base is the universal classic low chignon. Medium to long hair works; you need enough for both the coil and the wrap section. The honest downside: it’s a refinement, not a standalone style — you’re essentially doing the classic chignon plus a finishing step — and the wrap can loosen over a very long day, so check it once in the evening. Variations: wrap with a velvet ribbon for a romantic touch, or a thin gold chain for evening glamour.
15. The Curly Chignon
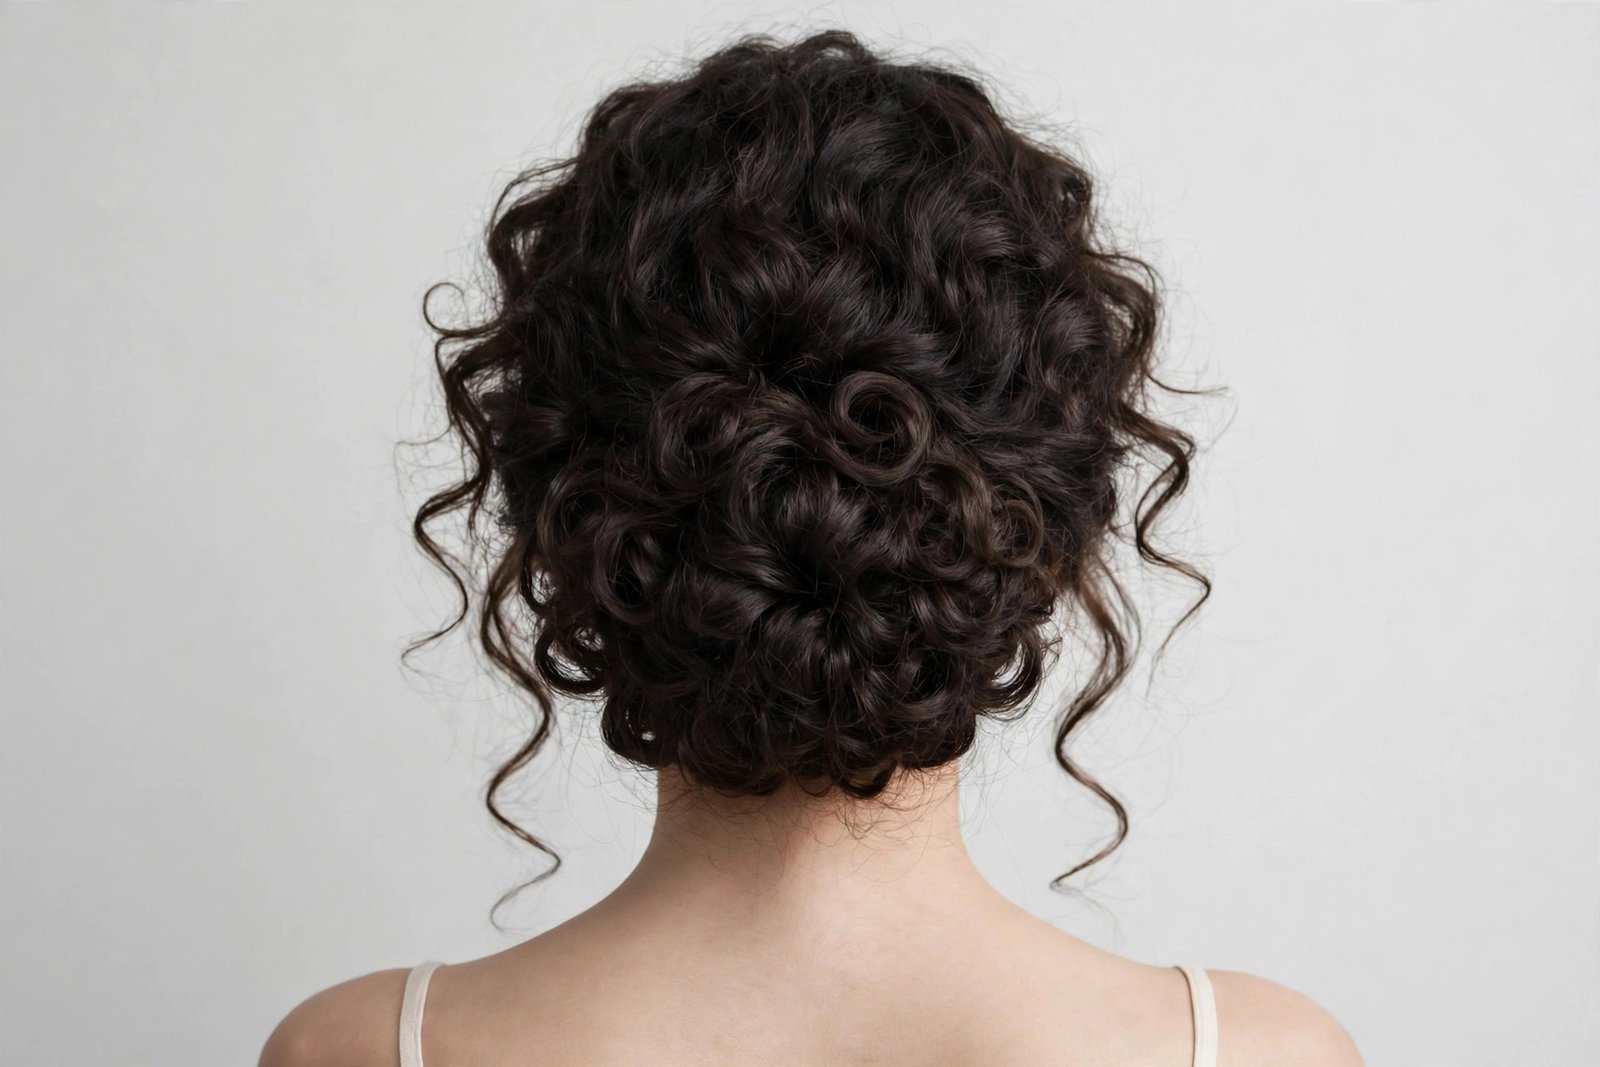
Curly-haired women, this is your moment, and I’m not just saying that. The curly chignon — where your natural curls are pinned up in sections into a soft, dimensional low bun — is one of the most romantic hairstyles that exists, and straight-haired women spend an hour with a curling iron trying to fake what you wake up with. The curls create natural volume, texture, and dimension that no product can replicate, and the finished style has this cloud-like softness that’s pure magic in photographs. If you’ve been straightening your hair for updos, stop. Your curls are the updo.
The technique is gloriously simple because your hair does half the work. On dry, defined curls (second-day curls are ideal), gather your hair loosely at the nape — don’t brush, don’t smooth, just gather. Pin sections of curls up and around into a loose bun form, letting the curls do what they want. The key is pinning curl clumps, not individual strands — work with your curl pattern, tucking and pinning so the bun looks like a cluster of beautiful curls rather than a smooth form. Leave the front soft with a few curls framing your face. A curl-defining cream on your fingertips helps tame frizz without killing texture, and a light flexible-hold spray finishes it. The whole thing takes ten minutes, and I am not exaggerating.
All face shapes — the softness is universally flattering — and it’s a dream for weddings, especially outdoor and garden weddings where the romance of the setting matches the romance of the hair. It’s also the lowest-effort formal style in this guide for anyone with natural curl or waves. The honest downside: very tight curl patterns may need the hair stretched slightly for pinning, and humidity is the enemy — an anti-humidity spray is worth its weight in gold. Fine curly hair might need a little padding for fullness. Variations: pin in a few small braids among the curls for texture contrast, or add pearl pins for bridal.
16. The Smooth Glass Chignon
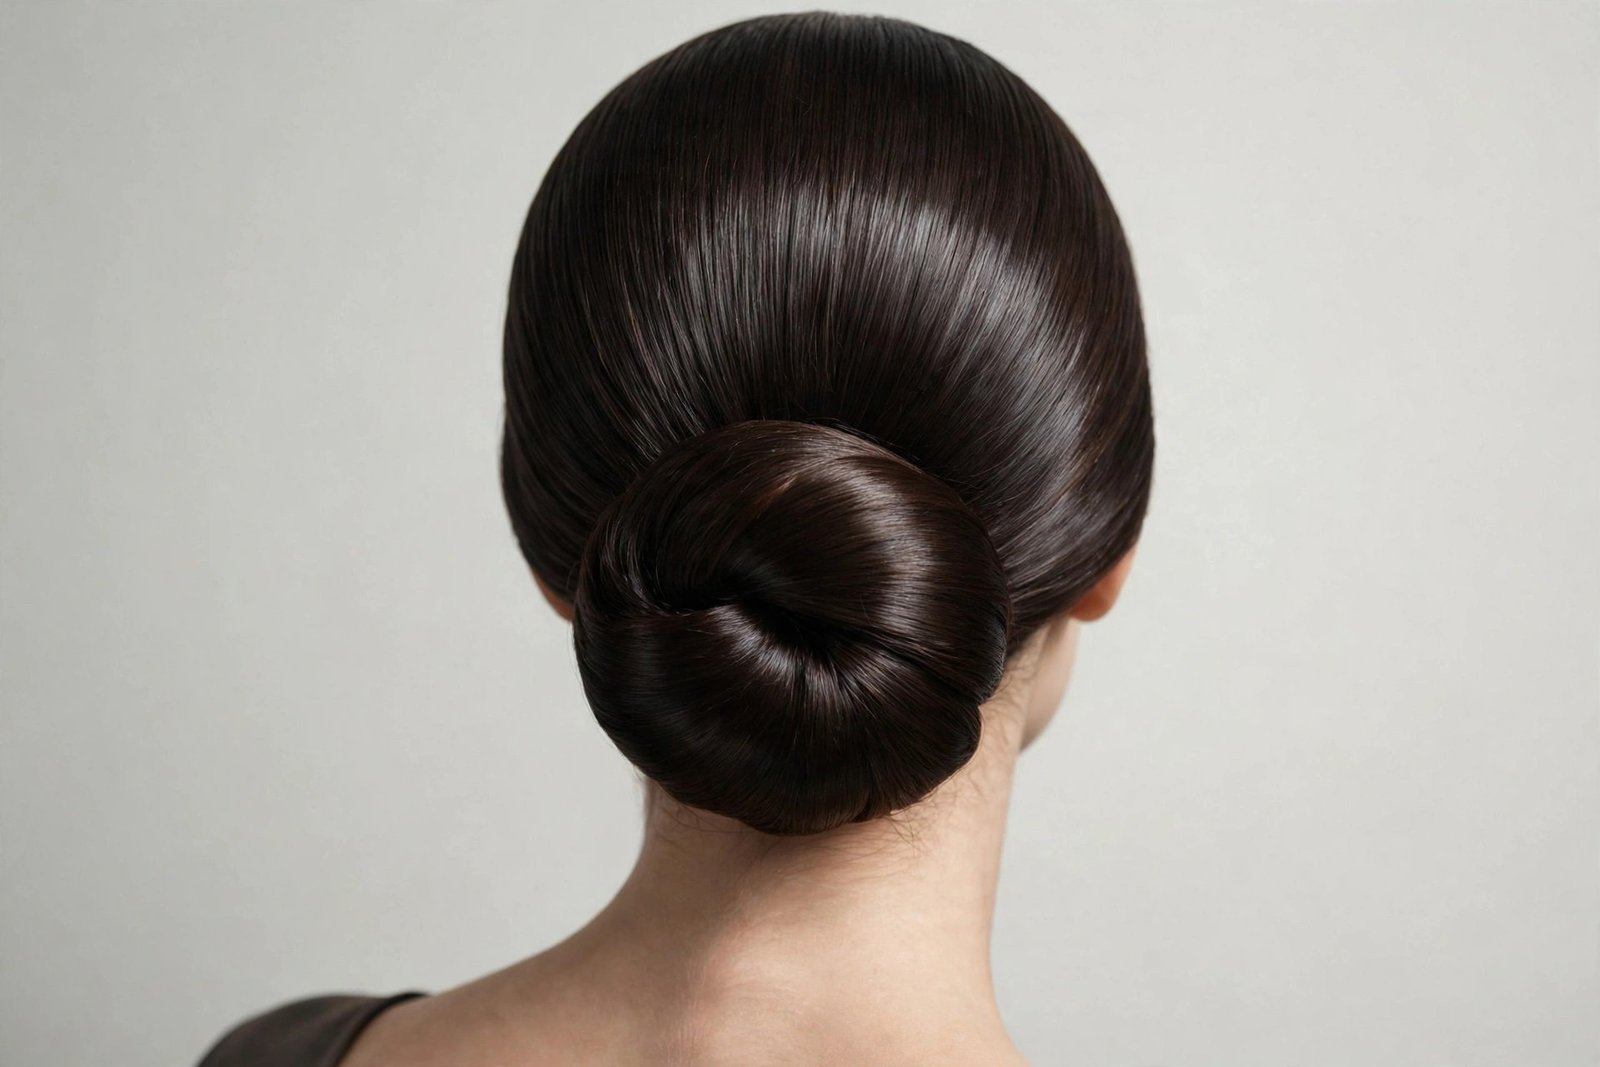
Glass hair met the chignon, and the result is the most high-shine style in this guide. The smooth glass chignon takes the classic low chignon and finishes it to a mirror-like, liquid shine — every strand in place, light bouncing off the surface, the kind of polish that looks expensive because it is difficult to achieve. This is the chignon for evening events where you want to look like the best version of yourself: sleek, controlled, luminous. It’s having a major moment in 2026 alongside the broader glass-hair trend, and on dark hair especially, the shine is otherworldly.
Shine is 90% prep. Start with a smoothing shampoo and condition well, then blow-dry straight with a paddle brush, directing the airflow down the hair shaft. Work a shine serum through the lengths — not too much, or it goes greasy — and flat-iron if needed for that truly glassy finish. Pull into a low ponytail, keeping everything smooth, then twist and coil tightly into your chignon. The coil should be compact and neat. Here’s the pro move: after pinning, take a clean mascara spoolie or a soft toothbrush with a tiny bit of pomade and lay down every flyaway around the hairline and the coil. Finish with a shine spray (not regular hairspray — a dedicated shine mist) for that liquid finish. Check in natural light; shine reads differently indoors.
Dark hair shows glass shine best — brunettes and black hair, this is your superpower — but it works on all colors with the right products. Oval and heart-shaped faces suit the sleekness; round faces should keep a little volume at the crown to avoid emphasizing width. It’s perfect for evening galas, cocktail events, and formal dinners. The honest downside: it’s the highest-maintenance chignon — humidity, touch, and time all degrade the shine, so carry your shine spray — and fine hair can look flat rather than glassy without careful product layering. It also shows every imperfection, so take your time with the smoothing. Variations: a glass chignon with a deep side part for extra drama.
17. The Fishtail Braided Chignon
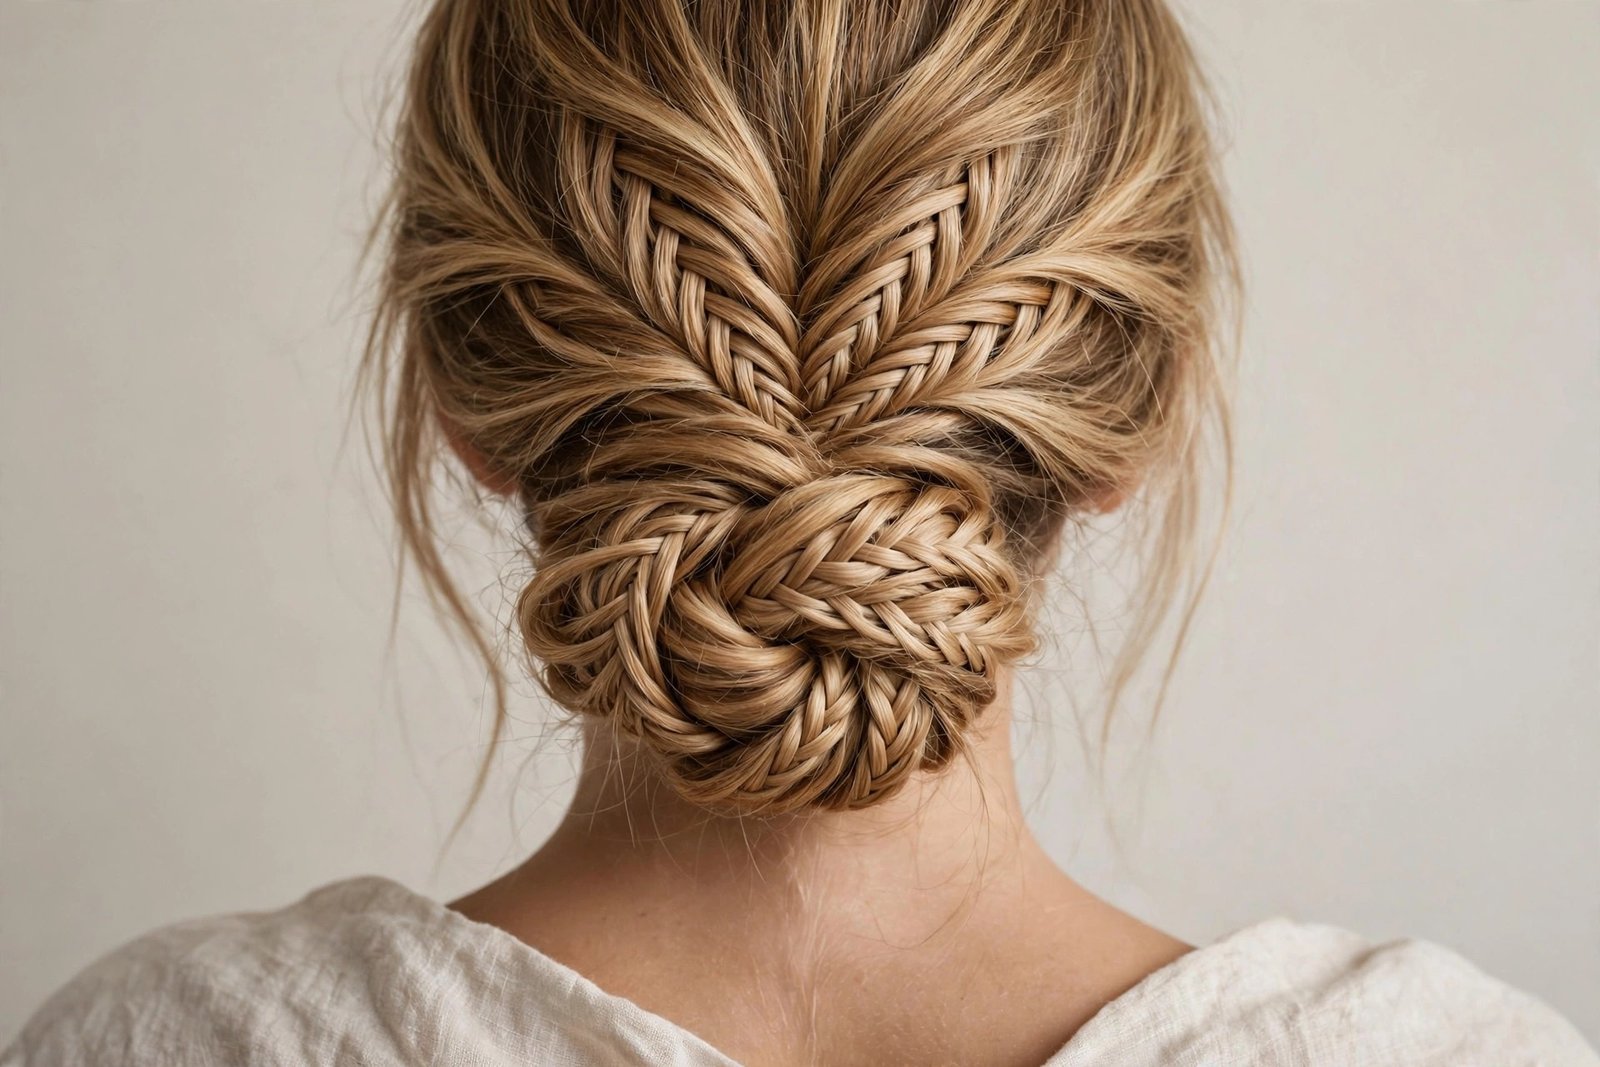
The fishtail braid is the most beautiful braid there is — fight me — and coiled into a chignon, it creates a level of texture that stops people mid-sentence. The fishtail’s distinctive V-shaped pattern wraps around the bun like an intricate woven basket, and because fishtails look best slightly undone, the whole style has this perfect balance of intricate and relaxed. It’s bohemian enough for a garden wedding and polished enough for an evening gala, which is a rare and wonderful combination.
Fishtail first, chignon second. Gather your hair into a low ponytail and fishtail braid it: divide into two sections, take a thin strand from the outside of the left section and cross it to the inside of the right, then repeat from the right to the left, working down. Pancake the braid as you go — pull the edges outward — because a fat, textured fishtail is the goal. Secure the end, then coil the braided ponytail around the base, pinning with U-pins. Tuck the end underneath. The braid’s texture means you barely need to do anything else — the pattern is the decoration. Finish with a light texturizing spray to enhance the piece-y texture and a flexible-hold mist.
Long hair gets the most dramatic fishtail — you need length for the braid to show its pattern — but medium hair works with a slightly chunkier fishtail. It flatters all face shapes, and it’s a standout for boho weddings, garden parties, and summer evenings. The honest downside: fishtailing your own hair takes practice and tired arms (it’s slower than a regular braid), and pancaking is essential — an un-pancaked fishtail looks thin and sad. Budget 20 minutes until you’re fluent. Variations: a side fishtail leading into a side chignon, or two fishtails coiled together for a double-texture effect.
18. The Chignon with Curtain Bangs
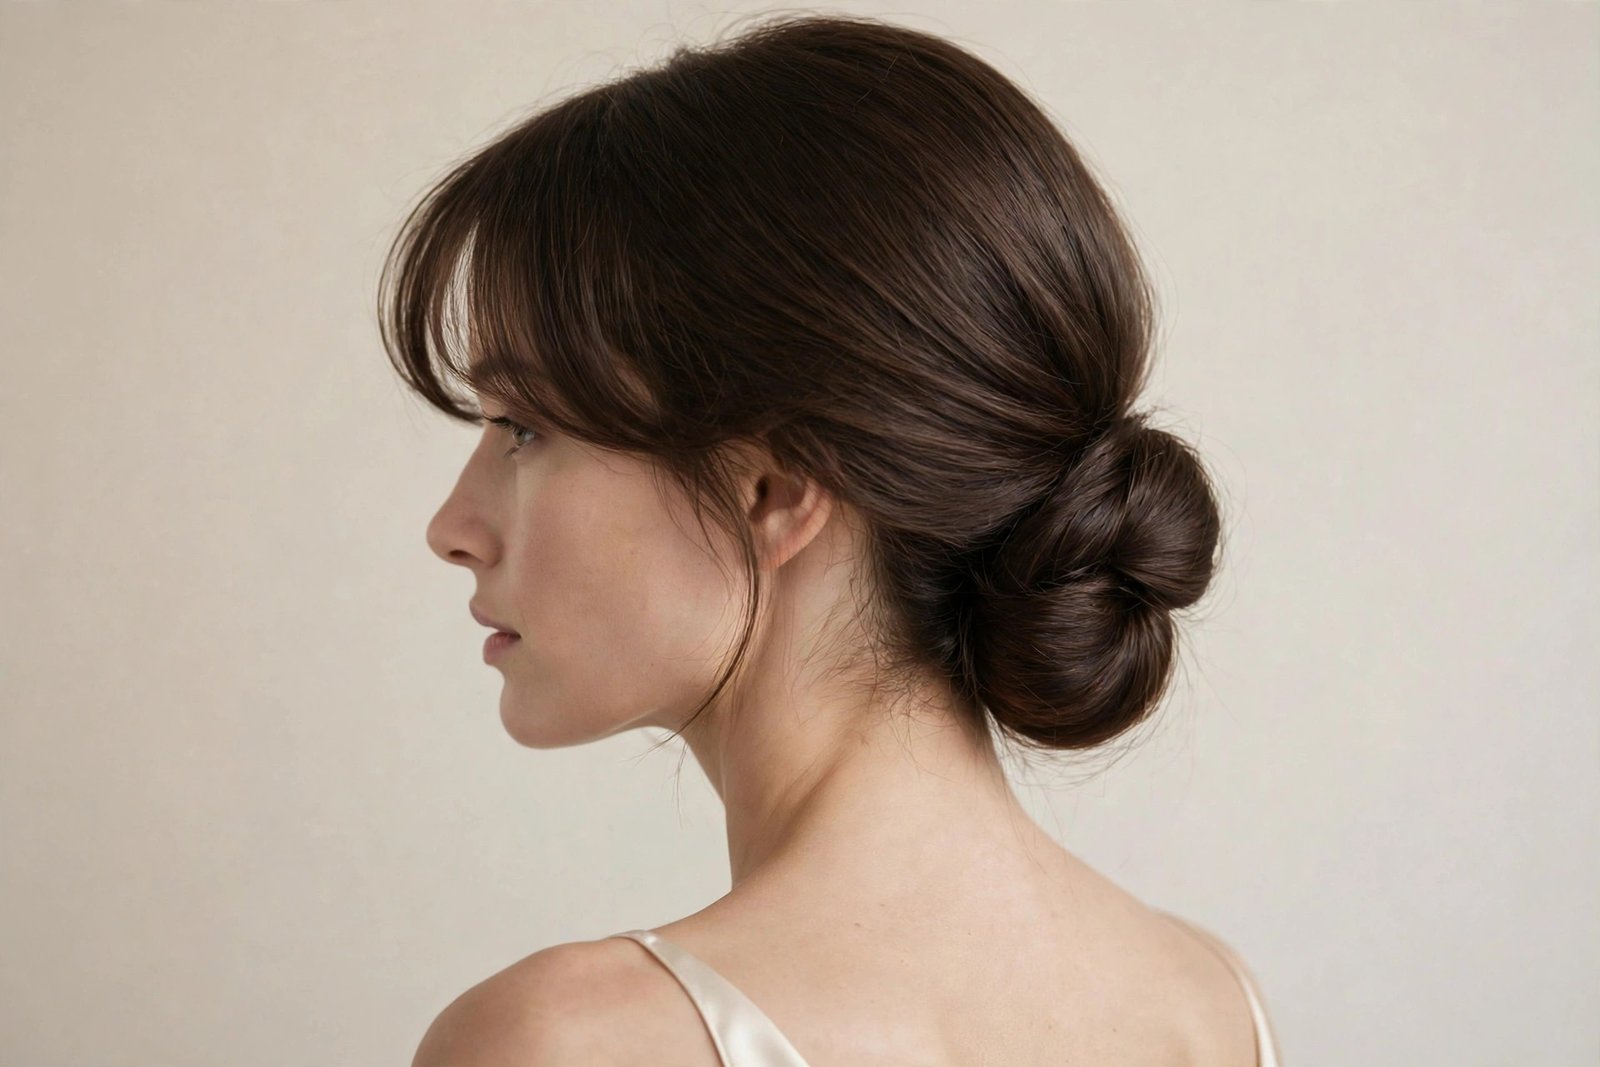
Curtain bangs and chignons are a match made in 2026 heaven. The soft, face-framing sweep of curtain bangs against the polished structure of a low chignon is one of those combinations that just works — the bangs add softness and modernity, the chignon adds elegance, and together they create a look that’s somehow both relaxed and refined. If you already have curtain bangs (and half the women I know do at this point), this is the easiest style upgrade in this guide: it’s just a classic chignon that lets your bangs do the talking.
Style your curtain bangs first — blow-dry them with a round brush, sweeping each side outward and away from the face, so they have that signature curved, parted shape. Then build your chignon behind them: a classic low, a twisted, or a messy chignon all work beautifully. The key is the transition — the bangs should flow into the chignon, not sit as a separate entity. Leave the bangs out of the ponytail, obviously, and make sure the sides where bangs meet chignon are smooth but not tight. A light spray on the bangs keeps their shape without stiffness. The 2026 update: keep the bangs piece-y and textured rather than perfectly smooth — it matches the lived-in chignon mood.
Heart-shaped and oval faces, curtain bangs were basically designed for you, and the combination is stunning. It’s versatile enough for work events, dinners, and semi-formal occasions — the bangs dress down the chignon’s formality just enough. Any hair length that supports a chignon works. The honest downside: curtain bangs need restyling if they fall flat (carry a mini dry shampoo), and on very humid days they’ll need extra attention while the chignon itself is fine. Also, growing-out bangs at an awkward length can fight the style — pin them into soft tendrils instead. If you’re considering bangs, our curtain bangs guide covers the cut and styling in detail. Variations: longer, cheek-grazing curtain bangs for maximum softness.
19. The Chignon with Face-Framing Tendrils
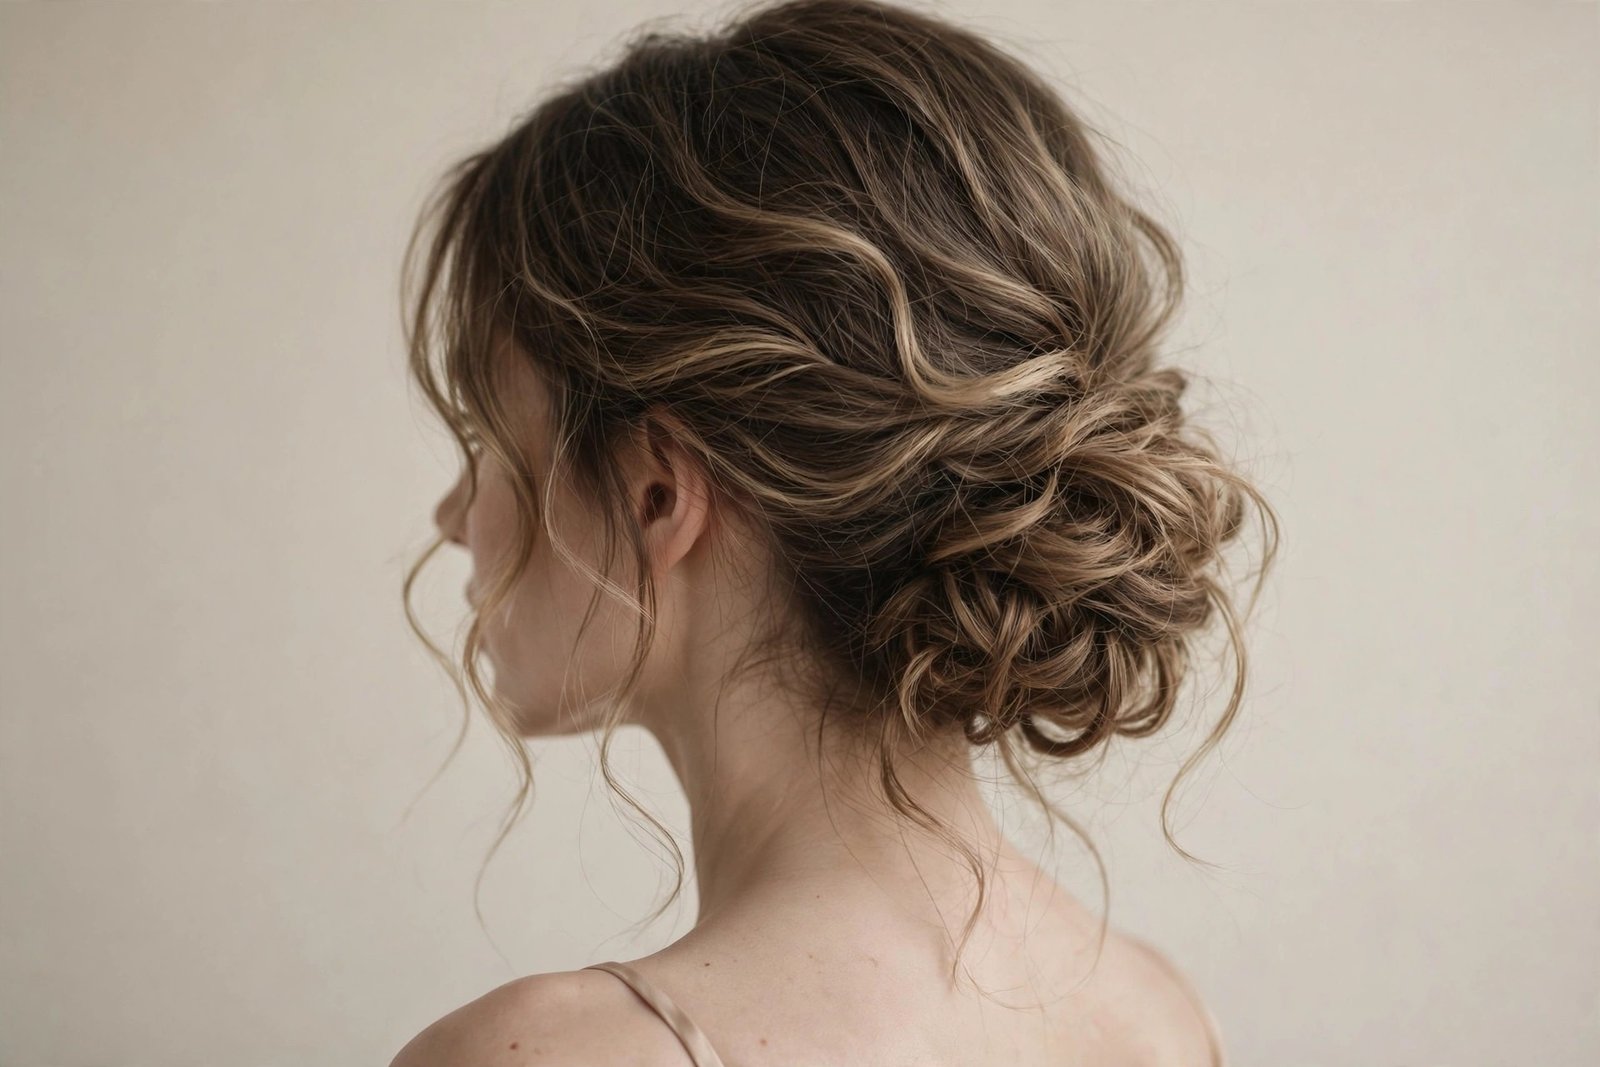
If there’s one detail that defines the 2026 chignon, it’s the tendril. Those soft, face-framing pieces pulled loose at the temples transform a chignon from “formal updo” to “romantic dream” — they soften the face, add movement, and give the whole style that lived-in quality everyone wants this year. The chignon with face-framing tendrils isn’t a separate construction so much as a finishing philosophy: build any low or messy chignon, then artfully release the front. It’s the difference between a chignon that looks done and a chignon that looks felt.
Build your base chignon — classic low or messy undone both work — but before securing the ponytail, leave out two front sections, roughly an inch wide, at each temple. Style the chignon as normal, then turn to the tendrils: curl them loosely with a medium iron (or leave natural if you have wave), keeping the curl soft and piece-y rather than ringlet-tight. The tendrils should start at about cheekbone level and fall naturally — too long and they look stringy, too short and they disappear. A tiny bit of texturizing spray gives them grip and separation. The art is in the asymmetry: make them slightly uneven, slightly imperfect. Perfectly matched tendrils look manufactured; sisters, not twins.
Heart-shaped and square faces benefit most — tendrils soften foreheads and jawlines beautifully — but honestly, tendrils flatter everyone, which is why they’re everywhere. They’re perfect for weddings, romantic dinners, and photos, because they give the face softness in every shot. Any chignon-capable length works. The honest downside: tendrils are the first thing to misbehave in wind or humidity, so they’re a fair-weather detail — and very fine, straight tendrils can look limp without texture product. Carry a travel spray for touch-ups. Variations: braided tendrils for boho texture, or longer tendrils tucked behind the ears for a subtler effect.
20. The Vintage Victory Chignon
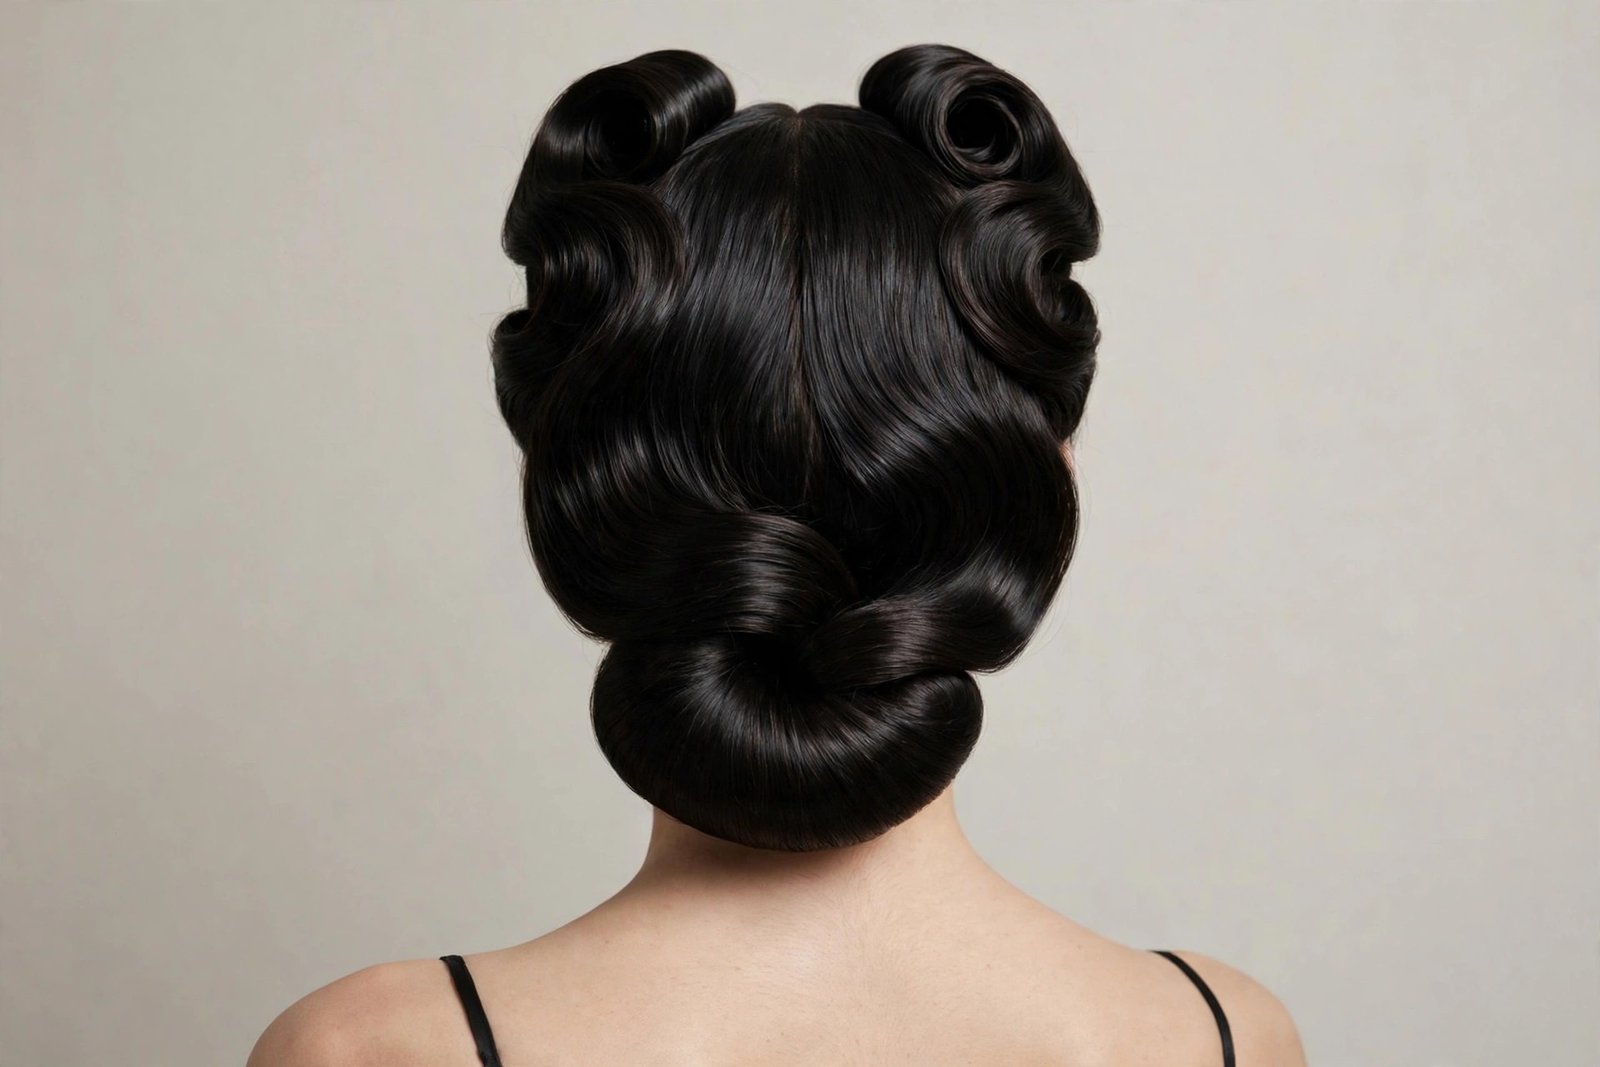
Channel your inner 1940s starlet. The vintage victory chignon takes the iconic victory roll — that sculpted, rolled shape synonymous with wartime glamour — and grounds it in a low chignon base, giving you retro drama without a costume-party feel. It’s bold, it’s sculptural, it’s unapologetically glamorous, and in a sea of soft messy chignons, it’s the style that stands out. This is for the woman who wants her hair to be the outfit.
The build has two parts: the rolls and the chignon. Section off the front and crown hair — this becomes your victory roll. Backcomb the section lightly for structure, then roll it under and inward (toward the head), shaping it into that distinctive tubular roll, and pin it securely along the base of the roll. Repeat on the other side for symmetry, or do a single dramatic roll for asymmetry. Gather the remaining back hair into a smooth low chignon — classic technique, neat and compact, since the rolls are providing all the drama. The chignon should be understated to balance the rolls. Set everything with strong-hold spray; vintage styles need vintage hold. A touch of shine serum on the rolls gives them that lacquered 1940s finish.
Oval and heart-shaped faces carry vintage rolls beautifully. This is the pick for themed events, retro weddings, burlesque nights, and anywhere dramatic glamour is the dress code — it’s a statement, so wear it like one. Medium to long hair works; the rolls need enough length to shape. The honest downside: it’s the most “costume” of the styles here — it reads vintage, which is perfect when that’s the goal and odd when it isn’t — and the rolls take real practice to shape symmetrically. Do a trial run, and photograph it; rolls look different in photos than in the mirror. Variations: a single victory roll with a sleek chignon for a subtler nod, or victory rolls with a textured messy chignon for vintage-meets-modern.
21. The Sculpted Architectural Chignon
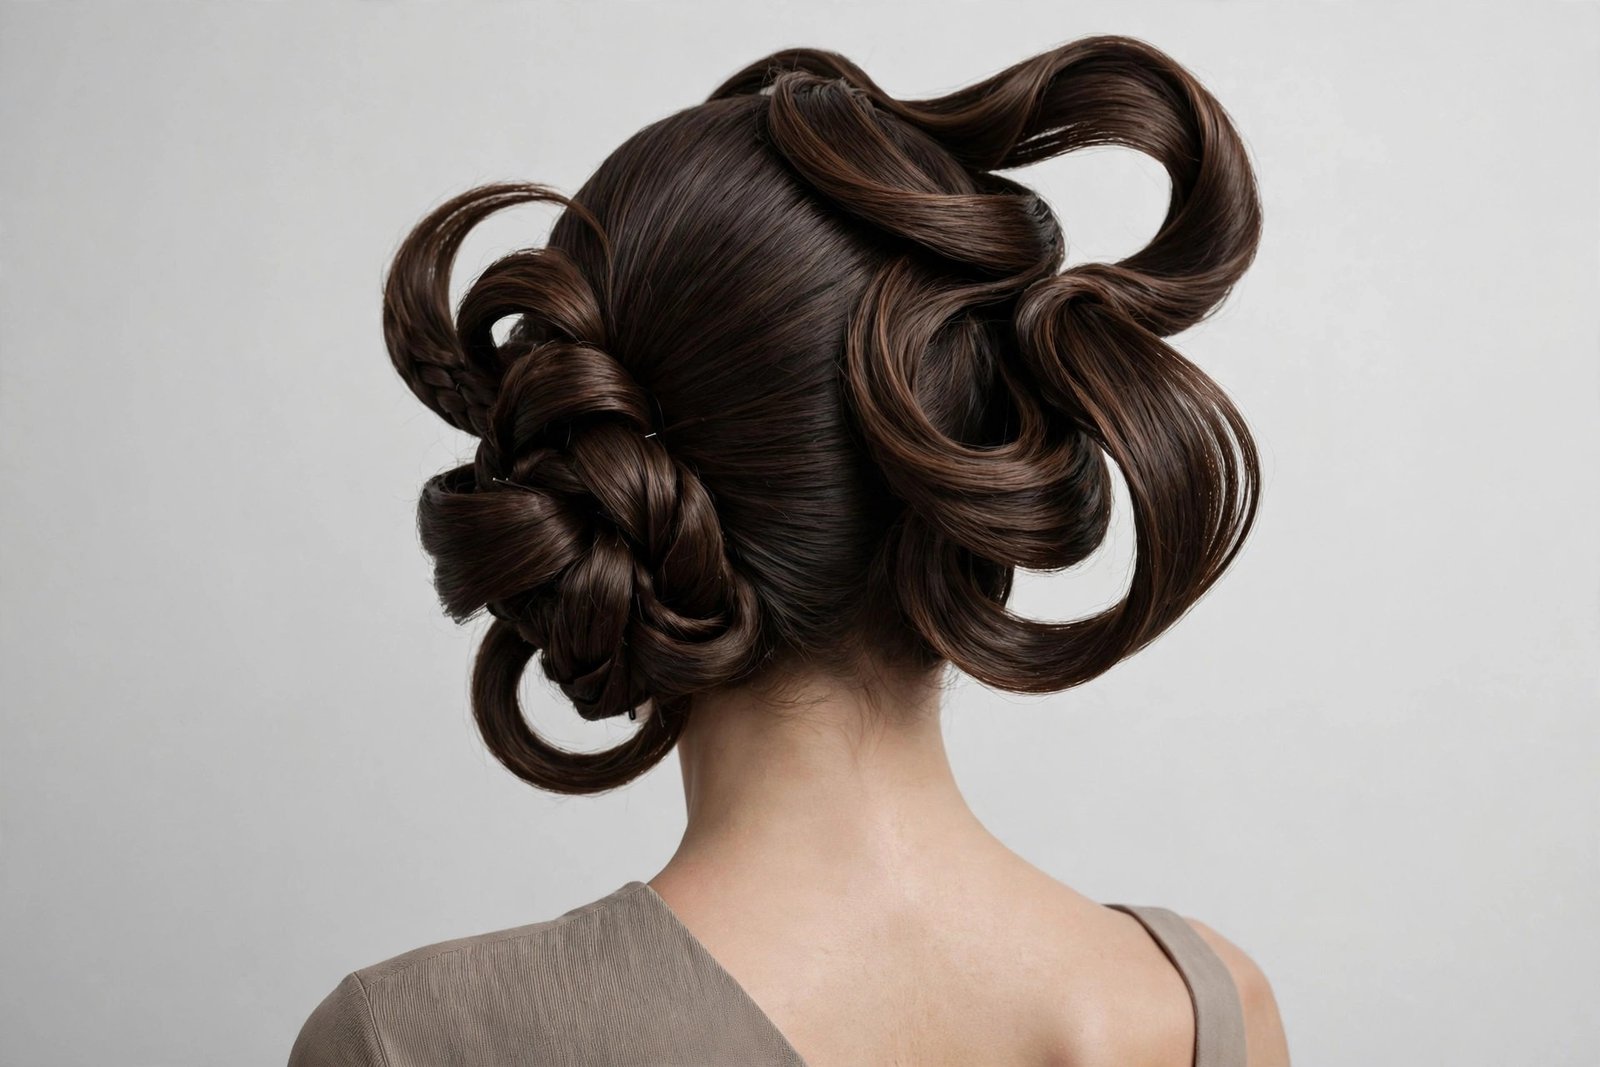
Not every chignon wants to look soft, and the sculpted architectural chignon doesn’t even pretend. This is hair as sculpture — dramatic shapes, clean lines, unexpected geometry, the kind of updo that belongs in a fashion editorial. Think twisted sections arranged like petals, loops stacked asymmetrically, negative space used deliberately. It’s the most artistic style in this guide, and honestly, it’s the one that gets remembered. If you’re going to a fashion event, an art opening, or anywhere the dress code is “interesting,” this is your chignon.
There’s no single technique here — that’s the point — but the principles are consistent. Work with clean, slightly damp hair and strong-hold products, because sculptural styles need cooperation. Build your chignon in deliberate sections rather than one coil: twist one section into a loop and pin it high, roll another into a tube and pin it low, leave a sleek wrapped section as a base. Think in shapes — circles, lines, curves — and arrange them asymmetrically for a modern feel. Pin everything twice; sculptural styles have gravity working against unusual angles. Step back frequently and look at the silhouette from all sides — the overall shape matters more than any individual section. Finish with strong-hold spray, and don’t touch it once it’s set.
This is for the confident, the creative, the woman who treats getting dressed as an art form. It suits strong features and oval faces best — the drama needs a canvas. Long, thick hair gives you the most sculptural material to work with. The honest downside: this is genuinely difficult — it’s the only style here I’d call advanced — and it’s not versatile; it’s a one-event showpiece, not a daily driver. It also photographs better than it looks in motion, so it’s best for events where you’ll be seen more than active. Consider a stylist for this one unless you’re experienced. Variations: incorporate a braid as one sculptural element, or keep it monochrome-sleek for maximum editorial impact.
22. The Low Chignon with Middle Part
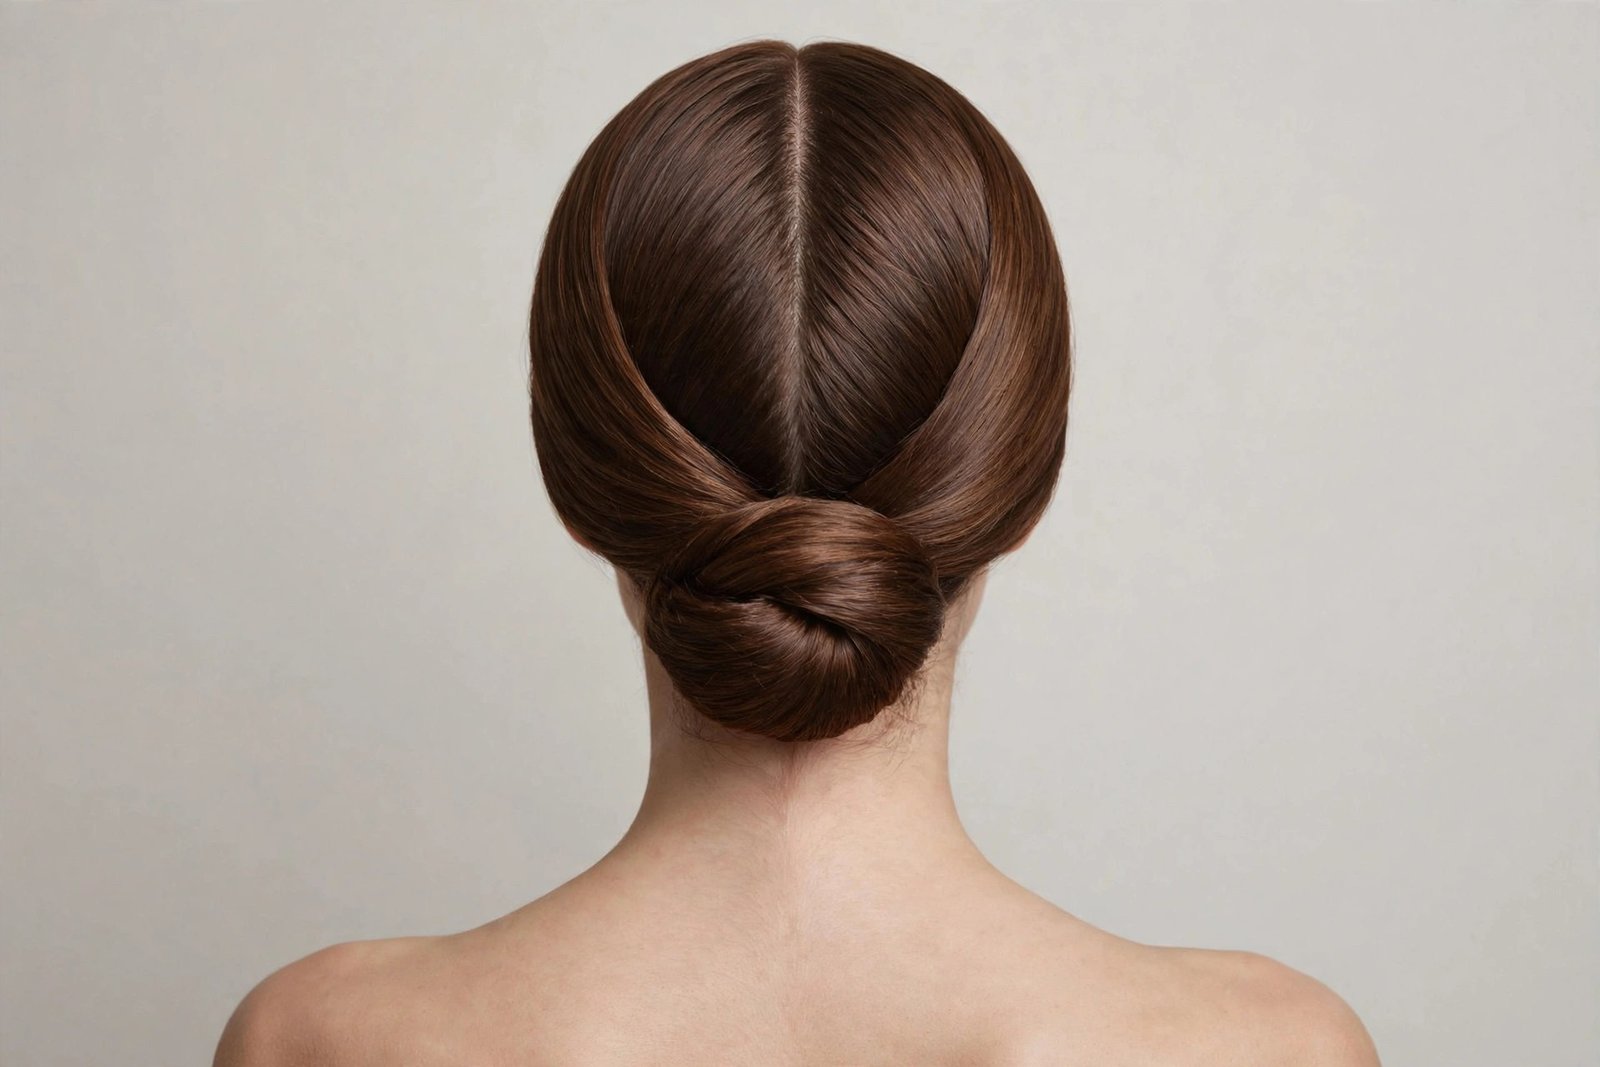
Symmetry is having a moment, and the low chignon with a middle part is its poster child. A dead-center part, hair swept smoothly back on both sides, coiled into a neat low chignon — it’s clean, modern, and quietly powerful. There’s something almost meditative about the symmetry; it reads as calm confidence, the visual equivalent of a deep breath. This is the chignon for the minimalist, the modern bride, the woman whose style is “less, but perfect.”
The part is everything here, so make it precise: use the handle of a rattail comb to draw a straight center part from forehead to crown. Smooth each side back with a brush and a touch of serum — the sides must be sleek and symmetrical, which means taking equal tension on both sides as you gather into the low ponytail. Build a neat classic chignon at the nape — twist, coil, pin — keeping it compact and centered to echo the part’s symmetry. The 2026 softness update: keep the part precise but let the chignon itself be slightly textured rather than shellacked, so it doesn’t read as severe. A light mist of spray, and check the part in the mirror — a wobbly center part ruins the whole effect.
Oval and heart-shaped faces are made for center parts, and the symmetry is incredibly photogenic — wedding photographers love this style. It’s perfect for modern minimalist weddings, professional events, and elegant dinners. Medium to long hair, any texture (though straight to wavy shows the sleekness best). The honest downside: center parts are unforgiving — they emphasize asymmetry in the face, so if your features are notably asymmetric, a slightly off-center part is kinder — and the style can read as severe on very angular faces without the softening tricks. Variations: a braided wrap around the chignon base, or soft tendrils to break the symmetry gently.
23. The Deep Side Part Chignon
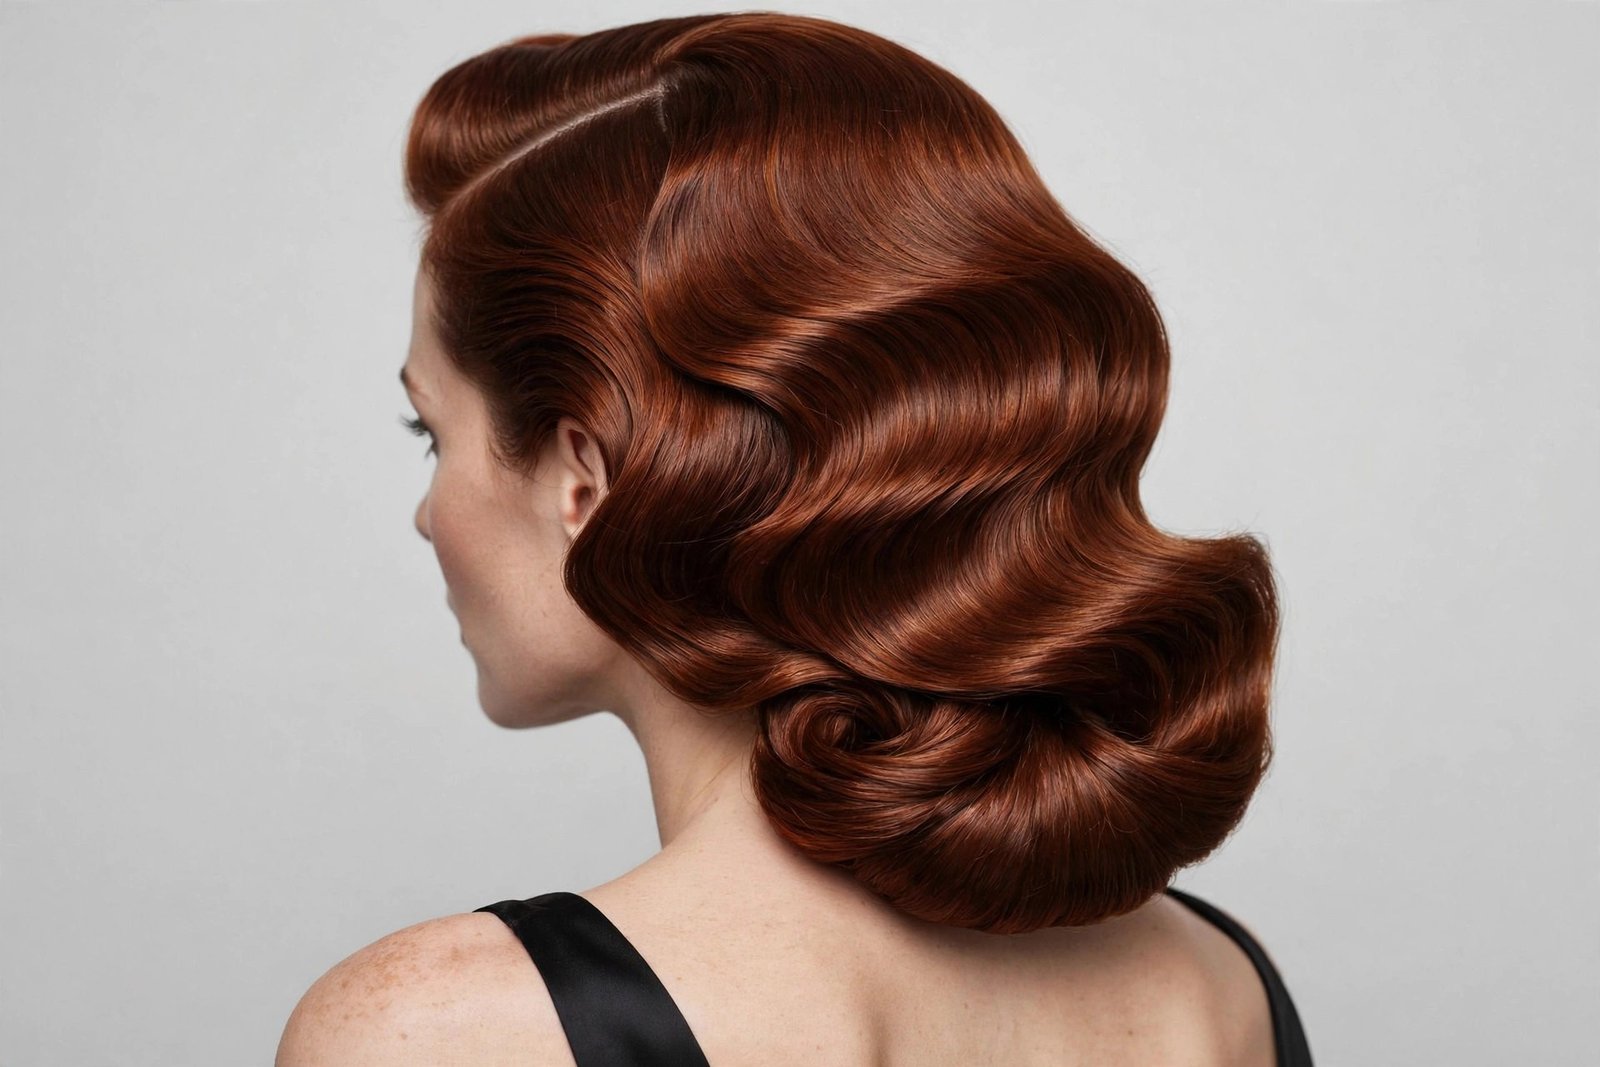
If the middle part is meditation, the deep side part is drama. Sweeping the hair from a far-off-center part creates instant volume, movement, and old-Hollywood glamour — it’s the most flattering part placement for the most face shapes, and against a low chignon it creates a beautiful diagonal energy. This is the chignon that makes you look like you have more hair, more cheekbones, and more secrets. It’s quietly the most universally flattering style in this guide, and stylists reach for it constantly for that reason.
Find your deep part — about two to three inches off-center, on whichever side suits your face (most people have a “good side”; this is the time to use it). Sweep the heavier side across the forehead and back, keeping it smooth and voluminous — a round brush and blow-dryer give the sweep its body. Gather everything into a low chignon at the nape, slightly off-center toward the heavier side for balance. The sweep should flow continuously into the chignon with no break or bump. Pin securely, smooth with serum, and finish with spray. The volume at the front is the star; make sure it stays lifted — a little backcombing at the part’s base helps it hold all evening.
Round faces (the asymmetry slims), square faces (the diagonal softens), long faces (the side volume adds width) — the deep side part flatters nearly everyone, which is why it’s a stylist favorite. It’s ideal for evening events, weddings, and photographs, because the asymmetry creates dimension in every shot. Any chignon-capable length works. The honest downside: the heavy sweep can fall flat over a long evening without solid prep (backcomb and spray the base), and in strong wind the whole asymmetry can come undone — it’s a fair-weather-or-indoor style. Variations: combine with a twisted chignon for texture, or add a decorative comb at the part for bridal.
24. The Woven Basket Chignon
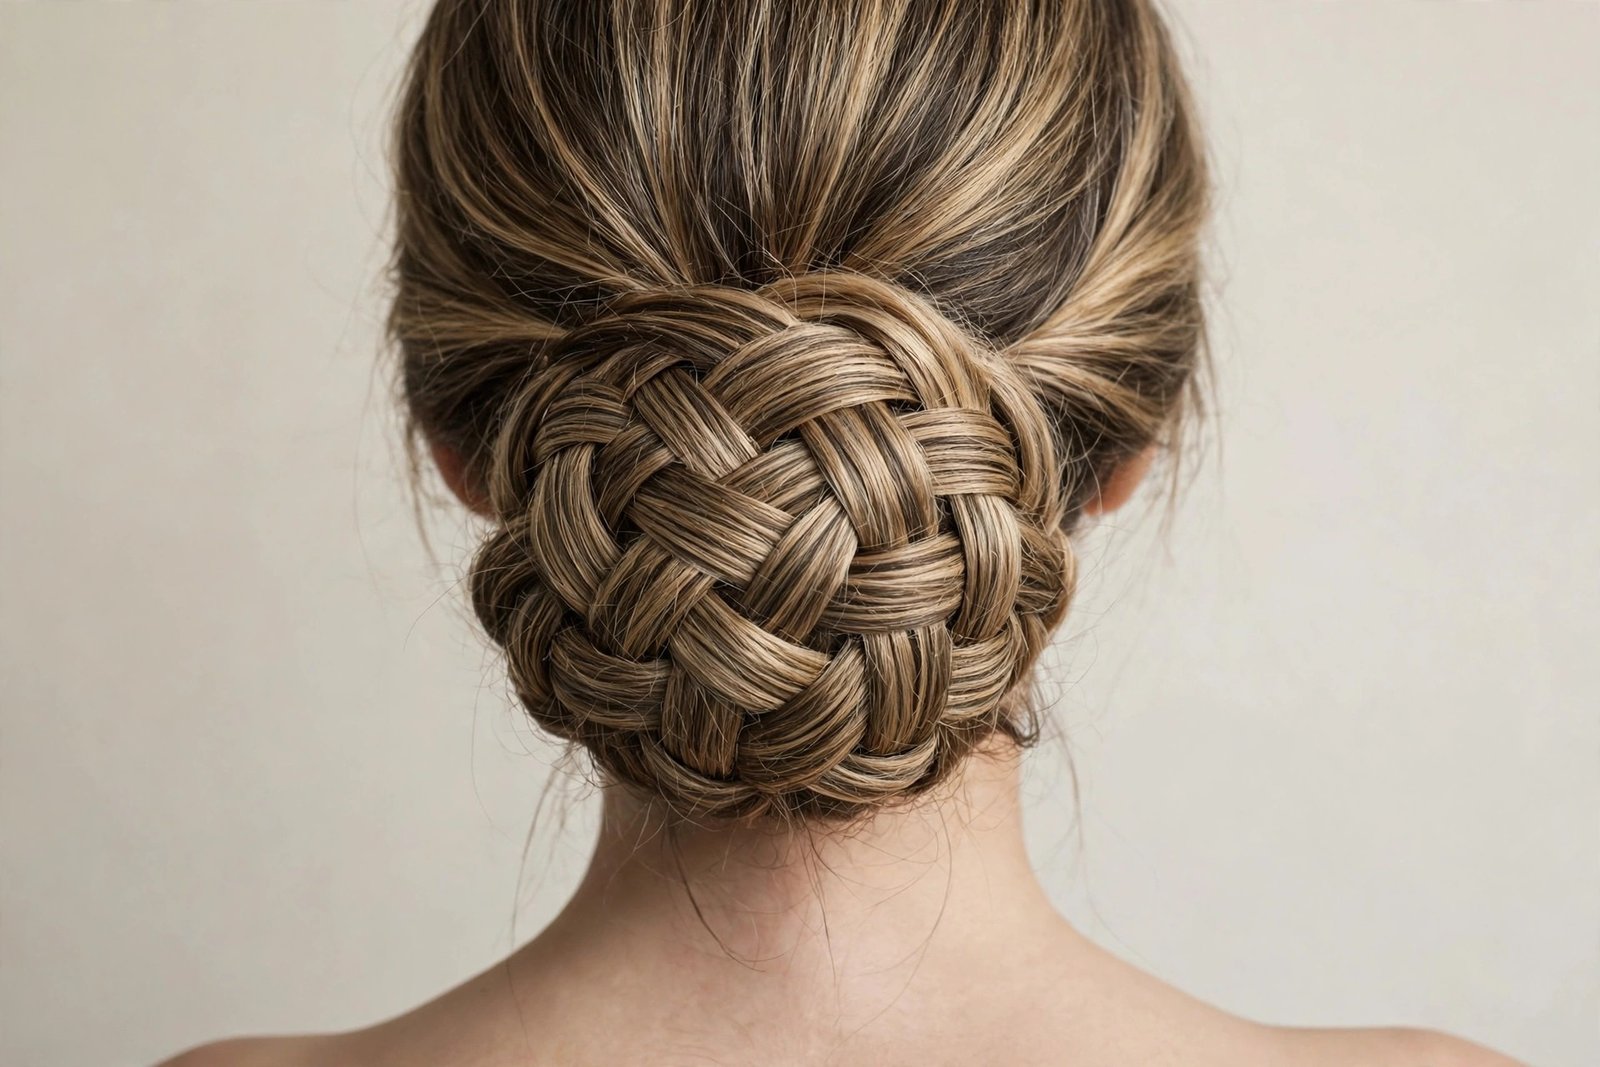
The woven basket chignon looks like it was made by someone with infinite patience and the hands of a artisan — interlaced sections of hair creating a genuine basketweave pattern across the bun. It’s mesmerizing up close, it photographs like a textile, and it’s the style that makes other women stare at the back of your head trying to figure out how it works. The secret? It’s just a series of simple weaves, repeated. Impressive doesn’t have to mean complicated.
The basketweave technique: divide your ponytail into four to six sections. Take the outer left section and weave it over-under-over across the other sections, pinning as you go; then take the next section and weave it under-over-under. Continue, alternating the pattern, building a woven panel. Coil the woven panel into your chignon form and pin it — the weave holds itself together surprisingly well once pinned. The key is keeping sections even and the weaving snug but not tight; too tight and it looks rigid, too loose and it falls apart. A texturizing spray before weaving gives the sections grip. Finish with flexible-hold spray — the weave needs to breathe a little to look soft.
Long hair shows the weave best — you need length for the pattern to develop — and it’s a showstopper for weddings, cultural celebrations, and artisan-loving souls. It flatters all face shapes since the base is a standard low chignon. The honest downside: it’s time-consuming (budget 30 minutes until practiced), and keeping the weave even while working at the back of your own head is genuinely tricky — two mirrors are essential. It’s also not a style to rush; this one rewards patience. Variations: weave in a thin ribbon for a romantic touch, or do a half-weave with smooth sections for contrast.
25. The Rose Bud Chignon
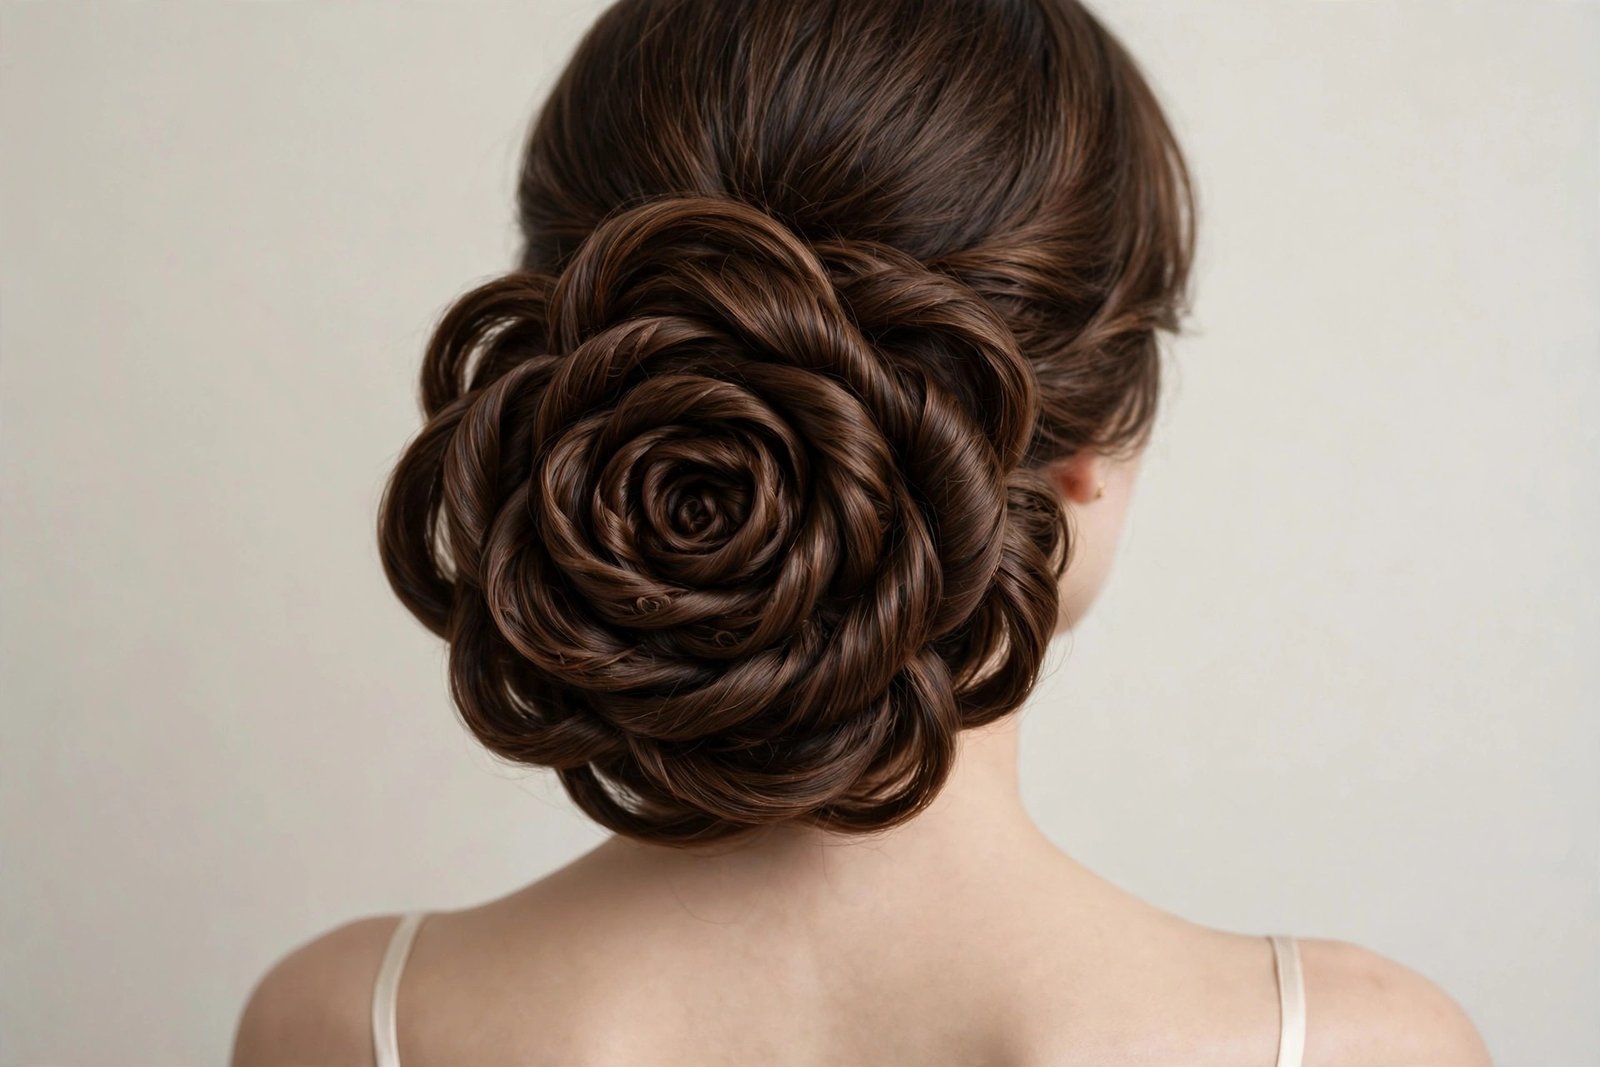
The rose bud chignon is exactly what it sounds like: your hair, shaped into a blooming rose. Sections are rolled and arranged in concentric circles like petals, creating a floral form that’s almost too pretty to be real hair. It’s whimsical, romantic, and utterly unforgettable — the kind of style people remember years later. “Remember her hair? It looked like a rose.” Yes. Yes, they will remember.
The petal technique: divide your low ponytail into five to seven sections. Starting with the center section, roll it into a tight bud and pin it — this is the heart of the rose. Take each remaining section, roll it loosely, and arrange it around the center bud like petals, pinning each one so they overlap slightly. The outer petals should be looser and more open than the center. Gently pull at the edges of each petal to soften them — a rose isn’t rigid. Work symmetrically outward, and keep stepping back to check the flower shape. A touch of shine serum on the petals gives them that velvety rose-petal finish. Set with flexible-hold spray.
Brides, this is your fairytale — garden weddings, spring ceremonies, romantic souls. It suits oval and heart-shaped faces with its soft roundness, and medium to long hair gives the best petals. The honest downside: it’s a novelty style — gorgeous, but it reads as whimsical, so it’s not for conservative formal events — and the petals can loosen over a long day, so pin well and carry spares. It’s also one of the more time-consuming styles here. Variations: a half-rose with smooth sections, or tiny pearl centers in each “petal” gap for bridal.
26. The Twisted Crown Chignon
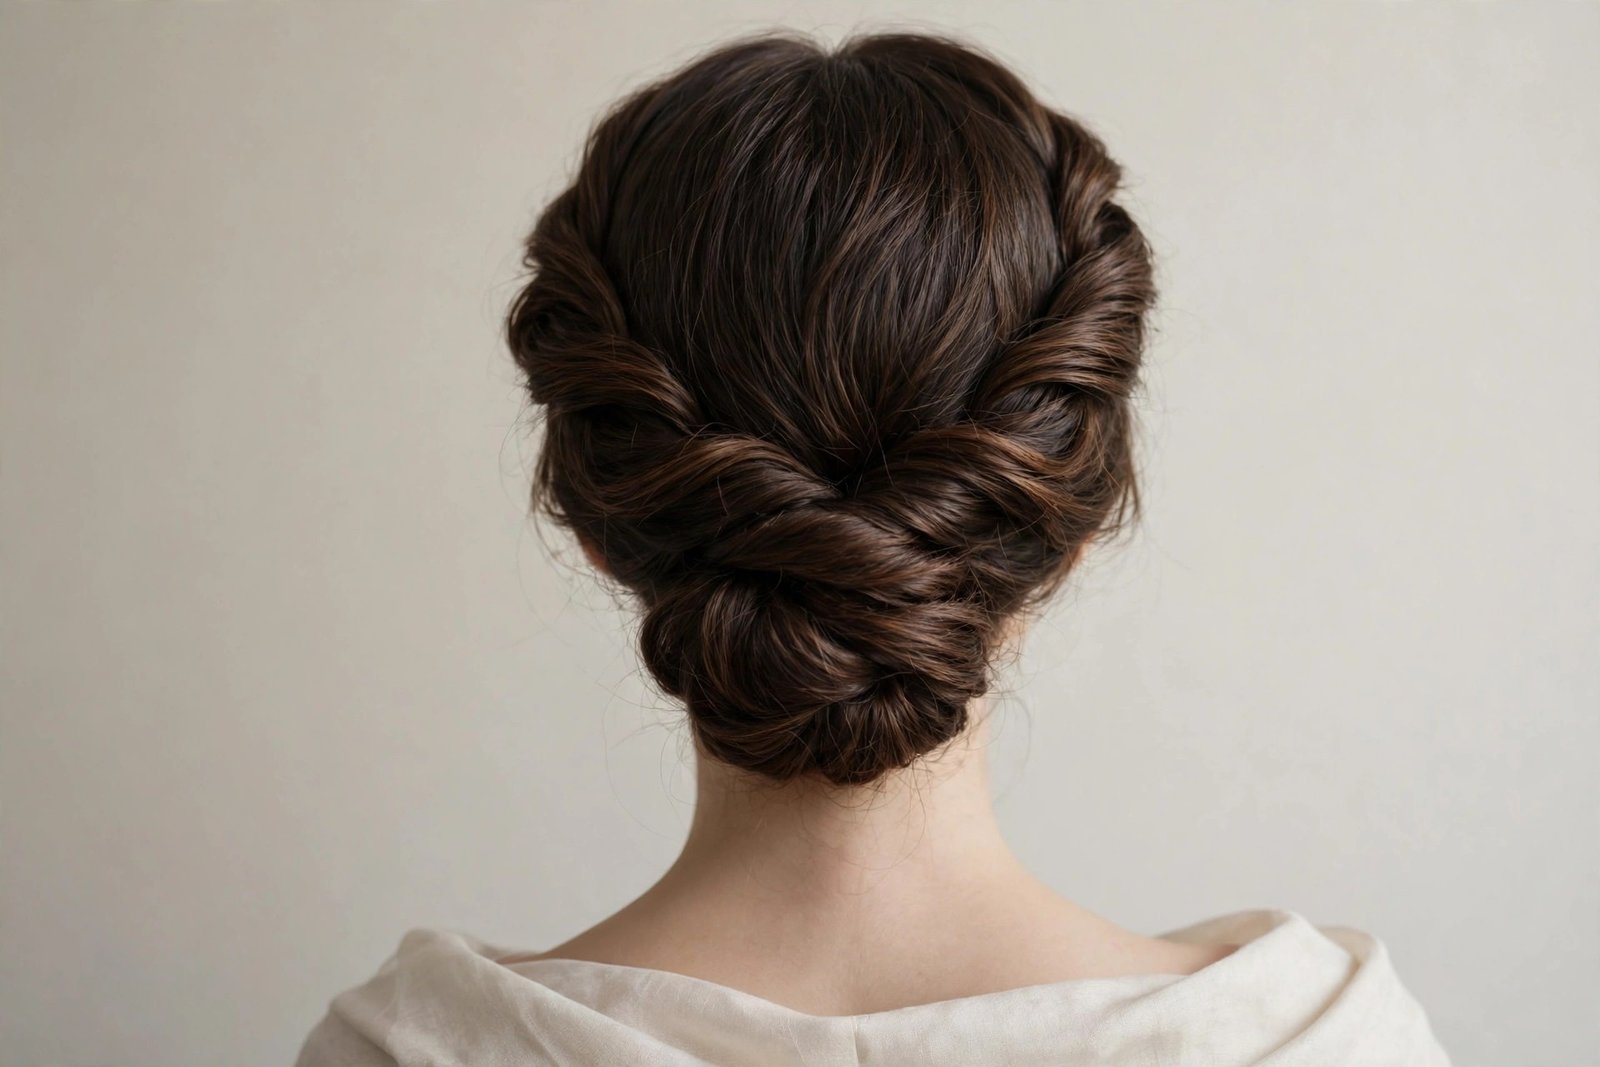
The twisted crown chignon frames your head like royalty. Two twisted sections start at the temples, sweep back along the head like a crown, and resolve into a low chignon at the nape — giving you the regal structure of a crown braid with the softness of twists. It’s romantic, it’s regal, and it’s significantly easier than a crown braid, which is why I’m including it: all of the majesty, half of the effort. This is the style for women who want to feel like the main character.
Part your hair in the middle, and take a two-inch section from each temple. Twist each section away from the face — adding hair as you go, like a twisted version of a French braid — working back toward the nape. Secure the two twists together at the nape with an elastic, then coil all the remaining hair (including the twist tails) into your chignon. The twists should lie flat against the head like a headband, framing the face beautifully. Pancake the twists gently for fullness — flat, skinny twists look severe; soft, full twists look royal. Pin everything, smooth the top, and finish with spray. The symmetry of the two twists is the whole aesthetic, so take time to make them match.
Round and heart-shaped faces love the crown framing — it adds structure around the face that’s incredibly flattering. It’s perfect for weddings (brides and bridesmaids), proms, and romantic evenings. Medium to long hair works best; the twists need some length. The honest downside: matching the two twists takes practice — lopsided twists are noticeable — and the style sits best on freshly styled hair with some texture for grip. Very slippery hair will need texturizing spray. Variations: a single twisted crown swept to one side for asymmetry, or small flowers tucked into the twists for a garden wedding.
27. The Half-Up Chignon
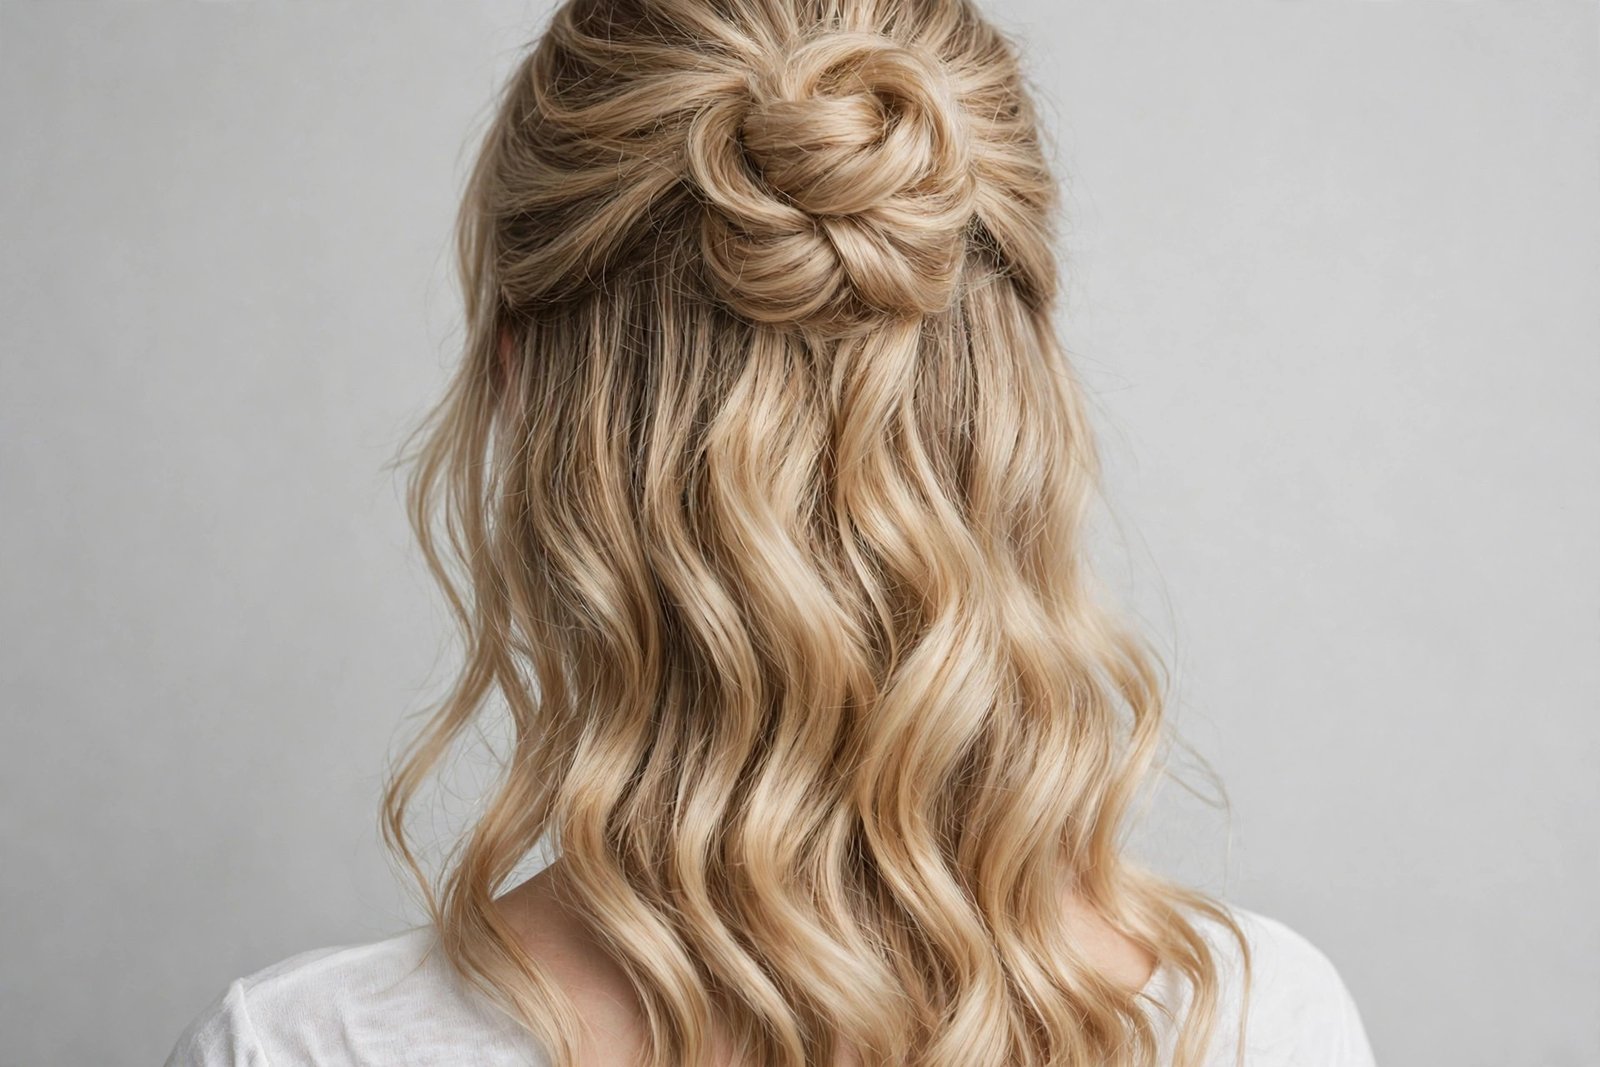
Can’t decide between an updo and wearing your hair down? Don’t. The half-up chignon gives you both: the top half swept into a soft chignon at the crown, the bottom half flowing free. It’s the best of both worlds — the elegance and face-framing of an updo with the length and movement of down hair — and it’s one of the most wearable styles in this guide for everyday life. Our half-up half-down guide covers the broader family, but the chignon version deserves its own spotlight for how polished it looks.
Section off the top half of your hair — from temple to temple, back to the crown — and secure it into a ponytail at the crown. Twist and coil it into a small, soft chignon, pinning loosely for that relaxed feel. The bottom half stays down: style it as you like — loose waves are the classic pairing, sleek straight is more modern. The key is the blend: the chignon shouldn’t look pasted on. Backcomb the crown slightly before gathering for a smooth transition, and let a few pieces fall naturally around the chignon’s base. Finish the chignon with light spray, and style the lengths to match the mood — beachy waves for casual, polished waves for dressy.
This is the everyday chignon — brunches, dates, work events, anywhere you want polish without full formality. It flatters round faces (crown height!) and works on medium to long hair; the lengths need to be long enough to look intentional. The honest downside: it’s the least formal style here — don’t wear it to a black-tie gala — and the chignon portion can look small if your top section is thin (tease for fullness). In wind, the down hair will fly while the chignon stays put, which is either charming or annoying depending on your mood. Variations: a braided section leading into the chignon, or a messy textured chignon for a boho feel.
28. The Floral Embellished Chignon
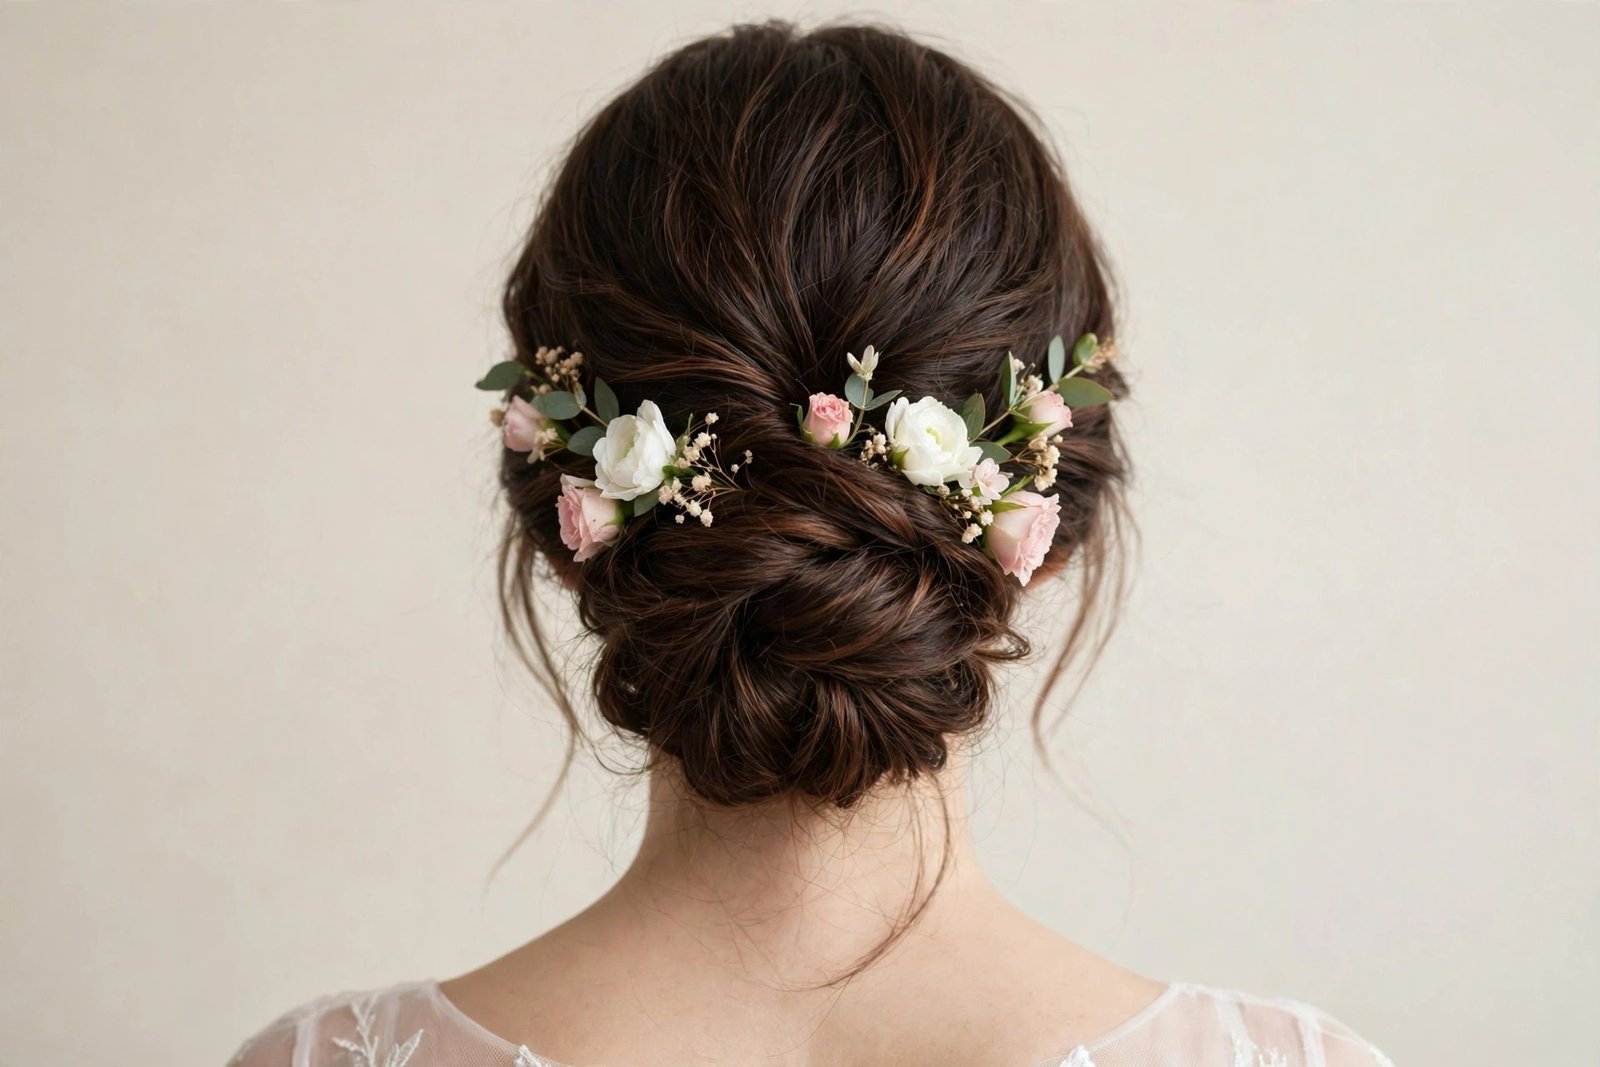
Flowers in hair will never not be beautiful, and the floral embellished chignon is the ultimate expression: a soft low chignon adorned with fresh blooms tucked into the coil. It’s the garden wedding look, the spring gala look, the “I’m the romantic lead in my own life” look. There’s a reason florists and hairstylists collaborate on this — the combination of structured hair and organic flowers is pure poetry, and in 2026, with the return of romantic aesthetics, it’s everywhere.
Build a soft, slightly textured low chignon first — the flowers need a soft, touchable base, not a severe one. Then the floristry: choose small, hardy blooms — baby’s breath, spray roses, waxflower, small ranunculus — and prep them with short stems wrapped in floral tape. Tuck them into the chignon asymmetrically, clustering two or three together and scattering singles, working with the coil’s natural gaps. The placement should look grown, not glued — imagine where flowers would naturally catch if you walked through a garden. Mist the flowers lightly with water before the event, and finish the hair with flexible-hold spray (keep spray off the petals — it wilts them). Coordinate with your florist or bouquet for a cohesive look.
Brides, bridesmaids, garden party guests — this is your style. It suits all face shapes and all hair textures; the flowers are the star, the chignon is the stage. The honest downside: fresh flowers wilt — this is a ceremony-and-photos style, not an all-night style, unless you use high-quality silk blooms — and they add weight, so pin the chignon extra securely. Some venues have rules about fresh flowers (allergic guests, historic buildings), so check. Coordinate colors with your outfit; clashing florals are the one way to get this wrong. Variations: a single dramatic bloom (orchid, garden rose) for minimalism, or dried flowers for a boho autumn wedding.
29. The Sleek Wet-Look Chignon
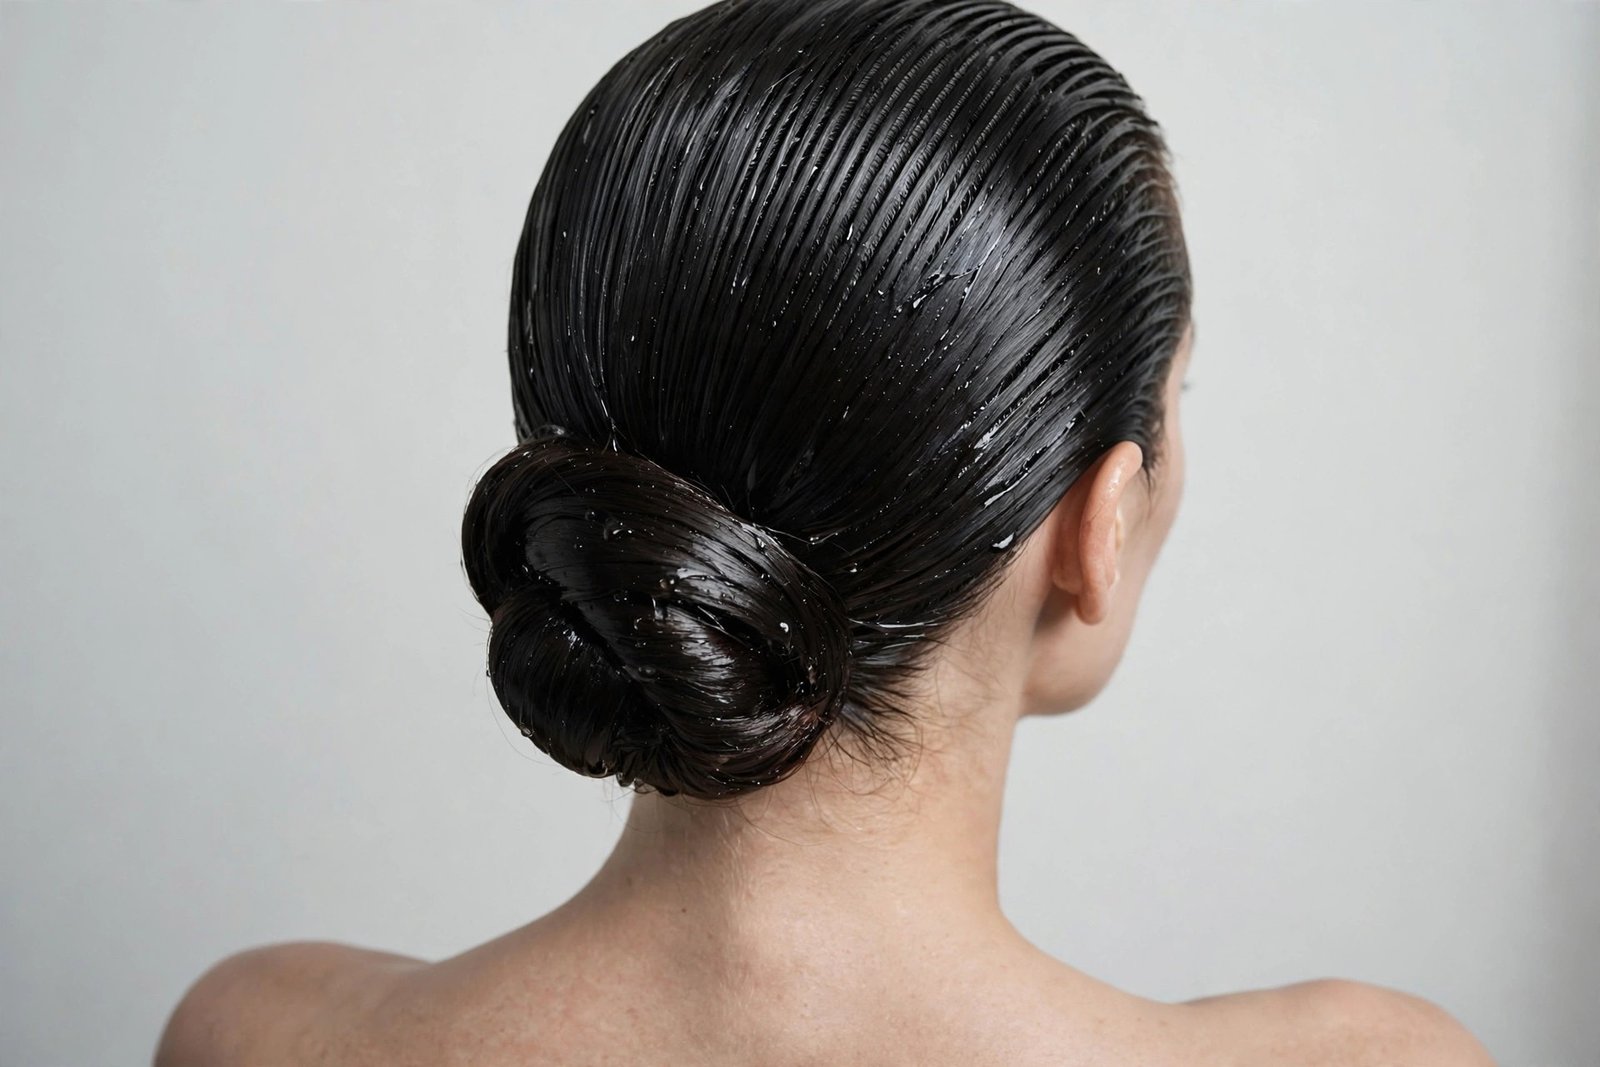
Editorial. High-fashion. Slightly dangerous. The sleek wet-look chignon takes the polished low chignon and finishes it with that glossy, just-out-of-the-water sheen that’s been all over runways and fashion editorials. It’s not for the faint of heart — this is a statement style that says you read fashion magazines and mean it — but when it’s done right, it’s absolutely magnetic. The wet finish against the structured chignon creates a tension between undone and precise that’s pure 2026.
The wet look is a product application, not a hair texture — your hair should be clean and smooth underneath. Work a generous amount of strong-hold gel through damp hair from roots to the chignon, combing it smooth and sleek. Pull into a low ponytail, keeping everything slicked, then twist and coil into a tight, neat chignon. The key: the top and sides must look wet and glossy, with visible comb lines — that’s the aesthetic. Use more gel than feels reasonable, then set with a high-shine spray. The chignon itself should be compact and smooth; any texture fights the wet look’s sleekness. Check in different lights — wet-look products can photograph either glossy or greasy, and you want glossy.
Oval and heart-shaped faces with strong features carry this best — the severity needs confidence. It’s for fashion events, editorial shoots, gallery openings, and nights where the dress code is “fashion.” Any chignon-capable length works; the products do the talking. The honest downside: it’s the most product-heavy, highest-commitment style here — you’ll use half a bottle of gel, it feels heavy, and washing it out takes two shampoos. It’s also polarizing: people either love it or think your hair is actually wet. Know your audience. And never, ever do this in rain — it just becomes actual wet hair. Variations: a wet-look top with a textured chignon for contrast, or a deep side part for extra drama.
30. The Soft Romantic Chignon
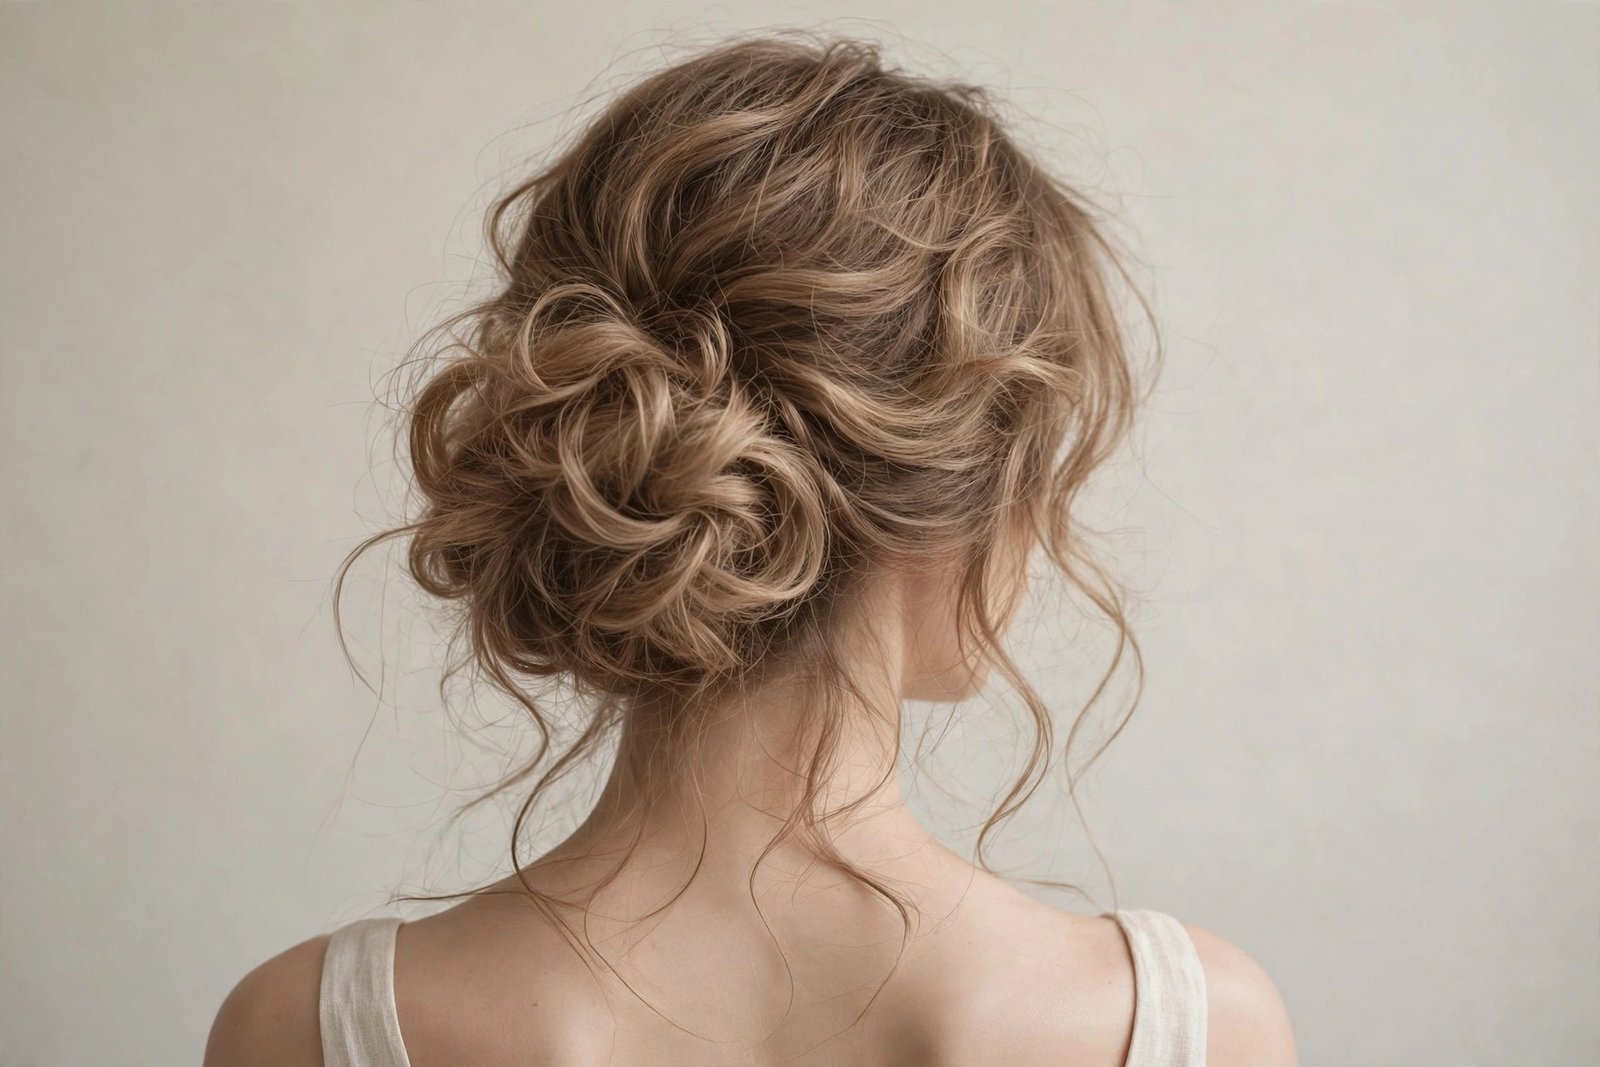
If the chignon had a love language, it would be this. The soft romantic chignon is all gentle waves, airy texture, tendrils everywhere, and a general feeling of “I might be in a period drama.” It’s the least structured style in this guide — barely pinned, beautifully imperfect, the chignon equivalent of a sigh. And it’s the most requested style for romantic occasions for a reason: it makes everyone look like the best, softest version of themselves. This is the chignon that launched a thousand wedding Pinterest boards.
Romance is built on texture, so start with soft waves or curls throughout — a large-barrel iron, loose and brushed out, is ideal. Gather everything very loosely at the nape — and I mean loosely, barely any tension — and pin sections up into a soft, cloud-like bun, letting pieces fall where they want. Pull tendrils generously at the temples and nape. Pancake and pull at the coil for airiness. The philosophy: every time you’re tempted to smooth something, don’t. A light, flexible-hold spray is all the hold this style wants — anything stronger kills the softness. The finished style should move when you move; that’s the romance.
All face shapes — softness is universal — and it’s the definitive choice for romantic weddings, Valentine’s dinners, anniversary evenings, and proposals (hint, hint). Wavy and curly hair achieves this fastest; straight hair needs the curling iron prep. The honest downside: it’s the least secure style in this guide — it’s barely holding on by design — so it’s not for windy venues or active evenings without accepting some beautiful disarray. And it has a short prime: it looks best in the first few hours, then settles into something still pretty but less intentional. Plan photos early. Variations: tiny braids woven through for texture, or pearl pins for bridal romance.
31. The Braided Nautilus Chignon
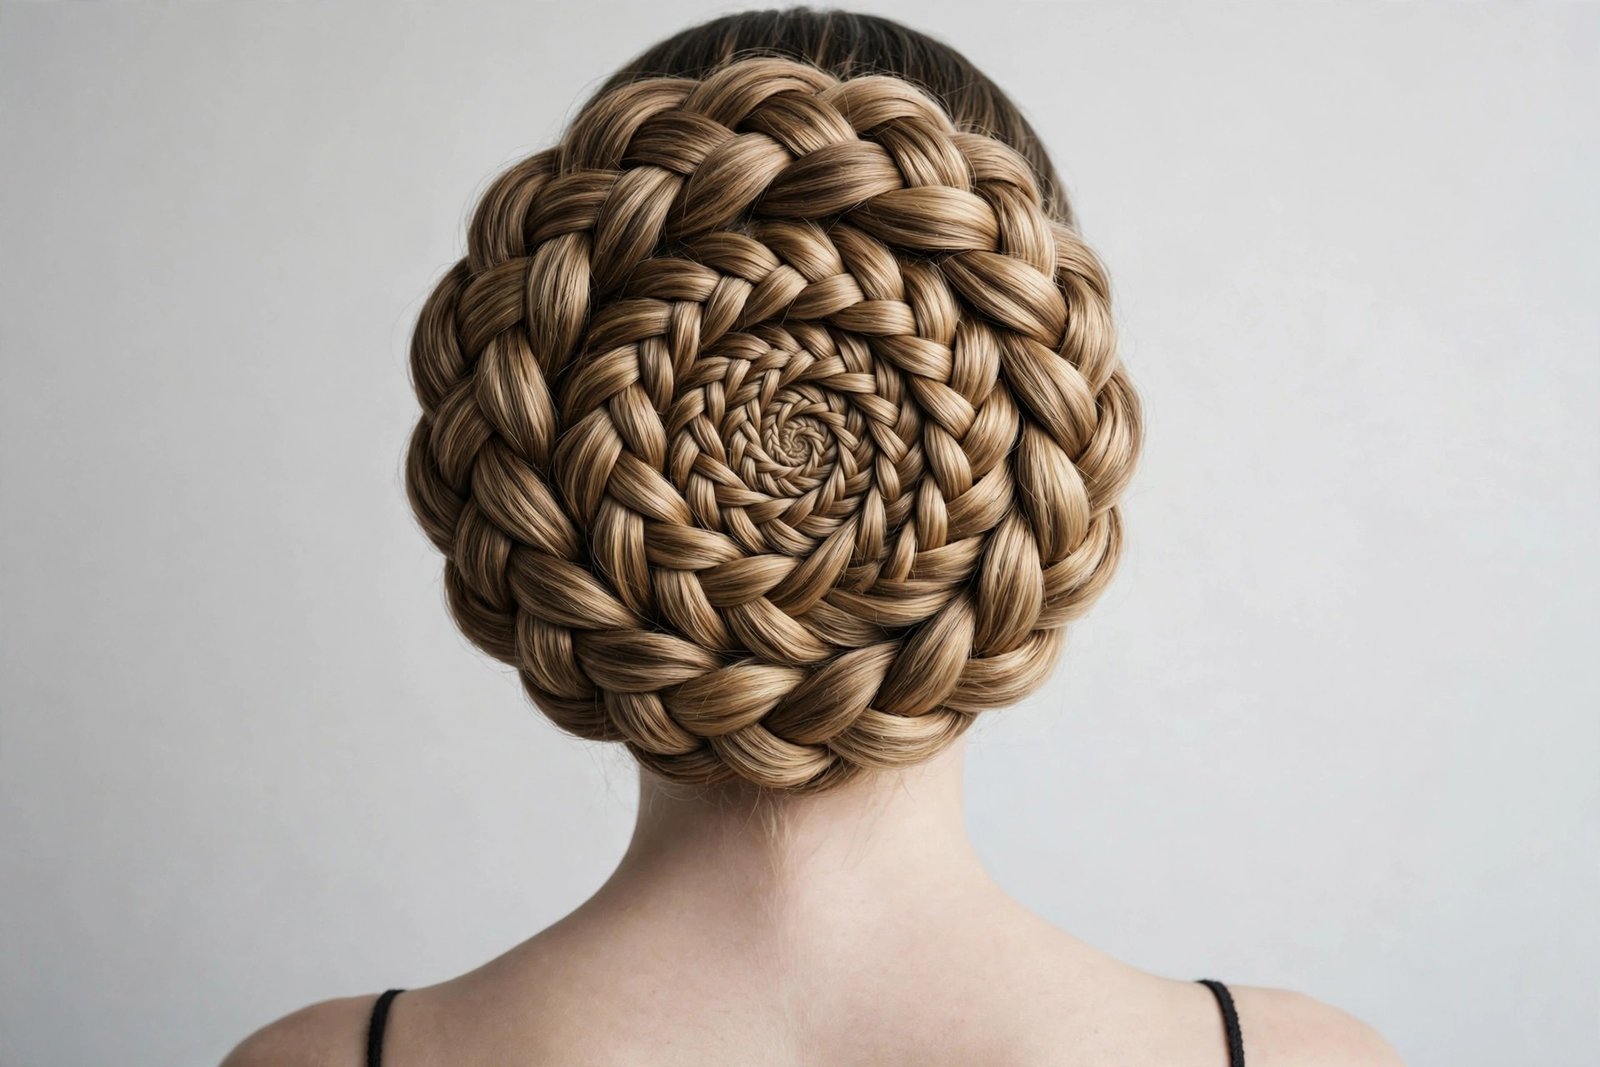
The nautilus chignon is named for the sea creature’s perfect spiral, and one look tells you why: the hair is braided and then coiled in an expanding spiral, creating a shell-like form that’s geometric, hypnotic, and utterly unique. It’s the most distinctive silhouette in this guide — from the back, it’s a genuine spiral, and people will stare. In the best way. This is for the woman who wants her updo to be a conversation piece.
Braid your low ponytail — a regular three-strand braid, pancaked for fullness — then coil it in a flat spiral against the head, starting from the center and working outward, pinning each revolution. The spiral should lie relatively flat, like a shell, rather than stacking upward like a regular bun. Tuck the end under the outer revolution and pin invisibly. The evenness of the spiral is everything: keep the braid’s thickness consistent, and pin each loop before moving to the next. A texturizing spray on the braid before coiling gives the spiral definition and grip. Finish with medium-hold spray, and check the spiral from directly behind — that’s the money angle.
Oval faces show off the spiral best, and it’s a stunner for art events, cultural celebrations, and fashion-forward weddings. Long hair makes the most dramatic spiral — you need length for multiple revolutions — though medium hair makes a beautiful single-spiral version. The honest downside: the flat spiral construction is unusual and takes practice to get even; lopsided spirals look accidental rather than artistic. It’s also a back-view style — from the front it reads as a simple low bun, so it’s best for events where you’ll be seen from all angles. Variations: a fishtail braid for a more textured spiral, or a double spiral with two braids for symmetry.
32. The Modern Minimalist Chignon
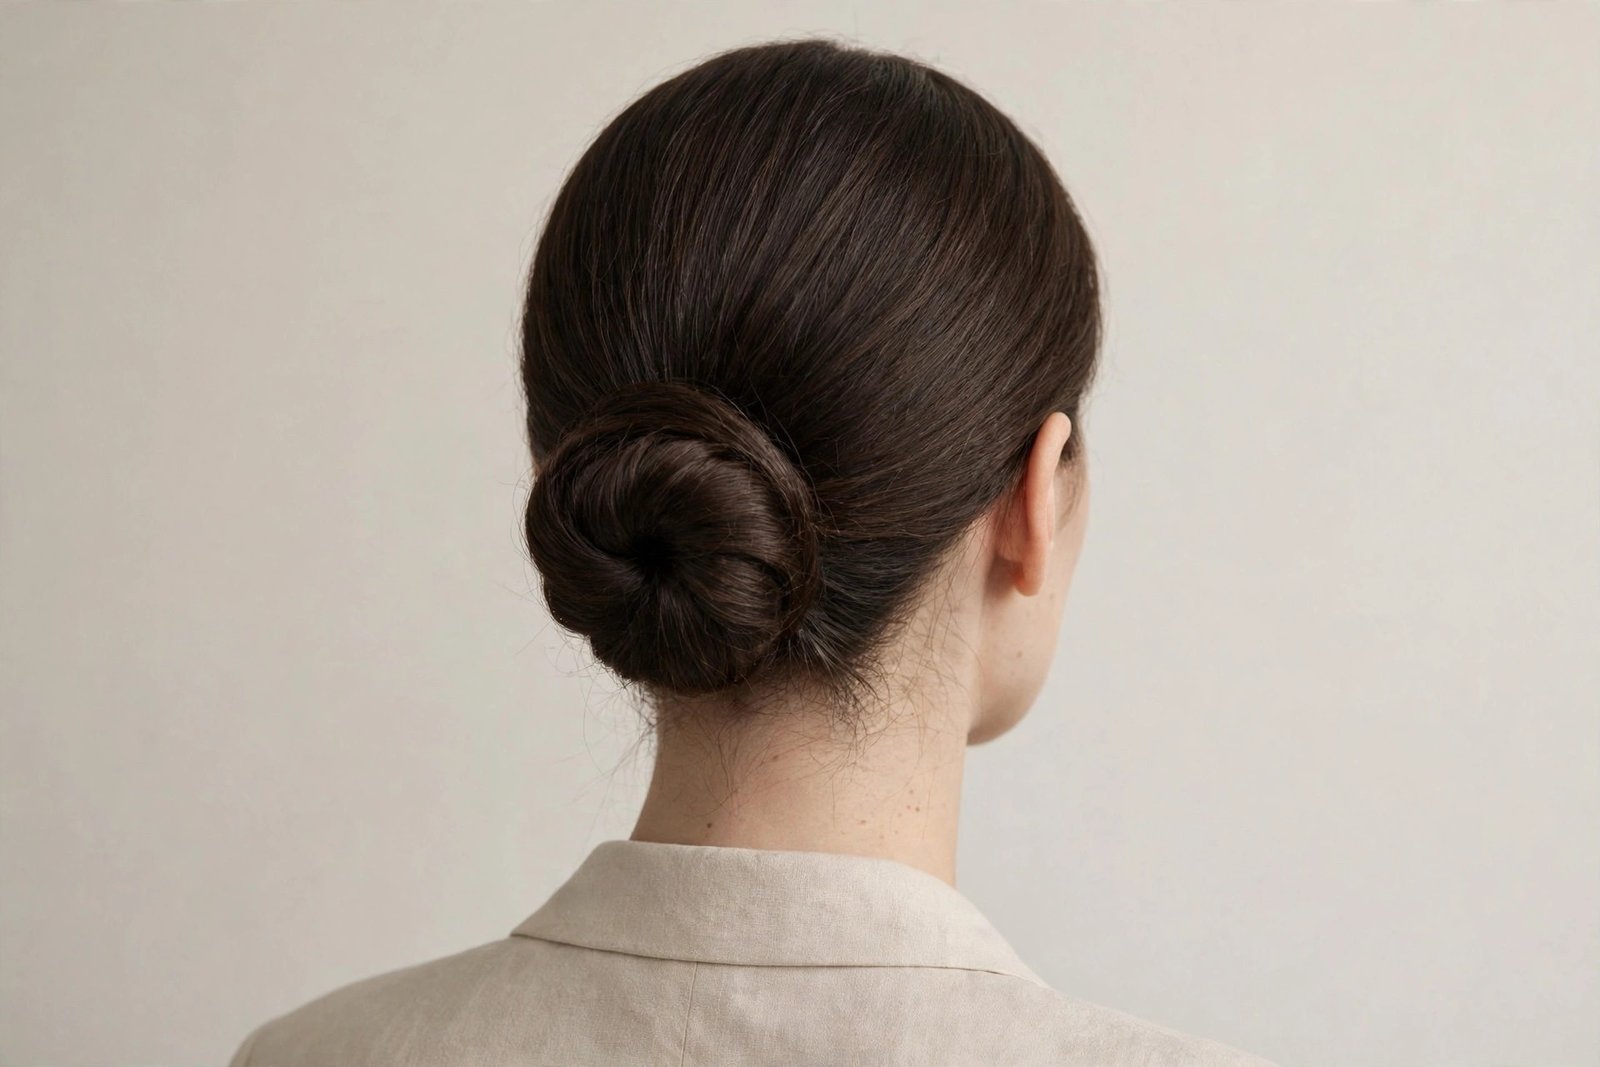
We end where 2026 began: with less. The modern minimalist chignon strips the style to its essence — a clean, simple low coil, no ornament, no tendrils, no fuss — executed perfectly. It’s the quiet-luxury chignon, the “my hair is just like this” chignon, and it requires the most confidence of any style here because there’s nowhere to hide. Every detail matters when there are no details. Done right, it’s the chicest thing in this guide. Done carelessly, it’s just a bun — so don’t be careless.
Perfection through simplicity: start with smooth, healthy-looking hair — a shine serum is essential because the minimalism shows off hair health. Pull into a low ponytail with a clean part (center or side, your choice, but make it deliberate). Twist and coil into a neat, compact chignon — not too big, not too small, just right. Pin invisibly, tuck every end, smooth every flyaway with a spoolie and pomade. The finish should look inevitable, like the hair simply belongs this way. A light shine spray — not heavy hold — because the style should look touchable, not set. Check from every angle; minimalism has no hiding places.
Everyone, everywhere, every day — this is the most versatile style here. Work, dinners, events, weddings as a guest: the minimalist chignon never overdresses and never underdresses. It flatters all face shapes and works on medium to long hair of any texture. The honest downside: it demands healthy, well-maintained hair — damage and split ends have nowhere to hide — and it can read as plain if your outfit is also minimal (balance it with one strong accessory, like earrings). It’s also the style most likely to be mistaken for “just a bun” by people who don’t know hair — but you’ll know. Variations: a single gold pin for the tiniest accent, or a sleek wrapped base for extra refinement.
Chignon Hairstyles Styling Routine and Maintenance Guide
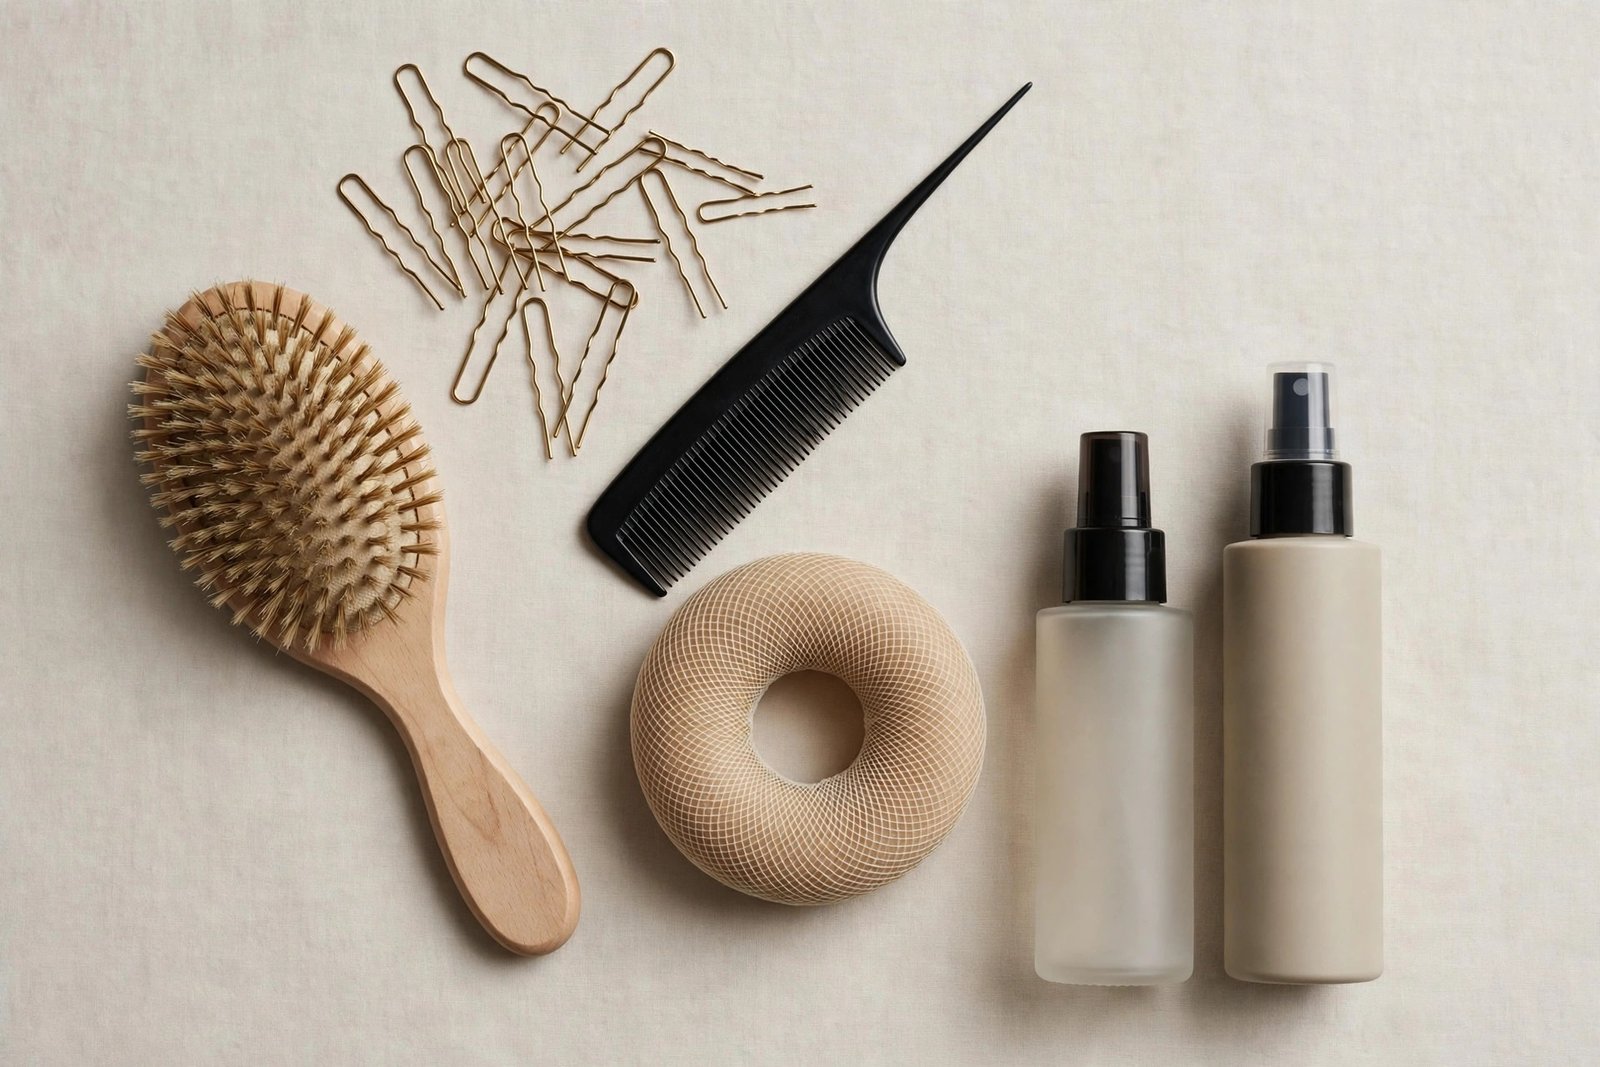
A beautiful chignon is 40% technique and 60% preparation. The women whose updos last from ceremony to last dance aren’t lucky — they’re prepped. This section is your complete routine: what to do before, during, and after, plus the toolkit that makes everything easier. Treat it as your chignon hairstyles bible.
The Night-Before and Morning-Of Prep
Here’s the truth stylists live by: the best chignon hair is not freshly washed hair. Day-old hair — or even two-day hair — has natural oils and texture that give pins something to grip. Freshly washed hair is slippery, flyaway-prone, and fights every pin you put in it. So plan ahead: wash your hair the night before your event, not the morning of. If your hair is very fine or slippery, add a texturizing spray or a light dry shampoo at the roots on the morning of — you’re manufacturing the grip that second-day hair has naturally.
If you must wash the morning of, blow-dry with a volumizing mousse and avoid heavy conditioners or smoothing oils at the roots — save the serums for the lengths only. Rough-dry for texture rather than sleek-blow-drying; you want some natural body. And whatever you do, don’t flat-iron everything poker straight before a textured chignon — you’ll spend the next hour fighting the sleekness you just created. Match your prep to your style: sleek chignons want smooth prep, textured chignons want gritty prep. One more night-before move: sleep on a silk pillowcase. It keeps whatever texture you have smooth without flattening it, and your morning hair will thank you.
Your Chignon Toolkit: What You Actually Need
You don’t need a professional kit, but you do need the right basics — and most chignon failures I see come down to wrong tools, not wrong technique. The non-negotiables: U-shaped hair pins (not bobby pins) in a color matching your hair — U-pins anchor by weaving through the style and catching scalp hair, while bobby pins just clamp and slide. Get the long ones; short pins are useless in a chignon. A strong elastic that matches your hair color for the base ponytail. A rattail comb for parts and smoothing. A soft bristle brush or a clean mascara spoolie for flyaways.
The products: a texturizing spray (your grip manufacturer), a flexible-hold hairspray for soft styles, a firm-hold hairspray for structured styles, a shine serum for the lengths, and a small pot of pomade or wax for flyaways and the hairline. Nice-to-haves: a mesh donut in your hair color (the volume cheat code), a few decorative pins or combs for dressing up, and travel sizes of your spray and pomade for your bag. That’s it. You don’t need seventeen products — you need the right six, used in the right order. If heatless styling interests you for everyday updos, a good heatless updos guide pairs beautifully with these techniques.
Pinning Like a Professional
Pinning is the skill that separates a chignon that lasts from one that slowly disintegrates, and it’s simpler than it looks once you know the mechanics. The golden rule: pins should go in against the direction of the hair’s pull. If your coil twists clockwise, your pins go in counterclockwise — this creates opposing tension that locks the style. Push the U-pin into the coil, catch some scalp hair, and weave it — don’t just stab it in and hope. Each pin should feel like it’s doing something; a pin that slides in with no resistance isn’t holding anything.
Use more pins than you think you need — a secure chignon typically needs 8 to 15 U-pins, and there’s no prize for minimalism in pinning. Distribute them evenly around the chignon, not clustered in one spot. Crisscross two pins in an X over heavy sections for extra security. And here’s the pro check: once you think you’re done, gently shake your head. Anything that moves needs another pin. Do the “lean test” — tilt your head forward, back, and side to side. A well-pinned chignon doesn’t shift. If it does, you haven’t failed; you just need two more pins. Pinning is invisible engineering — nobody sees it, everybody benefits from it.
Making It Last: All-Day and All-Night Hold
The 10-hour chignon is built in layers. Layer one is prep (texture and grip, covered above). Layer two is construction (solid base ponytail, opposing-tension pinning). Layer three is product strategy: texturizing spray before styling, working spray during, and finishing spray after — three light layers beat one heavy shellac every time, because heavy single coats go crunchy and then crack. For outdoor events, add a humidity-resistant spray as your final layer; it’s the difference between surviving and surrendering.
During the event, the rule is hands off — every touch loosens a chignon slightly, and the cumulative effect of fidgeting is real. If you feel something slipping, don’t yank it; find a mirror, identify the loose section, and add a pin — that’s why you carry spares. For dancing, do a pre-dance check: shake test, pin check, spray refresh. For very long days (wedding morning to midnight), a midday spray refresh on the outer layer extends the style’s life significantly. And the nuclear option for critical events: a light mist of strong-hold spray on the finished style, left untouched for five minutes to fully set before you leave the house. Patience at the start buys freedom all day.
Taking It Down and Aftercare
How you take down a chignon matters as much as how you put it up — rip pins out carelessly and you’ll break hair. Remove pins one at a time, in the reverse order you put them in, sliding them out along the direction they went in. Never pull a pin straight out against resistance; wiggle it free. Count your pins as you remove them — every pin that went in should come out, because a forgotten U-pin discovered with a brush is a painful experience. Once everything’s out, gently shake your hair loose and finger-comb; don’t brush aggressively through pinned-up hair.
After a big-style day, your hair deserves recovery. A thorough but gentle wash — two shampoos if you used heavy product — followed by a deep conditioning mask, because strong-hold products and backcombing are drying. If you teased, work the conditioner through before you shampoo (the slip helps release the teasing without breakage). A weekly hair mask is non-negotiable if you wear chignons regularly; the science of hair care is clear that repeated styling stress needs active repair. Sleep on silk, trim regularly, and give your hairline rest days between tight styles — traction damage is real and preventable. Your future hair will thank your present self.
Frequently Asked Questions
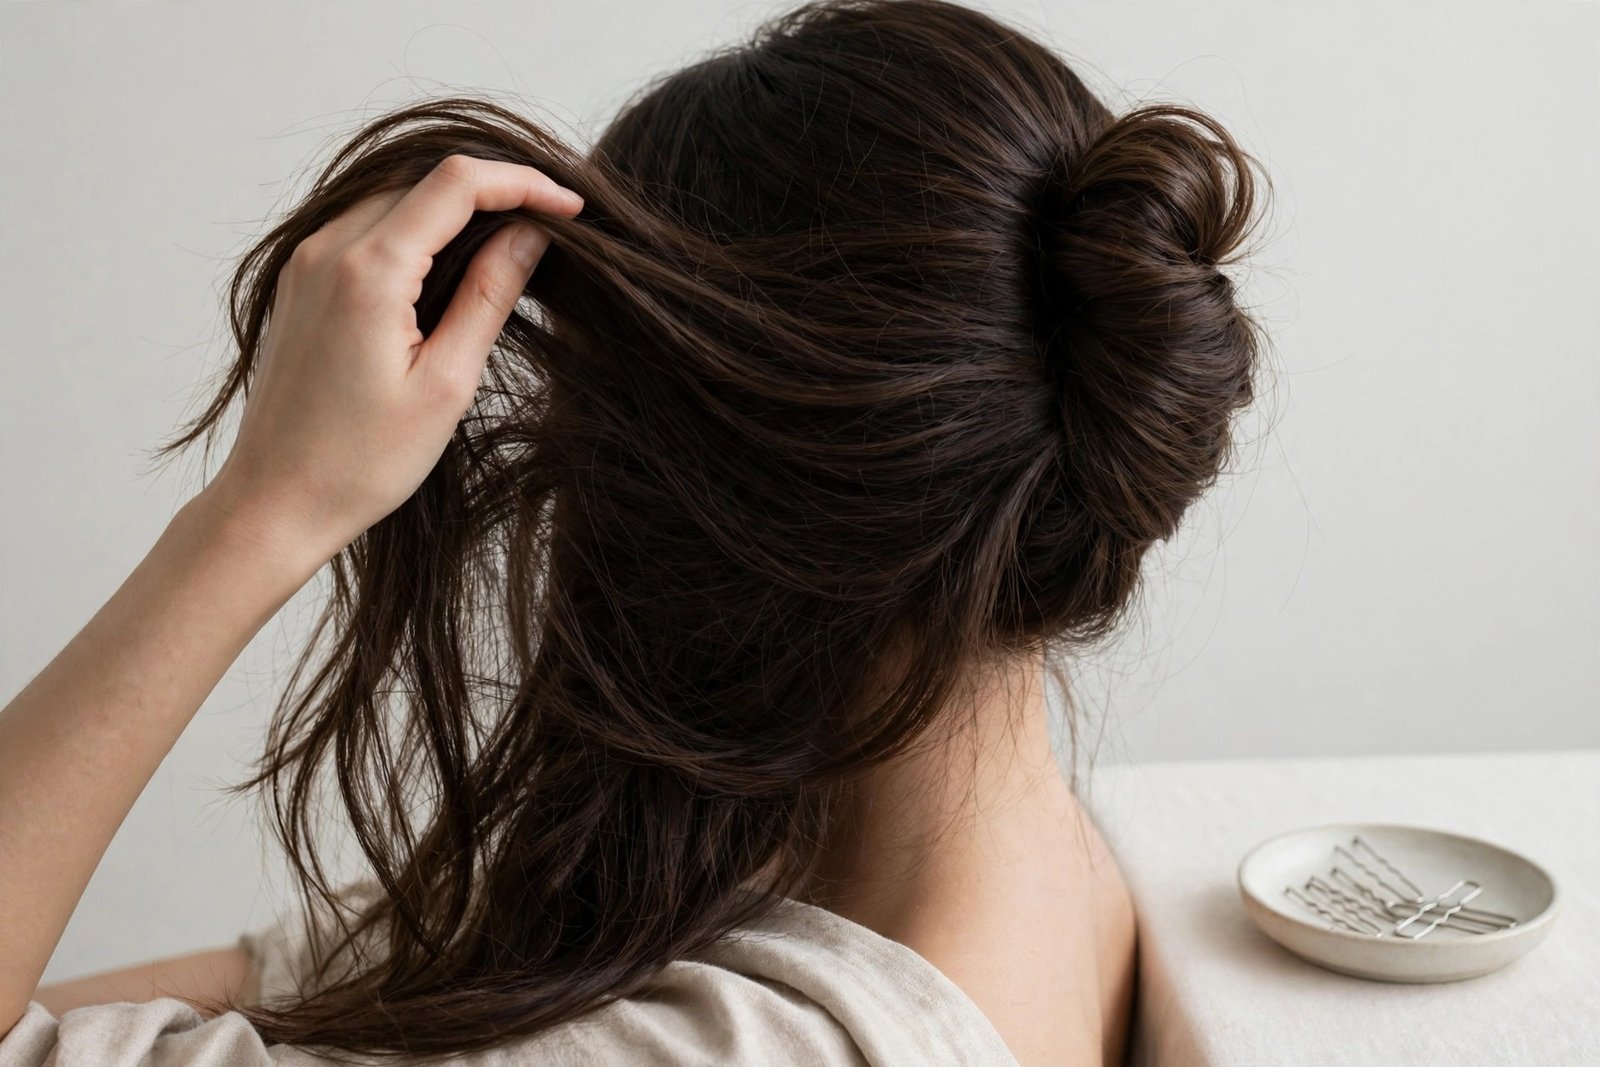
Everything you’re still wondering about chignon hairstyles, answered honestly — including the questions stylists hear every single wedding season.
What is the difference between a chignon and a messy bun?
A chignon is a structured, polished updo where the hair is twisted, looped or rolled and pinned at the nape or crown, with the emphasis on a smooth, finished silhouette. A messy bun is a casual, deliberately undone topknot usually thrown up quickly with loose pieces falling everywhere. The 2026 chignon revival embraces a ‘polished-to-lived-in’ middle ground — it looks effortless but is carefully constructed to hold its shape for hours, unlike a true messy bun that loosens within the hour.
How do I make my chignon last all day?
Three things: prep, pins, and product. Start with day-old hair or a texturizing spray so pins have grip; slippery freshly washed hair is the number one reason chignons collapse. Use U-shaped hair pins rather than bobby pins for real anchoring, crisscrossing them so they lock against the scalp. Finish with a medium-hold hairspray, and carry two spare pins in your bag for the evening. With proper prep, a chignon should comfortably last 10-12 hours.
Can I do a chignon on short or shoulder-length hair?
Yes — shoulder-length hair actually pins into a beautiful low chignon, and you can build the look on shorter lengths with padding tricks. A small mesh hair donut matched to your hair color, a few clip-in extensions, or a well-placed teased base gives you the volume you need. The twisted and knotted chignon variations in this guide are especially forgiving on shorter lengths because they don’t require a lot of excess length to wrap.
Is the chignon a formal hairstyle only?
Not at all, and that’s exactly why it’s back. The 2026 chignon ranges from red-carpet sculpted versions to soft, undone chignons people wear with jeans and a blazer. A messy chignon reads as daytime-effortless, a sleek low chignon reads as boardroom-polished, and a pearl-adorned chignon reads as full wedding. One technique, three completely different outfits — very few hairstyles pull that off.
What face shapes suit a chignon best?
All of them — the trick is placement. Round faces look best with a higher chignon and some volume at the crown, which lengthens the silhouette. Long faces suit a low chignon with width at the sides, keeping volume off the top. Heart-shaped faces love face-framing tendrils with a low, soft chignon. Square faces soften beautifully with a side-parted, textured chignon. The chignon is one of the most customizable updos there is.
Should I do my own chignon or get a stylist for a wedding?
For your own wedding, hire a stylist — trial included. Bridal chignons involve structural pinning, padding, and sometimes extensions that are genuinely hard to do on your own head, and you don’t want to troubleshoot hair on the morning of your wedding. For guest or bridesmaid roles, the simpler styles in this guide (the classic low chignon, the twisted chignon, the messy undone chignon) are completely doable at home with about 15 minutes and a mirror you can check the back in.
How much hair do I need for a full chignon?
Medium to long hair (armpit length or longer) gives you the most options and the fullest result. Shoulder-length hair handles most low and knotted chignons well. Below shoulder length, you’ll want a mesh donut or padding to fake the fullness, and twisted variations that gather hair in sections work better than rolled ones. Fine hair can absolutely do a chignon — it just needs texturizing product and sometimes a donut for body.
Conclusion
The chignon’s 2026 comeback isn’t nostalgia — it’s recognition. Recognition that elegance doesn’t have to mean stiffness, that a hairstyle can be both polished and lived-in, and that the most beautiful updo is the one that lets you forget about your hair and enjoy your evening. From the classic low chignon to the sculptural architectural versions, from pearl-pinned bridal dreams to messy undone romance, there’s a chignon here with your name on it.
Start with the classic low chignon — master it, and every other style in this guide becomes a variation you already half-know. Practice on a quiet evening, keep your U-pins handy, and remember the golden rule: slight imperfection is a feature, not a bug. Your turn now — pick your favorite, pin it, wear it, and let the compliments roll in. For more elegant inspiration, explore our braided bun ideas and Allure’s latest updo trend coverage. The chignon era is here, and you are so ready for it.