Half Up Half Down Hairstyles 2026: 16 Pretty Ideas for Every Occasion
Half Up Half Down Hairstyles: The One Style That Flatters Everyone
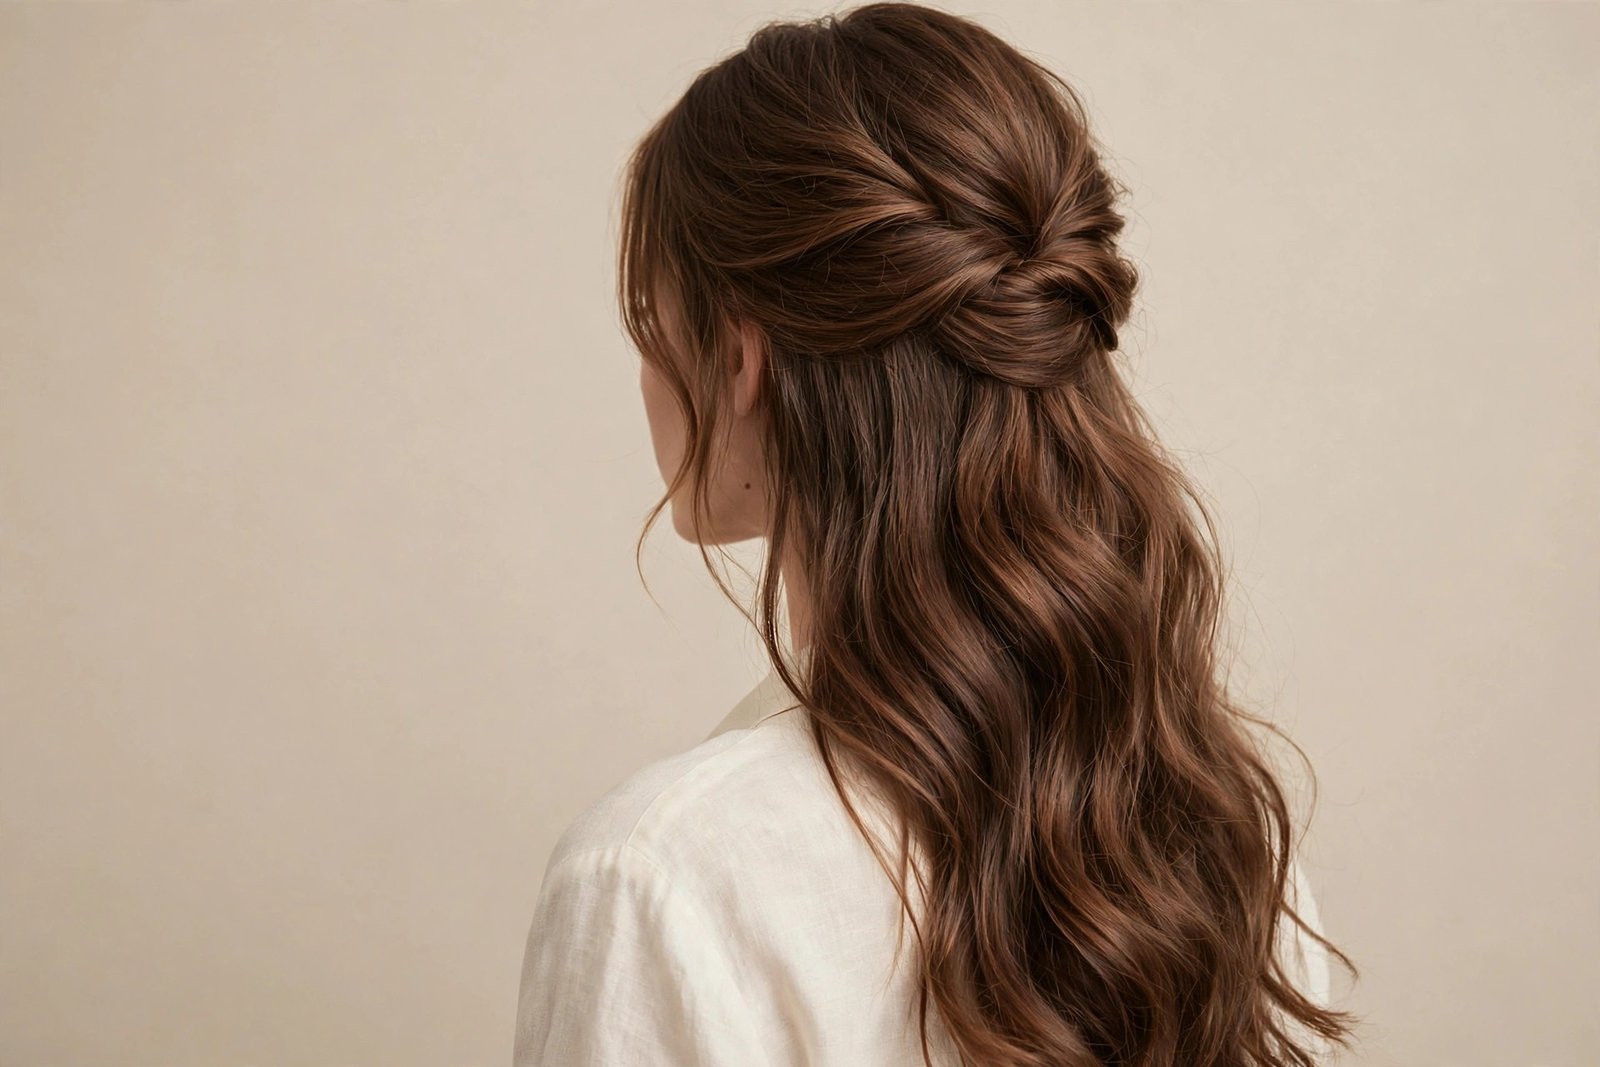
I’ll be honest with you — I’ve styled hundreds of hairstyles over the years, and half up half down hairstyles might just be the hardest-working style in the entire hair world. Think about it. You want the polish of an updo without hiding all that length you spent months growing out. You want your hair off your face for dinner, but you also want it tumbling down your back for the photos. This style refuses to choose, and honestly? That’s exactly why it works.
There’s a reason this look never really dies. Every few years it comes roaring back with a new twist — sometimes it’s the messy top knot version your favorite influencer wears to brunch, sometimes it’s the sleek red-carpet version that shows up at award season. And in 2026, half up half down hairstyles are having one of their biggest moments yet. Scroll through Pinterest or TikTok right now and you’ll see them everywhere: braided crowns, bubble ponies, claw-clip twists, romantic waves pinned just so. The style has evolved, and the new versions are prettier, easier, and more wearable than ever.
What I love most about this style — and I’m going to keep saying this throughout the article — is how forgiving it is. Bad hair day? Pull the top half up and nobody will know. Growing out bangs? Pin them into the half-up section. Second-day hair with a little too much texture? The style actually looks BETTER with lived-in hair. It’s one of those rare styles that works with your hair instead of fighting it, which is probably why women keep coming back to it decade after decade.
In this guide, I’m walking you through 16 of the prettiest half up half down ideas for 2026 — from the classic top knot that takes ninety seconds to the waterfall braid that’ll make people ask who did your hair. For every single style, I’ll tell you who it suits, how to actually do it (no vague “just style it!” nonsense), how to make it last, and the honest downsides nobody talks about. I’ve also packed in a full styling routine section and answered the questions I get asked most about this style. Grab a coffee — let’s find your version.
Table of Contents
- Half Up Half Down Hairstyles: The One Style That Flatters Everyone
- 16 Pretty Half Up Half Down Hairstyle Ideas for 2026
- Your Half Up Half Down Styling Routine: Prep, Style & Make It Last
- Frequently Asked Questions
- Conclusion
What Exactly Is a Half Up Half Down Hairstyle?
At its simplest, a half up half down hairstyle means exactly what the name says: the top portion of your hair is gathered, pinned, braided, or tied up, while the bottom half stays down and flowing. The “up” part usually takes hair from the crown and temples — roughly the top third to top half of your head — and the rest cascades freely over your shoulders and back.
But here’s what makes it interesting: that basic formula is really just a starting point. The gathered section can be a sleek ponytail, a messy bun, a braid, a twist, or literally just two face-framing pieces pinned behind your ears. The down section can be pin-straight, bouncy-curled, beach-waved, or left in its natural texture. Change one variable and you’ve got a completely different look. That’s why you’ll see this style on brides, on gym-goers, on red carpets, and on school runs — it’s not one hairstyle, it’s a whole family of them.
One thing worth knowing: the placement of the “up” section changes everything. Gather it high on the crown and you get lift, drama, and a longer-looking face. Keep it low at the nape and the whole thing reads softer and more romantic. Pull it from just the temples and you’ve got that sweet, simple look that works for literally every occasion. Once you understand that, you can customize any of the 16 styles below to suit your face and your mood.
Why Half Up Half Down Is Everywhere in 2026
Trends don’t come back by accident, and the 2026 revival of half up half down hairstyles has some real reasons behind it. First, there’s the whole romantic-feminine wave that’s been building in fashion — soft waves, ribbons, bows, ballet-inspired everything. This style fits that mood perfectly. It’s pretty without being precious, polished without being stiff.
Second, and this is the practical part, we’re all a bit tired of high-maintenance hair. The styles blowing up on TikTok right now are the ones real people can actually do in their bathroom in under ten minutes. A claw-clip half-up twist? That’s a thirty-second style that looks like you tried for an hour. The algorithm rewards “effortless but gorgeous,” and this style delivers exactly that.
Then there’s the versatility factor, which honestly might be the biggest driver. In 2026, women want styles that move with them — something that works for the office, survives the commute, and still looks good at dinner without a redo. Half up half down hairstyles do that better than almost anything else. The pinned-up top stays neat all day while the down section just gets better-looking as it loosens up. It’s the rare style that improves with wear.
And let’s not ignore the celebrity effect. When half a dozen A-listers show up to major events in variations of this style within the same season — sleek versions, braided versions, voluminous wavy versions — it cements the trend. But unlike some celebrity trends that are impossible to recreate, this one genuinely translates to real life. You don’t need a glam squad; you need a hair tie and maybe a clip.
Who Suits Half Up Half Down? Face Shapes, Hair Types and Lengths
Short answer: almost everyone. Longer answer — because the details matter — certain versions flatter certain features more, and knowing your best version saves you a lot of trial and error.
Let’s talk face shapes first. If you have a round face, height is your friend — gather the top section high on the crown for lift, and keep some face-framing pieces loose to create the illusion of length. Oval faces can honestly wear any version, so pick based on your mood. Square faces look gorgeous with softer versions — waves, loose twists, curtain pieces around the face to soften the jawline. For heart-shaped faces, keep some volume at the bottom (curls or waves in the down section) to balance a narrower chin. And if your face is long or oblong, avoid too much height on top; a lower half-up placement with width at the sides is more flattering.
Hair type matters too, but maybe not how you’d expect. Thick hair is actually ideal for this style — you’ve got the volume to make the up section look lush and the down section look full. The only watch-out is weight: really heavy hair can pull the style down over the day, so anchor with bobby pins, not just an elastic. Fine hair can absolutely rock this style, but you’ll want to add texture first — a little dry shampoo or texturizing spray at the roots makes all the difference, and teasing the crown lightly before gathering gives the illusion of much thicker hair. Curly and coily hair might be the best match of all; curls give the style built-in volume and personality, and the half-up format shows off your curl pattern while keeping hair out of your face.
As for length, you need enough hair to gather — generally shoulder-length or longer works best. That said, I’ve seen adorable half-up styles on lobs (long bobs) too; you just gather a smaller section and let the pieces do their thing. If your hair is very short, a mini half-up with just the front pieces pinned back is still lovely. The 16 styles below note the ideal length for each, so you can skip straight to the ones that’ll work for you.
16 Pretty Half Up Half Down Hairstyle Ideas for 2026
Alright, here’s the main event. Sixteen styles, each with the full breakdown: what it is, who it loves most, exactly how to do it, how to keep it looking fresh, and the honest truth about the downsides. I’ve ordered them from simplest to most involved, so if you’re a beginner, start at the top and work your way down as your confidence grows.
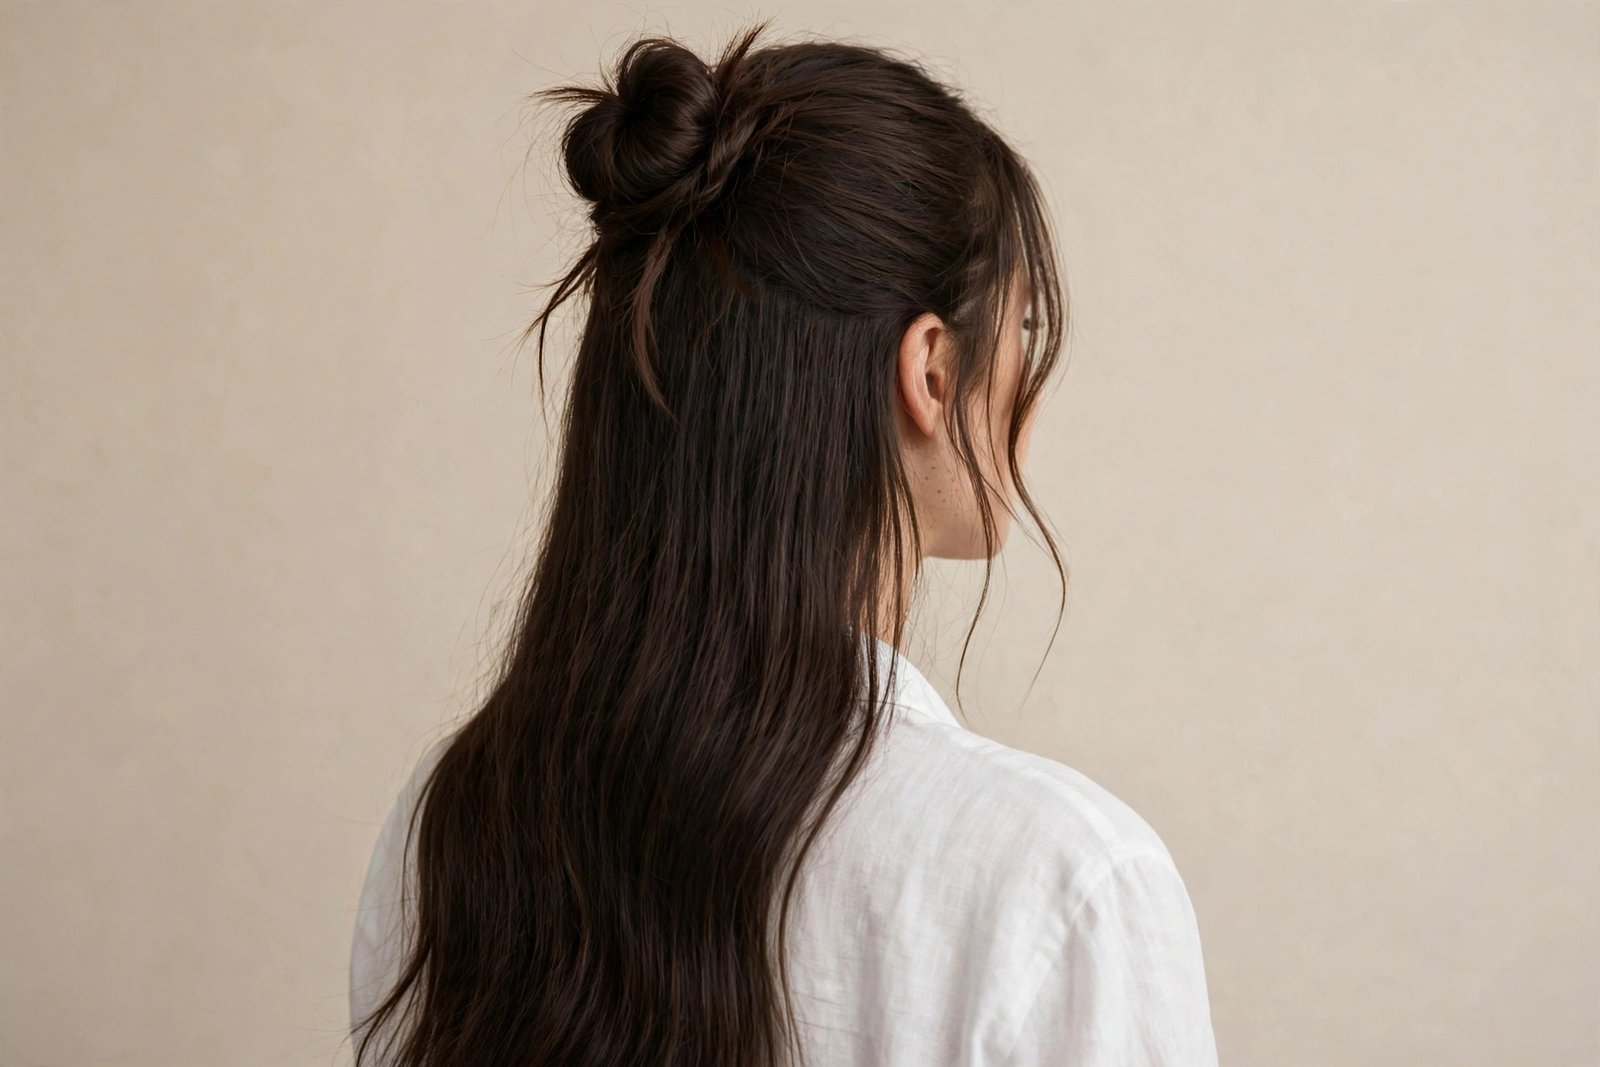
1. The Classic Half-Up Top Knot
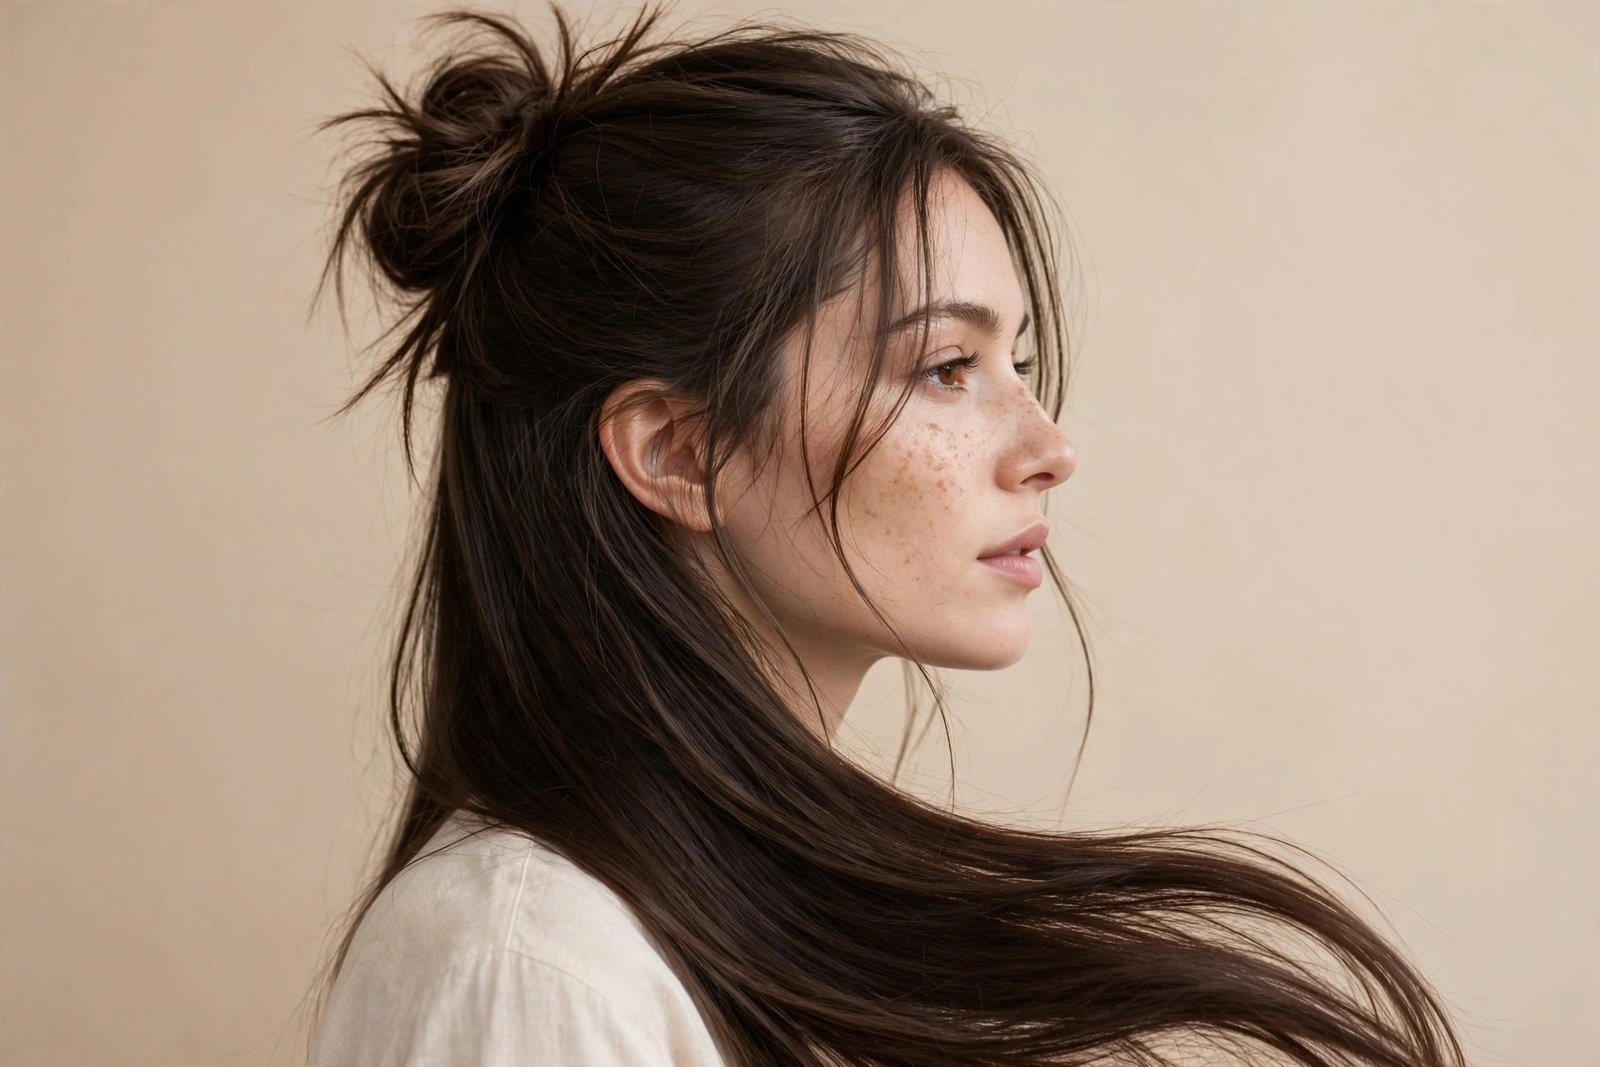
Let’s start with the undisputed champion of easy pretty. The classic half-up top knot is exactly what it sounds like: the top half of your hair twisted into a bun sitting on or just behind the crown, with everything else flowing free. It’s been around forever, but the 2026 version is softer than the severe scraped-back knots of years past — think slightly tousled, with a few face-framing pieces pulled loose.
Who it suits: Honestly, everyone, but it especially loves oval and heart-shaped faces because the height on top elongates beautifully. It works on straight, wavy, and curly hair alike. Length-wise, you want at least shoulder-length hair so the bun has something to work with — the longer your hair, the fuller the knot.
How to do it: Flip your head upside down and gather the top section — use your thumbs to draw a line from each temple up over the crown, and take everything above that line. Secure it into a ponytail first (this is the step most people skip, and it’s why their knots fall apart). Then twist the ponytail around its base and pin it, or loop it through the elastic one last time without pulling all the way through for an instant messy bun. Pull a few pieces loose around your face. Done. Ninety seconds, tops.
Making it last: The ponytail-first method is the whole secret — an elastic anchor holds infinitely better than pins alone in a bun. If your hair is silky and slippery, rough up the ponytail with a little texturizing spray before twisting. For all-day wear, crisscross two bobby pins at the base of the knot.
Variations: Try it high and perky for a playful look, or lower and looser for something more elegant. A braided base (braid the ponytail, then wrap it) adds gorgeous texture. For evenings, smooth the down section with a flat iron and add a little shine serum.
Honest downside: On very heavy, thick hair, a top knot can feel like it’s pulling by hour six. If that’s you, position the knot slightly further back rather than right on top — it distributes the weight better. And if your hair is freshly washed and super clean, the knot will slip; this style genuinely prefers day-two hair.
2. Romantic Loose-Wave Half-Up
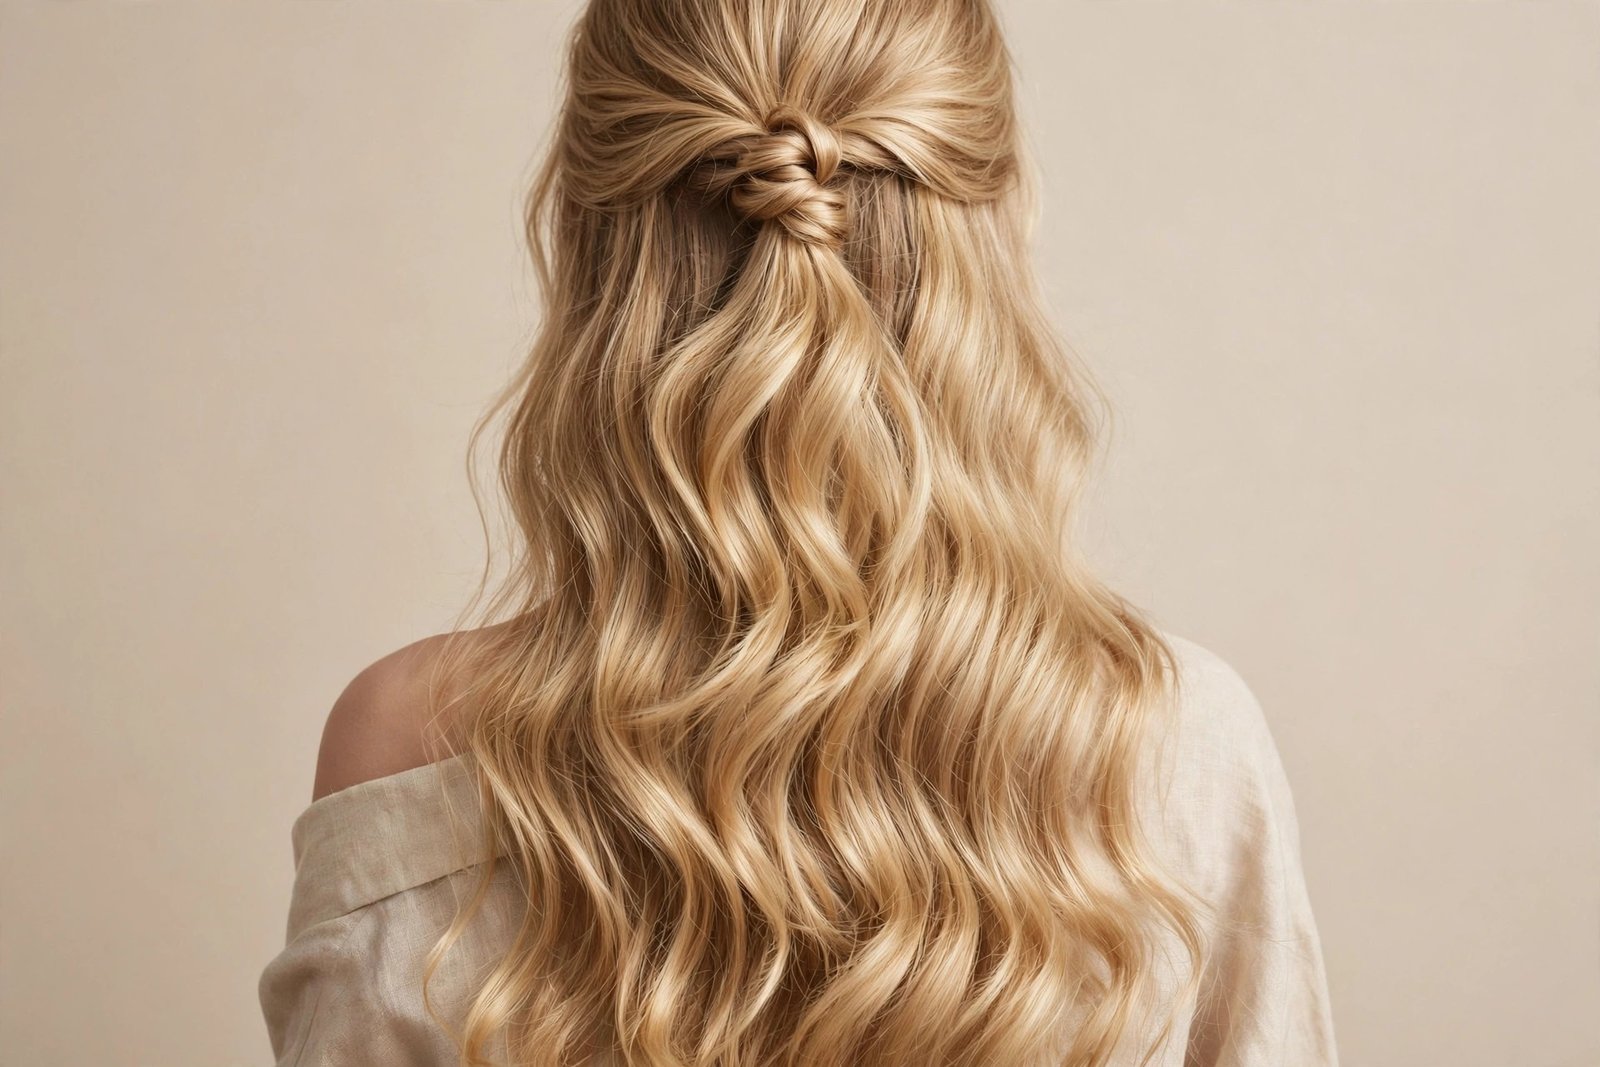
If the top knot is the cool girl of half up half down hairstyles, this one is the romantic lead. Picture this: soft, loose waves throughout, with just a small twisted or pinned section at the back of the crown holding the front pieces away from your face. It’s the style that shows up in every “effortless bridesmaid hair” Pinterest board, and for good reason — it photographs like a dream.
Who it suits: This is pure magic on long hair — the waves need length to really show off. It flatters round and square faces especially well because the soft waves around the face blur harder angles. Fine hair works beautifully here since the waves create the illusion of fullness.
How to do it: Start by curling your hair in alternating directions with a large-barrel iron (1.25 to 1.5 inch), leaving the ends straight for that modern undone feel. Let the curls cool completely — this is non-negotiable if you want them to last. Then take a small section from each temple, twist each one back toward the crown, and pin them where they meet. Or gather a small top section and secure it with a clear elastic, then gently tug the hair above the elastic to create soft volume. Finish with a flexible-hold hairspray.
Making it last: The enemy here is gravity plus humidity. A light mist of hairspray on each section BEFORE curling (not just after) makes a massive difference — it gives the hair “memory.” If you’re in a humid climate, swap the twists for a small braid; braids grip better than twists when moisture hits.
Variations: Add a delicate hair accessory where the sections meet — a small gold clip or a few pearl pins instantly takes this from daytime pretty to wedding-guest ready. For a boho feel, pull the twists looser and let more pieces escape.
Honest downside: This one takes the most prep time of the “simple” styles — you’re curling your whole head first. It’s also the most weather-sensitive; wind and humidity will have their way with it. Save it for indoor events or calm-weather days when you want maximum impact.
3. Braided Half-Up Crown
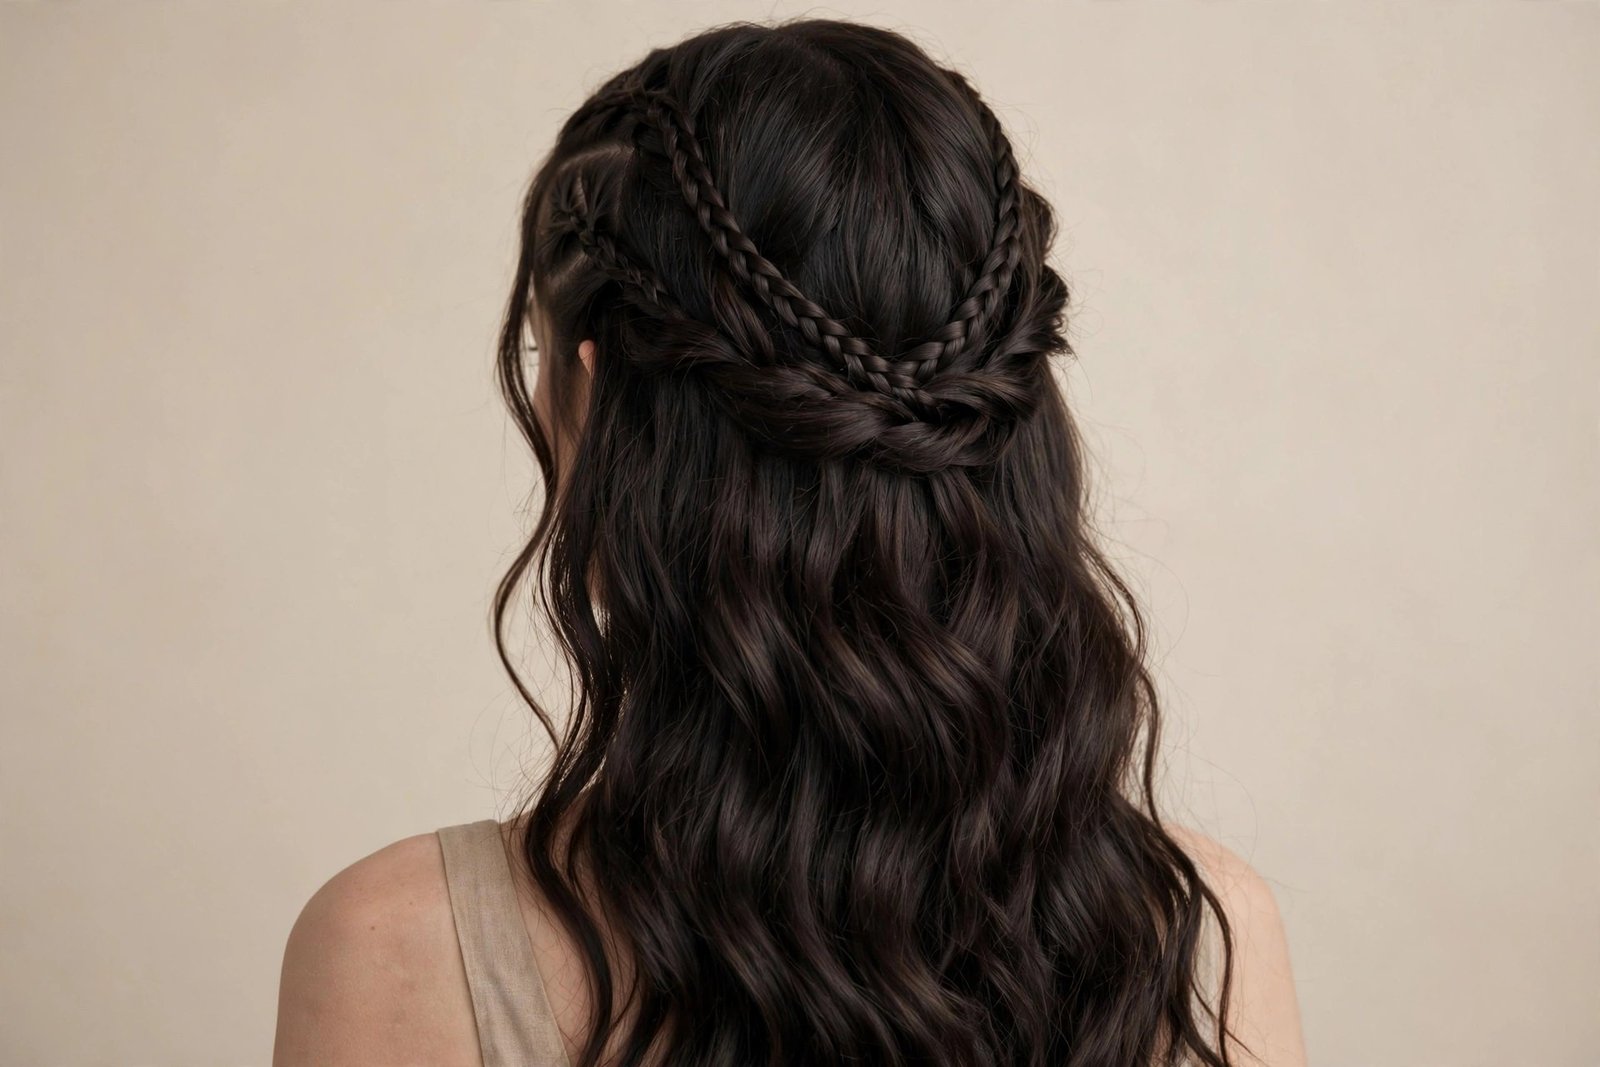
There’s something about a braid sitting like a crown across the top of your head that just reads “main character.” The braided half-up crown takes two braids — one from each temple — and pins them across the back of the crown so they meet in the middle, while the rest of your hair flows free underneath. From the front, you see this gorgeous braided detail framing your face; from the back, it looks like a halo. It’s stunning.
Who it suits: This style is a dream on medium to long hair with some texture — waves or curls give the braids beautiful dimension. It’s especially flattering on round faces because the braid draws the eye upward and outward. If you love boho or romantic aesthetics, this is probably your soulmate style. For more braid inspiration, our guide to boho braids for women pairs beautifully with this look.
How to do it: Part your hair down the middle (or wherever you naturally part). Take a section from one temple — about two inches wide — and braid it back toward the crown. A simple three-strand braid works, but a Dutch braid (where you cross under instead of over) sits more prominently on top of the hair and looks more dramatic. Secure the end with a clear elastic, then repeat on the other side. Bring both braids to meet at the back of your head, remove the elastics, and pin them together with bobby pins tucked underneath. Gently tug the braids wider with your fingertips — this “pancaking” step is what takes it from flat to full and gorgeous. Let the rest of your hair fall naturally.
Making it last: Braids are naturally one of the most secure half-up options, which is why this style survives weddings, windy days, and dance floors. The weak point is where the two braids meet — use at least three bobby pins in a crisscross pattern there, and hide them under the hair. A spritz of strong-hold hairspray on the braids before pancaking helps them hold their widened shape.
Variations: Try fishtail braids instead of three-strand for a more intricate look. For a softer take, braid only halfway and let the ends blend into the down section. Adding small flowers or pearl pins along the braid turns this into legitimate wedding hair.
Honest downside: This one requires actual braiding skill — if you can’t do a clean Dutch braid yet, practice on a ponytail first before attempting it on your own head from the temples. It also takes a good 10-15 minutes, so it’s not your rushed-morning style. And on very fine hair, the braids can look thin; pancaking helps, but there’s only so much hair to work with.
4. Half-Up Bubble Ponytail
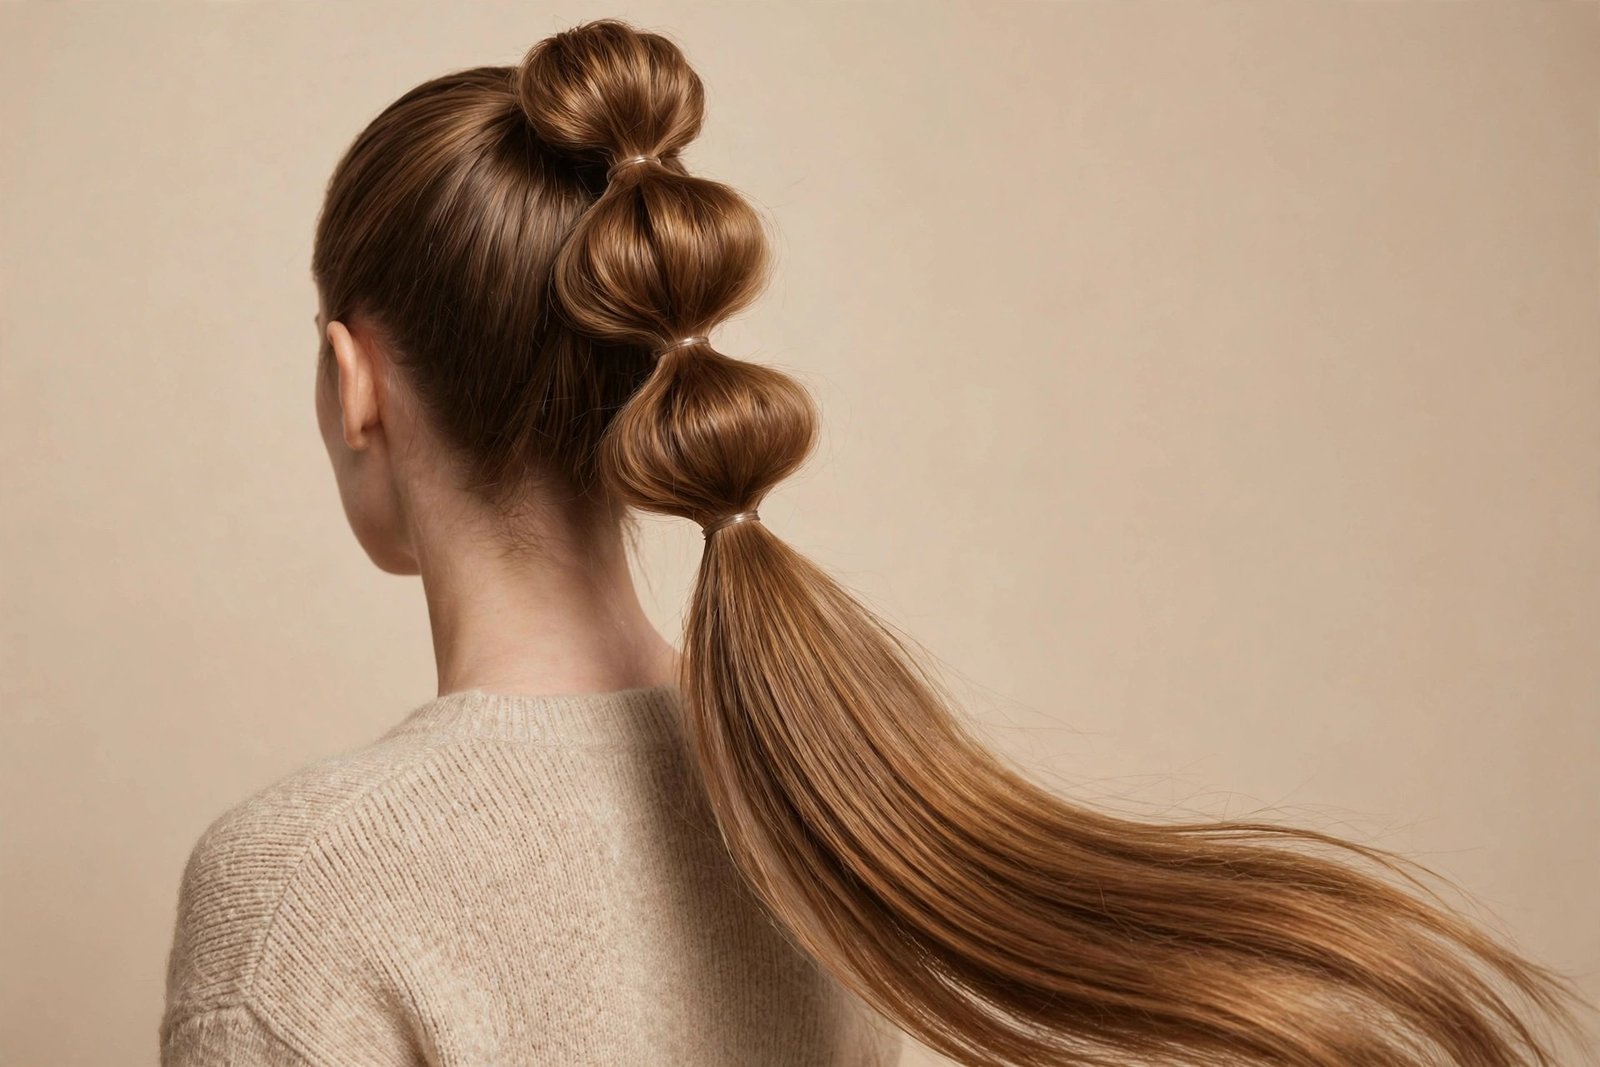
Fun, playful, and all over TikTok — the half-up bubble ponytail is the style that makes people smile. You gather the top half of your hair into a ponytail, then add elastics down its length at intervals, gently pulling each section wider to create “bubbles.” The result is this bouncy, dimensional ponytail sitting on top of flowing hair. It’s youthful without being childish, and it photographs incredibly well.
Who it suits: Long hair shows this off best — you need enough ponytail length for at least three bubbles. It suits pretty much every face shape, and it’s particularly great for thick hair because all that volume makes the bubbles look plush and full. This is a fantastic party, concert, or festival style.
How to do it: Gather the top section into a high ponytail on the crown and secure firmly — the base needs to be tight because it’s supporting the whole structure. Then place small clear elastics down the ponytail, spacing them about two inches apart. After each elastic, gently pull the hair between elastics outward to puff it into a bubble shape. Work from top to bottom, and don’t be shy with the pulling — flat bubbles are the number one mistake. Finish by wrapping a small strand of hair around the base elastic to hide it, and mist with hairspray.
Making it last: Clear elastics grip better than fabric ones for this style, and they’re invisible in photos. If your hair is silky, tease each section lightly before adding the elastic. The bubbles will compress a bit over the day — that’s normal — but you can re-puff them with your fingers in about ten seconds whenever you pass a mirror.
Variations: Two mini bubble ponies (one on each side of the part) give major playful energy. Try it with a deep side part for an edgier feel. For evenings, wrap the base with a velvet scrunchie or add a ribbon at the bottom bubble.
Honest downside: You’ll go through a lot of elastics, and taking them all out at night is genuinely annoying — use a seam ripper or cut them carefully rather than yanking. On fine hair, the bubbles can look deflated no matter how much you puff; this style really wants volume. And fair warning: it’s a high-maintenance style to sleep in, so plan to take it down before bed.
5. Sleek Straight Half-Up
Sometimes the most striking thing you can do is go perfectly smooth. The sleek straight half-up is all about glass-like shine and clean lines: the top section pulled back tight and smooth into a low ponytail or secured flat against the head, with the rest of the hair straightened to a mirror finish. It’s minimal, it’s powerful, and it goes with everything from a blazer to an evening gown.
Who it suits: This style loves oval, heart, and diamond face shapes — the sleekness shows off your bone structure beautifully. It works best on naturally straight or straightened hair; trying to force very curly hair into this without proper straightening will just lead to frizz and frustration. Medium to long lengths both work.
How to do it: Prep is everything here. Start with a smoothing serum on damp hair, blow-dry straight with a paddle brush, then flat-iron in small sections — small sections are the difference between “pretty straight” and “glass.” Gather the top section (temple to temple, over the crown) and smooth it back with a boar-bristle brush, securing into a low ponytail at the back of the crown or pinning it flat with bobby pins for a seamless look. Take a strand from the ponytail and wrap it around the elastic. Finish with a shine spray — hold it at arm’s length and mist lightly; too close and you’ll get spots.
Making it last: Humidity is the sworn enemy of sleek styles. An anti-humidity spray as your final step is worth its weight in gold. Carry a mini brush for touch-ups — the top section is the first thing to show flyaways. And here’s a pro trick: sleep with the style loosely wrapped in a silk scarf and it’ll still look good on day two.
Variations: A deep side part version looks incredibly chic. Try the half-up section secured with a minimalist metal barrette instead of an elastic for a jewelry-like detail. For drama, go pin-straight with a center part and tuck the front pieces behind your ears.
Honest downside: This style shows EVERYTHING — every flyaway, every bit of frizz, every uneven section. It demands the most prep of any style on this list and the most maintenance through the day. If your hair is naturally curly or wavy, the straightening alone is a 30-45 minute commitment. But when it’s done right? Nothing looks more expensive.
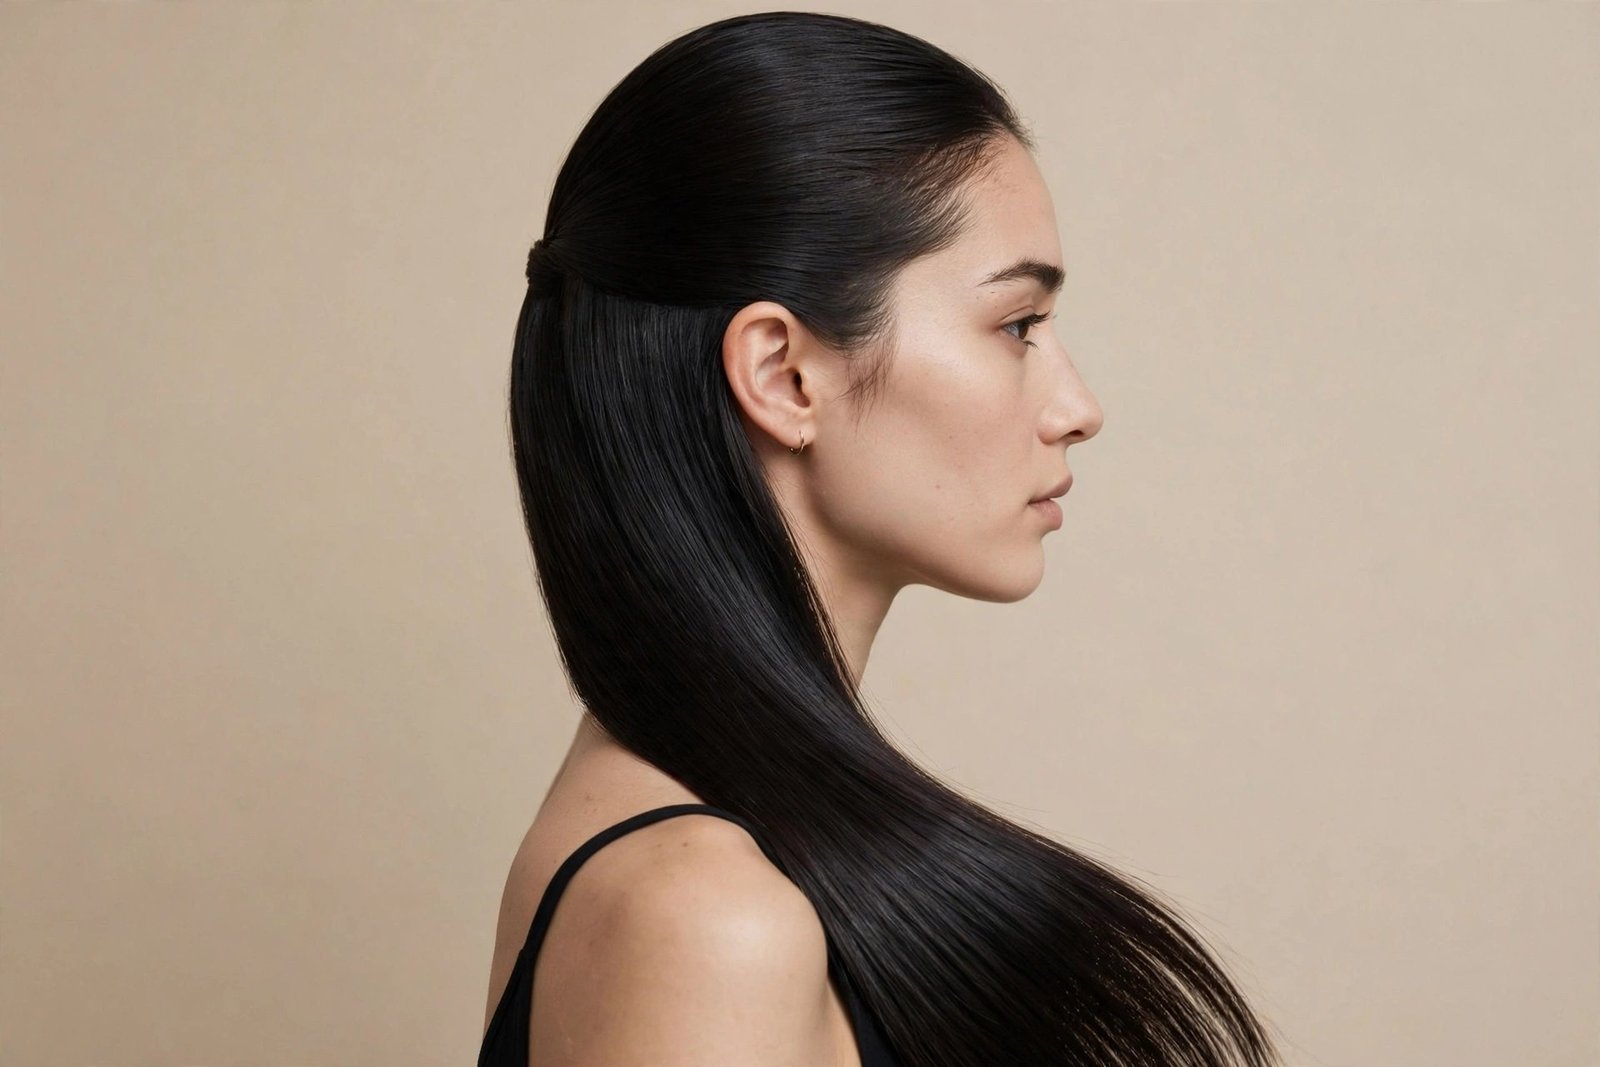
6. Messy Textured Half-Up Bun
The messy textured half-up bun is what happens when the classic top knot lets its hair down — literally and figuratively. Instead of a neat twisted bun, you’re going for deliberate undone-ness: a loose, airy bun with tons of texture, pieces escaping everywhere in the best way, sitting on top of tousled waves. It’s the “I woke up like this” of half up half down hairstyles, except it actually takes a little technique to look this effortlessly good.
Who it suits: Wavy and curly hair types, this is your moment — your natural texture does half the work. It flatters square and round faces because the softness around the face and the volume on top create beautiful balance. Medium-length to long hair both work; on shorter hair, go for a smaller, cuter mini bun.
How to do it: Here’s the thing most tutorials get wrong: you need texture BEFORE you start. Spritz dry shampoo or texturizing spray through the top section and scrunch it up. Gather loosely — and I mean loosely, don’t smooth anything — and twist into a bun, securing with pins rather than an elastic for a softer hold. Now the fun part: pull. Pull pieces out of the bun, pull face-framing strands loose, gently tug the hair at your crown for lift. The goal is controlled chaos. If it looks too perfect, mess it up a little more. Finish with a flexible hairspray that won’t make it crunchy.
Making it last: Because this style is supposed to look undone, it ages gracefully — loosening just makes it look more intentional. The pins are doing the real work, so use more than you think you need and crisscross them. If pieces fall that you wanted kept, that’s what the travel-size hairspray in your bag is for.
Variations: A double messy bun version (two small buns) is adorable on younger faces. Braid a small section before wrapping it into the bun for added interest. For a night-out version, add more volume at the crown and keep the down section in defined waves.
Honest downside: There’s a fine line between “artfully messy” and “actually messy,” and it takes practice to land on the right side. On very fine, silky hair, the texture can fall flat within an hour — you’ll need serious texturizing product. And if you’re someone who fidgets with their hair, you’ll dismantle this style by noon; it rewards a hands-off approach.
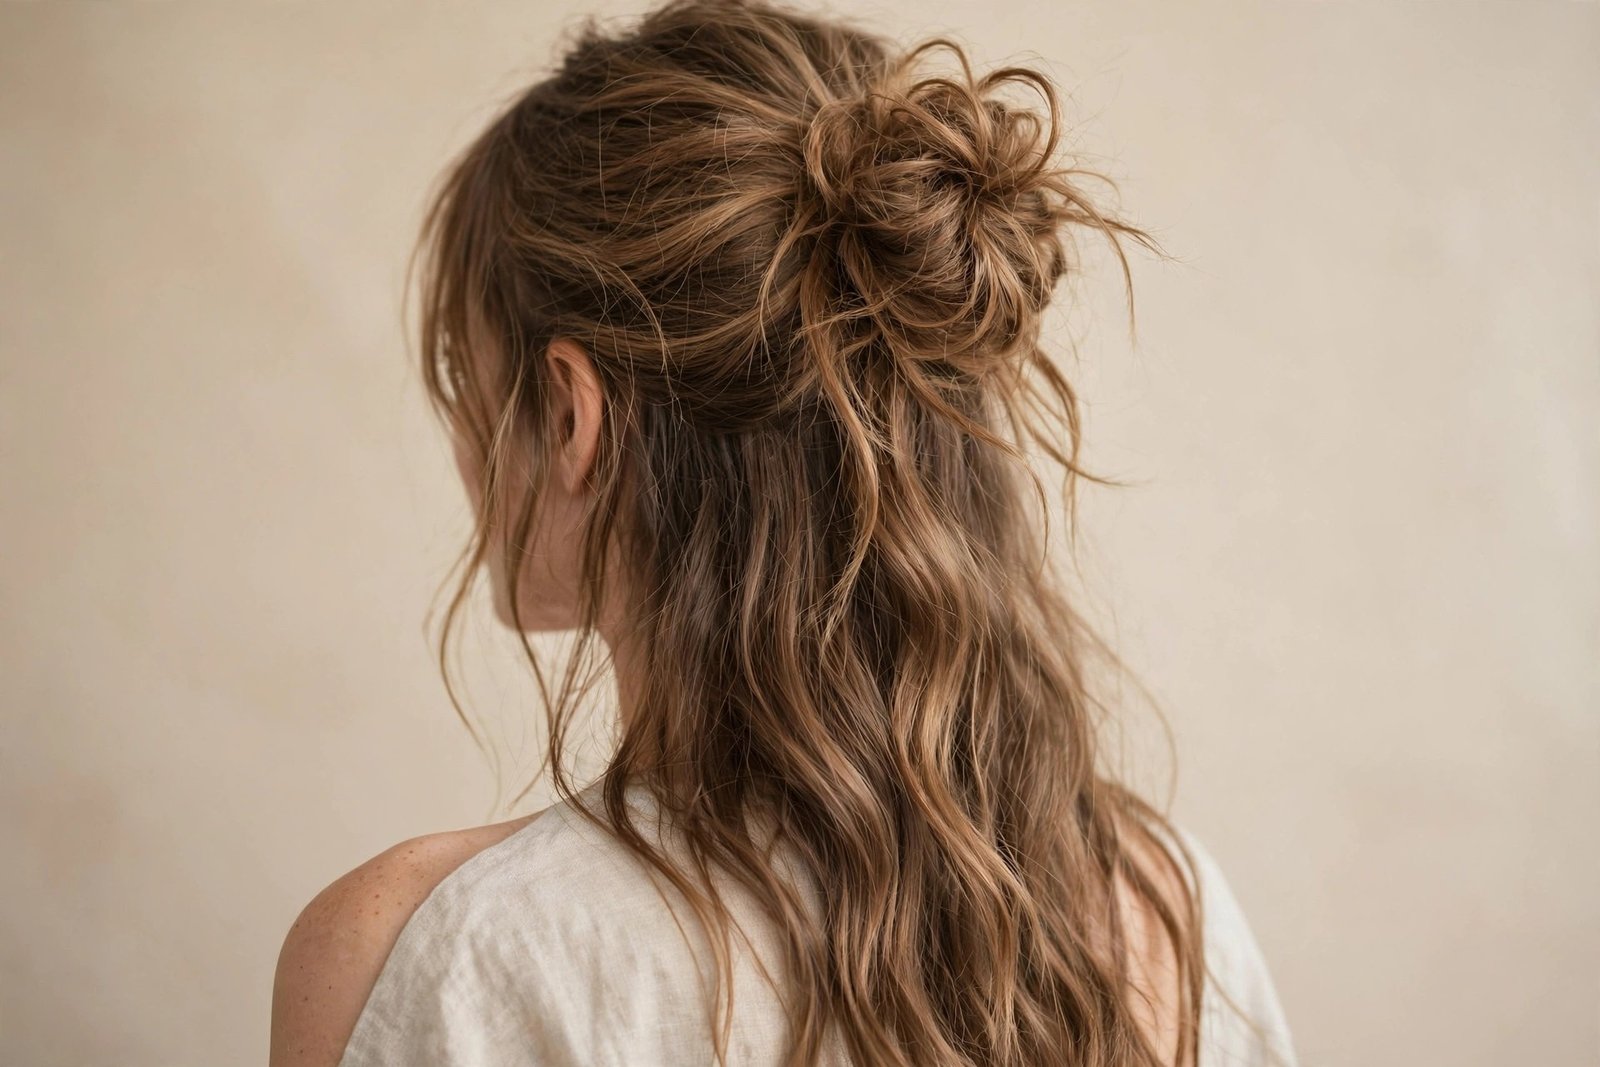
7. Twisted Rope Half-Up
Here’s a secret: the twisted rope half-up looks far more complicated than it is. Two rope-twisted sections meeting at the back of your head create this beautiful, sculptural detail that catches the light and looks genuinely intricate — but the whole technique takes about three minutes once you know it. It’s one of my favorite “cheat” styles for when you want to look like you tried much harder than you did.
Who it suits: This style is gorgeous on straight to wavy hair where the twist definition really shows. It works beautifully on medium-length hair — you don’t need tons of length since the twists are relatively short. Oval and long face shapes look especially good because the horizontal line of the twists adds flattering width.
How to do it: Part your hair where you like it. Take a two-inch section from one temple, split it into two strands, and twist them around each other — here’s the key — always twisting in the same direction while wrapping the strands around each other in the opposite direction. (Twist each strand clockwise, wrap them counterclockwise. That opposing tension is what locks the rope together.) Work your way back toward the crown, adding a little hair as you go like a French twist if you want, or just twist the section you started with. Secure with a clear elastic, repeat on the other side, then pin the two twists together at the back. Tuck the ends under and pin.
Making it last: Rope twists hold surprisingly well because of that opposing-tension trick, but silky hair will still try to unwind. A dab of styling cream on each section before twisting gives grip without stiffness. Pin the meeting point generously — that’s the structural weak spot.
Variations: A single chunky rope twist from one side, pinned across like an asymmetric detail, looks modern and cool. For a romantic version, pancake the twists gently to make them fuller and softer. You can also do mini rope twists just framing the face with the rest down.
Honest downside: The technique has a small learning curve — your first attempt might look more like a sad tangled rope than a sleek twist. Practice the motion on a ponytail first where you can see what you’re doing. And if your layers are very short around the face, the twists may not reach all the way back; in that case, do shorter twists and pin them just behind the ears.
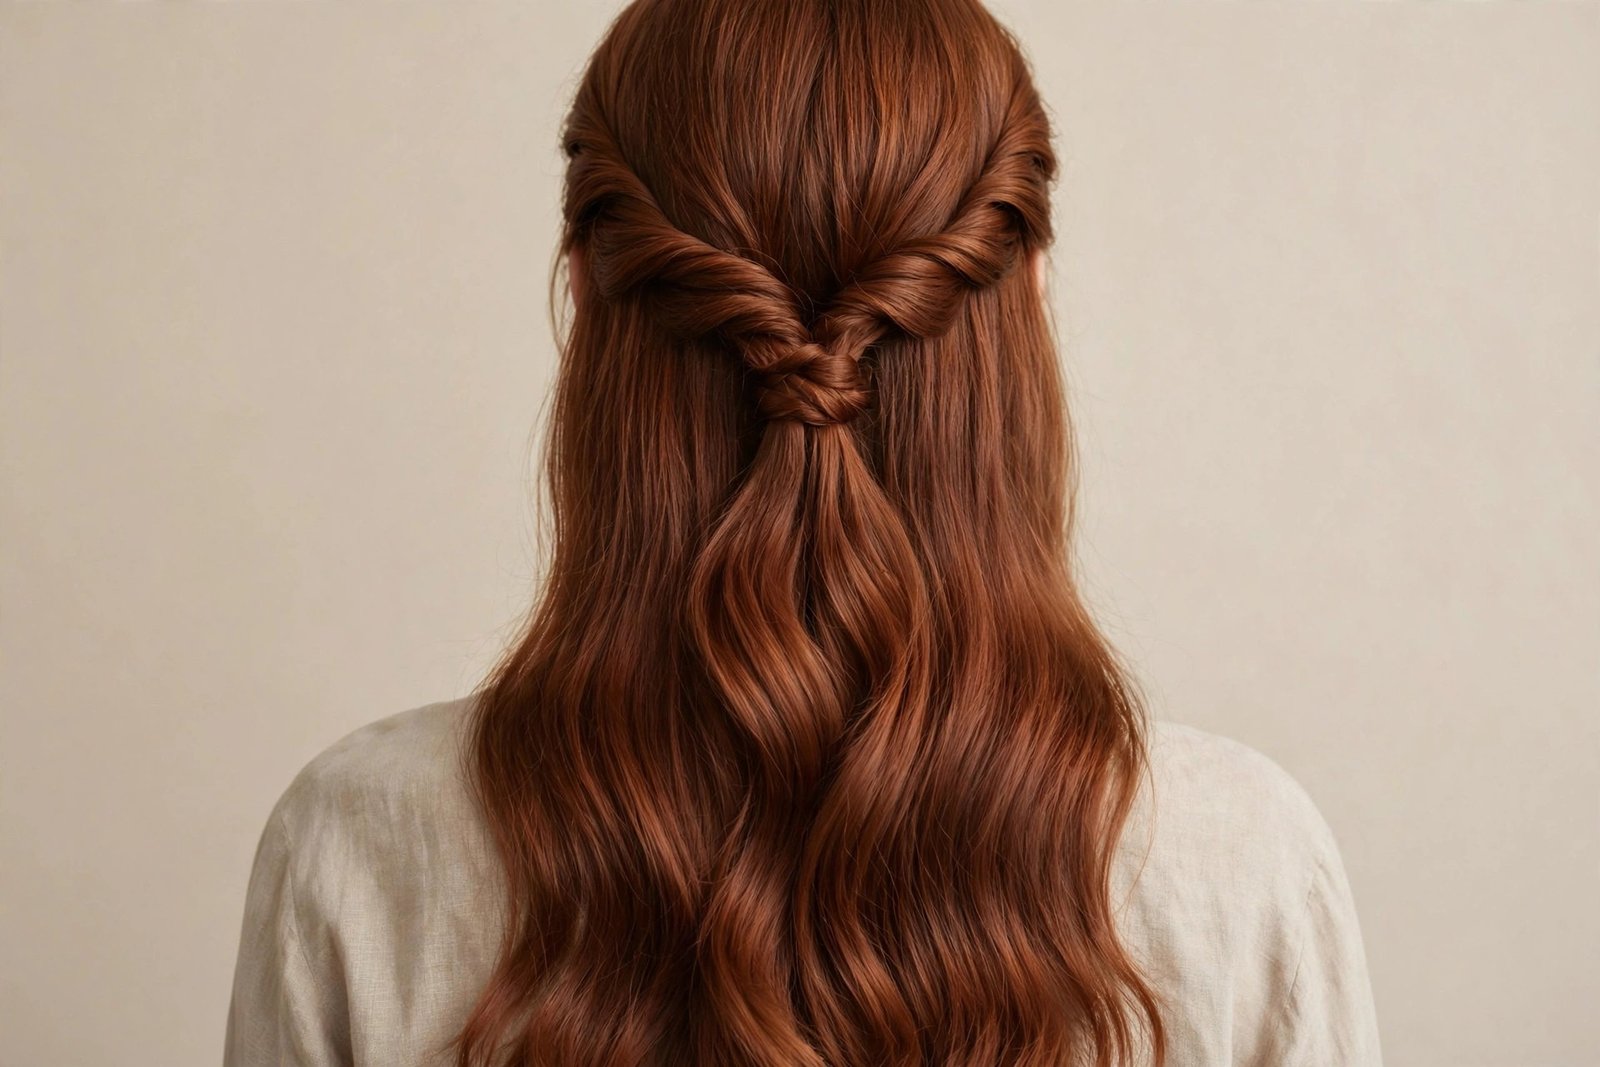
8. Half-Up Double Space Buns
Okay, hear me out — space buns aren’t just for festivals and teenagers. The half-up version, with two small buns perched on top and the rest of your hair flowing free, has this irresistible playful energy that works at any age when you keep the buns small and the finish soft. It’s the style equivalent of a wink: fun, confident, and a little bit cheeky.
Who it suits: This look loves younger faces and round or heart-shaped faces — the buns on top add height and playfulness. It works on all hair textures, and it’s genuinely one of the best half-up options for shorter hair (lobs and bobs can absolutely pull off mini space buns). Long hair gives you bigger, more dramatic buns.
How to do it: Part your hair down the middle — a clean center part is essential for symmetry here. Gather the top section on each side (temple to crown on each side) into two high ponytails, positioned symmetrically. Twist each ponytail into a bun and pin. The trick to keeping them cute rather than costume-y: keep them small (golf-ball to tennis-ball size depending on your hair) and slightly messy rather than perfectly round. Pull a few face-framing pieces loose. If your buns look uneven, step back from the mirror and check them in your phone’s front camera — it gives you a truer sense of symmetry.
Making it last: Two anchor points means this style is naturally secure, but the buns themselves can loosen. Wrap the base of each bun with a second elastic for insurance. If you’re dancing or moving a lot, add pins — no shame in structural support.
Variations: Braid each ponytail before wrapping it into a bun for braided space buns. Half-up space buns with the down section in waves is the classic festival look. For a subtler take, position the buns lower and further back — it reads more “cute” than “costume.”
Honest downside: Symmetry is genuinely tricky — your arms get tired, and one bun always wants to sit higher than the other. Give yourself extra time and good lighting. Also, be honest with yourself about the setting: this is a fun, casual style, and it might not be the right choice for a formal office or a solemn event. Know your audience.
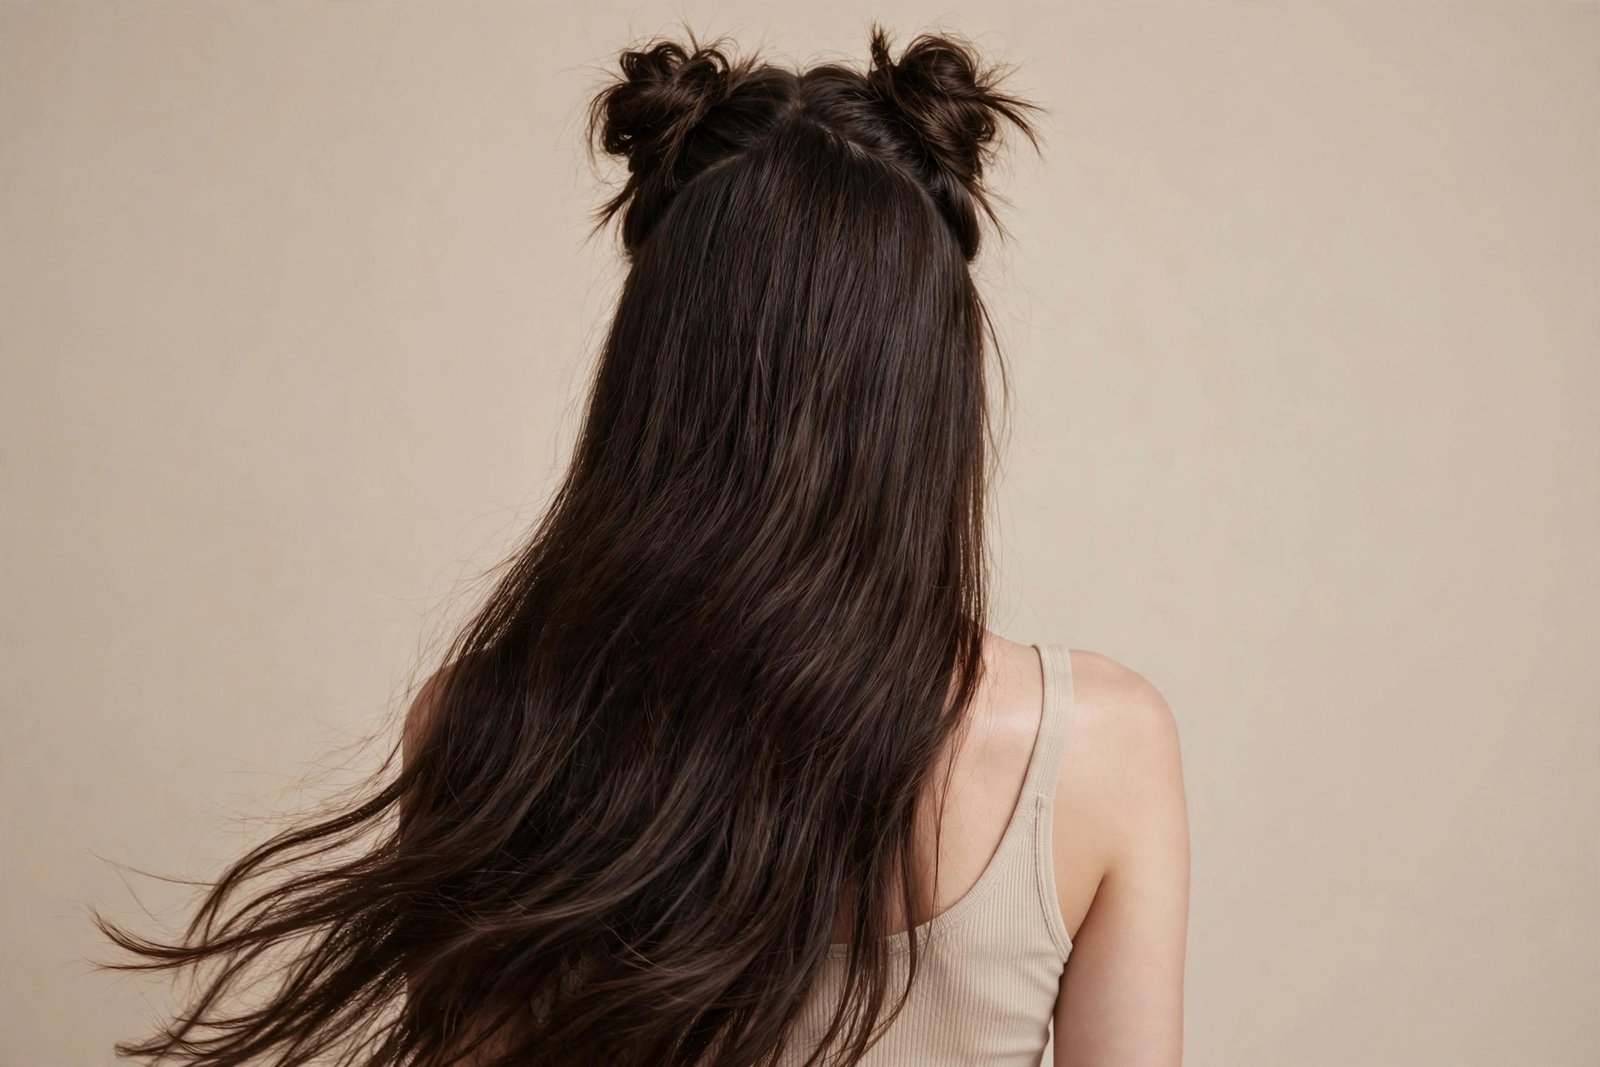
9. Curly Pineapple Half-Up Puff
Curly girls, this one’s for you. The pineapple half-up puff celebrates your natural texture instead of fighting it: the top section of your curls is gathered up into a full, glorious puff on the crown while the rest of your curls cascade freely. It’s bold, it’s beautiful, and it shows off curl definition like nothing else. If you’ve been straightening your curls into submission for half-up styles, consider this your permission slip to stop.
Who it suits: This is designed for curly, coily, and kinky textures — types 3A through 4C. The curlier and more voluminous your hair, the more spectacular the puff. It flatters round faces beautifully because the height on top elongates, and it’s stunning on oval faces too. This style genuinely doesn’t work on straight hair, and that’s fine — it’s not for straight hair.
How to do it: Start with your curls defined and dry — wash-and-go curls or a refreshed second-day curl pattern both work. Flip your head forward and gather the top section (forehead to crown, ear to ear) loosely — the key word is loosely; you want to preserve curl clumps, not stretch them out. Secure with a satin scrunchie or a loose elastic, positioning the puff high on the crown. Gently fluff and arrange the puff with your fingers, pulling it into a round shape. Use a pick at the roots of the down section for extra volume if you want drama. A light oil on your fingertips prevents frizz while you arrange.
Making it last: Pineapple puffs are a protective style’s casual cousin — they hold well because curls grip each other. A satin scrunchie prevents breakage at the gathering point. If the puff starts to droop, it’s usually because the elastic loosened; just re-gather and re-secure. Edge control on the hairline keeps the whole thing looking intentional and polished.
Variations: A high puff versus a slightly-back puff gives totally different vibes — experiment with placement. Adding a colorful scarf or headband at the base of the puff is gorgeous. For a softer look, leave curly tendrils loose around the face and nape.
Honest downside: If your curls are very tight, the puff may want to shrink and sit closer to the head than you’d like — stretching the gathered section slightly before securing helps. And on wash day when curls are at maximum volume, the puff can get BIG; embrace it or save this style for day two or three when things have settled a little.
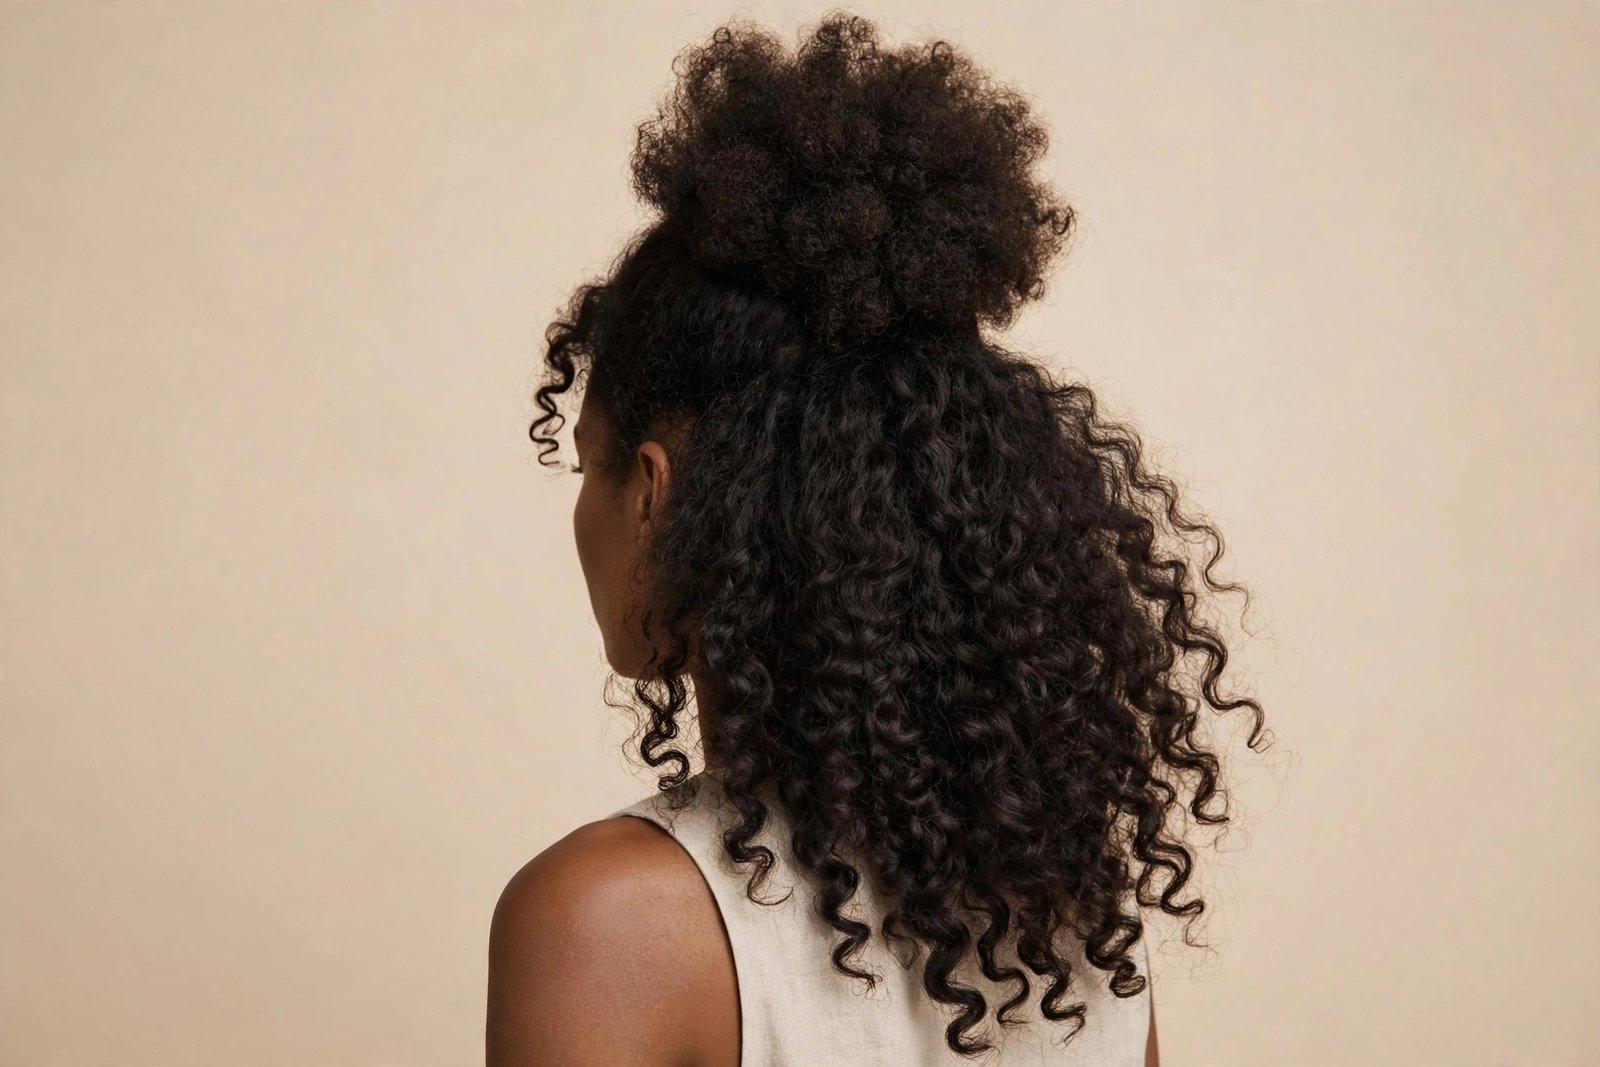
10. Fishtail-Braid Half-Up
The fishtail braid has this magical quality: it looks incredibly intricate — like something that took an hour and serious skill — but it’s actually just two strands woven back and forth. Done as a half-up detail, with a fishtail running across the back of the crown while long hair flows beneath it, it’s pure boho romance. This is the style people stop you to ask about.
Who it suits: Long hair is the sweet spot — fishtails need length to show off their pattern. It looks stunning on highlighted or balayaged hair because the weaving shows off every tone and dimension. All face shapes work; the braid sits at the back so it’s more about your hair than your face.
How to do it: Gather the top section into a low ponytail at the back of the crown — starting with a ponytail makes fishtailing dramatically easier than working with loose hair. Split the ponytail into two equal sections. Take a thin strand from the outside of the left section, cross it over to the inside of the right section. Then take a thin strand from the outside of the right section, cross it to the inside of the left. Repeat all the way down. The thinner your strands, the more intricate it looks (but the longer it takes — find your balance). Secure with a clear elastic, then pancake gently by tugging the edges wider. Pin the braid flat against the back of your head or let it hang over the down section — both look gorgeous.
Making it last: Fishtails are structurally sound — the weave locks itself together. Starting from a ponytail base means it can’t unravel from the top. If pieces poke out, that’s actually part of the charm with this style; embrace the texture.
Variations: Two side fishtails meeting at the back is a beautiful alternative. A fishtail headband (braided across the front hairline) with the rest down is striking. For a wedding-worthy version, weave in a thin ribbon or add pearl pins along the braid.
Honest downside: Let’s be real: fishtailing your own hair at the back of your head, where you can’t see, is awkward. Your arms will ache. The first few attempts will look lumpy. Practice with the ponytail hanging over one shoulder where you can see it, then graduate to the back-of-head version. Budget 15-20 minutes until you’ve got the muscle memory.
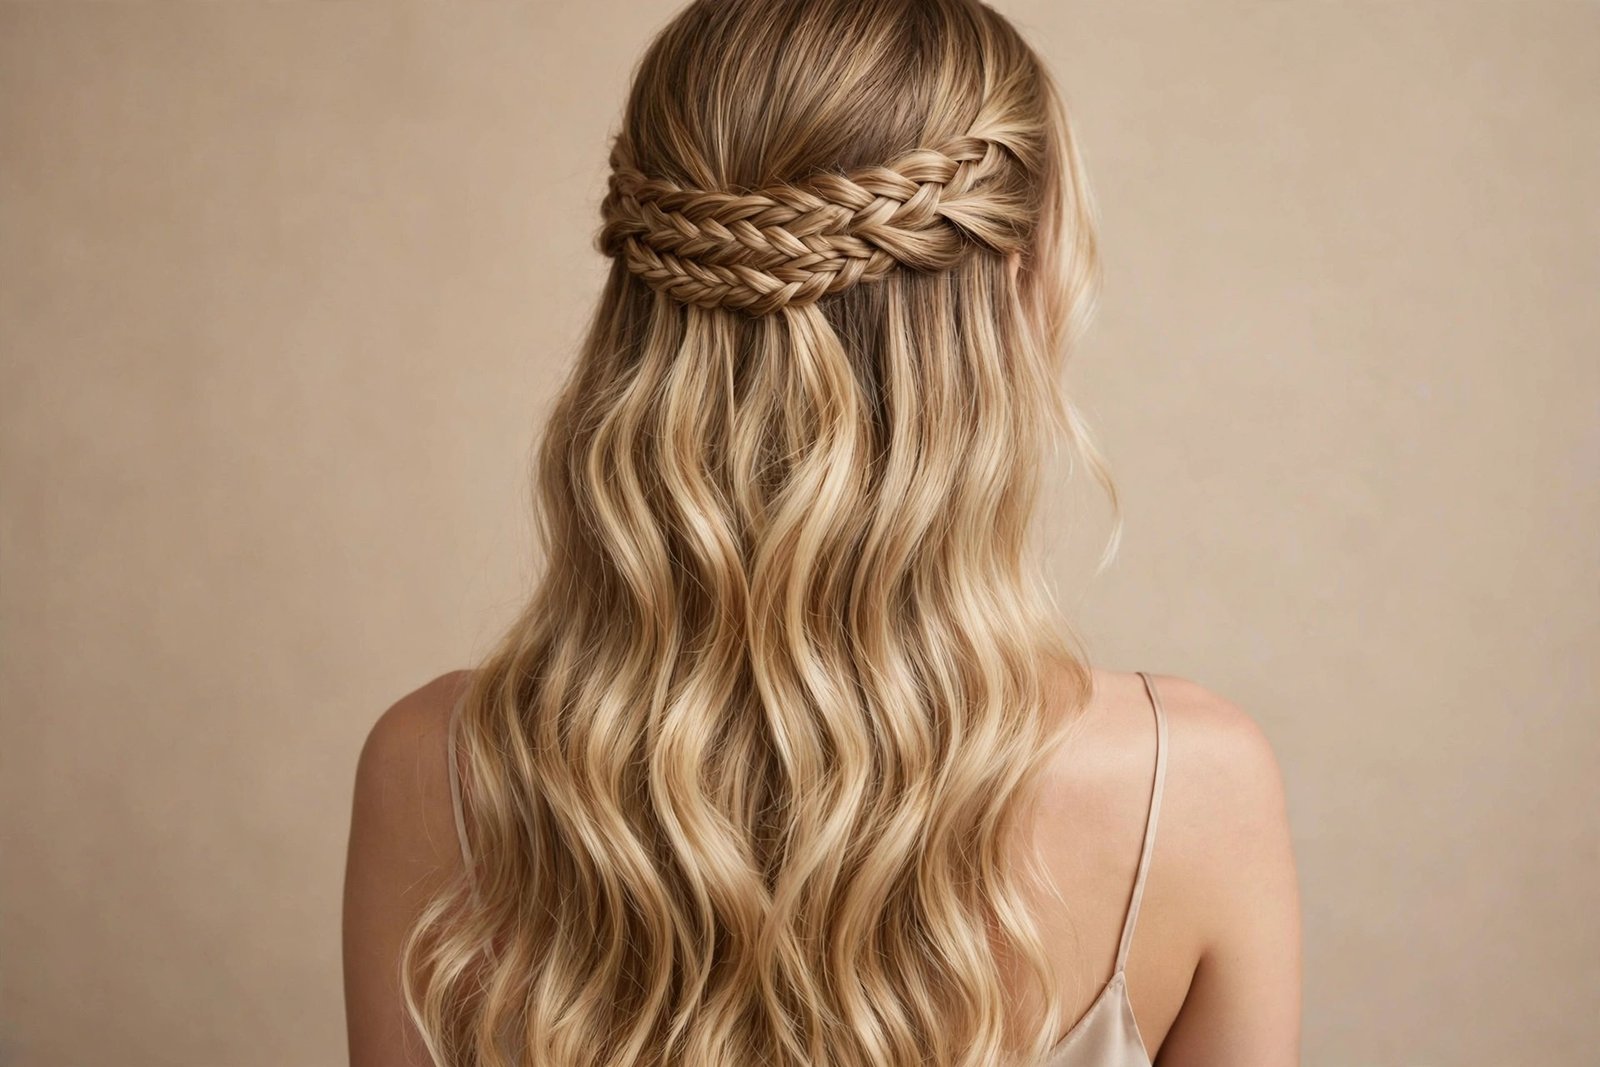
11. Low Half-Up Ponytail with Ribbon
There’s a reason ribbons are having a massive moment in 2026 — they take any hairstyle from simple to special in about five seconds. The low half-up ponytail with a ribbon is exactly that kind of magic: gather the top half of your hair into a relaxed low ponytail at the back of the head, tie a beautiful ribbon around the base, and let the bow’s tails drape down over your hair. It’s feminine, it’s romantic, and it works for everything from brunch to a wedding.
Who it suits: This style is universally flattering, but it especially loves long, straight to wavy hair where the ribbon tails can drape elegantly. It’s gorgeous on oval and heart-shaped faces. If your personal style leans romantic, preppy, or cottagecore, this was basically made for you.
How to do it: Gather the top section — keep it soft and a little loose rather than scraped back — and secure it into a low ponytail at the back of your head (around ear level, not high on the crown). Gently tug the hair above the elastic for soft volume. Now the ribbon: choose one about an inch wide and at least 18 inches long (velvet, satin, or grosgrain all work beautifully). Tie it around the base of the ponytail in a bow, letting the tails hang down over your hair. Pro tip: tie the ribbon around the elastic BEFORE you make the bow, so it’s anchored and won’t slide off. Curl the down section in loose waves for maximum romance.
Making it last: The ponytail itself is low-tension, so it’s comfortable all day. The ribbon is the flight risk — a tiny bobby pin through the knot into the hair underneath keeps it from migrating. If the bow starts looking sad by evening, just retie it; it takes ten seconds and looks freshly done.
Variations: A black velvet ribbon is classic and chic; a patterned silk scarf tied as a bow is more boho. For bridesmaids, matching ribbons in the wedding colors are adorable. Try the ponytail slightly to one side for an asymmetric, editorial feel.
Honest downside: Ribbons and wind are not friends — on a breezy day, those pretty tails will be in your face. This is an indoor-events or calm-weather style. Also, cheap ribbons look cheap; invest in a nice one because it’s the entire focal point. And if you have very slippery hair, the low ponytail can slide down over hours — anchor it with two crisscrossed bobby pins above the elastic.
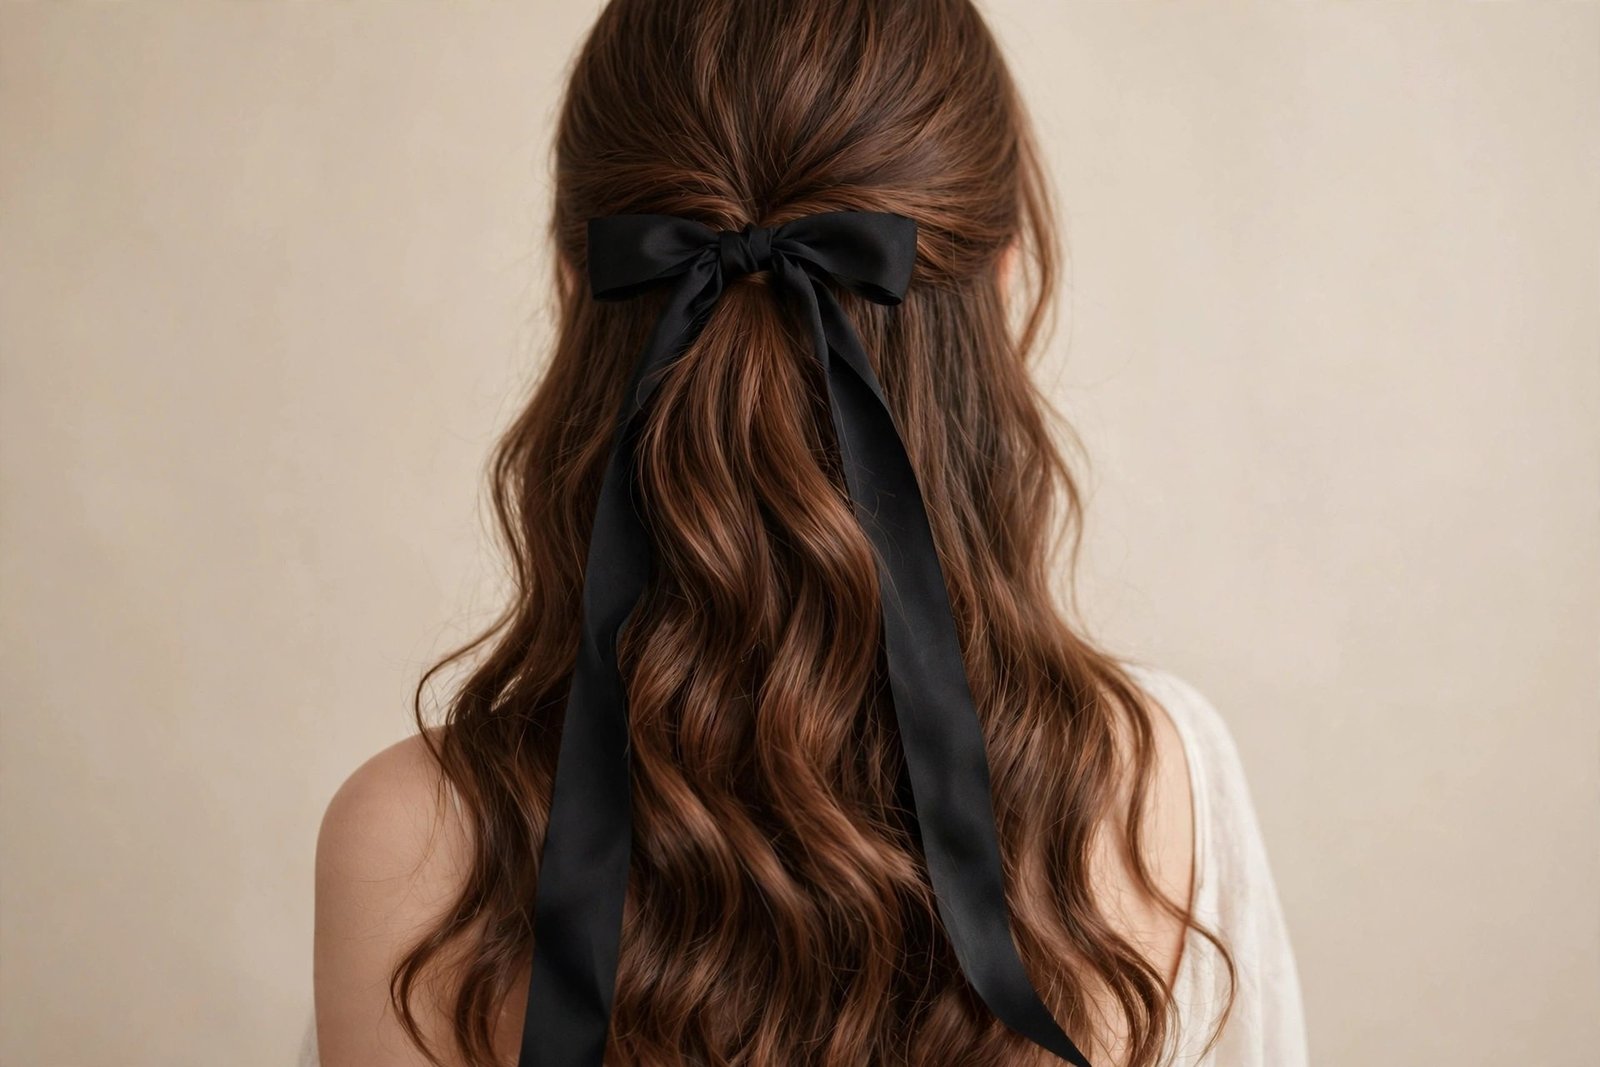
12. Face-Framing Half-Up with Curtain Bangs
Some combinations are just meant to be, and curtain bangs with a half-up style is one of them. The bangs frame your face in that soft, seventies-inspired curtain shape while the top section is gathered back, creating this gorgeous frame-within-a-frame effect. It’s the style that makes everyone look like they have cheekbones, and it’s one of the most requested salon looks of 2026. Our curtain bangs with long layered hair guide covers the cut itself if you’re thinking of taking the plunge.
Who it suits: Obviously, you need curtain bangs or long face-framing layers for this one — that’s the whole point. It flatters round, square, and heart-shaped faces beautifully because the curtain shape narrows the forehead and softens the jaw. Medium to long hair works best; the down section should have enough length to balance the face-framing pieces.
How to do it: Style your curtain bangs first — blow-dry them forward and outward with a round brush (or the viral roller trick: velcro rollers on the bangs for ten minutes while you do your makeup). Then gather the top section BEHIND the bangs — this is the key detail. Your bangs stay out, framing your face, while everything behind them goes up into a loose ponytail, bun, or twist. The contrast between the soft face frame and the pulled-back top is what makes this style sing. Keep the gathered section relaxed; tight and scraped-back fights the softness of the bangs.
Making it last: Bangs are the first thing to misbehave, so give them a dedicated shot of flexible hairspray. A tiny flat-iron touch-up on the bangs midday takes thirty seconds and revives the whole style. The half-up section itself is low-maintenance once it’s up.
Variations: Pair the curtain bangs with a messy bun for daytime, a sleek twist for evenings. Longer curtain pieces (cheekbone-grazing) give a more dramatic frame; shorter ones (brow-grazing) feel fresher and more modern.
Honest downside: This style lives and dies by the bangs. If your bangs are growing out awkwardly or you styled them badly that morning, the whole look suffers. It’s also not a wash-and-go situation — curtain bangs need daily styling to sit right. But if you’re already a curtain-bang person with a routine, this half-up version is one of the prettiest ways to wear them.
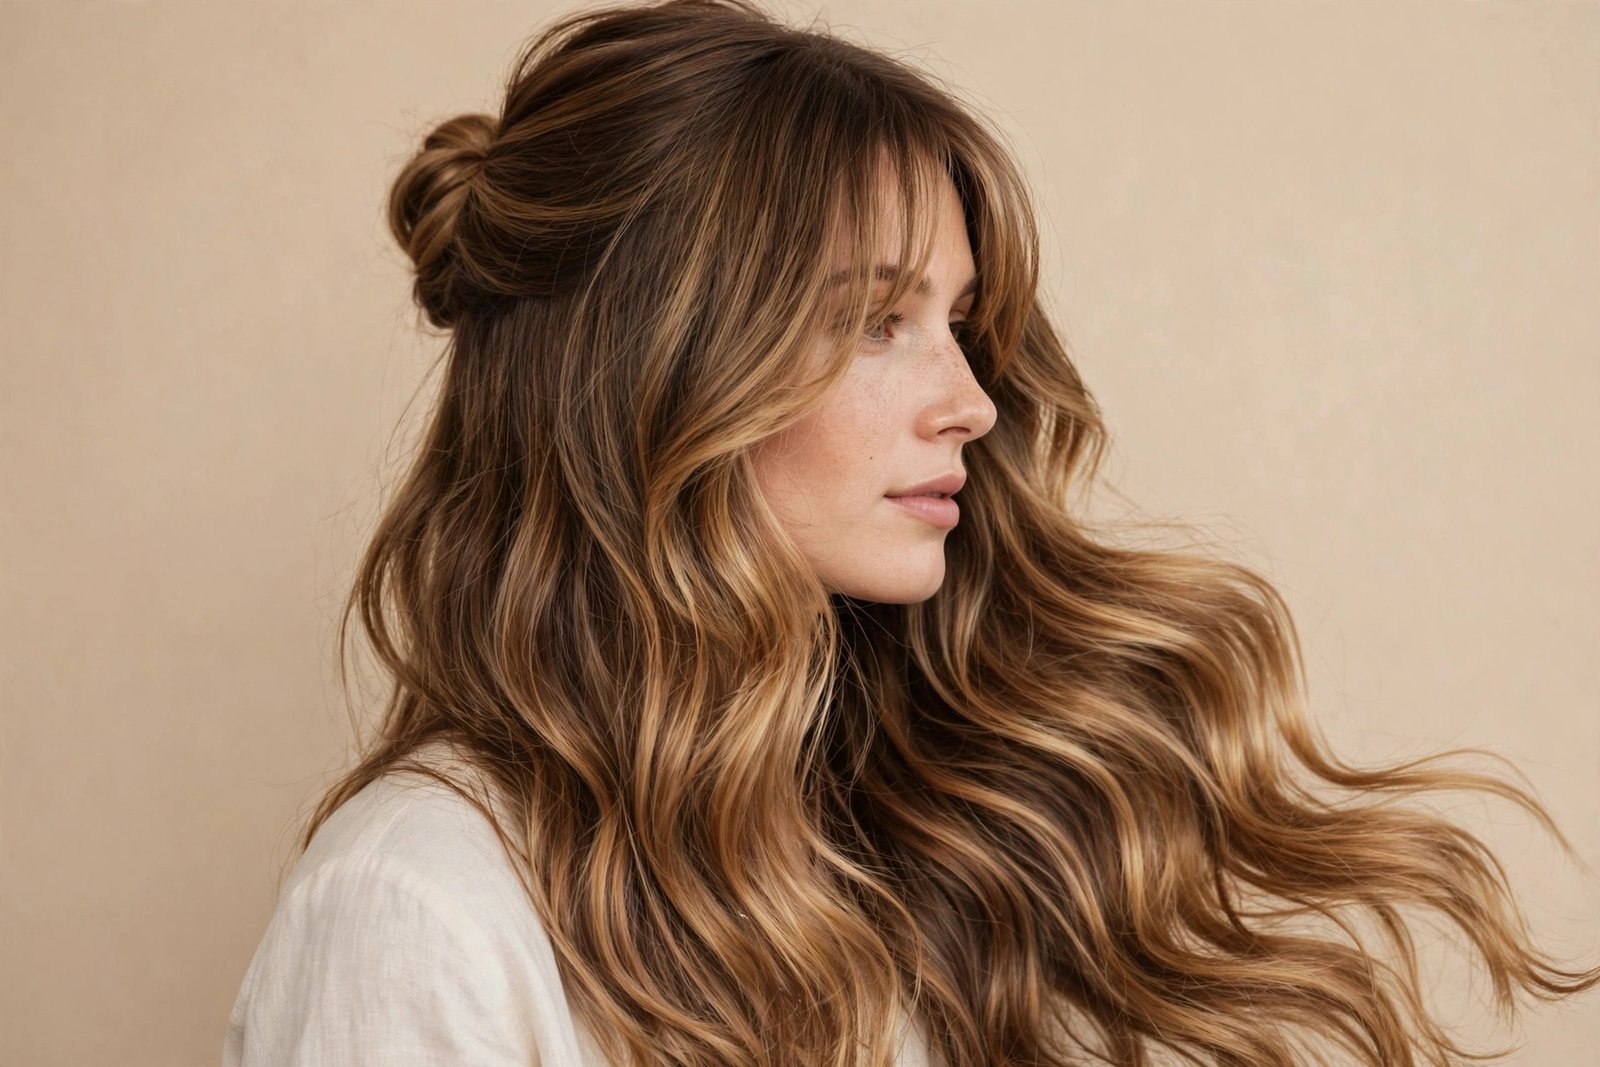
13. Dutch-Braid Half-Up
If the braided crown is the romantic, the Dutch-braid half-up is the cool, sporty one. Two Dutch braids start at the temples and run back along the sides of the head, meeting at the back where they’re secured — while everything underneath flows free. The braids sit raised on top of the hair (that’s the Dutch technique: crossing under instead of over), creating this bold, dimensional detail that looks amazing from every angle. It’s giving athlete-meets-model, and it’s incredibly practical.
Who it suits: This is a fantastic active-lifestyle style — it keeps the front sections locked down while showing off your length. It works on medium to long hair and suits all face shapes. Thick hair makes the most dramatic braids, but fine hair works too if you pancake generously. It’s also one of the best half-up options for second or third-day hair.
How to do it: Part your hair down the middle. On one side, take a section at the temple and divide it into three. Now braid Dutch-style: cross the side strands UNDER the middle strand (not over), adding hair from the hairline as you work back along the side of your head. Stop adding hair when you reach the back of the crown, then finish with a regular three-strand braid for an inch or two and secure with a clear elastic. Repeat on the other side. Bring both braids together at the back, remove the elastics, and pin them together — or tie them into a small ponytail with the down hair flowing beneath. Pancake both braids by gently tugging the edges for fullness.
Making it last: This is one of the most secure styles on the list — Dutch braids grip like nothing else. It’s genuinely a gym-to-dinner style. The meeting point at the back is the only vulnerability; pin it well. A little edge control along the hairline keeps it looking crisp.
Variations: Braid all the way down and let the two braids hang over the down hair for a different look. Add colorful thread or small rings to the braids for festival season. A single Dutch braid down the center part, with the sides left down, is a striking alternative.
Honest downside: Dutch braiding your own hair takes real practice — the underhand motion feels backwards at first, and doing it symmetrically on both sides is genuinely challenging. Your first attempts will be uneven, and that’s normal. Also, tight Dutch braids can cause tension headaches if you braid too aggressively; keep the tension firm but not painful, especially around the hairline.
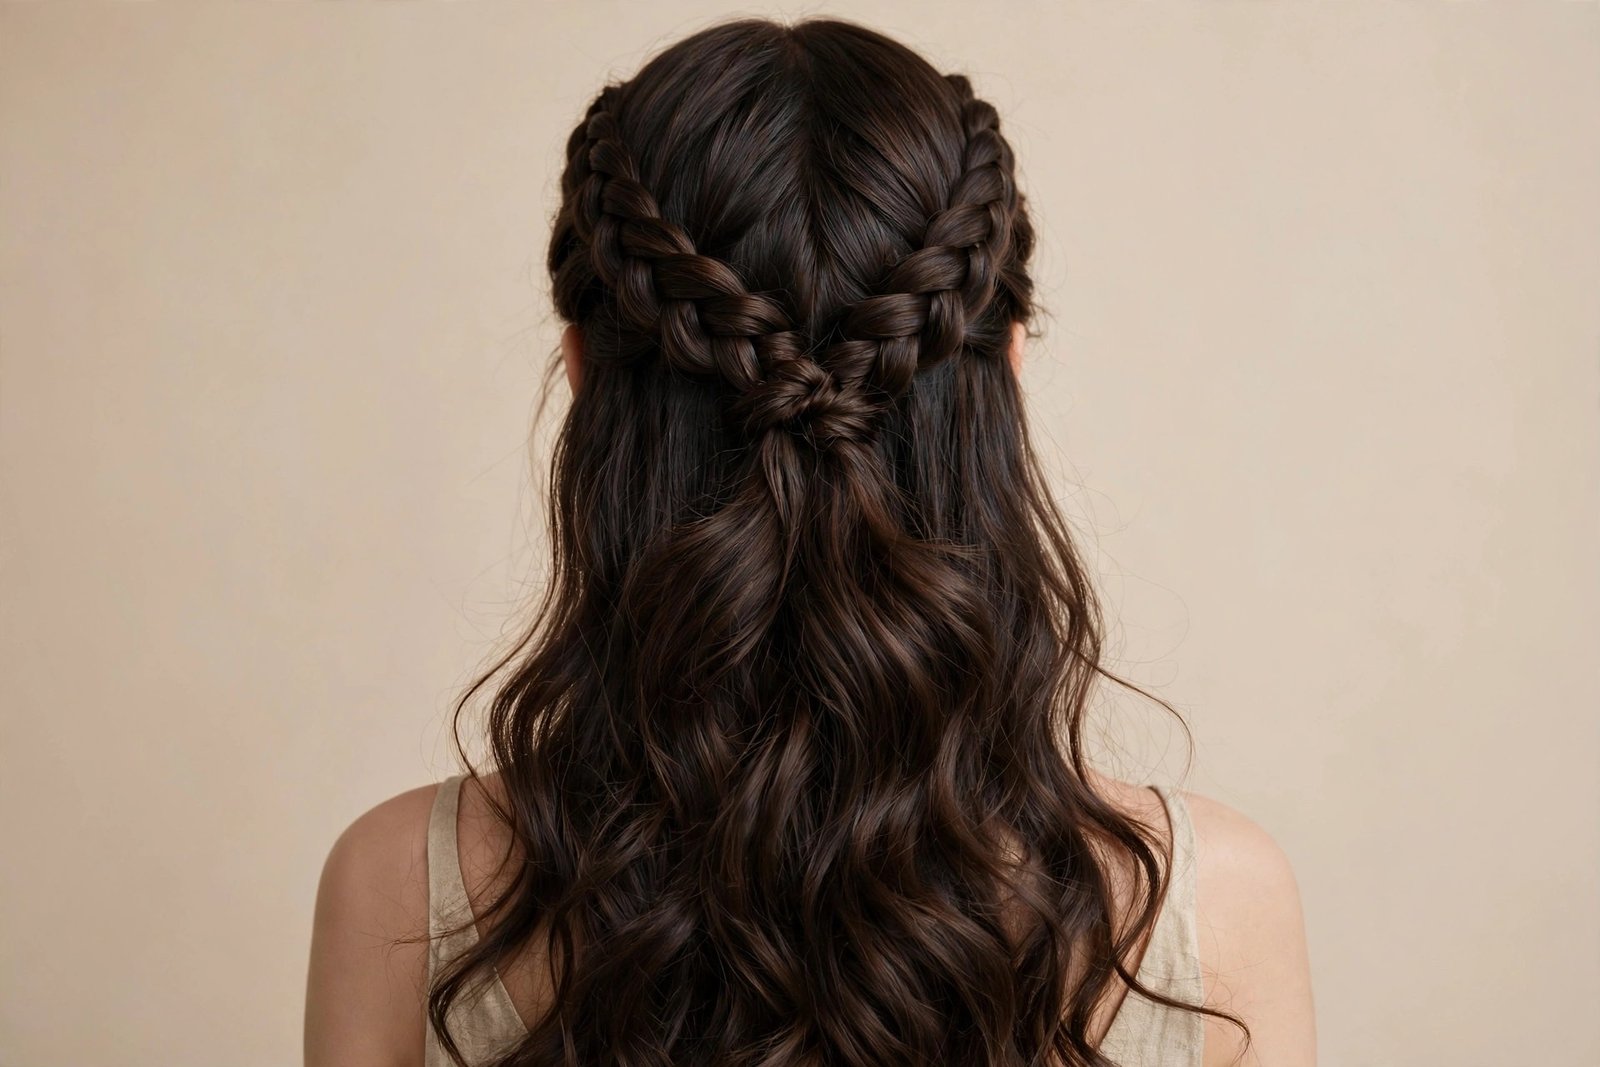
14. Claw-Clip Half-Up Twist
The claw clip renaissance is one of the best things to happen to hair in years, and the half-up twist might be its finest application. You twist the top section of your hair up and back, then clamp it with a claw clip — that’s it. Thirty seconds, zero skill required, and it looks like you have your life completely together. In 2026, the tortoiseshell and matte neutral clips are everywhere, and this style is the reason why. For more easy clip-based ideas, check our heatless updos for long hair collection.
Who it suits: Everyone. I’m not exaggerating — this is the most democratic style on the list. It works on fine hair (the clip does the holding, not tension), thick hair (use a large clip), straight, wavy, curly, medium length, long length. If you have hair and a claw clip, you can do this style. It’s especially great for busy mornings, work-from-home days, and anyone who “can’t do hairstyles.”
How to do it: Gather the top section loosely. Twist it upward — one or two full twists — and fold it against the back of your head. Open your claw clip and clamp it vertically over the twist, catching enough hair to feel secure. Let the ends of the twist poke out the top of the clip (that’s the cute part — don’t tuck them in neatly). Pull a few face-framing pieces loose. Done. If it feels wobbly, you didn’t catch enough hair — redo it with a slightly bigger section or a smaller clip.
Making it last: Clip quality matters enormously. A good claw clip with strong springs and teeth will hold all day; a flimsy one will pop open by lunch. Match the clip size to your hair volume — medium clips for fine to medium hair, large or XL for thick hair. For extra security, crisscross two bobby pins under the clip.
Variations: Twist horizontally and clip sideways for a different silhouette. Use two mini clips side by side instead of one big one. A French-twist version (tucking the twist into itself before clipping) looks more polished for evenings.
Honest downside: Cheap clips WILL betray you — usually at the worst moment. Invest in a good one. On very long, heavy hair, even a large clip can struggle; in that case, secure the twist with an elastic first, then clip over it for the look. And if you sleep in it (don’t), you’ll wake up with the most interesting dents — take the clip out before bed.
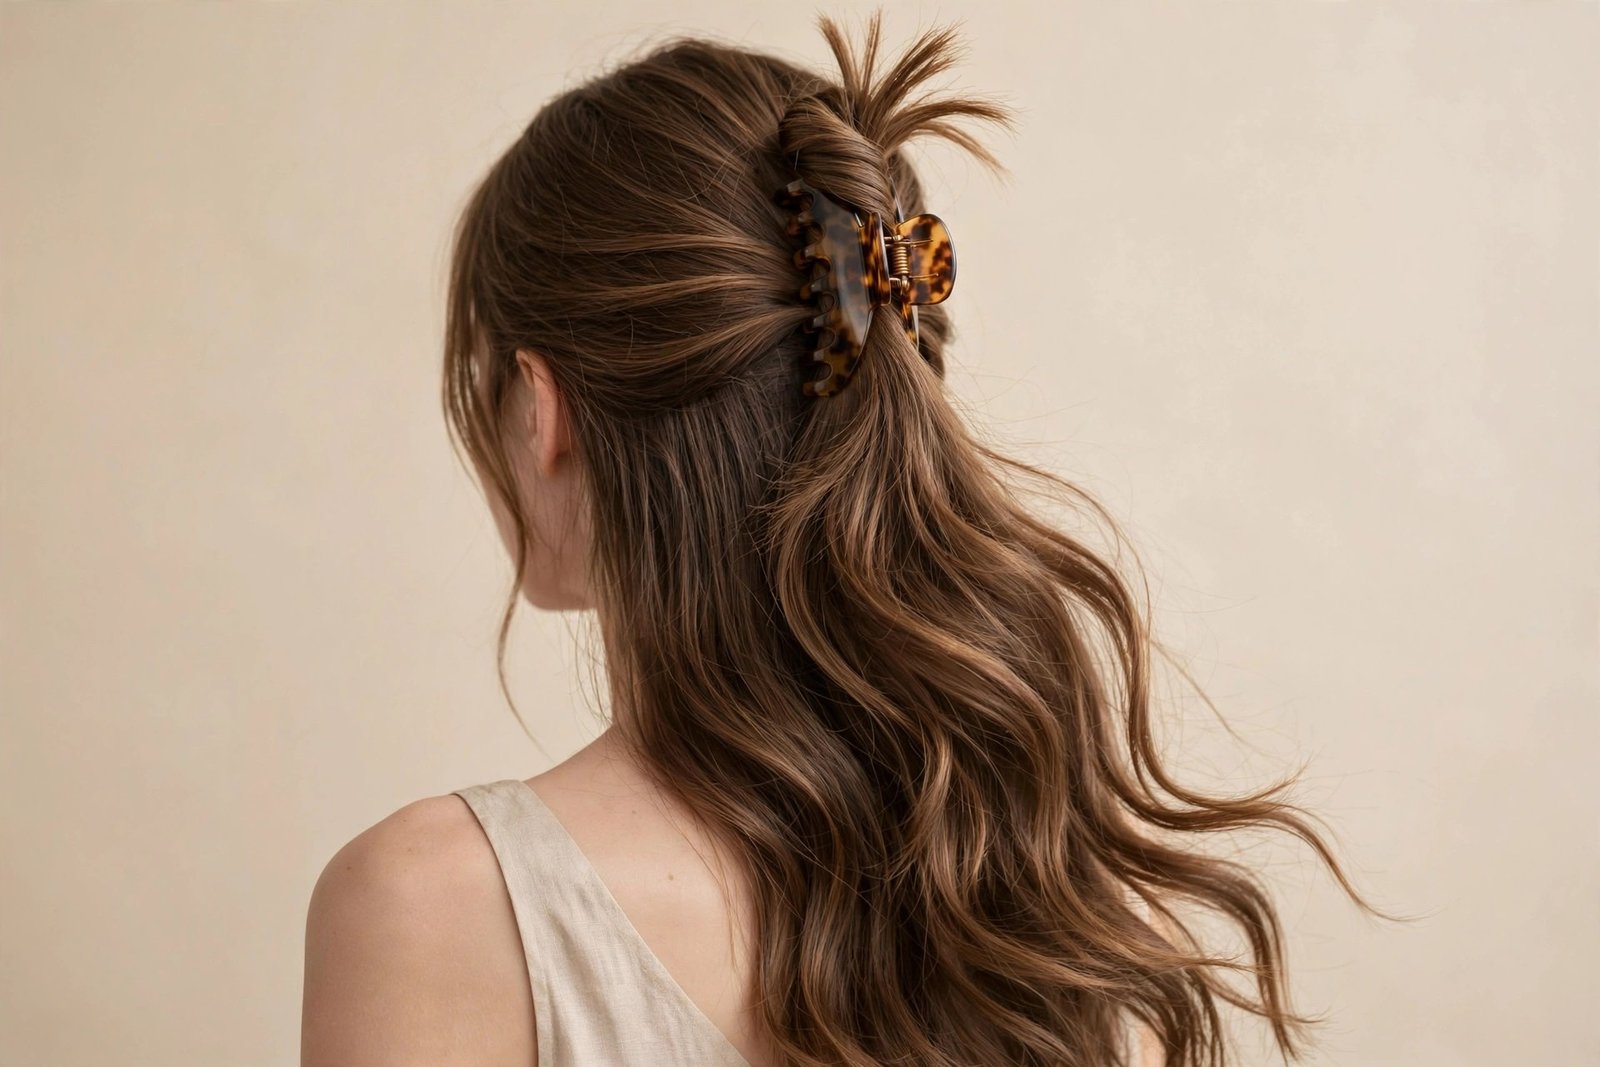
15. Waterfall-Braid Half-Up
The waterfall braid is pure hair magic: a braid that runs horizontally across the back of your head while strands of hair cascade through it like water over rocks. As a half-up style, it’s breathtaking — the braid creates a horizontal detail across the crown, and the “waterfall” strands blend into the down section below. It’s the most romantic style on this list, and it looks far more complex than it actually is.
Who it suits: Long hair is essential — the waterfall effect needs length to cascade. It looks most striking on hair with dimension: highlights, balayage, or multi-tonal color make each cascading strand visible. Straight to wavy hair shows the pattern best; very curly hair can work but the braid gets lost in the texture. This is a special-occasion style — weddings, proms, date nights.
How to do it: Take a section near one temple and divide it into three strands. Start a French braid: cross the side strands over the middle, adding hair from the top as you go. Here’s the waterfall trick: every time you would add hair from the BOTTOM, instead DROP the bottom strand entirely (let it fall — that’s your waterfall strand) and pick up a new strand of hair from just behind it to continue the braid. Work your way horizontally across the back of your head to the other temple. Secure the end with a clear elastic and pin it discreetly. The dropped strands cascade down through the braid and blend with your down hair. Gently pancake the braid for fullness.
Making it last: The waterfall braid is actually quite stable once it’s in — the French-braid structure on top anchors everything. The dropped strands will move naturally, which is the point. Pin both ends of the braid securely; they’re the only real failure points. A light hairspray over the braid keeps flyaways from blurring the pattern.
Variations: A double waterfall (two parallel braids) is absolutely stunning on very long hair. For a softer look, curl the waterfall strands so they blend into waves below. Adding tiny flowers or crystal pins along the braid makes it bridal.
Honest downside: The drop-and-replace motion is confusing until it clicks — expect your first attempt to take 20+ minutes and look questionable. Watch a video tutorial first; reading about it only gets you so far. And this style is strictly for longer hair — above shoulder length, there isn’t enough hair to drop and replace meaningfully. It’s also not a windy-day style; the whole point is delicate strands, and wind will tangle them into the braid.
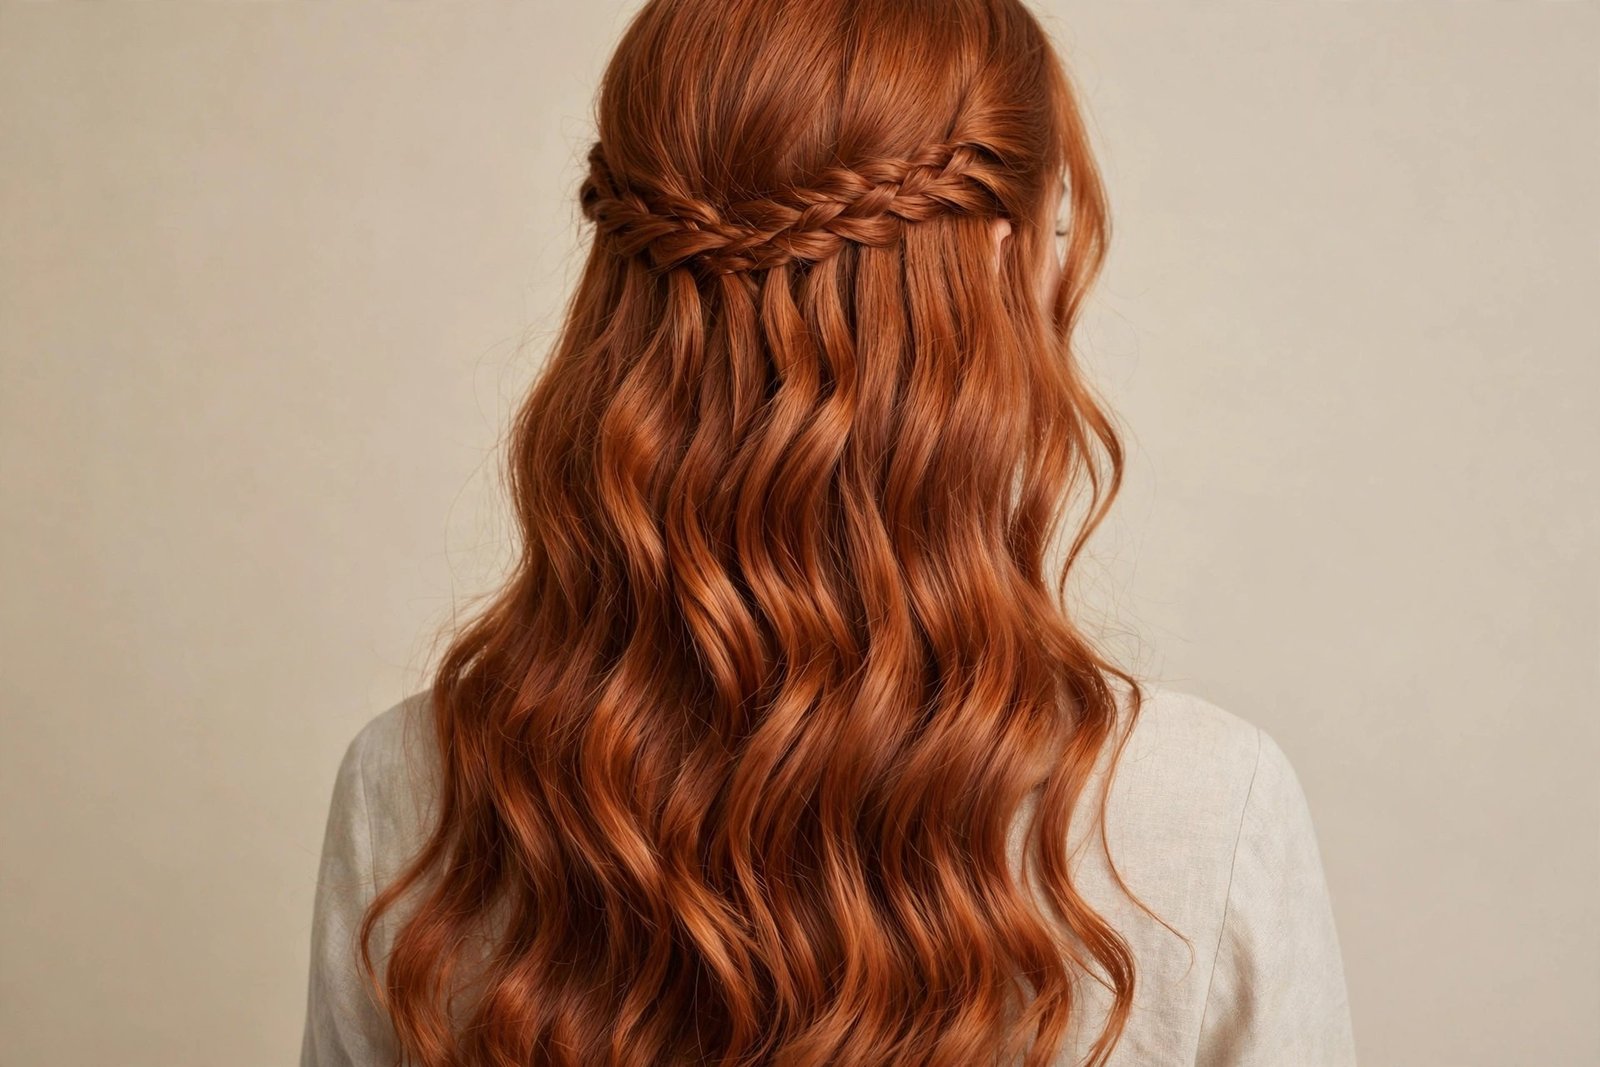
16. Voluminous Blowout Half-Up
We end with the showstopper. The voluminous blowout half-up is old-Hollywood glamour meets modern polish: big, bouncy, salon-fresh volume throughout, with the top section lifted and pinned back to show off the fullness. It’s the style that makes your hair look twice as thick as it is, and it carries the kind of confidence that turns heads when you walk into a room. If big hair is your love language, this is your style.
Who it suits: This style is a gift to fine and medium hair — the blowout technique creates volume that fine hair could never achieve on its own. It flatters oval, heart, and long faces beautifully (the width balances longer face shapes). You need at least medium length; the bounce needs hair to bounce with. If you love a bouncy blowout, this half-up version gives you the best of both worlds.
How to do it: The blowout is the foundation, so don’t rush it. Apply volumizing mousse to damp roots, then blow-dry in sections with a large round brush, lifting at the roots and rolling the ends under. Work in the direction you want the volume to sit. Once dry and bouncy, take the top section (crown area) and gently backcomb at the roots for extra lift — just a few strokes, we’re not building a beehive. Smooth the top layer over the backcombing, gather the section back, and pin it with the hair slightly lifted (don’t pull it flat — the lift IS the style). Let the sides and back fall in big bouncy waves. Finish with a strong-hold hairspray, applied in layers: spray, let it set for 30 seconds, spray again.
Making it last: Volume is a battle against gravity, so prep products matter more here than in any other style. Mousse on damp hair, a root-lifting spray, and layered hairspray are the holy trinity. Avoid touching the crown — every touch compresses the lift. If it starts to fall by evening, flip your head upside down, shake gently, and re-pin; you’ll get a surprising amount of volume back.
Variations: A deep side part version has incredible vintage glamour. For a modern twist, keep the blowout big but gather the top into a small sleek knot — the contrast between sleek top and voluminous bottom is striking. Adding velcro rollers to the crown for 15 minutes before pinning gives extra lift that lasts.
Honest downside: This is the highest-effort style on the list — a proper blowout takes 30-45 minutes, and there’s no shortcut that gives the same result. It’s also the most product-heavy, which means more washing later. Humidity will deflate it faster than any other style here, so check the forecast. But for the occasions that matter — when you want to feel absolutely unstoppable — nothing else on this list delivers like big, bouncy, half-up volume.
Your Half Up Half Down Styling Routine: Prep, Style & Make It Last
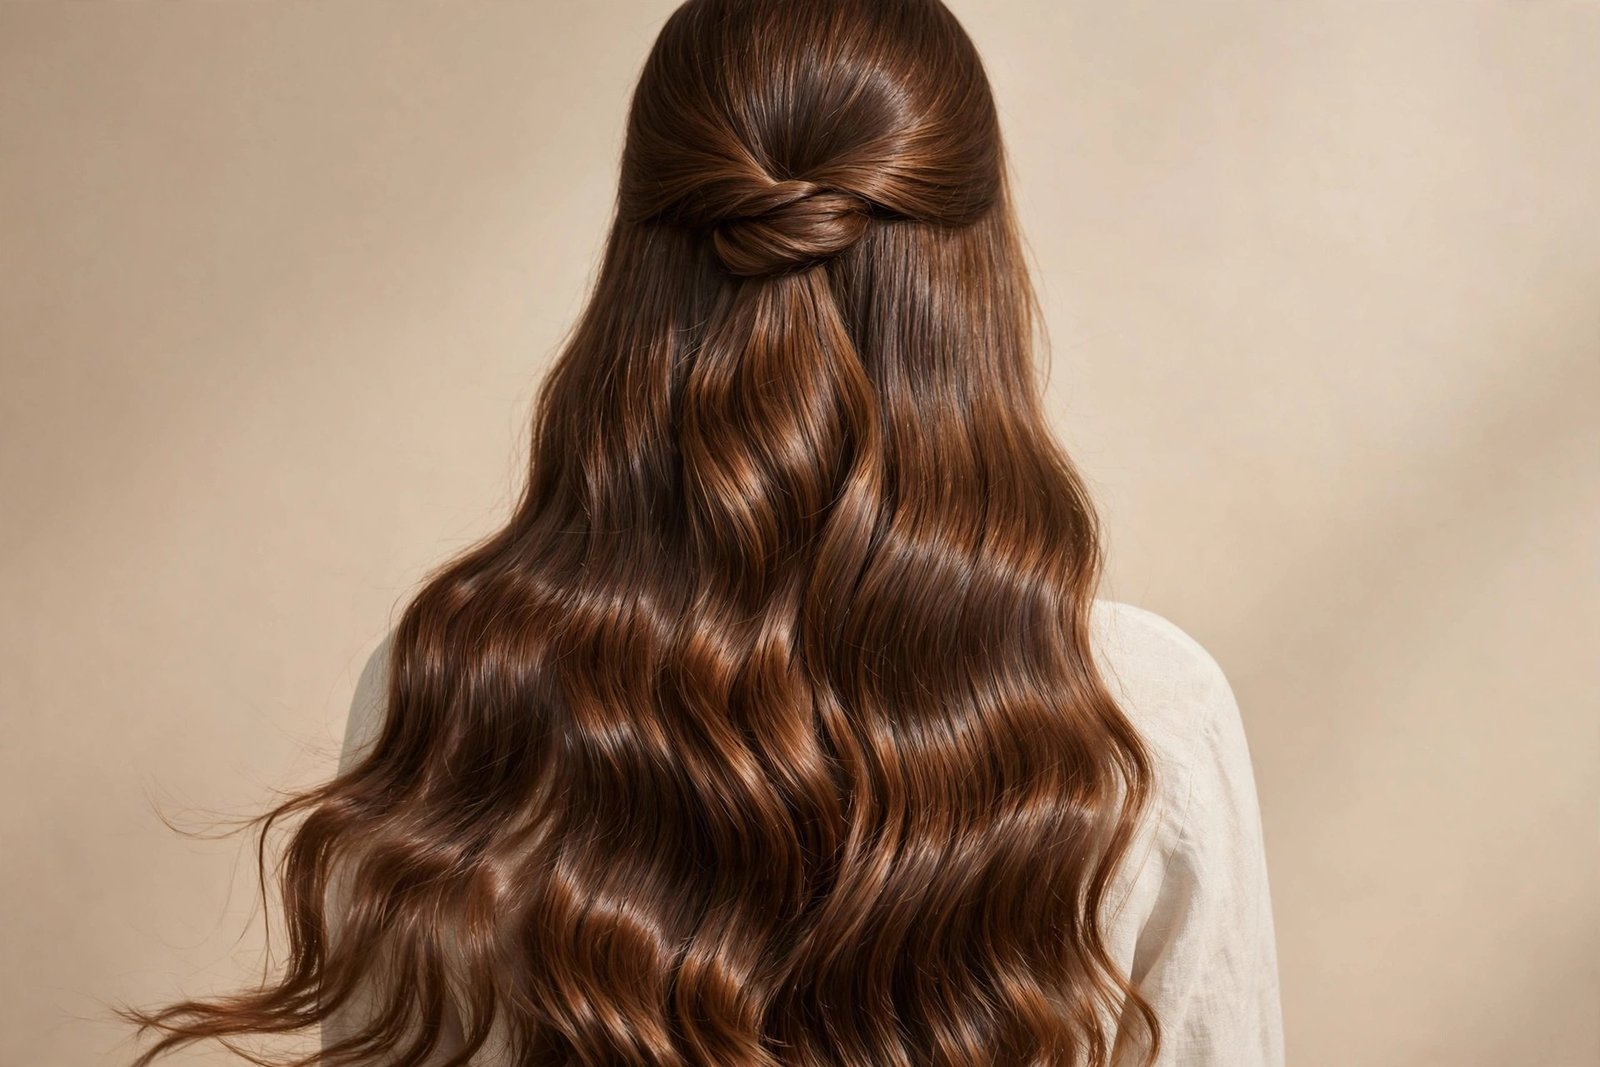
Here’s something nobody tells you: the difference between a half-up style that looks expensive and one that looks like you gave up halfway is almost entirely in the prep and the finishing — not the style itself. The same top knot can look chic or sloppy depending on what you did before and after. This section is my complete routine: how to prep your hair, how to choose the right products, how to make any half up half down hairstyle last all day, and how to take it all down without damage at night.
Prepping Your Hair: The Foundation Nobody Skips
Let me say the quiet part out loud: freshly washed, squeaky-clean hair is actually the WORST starting point for most half-up styles. Clean hair is slippery — elastics slide, pins slip, braids unravel. Day-two (or even day-three) hair has natural texture and grip that holds styles beautifully. If you must style on wash day, you need to fake that grit: a generous spritz of dry shampoo or texturizing spray through the roots and mid-lengths before you start.
That said, the down section still needs to look good — it’s half the style, after all. So the ideal prep is: clean-ish roots with texture, and smooth, polished lengths. On wash day, blow-dry as usual, then add texture spray only to the sections you’ll be gathering. On second-day hair, refresh the lengths with a light brush-through and a tiny bit of smoothing serum on the ends, then dry shampoo at the roots. You get the best of both worlds.
For curly girls, prep means defined, dry curls — never try to gather wet or damp curls into a half-up style unless you want frizz and a style that loosens as it dries. For straight-hair folks doing a wavy half-up, curl first and let the curls cool completely before gathering anything. I know it’s tempting to rush, but warm curls pinned up will fall flat within the hour. Patience here pays off all day.
One more prep essential: detangle thoroughly before you start. Every half-up style involves gathering, twisting, or braiding, and tangles will fight you at every step. A wide-tooth comb on dry hair (or a detangling brush) takes two minutes and saves ten minutes of frustration. Trust me on this one.
Choosing Products That Actually Work
You don’t need a cabinet full of products — you need the right five. First, a dry shampoo or texturizing spray: this is your grip-giver, essential for slippery hair. Second, a flexible-hold hairspray: for finishing without crunch. Third, a strong-hold hairspray: for special occasions and humid days when you need real staying power. Fourth, bobby pins that match your hair color — and more of them than you think; buy the big pack. Fifth, clear mini elastics: invisible, strong, and they don’t leave dents like fabric elastics can.
Beyond the basics, a few situational heroes are worth having. A smoothing serum for the down section when you want polish. An edge control or pomade for sleek styles and baby hairs. A heat protectant — non-negotiable if you’re curling or straightening first; half-up styles show off your lengths, so keep them healthy. And a shine spray for the final touch on sleek or blowout versions.
Here’s my product philosophy: apply in thin layers rather than one heavy blast. A light mist of texturizer before styling, a touch of serum on the ends, hairspray at the end — layered lightly, products work together. One heavy application of anything just makes hair sticky, stiff, or greasy. Less is more, applied in stages.
A quick word on tools: invest in good elastics (the cheap ones snap and snag), bobby pins with a good grip (test them — if they slide open easily in your fingers, they’ll slide in your hair), and one quality claw clip if that’s your style. These tiny tools make an outsized difference. According to the stylists at Byrdie, the right tools matter as much as technique for updos and half-up styles — and after years of doing this, I couldn’t agree more.
Making Your Half-Up Style Last All Day
Getting the style up is only half the battle — keeping it there through work, weather, and whatever your day throws at you is the real skill. The good news: a few strategic habits make an enormous difference, and none of them are complicated.
First, anchor before you decorate. Every half-up style should start with a secure base — a tight elastic, well-placed pins, or both — before you add any decorative elements like ribbons or clips. The decorative stuff is the first thing to fail if the foundation is weak. Think of it like building a house: nobody puts up curtains before the walls.
Second, pin in an X pattern. Two bobby pins crossed over each other grip exponentially better than two parallel pins. This one trick solves about 80% of “my style keeps falling” complaints. Push pins in against the direction of the hair’s pull — if the hair wants to fall down, angle your pins upward.
Third, layer your hairspray. One heavy blast at the end creates a crunchy shell that cracks and flakes. Instead: a light mist before styling (on the sections you’ll gather), another light mist after the style is up, and a final touch on trouble spots. Let each layer dry for 20-30 seconds. Flexible-hold for daytime, strong-hold for events.
Fourth, carry a mini emergency kit. Three bobby pins, one clear elastic, and a travel hairspray in your bag weigh nothing and have saved countless styles. The five-second bathroom mirror fix — re-pin, re-puff, re-spray — is the difference between a style that looks good at 9am and one that still looks good at 9pm.
Finally, hands off. Every touch loosens the style a little. I know it’s tempting to keep checking, but the less you fidget, the longer it lasts. Set it and forget it — that’s the whole point of a good anchor.
Taking It Down: End-of-Day Hair Care
How you take a style down matters almost as much as how you put it up — especially if you wear half-up styles regularly. Yanking out elastics and ripping through pins is a fast track to breakage, and breakage is the enemy of every future hairstyle.
Start by removing everything in reverse order: decorative elements first, then pins, then elastics last. For pins, don’t pull them straight out — open them slightly as you slide them out in the direction they went in. For elastics, especially the tiny clear ones, don’t stretch and yank; if one is tangled, cut it out with small scissors rather than pulling. A fifty-cent elastic is not worth broken hair.
Once everything’s out, detangle gently before bed. Your hair has been manipulated all day — product, pins, and gathering all create tangles. A wide-tooth comb, working from ends to roots, takes two minutes. If you wore a lot of hairspray, a light brush-through is fine, but save the real detangling for your next wash if your hair is fragile when dry.
If you’re a frequent half-up wearer, give your hair recovery days. Constant tension in the same spot — especially tight ponytails and buns — can cause breakage along the hairline and even traction alopecia over time. Vary your styles, vary the placement, and keep the tension comfortable, never painful. Pain is your hair’s way of telling you something’s wrong; listen to it.
And here’s my favorite end-of-day ritual: a tiny bit of hair oil on the ends before bed. Your ends did the heavy lifting all day, displayed for the world to see. A pea-sized amount of oil keeps them healthy, shiny, and ready for tomorrow’s style. Healthy hair styles better — it’s that simple. For heat-styled looks, quality tools make a real difference in minimizing damage; the styling guides at ghd have excellent advice on heat protection if you curl or straighten regularly.
Frequently Asked Questions
You asked, I’m answering. These are the questions I hear most often about half up half down hairstyles — the practical stuff that determines whether the style actually works in your real life.
How long does my hair need to be for half up half down hairstyles?
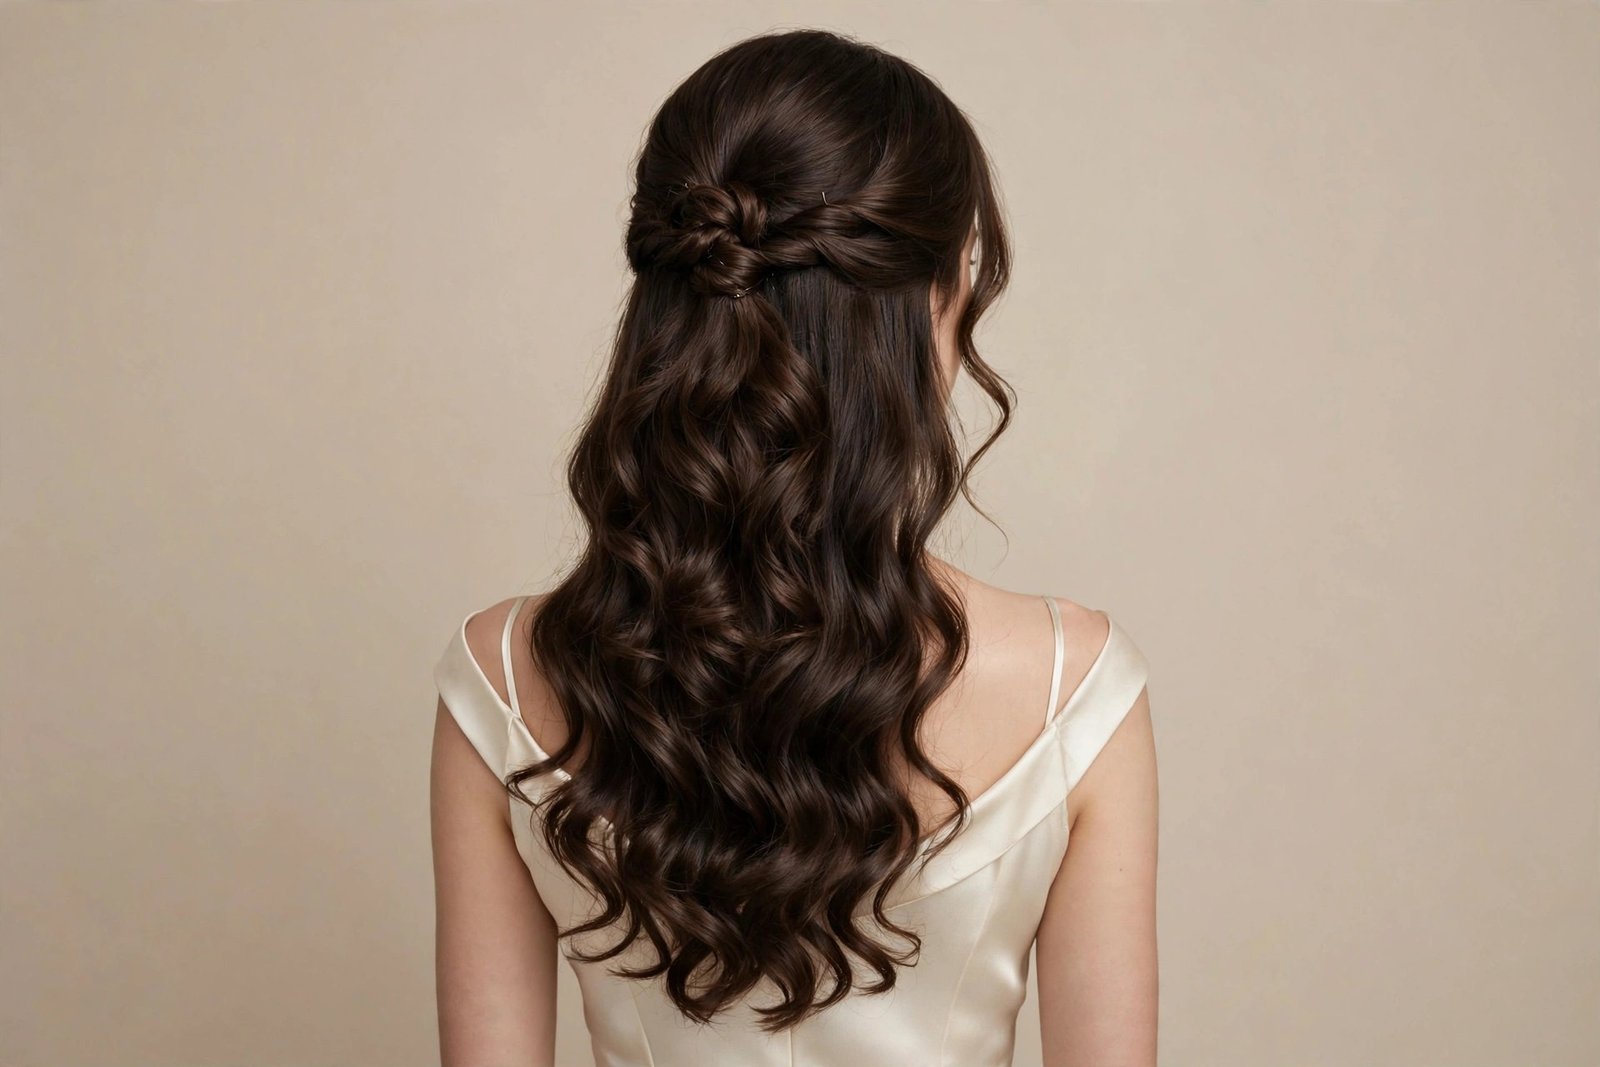
Shoulder-length is the practical minimum for most versions — you need enough hair to gather a meaningful top section while leaving enough down to actually look like “half down.” That said, shorter hair isn’t excluded: lobs and long bobs can do adorable mini half-up styles using just the front sections, and the claw-clip twist works beautifully on medium lengths. The braided and bubble-pony versions really want longer hair (armpit-length plus) to show off their detail. When in doubt, try gathering the top section in front of a mirror — if you can comfortably secure it while leaving a good amount down, you’re good to go.
Do half up half down hairstyles work on fine or thin hair?
Absolutely — with the right prep. The secret weapons for fine hair are texture and strategic teasing. Dry shampoo or texturizing spray at the roots before you start gives fine hair the grip it needs to hold a style. Lightly backcombing the crown before gathering creates the illusion of much thicker hair — just remember to smooth the top layer over the teasing so it looks polished, not messy. Styles like the twisted rope half-up and the claw-clip twist are particularly kind to fine hair because they don’t rely on volume. Avoid the bubble ponytail if your hair is very fine, as it needs volume to look right — but nearly everything else on this list is fair game.
Can I wear half up half down hairstyles to a formal event or wedding?
Yes — and honestly, it’s one of the most popular choices for weddings right now, for brides, bridesmaids, and guests alike. The key to formal-izing the style is polish: smooth the down section into defined curls or sleek straightness, choose an elegant gathered detail (waterfall braid, twisted sections, or a low sleek ponytail), and add a refined accessory like pearl pins or a delicate clip. The romantic loose-wave half-up and the waterfall-braid half-up are practically made for formal occasions. Just do a trial run before the event, use strong-hold products, and bring your emergency kit — formal events are long, and you’ll want backup.
How do I keep my half-up style from falling out?
The number one reason half-up styles fail is a weak foundation. Always secure the gathered section with a proper elastic first — don’t rely on pins alone. Then reinforce with bobby pins in a crisscross (X) pattern, pushing them in against the direction of pull. If your hair is silky, add grip with dry shampoo or texturizing spray before you start styling. For all-day events, finish with layered hairspray: a light mist before gathering, another after the style is complete. And match your method to your hair: thick, heavy hair needs more pins and stronger elastics, while fine hair needs texture products more than extra hardware.
Are half up half down hairstyles suitable for work or the office?
Completely — it depends on which version you choose. The sleek straight half-up, the low half-up ponytail, the twisted rope half-up, and the claw-clip twist all read as polished and professional. They keep hair out of your face (practical) while looking intentional and put-together. I’d save the space buns and bubble ponytail for casual settings, but even the braided crown works in creative workplaces. The office-friendly rule of thumb: neater finish, minimal accessories, and nothing too voluminous. A sleek half-up with straight hair is genuinely one of the most office-appropriate styles that exists.
Will half up half down hairstyles damage my hair?
Done sensibly, no — it’s one of the gentler ways to wear your hair up, because half your hair stays completely free of tension. The risks come from bad habits, not the style itself: wearing it painfully tight every day, using cheap elastics that snag, yanking pins out, or always gathering from the exact same spot (which stresses the same hairs repeatedly). Rotate your styles and placement, keep tension comfortable, remove everything gently at night, and use snag-free elastics and quality pins. If you follow those rules, you can wear half-up styles daily without issues. Your hair will thank you for varying things up.
What’s the easiest half up half down hairstyle for beginners?
The claw-clip half-up twist, hands down — no contest. Gather, twist, clip, done in thirty seconds with zero technique required. The classic half-up top knot is a close second: gather, ponytail, twist into a bun, pin. Both are extremely forgiving — if they’re a little messy, they just look intentionally undone. I’d suggest mastering those two first, then graduating to the twisted rope half-up (easy once you learn the motion) and the braided crown (needs basic braiding skill). Save the waterfall braid and fishtail for when you’re feeling ambitious — they’re the advanced level, and there’s no shame in working up to them.
Can I do half up half down hairstyles on curly or coily hair?
Not only can you — some versions are actually BETTER on curly and coily hair. Your natural volume and texture do half the styling work for you. The curly pineapple half-up puff was designed for your hair type, and the messy textured bun, braided crown, and twisted styles all look phenomenal with curls. The main adjustments: always style on dry, defined curls (never wet), use satin scrunchies instead of regular elastics to prevent breakage, and embrace the volume rather than fighting it. Avoid styles that require sleek smoothness unless you’re planning to straighten first — work with your texture, and the results will be stunning.
Conclusion
Here’s what I hope you take away from this guide: half up half down hairstyles aren’t just a trend — they’re a toolkit. Sixteen styles, sixteen different moods, sixteen ways to feel like the best version of yourself on any given day. Bad hair day? Top knot. Date night? Waterfall braid. Job interview? Sleek and straight. Lazy Sunday? Claw clip and done. There’s a version for every version of you.
My honest advice: don’t try to master all sixteen at once. Pick two or three that made you think “oh, that’s ME” while reading, and practice those until they’re second nature. The claw-clip twist on busy mornings, the braided crown when you want to feel pretty, the sleek half-up when you mean business — build your personal rotation and the rest will follow naturally. Hair should be fun, not homework.
And remember the golden rule that runs through every style in this guide: work WITH your hair, not against it. Your texture, your length, your face shape — they’re not obstacles to work around, they’re the raw materials. The prettiest half-up style isn’t the most complicated one; it’s the one that looks like it was made for you. Now go find yours — and if someone asks who did your hair, you get to smile and say you did it yourself.