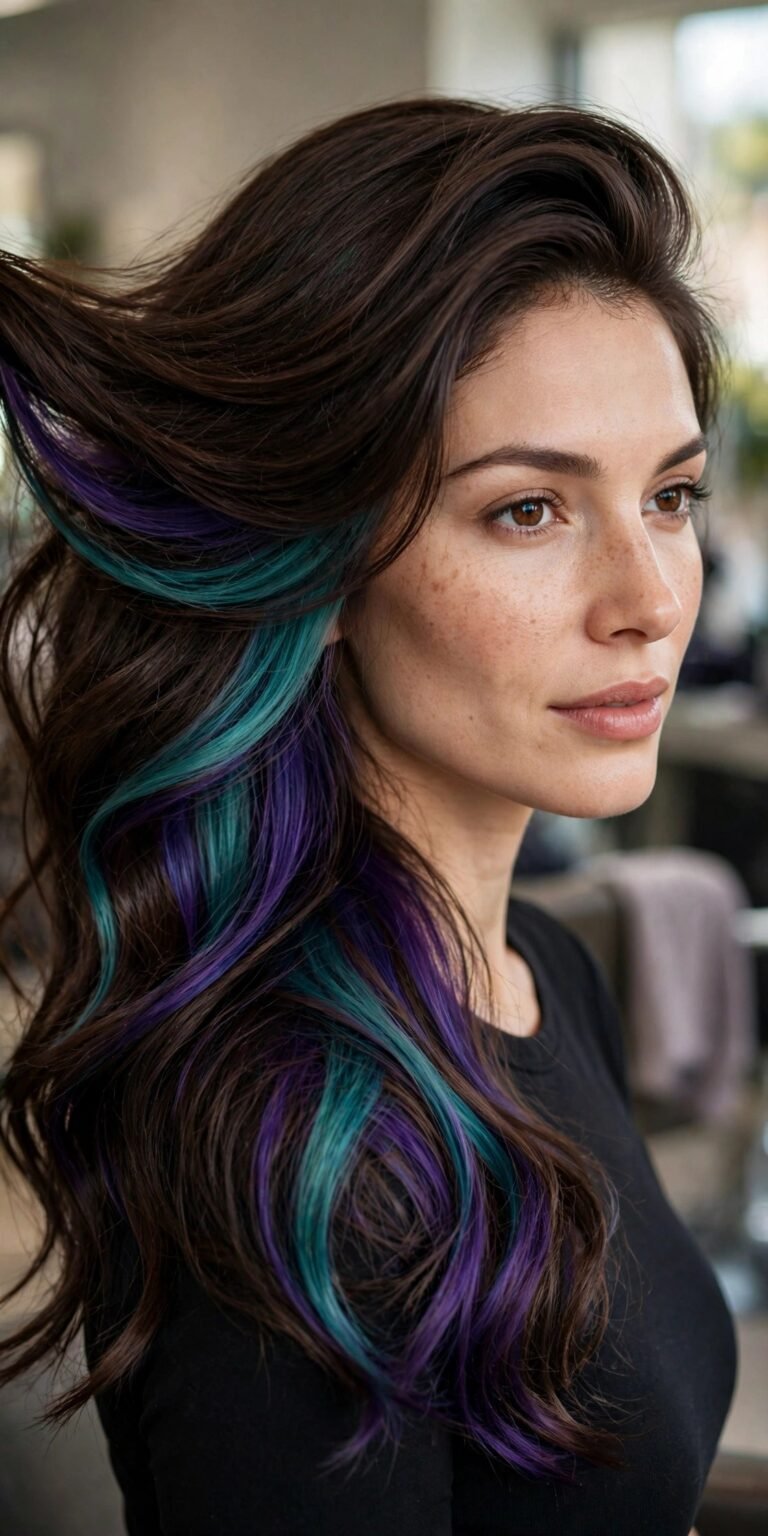
90s Hairstyles Women 2026: 16 Throwback Looks, Modernized
90s Hairstyles Women 2026: The Throwbacks Worth Revisiting
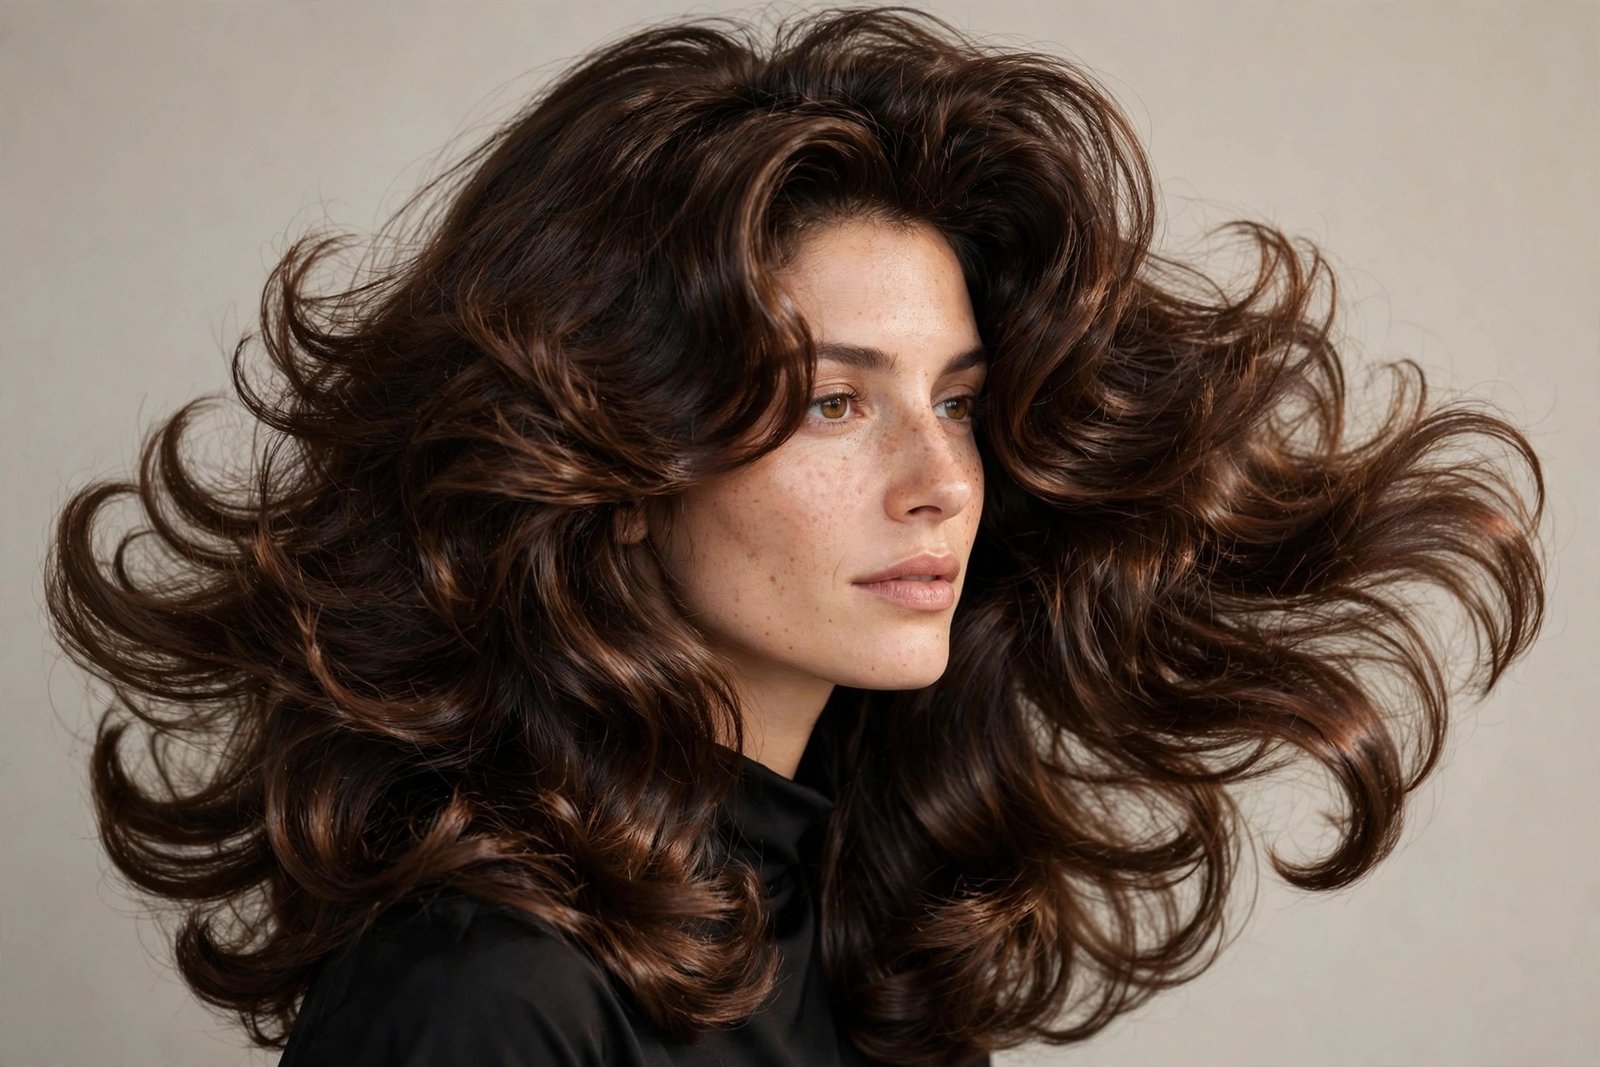
Every decade gets its nostalgia tour, but the 90s hairstyles women loved have returned with a confidence none of the other revivals managed. This isn’t ironic fancy-dress hair. The Rachel, the crimp, the high ponytail, the scrunchie — they’re back in 2026 because they were genuinely good ideas, and this time around we’re doing them with better products, better tools, and roughly twenty years of lessons about what actually damages hair.
I’ll be honest with you: when the 90s hairstyles women grew up with started creeping back, I rolled my eyes so hard I nearly sprained something. We’d been here before — the mid-2010s tried it and gave us stiff middle parts and sad attempts at grunge waves that lasted exactly one summer. But 2026 is different. Stylists aren’t copying the decade; they’re editing it. The volume stays, the crunchy gel goes. The layers stay, the over-thinned ends go. The attitude stays — God, the attitude definitely stays — but the execution is all grown up.
Inside this guide: 16 modernized 90s hairstyles for women, each one broken down properly. What the look actually is (no rose-tinted myths), who it genuinely flatters, exactly what to ask your stylist for, how to style it at home without a glam squad, what it costs to maintain, and — because nobody else will tell you — the honest downside of each one. Plus a full 90s-inspired styling routine and answers to the questions my clients ask every single week.
Table of Contents
- 90s Hairstyles Women 2026: The Throwbacks Worth Revisiting
- 16 Modernized 90s Hairstyles Women Are Wearing in 2026
- The 90s Styling Routine: Products, Tools & Maintenance
- 90s Hairstyles Women FAQs: Your Questions Answered
- Conclusion
Why the 90s Came Back (and Why It’s Staying This Time)
Hair trends run on a thirty-year nostalgia cycle, and the 90s hit that window dead on. But cycles alone don’t explain why these particular styles stuck. The real reason is structural: 90s hair was built on volume, movement, and visible texture — the exact things the flat, over-smoothed 2010s took away from us. After a decade of hair that was either poker-straight or artificially beachy, people were starving for hair that actually did something. Big bouncy layers, flipped ends, crimped texture, gravity-defying ponytails — the 90s gave hair a pulse.
The other reason this revival has legs: it’s democratic. Most 90s styles work across hair types, face shapes, and budgets. A scrunchie costs less than your coffee. Space buns need exactly two elastics and ten minutes. The Rachel works on fine, medium, and thick hair with the right layering. Compare that to, say, the glass-hair era, which demanded weekly salon glosses and a flat iron addiction — the 90s are refreshingly low-commitment. That’s why my chair is full of twenty-somethings asking for cuts their mothers wore to prom, and why their mothers are booking right after them.
One more thing worth saying: the 2026 versions are smarter. We’ve swapped the alcohol-heavy mousses that made 90s hair crackle for flexible creams and heat protectants that actually protect. We’ve replaced the daily 450-degree flat iron sessions with single-pass ceramic tools and lower temps. The looks are the same — the hair survives them now. If you lived through the original decade and swore you’d never go back, fair enough. But take a second look. Your hair is allowed to have fun again.
Who These 90s Hairstyles Women Suit Best (and Who Should Think Twice)
The good news first: there’s a 90s look for almost everyone. Long layered blowouts flatter round and square faces by adding vertical movement; pixie crops sharpen softer features beautifully; high ponytails lift everything — they’re basically a free facelift. Crimped texture and space buns don’t care about your face shape at all; they’re about attitude and texture, not bone structure. Age is a non-issue too. Some of my best 90s-revival clients are in their fifties, reliving the decade properly this time, and they look fantastic.
Now the honest part. Not every 90s style is a free pass. Baby bangs demand commitment and a face that can carry strong horizontal lines — they’re brutal on very round faces if cut wrong. Ultra-high ponytails pull at the hairline, so if your edges are fragile, keep the pony lower or give it rest days. Crimping on already-fragile, bleached hair is asking for breakage unless you’re obsessive about heat protectant. And the flippy bob needs thick-enough hair to hold the flip; on very fine hair it can fall flat by lunch, which is the opposite of the look.
Texture matters more than anything else. Straight and wavy hair will take to most of these styles easily. Curly and coily hair can absolutely wear 90s looks — silk-press blowouts, defined crimp-like texture, high puffs — but the technique changes, and your stylist should know that. My rule of thumb: bring your natural texture to the consultation instead of straightening it first. A good stylist cuts for the hair you actually have, not the hair you wish you had. The 90s were many things, but they were never about fighting your texture into submission — that was the 2000s. The 90s were about making your texture louder.
How to Talk to Your Stylist About a 90s Cut
Here’s a mistake I see constantly: someone walks in, says “give me The Rachel,” and walks out with something that looks like neither Rachel nor 1995. The problem is that 90s styles have a hundred modern interpretations, and your stylist can’t read your mind. Bring reference photos — three of them. One you love, one you sort-of like, and one that shows what you don’t want. That last one matters more than people think; it tells your stylist where your boundary is.
Use the right language. “Layers” in the 90s meant something specific: long, face-framing layers that start at the chin and cascade down, with movement at the ends. If you want The Rachel, say “layered lob with flipped-out ends and curtain framing around the face.” If you want grunge waves, say “one-length with long internal layers, nothing above the chin.” Vague requests get vague haircuts. And tell your stylist how you actually style your hair at home — daily heat or wash-and-go? That changes everything about how the cut should be built.
Finally, ask the maintenance question out loud: “How often do I need to come back to keep this looking right?” Some 90s cuts are forgiving growers — long layers and middle-part waves look fine for months. Others, like pixies and baby bangs, have a strict four-to-six-week trim schedule, and if you’re not going to commit, pick something else. There’s no shame in choosing the low-maintenance option. The decade’s best-kept secret was that half of those supermodel blowouts were wigs and extensions anyway.
16 Modernized 90s Hairstyles Women Are Wearing in 2026
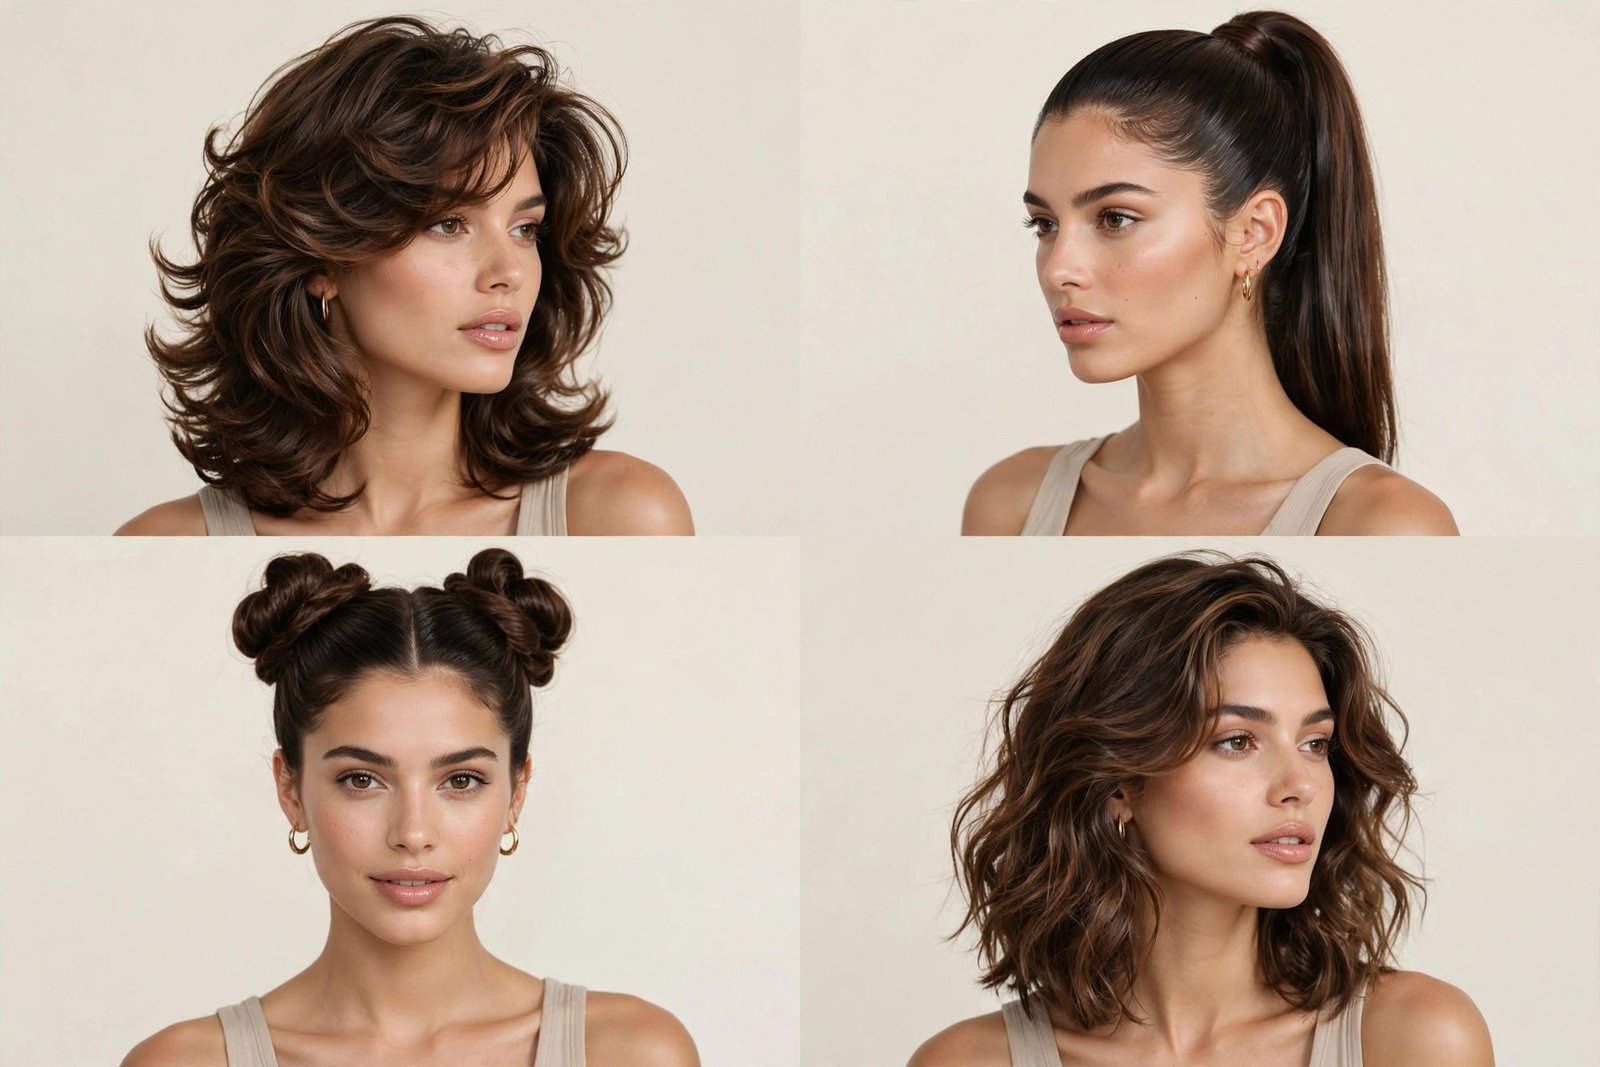
All sixteen of these 90s hairstyles women are wearing in 2026 are interpretations — the spirit of the decade, the technique of today. Each one includes who it suits, the exact salon script, at-home styling, maintenance reality, and the honest downside nobody puts on Pinterest.
1. The Rachel, Rebooted
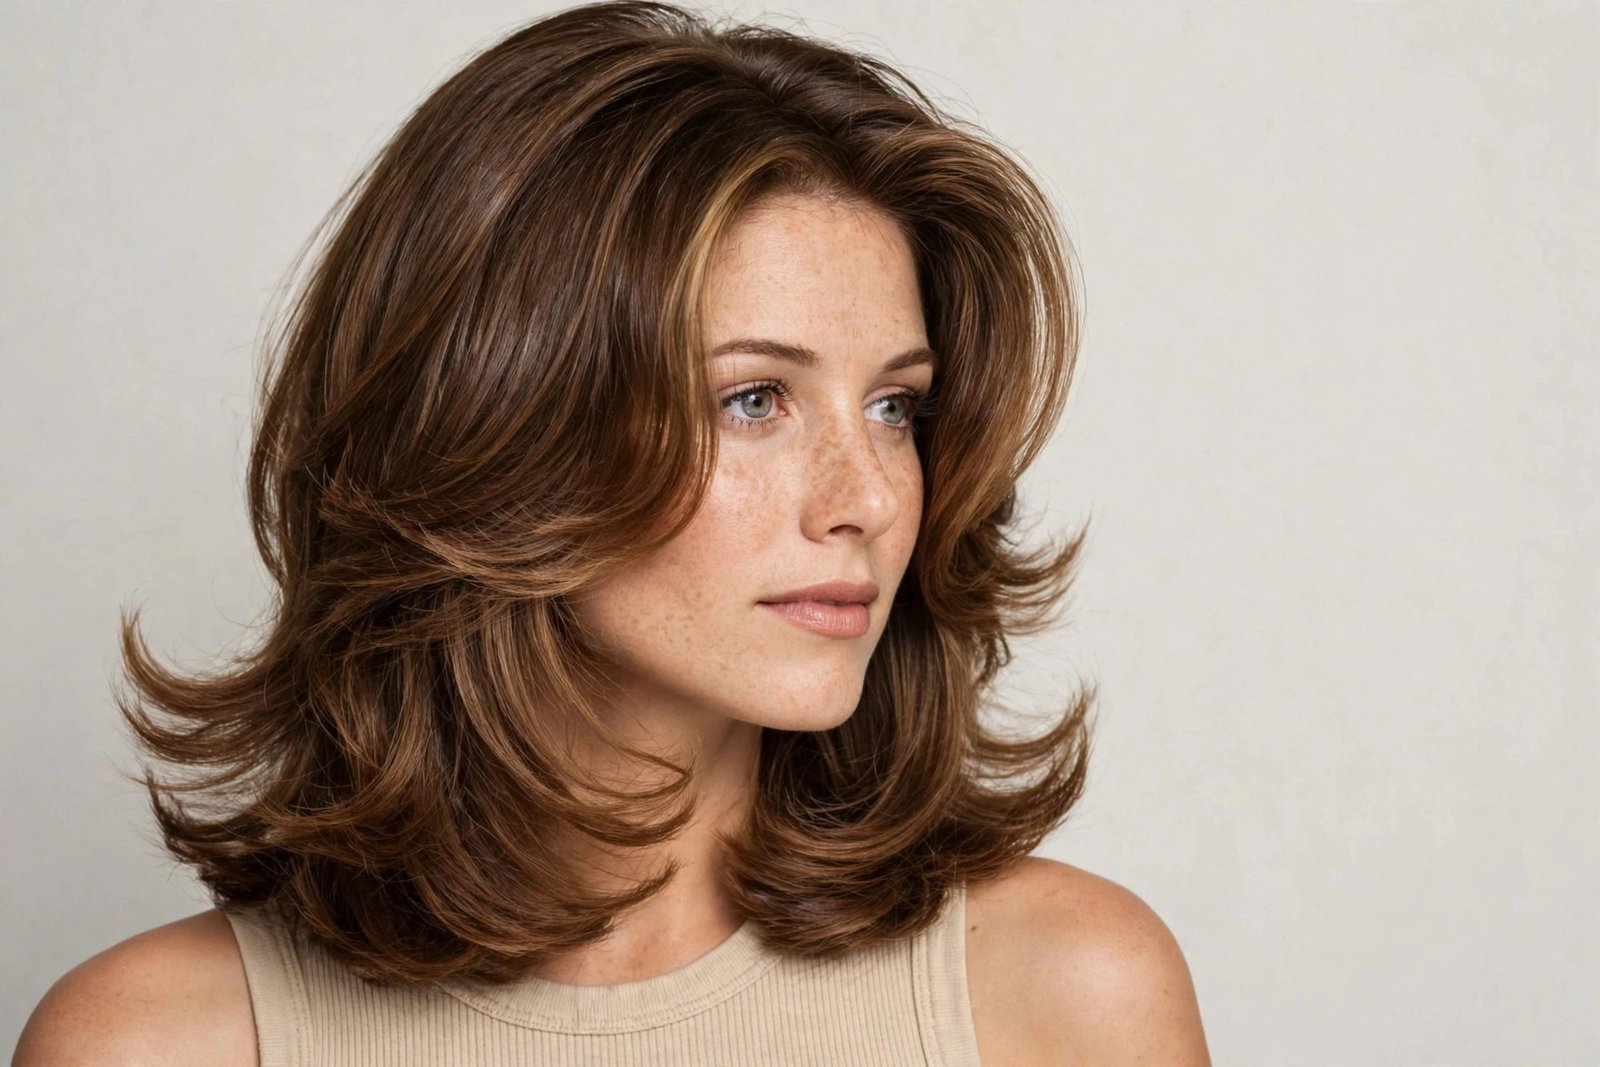
The most requested haircut of the entire decade, and the one that defined 90s hair more than anything else. Jennifer Aniston’s layered, bouncy, flippy lob was a cultural event — and the 2026 version keeps everything people loved while fixing everything that dated it. The rebooted Rachel is longer (collarbone-grazing rather than chin-skimming), the layers are softer and less chunky, and the flip is a gentle outward bend instead of that severe 1995 flick. It reads as expensive and effortless now rather than costumey.
Who it suits: genuinely one of the most universal cuts ever designed. It flatters oval, round, heart, and square faces because the face-framing layers can be customized — shorter framing opens a round face, longer framing softens a square jaw. Best on medium to thick hair with some natural body; on very fine hair it needs volumizing product at the roots or the layers collapse. Works straight or with a slight wave.
Salon script: “A layered lob hitting the collarbone, with face-framing layers starting at the chin, feathered through the ends. I want bouncy, flipped-out movement — not a blunt bob. Point-cut the ends so nothing looks heavy, and keep the layers long enough that it doesn’t turn into a shag.” Bring a photo. Seriously. Every stylist’s “Rachel” is slightly different.
At-home styling (12 minutes): Blow-dry with a round brush, flipping the ends outward on the last pass — that’s the signature move. Root-lifting mousse at the crown before drying gives it the 90s bounce without the crunch. Finish with a flexible hairspray, not the shellac-grade stuff. On second-day hair, a large-barrel curling iron flipped outward at the ends revives it in five minutes.
Maintenance: trims every 6–8 weeks to keep the flip crisp; the layers grow out gracefully so there’s no awkward phase. Color-wise it pairs beautifully with face-framing highlights — the modern answer to 90s chunky foils.
Honest downside: this cut needs heat styling to look like itself. Air-dried, it’s a perfectly nice layered lob — but the Rachel magic is the bounce, and bounce needs a round brush or hot rollers. If you’re strictly wash-and-go, you’ll wear it at about 60% of its potential. Also, fine hair at this length with heavy layering can look thin at the ends if the stylist over-texturizes. Ask them to go easy with the thinning shears.
Pro tip: the secret weapon for this cut is a set of velcro rollers. Put four or five large ones in the top layers while you do your makeup, hit them with a warm dryer for two minutes, and take them out right before you leave. You get salon bounce with about ninety seconds of actual effort.
2. The Supermodel Blowout
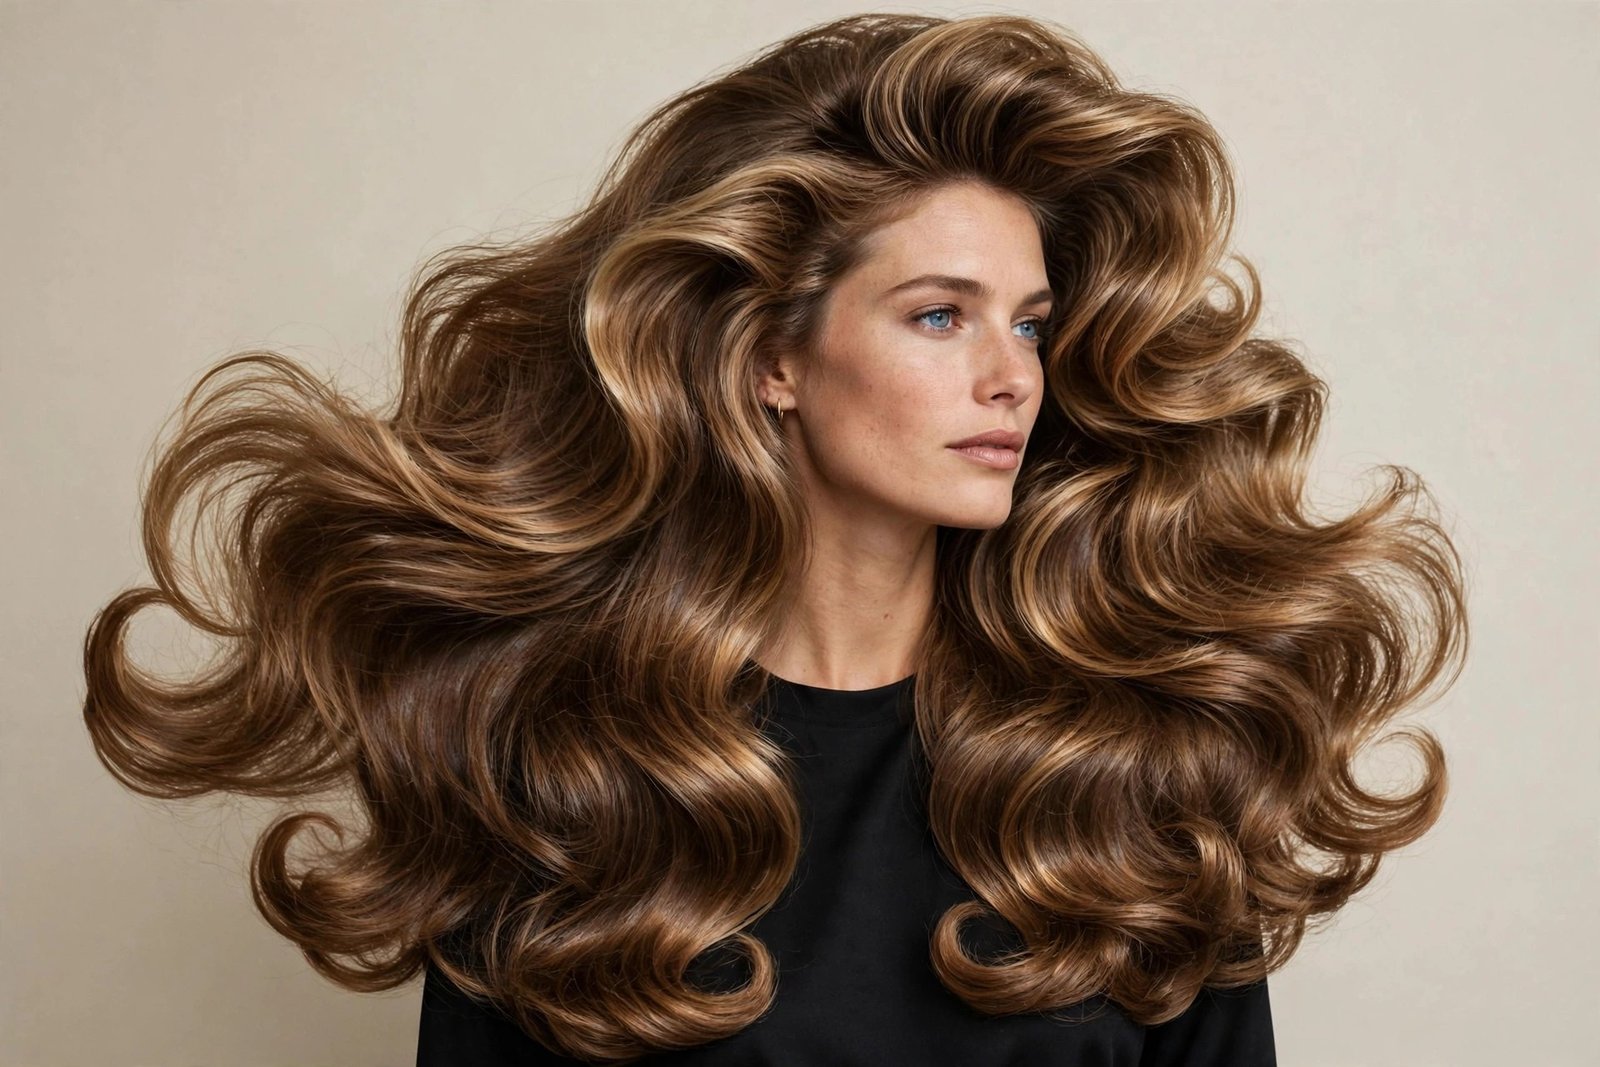
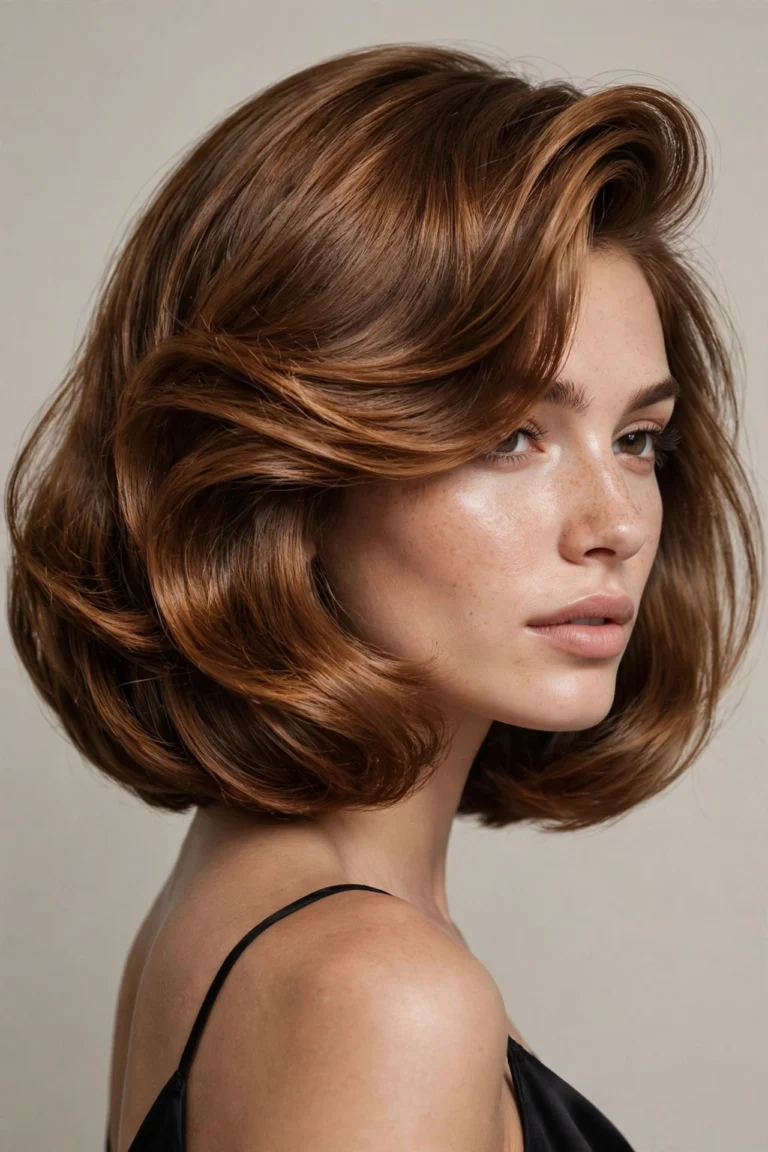
Cindy, Claudia, Naomi, Linda — the 90s supermodel blowout was hair with main-character energy before that phrase existed. Massive volume, glossy swooping layers, ends that curved under with military precision. The 2026 version is the same silhouette with a softer finish: the volume is real but not helmet-like, the shine is glossy rather than greasy, and the whole thing moves when you walk. This is the look people mean when they say they want “expensive hair.”
Who it suits: medium to long hair, medium to thick density — you need enough hair to build the volume. Long faces benefit enormously (the width balances length); round faces should keep the volume up top rather than at the cheeks. It’s the ultimate special-occasion hair but plenty of women wear it daily. If your hair is very fine, this will require extensions or a lot of teasing to fake — be honest with yourself about the effort.
Salon script: “Long layers throughout for movement, with the shortest layer at the cheekbones. I want a blowout cut — shaped so it falls into a bouncy blow-dry. Tapered ends, no blunt shelf.” If you’re getting it styled at the salon regularly, ask them to note your preferred part and flip direction on your file.
At-home styling (20 minutes): this is a wash-day production, and there’s no shortcut worth taking. Mousse at the roots, blow-dry upside down for volume, then smooth each section over a large round brush with the nozzle pointed down. The pro move: set the whole thing in velcro rollers for ten minutes after drying, then shake out. A pea-sized drop of shine serum on the ends only — never the roots.
Maintenance: trims every 8–10 weeks; deep-condition weekly because all that heat adds up. Silk pillowcase at night preserves day-two bounce. The style that shares its DNA is the modern bouncy blowout — same family, slightly less retro.
Honest downside: time. There is no five-minute supermodel blowout, no matter what a tutorial promises. Twenty minutes minimum, and humidity is its mortal enemy — in a humid climate, you’ll need anti-frizz serum and realistic expectations. It’s also a lot of heat; without proper heat protectant you’ll trade volume for split ends within months.
Pro tip: dry shampoo applied to clean roots before styling — not after — gives fine hair the grit it needs to hold volume. It sounds backwards. It works.
3. Soft Grunge Waves
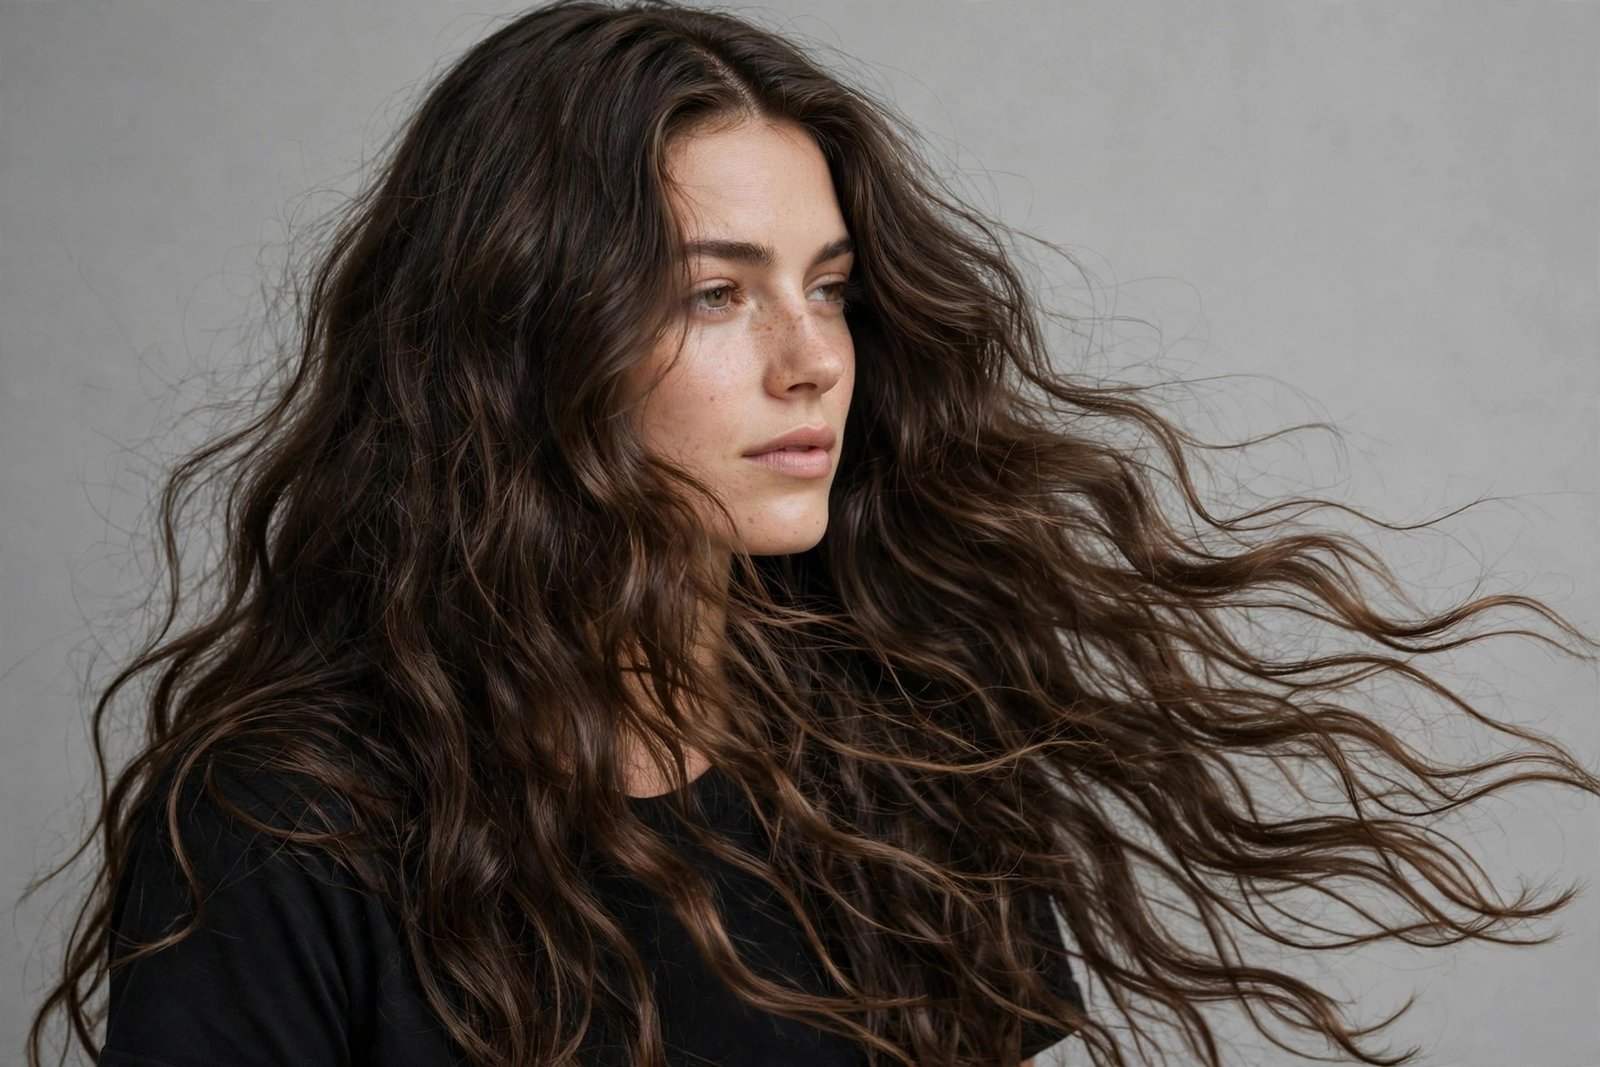
The anti-blowout. While the supermodels were spending an hour with a round brush, the grunge girls were sleeping on wet braids and calling it a day — and somehow looking cooler than everyone. Soft grunge waves are deliberately undone: a middle part, loose S-waves, matte texture, ends that nobody bothered to polish. In 2026 it reads as effortlessly cool rather than lazy, mostly because we finally have products that create that texture without the actual damage of sleeping on wet hair.
Who it suits: long to medium hair with natural wave or the patience to fake it. Flatters most face shapes thanks to the middle part’s symmetry; on very round faces, keep the waves starting below the chin so they elongate rather than widen. Fine hair can wear it with texture spray; thick hair needs the length to keep it from going triangular.
Salon script: “Long, one-length cut with internal layers for movement — nothing shorter than chin-length around the face. I want it to look good air-dried with texture. Point-cut the ends.” If you want the full grunge commitment, ask for barely-there layers that only show when the hair moves.
At-home styling (10 minutes): the modern method beats the 90s one completely. On damp hair: wave-enhancing cream, scrunch, diffuse or air-dry. On dry hair: wrap random sections around a large curling wand, alternating directions, leave the ends out, then rake through with fingers. Finish with texture spray at the roots and mid-lengths. The key word is random — grunge waves die the moment they look uniform.
Maintenance: the lowest-maintenance look on this list. Trims every 10–12 weeks, minimal heat if your natural texture cooperates, and it looks better on day two. This is the style for people who found the supermodel blowout exhausting to read about.
Honest downside: “undone” is a skill, not an accident. Too little effort and it reads as unwashed; too much and it stops being grunge. There’s a learning curve of about two weeks where you’ll look in the mirror and think you’ve made a terrible mistake. Push through it. Also, very straight, silky hair will drop these waves by afternoon without serious texture product — know your hair’s limits.
Pro tip: braid damp hair into two loose braids before bed — not tight, not neat — and undo in the morning. It’s the 1994 method, and honestly? Still unbeatable for authentic texture.
4. The Crimp, Grown Up
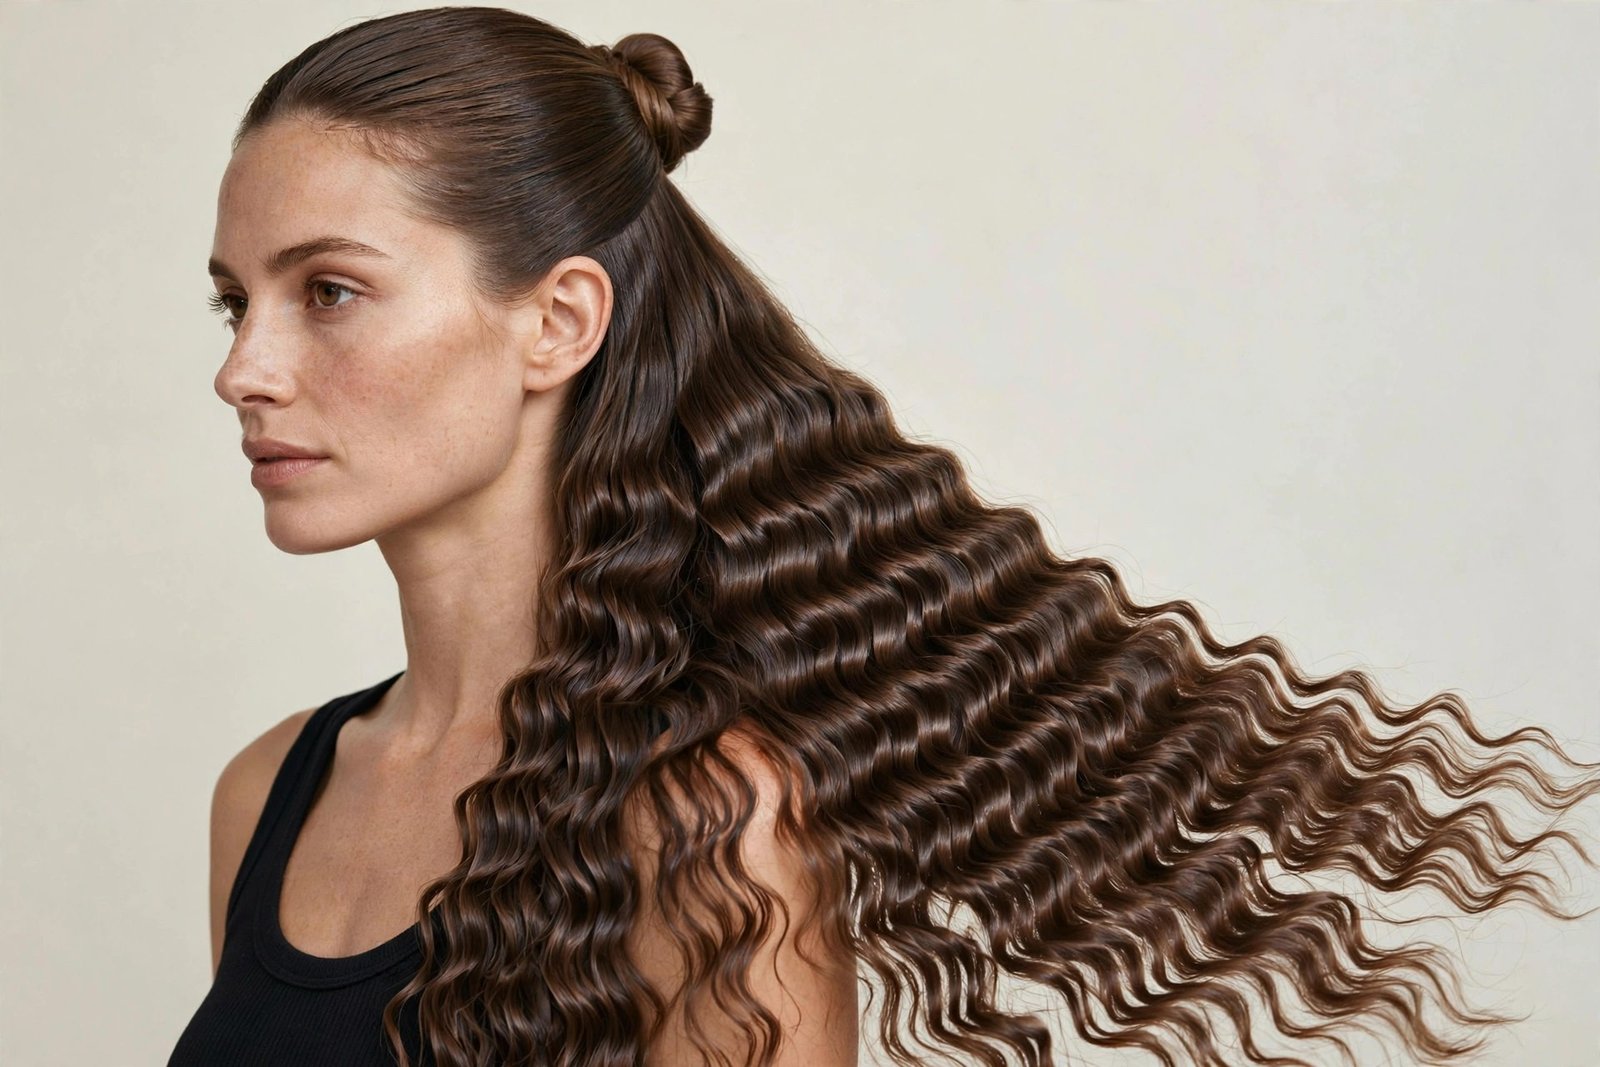
Crimping was the 90s party trick — zigzag texture pressed in with a crimping iron, worn to every school dance and mall outing in America. The original was crunchy, frizzy, and visible from space. The grown-up version is subtler: wider plates, less heat, texture concentrated at the mid-lengths or as an accent, finished with shine instead of hairspray. It reads as intentional texture now rather than a dare. On long hair worn half-up, it’s genuinely stunning.
Who it suits: medium to long hair; the zigzag pattern needs length to show. Adds width, so it’s fantastic for long and narrow faces and anyone wanting the illusion of thicker hair. Fine hair loves crimping — it’s one of the few textures that makes fine hair look genuinely fuller. Avoid if your hair is already heavily damaged or very short.
Salon script: you don’t need a salon cut for this one — it’s a styling technique. But if you want it as a regular look, ask for long layers that give the crimp somewhere to live, and mention you’ll be heat-styling so they can recommend a bond-building treatment schedule.
At-home styling (15 minutes): heat protectant is non-negotiable — crimping irons are aggressive by nature. Work in small sections, press for 3–4 seconds max, and don’t crimp the top inch at the roots (that was the 90s mistake; it looked like static). For the modern version, crimp only the bottom two-thirds, then brush through gently with a paddle brush to soften the zigzag into waves. Shine spray to finish.
Maintenance: crimping is a sometimes-food for your hair. Once a week max, always with heat protectant, and schedule a bond repair treatment monthly if it’s a regular look. The texture lasts 2–3 days with dry shampoo at the roots.
Honest downside: no way to sugarcoat this — crimping is hard on hair. The iron’s ridges concentrate heat and can snap fragile strands. Bleached or over-processed hair should skip it or accept the risk. It’s also the most obviously “90s” technique on this list; worn full-head with no softening, it can tip into costume territory. The grown-up version is all about restraint.
Pro tip: crimp just the underlayer of your hair and leave the top smooth. You get hidden volume and texture that peeks through when you move — all of the effect, none of the costume.
5. Chunky Highlights, Modernized
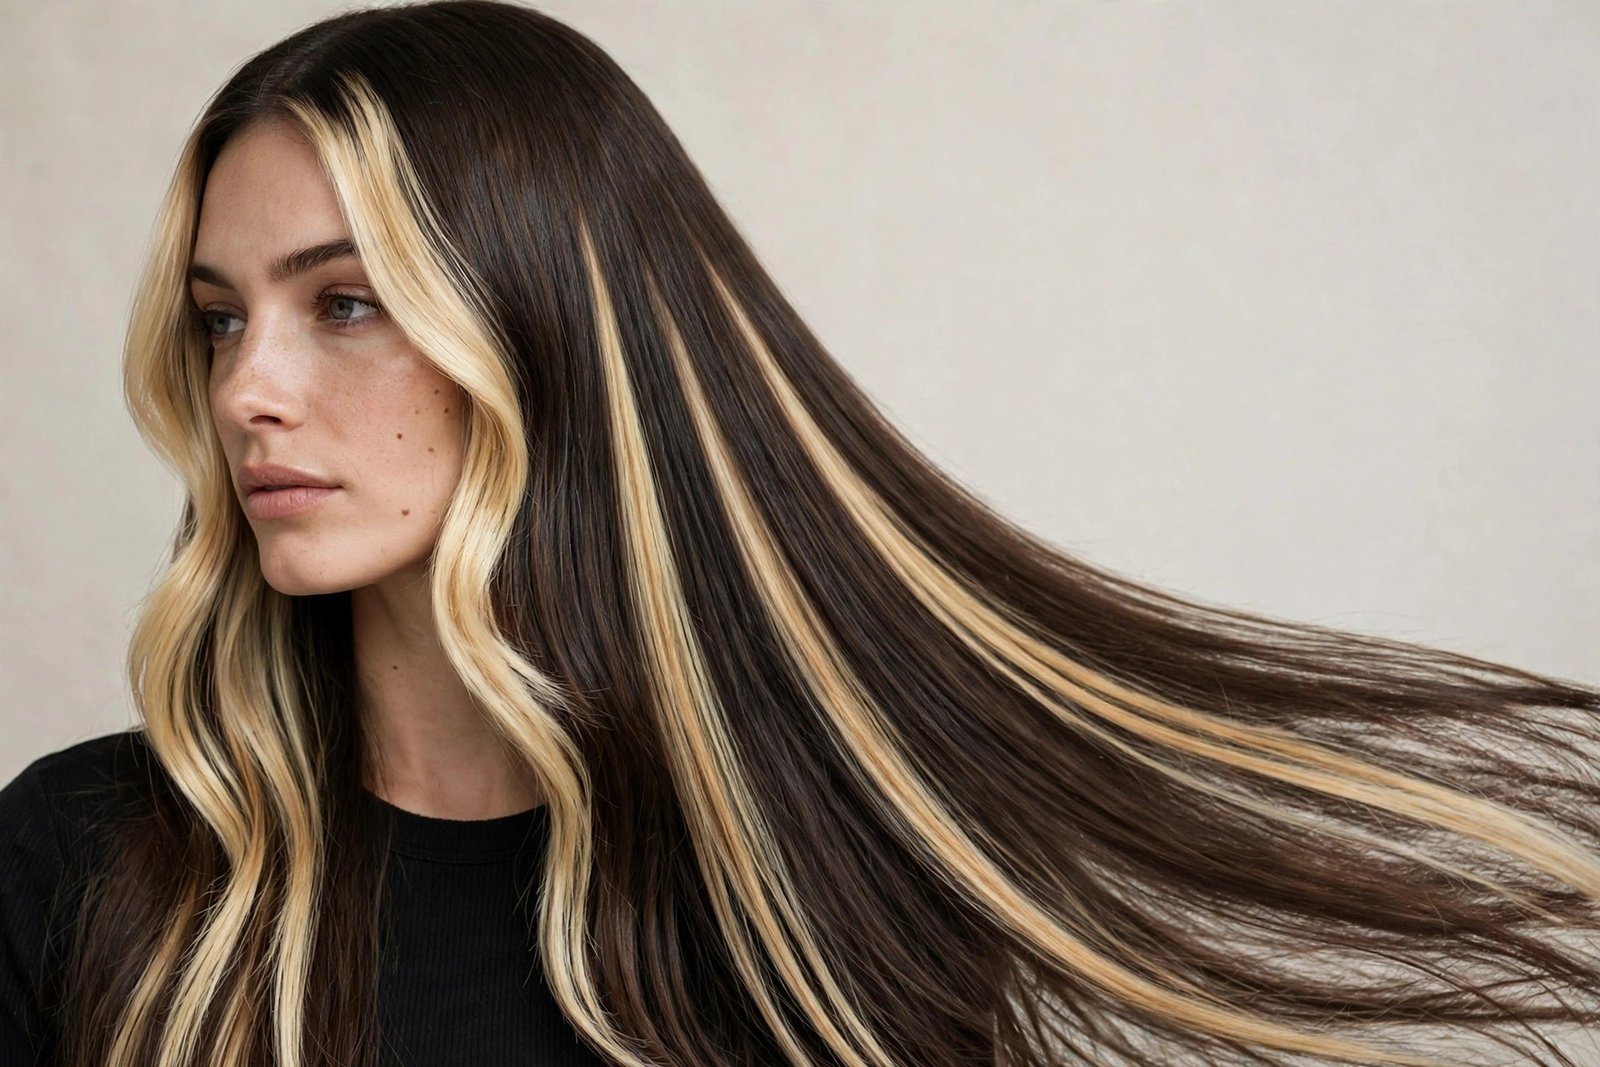
The 90s loved contrast: thick blonde stripes against dark brown, “frosted tips” energy applied to entire heads, Geri Halliwell’s two-tone everything. The originals were harsh — stripes with visible lines of demarcation, grown out like a barcode. The 2026 modernization keeps the boldness but blends the edges: chunky face-framing pieces (the money piece’s louder cousin), ribbons of lighter color woven through the interior, and enough softness at the root that grow-out doesn’t look like an emergency.
Who it suits: dark to medium hair shows chunky highlights best — the contrast is the point. Face-framing chunks flatter everyone by brightening the complexion; full-head chunky foils suit bolder personalities and thicker hair that can carry the visual weight. If your workplace is conservative, keep the chunks around the face and underneath rather than on top.
Salon script: “I want bold, chunky highlights — 90s energy — but blended at the root so they grow out softly. Thicker weaves than balayage, concentrated around the face and through the mid-lengths. Keep the contrast strong; I don’t want this to look like balayage.” Bring photos of the exact boldness level you want — “chunky” means very different things to different colorists.
At-home styling: this is a color look, so styling is about showing it off. Smooth blowouts and straight styles display chunky highlights best; curls can muddy the contrast. Purple shampoo once a week keeps blonde chunks from going brassy; color-safe everything else. Heat protectant, always — highlighted hair is compromised hair.
Maintenance: root touch-ups every 8–12 weeks depending on how blended the application was; glosses in between to keep the tone fresh. This is a salon-commitment look — box dye cannot do chunky 90s foils, and I will fight anyone who says otherwise.
Honest downside: bleach is bleach. Chunky highlights mean chunky sections of lightened hair, and lightened hair is weaker hair. If your hair is already fragile, this will find its breaking point. It’s also a look with a shelf life — bold contrast grows out visibly, so budget for maintenance or accept the roots era.
Pro tip: ask your colorist for a “root shadow” — a slightly darker toner melted into the first inch. It’s the difference between highlights that grow out gracefully and highlights that scream for a touch-up at week five.
6. The High Slick Ponytail
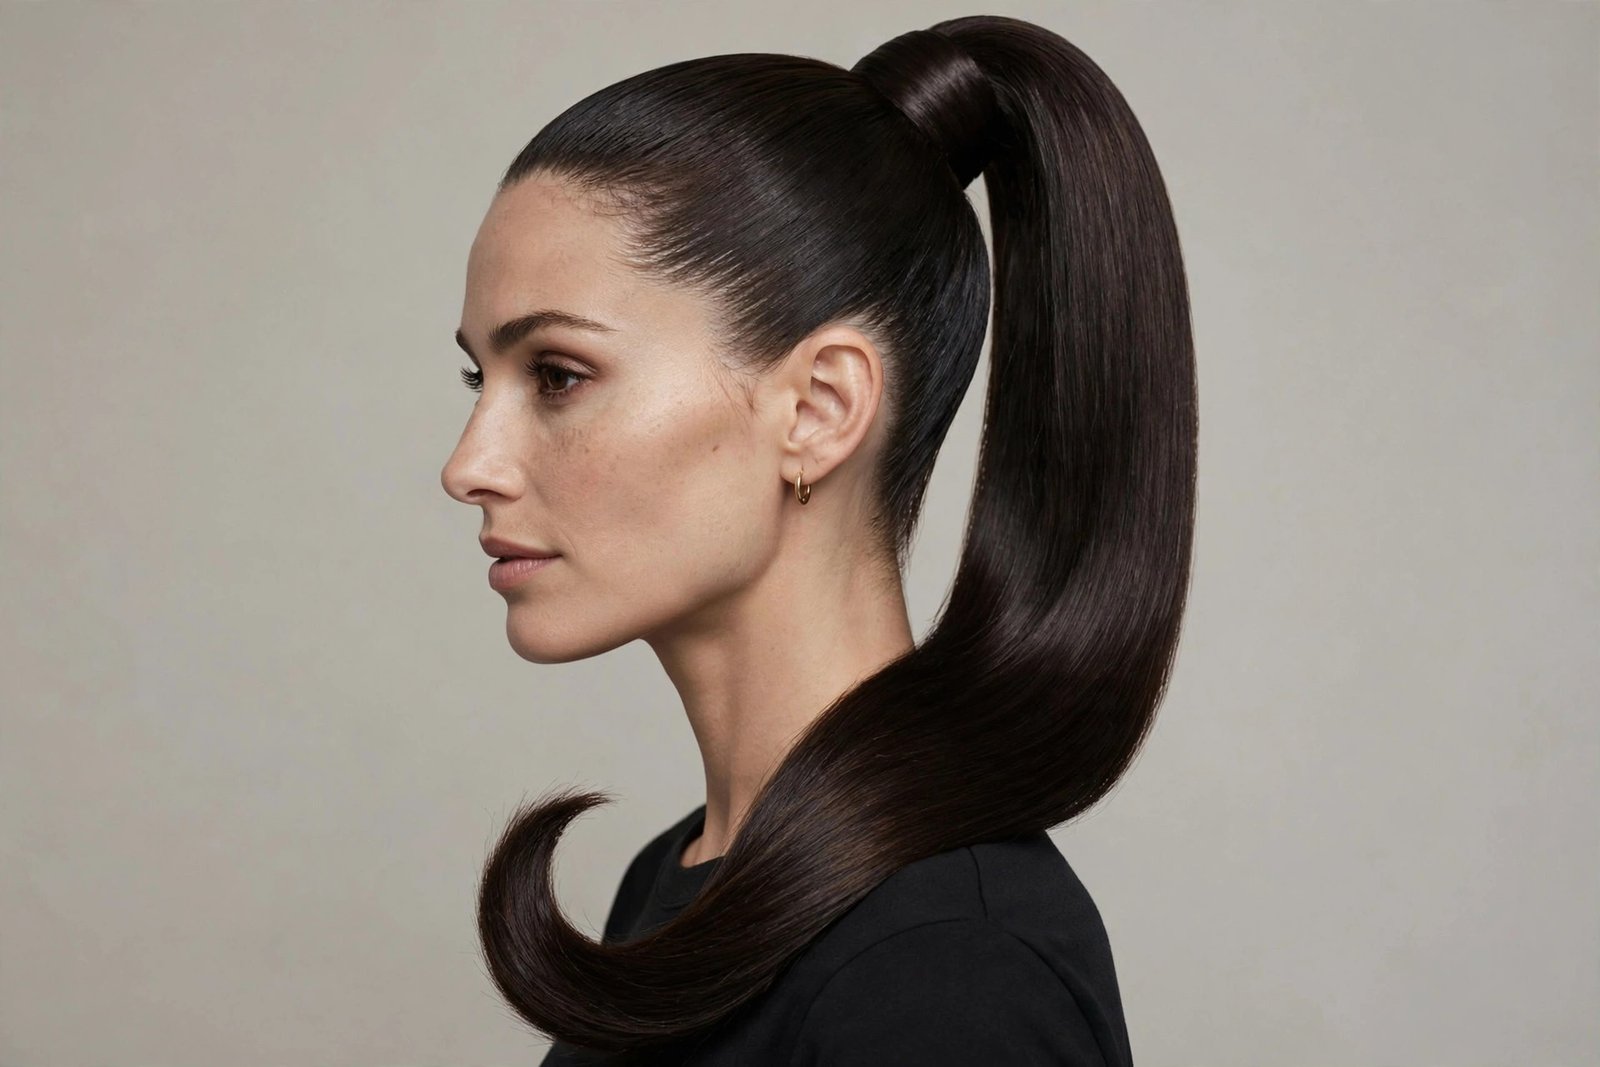
Ariana Grande didn’t invent the high ponytail; she inherited it from every 90s R&B video, every cheerleader movie, and every pop star who understood that a ponytail at the crown is basically architecture. The 90s version was scraped-back severe, gelled within an inch of its life, often wrapped with a strand of hair or a scrunchie. The 2026 version keeps the height and the polish but softens the hairline — a little baby-hair swoop, a slightly less aggressive pull — so it looks powerful instead of painful.
Who it suits: long to medium hair with enough length to clear the shoulders — the pony should swing. It lifts the face visually, which flatters round and square faces; on very long faces, keep it slightly lower to avoid adding more height. Thick hair makes the most dramatic pony; fine hair can fake it with a wrap-around extension piece.
Salon script: mostly a styling look, but the cut matters: long layers keep a high pony from looking like a broom, and face-framing pieces soften the severity. Ask for the perimeter to be kept full — thin, wispy ends make a sad ponytail.
At-home styling (10 minutes): brush everything up with a boar-bristle brush for smoothness, secure at the crown with a strong elastic (two, if your hair is heavy). The pro trick: flip your head upside down to gather — it gets the height right. Smooth the crown with a light gel or edge control on a toothbrush, wrap a strand of hair around the elastic, and straighten or curl the pony itself depending on your mood. 90s purists curl the ends under.
Maintenance: zero salon maintenance — this is pure styling. But be kind to your hairline: don’t wear it scraping-tight every day. Traction alopecia is real, and the 90s girls who wore this daily have the thinning edges to prove it. Alternate with lower styles.
Honest downside: headaches. A genuinely high, tight ponytail pulls, and by hour six you’ll feel it behind your eyes. The 2026 fix is placement slightly lower than the true crown and a looser hand at the hairline — you lose nothing visually and gain the ability to think. Also, short layers escape and stick out; keep bobby pins handy.
Pro tip: two elastics stacked — one for the ponytail, one a half-inch below it — distribute the weight and stop the pony from sagging by midday. Old backstage trick, still perfect.
7. The Scrunchie Top Knot
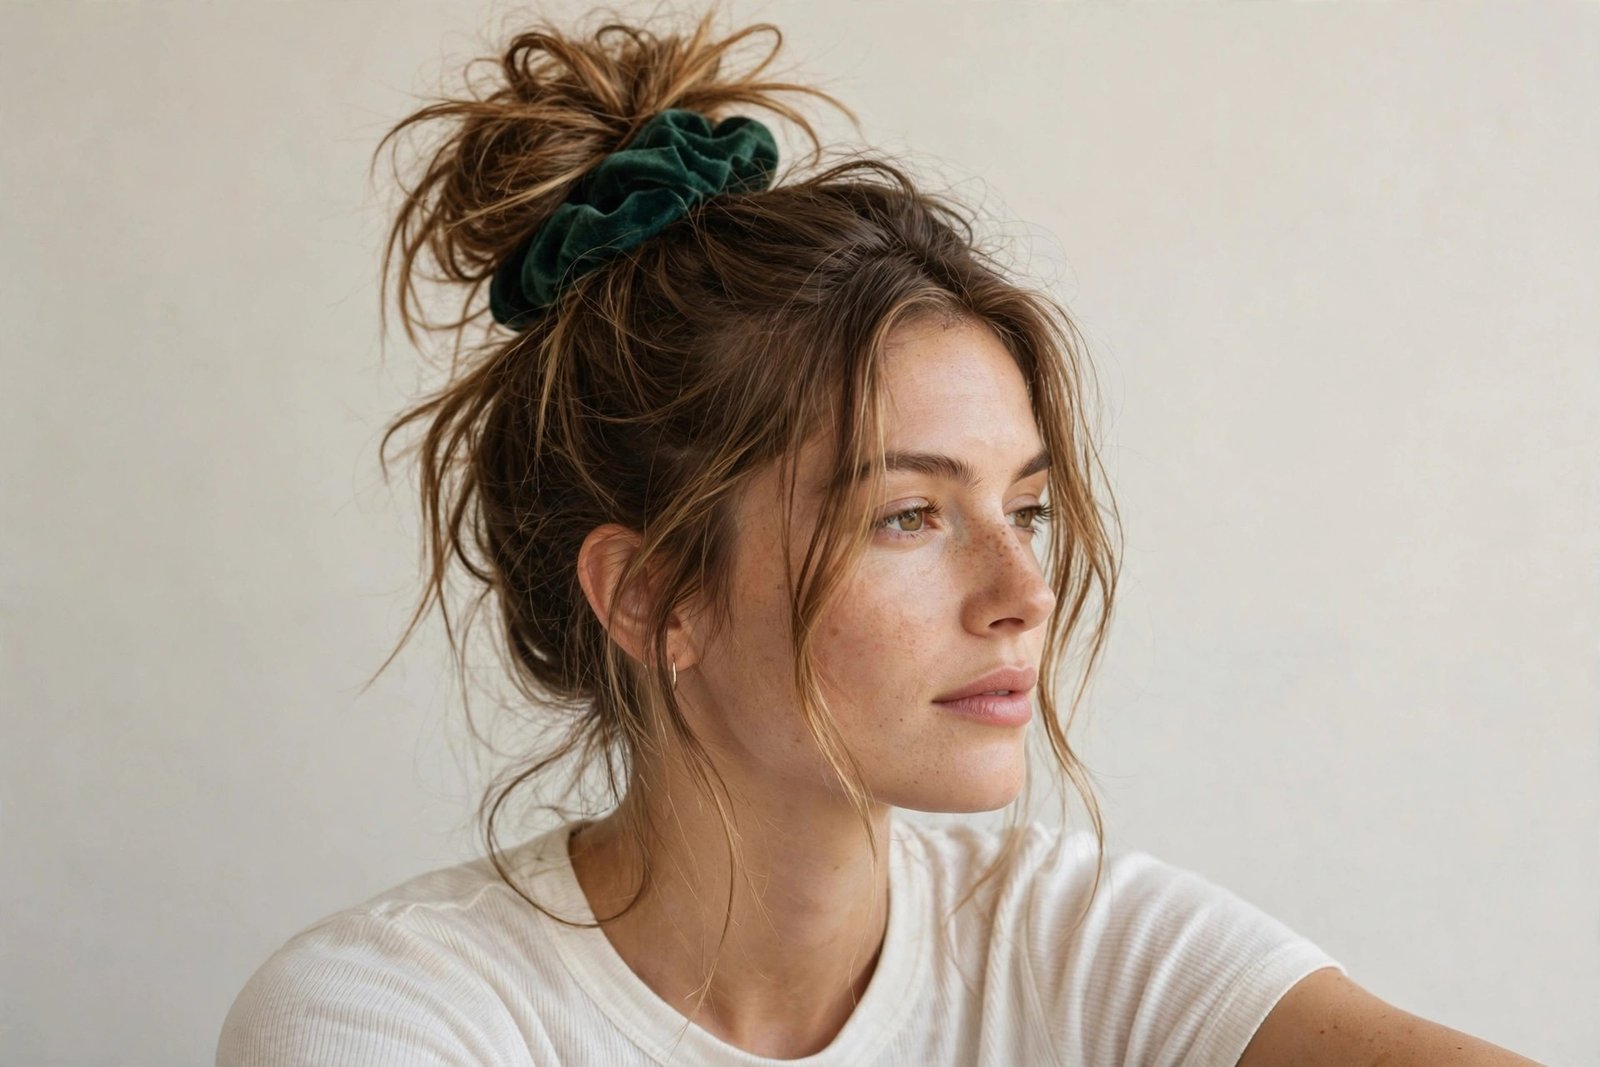
The scrunchie was the 90s in fabric form: practical, a little silly, completely unbothered. The top knot version — hair twisted into a high bun, secured with a scrunchie, a few pieces falling out — was the uniform of every cool girl running errands. It disappeared for a decade when minimalism took over, and its return is one of the revival’s happiest stories. The 2026 version uses better fabrics (silk and velvet instead of scratchy polyester) and a slightly more deliberate mess, but the spirit is identical: done in ninety seconds, looks like you have your life together.
Who it suits: everyone. Medium to long hair works best; short hair can do a half-up version. The height flatters round faces, the softness suits sharp features. It’s the ultimate second-day-hair, gym-hair, didn’t-feel-like-it hair — and that’s the point.
Salon script: no cut required, though long layers make the knot look fuller and the escaping pieces prettier. If you’re growing your hair out, this is your best friend — it hides every awkward stage.
At-home styling (2 minutes): flip head over, gather into a high pony, twist the pony loosely, wrap it around its own base, and secure with the scrunchie. Pull a few face-framing pieces out. Done. The messier the better — a perfect top knot misses the point entirely. Silk scrunchies cause less breakage than elastic ones and look more expensive; keep a cheap one in your bag for emergencies.
Maintenance: none, gloriously. This style actually protects your ends from friction and keeps hair off your neck. The only rule: don’t sleep in a top knot — the tension at one spot overnight causes breakage.
Honest downside: there isn’t much, which is suspicious, so let me find one: worn daily in exactly the same spot, even a scrunchie causes localized breakage over time. Vary the placement. Also, very heavy thick hair will defeat a single scrunchie by noon — use two, or pin the knot as well as scrunchie it.
Pro tip: tease the ponytail lightly before twisting and the knot doubles in size. It’s the difference between a sad little nub and the full 90s pouf.
8. Baby Spice Pigtails
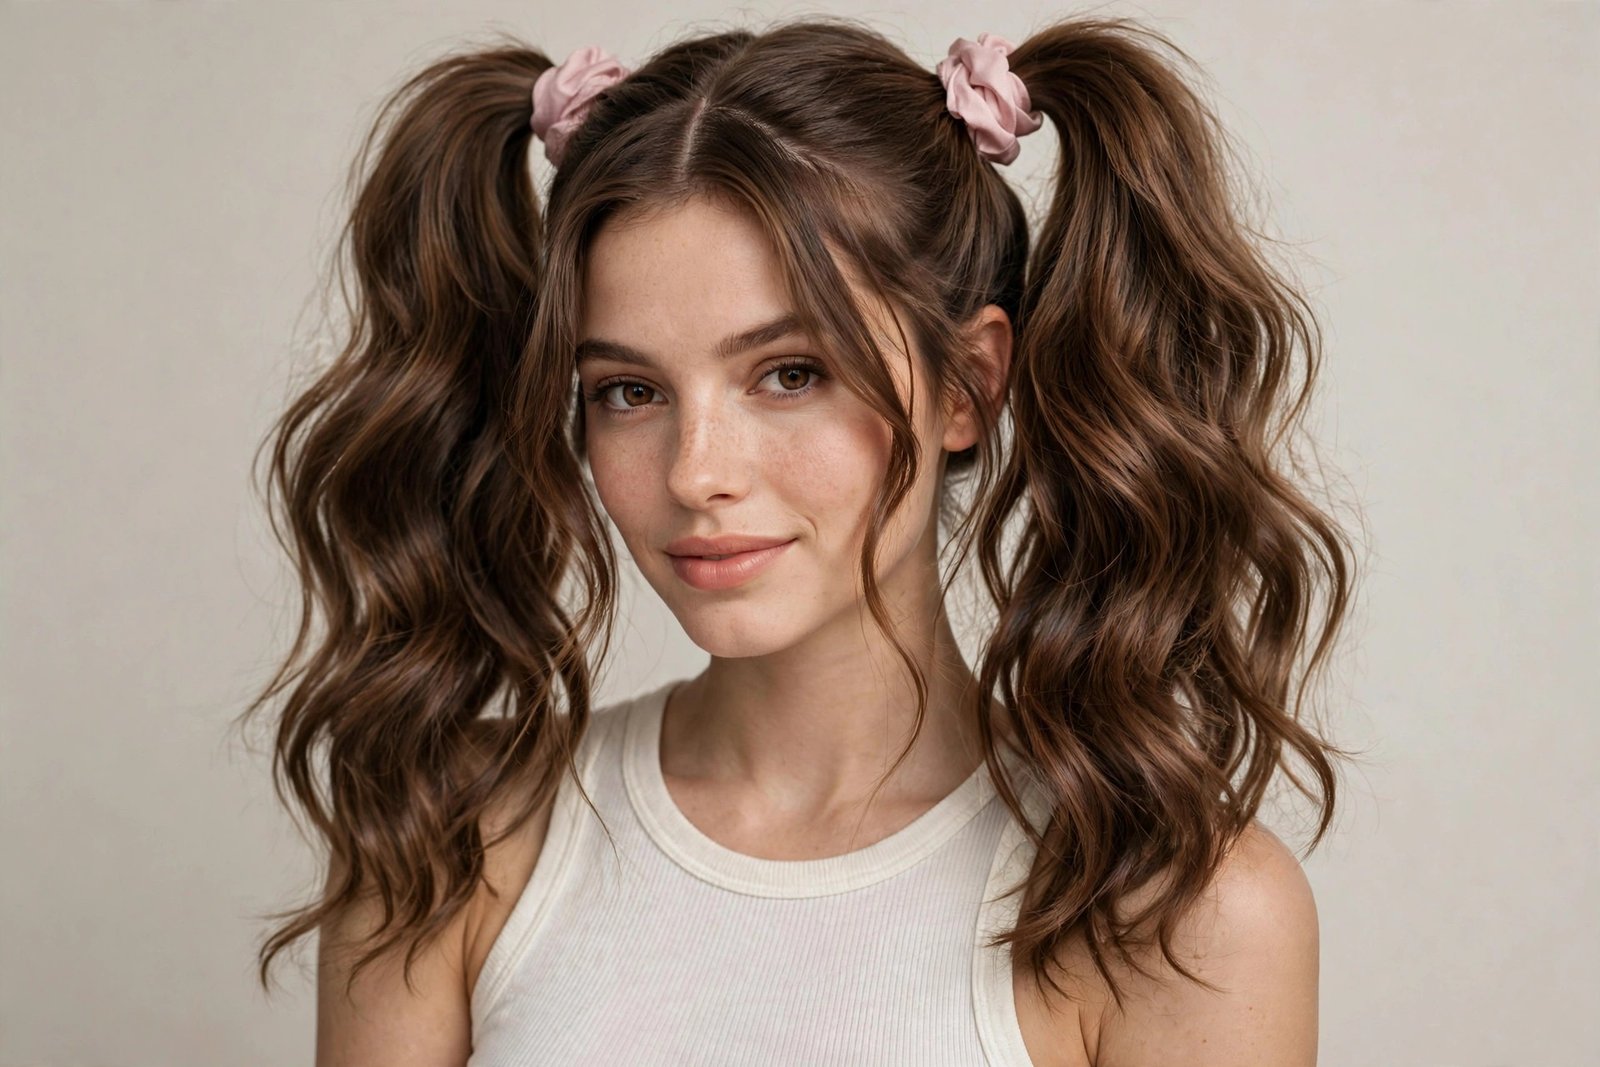
Emma Bunton’s twin high pigtails were the defining image of 90s pop sweetness, and they never really stood a chance of staying gone — they’re too fun. The 2026 version walks a careful line: playful without looking like a costume, sweet without being childish. The updates are in the details — softer waves instead of poker-straight tails, scrunchies or ribbons instead of plain elastics, and placement slightly lower and further back than the original perky-top position.
Who it suits: medium to long hair; the tails need enough length to read as pigtails rather than nubs. Flatters oval and heart faces beautifully. This is a personality look — it suits people who dress with a sense of fun. On very formal occasions it can read as costume, so know your room.
Salon script: styling look, but mention it at your cut appointment: even, healthy ends make pigtails look intentional, and long layers give the tails movement. Ask your stylist to keep the ends blunt enough to look full in a ponytail.
At-home styling (8 minutes): part down the middle, gather each side into a high pony — slightly behind the ears, not on top of the head. Curl the tails loosely or leave natural. Scrunchies, ribbons, or claw clips at the base sell the 90s reference; plain black elastics make it more modern. Pull a few face-framing strands out for softness.
Maintenance: none beyond the usual. This is a wash-day-to-day-three style — it hides greasy roots brilliantly because the part is the only scalp on display, and texture spray handles that.
Honest downside: context matters. This look at a music festival: perfect. At a job interview: a choice. It’s also genuinely high-maintenance socially — you will get comments, and they will range from delighted to confused. Wear it if you enjoy being noticed; skip it if you don’t.
Pro tip: curl the two front face-framing pieces away from the face and let them hang. It’s the detail that takes pigtails from cute to genuinely pretty.
9. Space Buns
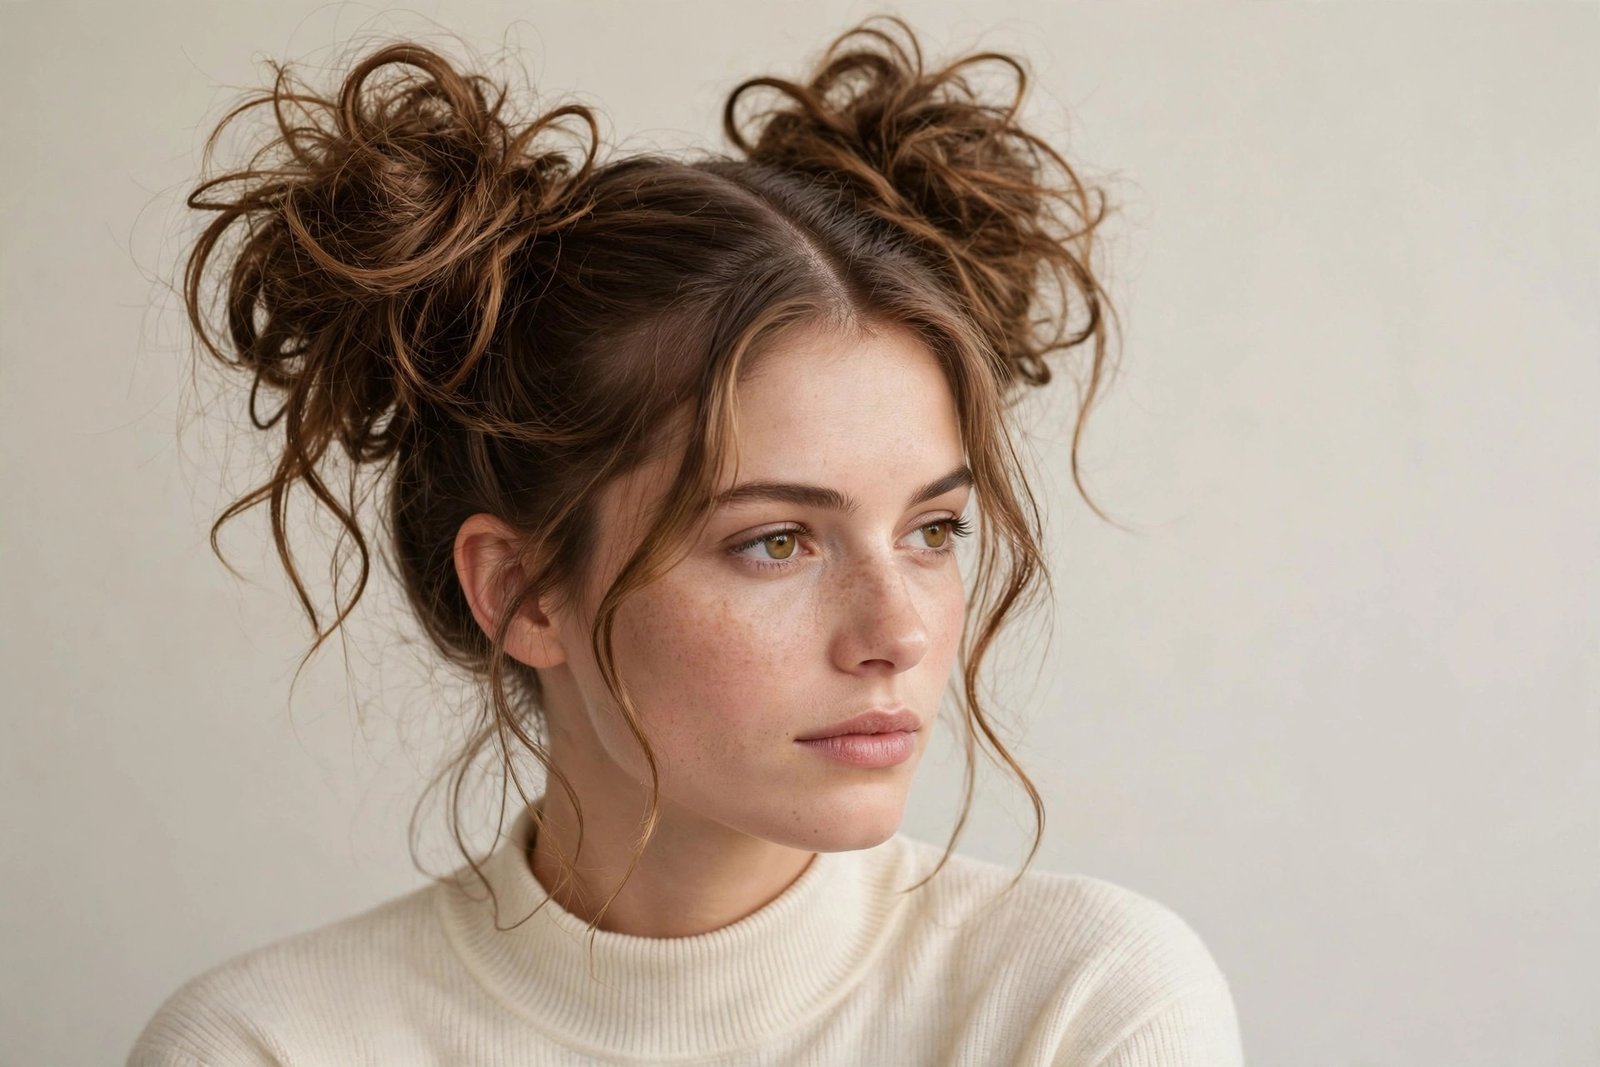
Half Princess Leia, half rave kid, entirely 90s. Space buns — two high buns, one on each side — went from festival fields to red carpets to your local brunch spot without losing their mischief. The 2026 version is less precise than the originals: textured, slightly messy, sometimes with the rest of the hair left down (half-up space buns), sometimes with braids leading into them. They’re the rare trend that works at 19 and at 45, provided you wear them with confidence instead of apology.
Who it suits: medium to long hair; short hair can do mini versions. The symmetry flatters most faces — on very round faces, keep the buns high and slightly back to add height. Thick hair makes gloriously big buns; fine hair benefits from teasing or a little texture powder.
Salon script: styling look. If you wear them often, ask for layers that keep the buns from looking sparse, and consider face-framing pieces — they make the difference between cute and severe.
At-home styling (10 minutes): part down the middle, make two high pigtails, twist each into a bun, pin. The modern trick: don’t twist tightly. Loose twists make bigger, softer buns. Pull the buns outward gently to fatten them, leave the ends poking out for texture, and add glitter, braids, or accessories if the occasion calls for it. Half-up version: take only the top half of each side, bun it, leave the rest down.
Maintenance: none. This is a protective style when done loosely — it keeps ends tucked away. Just don’t yank them tight every day; the part line takes the tension.
Honest downside: symmetry is harder than it looks. Your first five attempts will produce one bun noticeably larger than the other, and you will only discover this in photos later. Practice in front of a mirror with your phone camera as a second opinion. Also, sleeping in space buns is a non-starter — they’re a daytime look.
Pro tip: braid each pigtail loosely before twisting into a bun. Braided space buns look intricate, hold better, and hide the “I did this in a car” origins completely.
10. Baby Bangs (the Drew Barrymore)
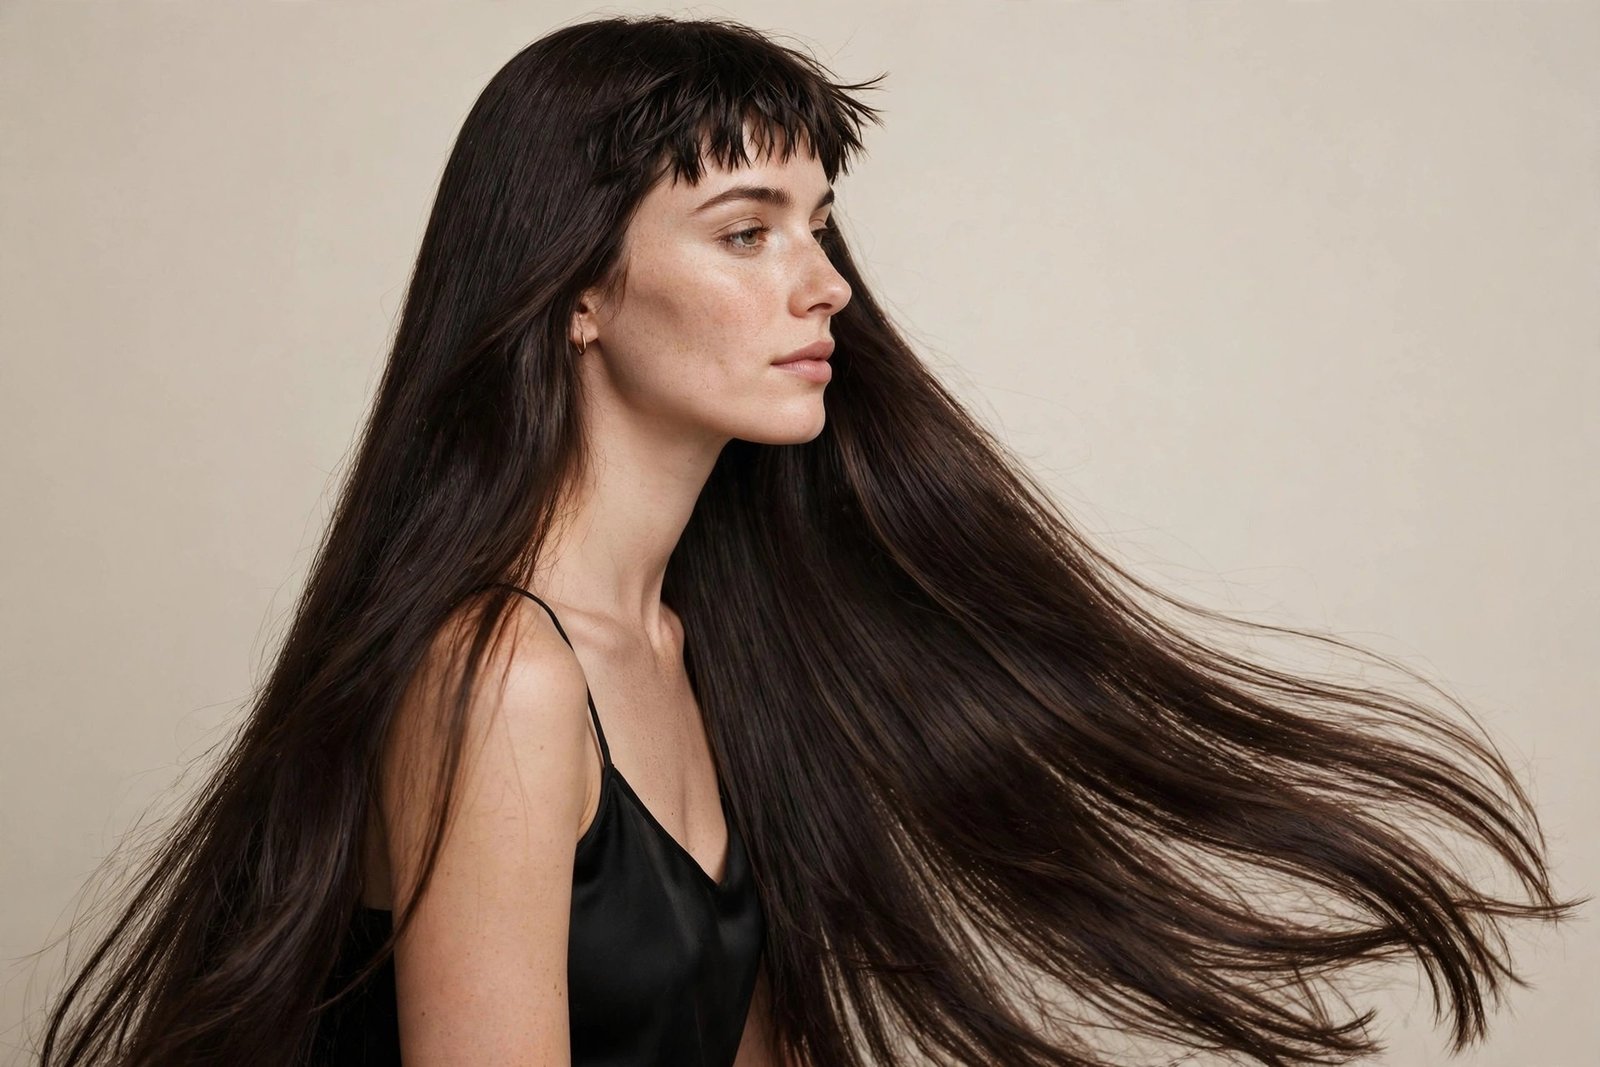
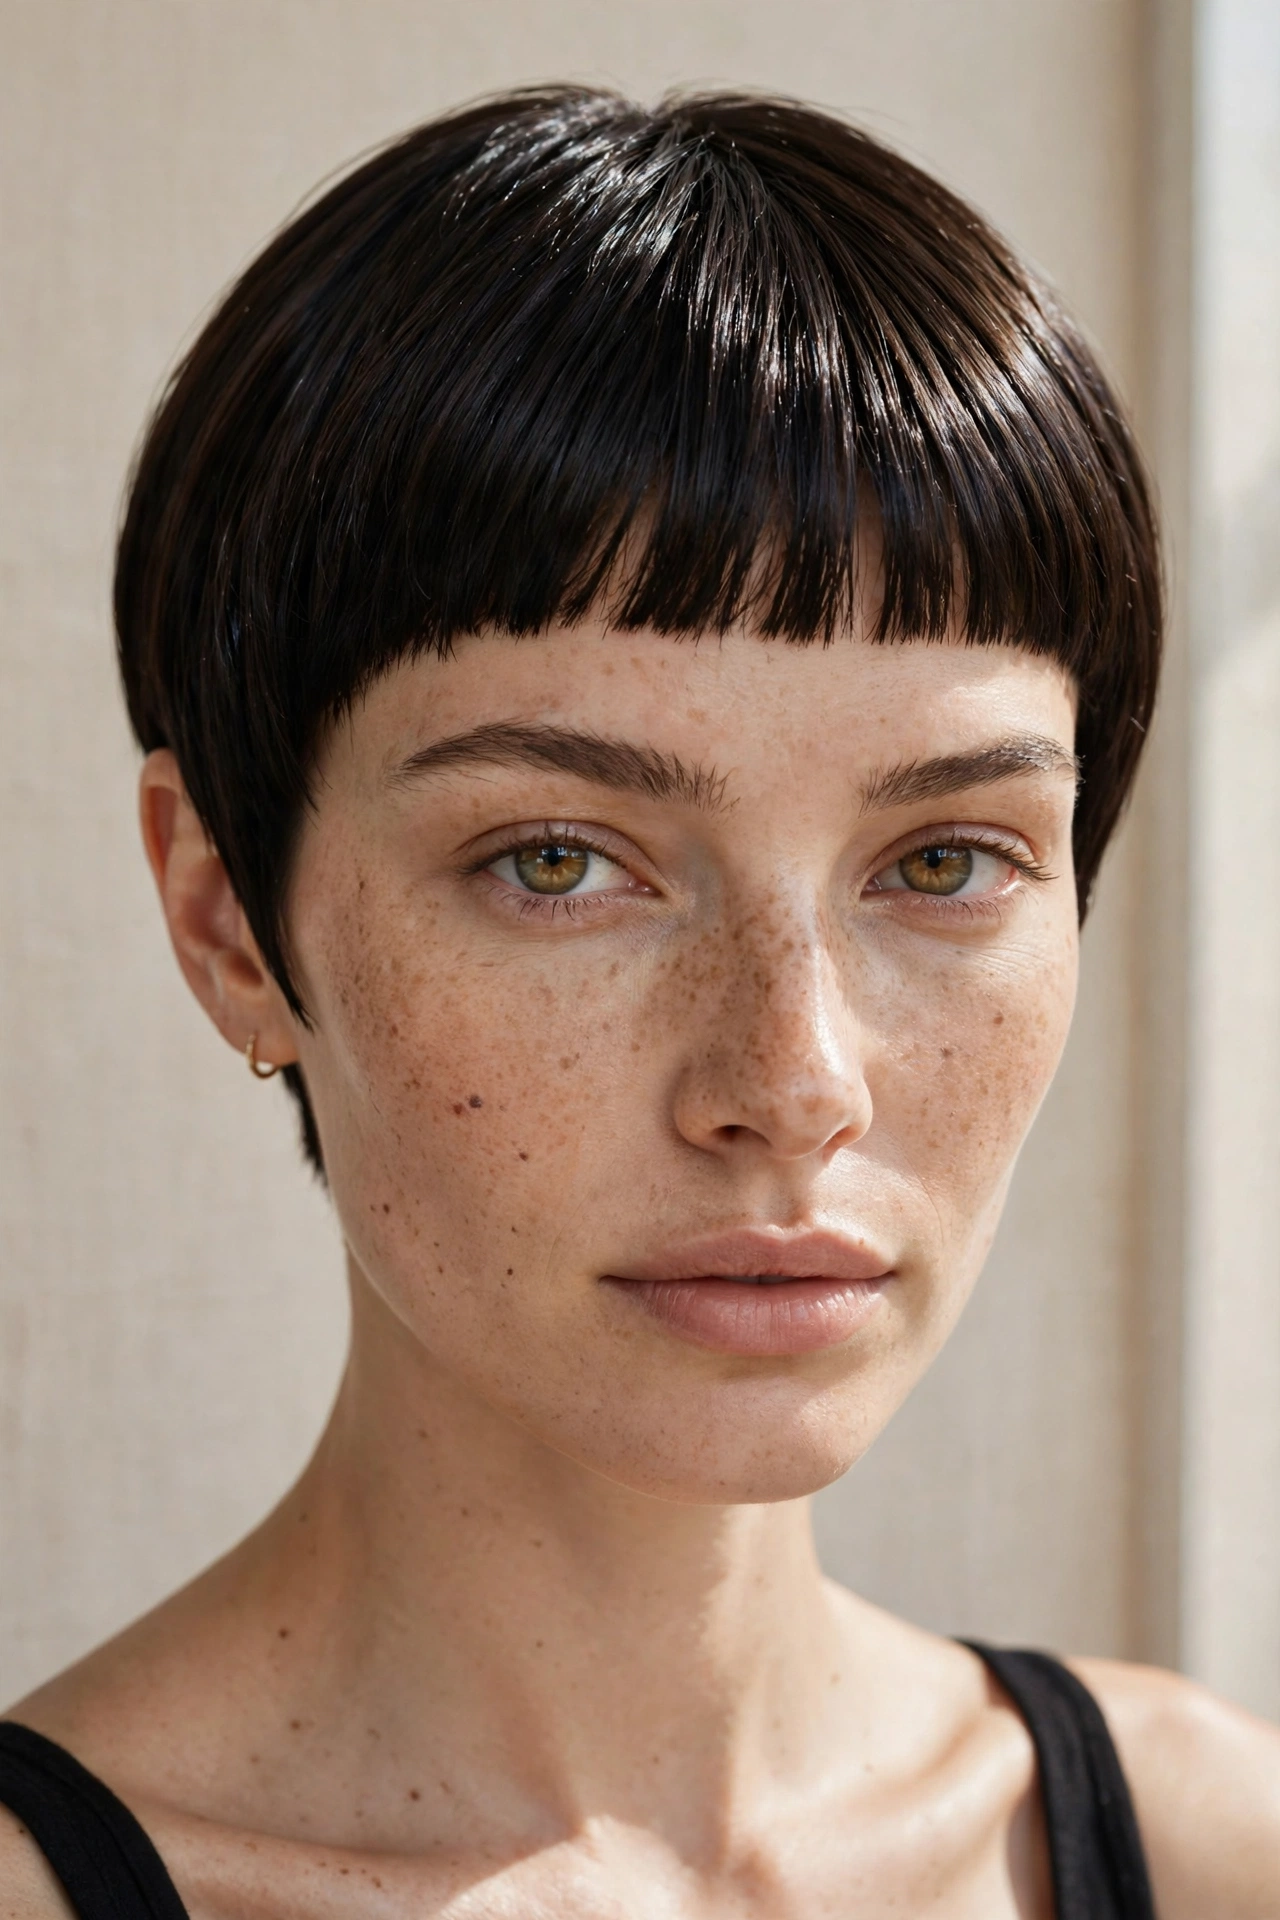
Short, choppy, sitting well above the eyebrows — baby bangs (or micro bangs) were the 90s’ boldest fringe move, worn by Drew Barrymore, Audrey Tautou-adjacent gamines, and everyone who wanted to look like they didn’t care what anyone thought. They’re back because they do something no other bang can: they completely change a face’s architecture. The 2026 version is textured and piece-y rather than blunt-cut straight across, which makes them more forgiving and much easier to grow out.
Who it suits: oval, heart, and long faces — the short fringe visually shortens a long face beautifully. Strong features carry them best; on very round faces they can emphasize width, so keep them wispy rather than heavy. They demand confidence more than any other style here. If you’re unsure, you’re not ready — and that’s fine.
Salon script: “Textured baby bangs, hitting mid-forehead, cut piece-y not blunt. I want them choppy with movement — not a straight line.” Be specific about length: mid-forehead is the classic; closer to the brow is softer. Ask your stylist to cut them dry if possible — bangs shrink as they dry, and wet-cut bangs are how horror stories start.
At-home styling (5 minutes): the beauty of baby bangs is they need almost nothing — a quick pass with a small round brush or flat iron, piece them out with a tiny bit of wax. They look best slightly imperfect. On greasy days they’re the first thing to betray you, so keep dry shampoo at the hairline.
Maintenance: trims every 3–4 weeks — this is the highest-maintenance bang on the list. Grow-out takes months and passes through an awkward floating-above-the-brows phase. Commit or don’t.
Honest downside: there’s no hiding from baby bangs. They frame your entire face, they photograph prominently, and growing them out is a genuine project. They also show cowlicks mercilessly — if your hairline has a strong swirl, discuss it with your stylist first. Some cowlicks can be worked around; some can’t.
Pro tip: style baby bangs first, before the rest of your hair. They’re the fussiest part and they set the tone — get them right while your tools are hot and your patience is fresh. For softer fringe inspiration, the wispy bangs guide covers the gentler end of the spectrum.
11. The Flicked Bob
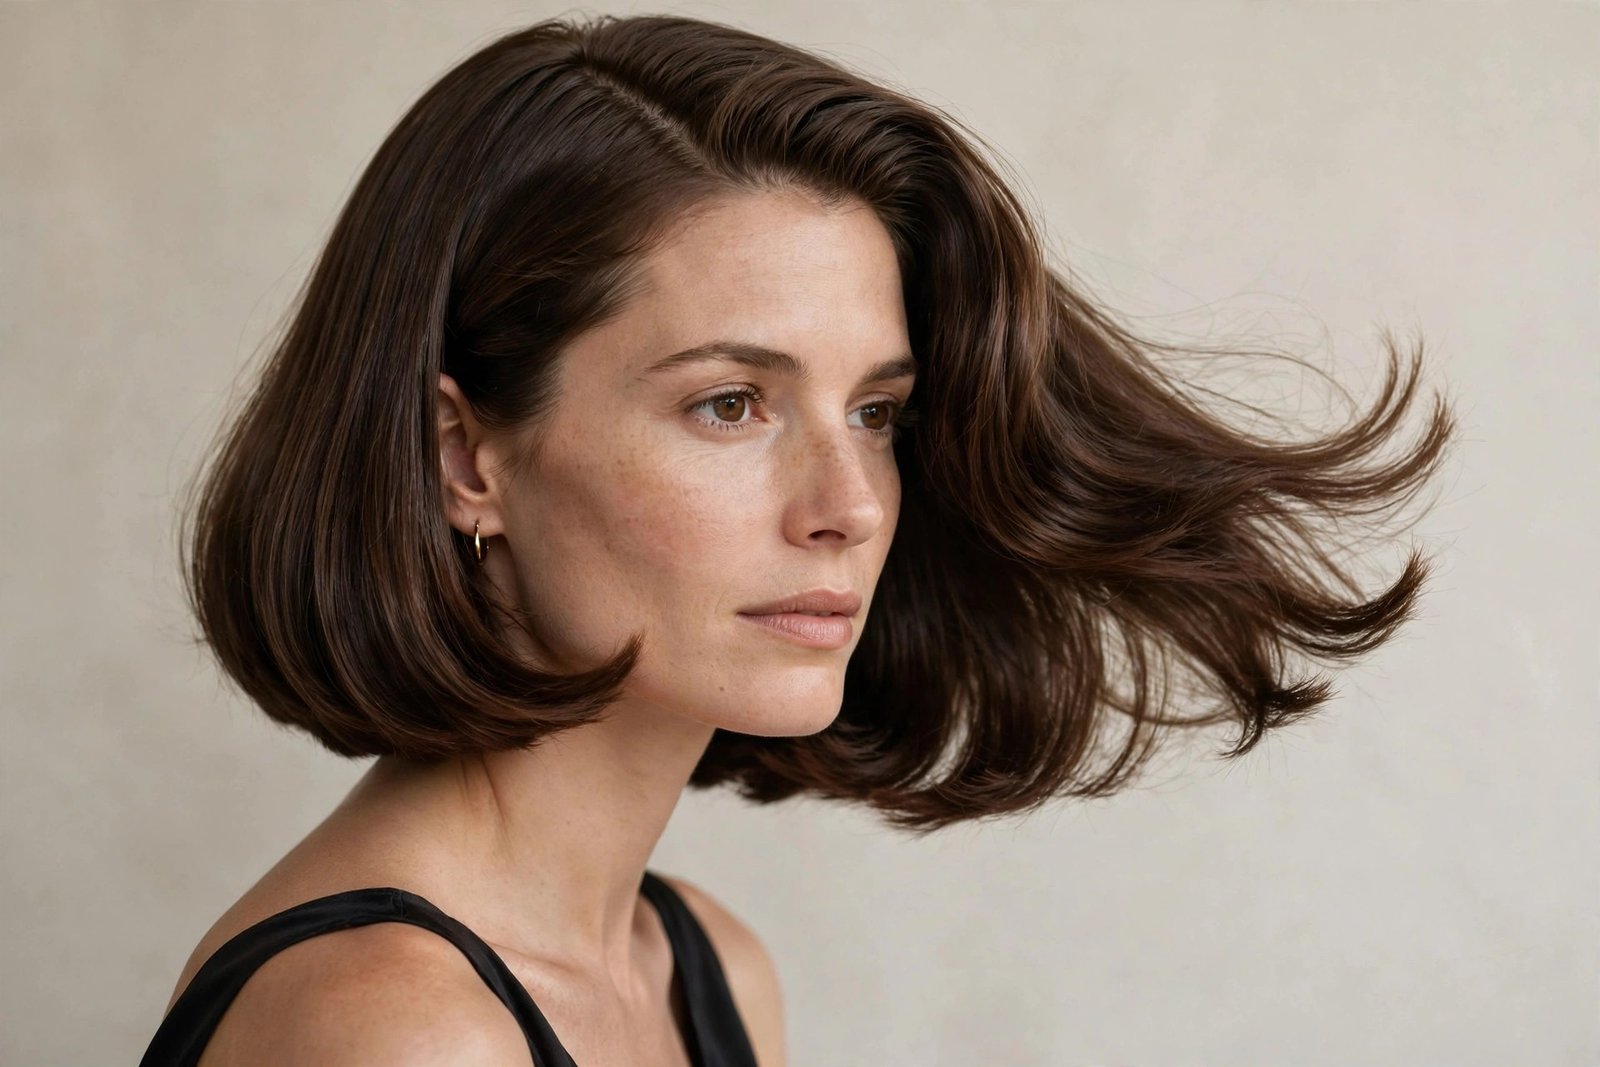
Before the lob took over, there was the flicked bob: chin-to-jaw length, ends flipped outward with attitude, often paired with a deep side part. It was the working woman’s 90s cut — polished enough for the office, fun enough for the weekend. The 2026 version keeps the flip but relaxes the rest: softer texture through the lengths, a less severe part, ends that bend rather than spike. It’s quietly become one of the most requested short cuts in salons, mostly by women who are done with long hair but not done with style.
Who it suits: jaw-length to chin-length hair; the cut creates the look, so length precision matters. Flatters round faces (the flip adds angles), softens square jaws, and gives fine hair the illusion of thickness — the flip creates width at exactly the right place. Thick hair needs internal thinning or the flip turns into a triangle.
Salon script: “A chin-length bob with the ends flipped out — 90s flick. Keep it soft through the lengths, not a blunt helmet. I want it to flip with a round brush, so leave enough length and layer the very ends.” Ask for the back to be slightly graduated if you want the classic 90s silhouette.
At-home styling (10 minutes): blow-dry with a round brush, rolling the ends outward — or cheat with a flat iron flipped out at the ends, which takes three minutes. A little texturizing spray keeps the flip from falling flat. The deep side part is half the look; don’t skip it.
Maintenance: trims every 6 weeks to keep the length precise — bobs show growth fast. The flip needs heat to exist, so this isn’t a wash-and-go cut. Color it or don’t; the flicked bob looks great in natural color, which is part of its low-key appeal. A related classic with a different finish: the blunt bob guide.
Honest downside: the flip has a lifespan of about six hours on most hair types. By evening you’re touching it up or accepting the fade. Humidity kills it outright. And if your hair has a natural inward bend, you’ll fight the cut’s intentions daily — some hair just wants to tuck under, and forcing it out is a losing battle.
Pro tip: flip the ends outward while the hair is still slightly damp from blow-drying, then hit just the flipped ends with the cool shot. Heat sets the shape; cold locks it. The flip lasts twice as long.
12. The Winona Pixie
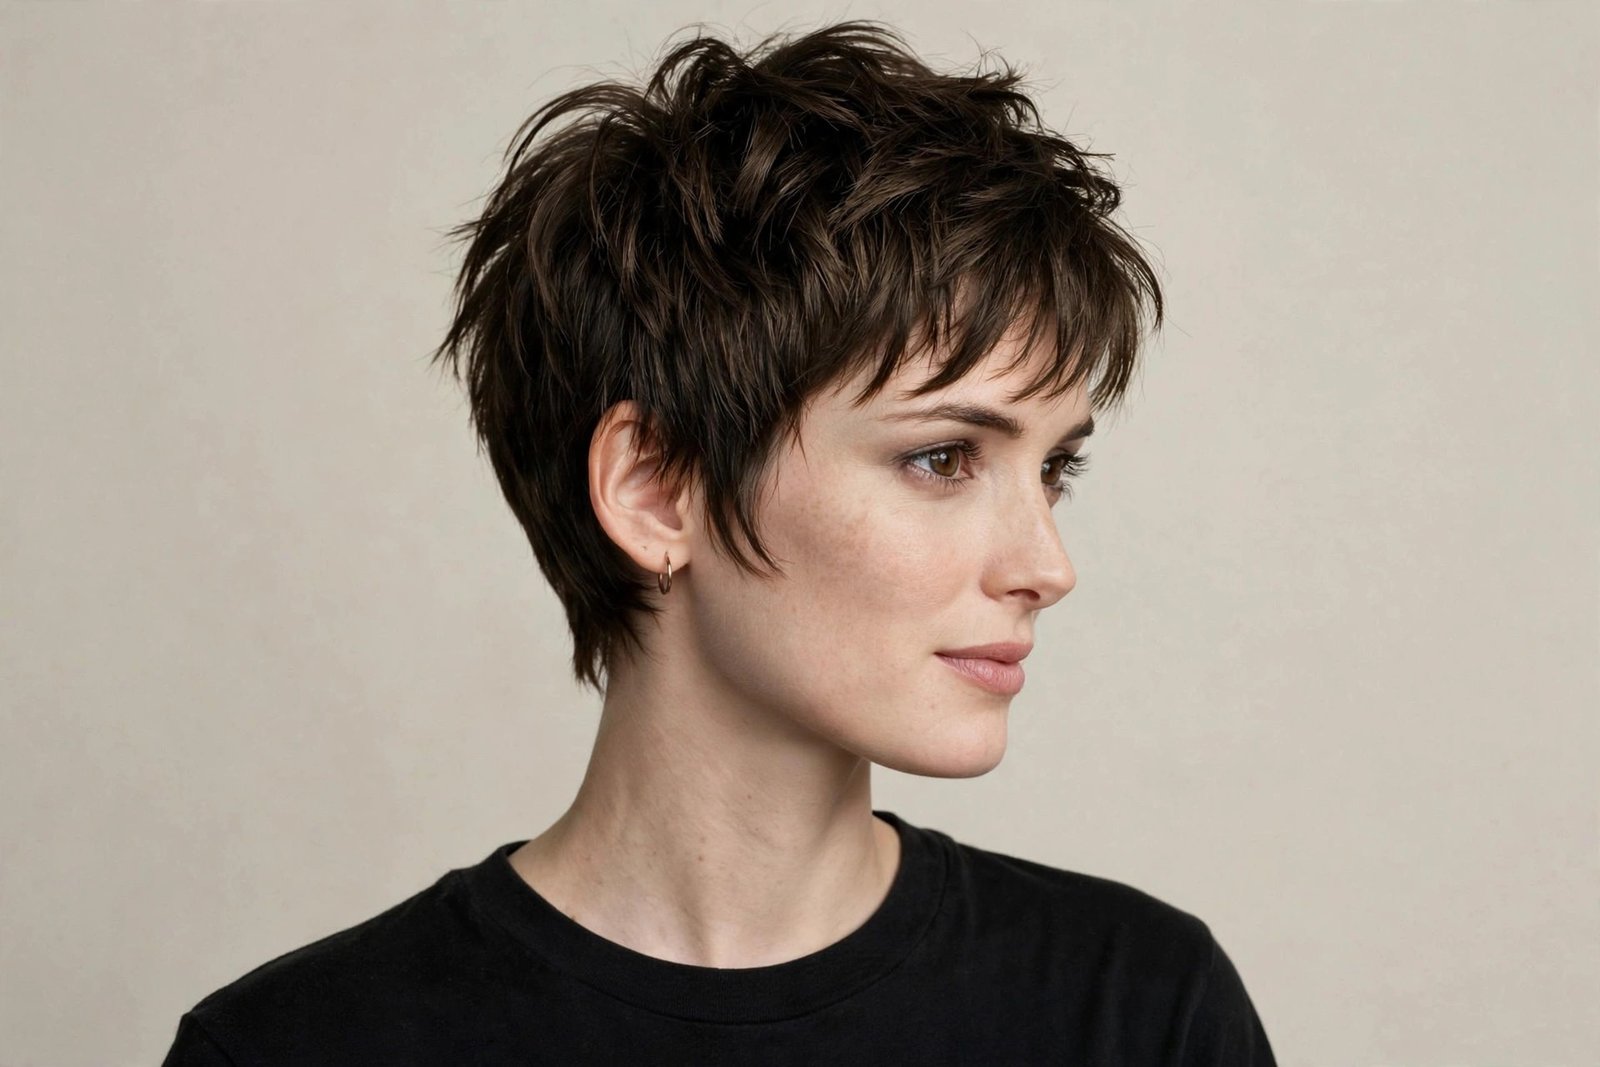
Winona Ryder’s 90s pixie — Reality Bites era, choppy, androgynous, impossibly cool — remains the gold standard of the short crop. It wasn’t a neat pixie; it was piece-y, textured, with a longish fringe that fell over one eye. The 2026 version is cut with more precision underneath (so it grows out better) but styled with the same insouciance. It’s the haircut equivalent of a leather jacket: it makes everything you wear look more interesting.
Who it suits: oval, heart, and square faces — the crop shows off bone structure, so strong cheekbones and jawlines shine. Petite features can get lost under too much fringe, so keep it tailored. Works on straight to wavy hair; very curly hair makes a different (also gorgeous) pixie that needs its own consultation. This cut is about the face — if you love your features, show them.
Salon script: “A textured 90s pixie — Winona Ryder, Reality Bites. Choppy and piece-y on top, longer fringe sweeping across, tapered but not skin-tight at the nape. I want it to look effortless, not precision-cut.” Bring the reference photo. This cut lives or dies on the fringe length.
At-home styling (5 minutes): the easiest styling on this list. Towel-dry, work a small amount of texturizing paste through with your fingers, push the fringe where you want it, done. It looks better slightly messy — over-styling a pixie defeats the purpose. Second-day pixie is often the best pixie; dry shampoo at the roots and go.
Maintenance: trims every 4–5 weeks — pixies grow out visibly and the shape collapses without upkeep. The grow-out is a known journey (pixie to bob takes about six months of awkward), so commit to the schedule or plan your exit strategy in advance.
Honest downside: there’s nowhere to hide. A pixie puts your face, your ears, your neckline all on display, and on a bad skin day you’ll feel it. It’s also the least versatile cut here — you can’t put it up, you can’t hide behind it. What you see is what you get, every single day. Make sure you like what you see.
Pro tip: invest in good earrings. A pixie frames the ears like nothing else, and a great pair of earrings becomes part of the haircut.
13. Side-Swept Bangs
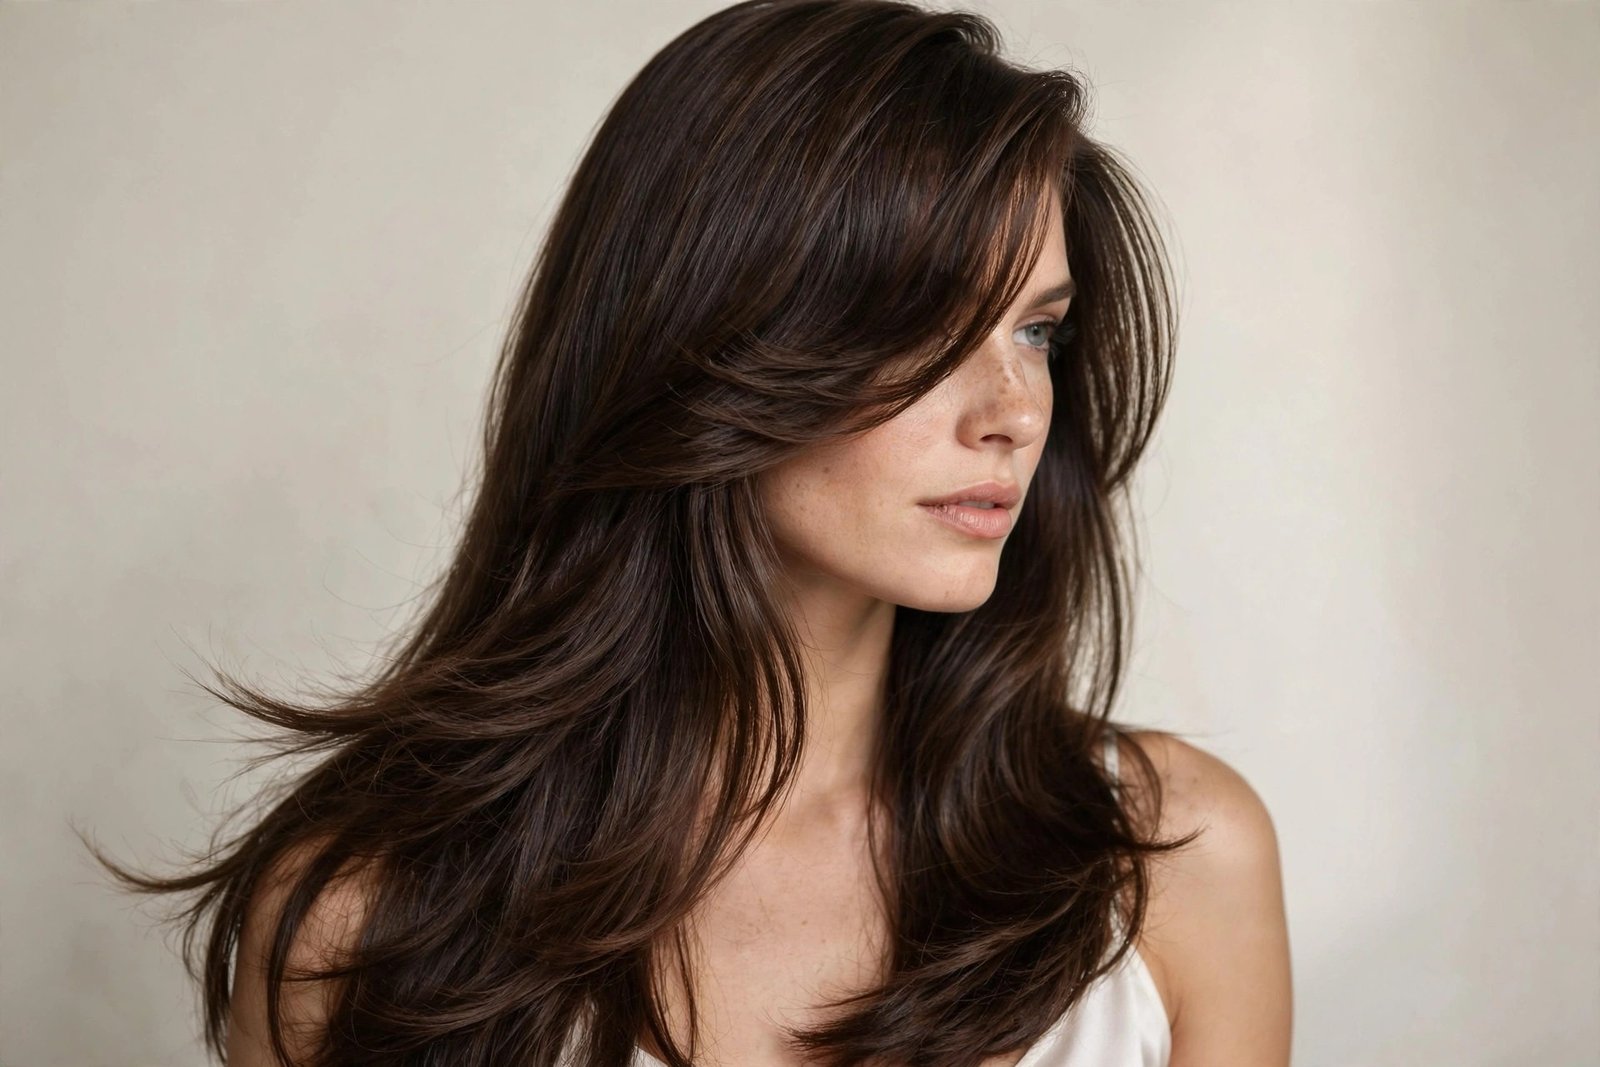
The 90s side sweep was less a bang and more a lifestyle: a deep side part with a long fringe cascading across the forehead, blending into face-framing layers. Every rom-com heroine had it. It was romantic, a little mysterious, and — crucially — the most forgiving fringe ever invented. The 2026 version is the same idea with softer blending: the sweep melts into the layers instead of sitting on top of them, and it works with everything from bobs to waist-length hair.
Who it suits: nearly everyone — this is the safest fringe in existence. The diagonal line flatters round faces (breaks up the width), softens square faces, and adds interest to long faces. Works on straight, wavy, and curly hair. If you’ve never had bangs and you’re nervous, start here.
Salon script: “Long side-swept bangs, blended into face-framing layers. Deep side part. I want the sweep to start around the cheekbone and melt into the lengths — no harsh line where the bang ends.” If you wear your part on a specific side, say so — bangs are cut to a part.
At-home styling (5 minutes): blow-dry the sweep across the forehead with a round brush, directing it to the side — drying it in the direction you want it to fall is the whole trick. A little smoothing cream keeps it from puffing up. It also air-dries beautifully on wavy hair; just arrange it while damp and leave it alone.
Maintenance: trims every 6–8 weeks; grows out seamlessly into layers, so there’s no awkward phase. This is the bang you get when you want bangs without the commitment. For a curtain-style variation on the same idea, see the curtain bangs with long layered hair guide.
Honest downside: it’s so safe it can be boring. The side sweep doesn’t make the statement that baby bangs or a full fringe do — it’s an enhancement, not a transformation. And in wind or humidity it migrates; you’ll be tucking it behind your ear by afternoon, which is fine, but know that going in.
Pro tip: train the sweep by blow-drying it flat against your forehead in the opposite direction first, then sweeping it over. It sounds wrong. The root direction it creates makes the sweep sit flatter and last longer.
14. The Headband Tuck
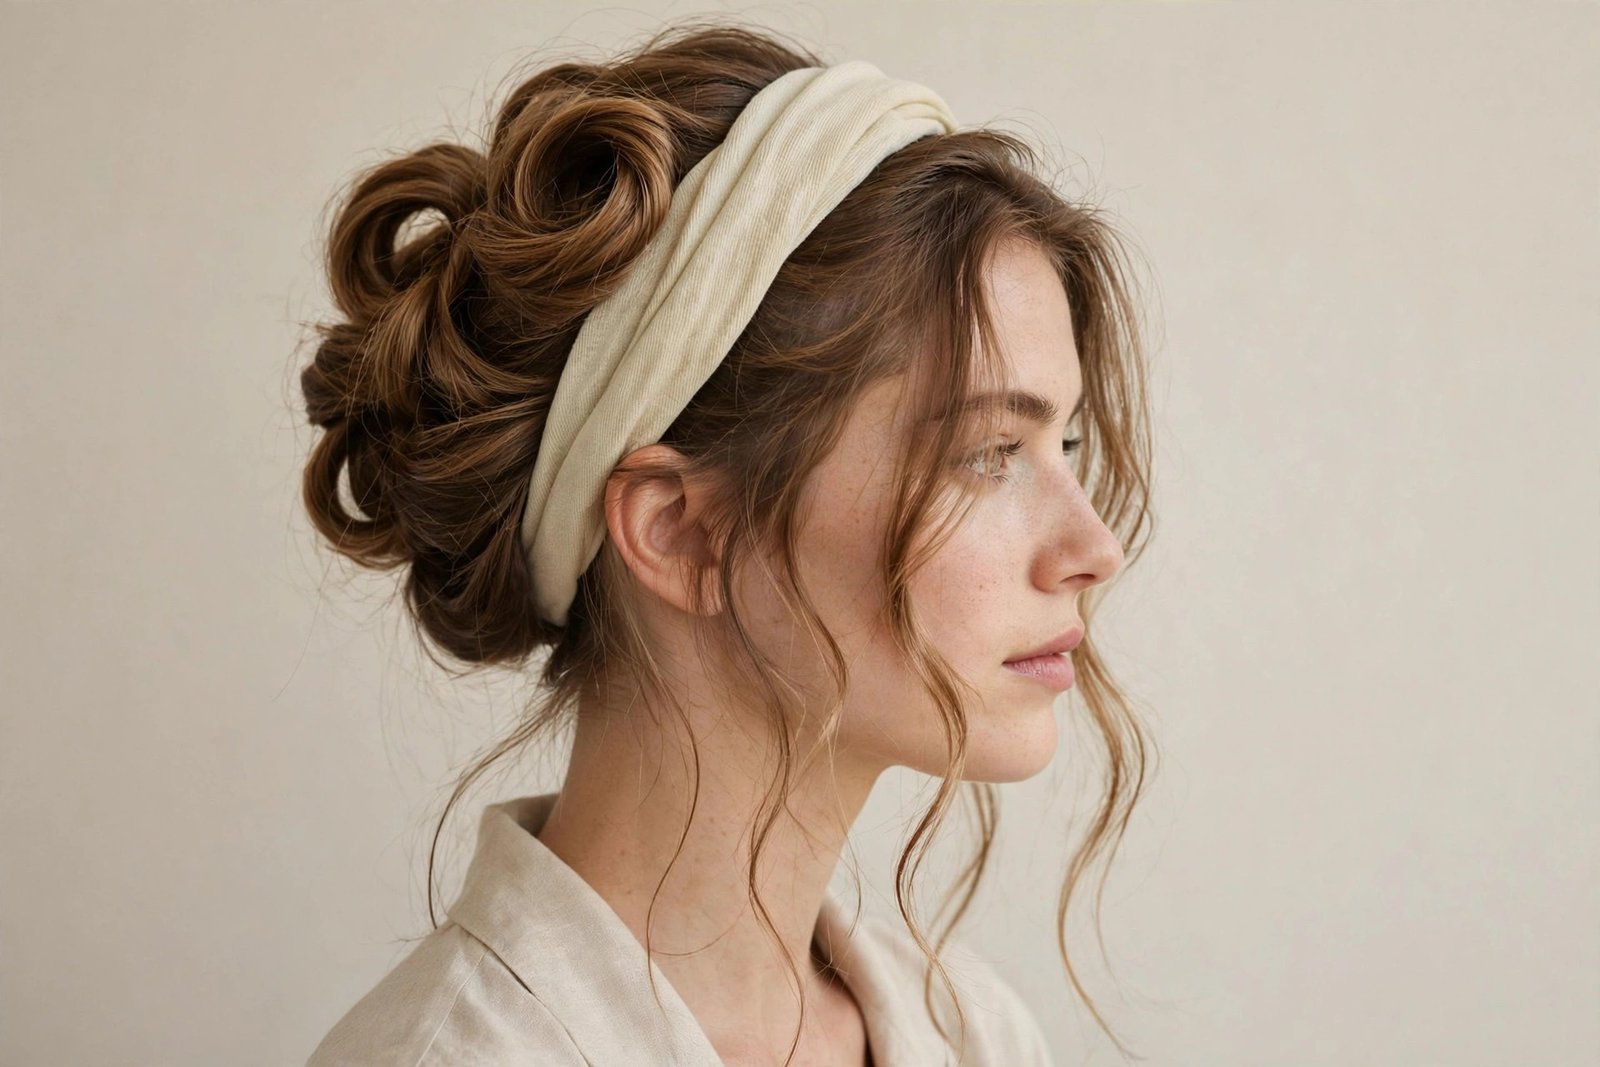
The 90s headband look — a wide fabric band with the hair tucked and rolled around it — was preppy perfection: Blair Waldorf before Blair Waldorf, tennis-club polish with zero effort. The 2026 version keeps the tuck but loosens everything: a softer band, looser rolling, face-framing pieces left out. It’s become a wedding-guest and date-night staple because it looks intricate and takes four minutes.
Who it suits: medium to long hair — you need enough length to tuck. Flatters all face shapes; the band adds structure up top, which is lovely on round faces, and the tucked volume at the nape balances long faces. Fine hair works beautifully here — the tuck creates fullness out of nothing.
Salon script: styling look. If you wear it often, layers help the tuck hold — one-length hair can slip. Mention it at your next trim and your stylist can adjust.
At-home styling (5 minutes): place the headband over your hair like a crown, then take sections from the front and tuck-and-roll them around the band, working toward the back. Pin where needed. Pull out face-framing pieces. The messier the tuck, the more modern it looks — a too-neat tuck reads as costume drama.
Maintenance: none. This is a style, not a cut or color. It doubles as a second-day-hair rescue and a workout-to-dinner transition.
Honest downside: headband headaches are real — a tight band across the forehead for hours will remind you it’s there. Choose soft, wide fabric bands over hard plastic. And very silky hair slips out of the tuck; texture spray or day-old hair grips much better.
Pro tip: do the tuck on slightly dirty hair with texture spray at the roots. Clean, silky hair is the enemy of this style — it slides out within the hour.
15. The Pamela Updo
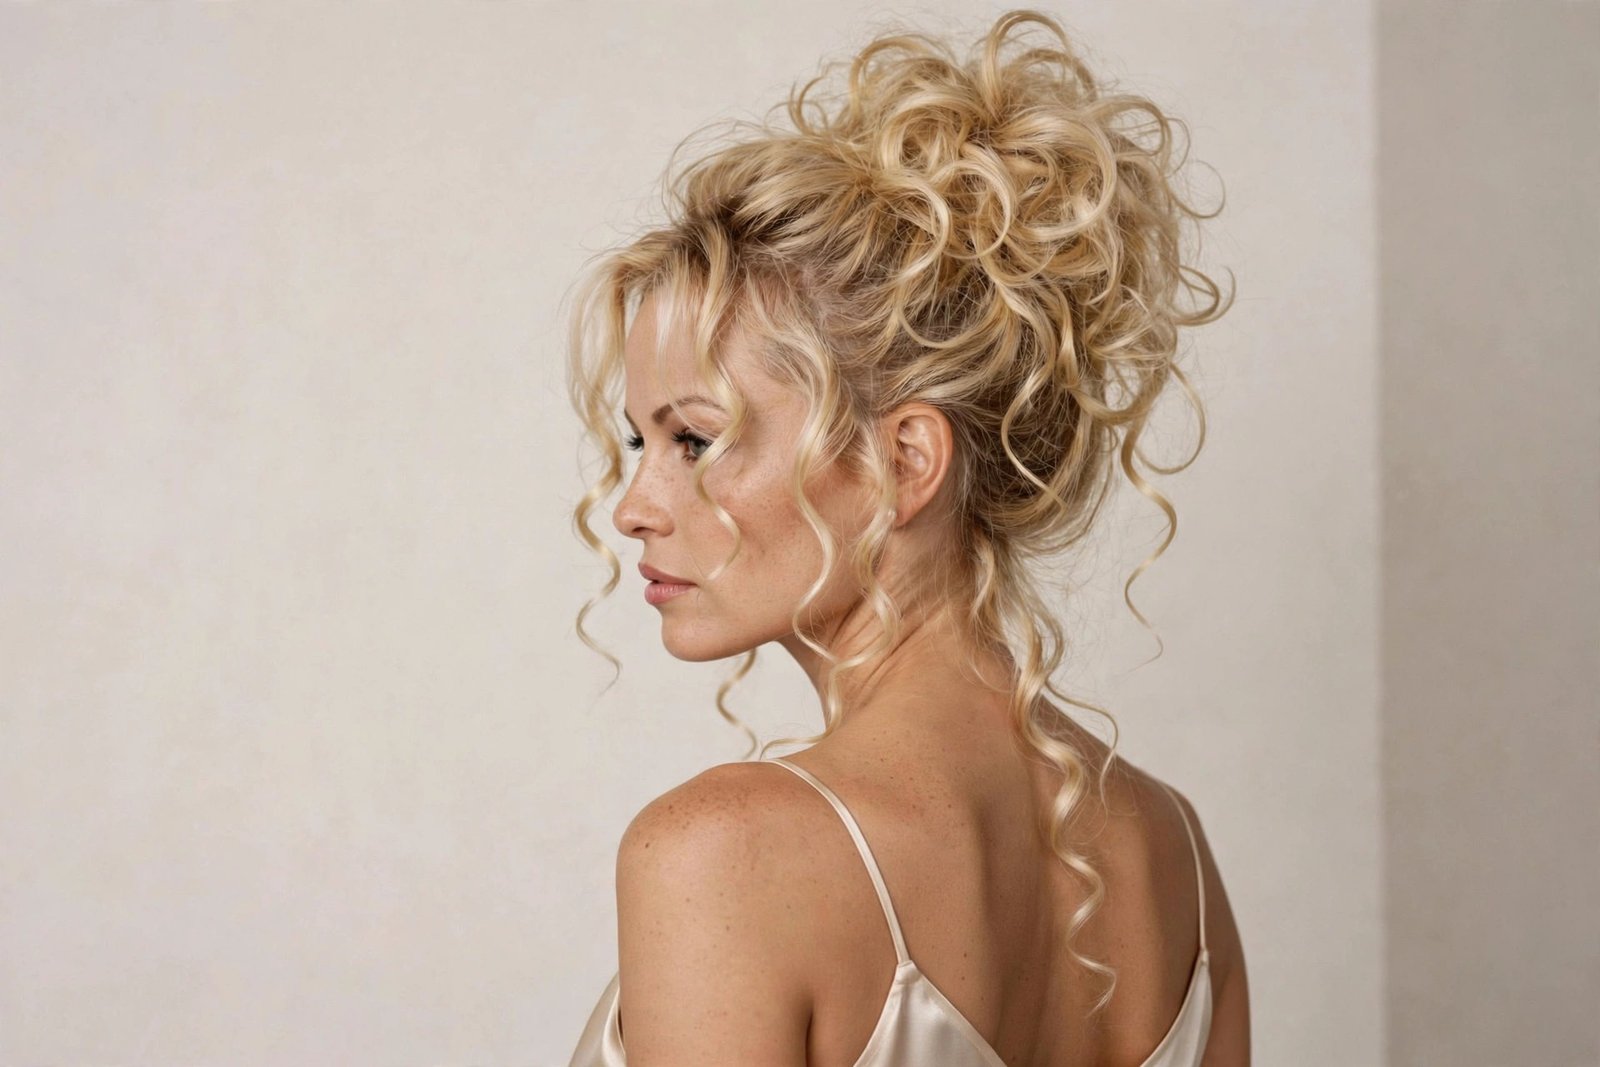
Pamela Anderson’s messy updo — the high, undone bun with curly tendrils falling everywhere — was the 90s’ answer to formal hair, and it broke every rule of the era’s polished updos. It was sexy precisely because it wasn’t trying. The 2026 version (sometimes called the “Pammy updo”) is all over red carpets: same high placement, same face-framing curls, but built on better prep so it actually lasts the night. It’s the rare formal style that looks better as it falls apart.
Who it suits: medium to long hair with some texture — the tendrils need something to hold a curl. Flatters oval, heart, and square faces; the height elongates round faces beautifully. It’s a going-out look at heart — weddings, dates, events where you want to look stunning without looking stiff.
Salon script: “I want to be able to wear a messy high updo with curly tendrils — so keep my layers long enough to pull pieces out around the face, and keep the ends healthy enough to curl.” If you’re getting it done professionally for an event, bring the photo and book a trial if it matters.
At-home styling (15 minutes): curl the whole head loosely first — the tendrils are pre-curled pieces, not afterthoughts. Gather into a high, loose ponytail, twist into a messy bun, pin casually. Pull out the front sections and a few pieces around the nape; curl any straight ones. The key: it should look like you did it in a hurry while late. Because the best ones were.
Maintenance: none as a style; as a cut, keep layers that support it. This is an occasion look, not a daily driver — though nobody’s stopping you.
Honest downside: “messy” updos are paradoxically fiddly. Getting the tendrils to fall right takes practice, and there’s a fine line between artfully undone and actually undone. Give yourself a practice run before the event. Also, bobby pins — you will need more than you think, and they will all migrate to the same spot.
Pro tip: backcomb the ponytail lightly before twisting it into the bun. The bun doubles in size and the pins actually have something to grip.
16. The Zigzag Part
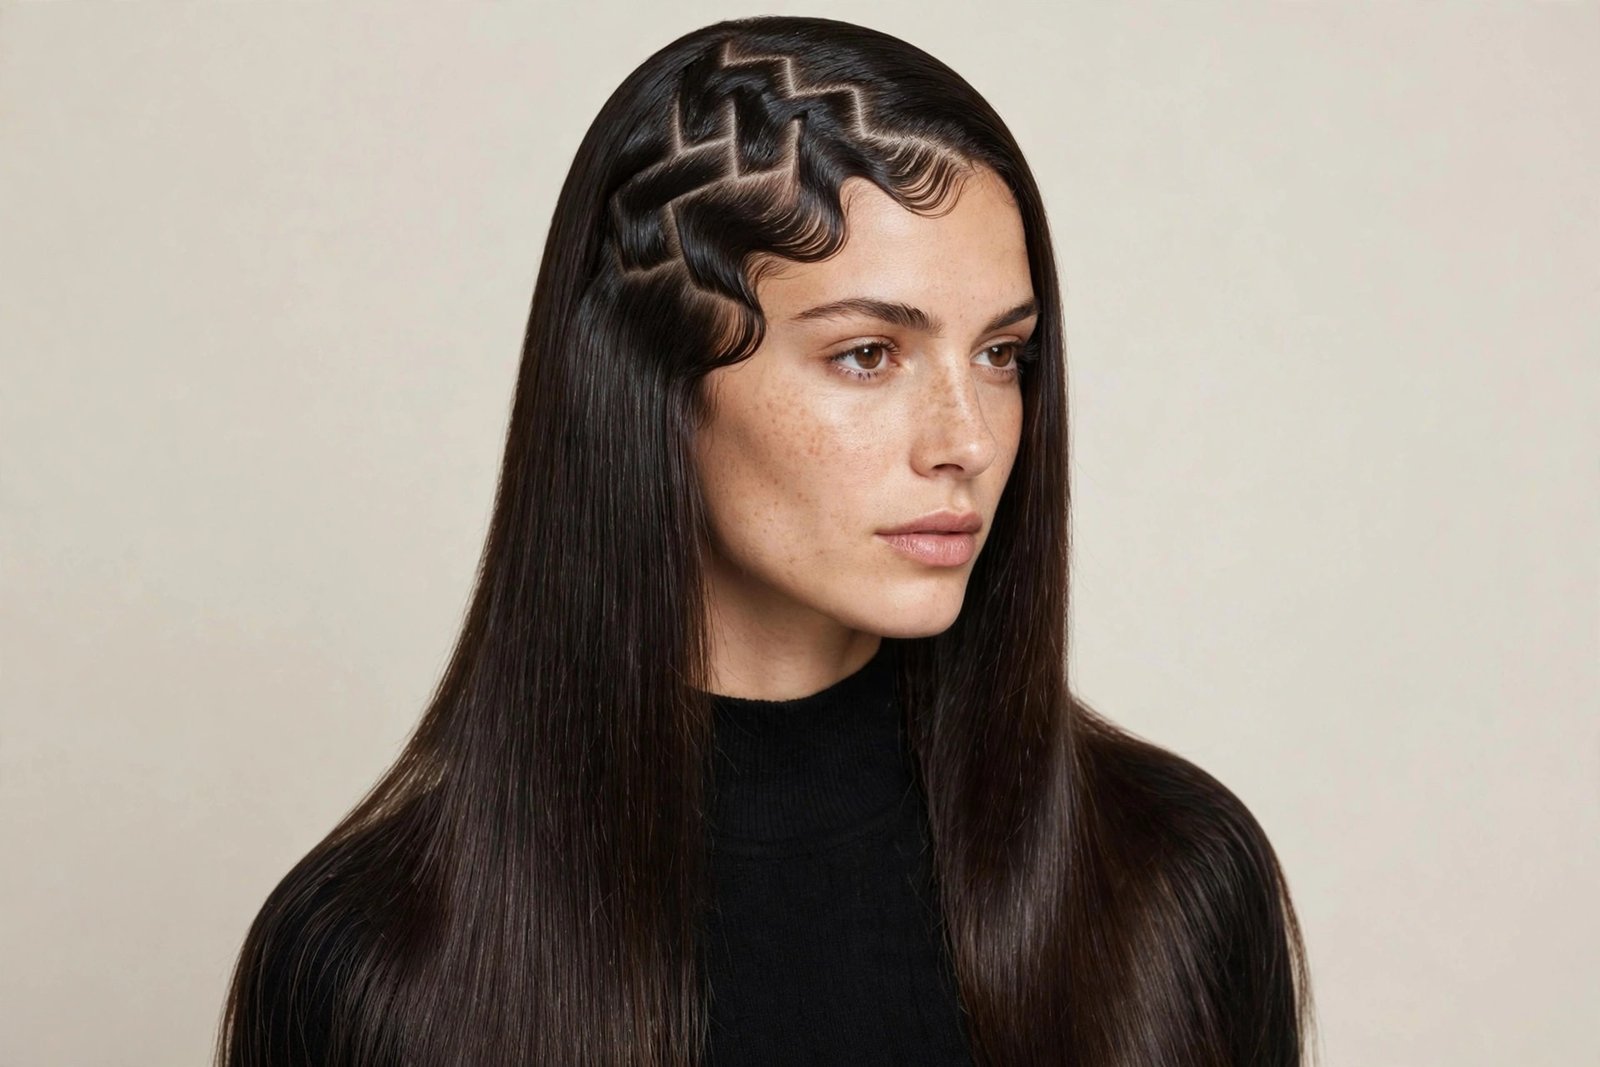
The zigzag part was pure 90s playfulness — instead of a straight center or side part, the hair was parted in a sharp Z pattern, usually with the help of a zigzag parting tool that every girl owned. It was a small detail with outsized impact: instantly youthful, a little rebellious, and weirdly flattering. The 2026 version is subtler — a soft zigzag rather than a severe one, often paired with sleek straight hair so the part is the star. It’s the lowest-commitment trend on this list and the easiest to try tonight.
Who it suits: everyone with enough length to show a part — chin-length and up. It breaks up the symmetry of a center part, which flatters faces that look too severe with a straight middle part. Fine hair benefits because the zigzag disguises sparse part lines.
Salon script: none needed — this is pure styling. But if your cut has a strong built-in part (like a curtain bang cut to a center part), mention you want to play with zigzag parts so your stylist doesn’t fight it.
At-home styling (3 minutes): on damp or dry hair, use the tail of a rattail comb to draw a zigzag from forehead to crown — small, tight zigs for the authentic 90s look, wider ones for modern subtlety. Smooth each side down. That’s the entire technique. Pair it with straight, sleek hair for maximum contrast, or with waves for softness.
Maintenance: zero. It’s a part. It washes out.
Honest downside: it’s a detail, not a hairstyle — on its own it won’t transform your look, and paired with the wrong outfit it can read as trying too hard. Think of it as an accessory, not a commitment. Also, the novelty wears off fast; most people do it for a week, love it, then forget about it for months.
Pro tip: a zigzag part with a sleek high ponytail is the combination nobody expects and everybody compliments. The part adds interest exactly where the pony is plainest.
The 90s Styling Routine: Products, Tools & Maintenance
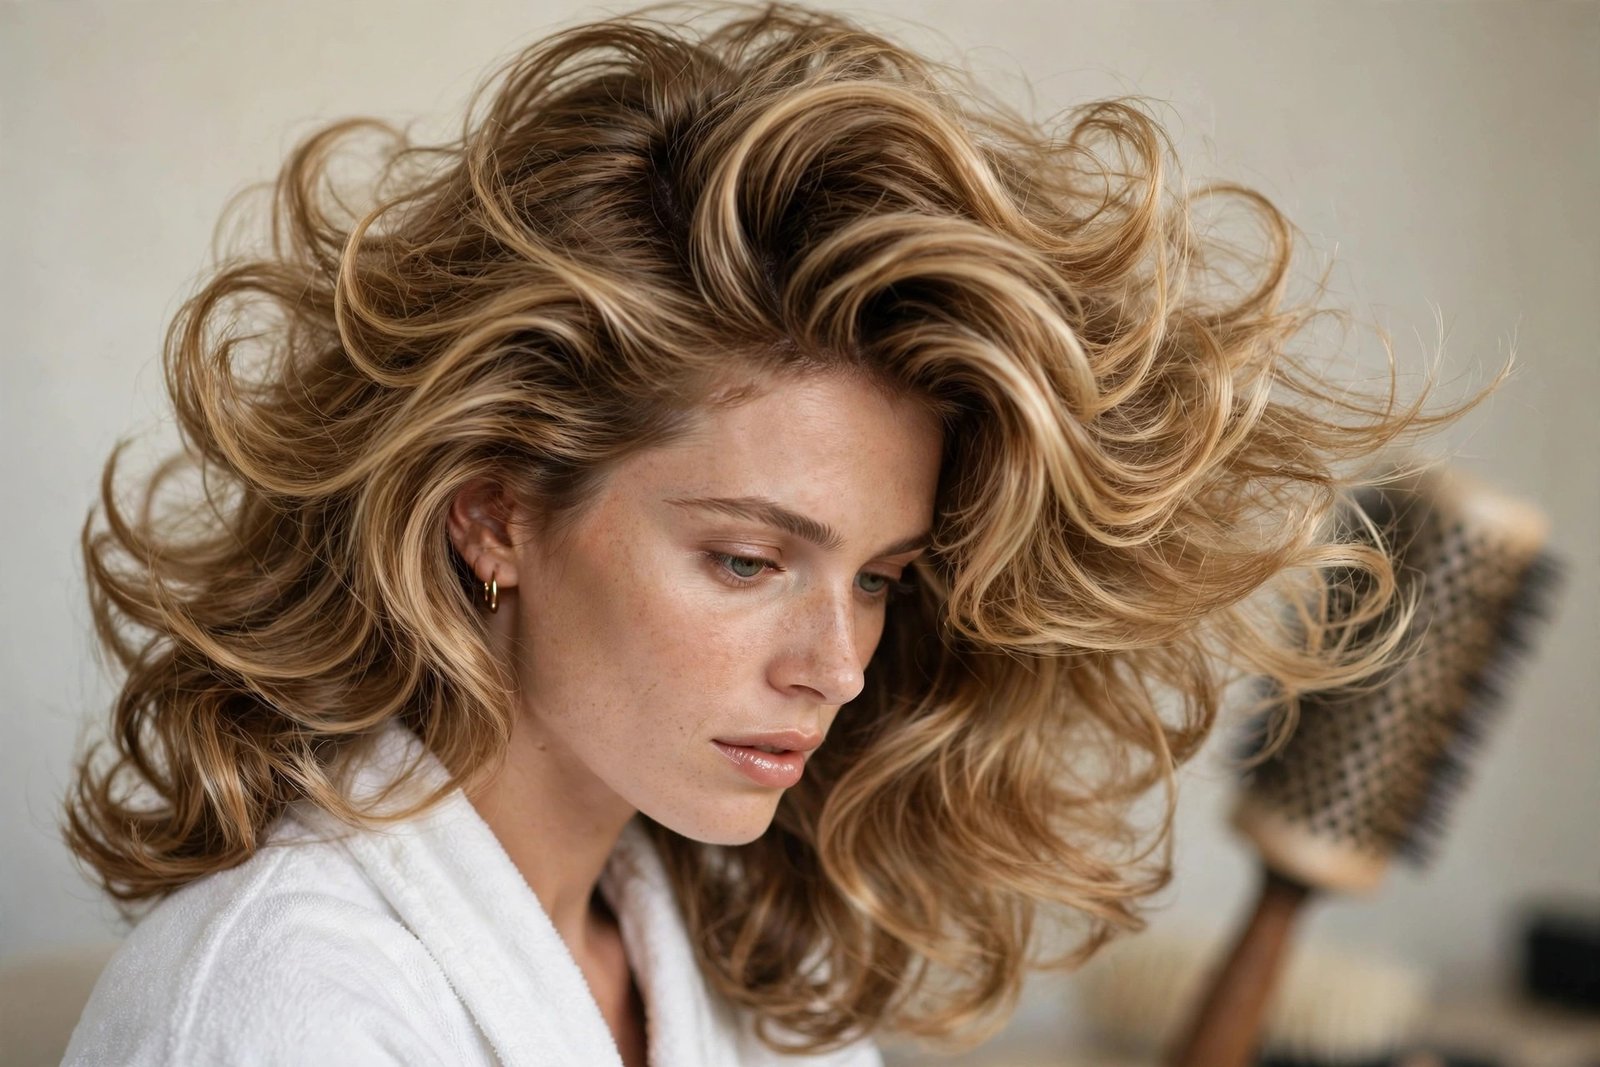
The 90s hairstyles women are reviving share a foundation: volume at the root, movement through the lengths, and texture with intention. This routine is the engine room — the products, tools, and habits that make every look on this list work better and damage your hair less than the original decade did.
The Product Lineup (What to Buy, What to Skip)
Let’s start with what the 90s got wrong, because the product aisle is where the revival succeeds or fails. The original decade ran on alcohol-heavy mousses, crunchy gels, and hairsprays with the hold strength of industrial adhesive. They worked — and they dried hair to straw. The 2026 replacements do the same jobs without the damage: a lightweight root-lifting mousse instead of the crunchy stuff, a flexible cream or serum for smoothing, a texture spray (the single most 90s-revival product in existence) for grit and volume, and a workable hairspray that holds without fossilizing.
Heat protectant is the product the 90s skipped and you must not. Every blowout, every crimp, every flicked end on this list involves heat, and modern heat protectants genuinely work — they reduce moisture loss and cuticle damage measurably. Apply to damp hair before any heat styling, every single time. No exceptions, no “just this once.” The second non-negotiable is a bond-building treatment (used weekly or biweekly) if you heat-style regularly or have any chemical processing. It’s the difference between hair that survives a 90s revival and hair that gives up by spring.
What to skip: heavy oils applied before heat styling (they fry — oil plus flat iron is a recipe for sizzle), anything with “extra super mega hold” in the name (you want flexible), and cheap crimping irons with no temperature control. When in doubt about a product’s claims, the editorial testing roundups at Byrdie are a solid reality check before you spend. Buy the tool once, properly, or don’t buy it. Your hair will know the difference.
The Tool Kit
You don’t need a salon’s worth of equipment. The 90s-revival toolkit is small: a good blow dryer with a nozzle attachment (the nozzle is what makes blowouts smooth — drying without one is just making wind), a large round brush (the bigger the barrel, the bouncier the blowout), a large-barrel curling iron or wand for waves and flicks, a flat iron for sleek looks and the zigzag-part pairing, and velcro rollers in large sizes. That last one is the sleeper hit — rollers do half the work of a blowout while you do your makeup.
Technique beats tools every time. A $40 dryer used properly outperforms a $400 dryer used badly — step-by-step blowout tutorials like the ones on Allure prove it. The fundamentals: always point the nozzle down the hair shaft (never up — that’s frizz school), dry roots first for volume, and let each section cool before you touch it. Heat shapes hair; cooling sets the shape. Every time you rake through a still-warm section, you’re undoing your own work.
For the crimp-curious: buy a crimper with adjustable temperature and ceramic or tourmaline plates, keep it at the lowest effective heat, and never crimp the same section twice. And for the love of your ends, deep-condition the week you crimp. Your hair will forgive a lot if you apologize properly.
Wash-Day Strategy for 90s Volume
Volume starts in the shower, not at the styling stage. If your hair is fine or limp, shampoo twice — the first wash removes buildup, the second actually cleans the scalp — and keep conditioner off the roots entirely. Conditioner on the scalp is the #1 volume killer and the reason so many people think their hair “can’t hold” 90s styles. Mid-lengths to ends only. Rinse with cool water if you can stand it; it smooths the cuticle and adds shine that no serum can fake.
Timing matters too. Most 90s styles look best on wash day or day two — day-three hair has either gone flat or gone wild, depending on your texture. Plan your high-effort styles (supermodel blowout, Pamela updo) for wash day, and save the forgiving ones (top knot, space buns, headband tuck) for later in the week. Dry shampoo is for the roots on day two and three — applied at night, not in the morning, so it has hours to absorb oil instead of sitting on top of it.
The weekly reset: once a week, clarify. Product buildup from mousses, texture sprays, and dry shampoos accumulates silently and murders volume. A clarifying shampoo once weekly (followed by a good condition) restores bounce like nothing else. Think of it as a reset button for everything the 90s revival asks your hair to endure.
Damage Control: Enjoying the 90s Without the 90s Hair Damage
Here’s the part the nostalgia accounts skip: the original 90s hairstyles women wore every day were brutal on hair. Daily high-heat styling, alcohol products, over-bleaching, tight ponytails worn for years — a generation of women spent the 2000s growing out the consequences. The revival works because we know better now, but only if you actually apply the knowledge. Heat protectant every time. Temperature as low as gives the result — test on a hidden section first. Rest days between heat styling when you can.
Watch for the warning signs: ends that feel crispy even after conditioning, breakage at the crown (hello, tight ponytails), color that fades in a week (porous, damaged hair can’t hold tone). These are your hair asking for a break, not a better product. When they appear, do a bond treatment, skip heat for a week, and wear the protective styles on this list — the top knot, the headband tuck, the space buns. The 90s gave us plenty of no-heat options; use them.
And the long game: trims. I know, nobody wants to hear it, but regular trims are what separate the women with great 90s hair from the women with fried 90s hair. Every 8–12 weeks for long hair, more often for short cuts. Split ends travel upward — a quarter-inch trim now prevents a three-inch chop later. The supermodels of the 90s had trims every three weeks and a glam squad; you have you, so be disciplined about the small stuff.
90s Hairstyles Women FAQs: Your Questions Answered
Real questions from real clients about the 90s hairstyles women are wearing in 2026 — answered honestly.
Are 90s hairstyles actually back, or is this just a passing trend?
They’re back with structural staying power, not just a season’s flirtation. The 90s revival has been building for three years and keeps deepening — from accessories (scrunchies, claw clips) to cuts (the Rachel, the bob) to color (chunky highlights). What makes it different from a fad is breadth: it’s not one look, it’s an entire design language of volume, layers, and texture. Fads are single items; this is a wardrobe. Expect the core ideas — bouncy layers, face-framing pieces, undone texture — to stick around for years, even as individual micro-trends (looking at you, zigzag part) cycle in and out.
Which 90s hairstyle is best for thin, fine hair?
The Rachel reboot and the flicked bob are your best friends — both create the illusion of thickness through layering and flipped ends. Crimped texture also adds genuine visual fullness to fine hair. What to avoid: the supermodel blowout without help (fine hair can’t sustain that volume alone — you’d need extensions or serious teasing), and heavy one-length cuts that show every thin spot. Whatever you choose, root-lifting mousse and texture spray are non-negotiable for fine hair wearing 90s volume. And keep the layers — blunt cuts on fine hair look thinner, not thicker, despite what intuition says.
Can I wear 90s styles if I have curly or coily hair?
Absolutely — the 90s belonged to everyone, and the revival does too. The techniques shift: instead of a round-brush blowout, a silk press gives you the sleek foundation for high ponytails and bobs; diffused wash-and-go gives you the volume for big 90s shapes; braid-outs create crimp-like texture without heat. Space buns, top knots, and headband tucks work beautifully on natural texture as-is. The key is finding a stylist experienced with your hair type — the cut architecture for a 90s bob on coily hair is different from straight hair, and a knowledgeable stylist will build the shape to work with your texture rather than against it.
How do I get 90s volume without damaging my hair with heat?
Velcro rollers are the answer — they create genuine bounce with zero heat if you put them in damp hair and let it air-dry, or minimal heat if you warm them with a dryer for two minutes. Root-clipping (clipping roots up while air-drying) adds lift at the crown. Sleeping in a loose high bun gives morning volume. And texture powder at the roots creates grit and lift that lasts all day with no heat at all. The 90s girls didn’t have these tricks — they just used more heat. You get the volume and keep the hair.
Will chunky 90s highlights damage my dark hair?
Any lightening causes some damage — that’s chemistry, not opinion. But modern lighteners, bond builders used during the service, and proper aftercare make it far less destructive than the 90s bleach jobs. The real question is your hair’s starting condition: healthy, unprocessed dark hair handles chunky highlights well; already fragile or previously lightened hair is at real risk. A good colorist will do a strand test and tell you honestly. After the service, purple shampoo for tone, weekly masks for strength, and heat protectant always. Expect touch-ups every 8–12 weeks.
What’s the easiest 90s hairstyle for beginners?
The scrunchie top knot, by a mile — ninety seconds, no skill, no heat, looks intentional. Second place: the headband tuck, which looks intricate and takes five minutes. Third: the zigzag part, which transforms a regular blowout with three minutes and a comb. Start with one of these before attempting the supermodel blowout or the Pamela updo. Build your confidence with the easy wins; the complicated styles are still there when you’re ready. Everyone’s 90s journey should start with a scrunchie.
How do I make 90s hairstyles look modern, not costumey?
Three rules. One: soften everything — the 2026 versions of these looks are all slightly less severe than the originals (softer flips, looser buns, blended highlights). Two: modernize the finish — glossy, healthy-looking hair reads 2026; crunchy, over-sprayed hair reads 1996. Three: mix eras in your overall look — 90s hair with modern makeup and current clothes looks like a style choice; 90s hair with 90s everything looks like a theme party. The hair is the statement; let everything else be now.
Conclusion
The 90s hairstyles women adored gave us the most fun decade in hair history — big, bold, unapologetic, and just a little bit ridiculous in the best way. The 2026 revival works because it kept the joy and fixed the damage: the volume without the crunch, the layers without the straw ends, the attitude with actual hair health underneath. Whether you go full Rachel, commit to baby bangs, or just buy a scrunchie and call it a day, you’re participating in the rare trend that’s genuinely for everyone.
My honest recommendation? Start with the look that made you smile while reading. Hair grows, trends cycle, and the worst 90s hair decision is still just hair — it’ll be gone in a year if you hate it. But the best ones, the ones that make you catch your reflection and grin? Those are worth the velcro rollers. The decade’s waiting. Go have fun with it.