
Pixie Cut Women 2026: 32 Bold, Chic Styles
The pixie cut women are asking for in 2026 is the boldest, most liberating haircut of the year — a short, sculpted cut with textured layers on top, tapered sides, and a fringe that can be long, side-swept, or micro-short. It frees you from long-hair maintenance while giving you more style options than ever, and this fall and winter it is everywhere: Zendaya debuted a Halle Berry-inspired pixie at the 2026 Emmys, the Parisian pixie owned the runways at Paris Fashion Week, and the bixie hybrid is bridging the gap for women who want short hair with a little more length. This guide covers 32 pixie cut styles for 2026, each with a stylist script, styling advice, and the maintenance truth nobody tells you at the salon.
Whether your hair is pin-straight, softly wavy, or naturally curly, there is a pixie in this list built for you. We cover every variation — classic and textured, undercut and spiky, sleek and polished, curly and feathered — alongside every face shape, from round and oval to heart-shaped and square, and every hair type, from fine to thick. Every style below follows the same proven structure: who it suits, exactly what to tell your stylist, how to style it in under ten minutes, and how often you will need a trim. Let us find your version.
What Is a Pixie Cut
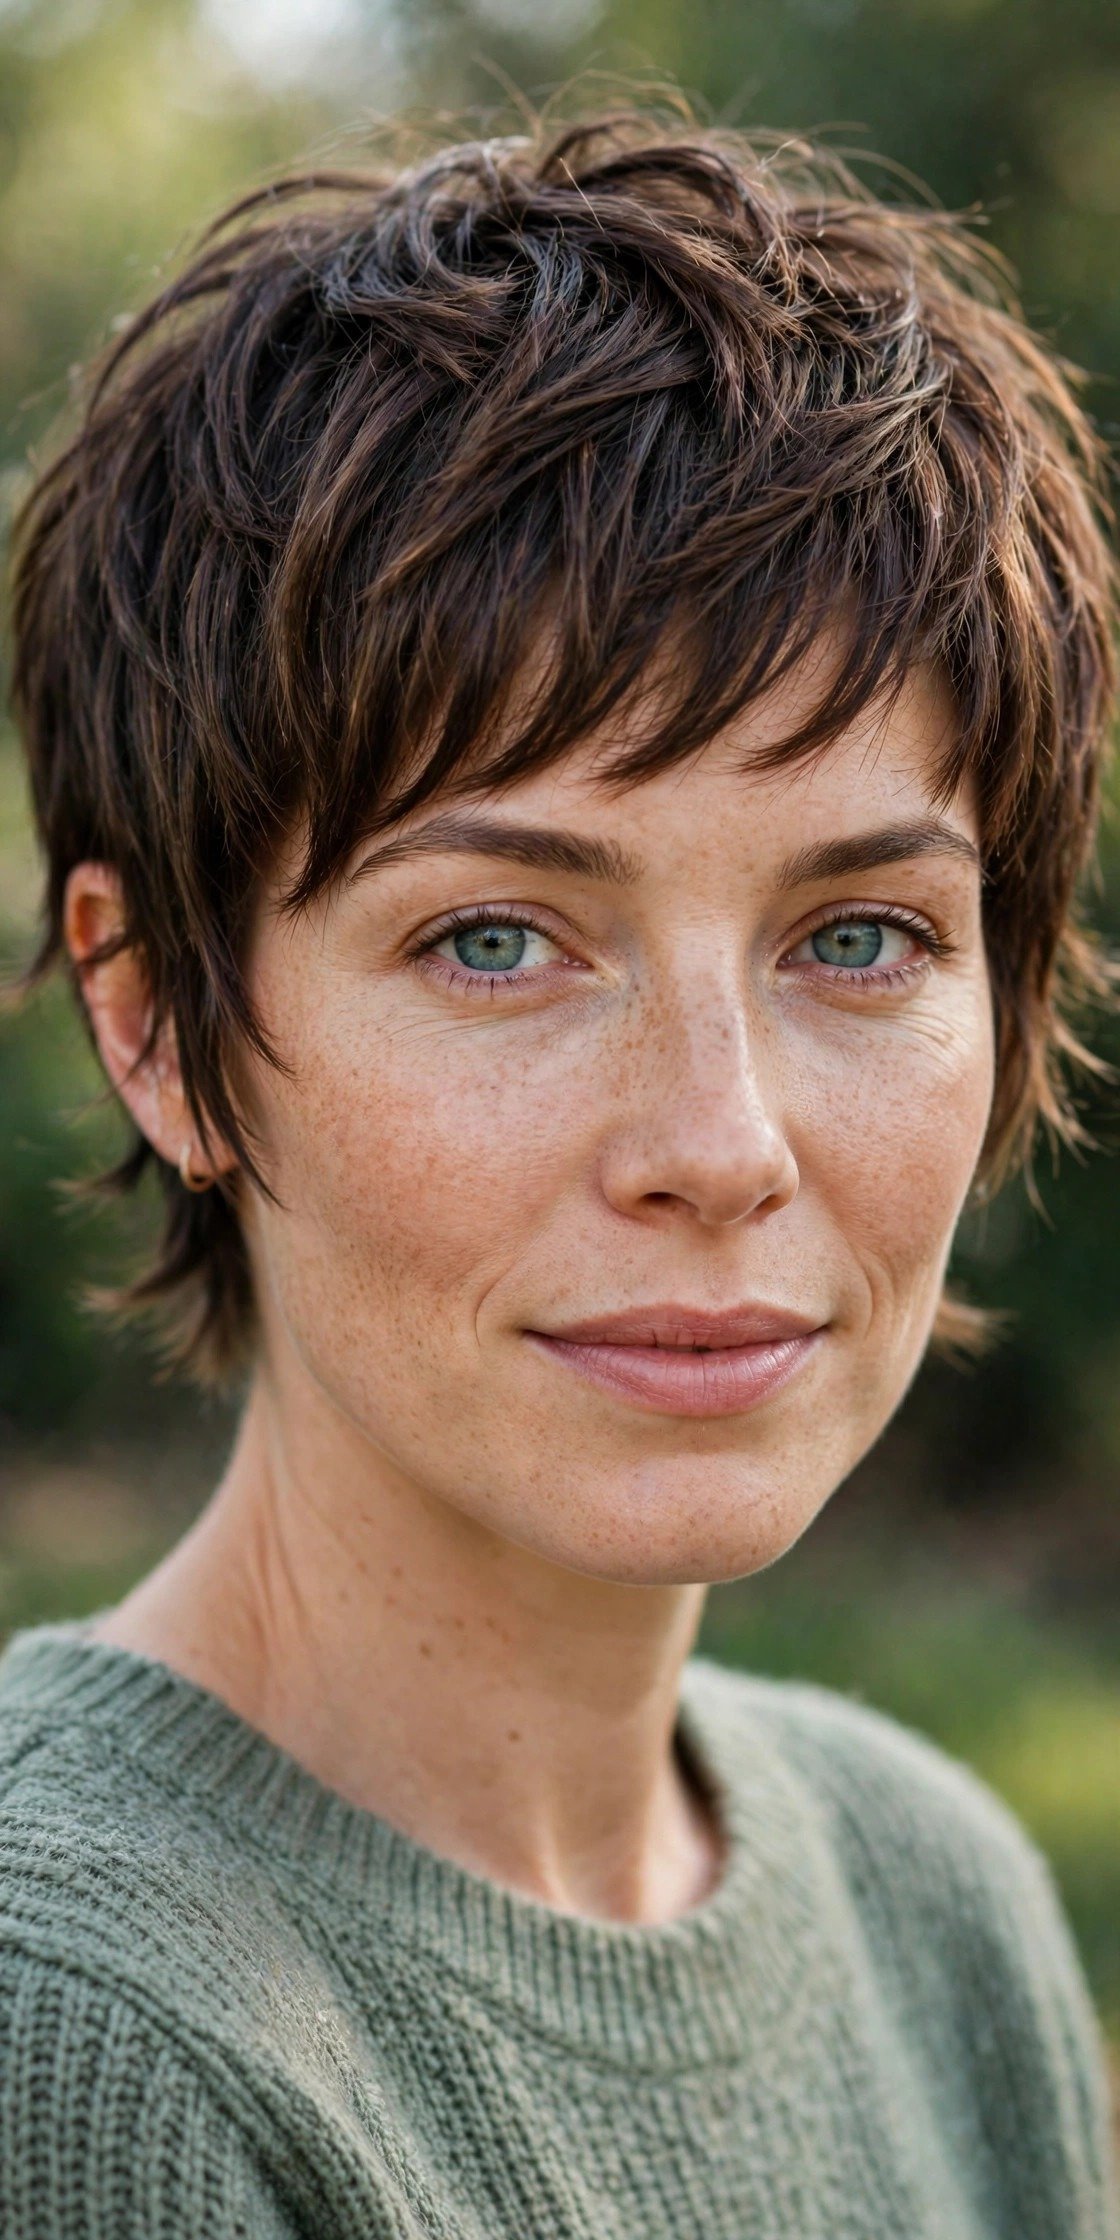
A pixie cut is a short women’s haircut built around one confident idea: the hair is cropped close at the sides and back while the top is left longer, layered, and textured so it can be swept, spiked, smoothed, or tousled into shape. The length usually sits between half an inch and three inches on top, with the nape tapered tight and the sides blended or clipped close, while the fringe is cut to suit the face — long and sweeping, side-parted, or cropped into a micro fringe. Unlike a bob, which keeps length around the jaw and frames the face from below, the pixie lifts everything upward, exposing the neck, the jawline, and the cheekbones. That openness is the whole point: the face becomes the feature, and the hair becomes its frame.
The pixie has been a symbol of confidence for more than seventy years, from Audrey Hepburn’s gamine crop in the fifties to Mia Farrow’s famous Vidal Sassoon cut in the sixties, through the androgynous spikes of the eighties and the polished crops of the nineties. Each decade reinvented it: Twiggy made it mod, Halle Berry made it glamorous, and in the 2010s it became the go-to cut for women reclaiming their hair after years of long styles. What has never changed is the feeling it gives — lighter, sharper, and unmistakably deliberate. A pixie is never an accident; it is always a decision, and that is exactly why women keep coming back to it.
What makes a pixie different from a bob or a bixie comes down to length and silhouette. A bob keeps hair at jaw length or longer, with the weight sitting low around the face, while a pixie removes that weight entirely and builds the shape from the crown upward. The bixie sits in between: a longer pixie with bob-like length at the nape and around the ears, softer and more forgiving for women who are not ready for a full crop. The pixie also differs from a buzz cut, which is clipped to one uniform length all over, while a pixie keeps deliberate variation — longer on top, shorter at the sides, with texture and direction built into every layer. That variation is what gives the pixie its styling range.
Why the Pixie Cut Is Dominating 2026
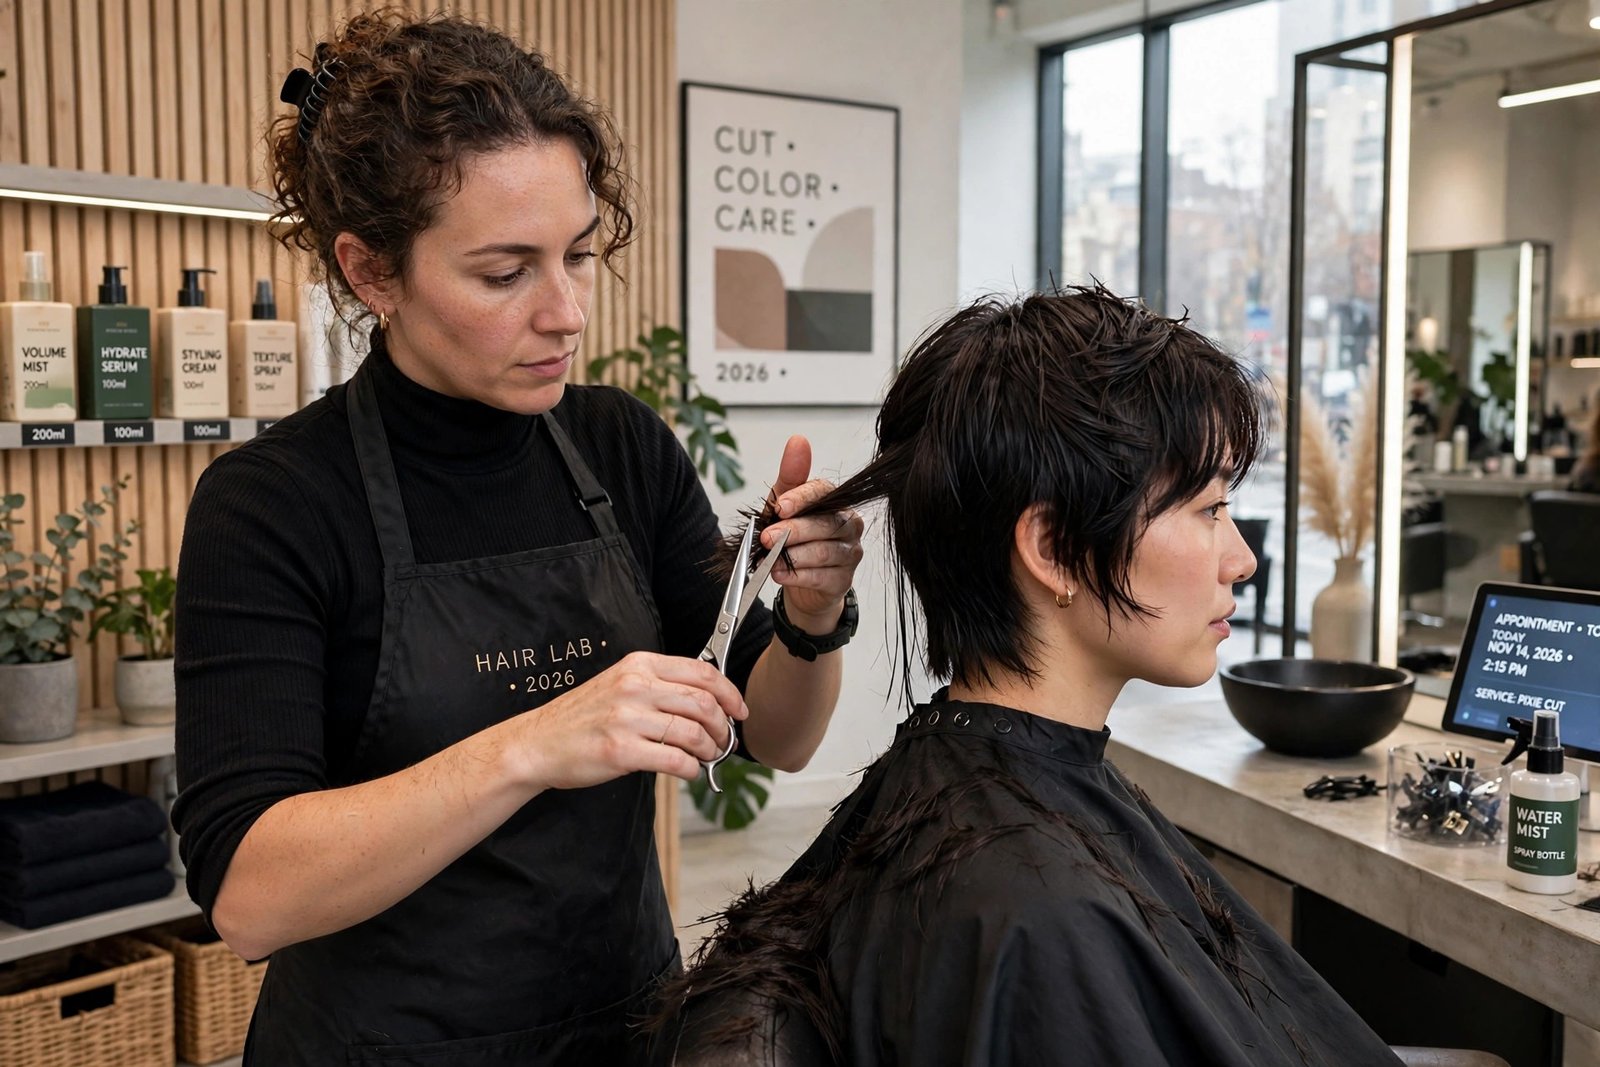
The pixie cut’s dominance in 2026 is no accident — the evidence is on every runway and red carpet. At Paris Fashion Week the Parisian pixie was everywhere: models walked with short, undone, piecey crops that looked deliberately effortless, paired with bare skin and strong tailoring, and the message was clear that short hair is the season’s most fashionable statement. Stylists backstage talked about the same thing — women are tired of long, high-maintenance hair, and they want a cut that looks expensive with almost no effort. The pixie delivers exactly that, which is why it keeps appearing in every major show of the fall and winter season.
Celebrity moments have pushed the trend even further this year. Zendaya’s Halle Berry-inspired pixie at the 2026 Emmys was the most talked-about hair moment of the awards season, while Quinta Brunson and Helen Mirren have both shown how a power pixie works at every age, from red-carpet glamour to everyday elegance. Stylists are reporting renewed demand for undone, piecey pixies and bixies with tapered sides and long bangs, the softer versions that grow out gracefully and suit more face shapes. According to HelloBeautiful’s fall 2026 pixie cut trends, the season’s defining pixies are textured and lived-in rather than severe, while Fabbon’s very short pixie haircuts trending in 2026 makes the same point from the styling side: short, bold, and beautifully undone is the look of the year.
The third reason is pure practicality, and it is the one that keeps women in pixies long after the trend fades. A pixie dries in minutes, needs almost no heat styling, and looks intentional on second-day hair with a dab of pomade. It flatters oval, heart, square, and round faces because the fringe length, the side taper, and the crown height can all be adjusted to balance proportions. It works on straight, wavy, curly, fine, and thick hair alike, because the short structure adapts to whatever grows on top. And it saves real money and time every single morning. When one cut serves that many needs, it stops being a trend and becomes the smartest choice in the salon.
1. The Classic Pixie Cut
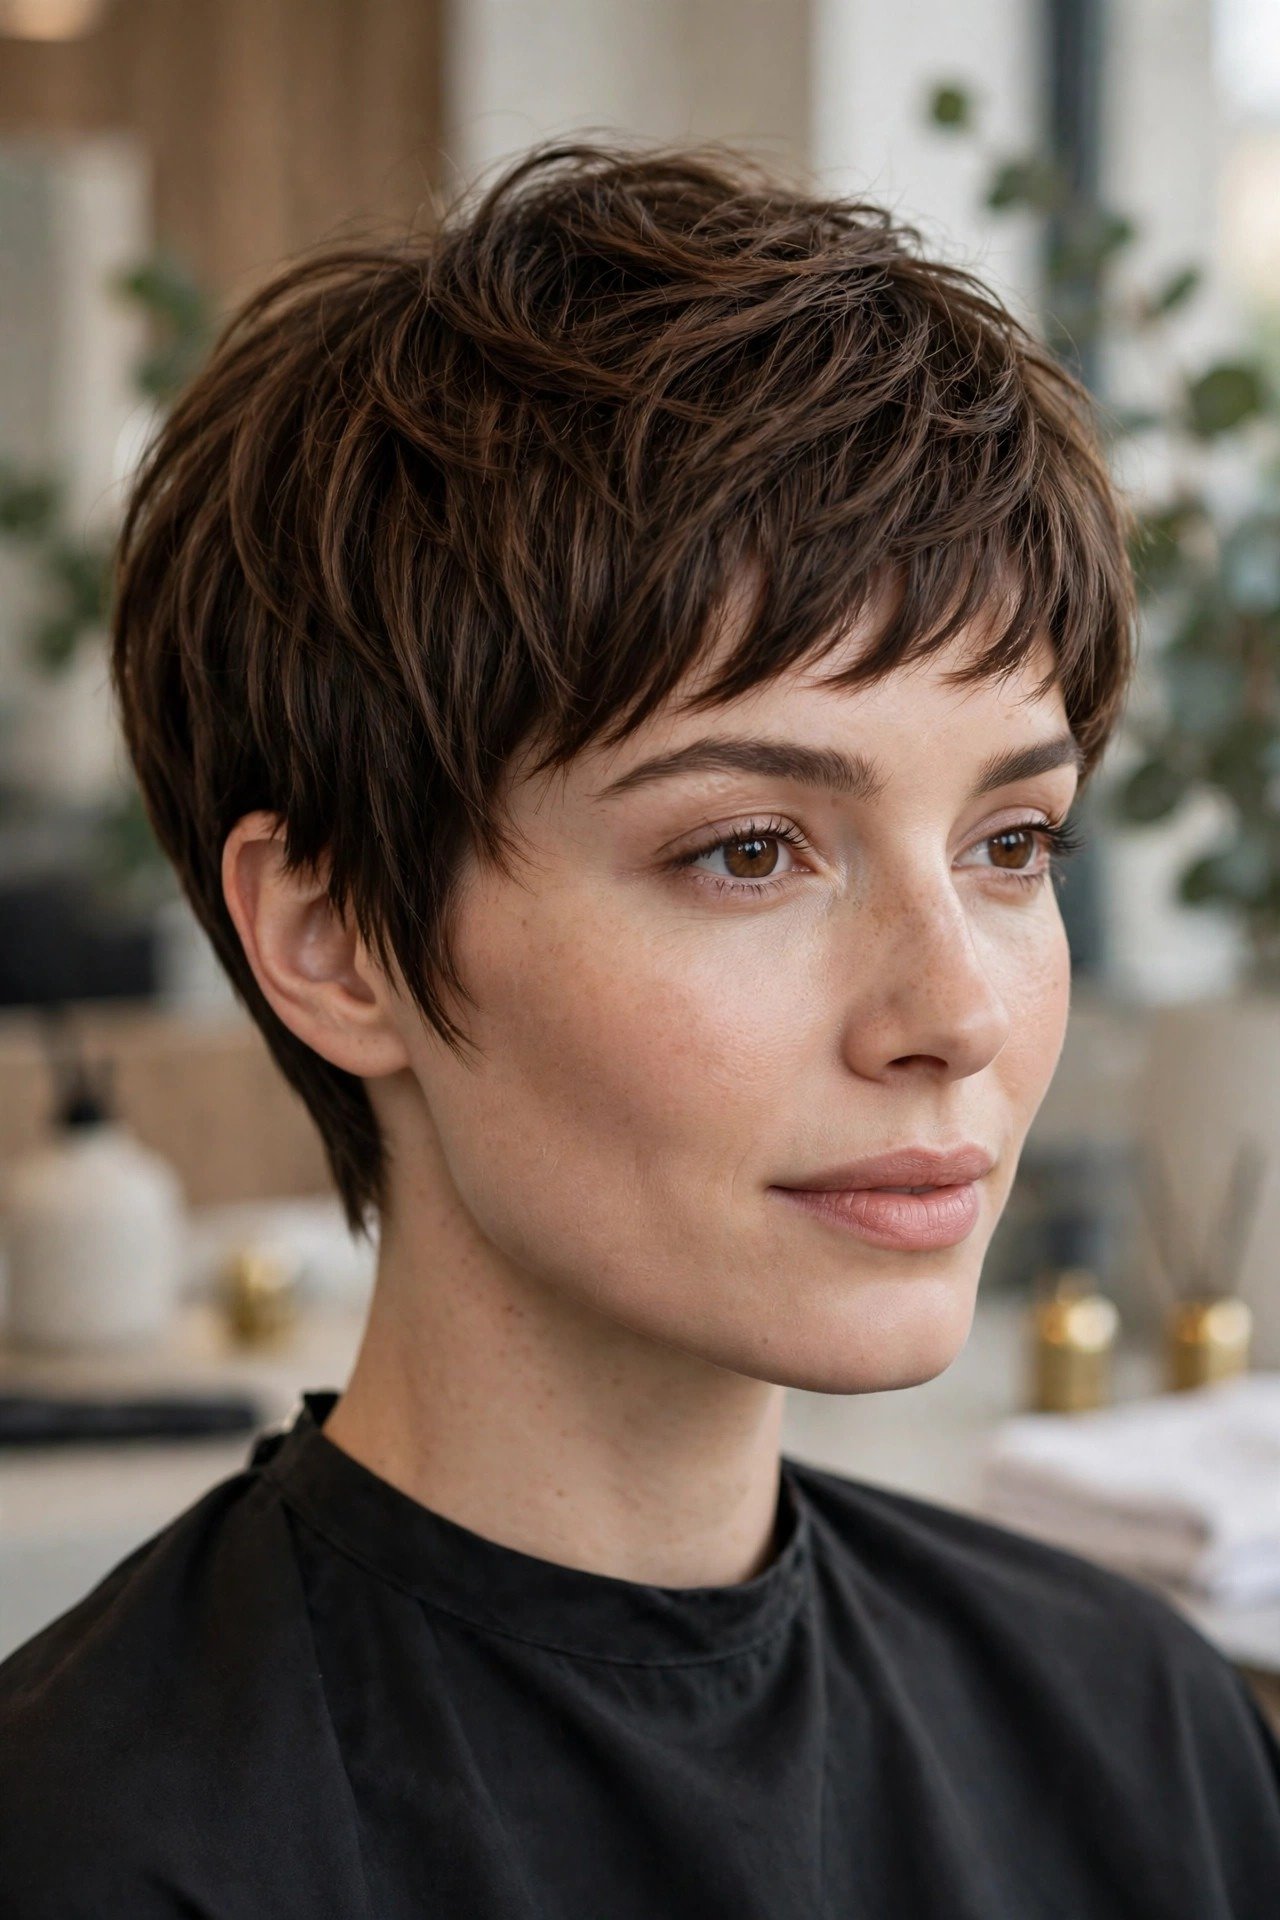
The classic pixie cut is the timeless starting point of the whole family, and it earns its reputation with pure elegance. Short, neat layers sit close at the sides and back while the top keeps enough length to sweep gently across the forehead, creating a soft, polished shape that frames the eyes and cheekbones. It suits straight and wavy hair best, and flatters oval, heart, and long faces because the gentle volume on top balances the face and the tapered nape lengthens the neck. It works beautifully for women trying short hair for the first time, and it looks just as good air-dried as it does blow-dried. This is the pixie that never goes out of style.
Stylist script: Start with clean, damp hair parted softly to one side and section the crown from ear to ear. Cut the top layers to around two to three inches, keeping them slightly longer at the front so the fringe can sweep across the forehead. Taper the sides and nape close with scissors over comb, blending gradually into the longer top so there is no harsh line. Point-cut the ends lightly for softness and check the silhouette from every angle to confirm the shape is balanced. Dry with a small round brush, lifting the crown and sweeping the fringe to the side.
Styling routine: Apply a pea-sized amount of styling cream to damp hair and blow-dry with a small round brush, lifting the crown and sweeping the fringe across the forehead. Smooth the sides with your palms and finish with a light flexible hairspray. A drop of shine serum on the ends adds polish. On second-day hair, a spritz of dry shampoo at the roots restores lift instantly. Maintenance: every four to six weeks; book a nape tidy and a crown refresh to keep the classic shape crisp.
2. Textured Pixie Cut

If the classic pixie feels too neat for your taste, the textured pixie keeps the same short shape but adds choppy, piecey layers that give it movement and attitude. The top is cut with point cutting and razor work so the pieces separate and catch the light, while the sides stay tapered and close. It suits straight, wavy, and fine hair beautifully, and flatters oval, heart, and round faces because the piecey texture breaks up the face shape and adds width where it is needed. It is perfect for women who want a lived-in, modern finish with almost no styling effort, and it grows out more gracefully than a blunt crop.
Stylist script: Cut the pixie base with the top at two to three inches and the sides and nape tapered close. Then work through the top with point cutting, removing small pieces at different lengths to create choppy, separated texture. Use a razor on the ends of the longest pieces for extra movement, but keep the perimeter soft rather than spiky. Check the texture by drying the hair roughly with your fingers and separating the pieces to see how they fall. Finish by pinching the ends with a tiny amount of pomade so the layers read piecey and deliberate.
Styling routine: Apply a texturising spray or sea-salt spray to damp hair and scrunch the top layers upward with your fingers, then blow-dry on low heat or let the hair air-dry. Once dry, pinch small sections with a little pomade to define the pieces and pull them in different directions for a tousled finish. Avoid over-brushing, which flattens the texture. Maintenance: every four to six weeks; textured layers lose their separation as they grow, so regular trims keep the choppy finish intentional.
3. Pixie Cut with Long Bangs
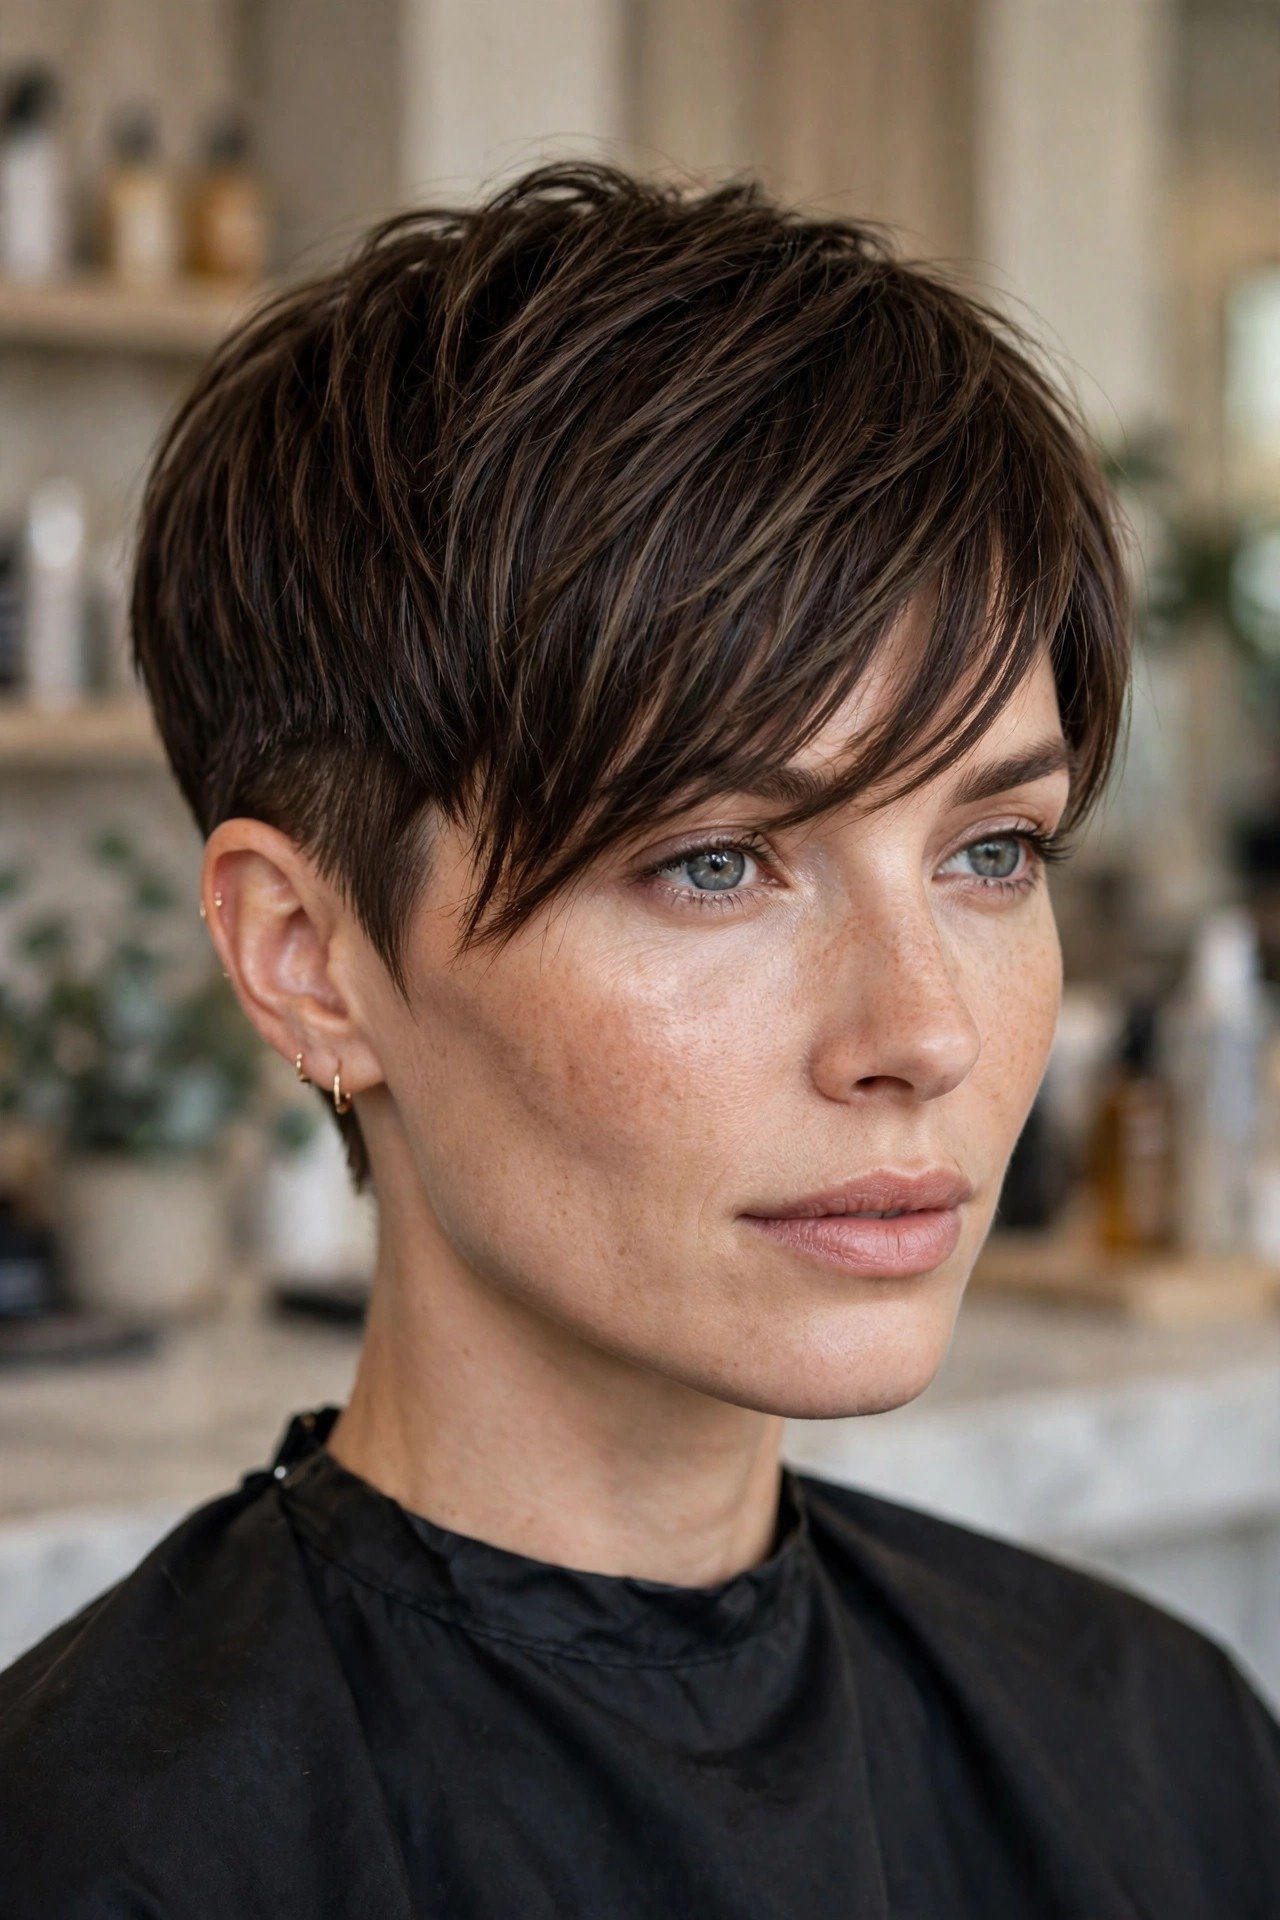
A pixie with long bangs is the most versatile version in this guide, because the fringe gives you styling options no other pixie offers. The back and sides stay short and tapered while the fringe falls long across the forehead, reaching the eyebrows or cheekbones, so you can sweep it to the side, part it in the middle, or pin it back. It suits straight, wavy, and thick hair best, and flatters round, oval, and heart-shaped faces because the long fringe softens the forehead and draws attention to the eyes. It is ideal if you want a pixie but are nervous about losing all your length, since the bangs keep a soft, feminine frame around the face.
Stylist script: Cut the pixie base with the sides and nape tapered close and the crown at two to three inches. Isolate the front section from temple to temple and cut the bangs long, with the longest point reaching the cheekbones on the side you plan to sweep toward. Point-cut the ends so the fringe stays light and moves freely, and blend the corners into the side layers so there is no visible step. Check the fringe length with the hair dry, since wet bangs shrink as they dry. Dry the bangs forward over a small round brush, then sweep them to the chosen side.
Styling routine: Work a pea-sized amount of styling cream through the damp bangs and blow-dry them forward with a small round brush, then sweep them to one side with your fingers. Style the crown with a texturising spray, lifting the roots for height. A flat iron can smooth the fringe in seconds if it kinks. Finish with a light hairspray to hold the sweep. Maintenance: every four to six weeks; long bangs grow into the eyes quickly, so ask for a quick fringe tidy between full cuts.
4. Pixie Cut with Side-Swept Bangs

Side-swept bangs give the pixie a soft, romantic sweep that flatters almost every face. The fringe is cut on a diagonal and swept across the forehead to one side, creating a long, graceful line that opens the face and highlights the cheekbones, while the rest of the cut stays short, tapered, and easy to manage. It suits straight and wavy hair best, and flatters round, square, and heart-shaped faces especially well, since the diagonal line breaks up symmetry and softens strong features. It is perfect if you like a polished look that still feels relaxed, and it works beautifully for both office days and evenings out.
Stylist script: Part the hair deeply to one side and cut the pixie base with the crown at two to three inches and the sides tapered close. Cut the fringe on a diagonal, shortest near the part and longest at the opposite temple, so it falls naturally across the forehead in one smooth sweep. Point-cut the ends lightly for softness and blend the longest corner into the side layers. Dry the fringe forward and across with a small round brush, directing it toward the longer side, then check the sweep from the front to confirm the diagonal reads clean and even.
Styling routine: Apply a light styling cream to damp hair and blow-dry the fringe across the forehead with a small round brush, rolling it slightly under at the ends. Lift the crown with your fingers as you dry for height, and smooth the sides with your palms. A tiny amount of pomade on the fringe ends keeps the sweep defined. Finish with a flexible hairspray. Maintenance: every four to six weeks; side-swept bangs lose their diagonal line as they grow, so trim the fringe before it starts falling into the eyes.
5. Pixie Cut with Baby Bangs

Baby bangs turn the pixie into a full fashion statement, with an ultra-short fringe sitting high above the eyebrows against a short, textured crop. The tiny fringe opens the whole face and shows off the eyes and cheekbones, while the pixie underneath keeps the look playful rather than severe. It suits oval and heart-shaped faces best, and works on straight and wavy hair that can hold a precise fringe line. It is the boldest bang choice in this guide, made for women who love editorial hair and do not mind standing out. Paired with a pixie, it reads confident, artistic, and unforgettable.
Stylist script: Cut the pixie base first, with a tapered nape, close sides, and a textured top at two inches. Then isolate a narrow front section and cut the baby bangs straight across, about an inch above the eyebrows, keeping the line slightly choppy with point cutting so it does not look severe. Blend the outer corners of the fringe into the side layers with short, wispy connectors. Keep the crown textured and piecey to match the fringe’s boldness. Dry the bangs forward with a small round brush, then style the crown upward for height.
Styling routine: Apply a pea-sized amount of pomade to the damp fringe and blow-dry it forward with your fingers or a small round brush, keeping it straight and neat. Style the pixie top with texturising spray, lifting the crown and separating the pieces. A flat iron can sharpen the fringe line in seconds. Finish with a light hairspray. Maintenance: every three to five weeks; baby bangs grow out faster than any other fringe, so book frequent tiny trims to keep the line bold and intentional.
6. Undercut Pixie Cut

The undercut pixie is the edgiest version in this guide, pairing a textured top with closely shaved or clipped sides for maximum contrast. The top keeps two to three inches of length for styling — swept, spiked, or tousled — while the sides and back are cut tight against the head, creating a bold, modern silhouette. It suits straight, wavy, and thick hair best, and flatters oval, long, and heart-shaped faces because the tight sides slim the face and the volume on top adds height. It is made for women who want a pixie with real attitude, and it looks incredible with colour or a shaved design detail.
Stylist script: Start by clipping the sides and back with a low guard, usually a one or two, working from the nape upward to just above the ears. Leave the top section long, at two to three inches, and cut it with point cutting for texture. Blend the boundary between the clipped sides and the longer top with scissors over comb so the transition is clean but not harsh. Check the balance from the front and both sides. Dry the top with a vent brush, lifting the crown and directing the hair forward or to the side.
Styling routine: Apply a strong-hold pomade or styling wax to damp hair and blow-dry the top upward or forward with your fingers for texture. Smooth the clipped sides with your palms and a tiny amount of product. A texturising spray adds grit to the top layers. For a sleek finish, comb the top flat and press the sides down. Maintenance: every three to four weeks; undercuts grow out visibly fast, so book regular clipper tidies to keep the contrast sharp.
7. Pixie Bob (Bixie)

The bixie is the perfect bridge between a pixie and a bob, giving you short hair with a little more length to play with. The top keeps pixie-like texture and volume, while the nape and sides grow longer, reaching the ears and the jawline in soft, face-framing layers. It suits straight, wavy, and fine hair beautifully, and flatters oval, round, and heart-shaped faces because the extra length softens the jaw and adds movement around the cheeks. It is ideal if you want a pixie but are not ready for a full crop, or if you are growing out a short cut and want it to look intentional. If you are weighing it against a wilder layered shape, our wolf cut guide shows how the bixie compares to the shaggy wolf silhouette.
Stylist script: Cut the top like a pixie, with two to three inches of textured length at the crown, then leave the sides and nape longer, building soft layers that reach the ears and jawline. Blend the crown into the longer sides with slide cutting so there is no harsh step between the short top and the longer perimeter. Keep the nape soft and tapered rather than blunt. Point-cut the ends for movement. Dry with a medium round brush, lifting the crown and turning the front layers gently outward, then check the shape from the side to confirm the pixie-bob balance.
Styling routine: Apply a volumising mousse to damp roots and a light leave-in cream through the mid-lengths, then blow-dry with a medium round brush, lifting the crown and flicking the front layers outward. Finish with a texturising spray for movement and a drop of shine serum on the ends. The bixie air-dries well too if you scrunch the crown while damp. Maintenance: every five to seven weeks; the bixie grows out more gracefully than a short pixie, so trims focus on refreshing the crown and keeping the nape tidy.
8. Curly Pixie Cut
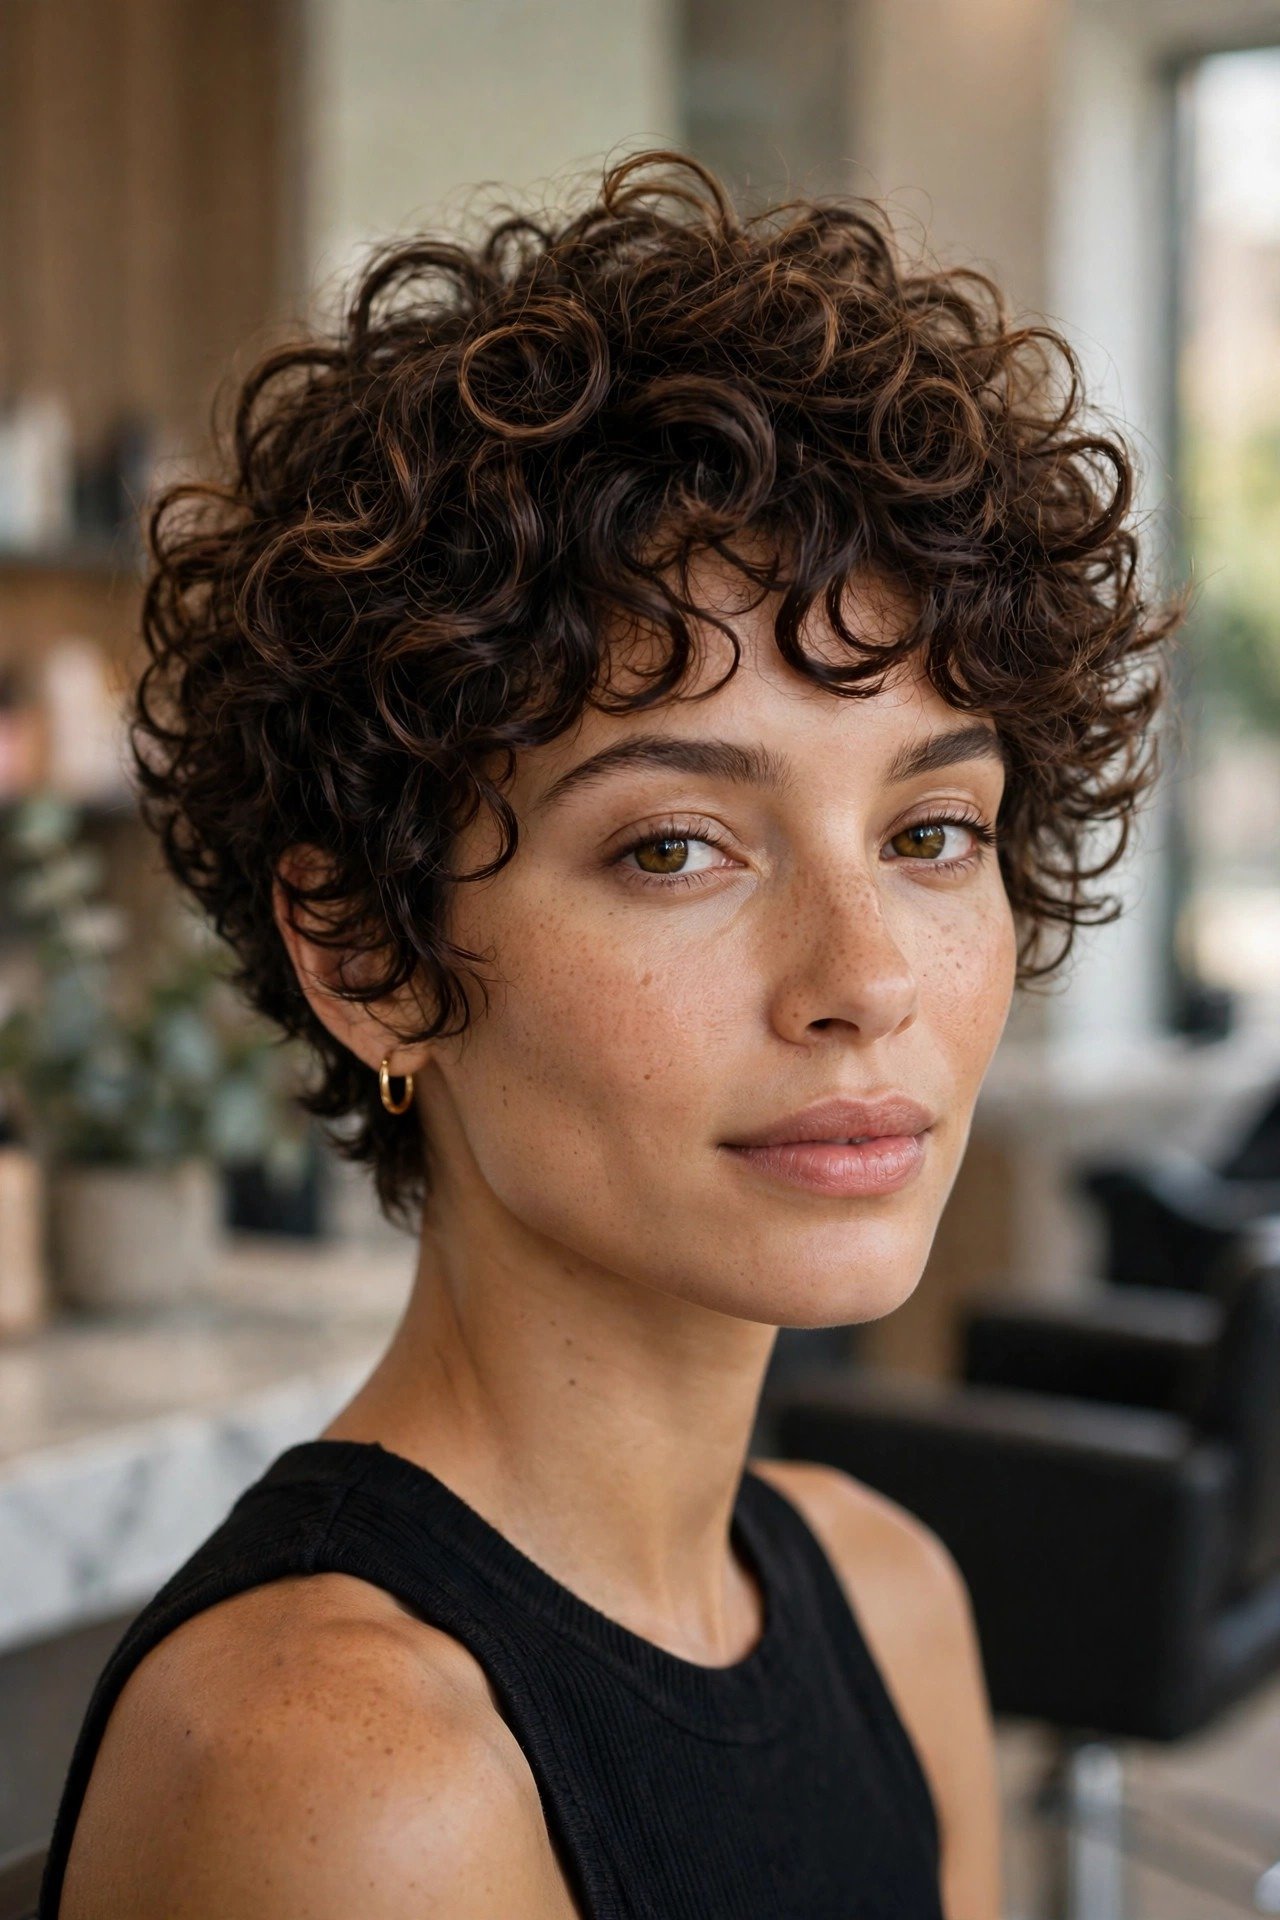
Curly hair gains shape, lift, and definition from a pixie cut, which stops curls from forming a heavy triangle. Shorter layers at the crown let the curls spring up, while the tapered sides keep the shape neat and balanced. It suits loose waves through to tight curls, and flatters round, oval, and heart-shaped faces by framing them with bouncy, defined curls. The result is joyful, full of movement, and surprisingly easy to manage once the layers are placed correctly. It is one of the most requested curly variations right now, and the volume it creates photographs wonderfully.
Stylist script: Always cut curly hair dry, curl by curl, so each layer lands where the curl naturally falls. Place the crown layers short, choosing curls that frame the face without shrinking too short when dry. Taper the sides and nape carefully, cutting curl by curl rather than in straight lines. Never use thinning shears, which create frizz. Keep the top slightly longer so the curls have room to form their shape. Diffuse on low heat with the head tilted, lifting the roots so the top curls spring into their full volume.
Styling routine: Apply a leave-in conditioner and curl cream to soaking wet hair, then scrunch in a light gel for definition. Diffuse on low heat or air-dry without touching the curls until fully dry. Once dry, fluff the roots gently and arrange the front curls outward. Refresh second-day curls with a water and leave-in mist. Maintenance: every six to eight weeks; curly pixies hold their shape longer than straight ones, but book a curl-by-curl tidy when the crown pieces lose definition.
9. Wavy Pixie Cut

Wavy hair and the pixie cut are a natural match, because the short layers release the wave pattern instead of weighing it down. The crown pieces add lift while the tapered sides keep the shape neat, creating soft, tousled volume without much styling. It suits oval, round, and heart-shaped faces, and works across fine, medium, and thick wavy hair. The cut enhances your natural texture rather than fighting it, so mornings get easier and the hair looks intentionally wild. It is perfect if you like an effortless, lived-in finish that still looks polished when you dress it up.
Stylist script: Cut wavy hair dry or barely damp so the natural wave pattern guides the layer placement. Cut the crown layers at two to three inches, following the wave’s bend, and taper the sides and nape close. Remove weight with long interior layers rather than short choppy ones, which can create unwanted puffiness. Keep the perimeter soft and slightly uneven to match the wave. Diffuse gently on low heat or let the hair air-dry, scrunching the crown layers upward so the shape forms naturally around the face.
Styling routine: Apply a curl-enhancing cream or sea-salt spray to damp hair, scrunch upward, and either diffuse on low heat or air-dry for soft waves. Once dry, shake the roots gently and separate the crown pieces with your fingers. A little texturising spray adds hold without stiffness. Avoid brushing dry waves, which creates frizz. Maintenance: every five to seven weeks; wavy hair hides growth well, so trims can stretch slightly, but refresh the crown layers to keep the shape.
10. Pixie Cut with Tapered Sides

Tapered sides give the pixie its cleanest, most polished silhouette, with the hair fading gradually from the longer top down to a close finish at the ears and nape. The contrast between the textured crown and the neat sides creates a sharp, sculpted look that flatters the jawline and lengthens the neck. It suits straight, wavy, and thick hair best, and flatters oval, long, and heart-shaped faces because the tight sides slim the face while the crown adds height. It is ideal if you love a precise, tailored finish, and it works beautifully for both professional settings and evenings out.
Stylist script: Cut the top first, keeping two to three inches of textured length at the crown. Then taper the sides and nape with scissors over comb, working from the longest point at the top of the side down to the shortest point at the ear and nape. Blend carefully so the taper is smooth and gradual, with no visible lines or steps. Check the taper from the side and the back in the mirror. Dry the top with a vent brush, lifting the crown, and smooth the tapered sides with your palms and a little pomade for a clean finish.
Styling routine: Apply a light styling cream to damp hair and blow-dry the top upward with your fingers or a vent brush. Smooth the tapered sides flat with your palms and a pea-sized amount of pomade. For extra polish, run a flat iron over the crown pieces. Finish with a flexible hairspray and a drop of shine serum. Maintenance: every three to five weeks; tapers grow out visibly, so regular tidies keep the sides sharp and the silhouette clean.
11. Spiky Pixie Cut
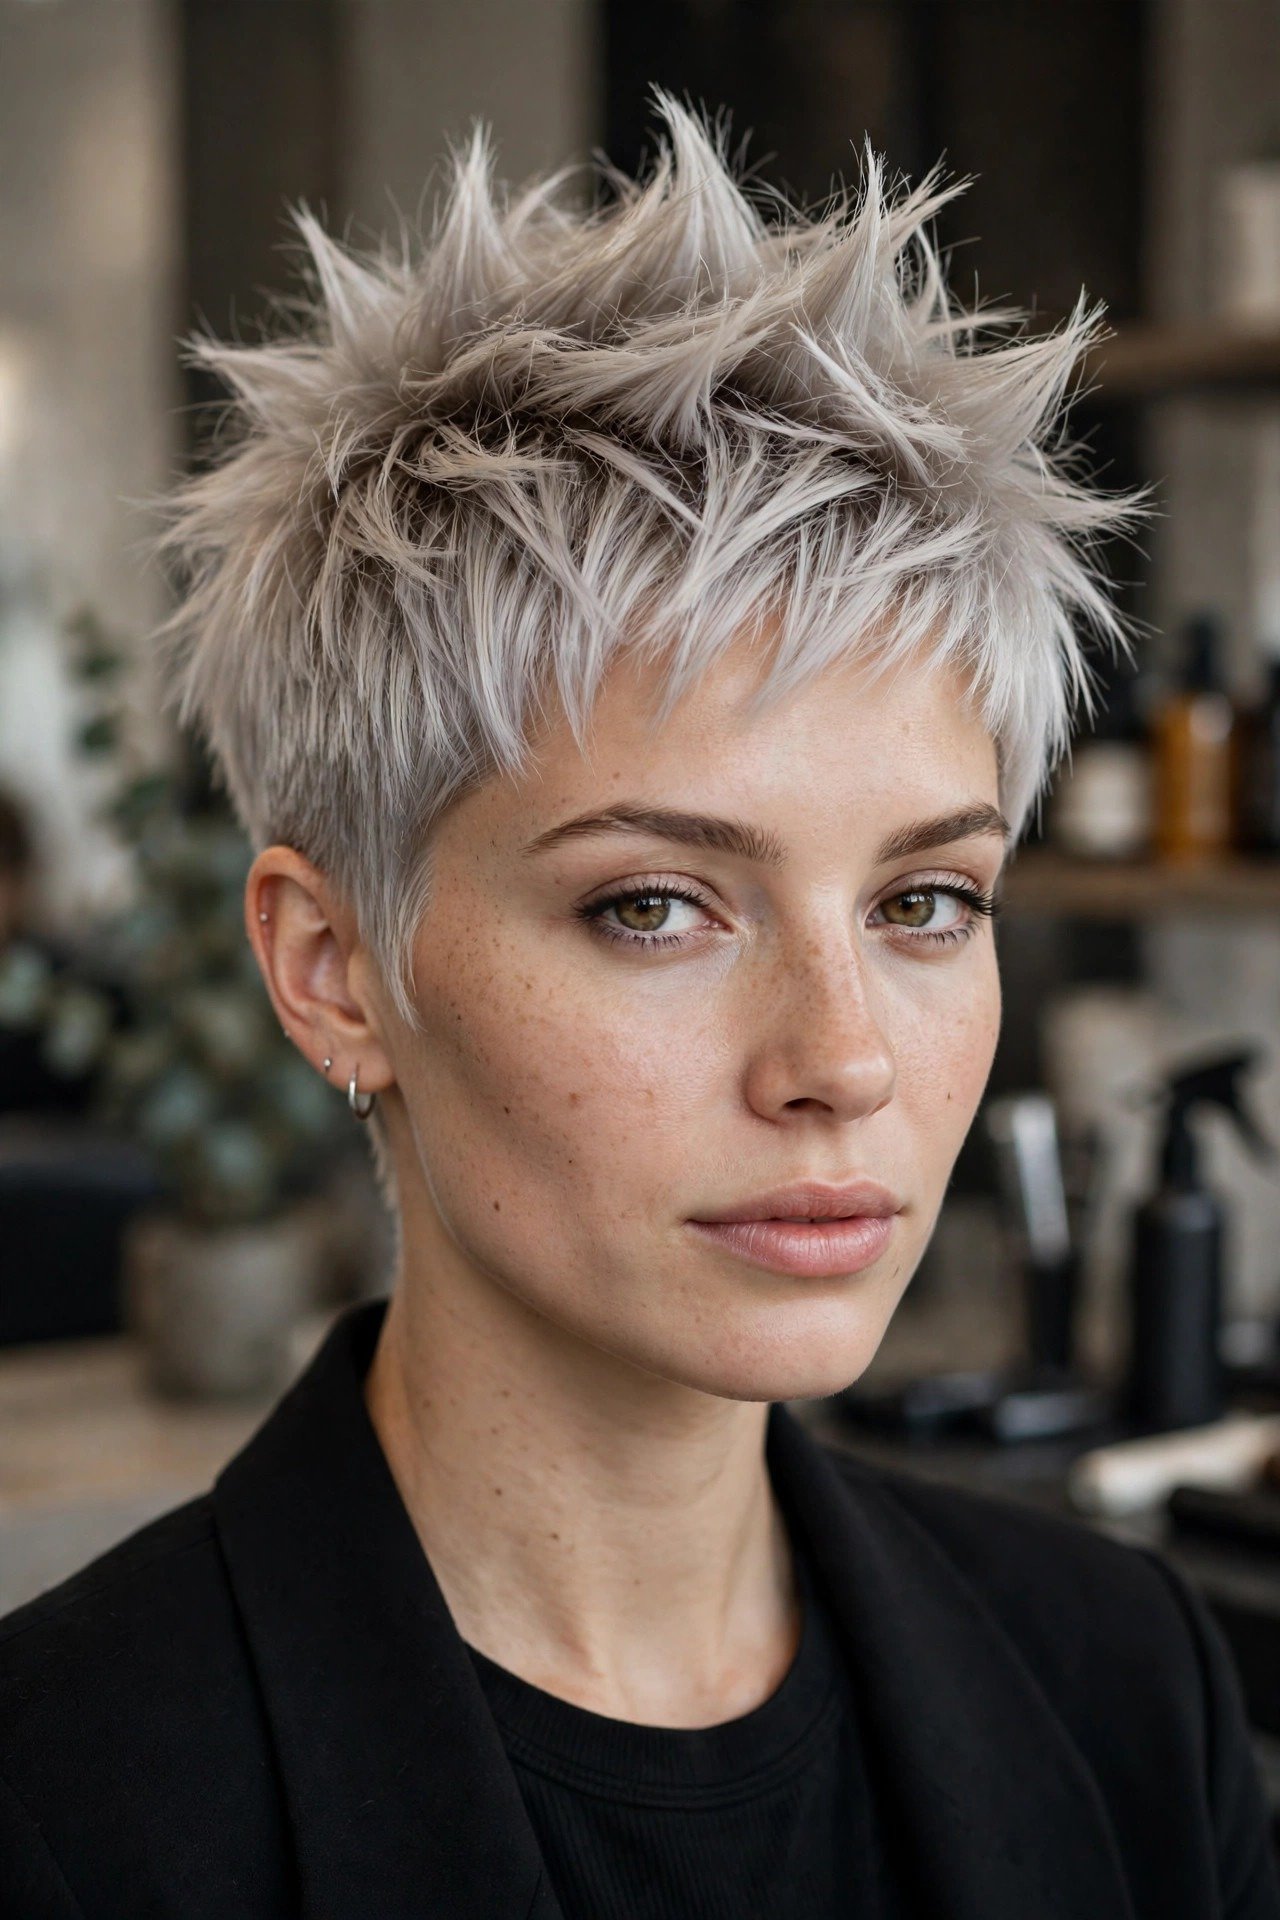
The spiky pixie is the most playful version in this guide, with short, piecey spikes on top that give the cut energy and edge. The sides stay tapered and close while the crown pieces are cut short and textured so they can be pushed upward into spikes, creating a bold, youthful silhouette. It suits straight and wavy hair best, and flatters oval, heart, and long faces because the upward spikes add height and draw the eye up. It is made for women who love a fun, fearless look and do not mind a little styling each morning. This is the pixie that turns heads on the street.
Stylist script: Cut the pixie base with the top at one to two inches and the sides and nape tapered close. Then work through the crown with point cutting, creating short, uneven pieces at different lengths so they spike naturally. Use a razor on the ends of the longest pieces for extra separation. Keep the fringe short and piecey so it can be pushed up or to the side. Dry the hair roughly with your fingers, pushing the crown upward, then pinch the ends with a strong-hold wax to define each spike.
Styling routine: Apply a strong-hold styling wax or pomade to damp or dry hair and pinch small sections between your fingers, pulling them upward and outward to form spikes. A texturising spray adds grit and helps the spikes hold. For a softer version, use a light cream and push the pieces in different directions. Finish with a strong-hold hairspray. Maintenance: every four to five weeks; spiky pixies lose their edge quickly as the crown grows, so keep the top trimmed short and textured.
12. Pixie Cut with Volume on Top

Volume on top is what turns a simple pixie into a glamorous one, with the crown lifted high and full while the sides stay neat and close. The extra height elongates the face, adds drama, and makes the whole cut look polished and intentional. It suits straight, wavy, and fine hair best, and flatters round, square, and heart-shaped faces especially well, since the height balances width and draws the eye upward. It is perfect for evenings, events, and anyone who loves a little drama in their hair. The look feels confident, elegant, and unmistakably styled.
Stylist script: Cut the pixie base with the crown at two to three inches and the sides tapered close. Keep the crown layers slightly longer at the very top so there is enough length to lift. Use point cutting through the crown to create texture and remove just enough weight for the hair to stand up. Dry the crown upward with a small round brush, lifting at the roots, and backcomb gently at the roots if extra height is needed. Finish by smoothing the outer layer over the lifted roots and setting the shape with a light hairspray.
Styling routine: Apply a volumising mousse to damp roots and blow-dry the crown upward with a small round brush, lifting at the roots as you dry. Once dry, backcomb gently at the crown for extra height and smooth the outer layer over the top. A root-lifting spray adds hold. Finish with a flexible hairspray and a drop of shine serum. Maintenance: every four to six weeks; volume pixies depend on the crown length, so trim the top before it grows heavy and falls flat.
13. Sleek Polished Pixie
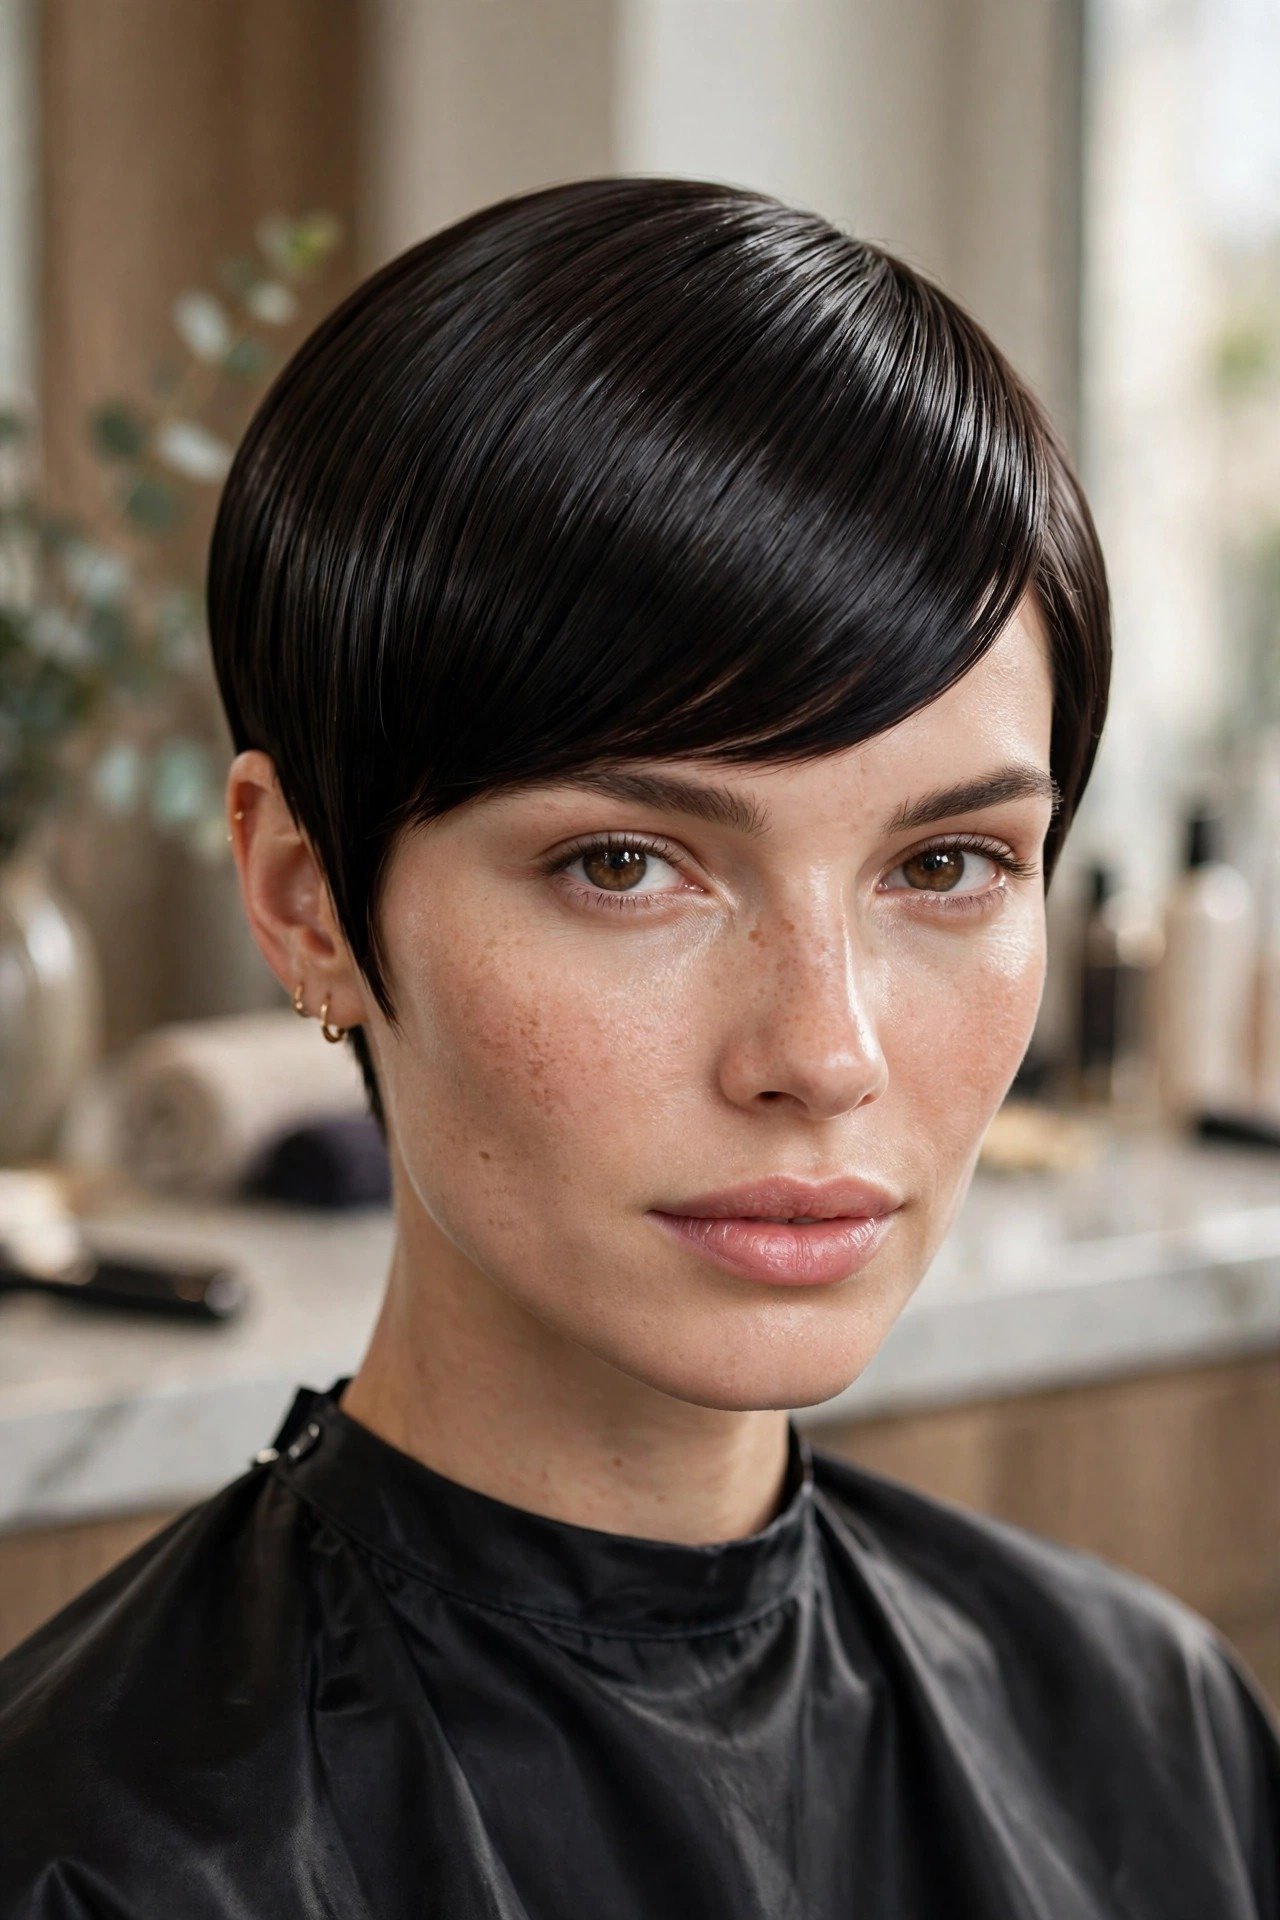
The sleek polished pixie is the most elegant version in this guide, with smooth, glossy hair hugging the head in clean, precise contours. Every strand sits exactly where it should, the sides lie flat, and the top sweeps in one smooth line, creating a look that feels expensive and effortless at the same time. It suits straight and fine hair best, and flatters oval, heart, and long faces because the smooth lines highlight the bone structure. It is perfect for formal occasions, professional settings, and anyone who loves a refined, put-together finish.
Stylist script: Cut the pixie base with the top at two to three inches and the sides and nape tapered close and smooth. Keep the perimeter clean and precise, with minimal point cutting so the edges stay sharp and polished. Dry the hair smooth with a small round brush, directing the top forward or to the side in one clean sweep. Finish with a flat iron on the crown pieces to remove any wave or kink, then smooth the sides with a little pomade and a fine-tooth comb for a glass-like finish.
Styling routine: Apply a smoothing cream and heat protectant to damp hair, then blow-dry smooth with a small round brush. Run a flat iron over the crown pieces for a glossy finish, and smooth the sides with a pea-sized amount of pomade. A shine spray adds gloss. Avoid texturising products, which break up the sleek lines. Maintenance: every four to five weeks; sleek pixies show uneven growth quickly, so keep the sides and nape trimmed tight and the shape precise.
14. Pixie Cut for Round Faces
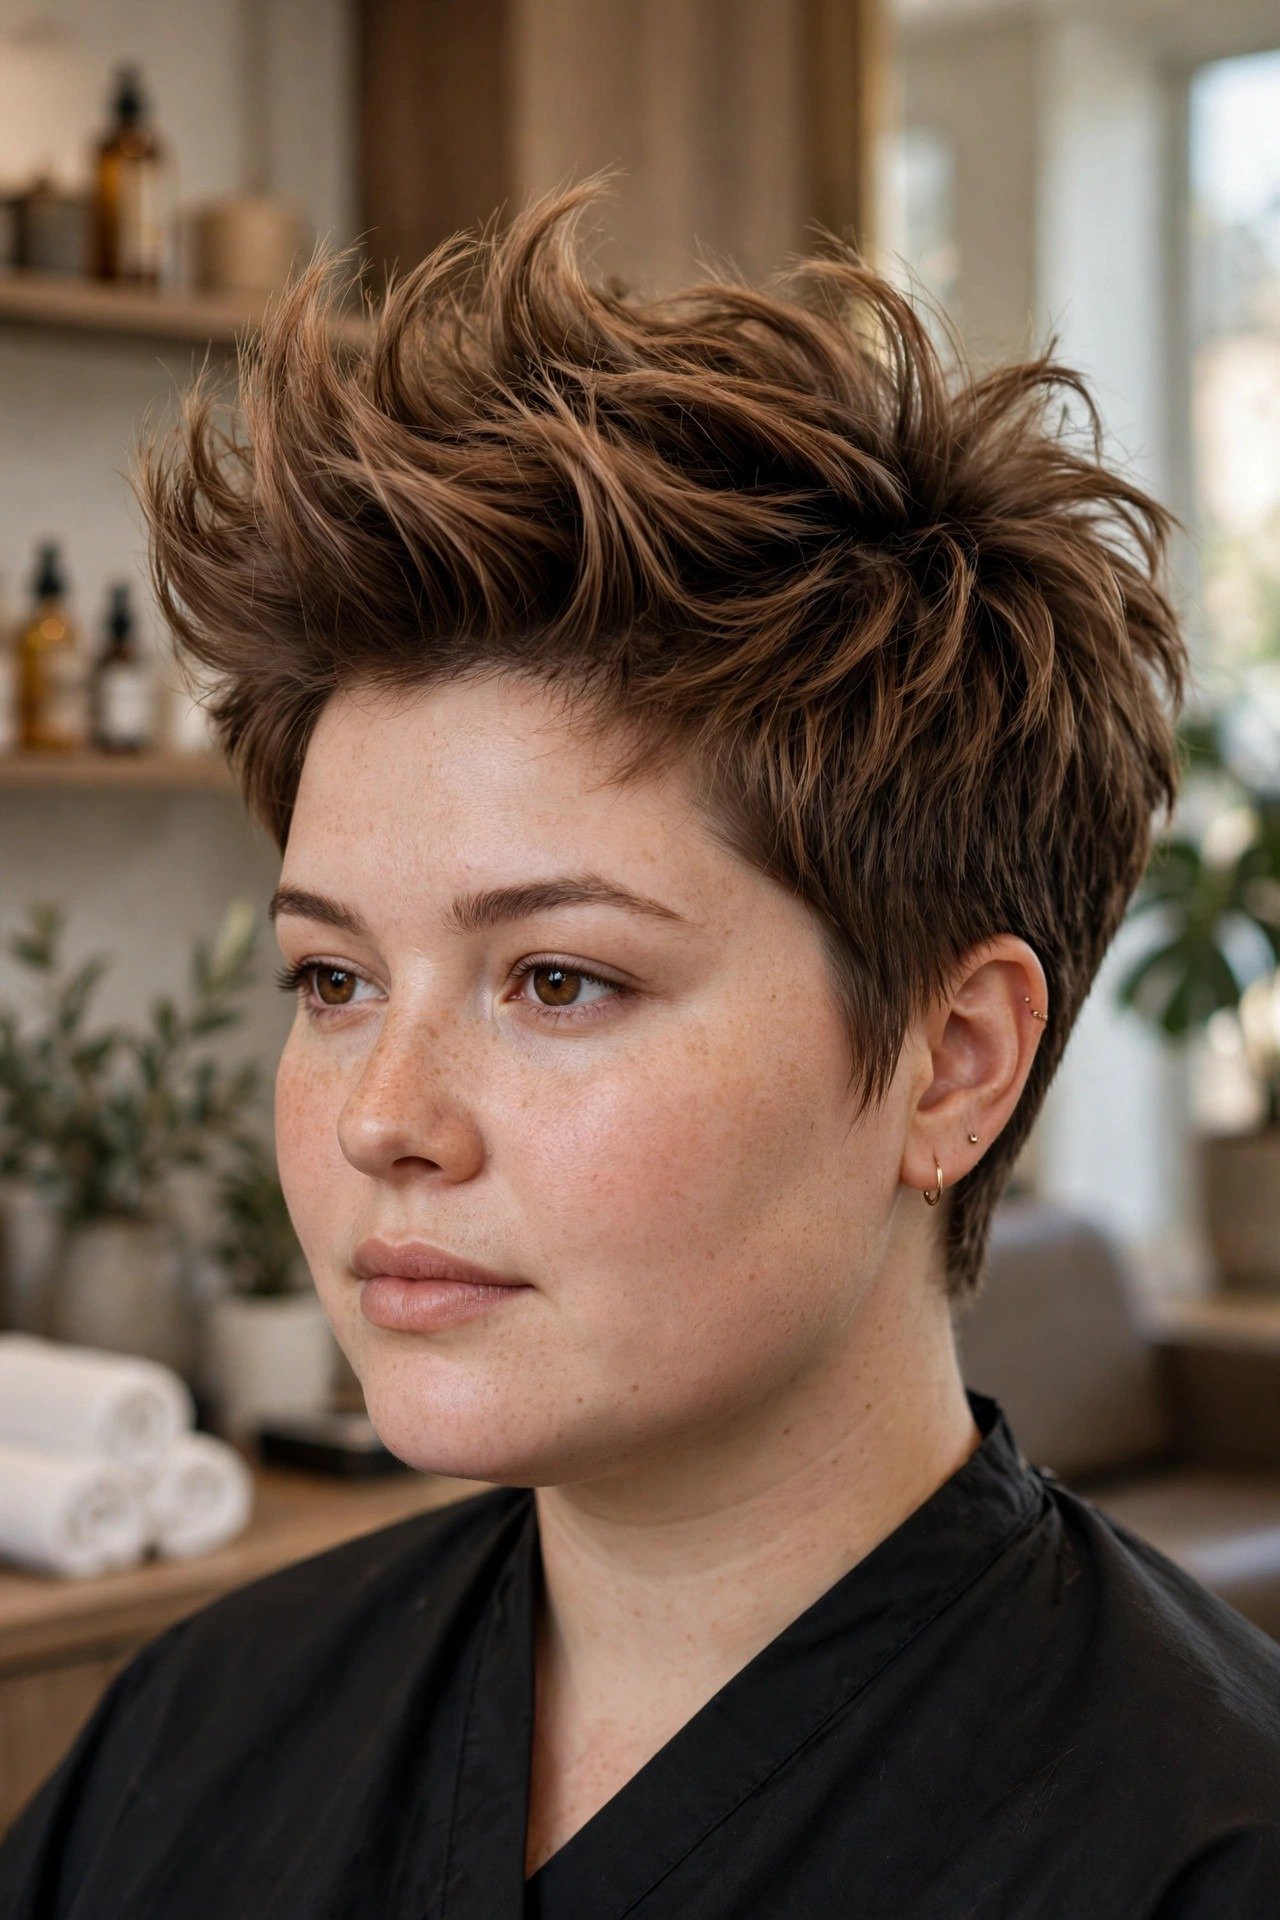
Round faces look longer and slimmer in a pixie cut, because the layers create vertical lines that draw the eye upward. Height at the crown elongates the face, while longer pieces at the front add length around the cheeks, and the tapered sides keep the silhouette narrow. It suits straight, wavy, and lightly curly hair, and works best when the crown is kept tall and the fringe is swept to the side rather than cut straight across. The result is a flattering, confidence-boosting cut that makes the face look more oval and defined. It is one of the most requested face-shape pairings in the salon.
Stylist script: Avoid short layers that end at the widest part of the cheeks, which would add width. Keep the crown at two to three inches and cut it with point cutting for height and texture. Sweep the fringe to one side on a diagonal so it creates a long line across the forehead. Taper the sides close and keep the nape neat so the silhouette stays narrow. Blow-dry the crown upward with a small round brush and direct the fringe across the face, checking the shape from the front to confirm the face looks longer and slimmer.
Styling routine: Apply a root-lifting mousse and blow-dry the crown upward with a small round brush, lifting at the roots for height. Sweep the fringe to one side with your fingers and smooth the sides with your palms. Avoid adding volume at the sides near the cheeks. Finish with a light hairspray to hold the lift. Maintenance: every four to six weeks; keep the crown tall and the fringe diagonal, and trim the sides before they grow wide and soften the slimming effect.
15. Pixie Cut for Oval Faces
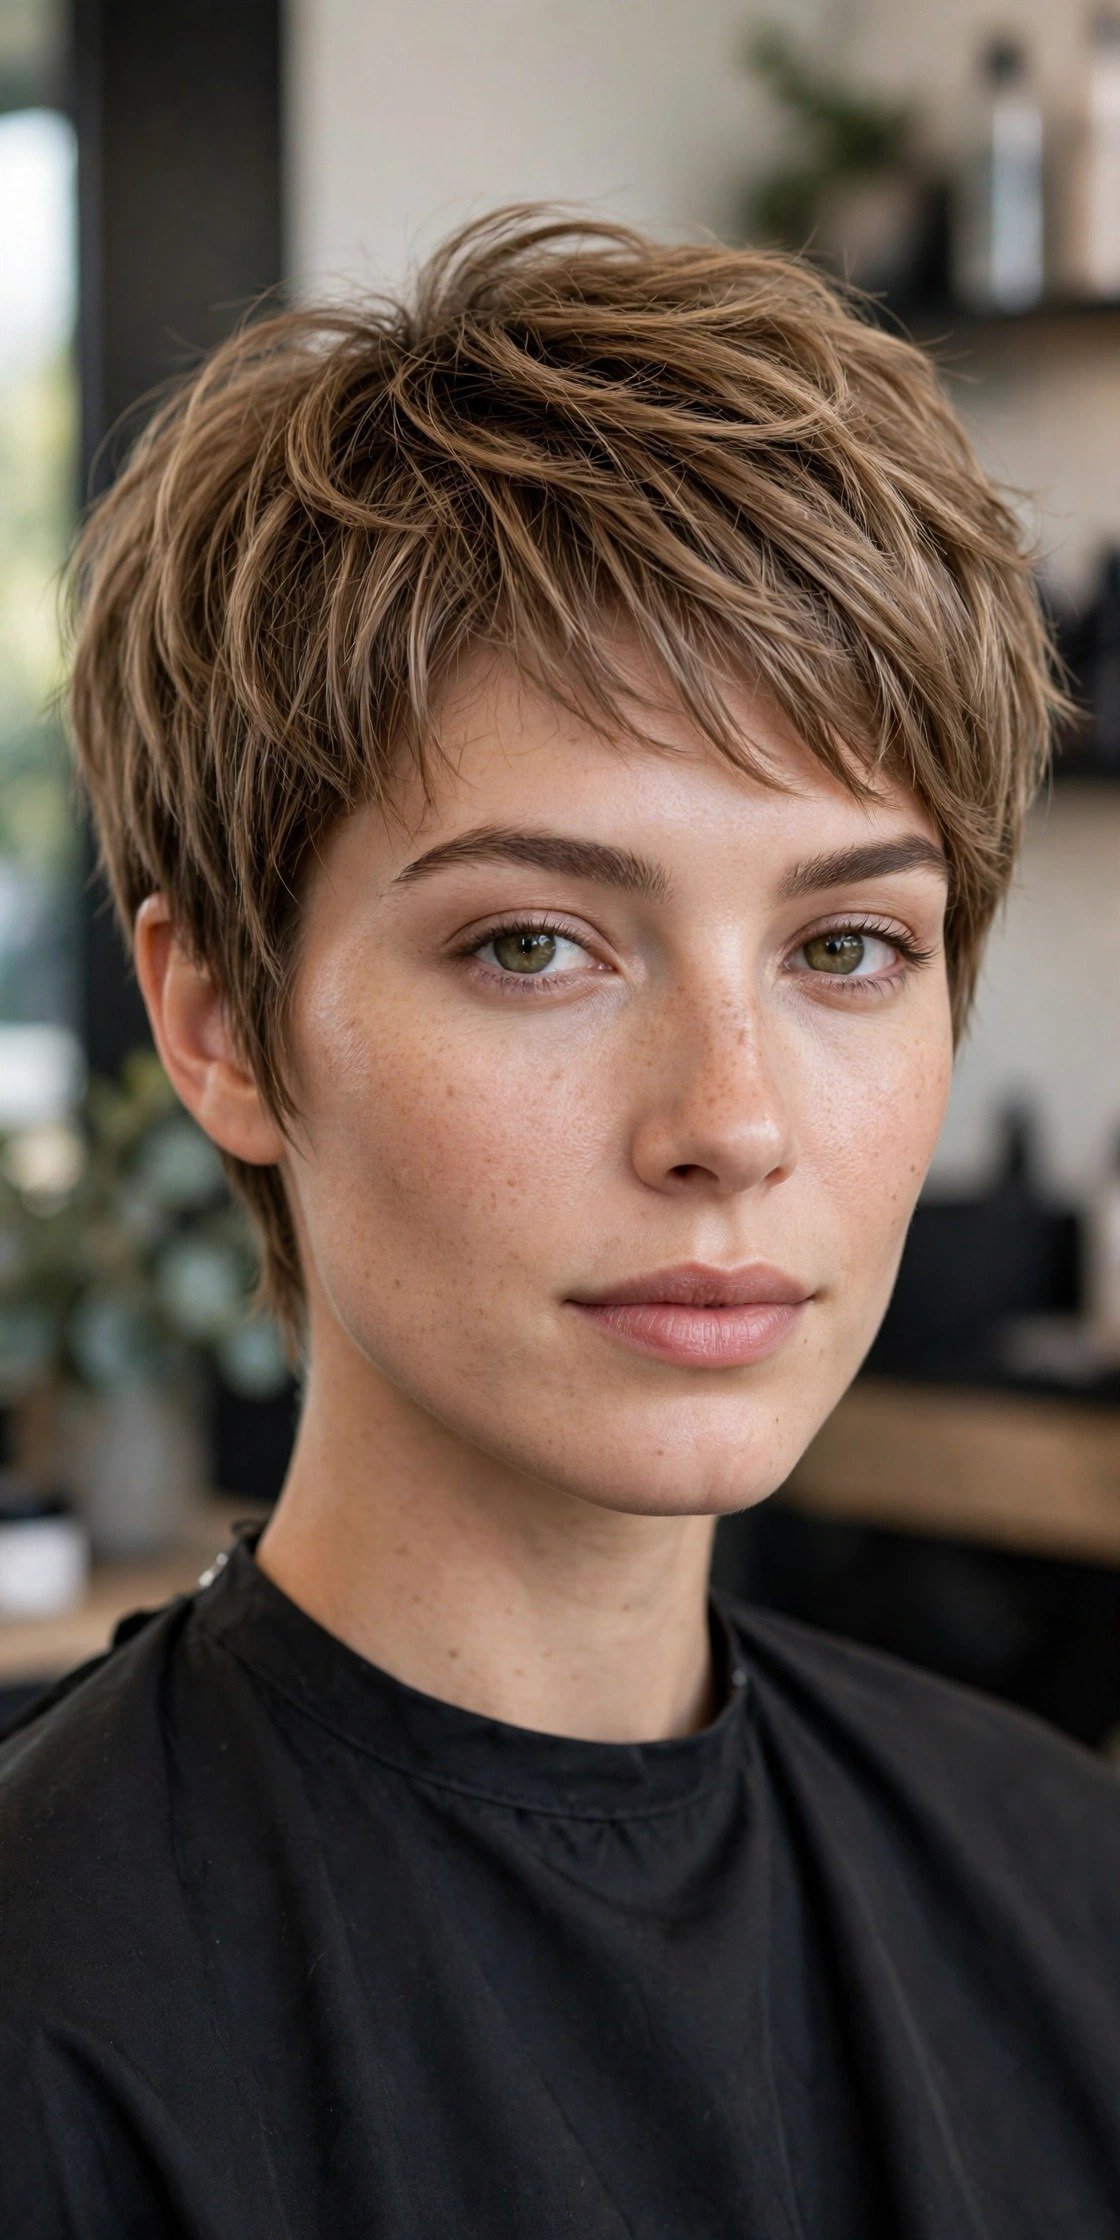
Oval faces can wear almost any pixie variation, because their balanced proportions suit every fringe length and crown height. The short crop highlights the natural symmetry, while the textured top adds movement without disturbing the face shape. It suits straight, wavy, curly, and thick or fine hair equally well, which makes it the most versatile face-shape pairing in this guide. You can choose a classic, textured, spiky, or sleek pixie, with bangs or without, and the result will still look harmonious. It is the ideal face shape for experimenting, since the cut frames the features rather than correcting them.
Stylist script: With an oval face, focus on the hair texture and desired length rather than corrective shaping. Cut the pixie base with the crown at two to three inches and the sides tapered close, keeping both sides perfectly symmetrical. Add texture through the crown with point cutting and choose the fringe length to match the desired mood — long and sweeping for softness, short and piecey for edge. Dry with a small round brush, lifting the crown and sweeping the fringe to the side, then check the symmetry from the front and both sides before finishing.
Styling routine: Apply a light styling cream to damp hair and blow-dry with a small round brush, lifting the crown and sweeping the fringe to the side. A texturising spray adds piecey movement, or a flat iron can polish the look sleek. The cut is forgiving, so air-drying with a little cream also works beautifully. Finish with a shine serum. Maintenance: every four to six weeks; oval faces suit every length, so trims are about keeping the layers fresh and the nape tidy rather than correcting the shape.
16. Pixie Cut for Heart-Shaped Faces
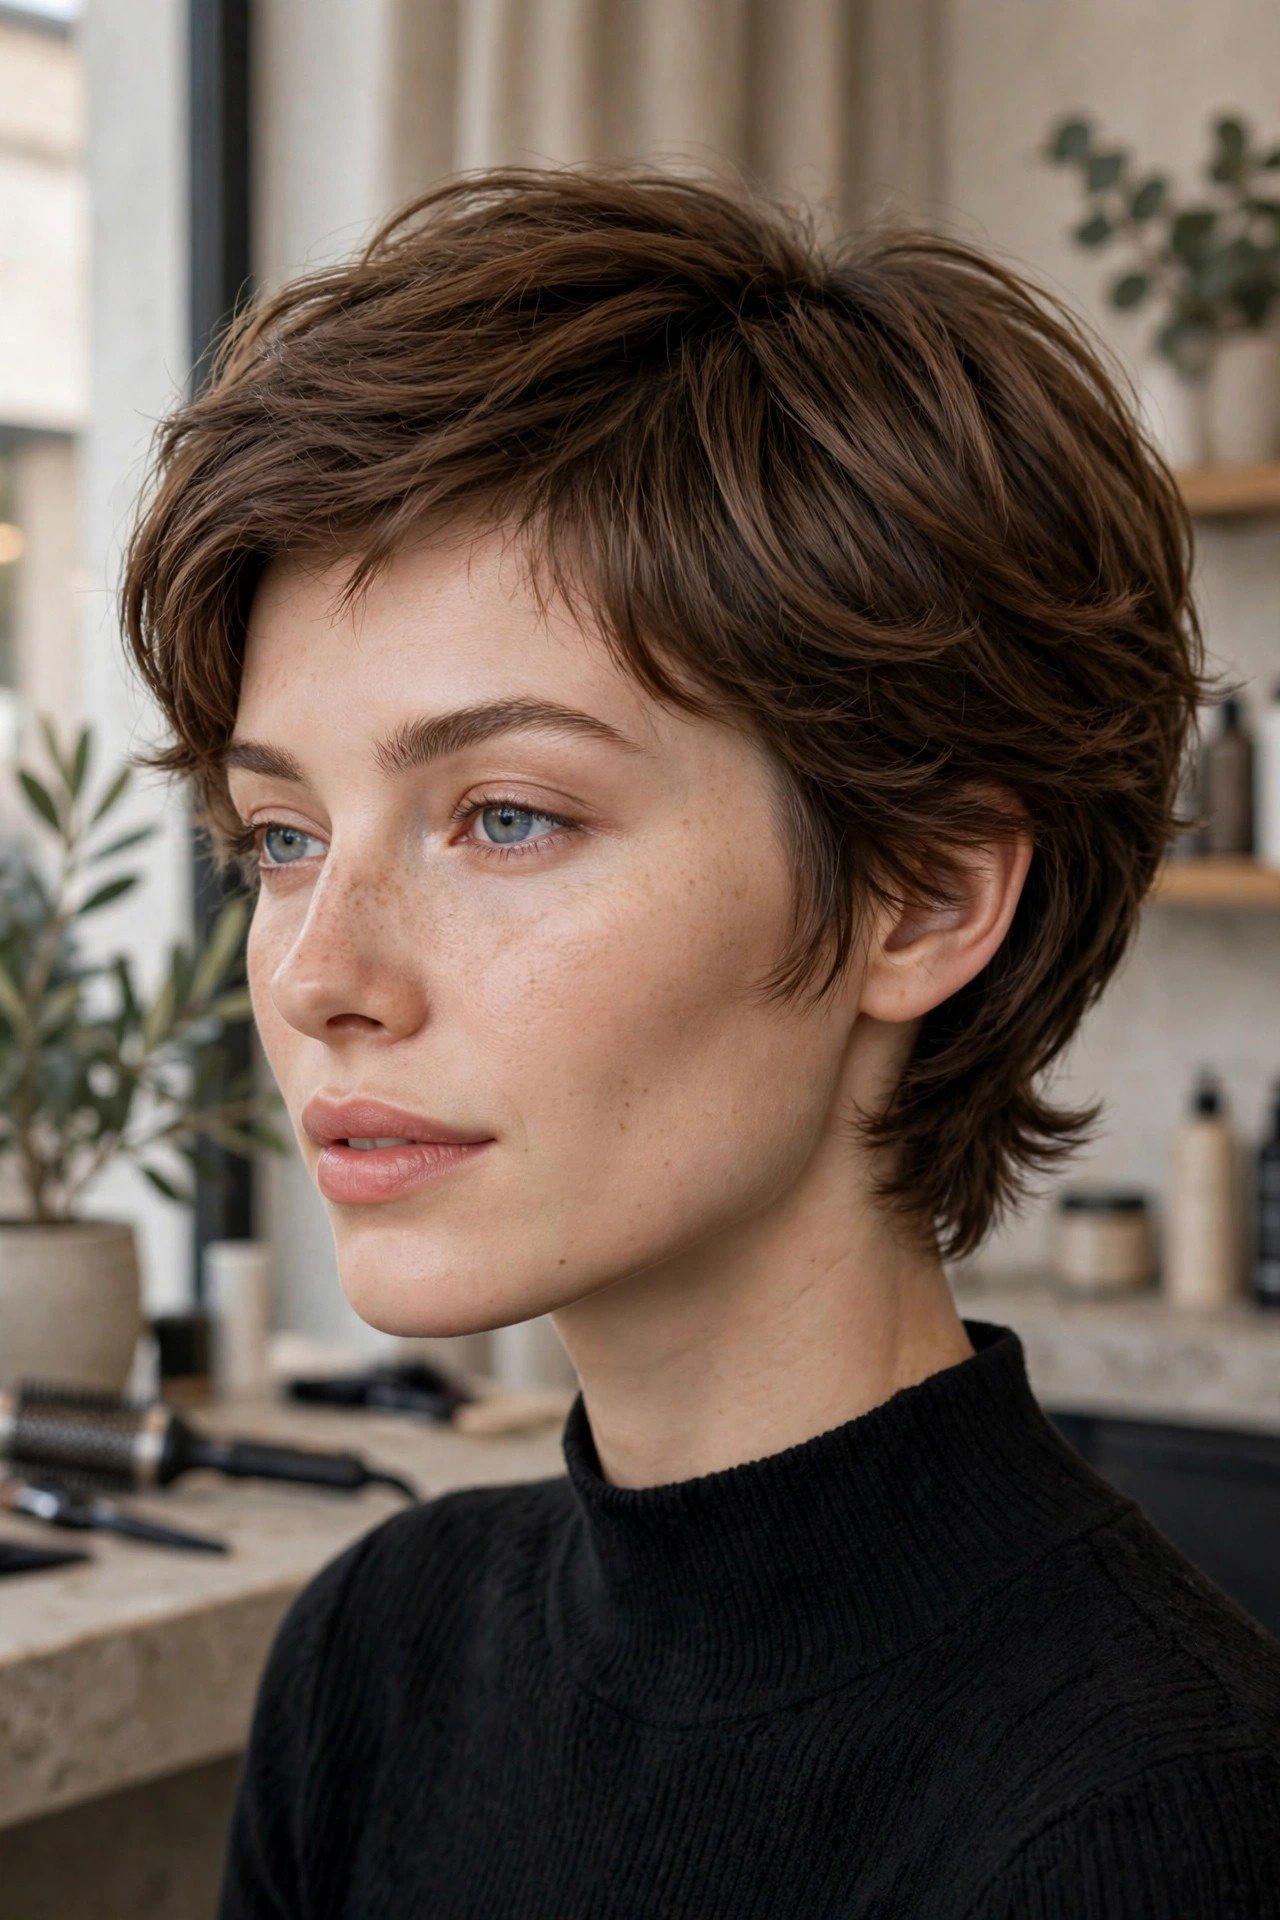
Heart-shaped faces soften beautifully in a pixie cut, because the short shape balances a wider forehead with a narrower chin. Soft volume at the sides and a side-swept fringe draw the eye down toward the cheekbones, while the tapered nape keeps the silhouette neat. It suits straight, wavy, and lightly textured hair, and works best with a side part that breaks up the width of the forehead. The movement in the layers makes the overall look feel gentle and feminine rather than severe. It is an excellent choice if you love your cheekbones but want the hair to soften the forehead.
Stylist script: Place the fringe on a deep side part and cut it long, sweeping across the forehead to soften its width. Keep the crown at two to three inches with soft texture, and leave the sides slightly fuller around the ears and jawline so the lower face gains balance. Taper the nape close but keep the perimeter soft rather than harsh. Avoid a straight-across fringe, which emphasises forehead width. Blow-dry the fringe across the face with a small round brush and lift the crown gently for height.
Styling routine: Apply a light styling cream to damp hair and blow-dry the fringe across the forehead with a small round brush, keeping it soft and sweeping. Lift the crown with your fingers as you dry for gentle height, and keep the sides soft and full around the jawline. A little pomade on the fringe ends keeps the sweep defined. Finish with a flexible hairspray. Maintenance: every four to six weeks; keep the fringe long and side-swept, and trim the crown before it grows heavy and loses its softness.
17. Pixie Cut for Square Faces
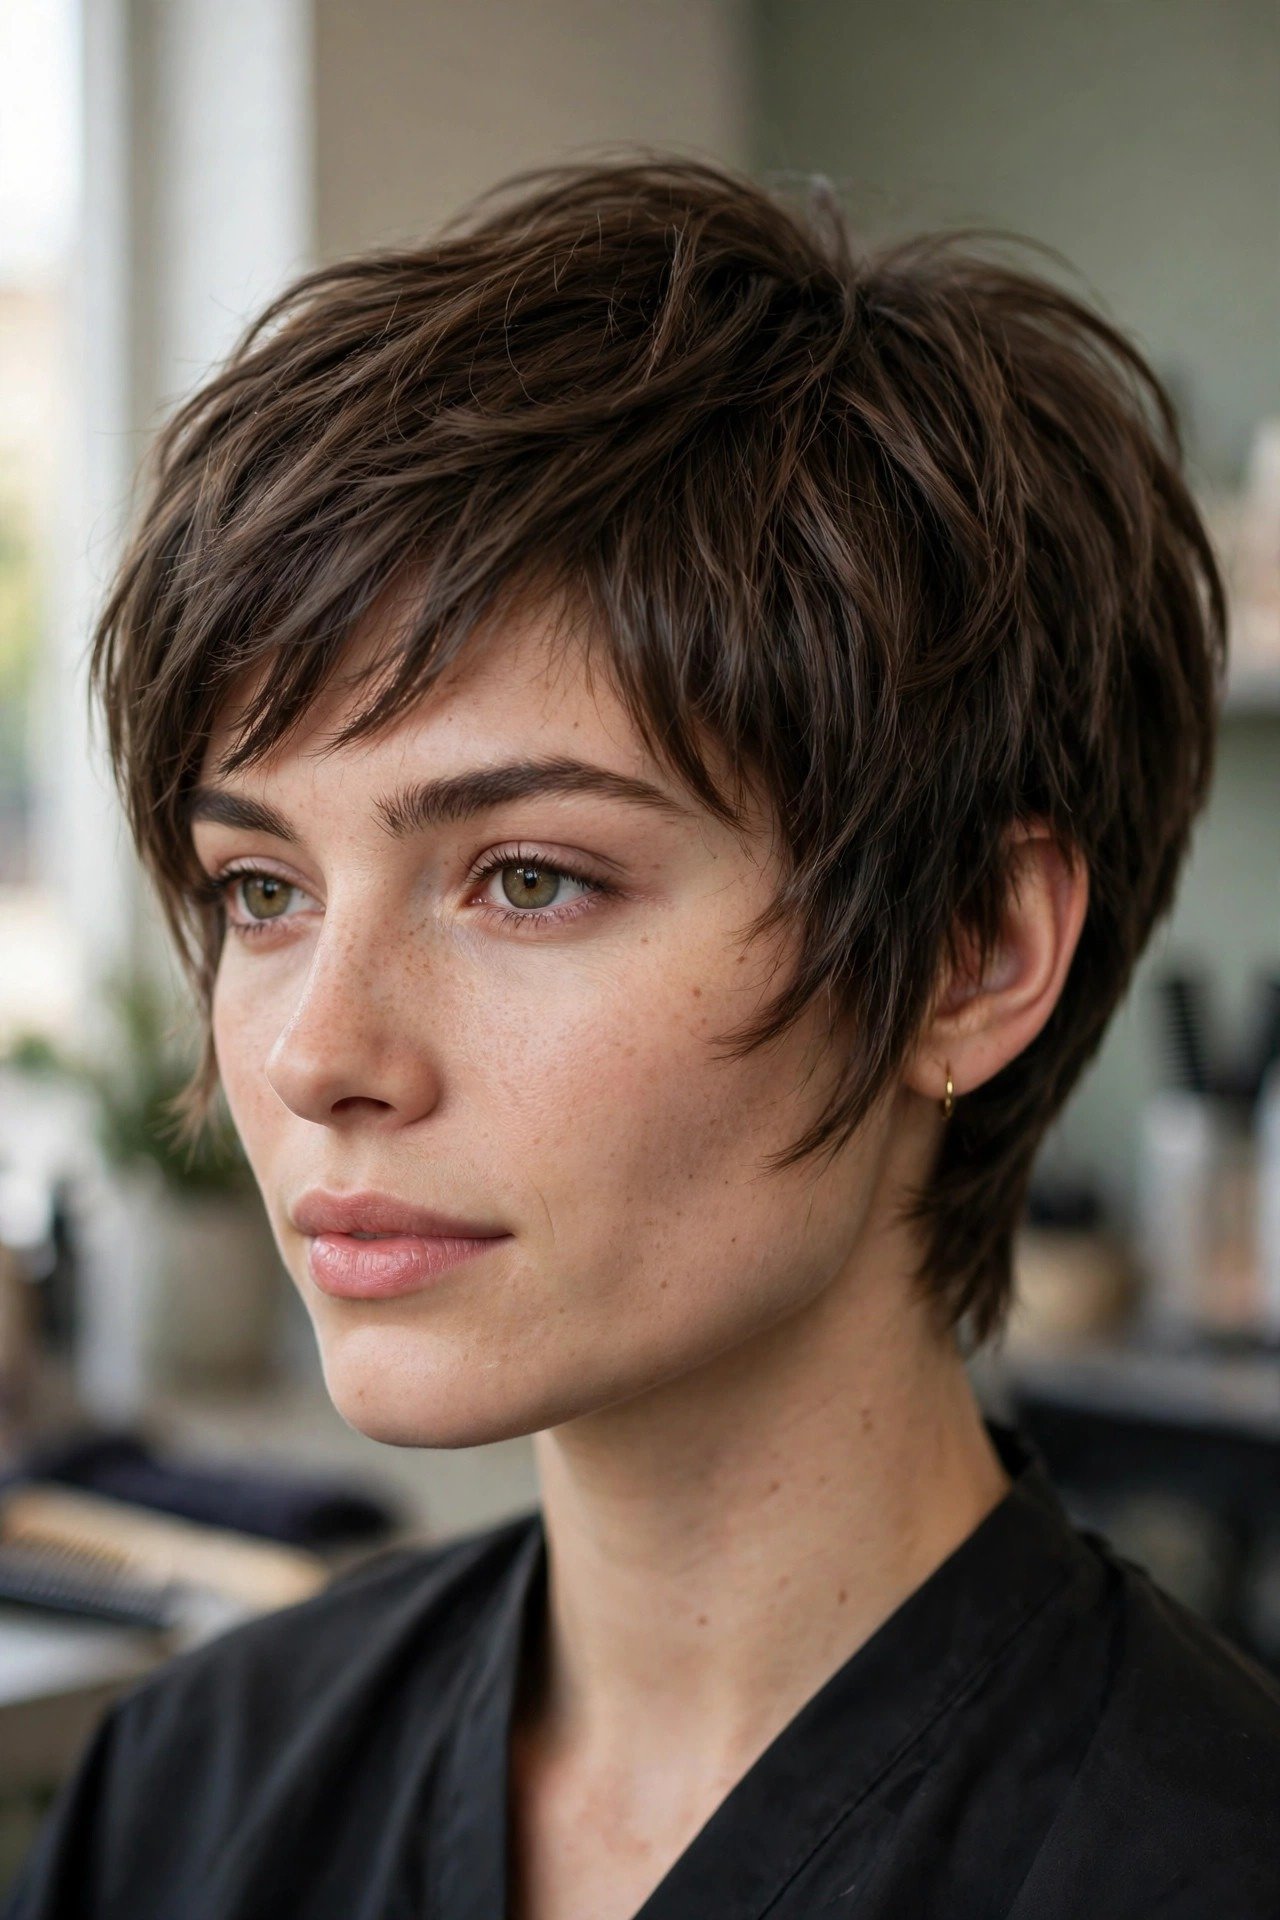
Square faces soften beautifully in a pixie cut, because the curved, sweeping layers balance a strong jawline. Soft pieces that curve around the cheeks draw the eye away from angular corners, while the longer fringe adds softness across the forehead. It suits straight, wavy, and lightly textured hair, and works best with a side part that breaks up the symmetry of the face. The movement in the layers makes the overall look feel gentle and feminine rather than severe. It is an excellent choice if you love your strong features but want the hair to soften them.
Stylist script: Place the fringe on a side part and cut it long and sweeping so it curves across the forehead. Keep the crown at two to three inches with soft, rounded texture, and leave the sides slightly longer around the ears so they curve past the jaw rather than ending right at it. Avoid blunt, straight-across lines near the jaw, which emphasise angles. Taper the nape softly. Blow-dry the front layers with a small round brush, curving them gently inward in a soft shape that hugs the face without hugging the jaw.
Styling routine: Apply a smoothing cream to damp hair and blow-dry with a small round brush, curving the front layers gently inward. A large-barrel curling iron can add soft waves that further soften the jawline. Avoid pin-straight styling, which highlights angles. Finish with a flexible hairspray and a drop of shine serum. Maintenance: every four to six weeks; keep the side layers curved and soft, and trim the ends before they grow blunt and angular again.
18. Pixie Cut with Highlights
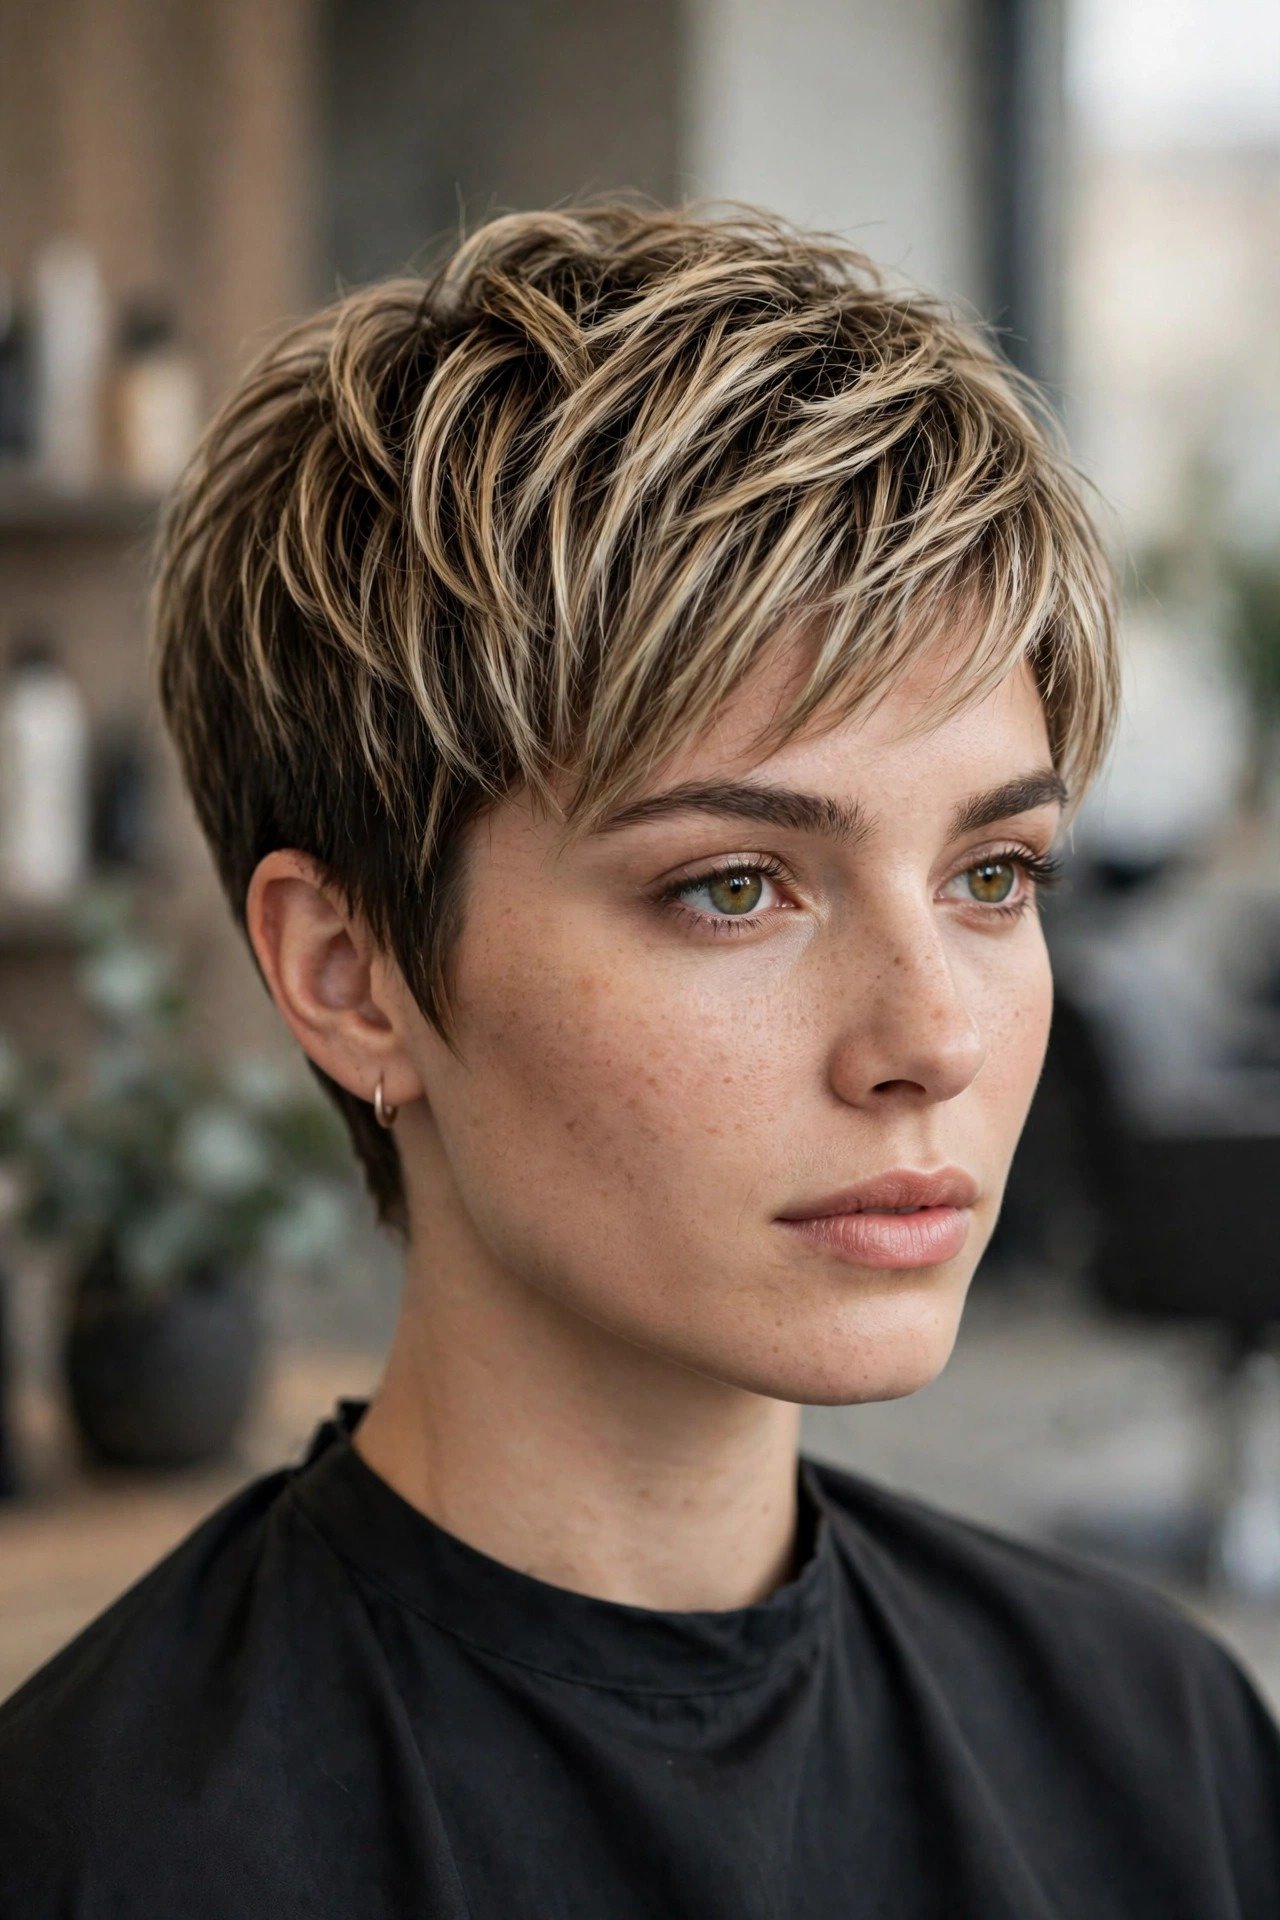
Highlights bring a pixie cut to life by tracing each short layer with light, so the texture reads even in photos. Fine ribbons of colour woven through the crown and fringe brighten the face, while deeper lowlights underneath keep the colour looking natural and dimensional. It suits straight and wavy hair best, and flatters oval, round, and heart-shaped faces because the brightness is placed exactly where the layers turn. It works on blonde, brunette, and copper bases alike, and it is ideal if you want dimension without a full colour change. The result looks sunlit, polished, and full of depth.
Stylist script: Establish the pixie cut with a tapered nape, close sides, and a textured crown at two to three inches. Add fine highlights through the crown layers and the fringe, using a mix of babylights and slightly bolder ribbons for dimension. Keep the underneath darker for contrast so the layers stand out. Tone the highlights carefully to suit the base colour, warm or cool. Blow-dry with a small round brush, lifting the crown so the highlighted pieces catch the light as they move.
Styling routine: Wash with a colour-safe shampoo and apply a leave-in conditioner to keep highlighted ends soft. Blow-dry with a small round brush, lifting the crown and sweeping the fringe to the side to show the dimension. A gloss spray boosts shine and makes the highlights glow. Limit heat styling to protect the colour. Maintenance: every four to six weeks for the cut; refresh highlights every eight to twelve weeks, with a toner between appointments to keep the shade fresh.
19. Platinum Blonde Pixie
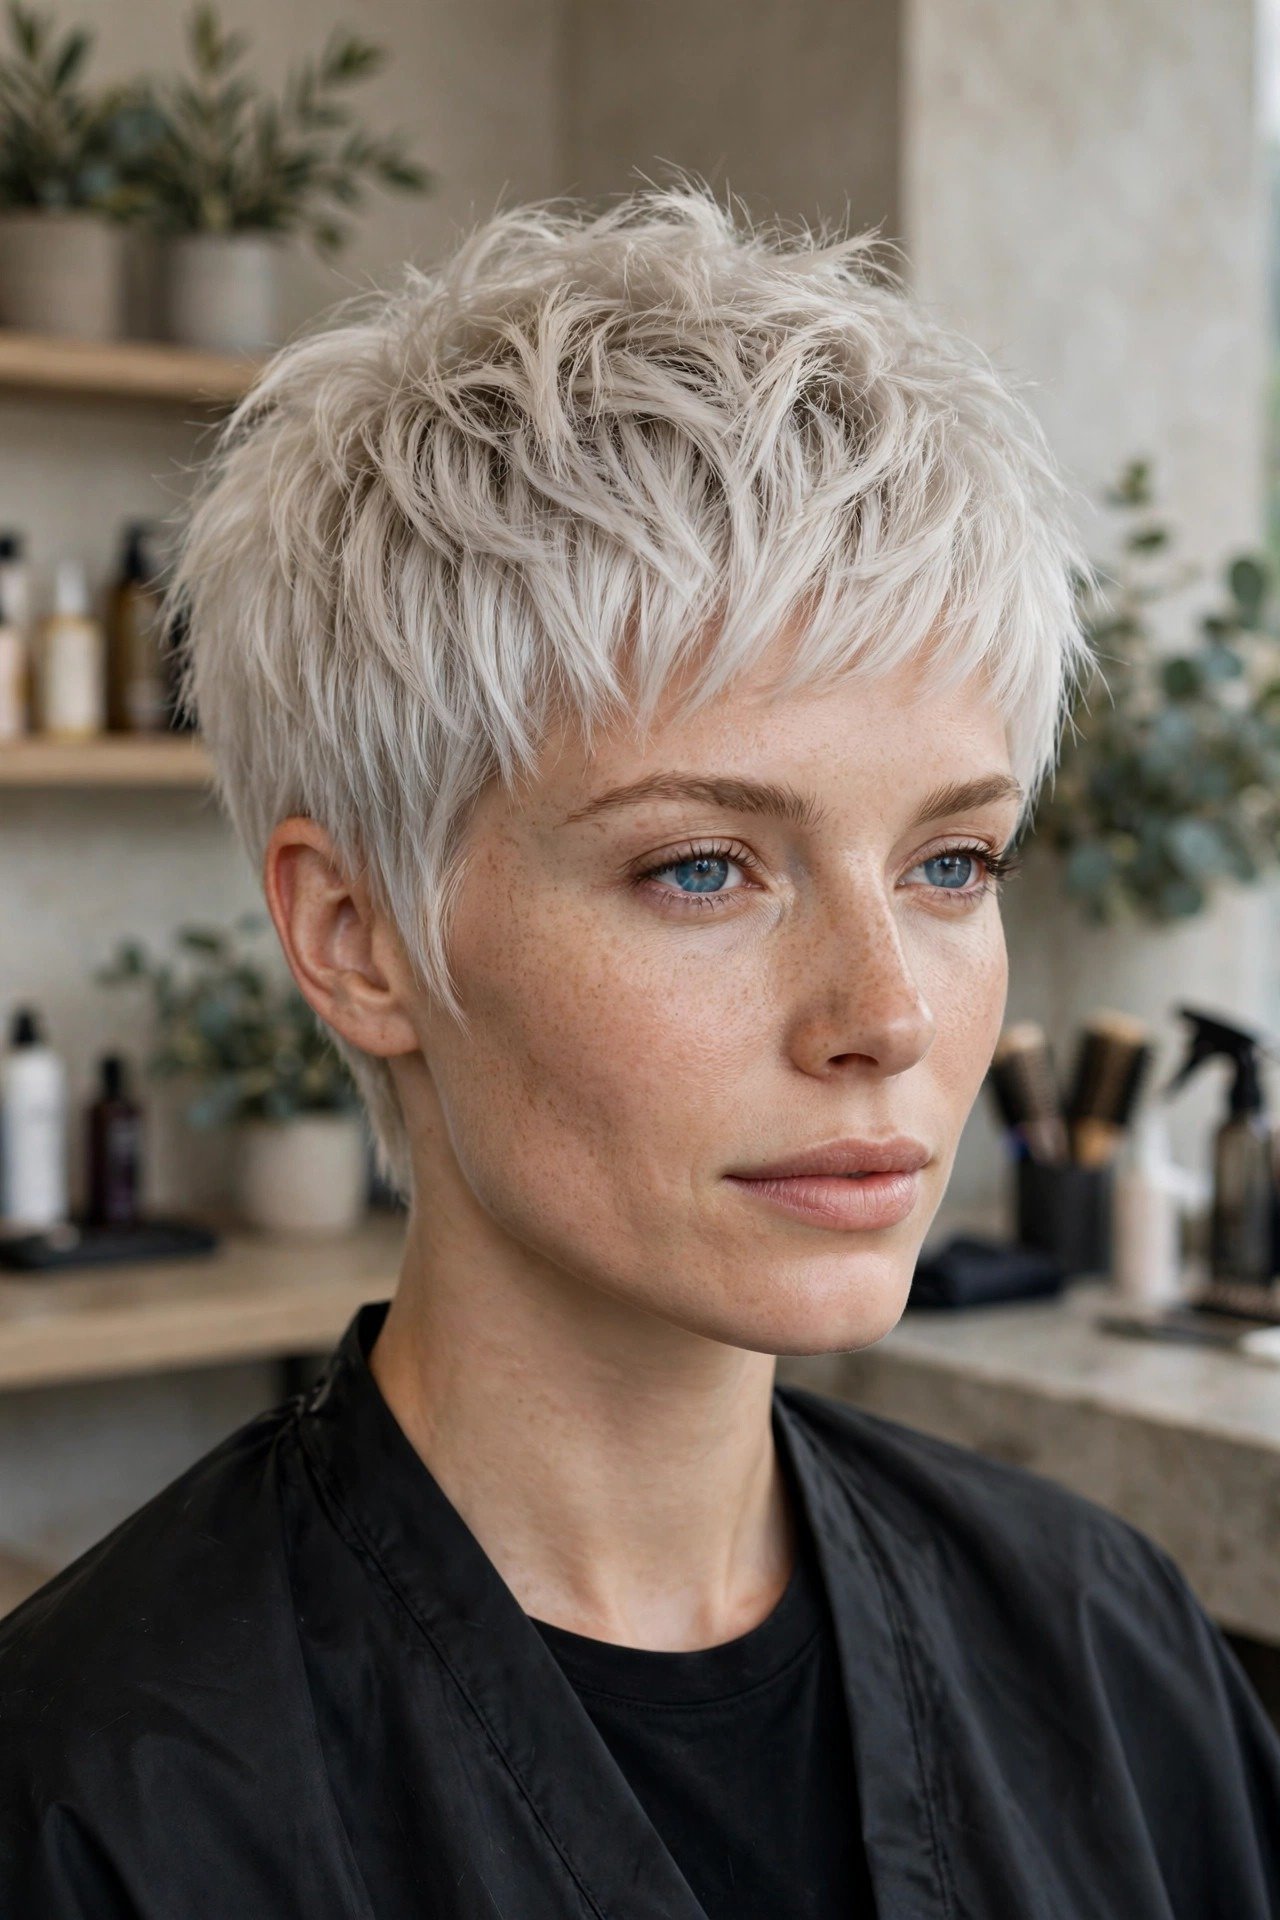
A platinum blonde pixie is the most striking colour choice in this guide, pairing an icy, almost-white shade with a short, sculpted cut for maximum impact. The pale colour highlights every layer and texture in the crop, making the shape read sharper and more deliberate. It suits straight and wavy hair best, and flatters cool skin tones and oval, heart, and long faces especially well. The colour feels bold yet wearable, and it pairs beautifully with the pixie’s clean silhouette. It is perfect if you want a statement colour that still looks expensive, with the short length keeping the upkeep manageable.
Stylist script: Cut the pixie base first, with a tapered nape, close sides, and a textured crown at two inches. Pre-lighten the hair evenly to a pale yellow stage, then tone to a clean icy platinum, keeping the roots slightly deeper for a soft grow-out if the client prefers it. Avoid over-processing the already short hair, which can become fragile. Gloss the colour for shine and seal the cuticle. Blow-dry with a small round brush, lifting the crown so the icy pieces catch the light.
Styling routine: Wash with a purple shampoo once a week to keep platinum tones bright and brass-free, plus a hydrating mask to protect lightened hair. Apply a heat protectant before blow-drying with a small round brush, lifting the crown and sweeping the fringe to the side. A shine spray adds gloss to the icy dimension. Avoid overwashing, which fades the tone quickly. Maintenance: every four to six weeks for the cut; refresh the platinum every four to six weeks too, with a toner between appointments.
20. Copper Pixie Cut

Copper tones make a pixie cut glow, adding warmth and richness that catches the light in every short layer. The fiery shade highlights the movement of the crown pieces and gives the tapered sides a dimensional, sunlit depth. It suits straight, wavy, and lightly curly hair, and flatters warm skin tones and oval, heart, and long faces especially well. The colour feels bold yet wearable, and it pairs beautifully with the pixie’s sculpted shape. It is perfect if you want a statement colour that still looks natural and expensive, with the layers doing the styling work for you.
Stylist script: Cut the pixie base first, with a tapered nape, close sides, and a textured crown at two to three inches. Apply the copper colour as a full tint, keeping the crown and fringe slightly brighter to highlight the movement. Choose a warm copper that suits the skin tone, from soft ginger to deep auburn. Gloss the colour for shine and seal the cuticle. Blow-dry with a small round brush, lifting the crown so the brightest copper pieces frame the face and catch the light.
Styling routine: Wash with a colour-safe shampoo for red and copper tones and use a weekly colour-depositing mask to keep the shade rich. Apply a heat protectant before blow-drying with a small round brush, lifting the crown and sweeping the fringe to the side. A shine serum adds gloss to the copper dimension. Limit sun exposure, which fades copper quickly. Maintenance: every four to six weeks for the cut; refresh the copper colour every six to eight weeks, with a gloss between appointments.
21. Pixie Cut for Fine Hair
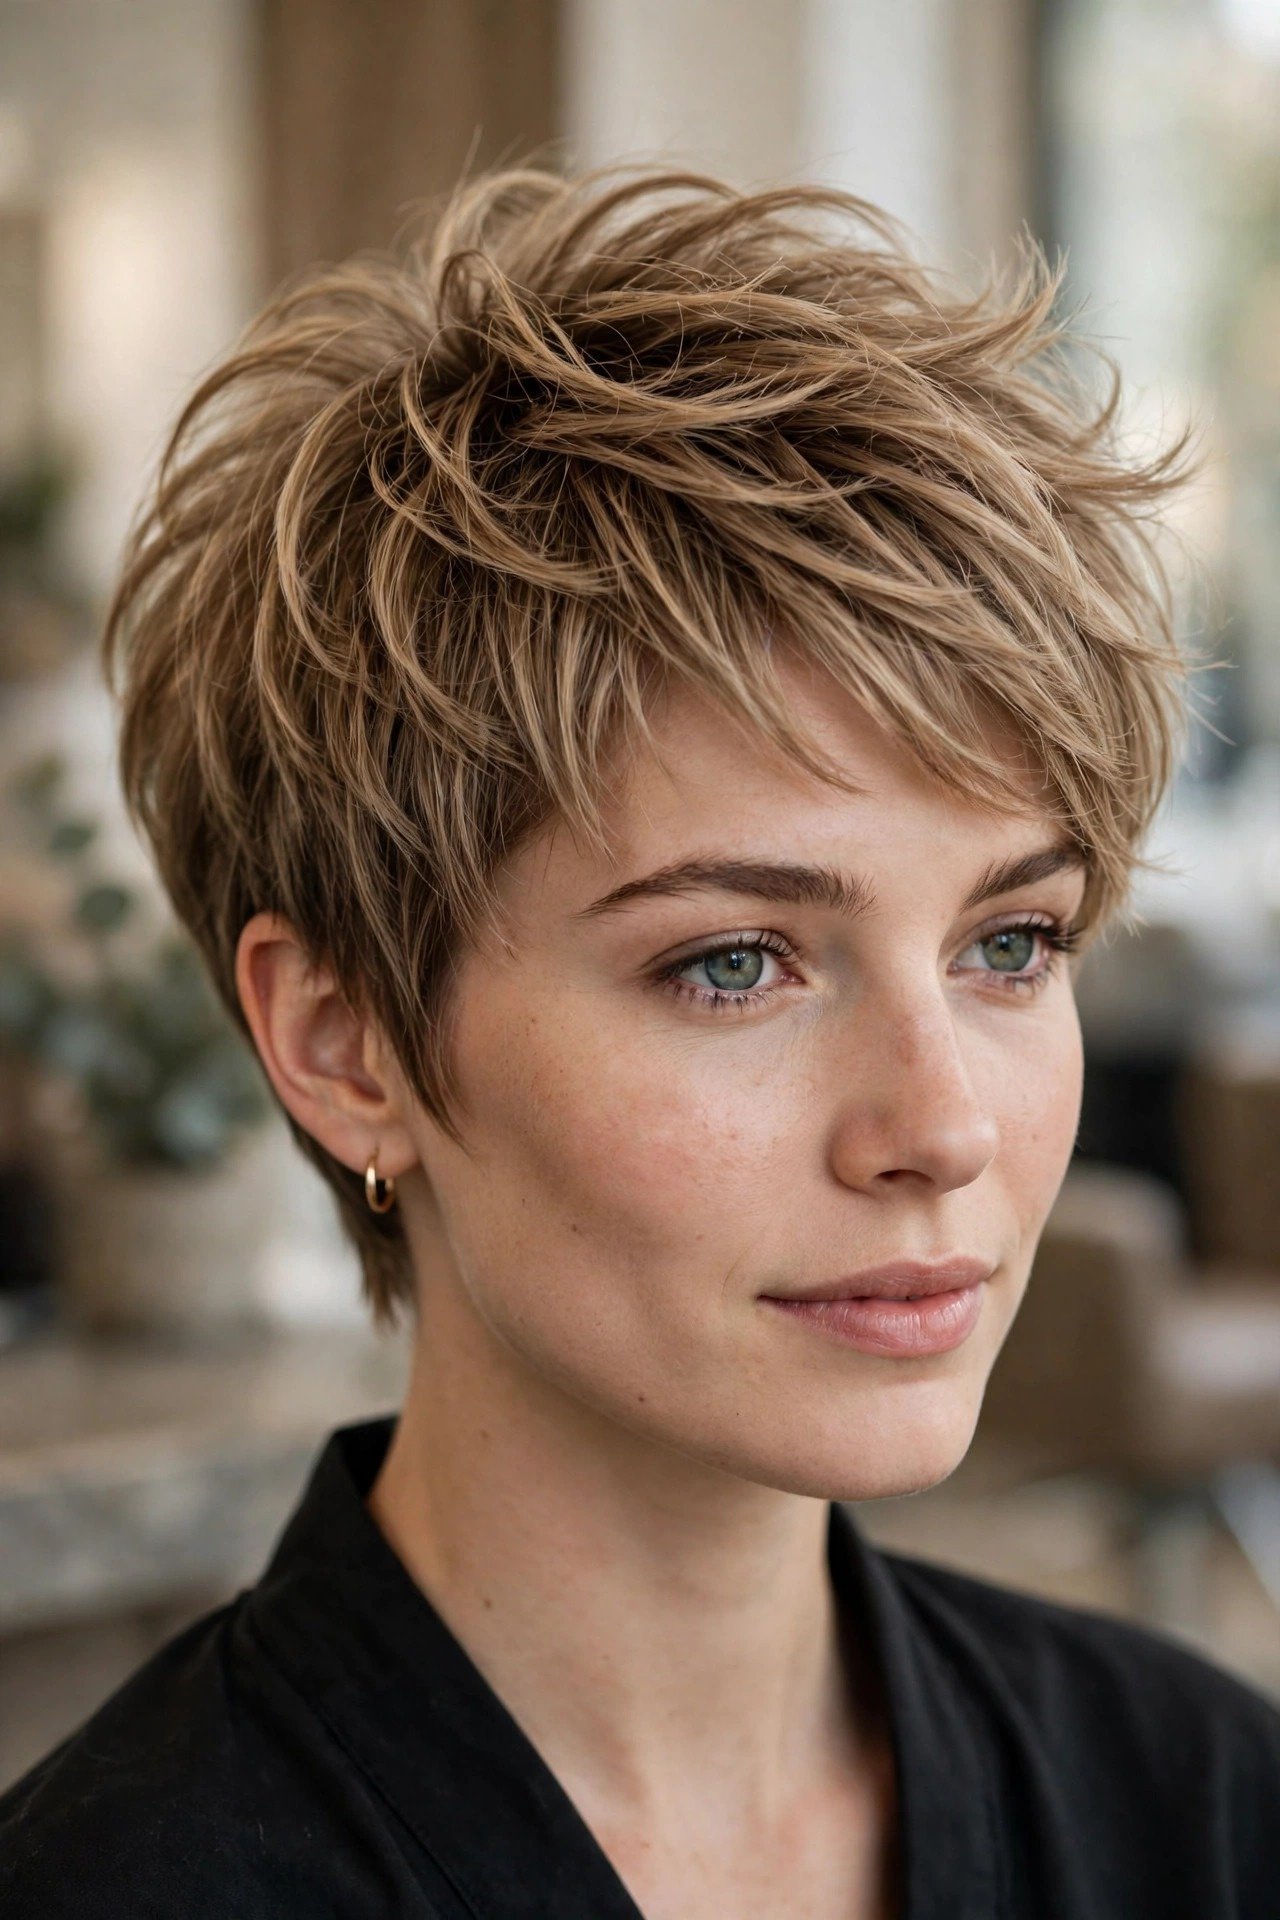
Fine hair looks instantly fuller in a pixie cut, because the shorter crown layers create lift and the illusion of density. The tapered sides keep the shape neat while the textured top adds body, and the fringe can be cut to add width across the forehead. It suits oval, heart, and long faces, and works best on straight to wavy fine hair that needs volume. The cut is a clever optical trick, making the hair appear thicker without adding extensions or heavy products. It is ideal if your hair falls flat by midday or if you want volume that lasts from morning to evening.
Stylist script: Keep the layers slightly longer and the perimeter as full as possible to protect the appearance of thickness. Place the crown layers at two to three inches rather than very short, then add only a few textured pieces through the top, avoiding over-layering, which thins fine ends. Use minimal thinning and point-cut very lightly. Taper the sides gently rather than clipping them too close. Blow-dry with a small round brush, lifting the roots and sweeping the fringe to the side, then finish with a volumising spray at the crown for lasting body.
Styling routine: Apply a lightweight volumising mousse to damp roots only, avoiding heavy creams that flatten fine hair. Blow-dry upward with a small round brush for lift, then finish by sweeping the fringe to the side. Dry shampoo on day two restores volume at the crown. Use a light texturising spray rather than oils. Maintenance: every four to five weeks; fine hair shows split ends quickly, so regular small trims keep the shape looking thick and healthy.
22. Pixie Cut for Thick Hair
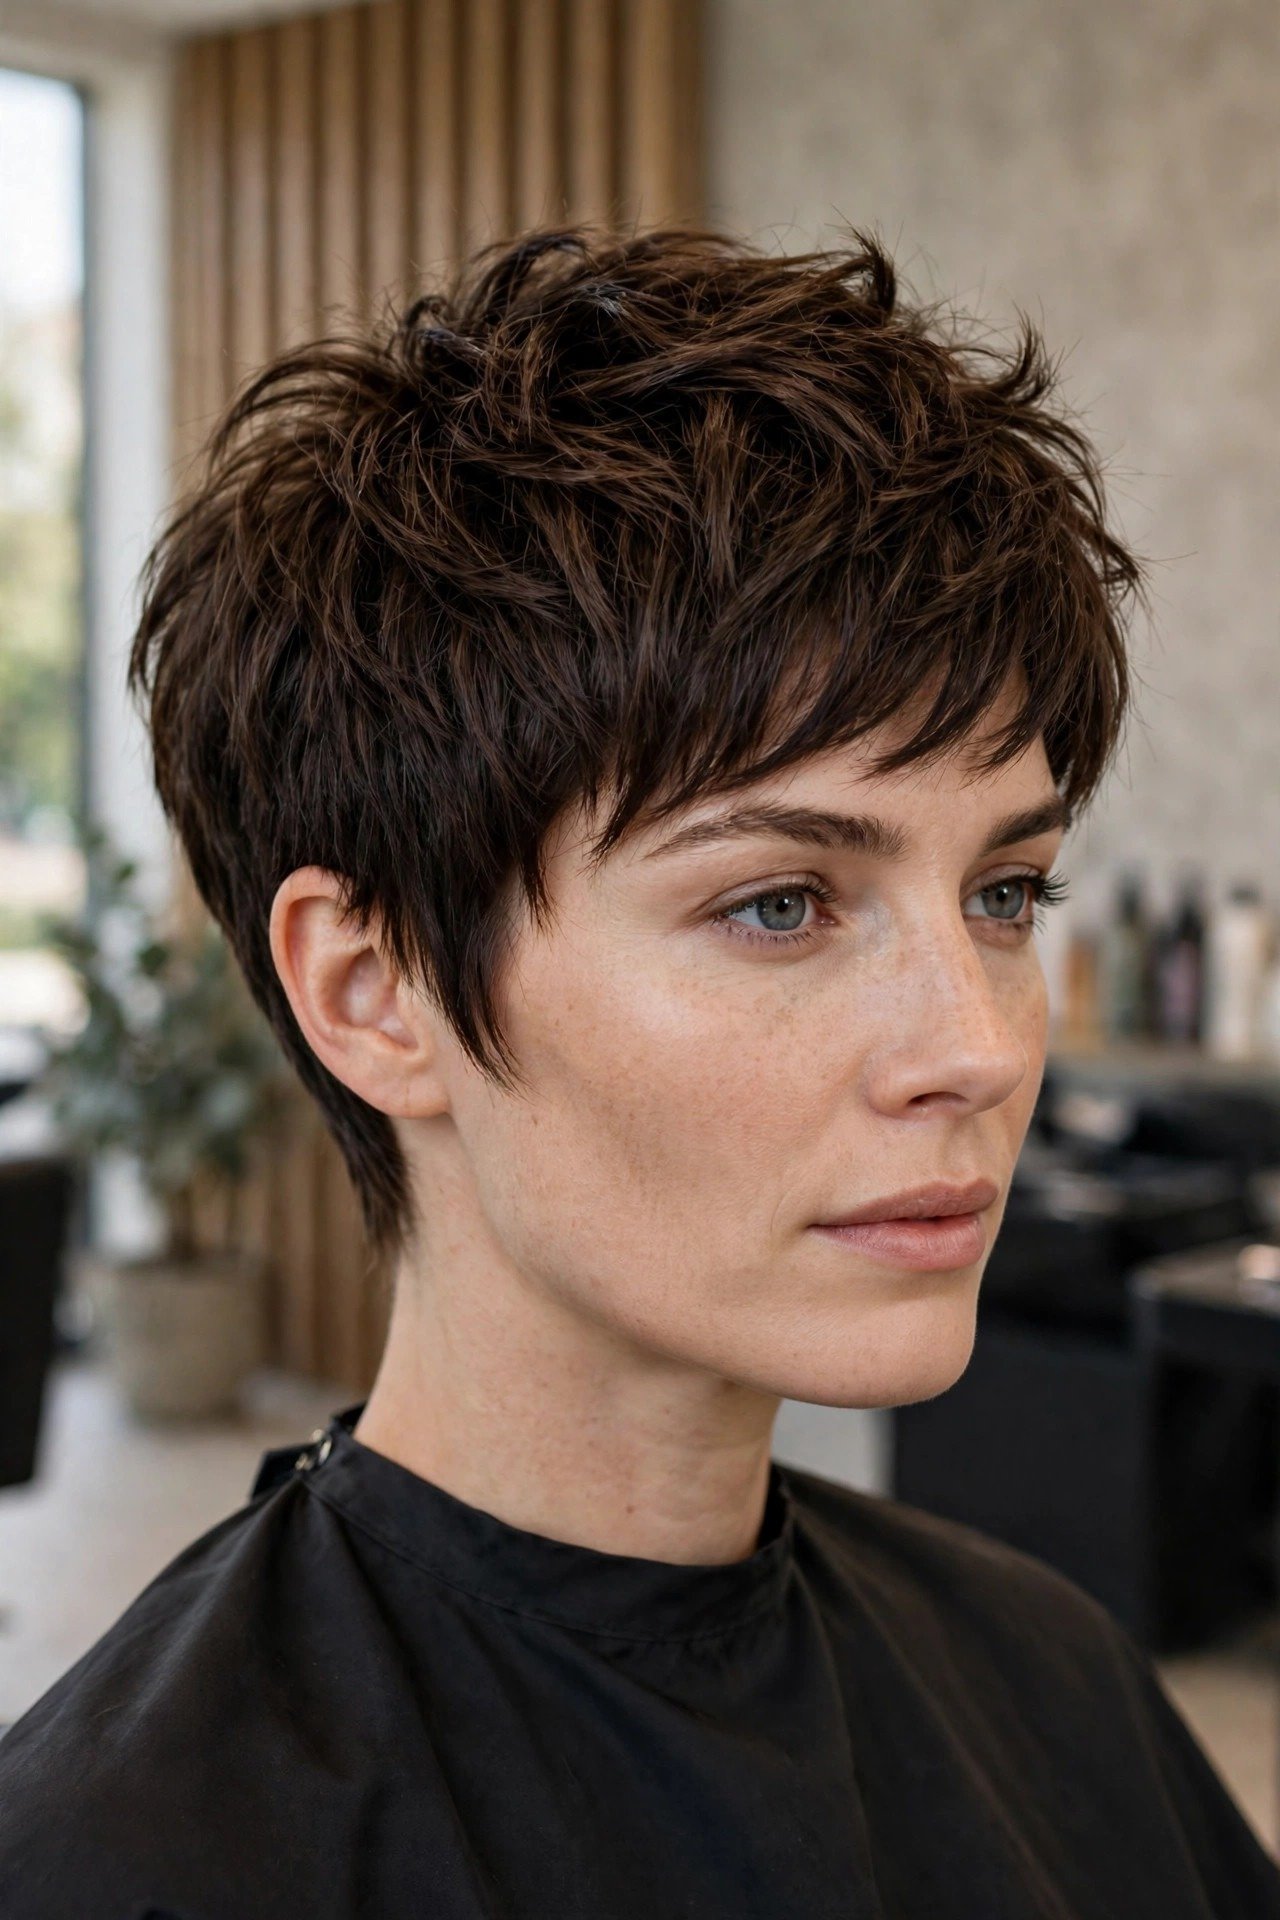
Thick hair finally feels light in a pixie cut, because the short layers remove bulk exactly where it weighs the hair down. Shorter pieces at the crown create lift and movement, while the tapered sides keep the shape controlled and neat. It suits oval, round, and square faces, since the textured top breaks up the width and adds shape around the cheeks. Women with thick straight or wavy hair benefit most, as the cut tames the bulk without sacrificing the natural fullness they love. The result is bouncy, manageable, and far easier to style every day.
Stylist script: Work in clean sections on thick hair, starting with the interior to remove weight before shaping the outline. Cut the crown layers at two to three inches with point cutting and slide cutting to debulk without creating short, spiky pieces. Taper the sides and nape close so the shape stays controlled. Check the balance by lifting sections and letting them fall. Blow-dry in sections with a small round brush, smoothing the top and sweeping the fringe to the side for the finished shape.
Styling routine: Apply a smoothing cream and a little leave-in conditioner to damp hair, then blow-dry in sections, starting underneath and working upward for control. A small round brush gives lift at the crown and a smooth sweep at the fringe. Use a flat iron only on stubborn sections. A weekly deep-conditioning mask keeps thick ends healthy. Maintenance: every four to six weeks; thick hair holds the shape well, but regular debulking trims stop the cut from growing heavy and puffy.
23. Pixie Cut for Older Women
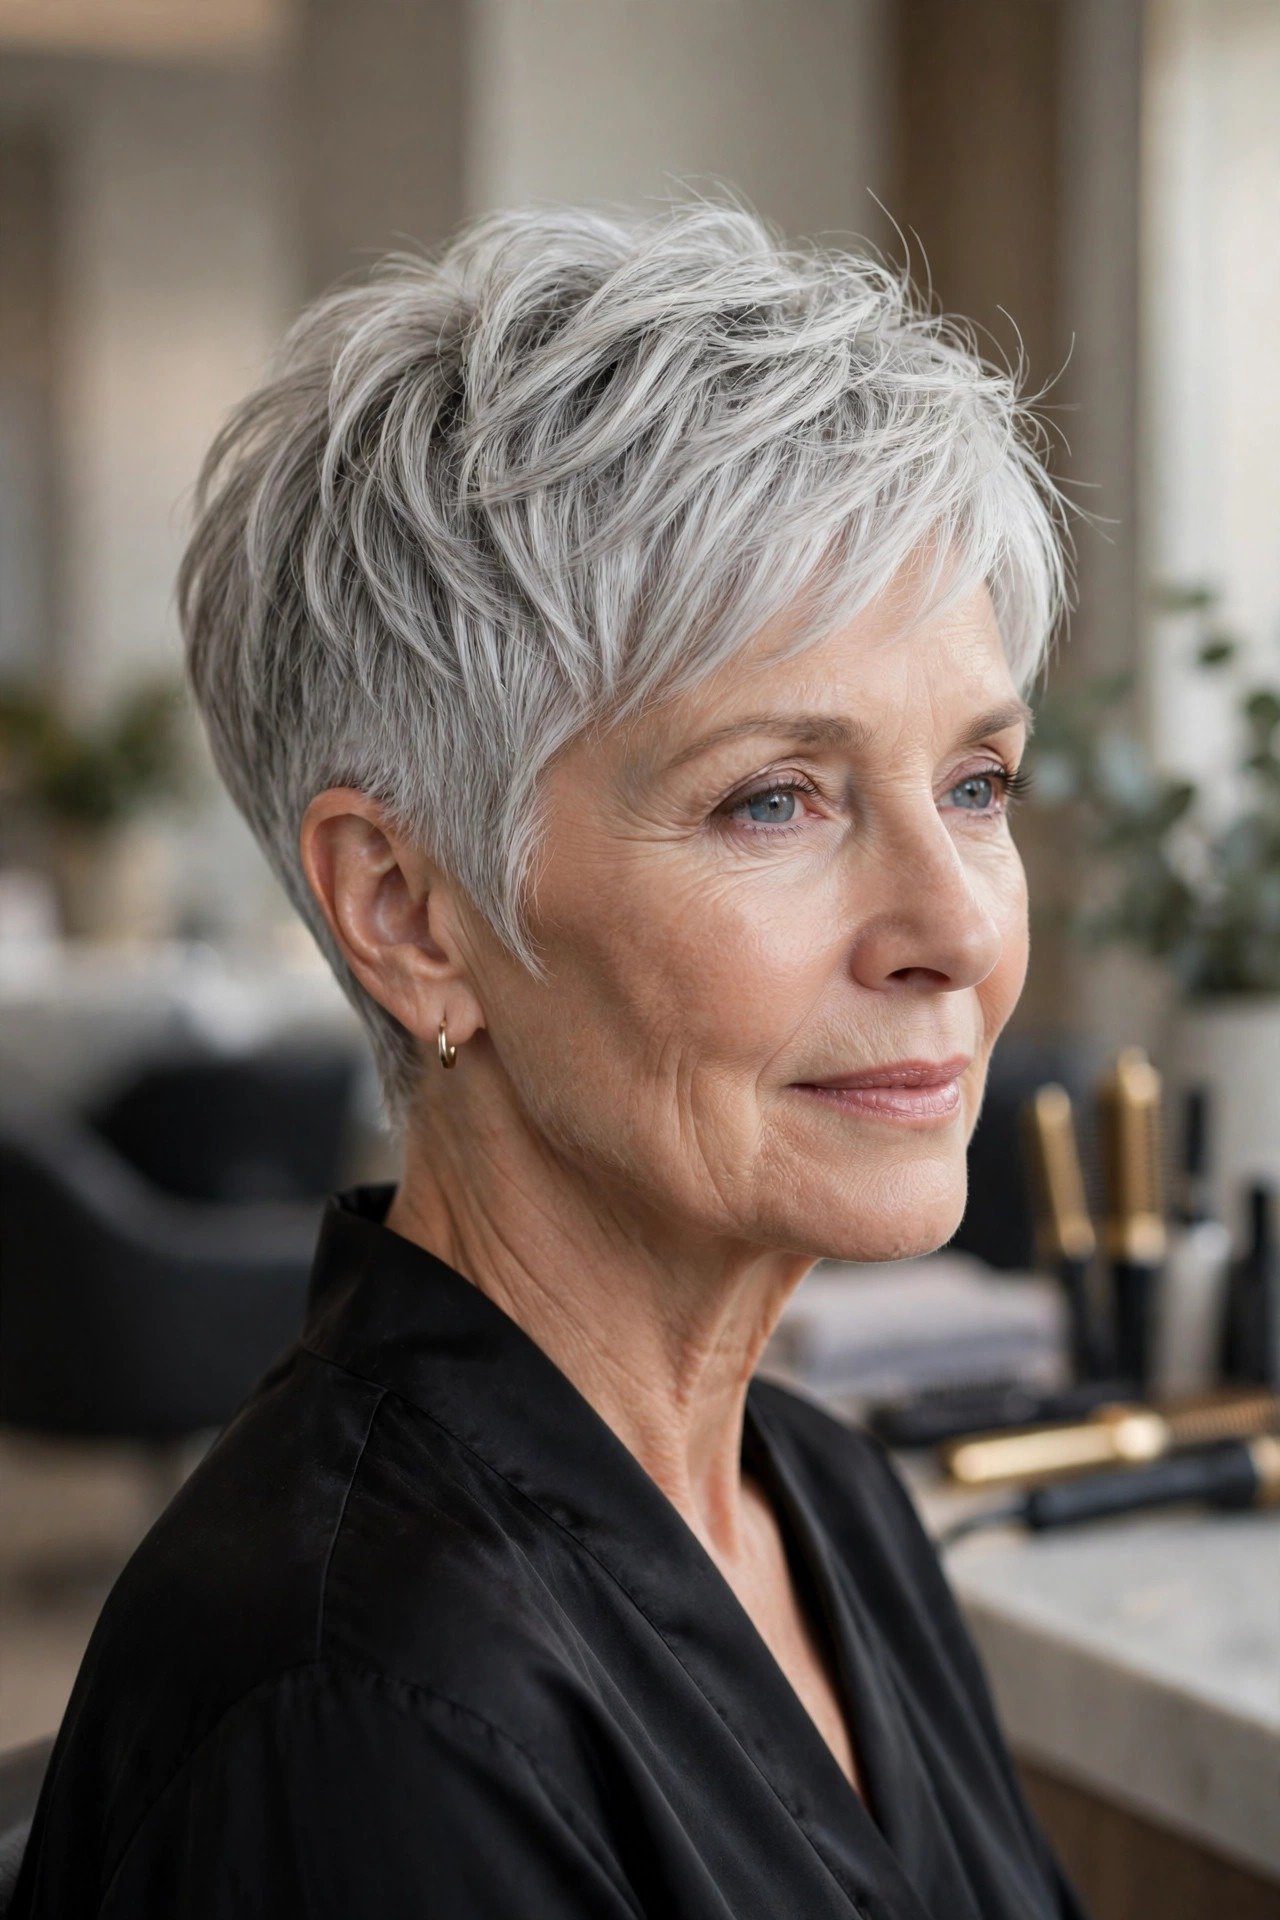
A pixie cut is one of the most elegant choices for older women, because it lifts the face, shows off the cheekbones, and looks effortlessly chic at any age. The soft texture and tapered nape create a polished shape that frames the face beautifully, while silver or grey hair adds natural dimension to every layer. It suits straight, wavy, and fine hair, and flatters oval, heart, and square faces especially well. It is perfect if you want a low-maintenance cut that still looks intentional, and it works beautifully for both everyday life and special occasions. Helen Mirren’s power pixie is the proof that this cut only gets better with age.
Stylist script: Cut the pixie base with the crown at two to three inches and the sides tapered softly rather than clipped harshly. Keep the texture gentle, with light point cutting through the crown so the layers move naturally. Sweep the fringe to one side to soften the forehead and open the eyes. Blend the nape smoothly into the longer top. Dry with a small round brush, lifting the crown and sweeping the fringe across the forehead, then finish with a light cream that adds shine without weighing the hair down.
Styling routine: Apply a lightweight styling cream to damp hair and blow-dry with a small round brush, lifting the crown and sweeping the fringe to the side. A purple shampoo once a week keeps silver tones bright and brass-free. Finish with a flexible hairspray and a drop of shine serum. The cut air-dries well with a little cream scrunched through the crown. Maintenance: every four to six weeks; regular trims keep the shape elegant and the silver tones looking fresh and intentional.
24. Pixie Cut with Shaved Side

A shaved side turns the pixie into a bold, asymmetric statement, with one side clipped close to the head while the other keeps its textured length. The contrast is dramatic: the shaved side shows off the jawline and earrings, while the longer side sweeps across the forehead in soft layers. It suits straight and wavy hair best, and flatters oval, long, and heart-shaped faces because the asymmetry draws attention to the eyes and cheekbones. It is made for women who want their hair to start conversations. On the pixie’s short silhouette, a shaved side feels fearless, modern, and completely unforgettable.
Stylist script: Choose the side to shave and clip it close with a low guard, usually a one or two, working from the nape upward to just above the ear. Keep the opposite side and the top at two to three inches, cut with point cutting for texture. Blend the boundary between the shaved side and the longer top carefully so the transition is clean. Keep the fringe long enough to sweep across the forehead. Dry the longer side with a small round brush, sweeping it across the face, and smooth the shaved side with your palm.
Styling routine: Apply a styling cream or pomade to damp hair and blow-dry the longer side across the forehead with a small round brush. Smooth the shaved side with a tiny amount of product for a clean finish. A texturising spray adds movement to the top layers. Finish with a flexible hairspray. Maintenance: every three to four weeks; shaved sides grow out visibly fast, so book regular clipper tidies to keep the asymmetry sharp.
25. Long Pixie Cut
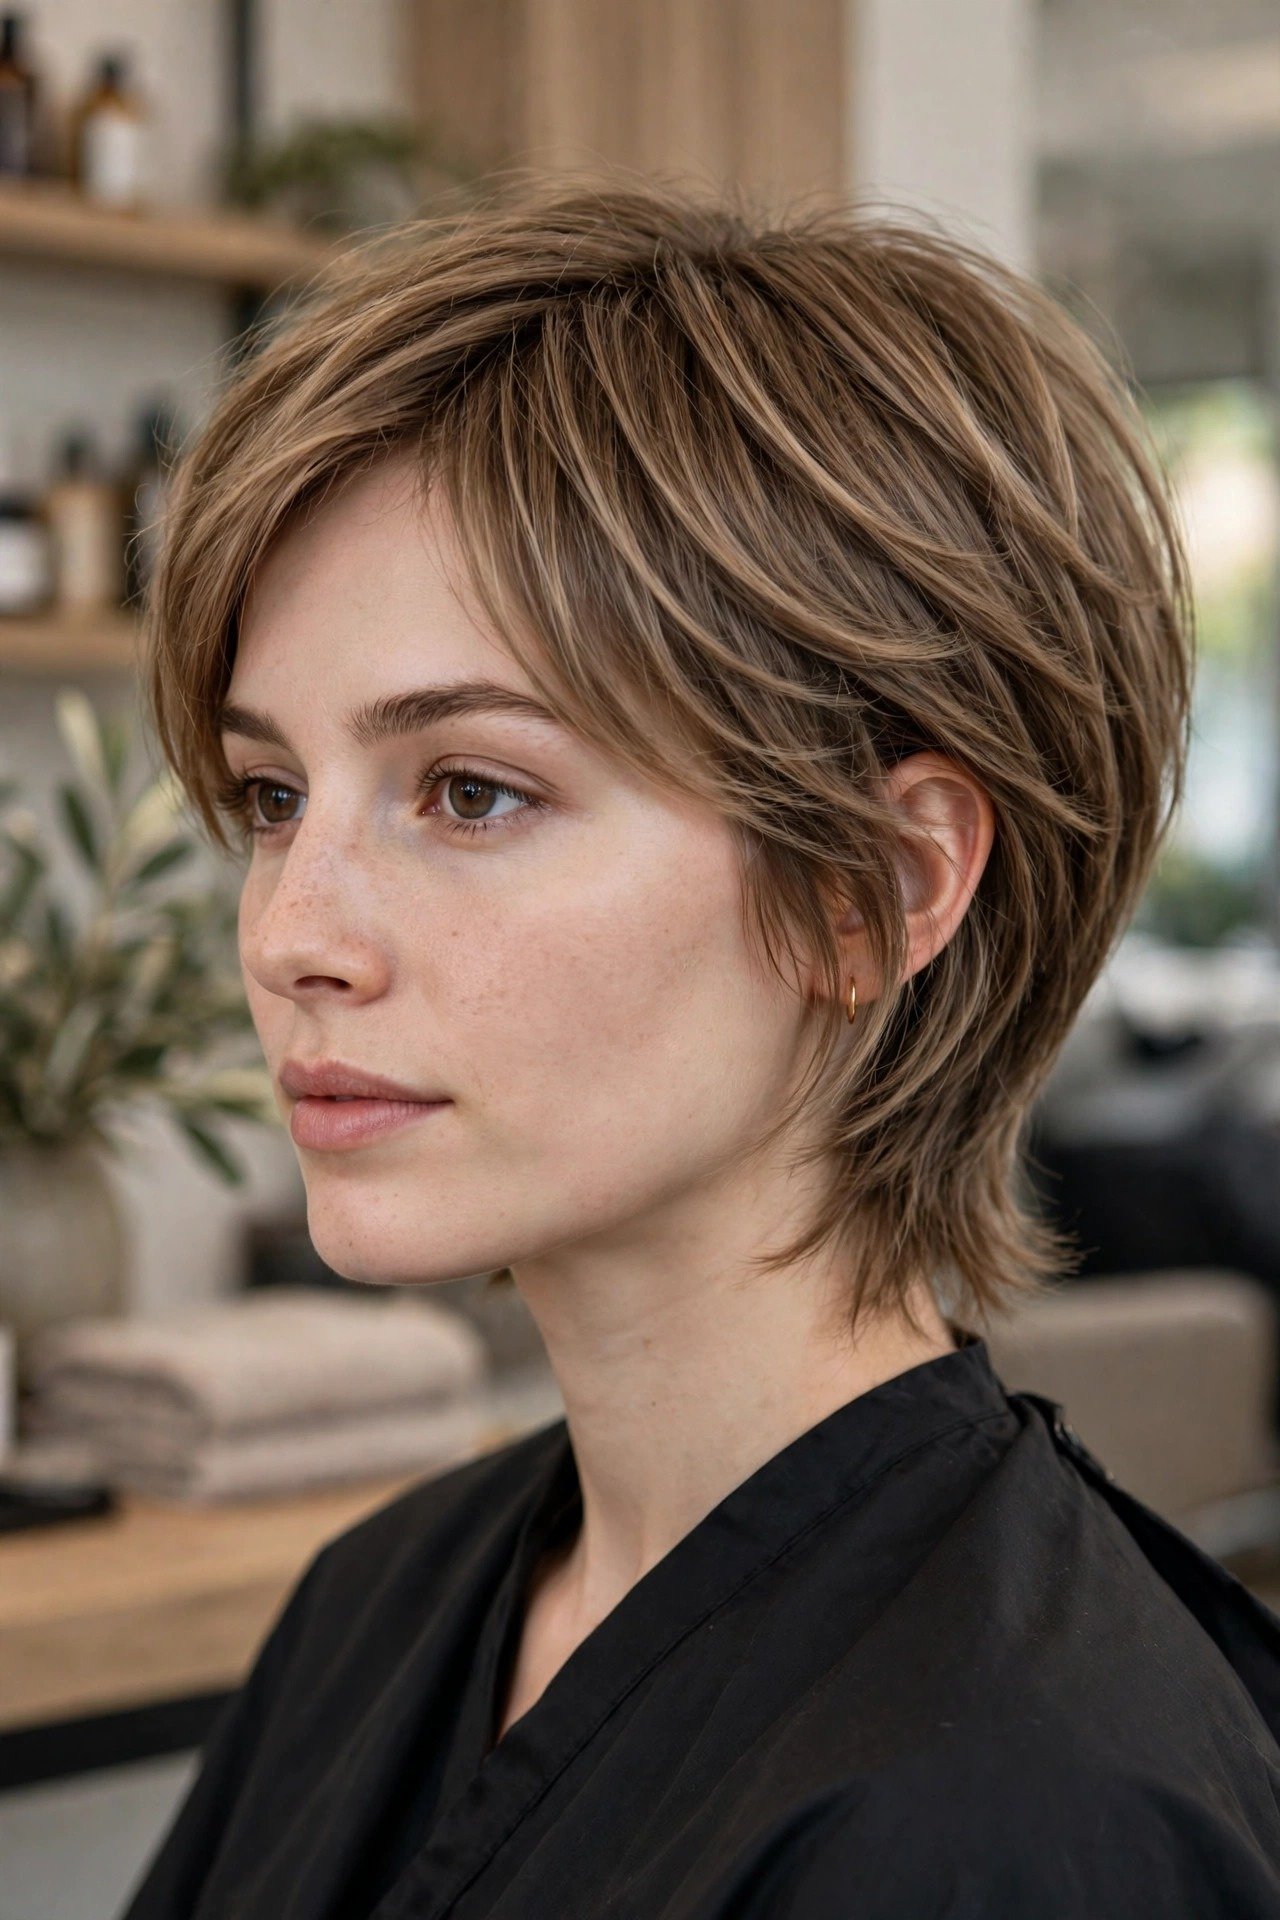
The long pixie is the gentlest entry into short hair, keeping soft layers that reach the ears and nape while the crown stays textured and full. It feels like a pixie but wears like a very short bob, with enough length to tuck behind the ears or sweep across the forehead. It suits straight, wavy, and fine hair beautifully, and flatters oval, round, and heart-shaped faces because the extra length softens the jaw and adds movement around the cheeks. It is ideal if you want short hair without the shock of a close crop. For a smoother, slightly longer alternative, our Italian bob guide shows how the long pixie compares to the polished Italian shape.
Stylist script: Cut the top like a pixie, with two to three inches of textured length at the crown, then leave the sides and nape longer, building soft layers that reach the ears and the nape. Blend the crown into the longer sides with slide cutting so there is no harsh step. Keep the nape soft and tapered rather than blunt, and point-cut the ends for movement. Dry with a medium round brush, lifting the crown and turning the front layers gently outward, then check the shape from the side to confirm the length reads soft and intentional.
Styling routine: Apply a volumising mousse to damp roots and a light leave-in cream through the lengths, then blow-dry with a medium round brush, lifting the crown and flicking the front layers outward. Finish with a texturising spray for movement and a drop of shine serum on the ends. The long pixie air-dries well too if you scrunch the crown while damp. Maintenance: every five to seven weeks; the long pixie grows out gracefully, so trims focus on refreshing the crown and keeping the nape tidy.
26. Short Pixie Cut

Short does not mean severe, and this close-cropped pixie proves it with maximum confidence in minimum length. The hair sits tight at the sides and nape while the top keeps just enough texture to sweep, spike, or tousle, creating a clean, sculpted shape that shows off the eyes, cheekbones, and jawline. It suits straight and wavy hair best, and flatters oval, heart, and long faces because the short layers open the whole face. It is ideal if you want the lowest-maintenance cut in this guide, or if you are ready for a truly bold change. The shorter length makes the pixie shape read louder than any other version.
Stylist script: Cut the baseline close at the sides and nape with scissors over comb or a low clipper guard, keeping the perimeter soft rather than harsh. Place the crown layers at one to two inches and connect them through the front so the fringe can sweep or spike. Use point cutting on the top to create texture and separation. Keep the shape balanced by checking the silhouette from the front, side, and back. Dry with your fingers, pushing the crown upward or to the side, and finish by pinching the ends with a tiny amount of pomade.
Styling routine: Apply a pea-sized amount of pomade or styling wax to damp or dry hair and push the crown pieces upward or to the side with your fingers. A texturising spray adds grit and hold. For a sleek finish, smooth the top flat with your palms. The cut dries in minutes and needs almost no tools. Maintenance: every three to five weeks; very short pixies lose their shape quickly as they grow, so regular trims matter more at this length.
27. Pixie Cut with Feathered Layers

Feathered layers give the pixie a soft, airy movement that feels light and romantic. The layers are cut with a razor or slide cutting so the ends feather outward in wispy, weightless pieces, while the crown keeps enough volume to lift the shape. It suits straight, wavy, and fine hair beautifully, and flatters oval, heart, and long faces because the feathered pieces soften the forehead and frame the eyes. It is perfect if you want a pixie that feels gentle rather than edgy, and it grows out more gracefully than any other version here. If you love this soft, wispy finish, our wispy bob guide shows the same feathered feeling at a longer length.
Stylist script: Cut the pixie base with the crown at two to three inches and the sides tapered close. Then work through the top and fringe with slide cutting or a razor, removing weight from the ends so each layer feathers outward in soft, wispy pieces. Keep the perimeter light and airy rather than blunt, and blend the feathered layers into the sides so there is no visible step. Dry with a small round brush, lifting the crown and turning the front layers gently outward so the feathers fall naturally around the face.
Styling routine: Apply a light styling cream to damp hair and blow-dry with a small round brush, lifting the crown and turning the front layers outward. A texturising spray adds airy movement without weighing the feathers down. Avoid heavy pomades, which clump the fine layers together. Finish with a flexible hairspray. Maintenance: every four to six weeks; feathered layers lose their lightness as they grow, so regular trims keep the airy finish intentional.
28. Pixie Cut with Choppy Layers

Choppy layers double down on everything the pixie already does, with extra uneven texture and piecey movement throughout. The crown gets shorter and more disconnected, the fringe gains jagged edges, and the ends turn flicked and separated, so the whole head reads bold from every angle. It suits straight, wavy, and thick hair best, and flatters oval, heart, and round faces because the texture breaks up the face shape. It is perfect if you like a lived-in, rock-and-roll look with plenty of personality. This is the most untamed version in the guide, and it styles itself more than you would expect.
Stylist script: Cut the pixie base with the crown at two inches and the sides tapered close. Then add shorter, choppier layers through the crown and fringe with point cutting, creating uneven, disconnected ends rather than smooth blends. Use a razor on the longest pieces for extra separation. Keep the perimeter textured and slightly uneven for a lived-in edge. Dry the hair roughly with your fingers, pushing the crown upward, and finish by pinching the ends with a little pomade so the choppy pieces read deliberate rather than messy.
Styling routine: Apply a texturising spray or sea-salt spray to damp hair, scrunch the crown upward, and blow-dry on low heat or let the hair air-dry. Once dry, separate the pieces with your fingers and add a little pomade to the ends for definition. Avoid over-brushing, which ruins the piecey finish. Dry shampoo adds grit on day two. Maintenance: every four to six weeks; choppy layers grow out into a softer pixie, so regular trims keep the edgy texture intentional rather than messy.
29. Pixie Cut with Curtain Bangs
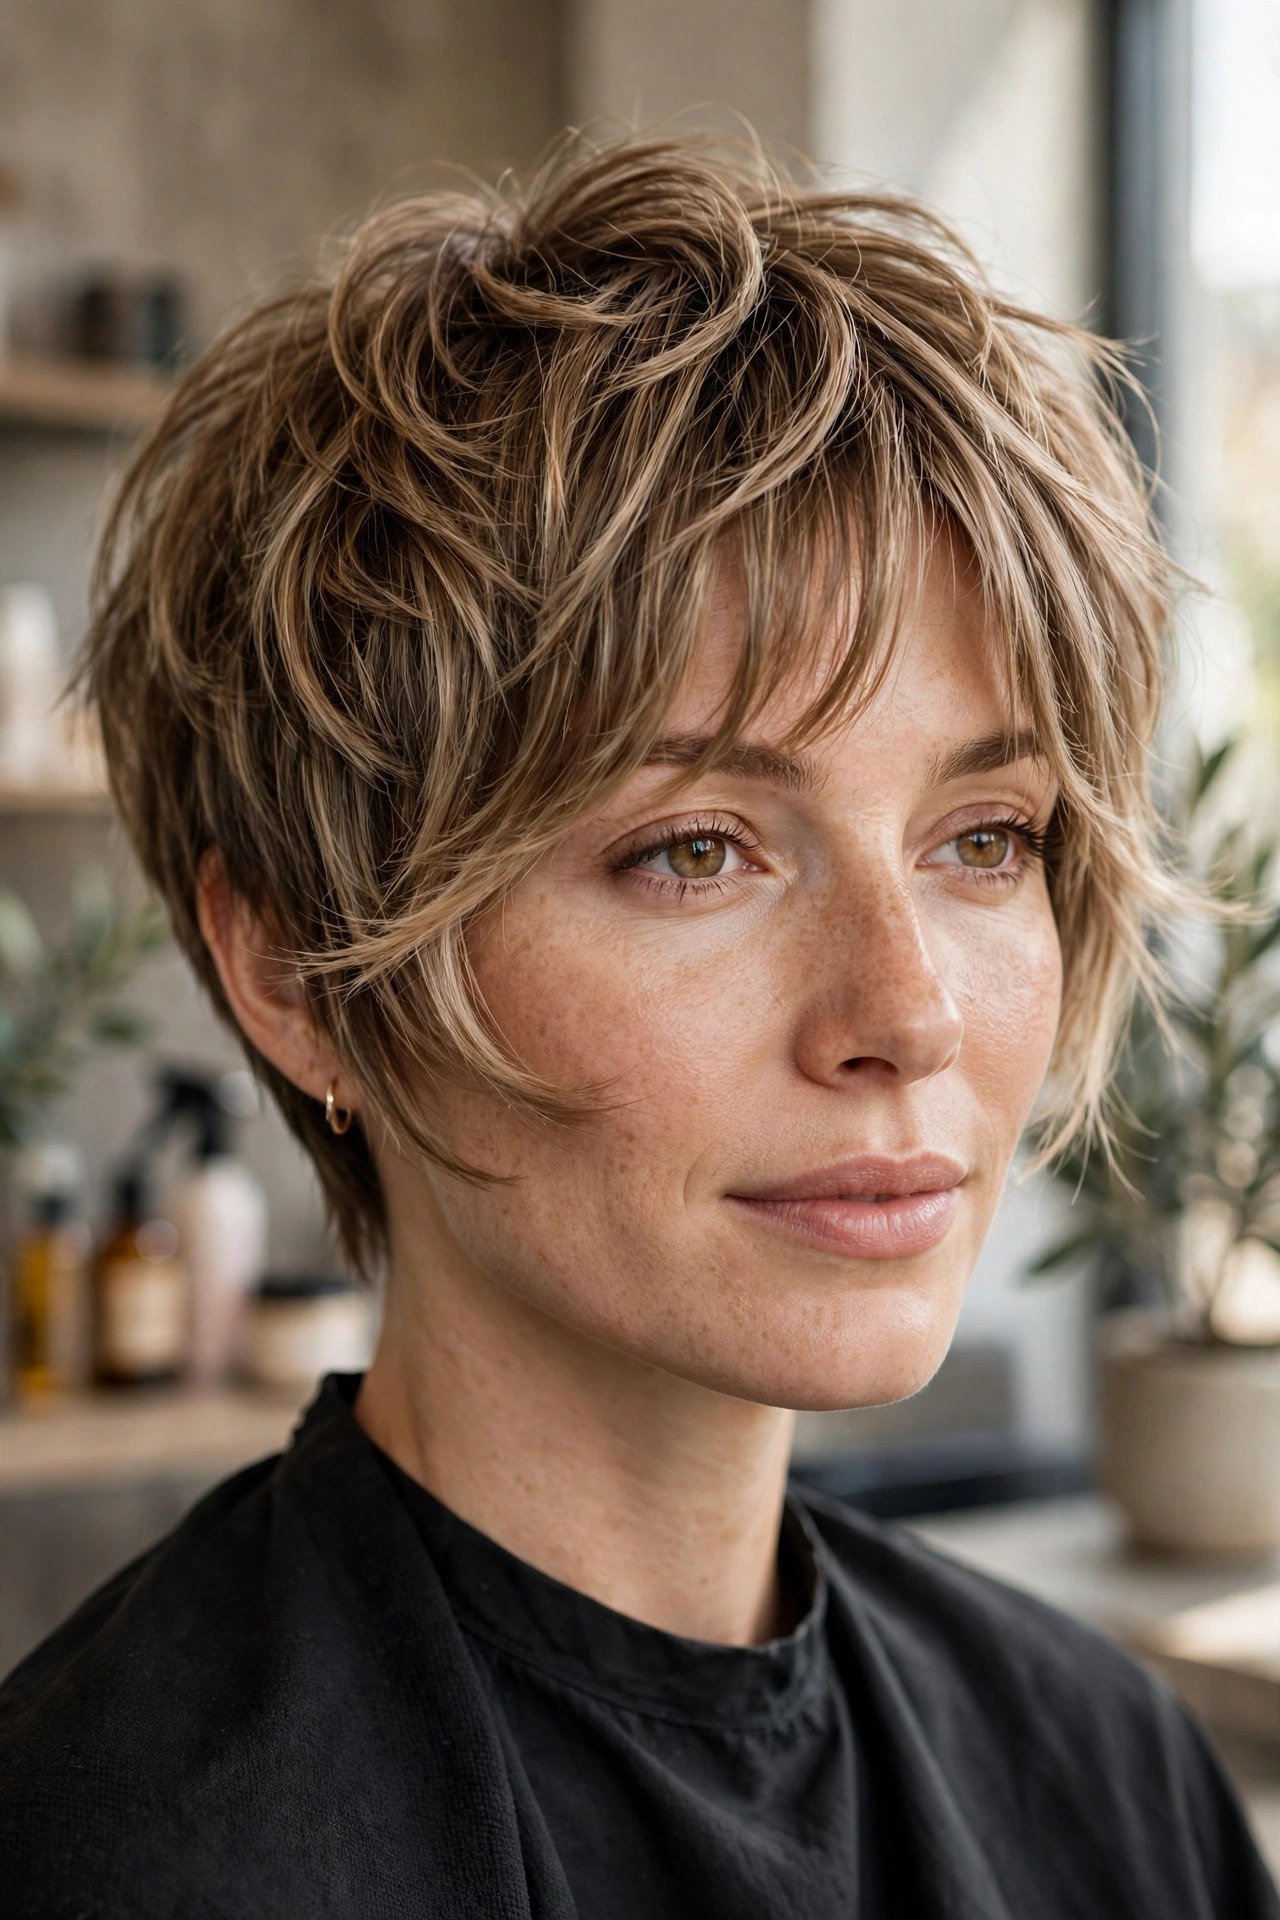
This version pairs the short pixie with curtain bangs that part in the middle and melt into the textured crown, giving the face a soft, romantic frame. The bangs shorten the look of a long forehead while the tapered sides keep the cut neat, and the longer fringe pieces can be tucked behind the ears or swept aside. It suits women with oval, heart, and long faces who want forehead coverage without a heavy fringe, and works on straight, wavy, and fine to medium hair. The blend between bang and crown is what makes it feel modern rather than retro. For a longer cut with the same curtain framing, our butterfly haircut guide shows how curtain layers work at shoulder length.
Stylist script: Part the hair down the middle and isolate a triangular bang section from the front hairline to the crown. Cut the curtain bangs longest at the outer edges and shortest near the centre, with the centre point sitting just below the eyebrows. Connect the bang corners directly into the textured crown so there is no visible step. Keep the sides tapered close and the nape neat. Dry the bangs forward over a small round brush, then sweep each side outward and blend them into the crown pieces.
Styling routine: Work a pea-sized amount of styling cream through the damp bangs, then blow-dry them forward with a small round brush, rolling each side away from the centre part. Dry the crown with your fingers, lifting the roots for height. A quick pass with a flat iron can smooth any kink at the parting. Finish with a light texturising spray for movement. Maintenance: every four to six weeks; curtain bangs grow out fastest, so book a quick bang tidy between full cuts to hold the shape.
30. Pixie Cut with Micro Fringe

A micro fringe gives the pixie a sharp, editorial edge, with a tiny cropped fringe sitting high above the eyebrows against a short, textured crop. The contrast is striking: the short fringe opens the whole face and shows off the cheekbones, while the pixie underneath keeps the look playful and modern. It suits oval and heart-shaped faces best, and works on straight and wavy hair that can hold a precise fringe line. It is the boldest fringe choice in this guide, made for women who love fashion-forward hair and do not mind standing out. Paired with a pixie, it reads confident, artistic, and unforgettable.
Stylist script: Cut the pixie base first, with a tapered nape, close sides, and a textured top at two inches. Then isolate a narrow front section and cut the micro fringe straight across, about an inch above the eyebrows, keeping the line slightly choppy with point cutting so it does not look severe. Blend the outer corners of the fringe into the side layers with short, wispy connectors. Keep the crown textured and piecey to match the fringe’s boldness. Dry the fringe forward with a small round brush, then style the crown upward for height.
Styling routine: Apply a pea-sized amount of pomade to the damp fringe and blow-dry it forward with your fingers or a small round brush, keeping it straight and neat. Style the pixie top with texturising spray, lifting the crown and separating the pieces. A flat iron can sharpen the fringe line in seconds. Finish with a light hairspray. Maintenance: every three to five weeks; micro fringes grow out faster than any other fringe, so book frequent tiny trims to keep the line bold and intentional.
31. Pixie Cut with Side Part

A side part gives the pixie a classic, polished structure, with the hair swept neatly to one side from a deep, defined parting. The sweep creates a long, graceful line across the forehead, adds volume on the heavier side, and keeps the shorter side neat and close. It suits straight and wavy hair best, and flatters round, square, and heart-shaped faces especially well, since the diagonal line breaks up symmetry and softens strong features. It is perfect if you like a timeless, elegant finish that works for the office, for events, and for everyday life. This is the pixie for women who love structure.
Stylist script: Part the hair deeply to one side, choosing the side that suits the client’s natural growth pattern. Cut the pixie base with the crown at two to three inches and the sides tapered close, keeping the heavier side slightly longer so the sweep has weight. Point-cut the ends lightly for softness and blend the fringe into the side layers. Dry the hair across the part with a small round brush, directing the longer side over the forehead, then check the part line from the front to confirm it reads clean and defined.
Styling routine: Apply a light styling cream to damp hair and blow-dry across the part with a small round brush, sweeping the longer side over the forehead. Smooth the shorter side with your palms and a pea-sized amount of pomade. A little root-lifting spray on the heavier side adds volume. Finish with a flexible hairspray. Maintenance: every four to six weeks; side parts lose their definition as the hair grows, so trim the fringe and the heavier side before the sweep starts falling into the eyes.
32. Pixie Cut with Disconnected Layers

Disconnected layers give the pixie its most daring silhouette, with bold, uneven lengths that create visible steps between the short crown and the longer fringe. The contrast is deliberate: the top pieces sit longer and piecey while the sides stay tight, creating a graphic, architectural shape that looks different from every angle. It suits straight and wavy hair best, and flatters oval, long, and heart-shaped faces because the uneven lengths add drama and draw the eye upward. It is made for women who want the pixie’s boldest form and love standing out. This is not a subtle cut — it is a statement, and it wears its attitude proudly.
Stylist script: Cut the pixie base with the sides and nape tapered close. Then cut the crown in disconnected sections, keeping the top pieces at two to three inches and the fringe longer, with visible steps between each section rather than smooth blends. Use point cutting and slide cutting to create separation between the layers. Keep the contrast between the short sides and the long top deliberately visible — that is the disconnected effect. Dry with your fingers, lifting the crown and separating the pieces so each length reads clearly.
Styling routine: Apply a texturising spray to damp hair and scrunch the crown upward, then blow-dry on low heat or let the hair air-dry. Pinch the longer pieces with pomade for definition and sweep the fringe to the side. A flat iron can sharpen the longest pieces for extra contrast. Finish with a flexible hairspray. Maintenance: every four to six weeks; the disconnected effect depends on the contrast between lengths, so trim the sides before they grow soft and blur the steps.
How to Style and Maintain a Pixie Cut at Home

The morning routine for a pixie cut takes under ten minutes, and it starts with the right tools. Keep a small round brush, a vent brush, a blow dryer with a concentrator nozzle, and a flat iron in your kit, plus a pea-sized amount of pomade, a light styling cream, and a texturising spray. Towel-dry the hair until it is damp rather than dripping, then work a tiny amount of styling cream through the top layers with your fingers, pushing the hair in the direction you want it to sit. Blow-dry on low heat with your fingers or a vent brush, lifting the crown and directing the fringe forward or to the side.
Washing a pixie is simple, but the rhythm matters more than the products. Shampoo every two to three days rather than daily, since short hair shows oil quickly at the roots but also dries out fast if it is overwashed. Use a lightweight shampoo and a small amount of conditioner on the ends only, never heavy masks on the crown, which will flatten the volume. On non-wash days, a spritz of dry shampoo at the roots absorbs oil and restores lift in seconds. Rinse with cool water to seal the cuticle and add shine, and avoid piling the hair up in a towel, which creates kinks in short layers.
Styling products are where a pixie lives or dies, so choose them for your hair type and use less than you think you need. Fine hair loves a volumising mousse at the roots and a light texturising spray for grip, while thick hair needs a smoothing cream to control bulk and a pomade to define the pieces. For a sleek finish, smooth a pea-sized amount of pomade over the top with your palms and press the sides flat; for a textured finish, pinch small sections between your fingers and pull them upward and outward. A light flexible hairspray holds the shape without stiffness, and a drop of shine serum on the fingertips adds polish to the ends.
The trim schedule is the one non-negotiable rule of pixie ownership. Pixies need trims every four to six weeks to keep the shape crisp, because even half an inch of growth softens the taper at the nape and lets the crown fall flat. Book your next appointment before you leave the salon, and ask for a quick nape and side tidy between full cuts if the shape starts to blur. At home, never trim the fringe yourself with kitchen scissors — a crooked fringe is the hardest mistake to fix on short hair. Treat the pixie like a tailored jacket: regular small adjustments keep it looking sharp, while neglect turns it into an awkward grow-out in a matter of weeks.
Frequently Asked Questions
How do I grow out a pixie cut?
Growing out a pixie cut is easier than most people expect, because the layers blend gradually as they lengthen. Let the crown grow first, trimming only the very ends every six to eight weeks to keep them healthy, and the shape will slowly soften into a bixie. Once the crown reaches the ears, ask your stylist to blend the steps with longer layers and reshape the nape into a soft bob. Avoid cutting the fringe short during the grow-out, since the longer fringe is what carries you through the awkward stage. Patience and regular small trims are the whole secret.
What face shape suits a pixie cut best?
Oval faces suit almost every pixie variation, because their balanced proportions work with any fringe length and crown height. Heart-shaped faces look wonderful with a side-swept fringe and soft volume at the sides, while square faces benefit from curved, sweeping layers that soften the jawline. Round faces suit pixies with height at the crown and a diagonal fringe, which elongate the face. The real secret is customisation: a good stylist adjusts the fringe length, the side taper, and the crown height to balance your proportions, so almost any face shape can wear a pixie beautifully.
Does a pixie cut work for fine hair?
Yes, a pixie cut works wonderfully for fine hair, because the short layers create lift and the illusion of thickness. Ask your stylist to keep the crown layers slightly longer, avoid over-thinning, and keep the perimeter as full as possible so the ends do not look wispy. Style with a lightweight volumising mousse at the roots and dry shampoo on day two to hold the volume. Avoid heavy creams and oils, which flatten fine hair. With the right cut and light products, fine hair looks fuller, more textured, and more voluminous in a pixie than in a longer style.
How often does a pixie cut need trimming?
Most pixies need a trim every four to six weeks to keep the shape crisp, because even half an inch of growth softens the taper at the nape and lets the crown fall flat. Very short pixies and undercuts may need a tidy every three to four weeks, since the clipped sides grow out visibly fast. Longer pixies and bixies can stretch to five to seven weeks, because the extra length hides growth better. Book your next appointment before you leave the salon, and ask for a quick nape tidy between full cuts if the shape starts to blur.
What products do I need to style a pixie cut?
You need only a few key products to style a pixie cut well at home. Start with a light styling cream or volumising mousse for the crown, a texturising spray for grip and separation, and a pea-sized amount of pomade to define the pieces. A heat protectant guards the hair during blow-drying, while a flexible hairspray holds the shape without stiffness. A small round brush and a blow dryer with a concentrator nozzle are the main tools, and a flat iron adds optional polish. Finish with a drop of shine serum on the ends only.
Can I get a pixie cut with curly hair?
Yes, curly hair looks wonderful in a pixie cut, as long as the layers are placed with the curl pattern in mind. Ask for a stylist experienced with curly cuts, who will cut the hair dry, curl by curl, so each layer lands where the curl naturally falls. Shorter layers at the crown let the curls spring up and create lift, while the tapered sides keep the shape neat. Style with a leave-in conditioner and curl cream on wet hair, then diffuse on low heat. Avoid thinning shears, which create frizz and ruin the curl definition.
Are pixie cuts good for older women?
Yes, pixie cuts are one of the most flattering choices for older women, because they lift the face, show off the cheekbones, and look effortlessly chic at any age. The soft texture and tapered nape create a polished shape that frames the face beautifully, while silver or grey hair adds natural dimension to every layer. Helen Mirren’s power pixie is the proof that this cut only gets better with age. Choose a softer version with a side-swept fringe and gentle texture, and keep the trims regular so the shape stays elegant and intentional.
Should I get bangs with my pixie cut?
Bangs are optional with a pixie cut, but they change the whole look, so choose them carefully. Long bangs add versatility, since you can sweep them to the side, part them in the middle, or pin them back. Side-swept bangs soften the forehead and flatter most face shapes. Baby bangs and micro fringes are bold, editorial choices that open the face and show off the cheekbones. Curtain bangs give a soft, romantic frame. If you are unsure, start with long bangs, which grow out gracefully and can be shortened later.
What should I tell my stylist when asking for a pixie cut?
Walk in with specifics: name the version first, such as classic pixie, textured pixie, or bixie, then the crown length, then the fringe style, in that order. Bring a reference photo from this guide, since a picture plus the vocabulary here turns a vague request into a precise one. Mention your hair’s behaviour, such as whether it flips out, goes flat at the crown, or curls at the ends, because a good stylist adjusts the layering to compensate. Ask how often you will need trims, and book your next appointment before you leave.
What is the difference between a pixie cut and a bixie?
A pixie cut is short all over, with the top at one to three inches and the sides and nape tapered close, creating a sculpted shape that exposes the neck and jawline. A bixie is a longer pixie-bob hybrid, with the same textured crown but longer sides and nape that reach the ears and jawline in soft layers. The bixie is softer and more forgiving, grows out more gracefully, and suits women who want short hair without a full crop. Choose the pixie for boldness and the bixie for versatility.
Conclusion
The pixie cut is the rare hair idea that improves everything it touches: the mornings get shorter, the face looks more considered, and the hair looks lighter and more deliberate, all from a single sculpted shape that lets your features lead. The 32 styles above cover every variation, every face shape, and every hair type, so the only real decision left is which version matches your face, your hair, and the amount of time you want to spend in front of the mirror. Pick two or three favourites, screenshot them, and bring them to your stylist — a picture plus the vocabulary in this guide turns a vague request into a precise one.
Start with the classic if you are unsure: the classic pixie with soft texture and a tapered nape is the safest entry point, and you can go shorter, spikier, or bolder next time once you know how short hair feels on your head. Whatever you choose, keep the maintenance honest — a pixie is a relationship with your stylist, and the styling is a daily habit, not a weekend project. Get both right, and the pixie will do what the best haircuts always do: make you look like the most confident version of yourself, every single day of 2026.